Baby Axolotl Amigurumi – Free Crochet Pattern
Hi everyone! This free axolotl crochet pattern is the first pattern of 2022! Oh wow… that means we’re coming up on THREE years of StringyDingDing existing. It feels like just yesterday I started this website!
Anyways, I didn’t realize just how popular axolotls are right now. It seems like just about everyone I know is talking about how cute they are – and I agree! If you’ve never heard or seen an axolotl before, here’s a picture: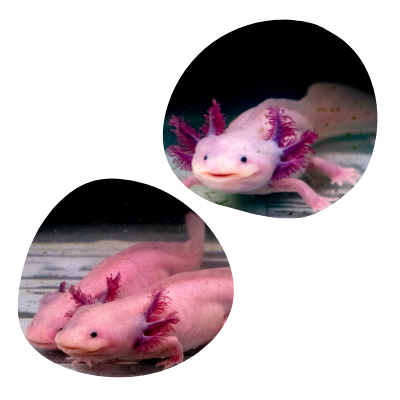
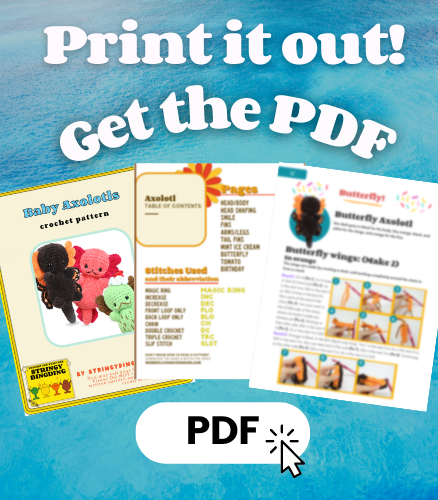
Print this pattern out – purchase the PDF version here!

 Supplies:
• Yarn 4/Medium Weight in…
Main body color, contrast color. You can use any color you’d like depending on what theme you want your axolotl to have
•7mm Crochet Hook
•Tapestry needle
•Scissors
•Stuffing
•16mm safety eyes (or you can use 16mm buttons that have a smooth surface)
Additional Information:
Difficulty: Intermediate
• Before we get started…
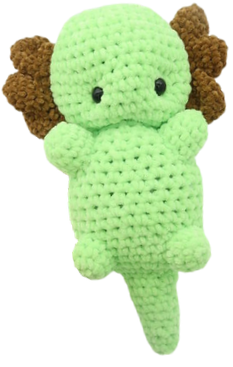
These axolotls are super fun to make! I used a plushy-like yarn from Premier.com called “Parfait”. You can use any yarn you’d like for this pattern, but regular 4/Medium weight yarn will make your your come out much smaller. Using Bernat Blanket Yarn will make your toy come out much bigger. For the closest results, try using a 5 weight plushy yarn.
Let’s get started!
First, we will start by making the axolotls tail, working up to the body, then the head. The tail, body, and head, are all make in one continuous piece. After this, we will make the face shaping (to give the axolotl a baby face), and make the head fins. Next, we do the arms/legs, tail fins, and the fun accessories!
Body:
In body color
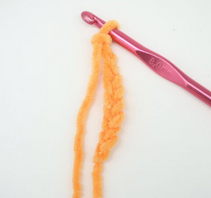
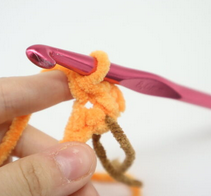
Round 1: 6 Sc into a Magic Ring (6)
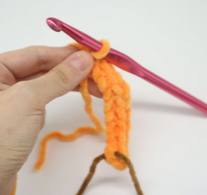
Round 2-3: *Sc* all around (6)
Round 4: *Inc, Sc in the next 2 st* all around (8)
Round 5-6: *Sc* all around (8)
Round 7: *Inc, Sc in the next 3 st* all around (10)
Round 8-9: *Sc* all around (10)
Round 10: *Inc, Sc in the next 4 st* all around (12)
Round 11-12: *Sc* all around (12)
Round 13: *Inc* all around (24)
Round 14: *Inc, Sc in the next 3 st* all around (30)
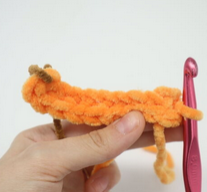
Round 15-24: *Sc* all around (30)
Stuff the tail firmly now.
Round 25: *Dec, Sc in the next 3 st* all around (24)
Round 26: *Sc* all around (24)
Round 27: *Dec, Sc in the next 2 st* all around (18)
Round 28: *Sc* all around (18)
Stuff the body firmly now.
Round 29: *Dec, Sc in the next st* all around (12)
Round 30: In the FLO (Front Loop Only), *Inc, Sc in the next st* all around (18)
Round 31: In BOTH Loops, *Inc, Sc in the next 2 st* all around (24)
Round 32: *Inc, Sc in the next 3 st* all around (30)
Round 33: *Inc, Sc in the next 4 st* all around (36)
Round 34: *Sc* all around (36)
Now we will add two eye stitch markers to mark where to place the eyes in Round 34. Add an eye stitch marker into the 15th and 21st stitch in Round 34.
Round 35-40: *Sc* all around (36)
Add the eyes into the marked areas now.
Round 41: *Dec, Sc in the next 4 st* all around (30)
Round 42: *Dec, Sc in the next 3 st* all around (24)
Stuff the head here. Continue stuffing after each round.
Round 43: *Dec, Sc in the next 2 st* all around (18)
Round 44: *Dec, Sc in the next st* all around (12)
Round 45: *Dec* all around (6)
Finish off, leaving a long tail for sewing. Sew the remaining stitches closed and weave in the ends.
Head Shaping:
In body color
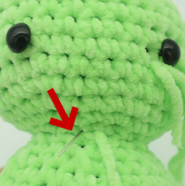
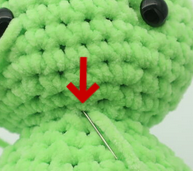
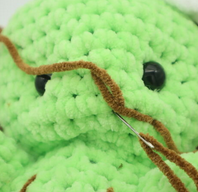
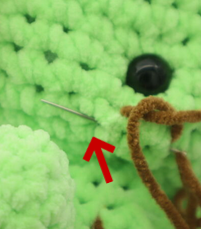
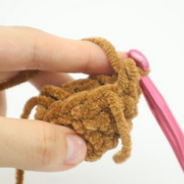
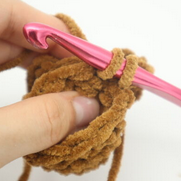
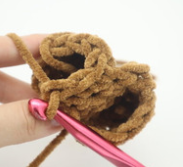
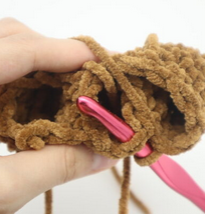
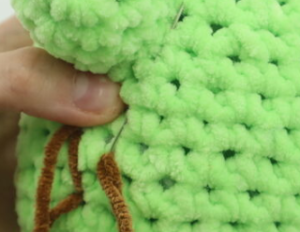
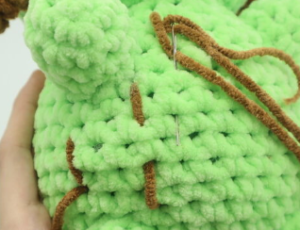
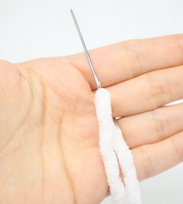
To make the axolotl have a cute baby face, we will thread yarn through the toy’s head.
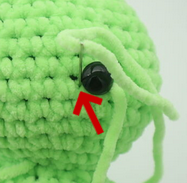
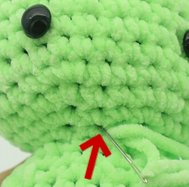
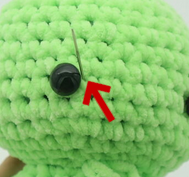
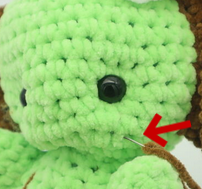
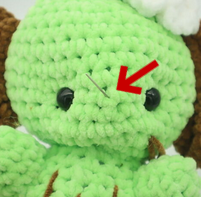
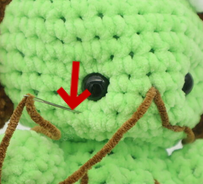
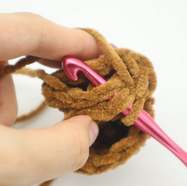
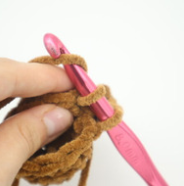
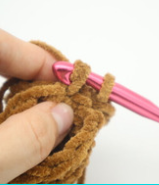
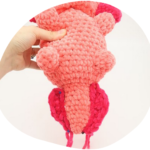
Take a long piece of body color yarn (about 10″ long) and place the needle into the middle start of the toy’s head as shown (Pic 1). Pull the needle out next to the toy’s right eye as shown (Pic 2). Reinsert the needle to the left side of the right eye as shown (Pic 3).
1. 2.
2. 3.
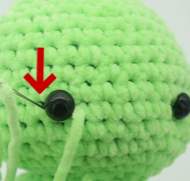
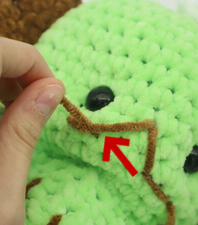
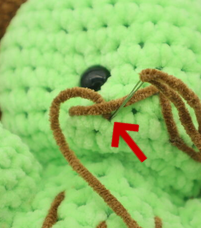
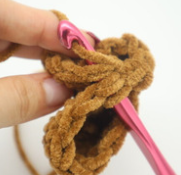
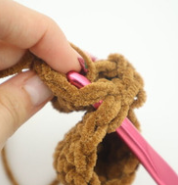
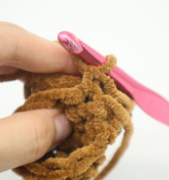
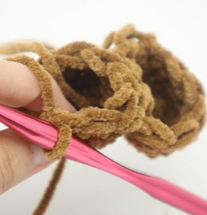
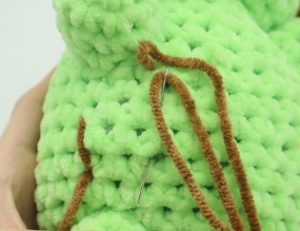
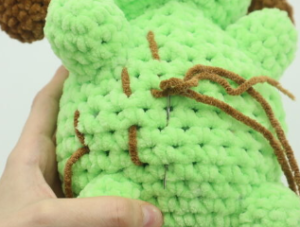
3. Pull the needle out one stitch over from where we first inserted out needle (Pic 4). Reinsert needle one stitch to the left (Pic 5). Pull the needle out next to the toy’s left eye as shown (Pic 6).
4.
5.
6.
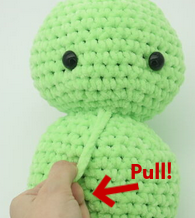
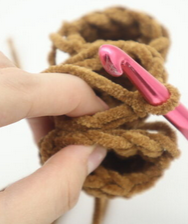
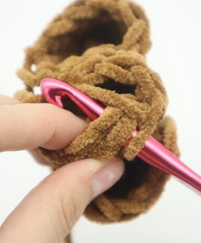
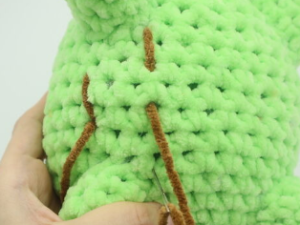
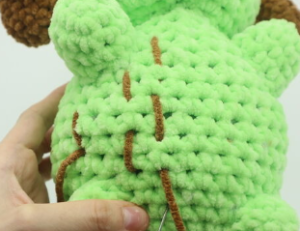
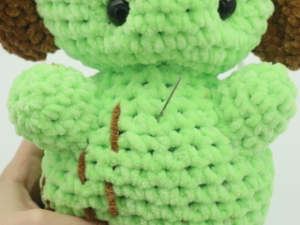
Reinsert the needle at the left side of the toy’s left eye (Pic 7). Pull needle out at the same stitch as where the tail end of yarn is (Pic 8). Pull both ends of yarn firmly at the same time (Pic 9). This will form the face (Pic 10).
7.
8. 9.
9. 10.
10.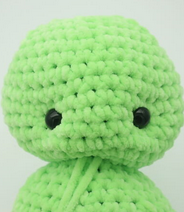
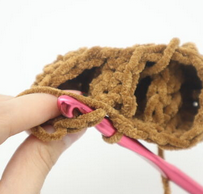
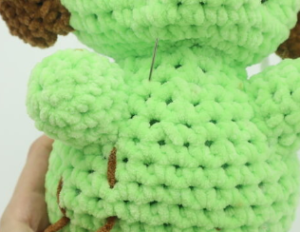
Once done, tie both tail ends of yarn together to form a firm knot. Bring this knot inside the toy’s head by using your crochet hook (Pic 11-12). Cut the excess yarn. Done!
11. 12.
12.
Smile: (Optional)
In contrast color or black
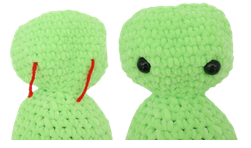
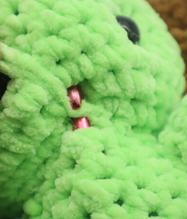
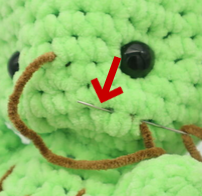
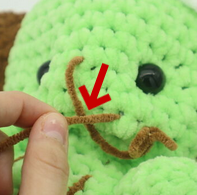
Cut a long piece of yarn, about 10″, and place the yarn onto a needle. Insert the needle where shown (Pic 1). Pull the needle out between the toy’s eyes as shown (Pic 2). Reinsert needle into the original place we inserted out needle (Pic 3). Pull the needle out about a stitch to the left (Pic 3). Make sure the yarn lands ABOVE the smile as shown (Pic 4).
1. 2.
2. 3.
3. 4.
4. Now reinsert your needle into the same stitch, this time making sure the yarn lands BELOW the smile (Pic 5). Pull the needle out to at the same area between the toy’s eyes as shown (Pic 6). Reinsert needle where shown (Pic 7).
5. 6.
6. 7.
7. Pull the needle out about a stitch or two to the right as shown (Pic 8) making sure the needle lands ABOVE the smile yarn (Pic 8-9). Reinsert needle into the same stitch, this time inserting the needle BELOW the smile yarn (Pic 10). Pull the needle out a few stitches away (Pic 11). Tie the ends of yarn into firm knots. Bring the knots into the toy’s head using a crochet hook to hide the knot. Cut any excess yarn.
8. 9.
9. 10.
10. 11.
11. 12.
12.
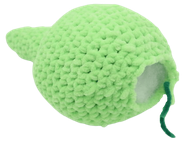
Head fins:
 Head fins:
There will be two different types of fins we make – a first and second version. We will start by making the first version, then make the second version. We have two different versions but the only difference is that the second version is not finished off unlike the first versions, where we do finish off.
First Fins: (Make this version first, make 4 total)
In contrast color
Round 1: 6 Sc into a Magic Ring (6)
Round 2: *Inc, Sc in the next st* all around (9)
Round 3-5: *Sc* all around (9)
Finish off and weave in ends.
Second Fins: (Make second, make 2 total)
In contrast color
Round 1: 6 Sc into a Magic Ring (6)
Round 2: *Inc, Sc in the next st* all around (9)
Round 3-4: *Sc* all around (9)
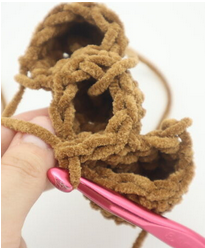
DON’T finish off! Instead, we will now crochet this piece to two of the first fins we made.
Round 5: Line up your current fin to one of the first fins we made. The stitches should align as shown (Pic 1-2). Insert your hook going through BOTH the fin’s stitches as shown (Pic 3).
1. 2.
2. 3.
3.
Yarn over (Pic 4), pull the yarn through both fins (Pic 5), you will have 2 loops on your hook (Pic 6).
4. 5.
5. 6.
6.
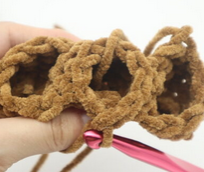
Yarn over and pull through both loops (Pic 7-9). You have just single crocheted the fins together!
Continuing working through both stitches of the fins, Single Crochet in the next 2 st (Pic 10).
7. 8.
8. 9.
9. 10.
10.
Now working back on the second fin we made, Sc in the next st (Pic 11-12).
11. 12.
12.
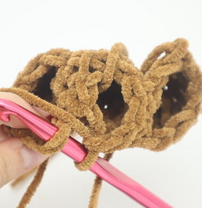
Take another one of the first fins we made and line up the stitches to our second fin (Pic 13). Going through both stitches (Pic 14), Sc in the next 3 st (Pic 15). Working back into the second fin, Sc in the next st (Pic 16). Now all three fins are connected!
13. 14.
14. 15.
15.
16.
Round 6: Sc in the next 6 st on the next fin (Pic 17-18). Now we meet the middle fin (Pic 19), Sc in the next 2 st of the middle fin (Pic 20).
17. 18.
18.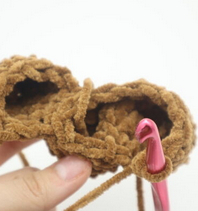 19.
19. 20.
20.
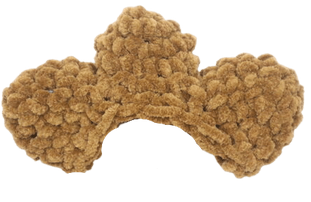
Now we meet the next fin, Sc in the next 6 st of that fin (Pic 21). Now we meet the middle fin, Sc in the next st of the middle fin. SlSt in the next st to complete. Finish off and leave a long tail for sewing. Pin the fin onto the side of the toy’s head as shown. Sew on and weave in ends.
21. 22.
22.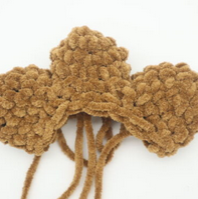
Pin the fins on the side of the head and sew on! Weave in ends
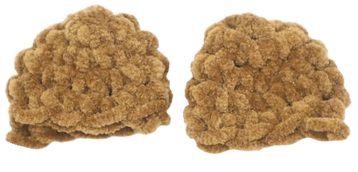
Legs: (Make 2)
In body color
Round 1: 6 Sc into a Magic Ring (6)
Round 2: *Inc, Sc in the next st* all around (9)
Round 3-4: *Sc* all around (9)
Finish off, leaving a long tail for sewing. Pin the legs on as shown (specifically, the bottom of the leg on Round 15 and the top of the leg on Round 18, spaced 5 stitches apart.)
Arms: (Make 2)
In body color
Round 1: 6 Sc into a Magic Ring (6)
Round 2: *Inc, Sc in the next st* all around (9)
Round 3-5: *Sc* all around (9)
Finish off, leaving a long tail for sewing. Pin the arms on as shown (specifically, the bottom of the arm on Round 24 and the top of the arm on Round 28, spaced 5-6 stitches apart.)
Right tail fin:
In contrast color
Row 1: Ch 8. Sc in the 2nd Ch from the hook. Sc in the next st, Dc in the next st, Trc 2 times in the next st, Dc in the next st, Hdc in the last st, Sc in the next st (8) Pin on as shown and sew on.
Left tail fin:
in contrast color
Row 1: Ch 8. Sc in the 2nd Ch from the hook. Hdc in the next st, Dc in the next st, Trc 2 times in the next st, Dc in the next st, Sc in the next 2 st (8) Pin on as shown and sew on.
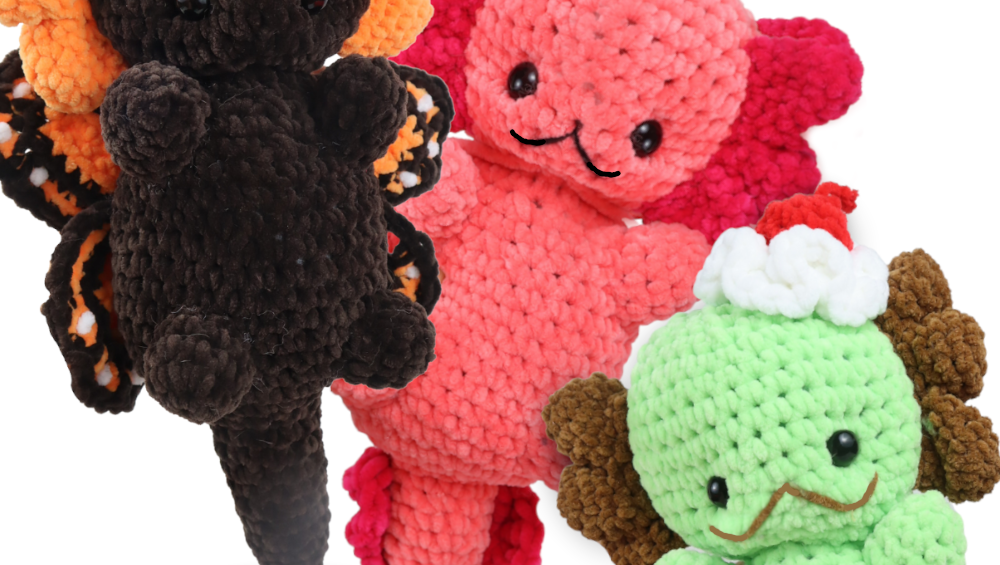
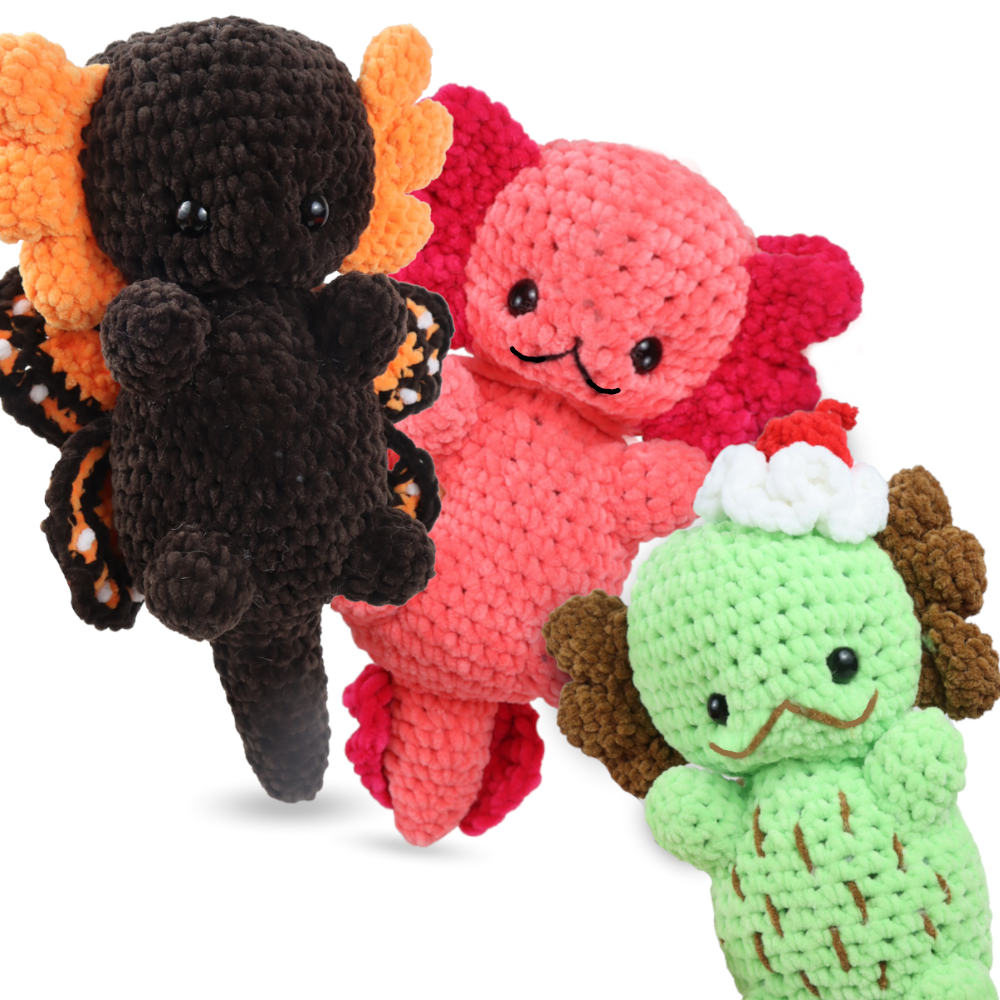
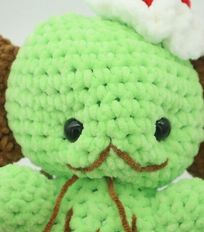
Axolotl Types:
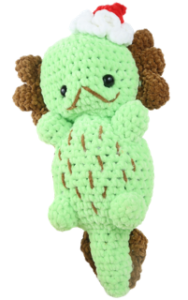
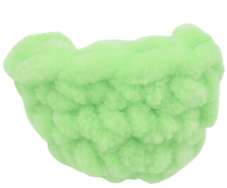
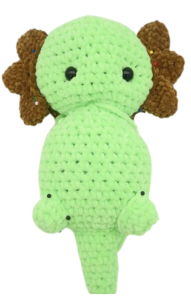
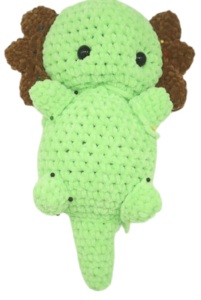
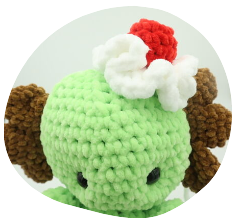
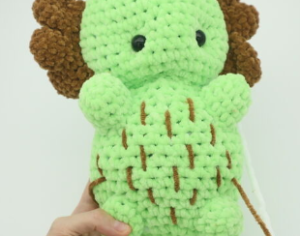
Mint Ice Cream!
Use mint green color for the body. Use a medium brown color for the fins. Use white for the whipped cream, and red for the cherry. Let’s make his pieces!
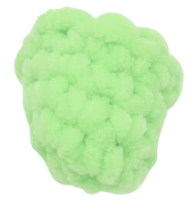
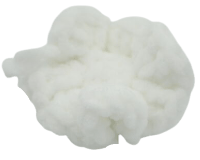
Whipped cream:
In white
Round 1: 6 Sc into a Magic Ring (6)
Round 2: *Inc* all around (12)
Round 3: Place 3 Trc in each st all around (36)
Finish off, leaving a long tail for sewing. Pin the whipped cream to the top of the toy’s head as shown and sew on. Don’t weave in the ends yet – we will use this same thread to sew on the cherry!
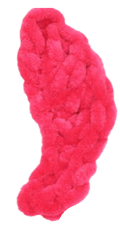
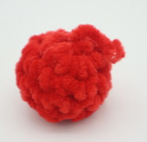
Cherry:
In red
Round 1: 6 Sc into a Magic Ring (6)
Round 2: *Inc, Sc in the next st* all around (9)
Round 3-4: *Sc* all around (9)
Round 5: *Dec, Sc in the next st* all around (6)
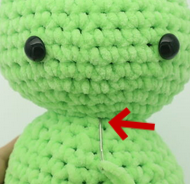
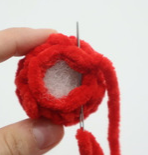
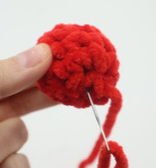
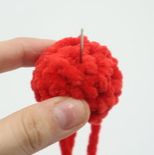
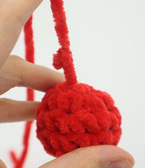
Finish off, leaving a long tail for sewing. Stuff the cherry firmly now. Sew the bottom closed (Pic 1), and then insert the needle directly into the center bottom of the cherry (Pic 2). Bring the needle to the top (Pic 3).
1. 2.
2. 3.
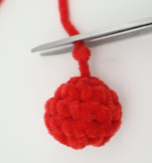
3. Tie a firm knot at the top (Pic 4). Cut excess yarn above the knot (Pic 5). Pin the cherry to the top of the whipped cream as shown, and sew on using the yarn from the whipped cream
4. 5.
5. 6.
6.
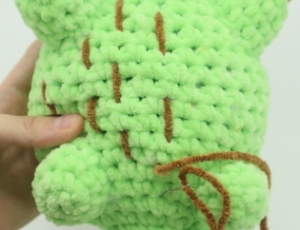
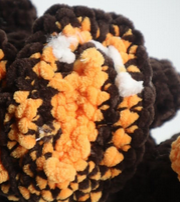
Mint Ice Cream Sprinkles:
(You can freehand this part if you prefer. If you want to know exactly how I did it, here are the instructions:)
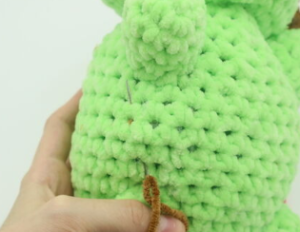
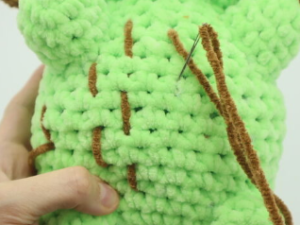
Insert needle with thread into the side of the toy axolotl, between the left arm and leg. Pull the needle out about 3 stitches up (Pic 1). Reinsert needle into the original insertion spot, and bring needle out under the left arm (Pic 2). Reinsert the needle where it matches up with the top of the first sprinkle (Pic 3) and pull needle out where it matches up with the bottom of the first sprinkle (Pic 3). Reinsert needle 2 stitches down (Pic 4).
1. 2.
2. 3.
3. 4.
4.
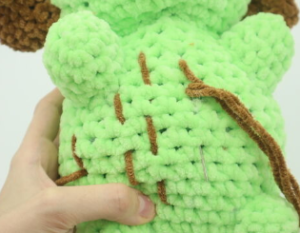
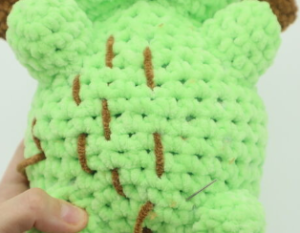
Bring needle to the right of the left arm (Pic 5). Reinsert needle where it meets the top of the left sprinkle as shown (Pic 6). Bring needle out where it meets the bottom of the left sprinkle (Pic 6). Reinsert needle where it matches up with the top part of the left sprinkle (Pic 7). Pull needle out where it matches up with the bottom left sprinkle (Pic 7). Reinsert needle 2 stitches down (Pic 8).
5. 6.
6. 7.
7. 8.
8.
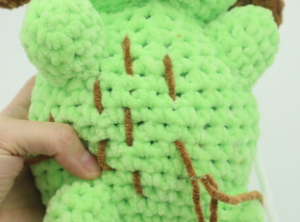
Bring the needle out where it matches up to the middle of the left sprinkle as shown (Pic 9). Reinsert needle 2 stitches down (Pic 10). Pull needle out where it meets the bottom of the left sprinkle (Pic 11). Reinsert needle where it meets the top of the left sprinkle (Pic 12).
9. 10.
10. 11.
11. 12.
12.
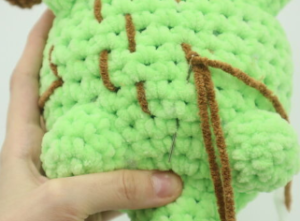
Pull needle out where it meets the bottom of the left sprinkle (Pic 13). Reinsert needle 2 stitches down (Pic 14). Now repeat this similar process for the remaining sprinkles, aligning your needle to the opposite side’s sprinkles (Pic 15-16). Once done, weave in ends!
13. 14.
14. 15.
15. 16.
16.
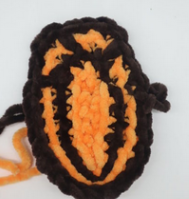
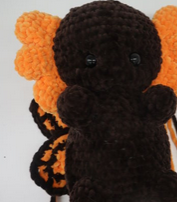
Butterfly Axolotl!
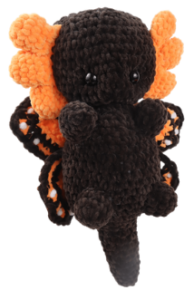
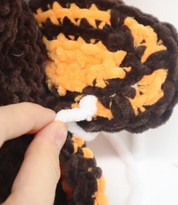
Use dark grey or black for the body. Use orange, black, and white for the wings, and orange for the fins.
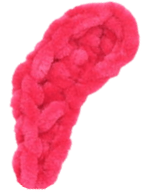
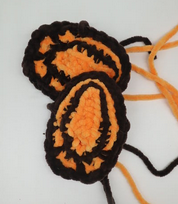
Butterfly Wings: (Make 2)
In orange
The wings are made by creating a chain, and working completely around the chain to form a round.
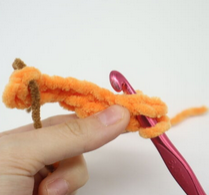
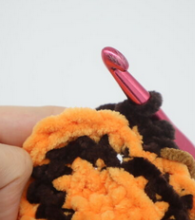
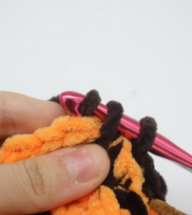
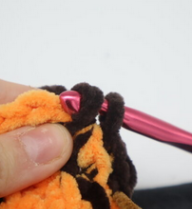
Round 1: Ch 10 (Pic 1). Sc 3 times in 2nd Ch from hook (Pic 2). Sc in the next 4 st, SlSt in the next 3 st, SlSt 3 times in the last Ch. Now we’re at the end of the chain (Pic 3).
1. 2.
2. 3.
3.
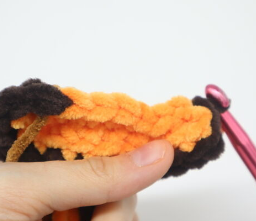
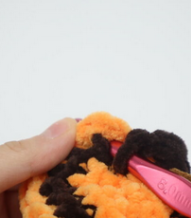
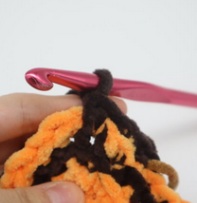
Turn your work to the OTHER side of the chain, where we haven’t made any stitches yet (Pic 4). Working on that other side, SlSt in the next 3 st (Pic 5), Sc in the next 4 st (20)
4. 5.
5.
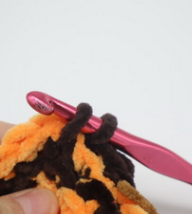
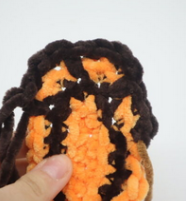
Round 2: Change to Black. In the BLO (Back Loop Only), *Inc* in the next 3 st, Sc in the next 4 st, SlSt in the next 3 st. Now we meet end of the oval (Pic 7), SlSt in the next 3 st (Pic 8). Continuing on the other side (Pic 9), SlSt in the next 3 st, Sc in the next 4 st (23)
7. 8.
8. 9.
9.
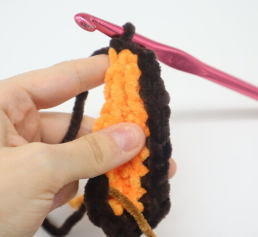
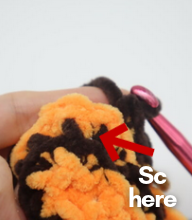
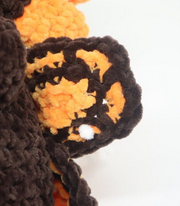
Round 3: Change to Orange. In the BLO, repeat *Inc, Sc in the next st* 3 times. Sc in the next 4 st, SlSt in the next 9 st, Sc in the next 4 st (26, Pic 1)
1.

Round 4: Change to Black. In the BLO, Repeat *Inc in the next st, Sc in the next st, Sc into the previous round’s next stitch as shown (Pic 3-8)* 3 times. Your wing will look like Pic 9. Sc in the next 4 st, SlSt in the next 9 st, Sc in the next 4 st (Pic 10, stitch count: 29)
2. 3.
3. 4.
4. 5.
5. 6.
6. 7.
7. 8.
8. 9.
9. 10.
10.
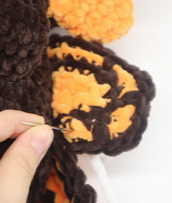
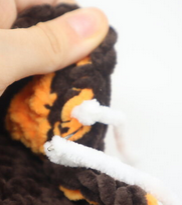
Butterfly Wing Dots:
Take a ~10″ piece of white yarn and place it on a needle (Pic 1). Bring the needle through the wing as shown (Pic 2). Tie a knot at the base of the wing (Pic 3-4).
1. 2.
2. 3.
3. 4.
4.
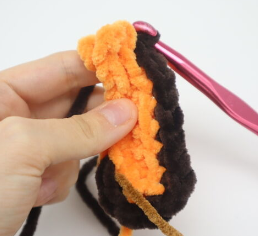
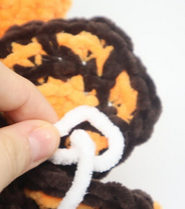
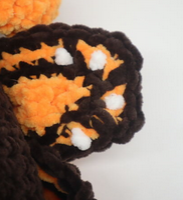
Reinsert needle into the wing one stitch to the left (Pic 5). You have made 1 white speck (Pic 6). Repeat this for the next 3 sections as shown (Pic 7). Once done, tie the end of yarn into firm knots at the back of the wing and cut excess yarn (Pic 8). Place two wings on top of each other as shown (Pic 9) and sew together. Now place the wings onto the axolotl as shown and sew on. Weave in ends.
5. 6.
6. 7.
7. 8.
8. 9.
9. 10.
10.
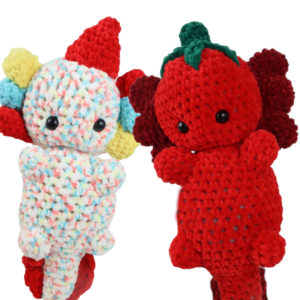
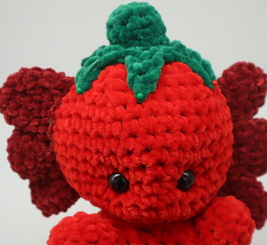
Tomato Axolotl:
This is a very simple and easy addition to the axolotl. It could even look like a strawberry – just use the “sprinkles” instructions from page 11. Just be sure to do them in yellow.
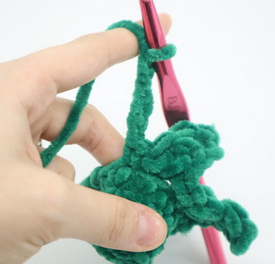
Tomato Hat:
In Green
Round 1: 5 Sc into a Magic Ring (5)
Round 2: *Inc* all around (10)
Round 3: In the BLO, *Sc* all around (10)
Round 4-5: In BOTH loops, *Sc* all around (10)
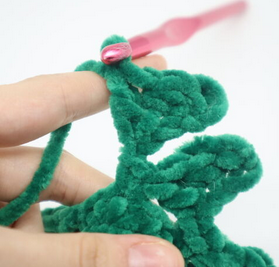
Round 6: Repeat *Ch 4 (Pic 1). Sc in the 2nd Ch from the hook, Dc in the next Ch, Trc in the next Ch (Pic 2). Skip the next st on the round, Sc in the next st (Pic 3)* 5 times.
1. 2.
2. 3.
3.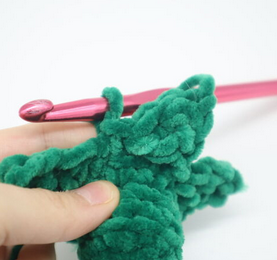 4.
4.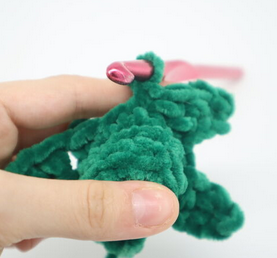 5.
5.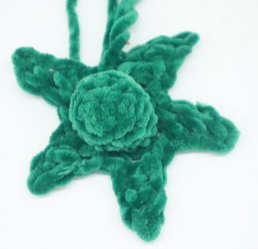
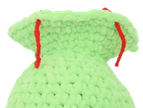
Finish off, leaving a long tail for sewing. Pin the tomato hat on as shown and sew on (Pic 6). Be sure to stuff the stem before fully sewing on. Once done, weave in ends and cut any excess yarn.
6.
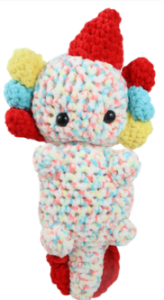
Birthday Axolotl:
Use multicolor yarn to make the body! Use a different color for each fin, and then we’ll make the hat.
Birthday Hat:
In Red
Round 1: 6 Sc into a Magic Ring (6)
Round 2-3: *Sc* all around (6)
Round 4: *Inc* all around (12)
Round 5-6: *Sc* all around (12)
Round 7: *Inc, Sc in the next st* all around (18)
Round 8: *Sc* all around (18)
Finish off, leaving a long tail for sewing. Pin the hat on as shown and sew on. Before fully sewing closed, stuff the hat firmly. Once fully sewn on, weave in ends and cut excess yarn.
Done! I hope you liked this pattern 🙂 If you made an axolotl, I would LOVE to see! You can show me by posting a photo in the comments underneath this post.


10 Comments
Hello, what is the size of the hook should I use to make these absolutely adorable axolotls? Thanks!
It depends on the yarn! Usually when you buy your yarn it should have the hook size somewhere on the packaging, if not I’m sure you could look up what hook to use with your yarn type!
She’s so darn cute
Adorable!
Hi, how much yarn did you use for this product?
Hi what kind of yarn did you use for this project?! 🧶
Hi! I was thinking of starting a small crochet business and I was wondering if I could use this pattern and sell these axolotls? Thank you 🙂
How many yards of yarn did you use for the body? I love your patterns, thank you so much for making them easy for a beginner like me 🙂
Can’t wait to make others; grands will love
Thanks for sharing your amazing ideas!