
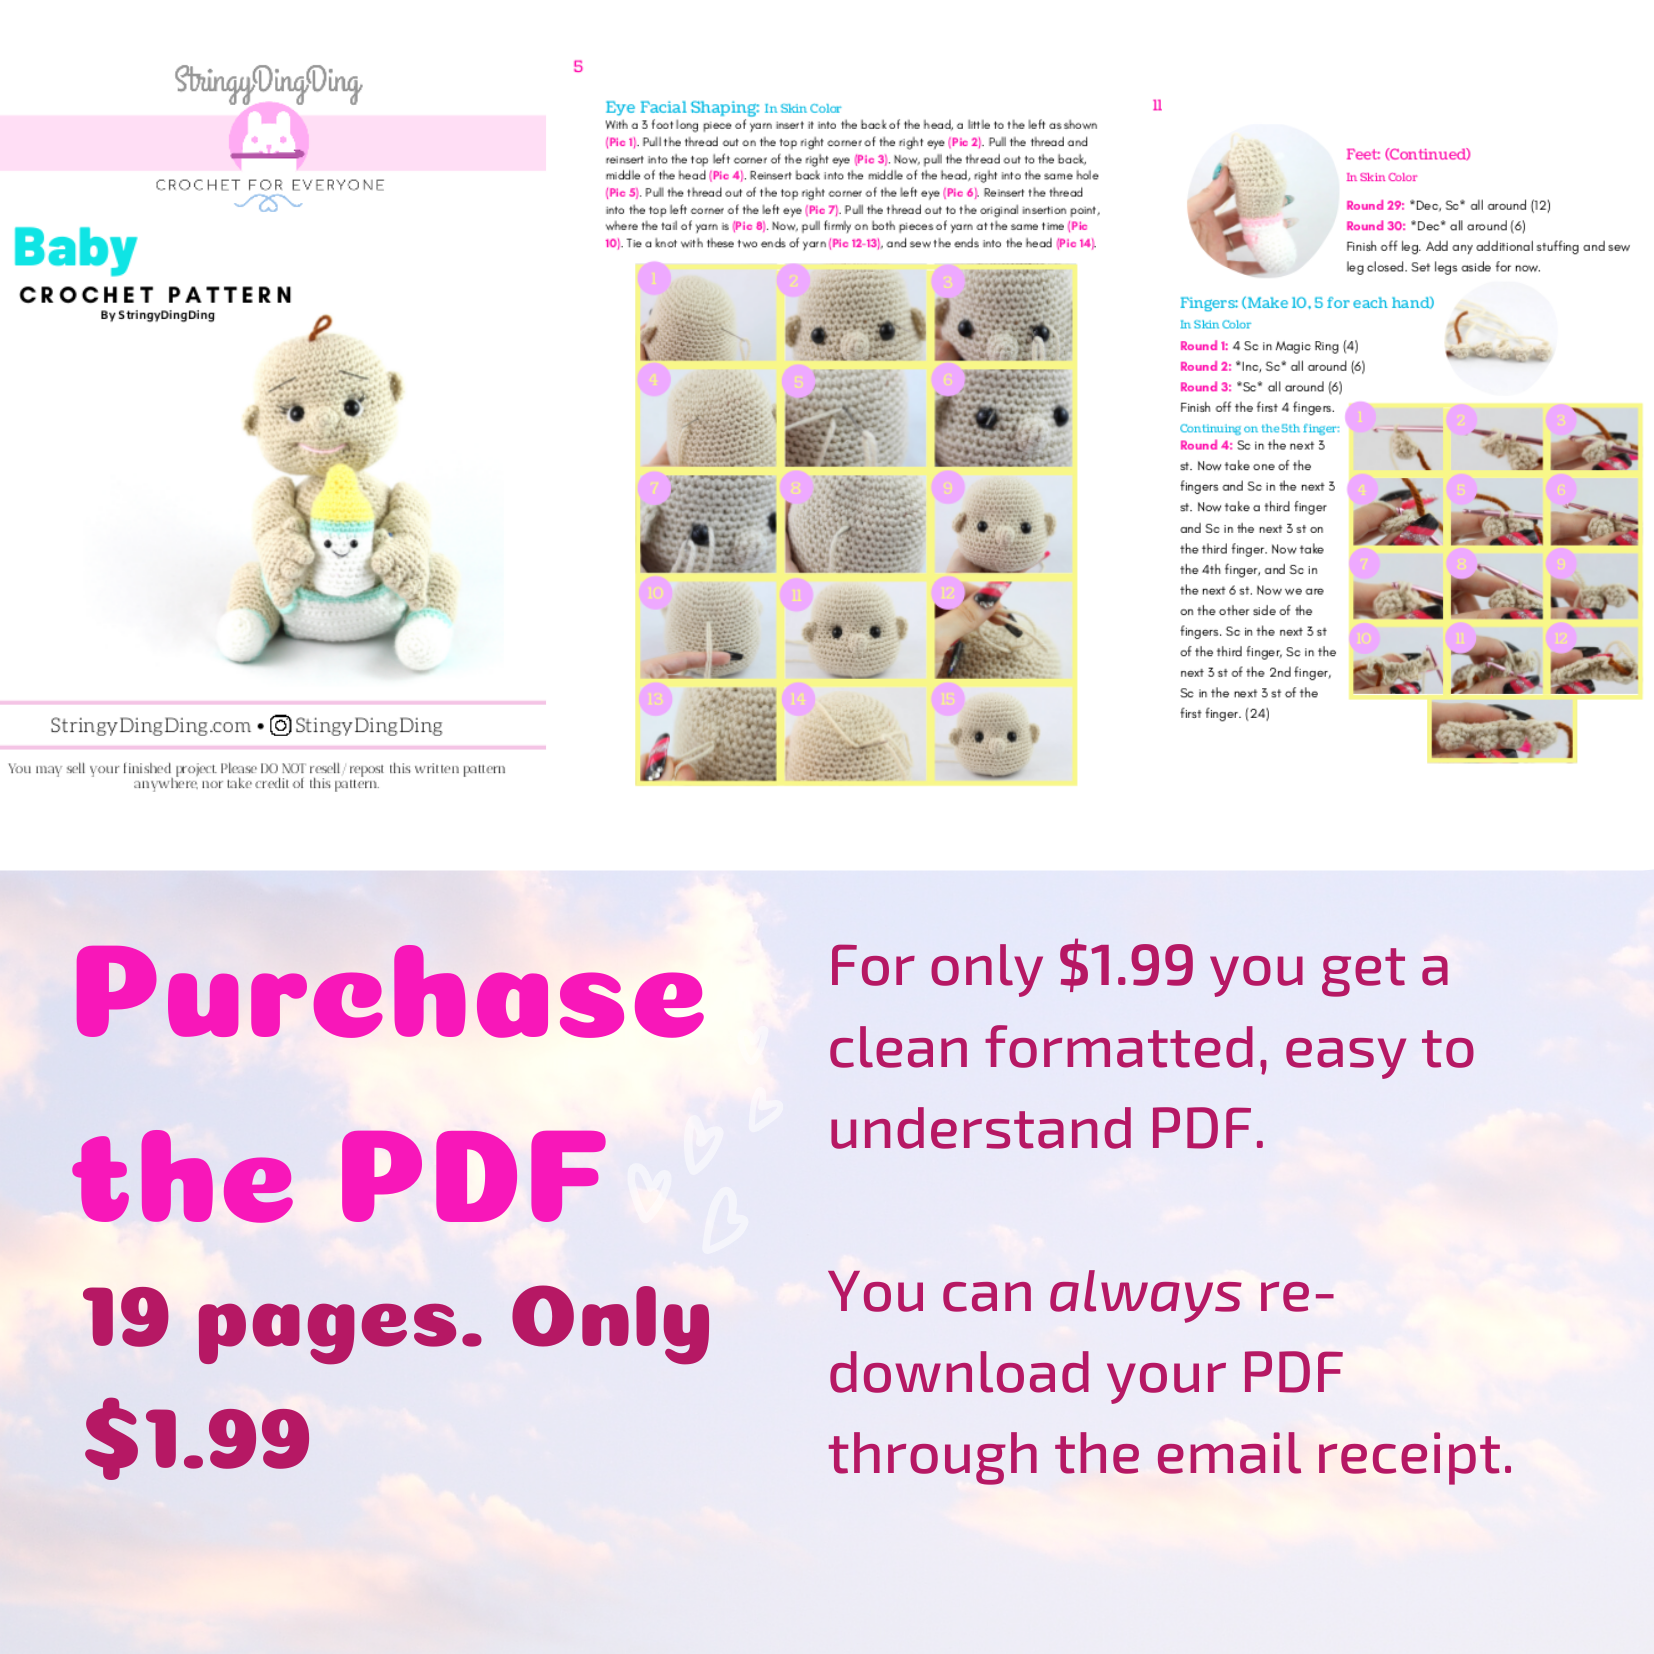
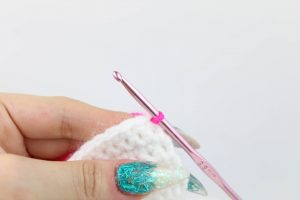
 Purchase the PDF version here
Supplies:
4mm crochet hook, 4/Medium weight yarn in skin color, hair color, light pink or light blue, white, black embroidery thread, 10mm safety eyes, 4 plastic limb washers for movable limbs (optional), tapestry needle, scissors, and stuffing.
Additional Information:
Difficulty: Easy
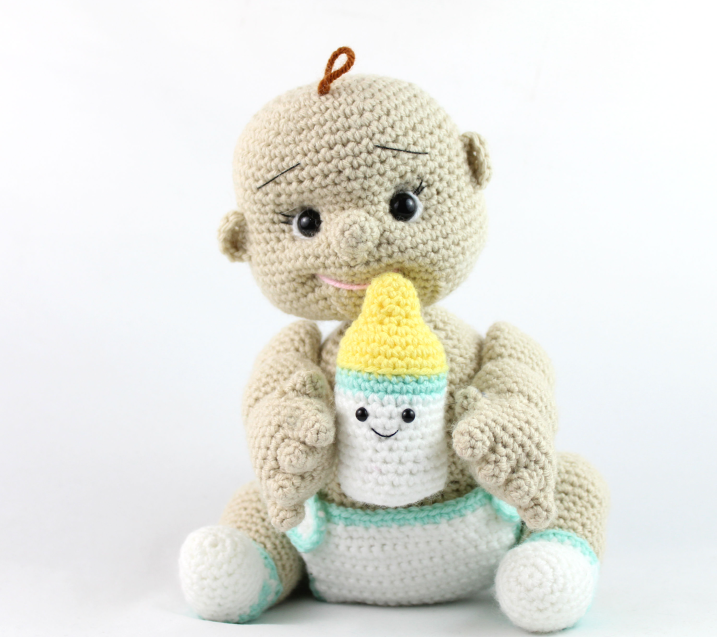
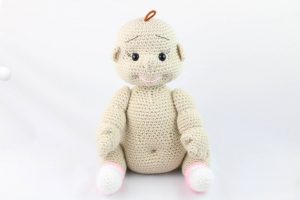
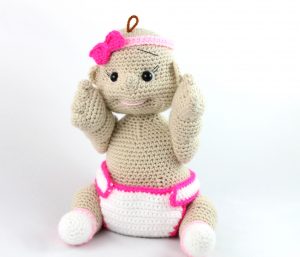
This pattern starts by making the head. After making the head, we add all the facial details such as nose, ears, shaping, eyelashes, etc. We then make the legs, then arms. If you’re using limb washers we will insert them into the arms and legs when making them. We then create the body, and attach the limbs with washers or sew them on. Next, we attach the head to the body. We then create the diaper, and finally make the baby bottle.
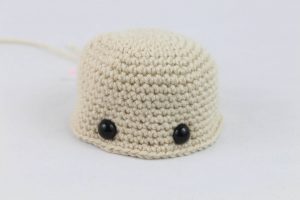
Head:
In Skin Color

Round 1: 6 Sc in Magic Ring (6)
Round 2: *Inc* all around (12)
Round 3: *Inc, Sc* all around (18)
Round 4: *Inc, Sc 2* all around (24)
Round 5: *Inc, Sc 3* all around (30)
Round 6: *Inc, Sc 4* all around (36)
Round 7: *Inc, Sc 5* all around (42)
Round 8: *Inc, Sc 6* all around (48)
Round 9-15: *Sc* all around (48)
Round 16: Sc in the next 19 st, Sc in next st and add a different colored stitch marker to the Sc just made. This marks where to place the eye. Sc in the next 7 st. Sc in the next st and add a different colored st marker to Sc just made. Sc in the next 20 st (48)
Round 17: *Sc* all around (48)
Round 18: *Inc, Sc 3* all around (60)
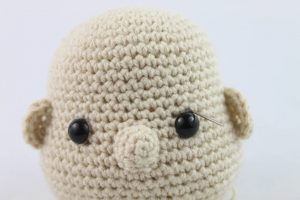
Add eyes in here
Round 19-24: *Sc* all around (60)
Round 25: *Dec, Sc 8* all around (54)
Round 26: *Dec, Sc 7* all around (48)
Round 27: *Dec, Sc 6* all around (42)
Round 28: *Dec, Sc 5* all around (36)
Round 29: *Dec, Sc 4* all around (30)
Stuff here
Round 30: *Dec, Sc 3* all around (24)
Round 31: *Dec Sc 2* all around (18)
Stop here for now. This is because we need the bottom of the head to be open for now so we can add facial indents for detail. You can cut a long tail to finish closing later. Now we will make the ears and nose, then facial details.
Nose:
In Skin Color
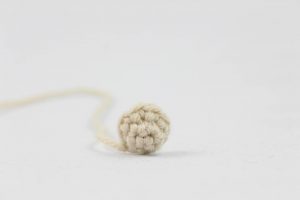
Round 1: 4 Sc in Magic Ring (4)
Round 2: *Inc* all around (8)
Round 3: *Sc* all around (8)
Finish off. Pin on head where shown
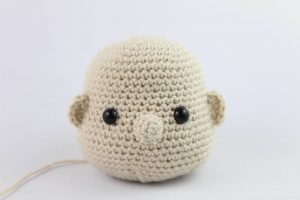
Ears:
In Skin Color
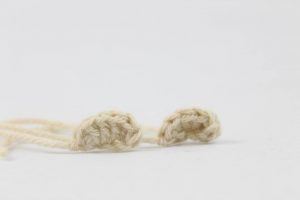
Round 1: Ch 3. Dc in the 2nd Ch from the hook. Dc 2 more times in same st. Dc 3 times in next st.
Finish off. Pin on head where shown.
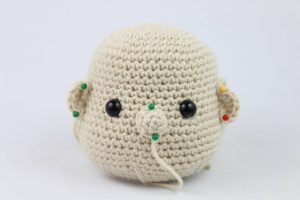
Facial Shaping:
In Skin Color
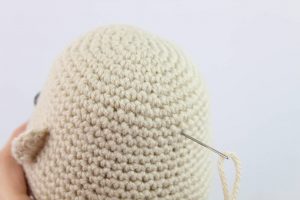
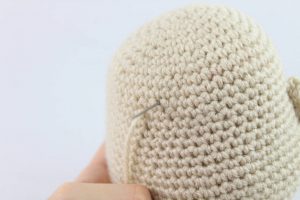
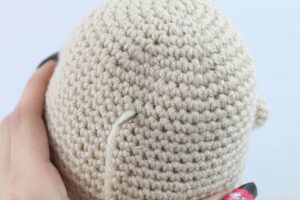
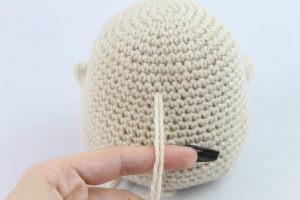
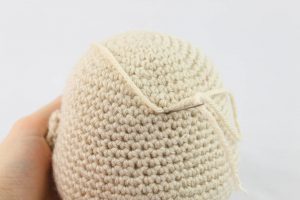
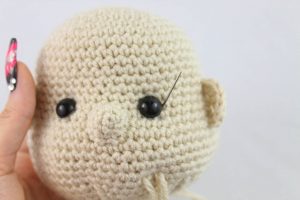
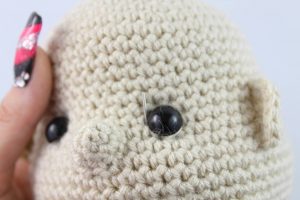
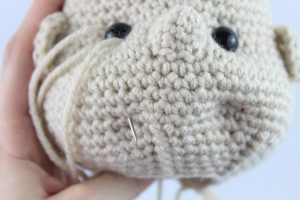
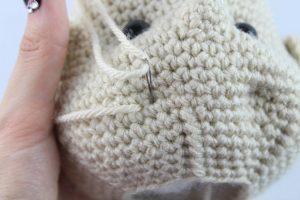
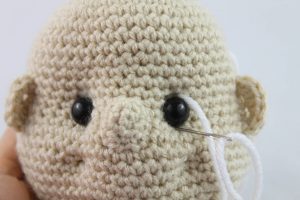
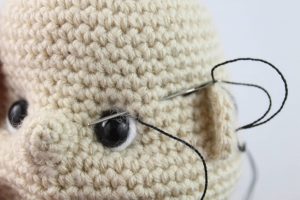
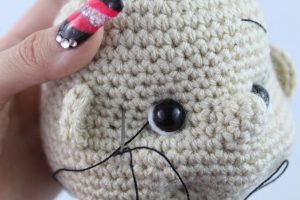
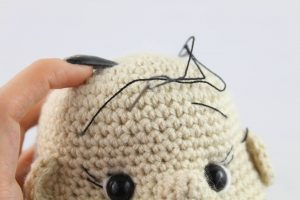
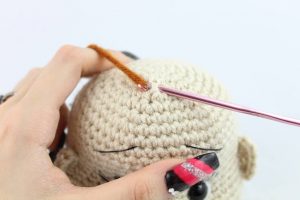
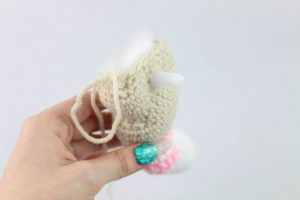
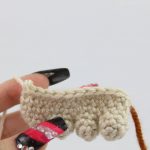
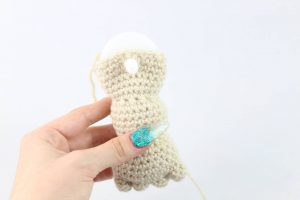
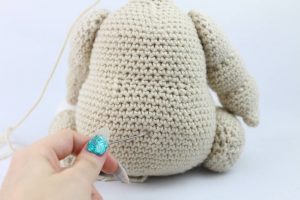
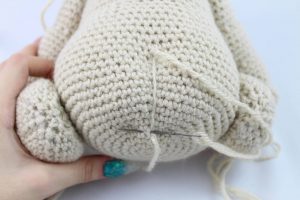
With a 3 foot long piece of yarn insert it into the back of the head, a little to the left as shown (Pic 1). Pull the thread out on the top right corner of the right eye (Pic 2).
1. 2.
2.
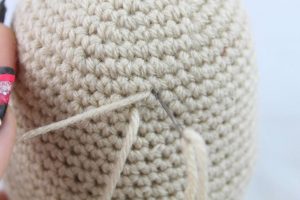
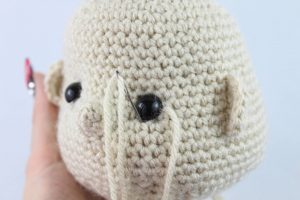
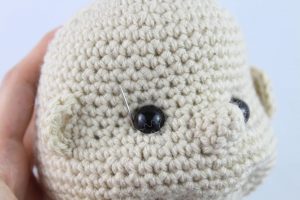
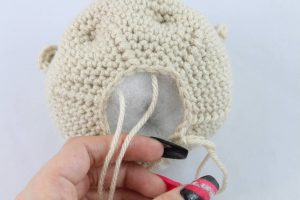
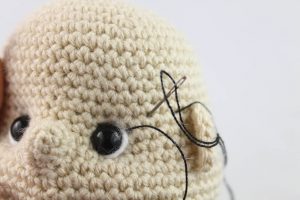
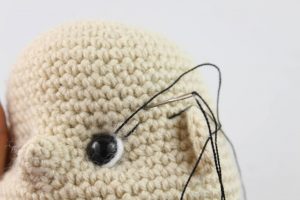
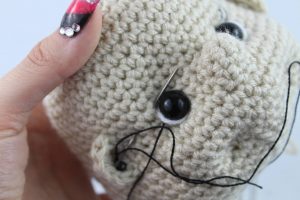
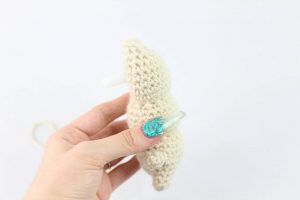
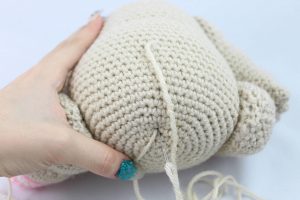
Pull the thread and reinsert into the top left corner of the right eye (Pic 3). Now, pull the thread out to the back, middle of the head (Pic 4).
3. 4.
4.
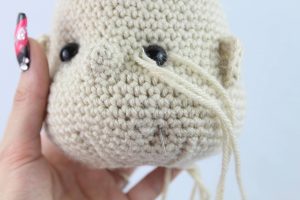
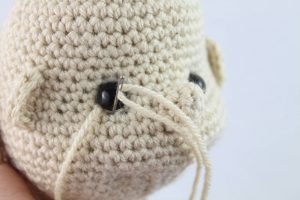
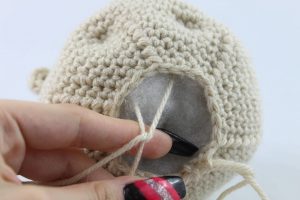
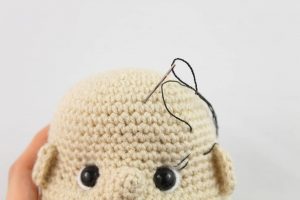
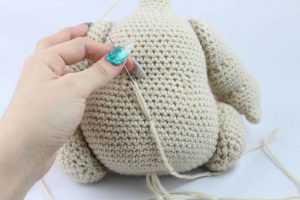
Reinsert back into the middle of the head, right into the same hole (Pic 5). Pull the thread out of the top right corner of the left eye (Pic 6).
5. 6.
6.
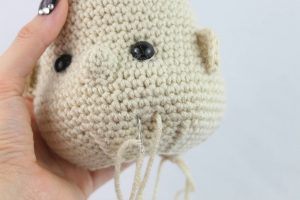
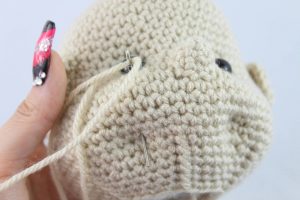
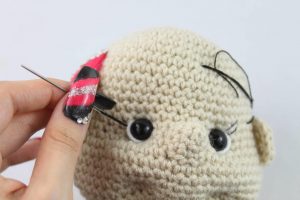
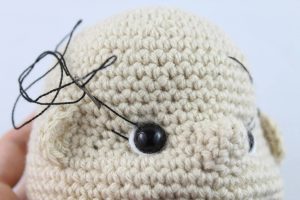
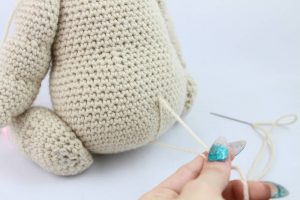
Reinsert the thread into the top left corner of the left eye (Pic 7). Pull the thread out to the original insertion point, where the tail of yarn is (Pic 8).
7. 8.
8.
Now, pull firmly on both pieces of yarn at the same time (Pic 10). Tie a knot with these two ends of yarn (Pic 12-13),
9. 10.
10.
11. 12.
12.
13.
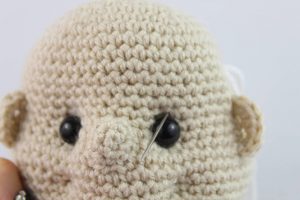
and sew the ends into the head (Pic 14).
14. 15.
15.
Facial Shaping:
In Skin Color
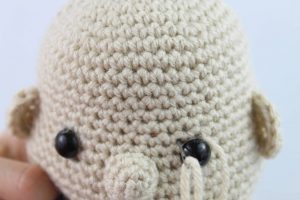
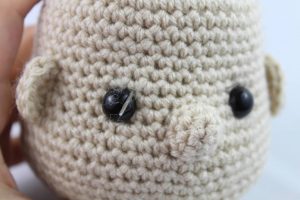
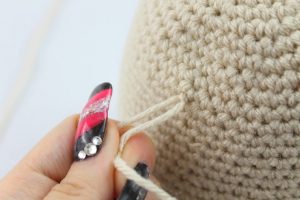
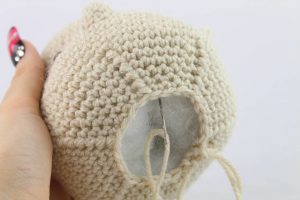
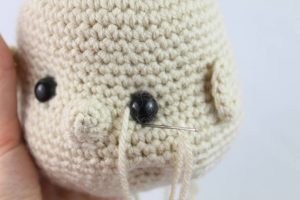
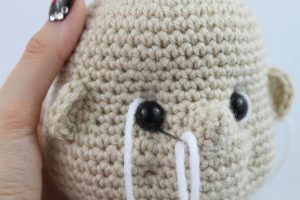
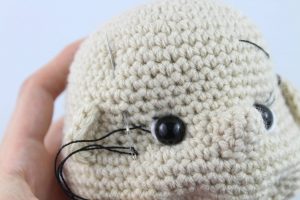
With a 3 foot long piece of yarn insert it into the bottom of the head (Pic 1). Pull the thread out of the right side of the mouth area (Pic 2).
1. 2.
2.
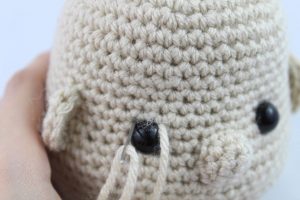
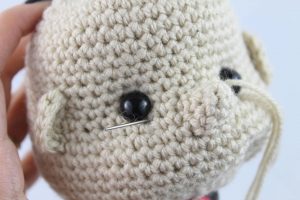
Pull the thread and reinsert into the head, one stitch to the right (Pic 3). Now, pull the thread out to the side of the right eye (Pic 4).
3. 4.
4.
Reinsert back into the head, in the inner corner of the right eye (Pic 5). Pull the thread out of the mouth area as inserted in earlier (Pic 6).
5. 6.
6.
Reinsert the thread one stitch to the left (Pic 7). Pull the thread out the upper left corner of the right eye (Pic 8).
7. 8.
8.
and reinsert into the bottom left corner of the right eye (Pic 9). Pull the yarn out to the bottom right corner of the left eye (Pic 10). Continue shaping on next “Facial Shaping” steps.
9. 10.
10.
Facial Shaping: (Continued)
In Skin Color, using same yarn
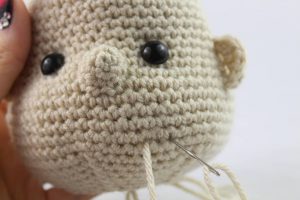
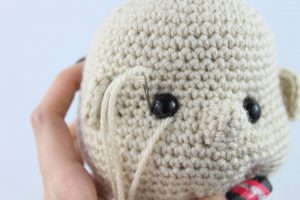
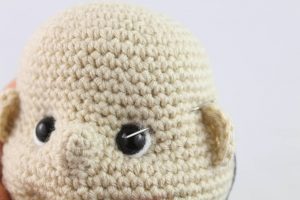
Reinsert the needle into the middle-left side of the left eye (Pic 1). Pull the thread out of the left side of the mouth area, making sure it lines up with the right side of the mouth (Pic 2).
1. 2.
2.
Pull the thread and reinsert into the head, one stitch to the left (Pic 3). Now, pull the thread out to the side of the left eye (Pic 4).
3. 4.
4.
Reinsert back into the head, in the inner side of the left eye (Pic 5). Pull the thread out of the mouth area as inserted in earlier (Pic 6).
5. 6.
6.
Reinsert the thread one stitch to the right (Pic 7). Pull the thread out to the bottom of the head. You will now have two pieces of yarn coming out f the bottom of the head (Pic 8).
7. 8.
8.
Firmly pull both pieces of yarn at the same time to tighten the head. Now tie a knot to secure (Pic 9).
9. 10.
10.
Eye Whites:
In White
Insert needle with yarn in the top right corner of the right eye (Pic 1). Pull the thread and reinsert to the inner left corner of the right eye (Pic 2). Pull the thread out to the left side of the eye and repeat to the left eye (Pic 3).
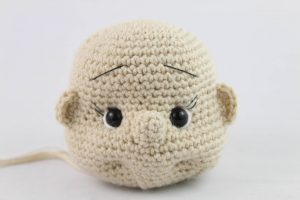
Eyelashes and Eyebrows:
In Black Embroidery Thread
Insert needle out by the top right side of the right eye, next to the white of the eye (Pic 1). Reinsert needle diagonal and to the right (Pic 2).
1. 2.
2.
Pull needle out to the top right side of the eye, next to the white and above the first eyelash (Pic 3). Pull needle out diagonal and to the right, above and slightly longer than the first eyelash (Pic 4).
3. 4.
4.
Continuing with the same thread, we will make the eyebrow. Pull the needle out as shown (Pic 5). Reinsert the needle diagonal and to the left as shown (Pic 6).
5. 6.
6.
Now we pull the needle out on the opposite side. Pull needle out to the top left side of the eye, next to the white of the eye (Pic 7). Reinsert needle diagonal and to the left to make the first eyelash (Pic 8).
7. 8.
8.
Pull needle out to the top left side of the eye, next to the white and above the first eyelash (Pic 9). Pull needle out diagonal and to the left, above and slightly longer than the first eyelash (Pic 10).
9. 10.
10.
Pull the needle out to the bottom area of the eyebrow (Pic 11). Reinsert needle to the diagonal and to the right (Pic 12). Weave in the ends to the eyes, eyelashes, and eyebrows.
11. 12.
12.
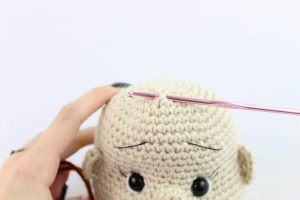
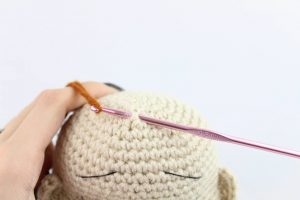
Hair:
In Any Color
Insert needle with yarn in the top right corner of the right eye (Pic 1). Pull the thread and reinsert to the inner left corner of the right eye (Pic 2). Pull the thread out to the left side of the eye and repeat to the left eye (Pic 3).
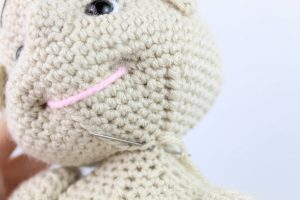
Mouth:
In Light Pink
Simply insert a piece of light pink yarn into the left side of the mouth, and reinsert it into the right side of the mouth.
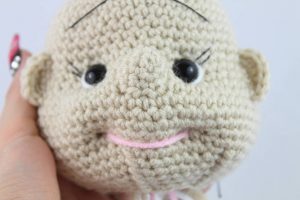
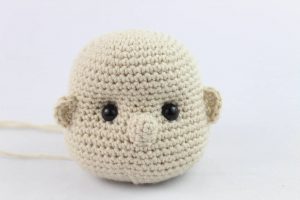
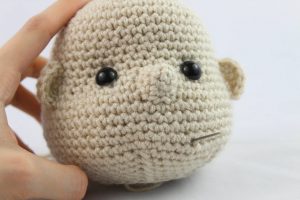
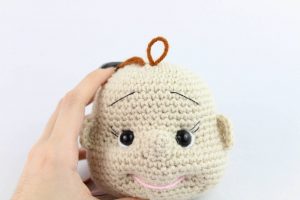
You are done with the head!
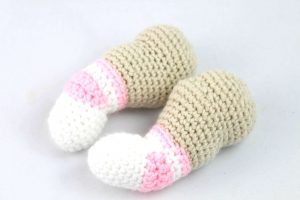
Feet: (Make 2)
In White for Socks
Round 1: 6 Sc in Magic Ring (6)
Round 2: *Inc* all around (12)
Round 3: *Sc* all around (12)
Round 4: *Inc, Sc* all around (18)
Round 5-9: *Sc* all around (18)
Round 10-11: Slst in the next 7 st. Switch to Light Blue or Pink. Hdc in the next 2 st, Dc in the next 6 st, Hdc in the next 2 st, Switch to White. SlSt in the last st (18)
Round 12: In White, SlSt in the nex 7 st, Sc in the next 10 St, SlSt in the last st (18)
Round 13: *Sc* all around (18)
Switch to Light Blue or Pink
Round 14: *Sc* all around (18)
Switch to Skin Color
Round 15: In BLO (Back Loop Only), *Sc* all around (18)
Round 16: In BOTH Loops, *Inc, Sc 2* all around (24)
Round 17-19: *Sc* all around (24)
Round 20: Sc in the next 5 st, *Inc* in the next 6 st, Sc in the next 5 st, *Dec* 4 times (26)
Round 21-22: *Sc* all around (26)
Round 23: Sc in the next 5 st, *Dec* 6 times, Sc in the next 5 st, *Inc* 4 times (24)
Round 24: *Inc, Sc 3* all around (30)
Round 25-26: *Sc* all around (30)
Round 27: *Dec, Sc 3* all around (24)
Round 28: *Dec, Sc 2* all around (18)
If you’re using washers for limbs, insert them into the inner side of the leg.
Continue closing leg.
Round 29: *Dec, Sc* all around (12)
Round 30: *Dec* all around (6)
Finish off leg. Add any additional stuffing and sew leg closed. Set legs aside for now.
Fingers: (Make 10, 5 for each hand)
In Skin Color
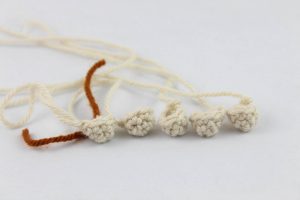
Round 1: 4 Sc in Magic Ring (4)
Round 2: *Inc, Sc* all around (6)
Round 3: *Sc* all around (6)
Finish off the first 4 fingers.
Continuing on 5th finger:
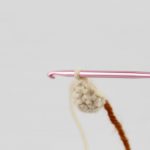
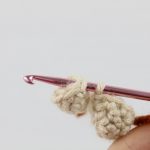
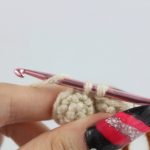
Round 4: Sc in the next 3 st. Now take one of the fingers and Sc in the next 3 st. Now take a third finger and Sc in the next 3 st on the third finger. Now take the 4th finger, and Sc in the next 6 st. Now we are on the other side of the fingers. Sc in the next 3 st of the third finger, Sc in the next 3 st of the 2nd finger, Sc in the next 3 st of the first finger. (24)
Round 5-6: *Sc* all around (24)
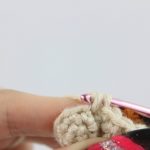
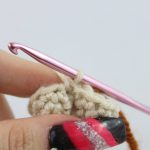
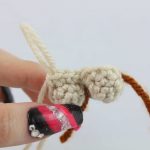
Round 7: Sc in the next 12 st. Line up the thumb to the hand and Sc the next 3 st together (Pic 2-4). Continuing on the hand, Sc in the next 9 st (21)


Round 8: Sc in the next 12 st. Now we meet the thumb, Sc in the next 3 st on the thumb. Now we meet the hand, Sc in the next 9 st (24)
Round 9-10: *Sc* all around (24)
Round 11: *Dec* all around (12)
Round 12: *Inc* all around (24)
Round 13-17: *Sc* all around (24)
Stuff here
Round 18: *Dec* all around (12)
Round 19: *Inc* all around (24)
Round 20-24: *Sc* all around (24)
Round 25: *Dec, Sc 2* all around (18)
Stuff again. If you’re using washers for limbs, insert them into the inner arm. Continue closing arm.
Round 26: *Dec, Sc* all around (12)
Round 27: *Dec* all around (6)
Add any additional stuffing. Sew arm closed and set aside.
Body:
In Skin Color
Round 1: 6 Sc in Magic Ring (6)
Round 2: *Inc* all around (12)
Round 3: *Inc, Sc* all around (18)
Round 4: *Inc, Sc 2* all around (24)
Round 5: *Inc, Sc 3* all around (30)
Round 6: *Inc, Sc 4* all around (36)
Round 7: *Inc, Sc 5* all around (42)
Round 8: *Inc, Sc 6* all around (48)
Round 9: *Inc, Sc 7* all around (54)
Round 10: *Inc, Sc 8* all around (60)
Round 11-21: *Sc* all around (60)
Round 22: *Dec, Sc 8* all around (54)
Round 23: *Dec, Sc 7* all around (48)
Round 24: *Dec, Sc 6* all around (42)
Round 25: *Inc, Sc 6* all around (48)
Round 26-34: *Sc* all around (48)
Stuff here
Round 35: *Dec, Sc 6* all around (42)
Round 36: *Dec, Sc 5* all around (36)
Round 37: *Dec, Sc 4* all around (30)
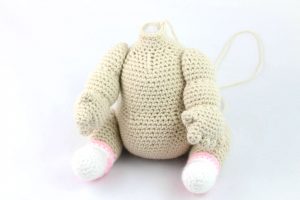
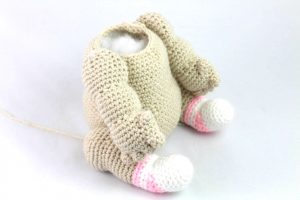
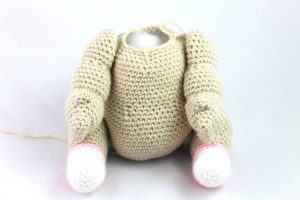
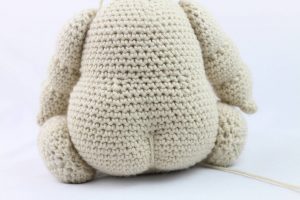
Stuff again here. If you’re using the limb washers, add the limbs in now. If you’re sewing the limbs on instead, you can sew them on after closing the body. Pin the limbs on where they are shown in the photo. Sew on.
Round 38: *Dec, Sc 3* all around (24)
Round 39: *Dec, Sc 2* all around (18)
Round 39-44: *Sc* all around (18)
Finish off and add any additional stuffing.
Body Shaping:
In Skin Color
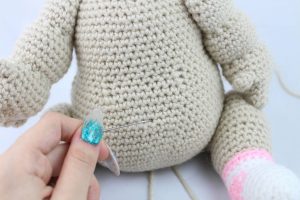
Take a 3 foot long piece of yarn and insert it into the bottom of the body as shown (Pic 1). Pull out the needle to the belly button area (Pic 2).
1. 2.
2.
Reinsert the needle one stitch over (Pic 3), and pull out where shown (Pic 4).
3. 4.
4.
Insert needle into original insertion point (Pic 5), and pull needle out in same spot as in Pic 4 (Pic 6).
5. 6.
6.
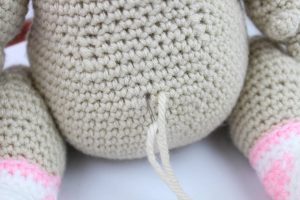
Firmly pull both pieces of yarn at the same time to tighten shape (Pic 7). Reinsert needle to original insertion point (Pic 8),
7. 8.
8.
and finally pull both pieces of yarn again to tighten. Tie the yarn in a knot and weave into the body.
9. 10.
10.
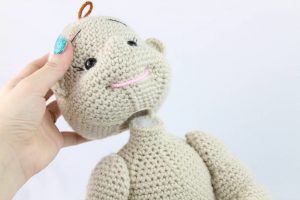
Head Assembly:
In Skin Color
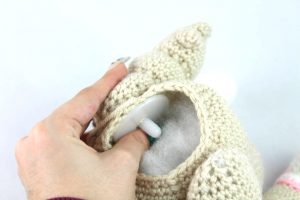
Place the head onto the body. Sew them together. If you want a stiffer head, you can place a foam roller in the neck. Be sure it is safe for children if you are giving the toy to a child.

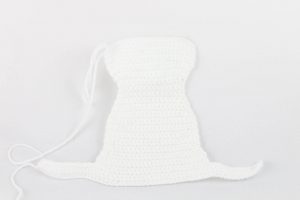
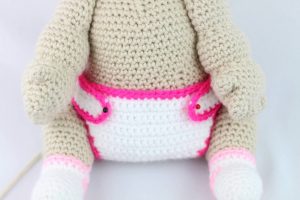
Diaper:
In White

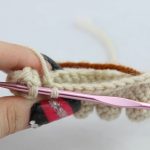
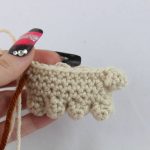
Row 1: Ch 56. Sc in 2nd Ch from hook. Sc in the next 54 st (55)
Row 2-3: Turn, Sc in the next 55 st (55)
Row 4: Turn, SlSt in the next 14 st. Sc in the next 27
Row 5-7: Turn, Sc next 27 (27)
Row 8: Turn, *Dec* 2 times, Sc in the next 19 st, *Dec* 2 times (23)
Row 9-18: Turn, Sc next 23 (23)
Row 19: Turn *Dec 2 times, Sc in the 14 st, *Dec* 2 times (18)
Row 20-22: Turn, Sc in the next 18 st (18)
Row 23: Turn, *Dec* 2 times, Sc in the next 10 st, *Dec* 2 times (14)
Row 24-29: Turn, Sc in the next 14 st (14)
Row 30: *Inc* 2 times, Sc in the next 10 st, *Inc* 2 times (18)
Row 31-32: Turn Sc in the next 18 st (18)
Row 33: Turn, *Inc* 2 times, Sc in the next 14 st, *Inc* 2 times (22)
Row 34-40: Turn, Sc in the next 22 st (22)
Finish off.
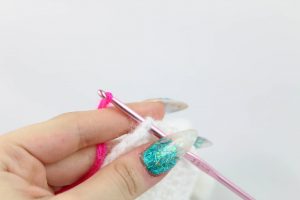
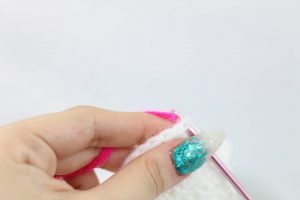
Diaper Lining:
In Pink or Blue
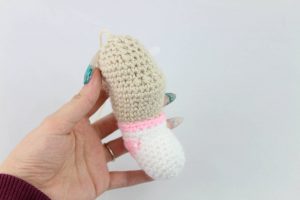
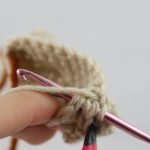
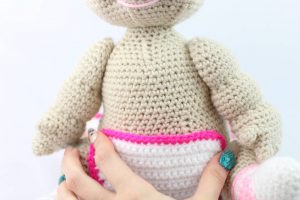
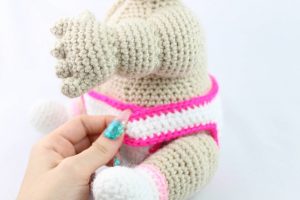
Attach pink or blue yarn to the diaper as shown. Sc around the entire diaper. Finish off.
Diaper Assembly:
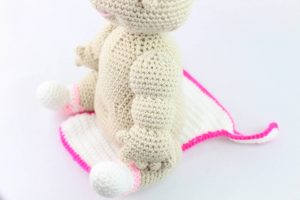
Place the diaper with the long side on the back of the baby (Pic 1). Fold the short side on the front of the baby (Pic 2). Pull the long sides to the front of the baby (Pic 3). Pin in place and sew diaper together (Pic 4).
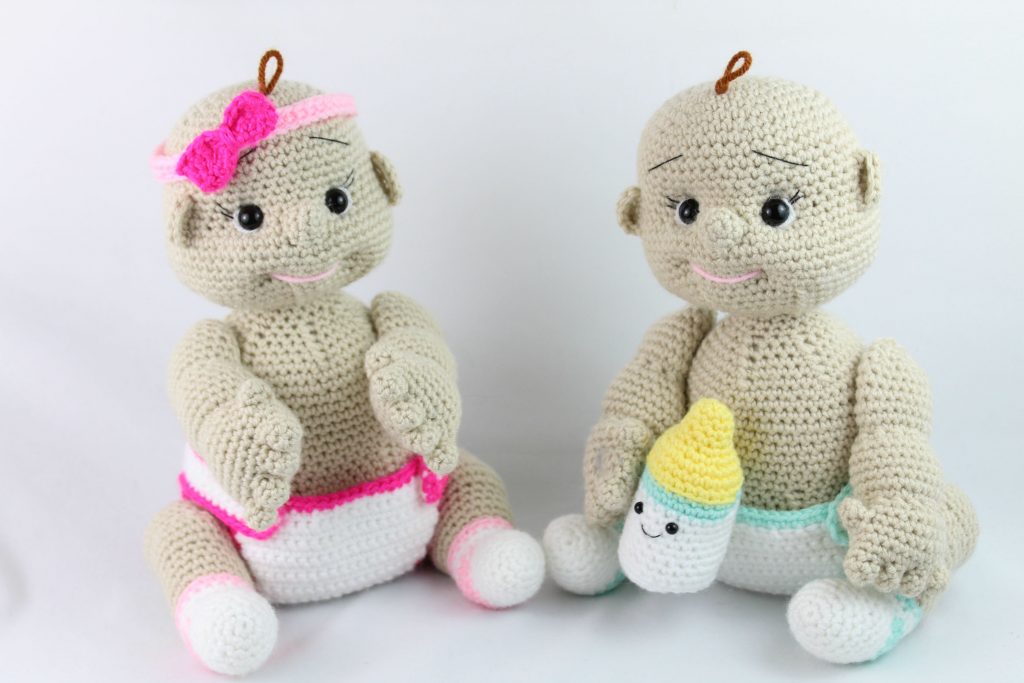
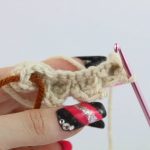
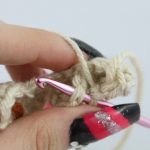
Headband:
In Pink
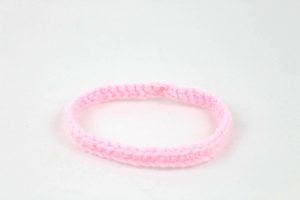
Ch 50. Sc in the 2nd Ch from hook. Sc in the next 48 down the Ch. Finish off. Sew the ends together.

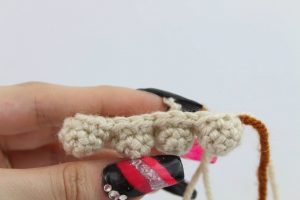
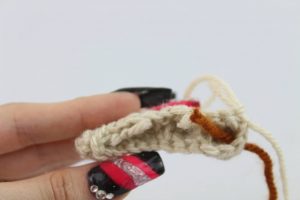
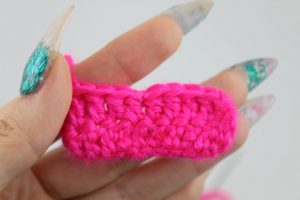
Bow:
In Pink
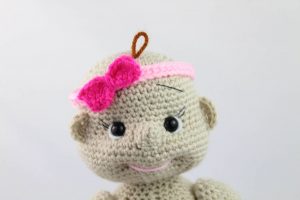
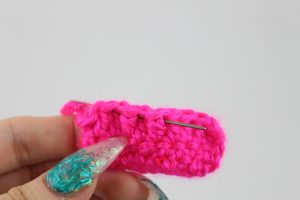
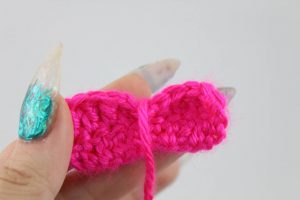
Row 1: Ch 10. Dc in the 2nd Ch from the hook. Dc in the next 8 st (9)
Row 2: Turn, Dc in the next 9 st (9)
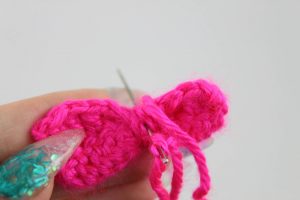
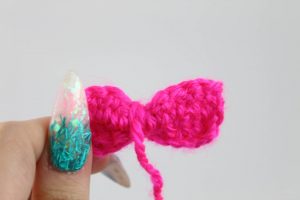
Finish off. Weave the needle to the middle (Pic 2). Wrap the tail of the yarn around the middle firmly a few times (Pic 3). Insert the needle into the middle (Pic 4). Sew the bow onto the headband (Pic 6-7).

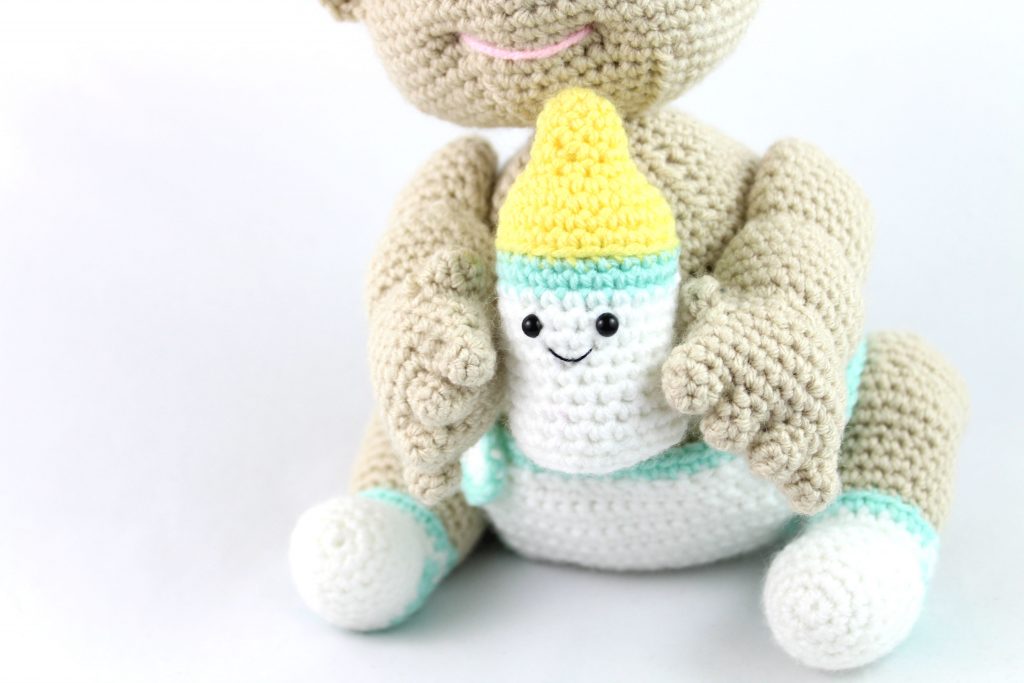
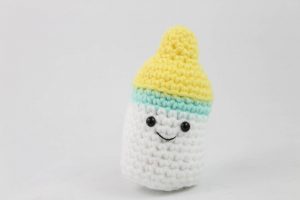
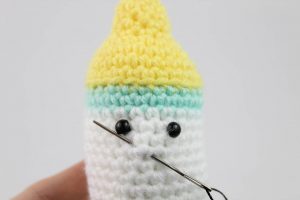
Bottle:
In Light Yellow
Round 1: 6 Sc in Magic Ring (6)
Round 2: *Inc, Sc* all around (9)
Round 3-5: *Sc* all around (9)
Round 6: *Inc, Sc* all around (12)
Round 7: *Inc, Sc 2* all around (18)
Round 8-9: *Sc* all around (18)
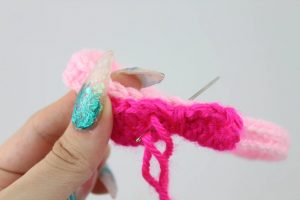
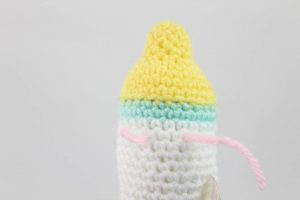
Round 10: Switch to Light Blue or Pink, *Sc* all around in BLO (Back Loop Only) (18)
Round 11: In BOTH Loops, *Sc* all around (18)
Round 12: Switch to White, *Sc* all around (18)
Round 13: Sc in the next 8 st, Sc in the next st and add a different colored st marker to Sc just made. This marks where to place the eye. Sc in the next 2 st. Sc in the next st and add a different colored st marker to Sc just made. Sc in next 6 st (18)
Round 14-21: *Sc* all around (18)
Stuff here. Add eyes here
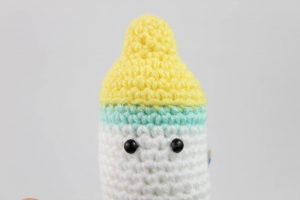
Round 22: In BLO, *Dec, Sc 2* all around (12)
Round 23: In BOTH Loops, *Dec, Sc* all around (6)
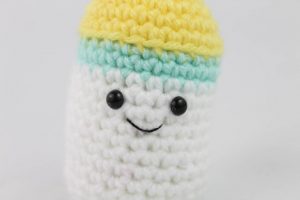
Finish off. Add any additional stuffing and sew closed.
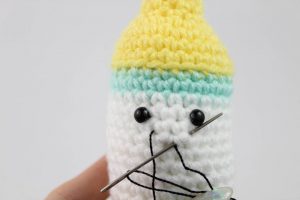
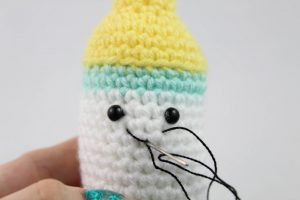
Smile:
In Black Embroidery Thread
Insert needle in the middle of the mouth, and pull it out where shown (Pic 1). Reinsert needle back into the middle of the smile, and pull out on opposite side as shown (Pic 2). Finally, reinsert needle into the middle of the smile and pull through (Pic 3). Weave in ends.
 Done! If you finished this pattern, I would be SO HAPPY if you “try” it on Pinterest, or tag me on Instagram @StringyDingDing or #StringyDingDing


23 Comments
Wow! These babies are so adorable❣️ I think any child would love to give them a squeeze!
Thank you so much for your comment! I’m really glad you think they’re cute 🙂 I hope many children will be able to enjoy this doll <3
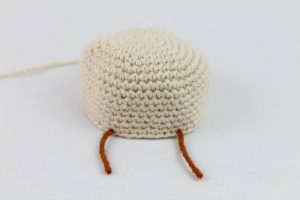
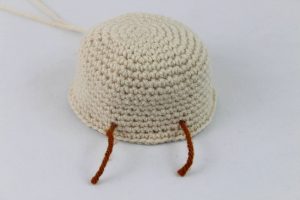
I don’t understand what to do under hair. It says hair but us working with the eyes
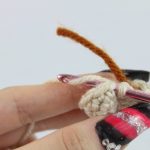
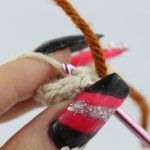
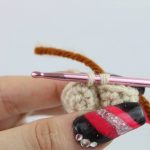
I went ahead and added the instructions 🙂 Take a long piece of brown yarn. Insert the hook into the top of the head, where you want the hair. Now pull the brown yarn through as shown. Tie a knot and weave in ends.
Your baby is so cute! I really enjoy crocheting dolls! I only have 2 adorable grandsons! I still crochet dolls even though I have to hide them from my chihuahuas! Thank you! I will be adding this to my other to do dolls. Great work! Amanda
Hi! Aw wow thank you so much 🙂 I bet you crochet lots of cute toys for your grandsons, especially now that it’s the gifting season <3 Haha dogs just love to play with anything they can! Chihuahuas are really cute, the have the cutest buggy eyes. Thank you so much for your comment - you are so kind! I hope you have a great day and happy crocheting
Hi im thinking of crocheting this adorable baby whats the height of the doll pls ?? As i would like to make it big
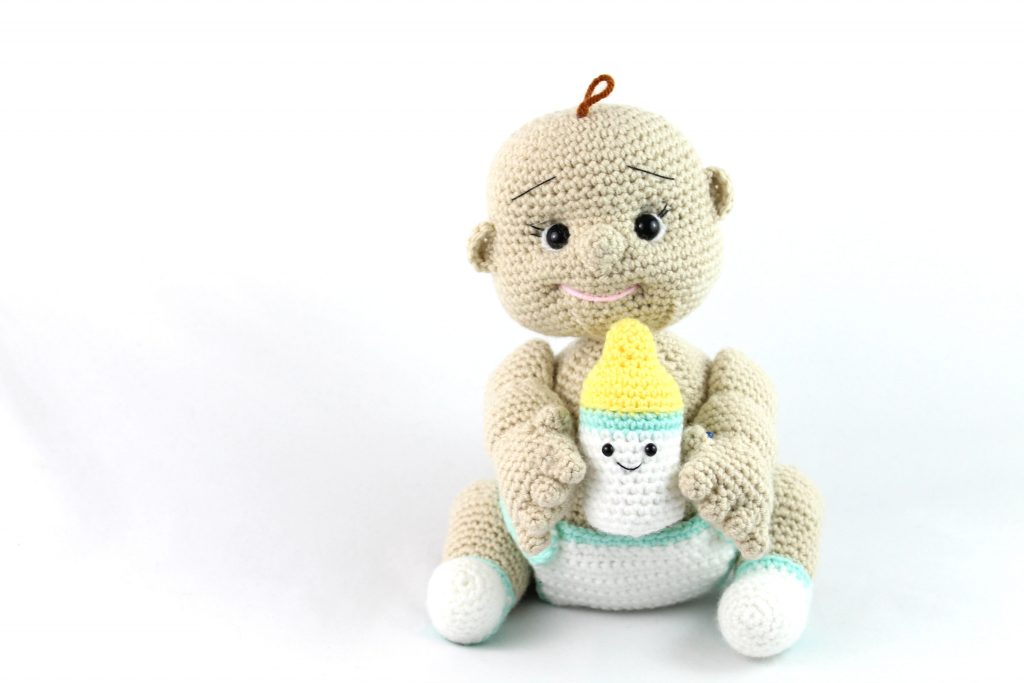
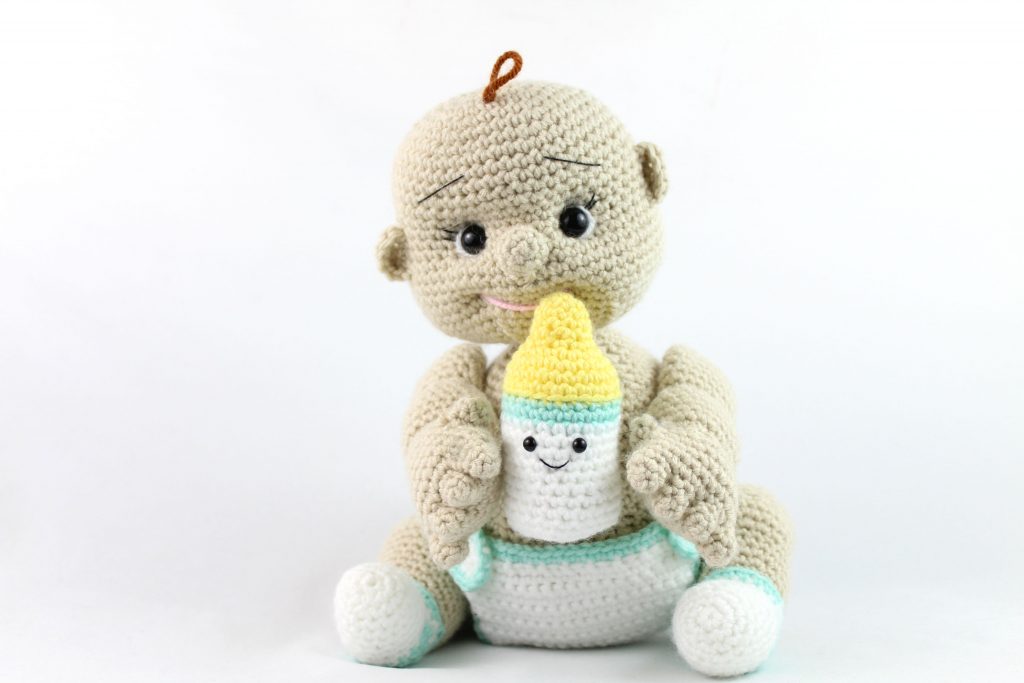
Hi there! The baby sitting is 10.5″, so it’s larger compared to most amigurumis 🙂
I loved this project so much! It turned out so good. I made a girl, then decided to make a boy also. Thanks so much for the pattern.
Hi Jana! Wow that’s really amazing, I’m so glad to hear you liked the pattern 🙂 I hope it wasn’t too difficult, as I tried to make it an easy pattern that LOOKS difficult! I would love to see pictures of your finished projects, I’m sure they look adorable. I hope you have a great day Jana!
This cute baby doll crochet pattern was very user/crochet friendly. Your pattern was easy to follow and the doll(s) turned out very nicely. Thank you for sharing. As soon as I finish the boy baby doll, I will show you the finished product. Thanks AGAIN!
That’s really great, I tried very hard to make this pattern easy so it means so much to hear that you enjoyed it! Thank you for being so kind 🙂 I would love to see the babies you made! Thanks again Robin, comments like yours make my day.
I am just learning and I love this baby, I am having a problem with round 26 the Dec part. I can’t get the numbers right. Please can you tell me how many should be between each Dec.
I can’t do the Dec part on the head. What is the numbers you do Dec on. I am just learning and I have tried round 25 over and over and can’t make it work. I love this baby.
Hi Siane, I am so happy to hear that you like this baby pattern! I’m so glad that you’re trying out this pattern as a beginner, it’s a bit of a more intricate pattern compared to most amigurumis but worth all of the hard work.
Before we can work Round 25, we must confirm that Round 24 is correct. Be sure that you have a total of 60 stitches before moving onto Round 25. You must have 60 stitches in Round 24, or else Round 25 wont work.
So for Round 25 it reads:
Round 25: *Dec, Sc 8* all around (54)
This means *decrease 1 time (also known as single crochet the next two stitches together), Sc in the next 8 stitches* all around (so repeat *Dec, Sc in the next 8 st*, a total of 6 times).
You will have a total of 8 single crochets between each decrease, and a total of 6 decreases. Round 25 will have a total of 54 stitches at the end of this Round.
I hope this made sense, but if it didn’t please just let me know! I’m happy to help if you have any other questions 🙂 Thanks!
Love this pattern nearly finished the girl one then am doing the boy one my daughter wants twins
Hi Jenny! Thank you so much for your kind comment, I’m really glad to hear that you enjoy this pattern 🙂 That is so cute that your daughter wants twin amigurumi babies! I bet they look adorable ❤️ If you get a chance, I would love to see them!
Thank you for making this a free pattern. I loved making two babies for my granddaughters.
Hi there Lori! Thank you so much for the kind comment, it means a lot that you would say this ❤️ Your granddaughters sound like lucky girls! I’m sure they will love the babies you made them 🙂
this pattern can only be described in one word . amazing !!!!!!!!
Thanks for sharing your pattern. This is my BIG Baby 👶🏻🤣
Im stuck on the add the thumb part ” sc the next 3 together. The pics dont help.
Im stuck on the add the thumb part ” sc the next 3 together. The pics dont help.
Is there a video?