

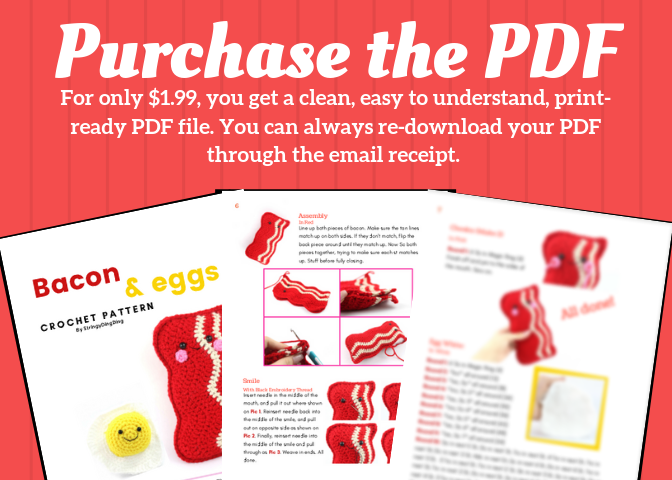
Purchase the PDF version here

Stitches used in this pattern:
Magic Ring, YO/Yarn Over, Ch/Chain, Sc/Single Crochet, Dc/Double Crochet, Hdc/Half Double Crochet, Trc/Triple Crochet, Dc Inc/Double Crochet Increase, Dc Dec/Double Crochet Decrease
Supplies:
4mm crochet hook. 4/Medium weight yarn in red, tan, white, yellow, and pink. Black embroidery thread. 8mm safety eyes for bacon, 6mm safety eyes for egg. Stuffing. Scissors. Tapestry needle.
Additional Information:
Difficulty: Easy
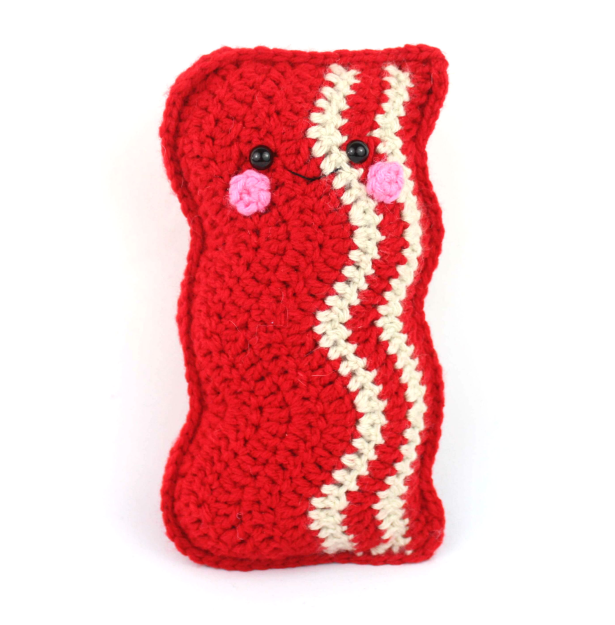
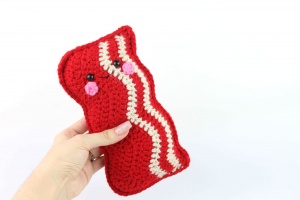
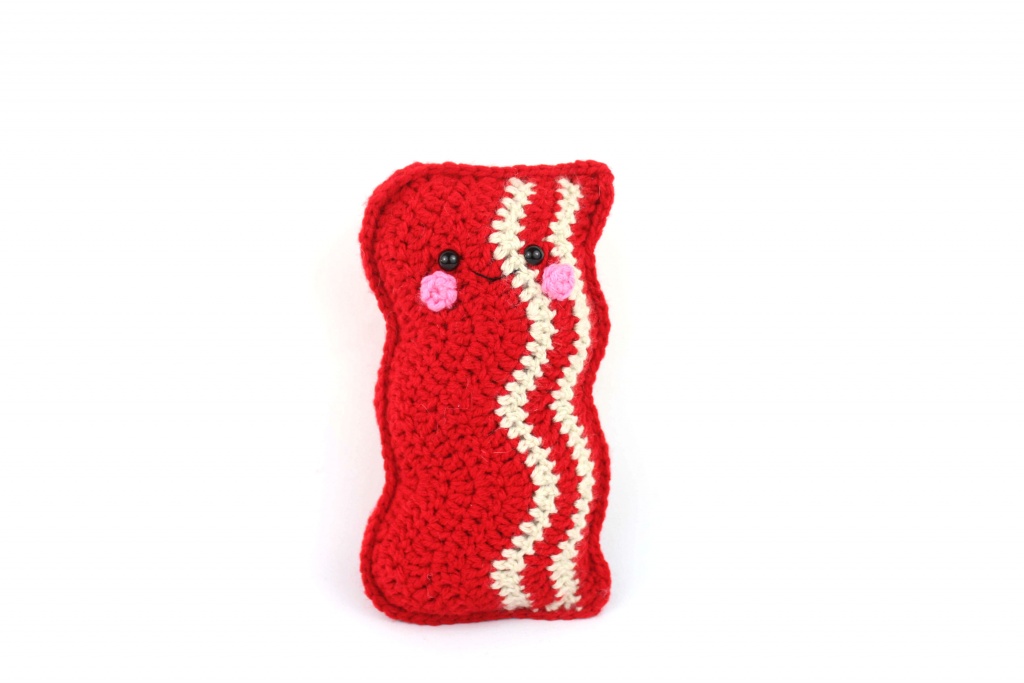
The bacon is made in two pieces, then crocheted together. The “Dec Dc” stitch makes the dip on the bacon and the “Dec Inc” makes the peak. The Dec Dc stitch is explained and shown with pictures. The Dec Inc means make two Dc in one stitch.
Bacon (Make 2):
In Red
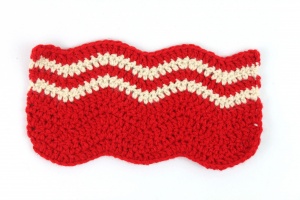
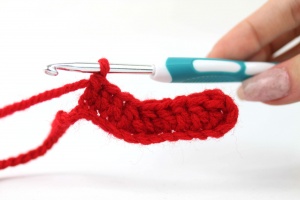
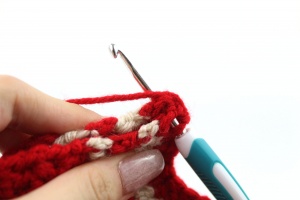
Row 1: Ch 39. Dc in 4th Ch from hook. Dc in next 3 Ch. Dc Decrease 2 times. Below is how to make 1 Dc Decrease. Remember to do this 2 times.
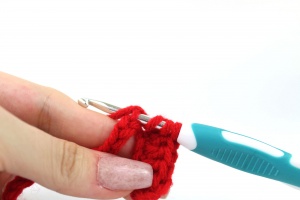
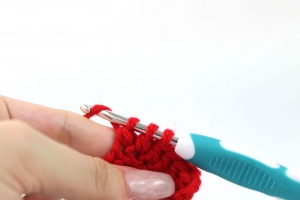
Yarn over and insert hook into next st. YO and Pull up a loop. You will have 3 total loops on your hook. Yarn over and pull through 2 loops (Pic 1). Yarn over and insert hook into next stitch YO and Pull up a loop (Pic 2-3). You will have 4 total loops on your hook (Pic 4). Yarn over and pull through 2 loops (Pic 5). You will have 3 loops on your hook now (Pic 6), Yarn over and pull through all 3 loops. (Pic 7). You have just completed 1 Dc Decrease!


Row 1 (Continued): Dc in next 3 Ch (Pic 1), Dc Inc in next 2 St. Dc in next 3 St (Pic 2), Dc Dec 2 times, Dc in next 3 St, Dc Inc in next 2 St, Dc in next 3 St, Dc Dec 2 times, Dc in next 3 Ch, Dc Inc in last St (36)


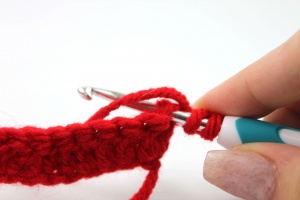
Row 2-5: Ch 3. Turn (Pic 1), Dc in very 1st St (Pic 2 & 3), Repeat *Dc in next 3 St. Dc Dec 2 times, Dc in next 3 St, Dc Inc in next 2 St* 2 times, Dc in next 3 St, Dc Dec 2 times, Dc in last 3 St, Dc Inc in last St (Pic 4 & 5. You Dc Inc in the Ch 3 st)(36)


Switch to Tan
Row 6: Ch 3. Turn, Dc in very 1st St, Repeat *Dc in next 3 St, Dc Dec 2 times, Dc in next 3 St, Dc Inc in next 2 St* 2 times, Dc in next 3 St, Dc Dec 2 times, Dc in last 3 St, Dc Inc in last St (36)
Switch to Red
Row 7: Ch 3. Turn, Dc in very 1st St, Repeat *Dc in next 3 St, Dc Dec 2 times, Dc in next 3 St, Dc Inc in next 2 St* 2 times, Dc in next 3 St, Dc Dec 2 times, Dc in last 3 St, Dc Inc in last St (36)
Switch to Tan
Row 8: Ch 3. Turn, Dc in very 1st St, Repeat *Dc in next 3 St, Dc Dec 2 times, Dc in next 3 St, Dc Inc in next 2 St* 2 times, Dc in next 3 St, Dc Dec 2 times, Dc in last 3 St, Dc Inc in last St (36)
Switch to Red
Row 9: Ch 3. Turn, Dc in very 1st St, Repeat *Dc in next 3 St, Dc Dec 2 times, Dc in next 3 St, Dc Inc in next 2 St* 2 times, Dc in next 3 St, Dc Dec 2 times, Dc in last 3 St, Dc Inc in last St (36)
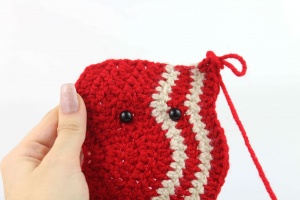
Finish off. Weave in the ends. Add safety eyes in where you’d like.
Assembly:
In Red
Line up both pieces of bacon. Make sure the tan lines match up on both sides. If they don’t match, flip the back piece around until they match up. Now Sc both pieces together, trying to make sure each st matches up. Stuff before fully closing.


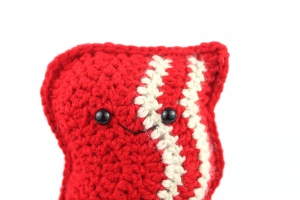
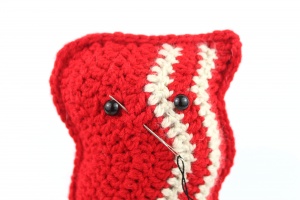
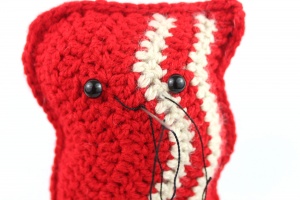
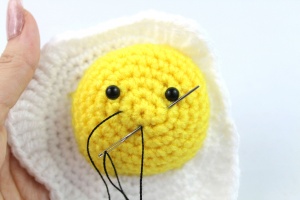
Smile
With Black Embroidery Thread
Insert needle in the middle of the mouth, and pull it out where shown on Pic 1. Reinsert needle back into the middle of the smile, and pull out on opposite side as shown on Pic 2. Finally, reinsert needle into the middle of the smile and pull through as Pic 3. Weave in ends. All done.

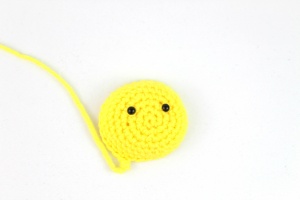
Cheeks: (Make 2)
In Pink
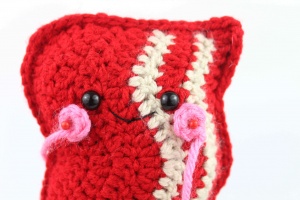
Round 1: 6 Sc in Magic Ring (6)
Finish off and pin to the sides of the mouth. Sew on.
Egg White:
In White

Round 1: 6 Sc in Magic Ring (6)
Round 2: *Inc* all around (12)
Round 3: *Inc, Sc* all around (18)
Round 4: *Inc, Sc 2* all around (24)
Round 5: *Inc, Sc 3* all around (30)
Round 6: *Inc, Sc 4* all around (36)
Round 7: *Inc, Sc 5* all around (42)
Round 8: *Inc, Sc 6* all around (48)
Round 9: *Inc, Sc 7* all around (54)
Round 10: Sc in next 5 St, Dc in next St, Trc in next St, 4 Trc in next St, Trc in next St, Dc in next 2 St, Hdc in next St, Sc in next 6 St, Dc in next 4 St, Trc in next 3 St, 3 Trc in next St, Trc in next 2 St, Dc in next 3 St, Sc in next St, Dc in next St, Trc in next 2 St, Dc in next St, Sc in next 4 St, Dc in next 2 St, Trc in next 4 St, 3 Trc in next St, Trc in next 2 St, Dc in next 2 St, Sc in last 3 St (61)
Finish off and weave in ends.
Yolk:
In Yellow
Round 1: 6 Sc in Magic Ring (6)
Round 2: *Inc* all around (12)
Round 3: *Inc, Sc* 2 times, Inc in next St, Sc in next St and add different colored St marker. This marks where we will place the eye. Inc in next St, Sc in next St, Inc in next St, Sc in next St and add different colored St marker. Inc in next St, Sc in last St (18)
Round 4: *Inc, Sc 2* all around (24)
Round 5: *Inc, Sc 3* all around (30)
Round 6-8: *Sc* all around (30)
Finish off and add in safety eyes. Put yolk on egg white and sew on. Stuff before fully closing.
Smile Assembly:
With Black Embroidery Thread
Insert needle in the middle of the mouth, and pull it out where shown on Pic 1. Reinsert needle back into the middle of the smile, and pull out on opposite side as shown on Pic 2. Finally, reinsert needle into the middle of the smile and pull through as Pic 3. Weave in ends. All done!


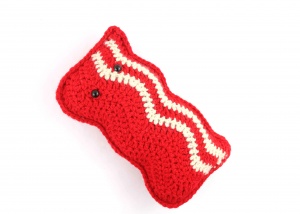
All done! If you finished this pattern, I would be SO HAPPY if you “try” it on Pinterest, or tag me on Instagram @StringyDingDing


9 Comments
First off, love the pattern! So cute!
I did notice that you are missing a row 9 in your bacon pattern. It’s on the picture but not on the pattern itself.
Thanks! I went ahead and fixed it. All you need to do is repeat the same row but in red for one last row 🙂
Hello! I am trying to do the bacon pattern but, i am not understanding how you are getting 36 stitches at the end. I followed the first round to a tea and im getting 35 stitches. I tried recounting the stitches by reading your instructions and its adding up to 35. am i doing something wrong?
Hi, try counting the “hole” we make when we do the Dc in the 4th Ch from the hook here: Row 1: Ch 39. Dc in 4th Ch from hook.
As you see it makes a hole which we will crochet into on the second round. It’s a little hard to explain, but that may help you! Please let me know and I’m happy to help if you need clarification or have any questions 🙂
Hi. Your pdf is blacking out.
Halp!
Hi Allison!
Sometimes this can happen, but luckily the fix is easy 🙂 All you need to do is redownload the pattern. Sometimes the file corrupts while downloading, so downloading it again will fix it! You can find your download link in the email sent to you after purchase. Let me know if I can help further!
I tried downloading the same link. It’s the same result. So strange. Are you able to just email it to me?
Hi! I haven’t heard back from you via email or after I tried to redownload the original link. I’d prefer a refund please. We can discuss further in an email if you’d please reach out.
Can someone please respond to me please? I’m crocheting ghosts over here that are better at conflict resolution. 👻