Get the PDF version here
Or Get the entire Halloween PDF Bundle
Show me the rest of the Halloween bundle, no PDFs.
Supplies:
• Yarn 4/Medium Weight Yarn in…
Black, Pink, and Green
• 4mm Crochet Hook
•10mm safety eyes
•8mm Safety Nose
•Tapestry needle
•Scissors
•Stuffing
Additional Information:
Difficulty: Easy
• Getting Started
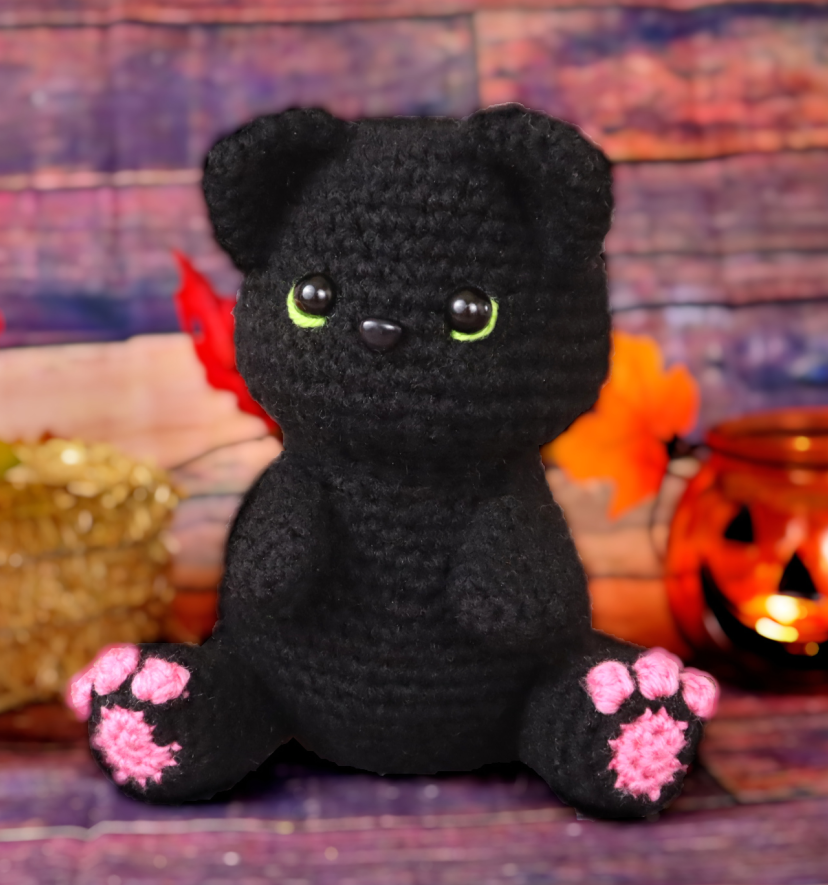
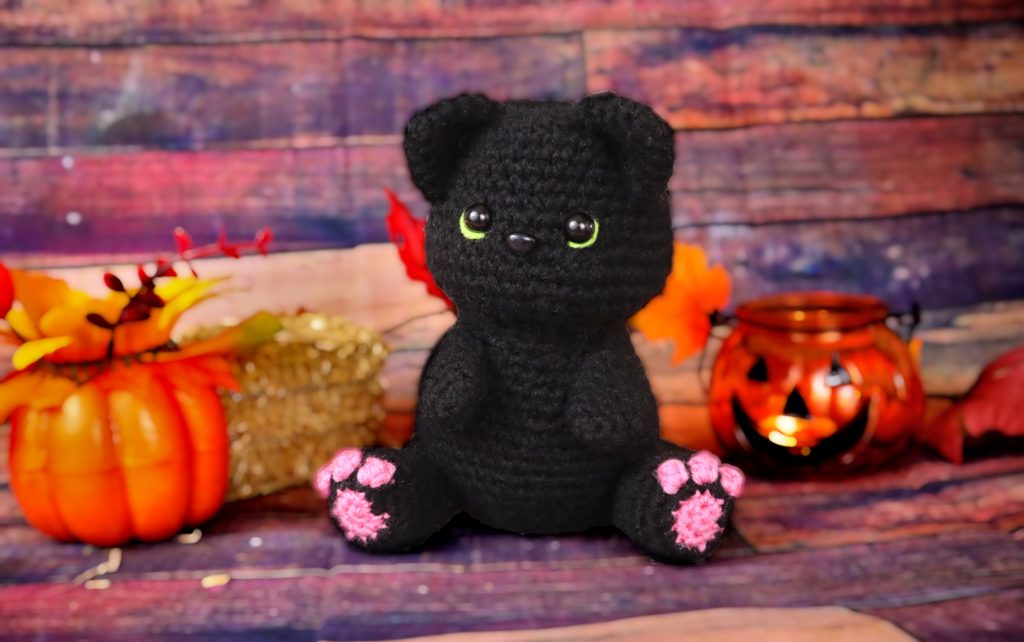
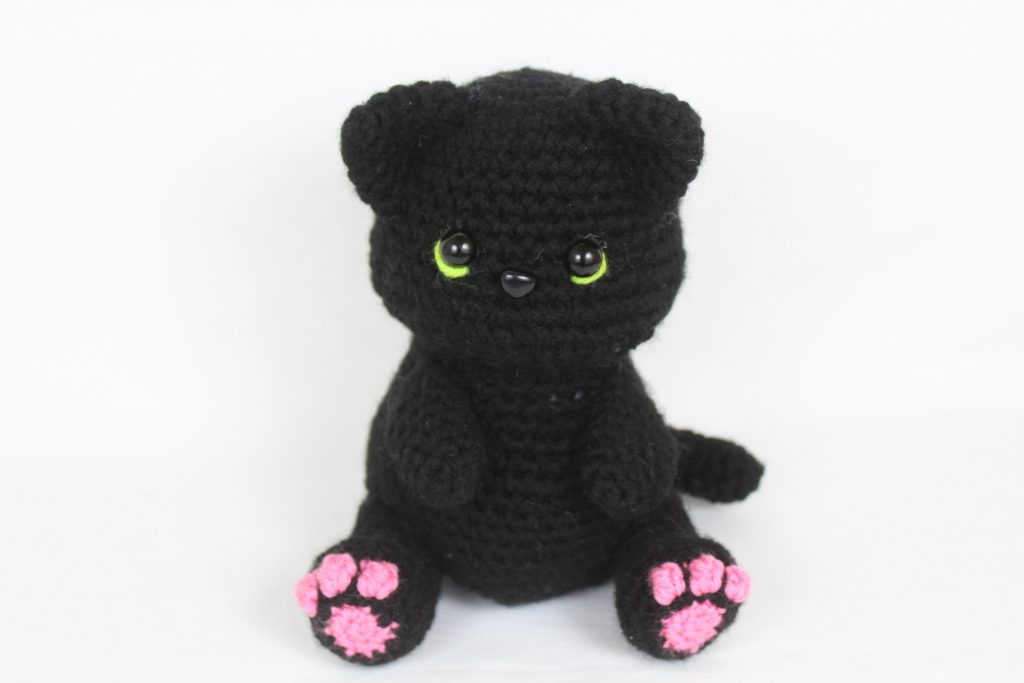
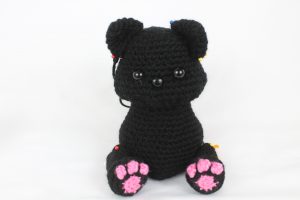
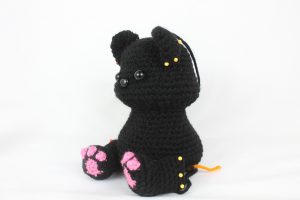
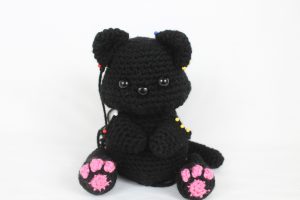
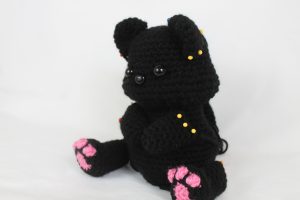
To make the cat we first start making the top of the head. We work our way down to the body. The head and the body are one continuous piece.
After that, we make the ears, legs, arms, tail, and green eyes!
• Popcorn Stitch
This pattern uses a popcorn stitch to make the toes. If you don’t know how to make one, no worries! I explain how to once we get to that part.
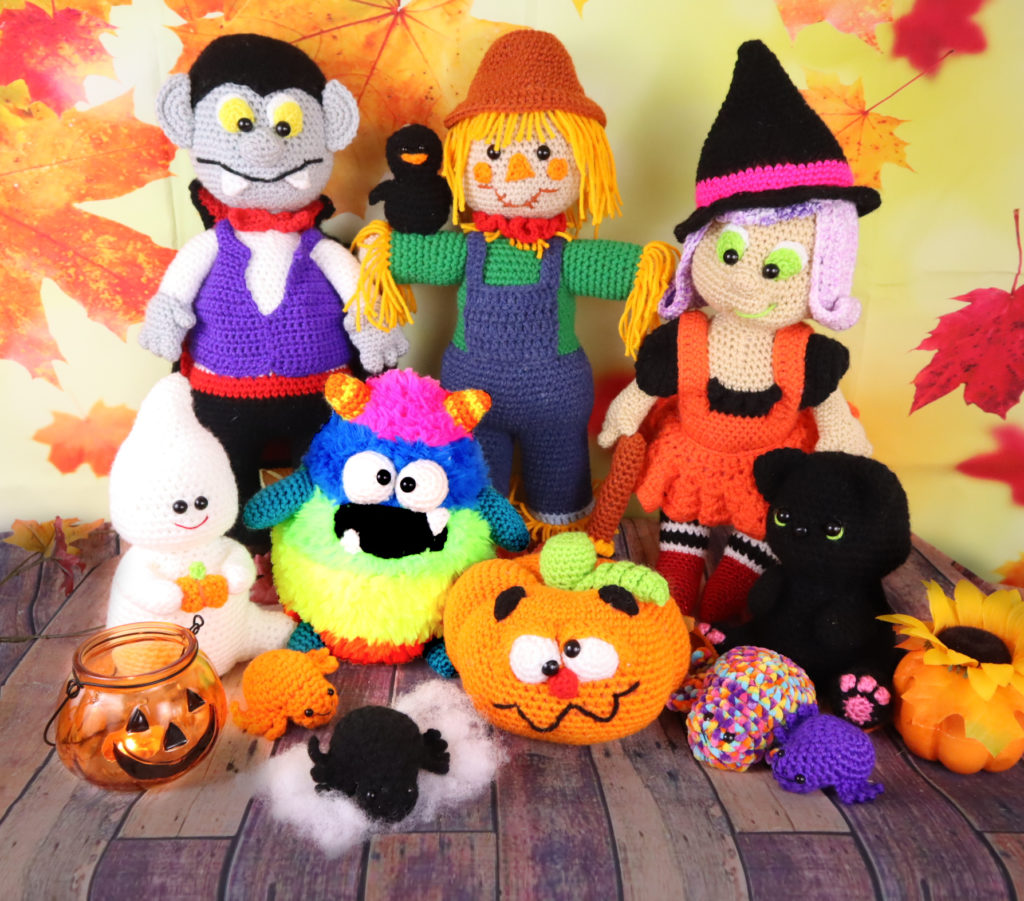
First we’re starting by making the top of the cat’s head and work our way down to the body. The head and the body are one continuous piece.
Cat Head/Body:
In Black Yarn
Round 1: 6 Sc in Magic Ring (6)
Round 2: *Inc* all around (12)
Round 3: *Inc, Sc* all around (18)
Round 4: *Inc, Sc 2* all around (24)
Round 5: *Inc, Sc 3* all around (30)
Round 6: *Inc, Sc 4* all around (36)
Round 7-11: *Sc* all around (36)
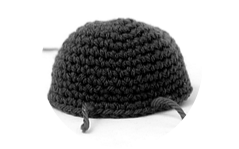
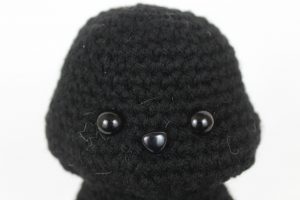
In the next round we will add eye stitch markers. These will mark where to place the eyes later.
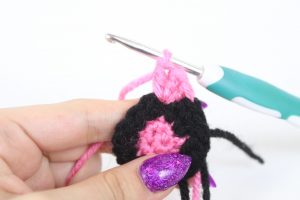
Round 12: Sc in the next 15 st. Sc in the next st and add a different colored st marker to the Sc just made. This will mark the eye. Sc in the next 4 st. Sc in the next st and add a different colored st marker to the Sc just made. Sc in the next 15 st (36)
Round 12 eye markers will look like this
Round 13: Repeat *Inc, Sc in the next 2 st* 12 times (48)
Round 14: Repeat *Inc, Sc 7* all around (54)
Add the safety nose between the rounds 13 & 14, between the eyes markers
Round 15-16: *Sc* all around (54)
Round 17: Repeat *Dec, Sc in the next st* all around (36)
Round 18: Repeat *Dec, Sc in the next 4 st* all around (30)
Round 19: *Dec, Sc 3* all around (24)
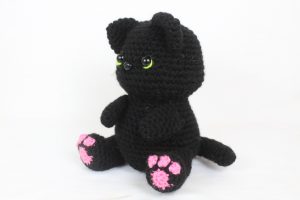
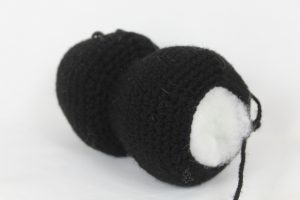
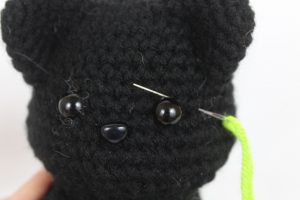
Add the safety eyes in the marked areas from Round 12 now. Stuff the head. Now we’re working on making the body.
Round 20: In the FLO (Front Loop Only), *Sc* all around (24)
Round 21: *Inc, Sc 3* all around (30)
Round 22: *Sc* all around (30)
Round 23: *Inc, Sc 4* all around (36)
Round 24: *Sc* all around (36)
Round 25: *Inc, Sc 5* all around (42)
Round 26: *Inc, Sc 6* all around (48)
Round 27-32: *Sc* all around (48)
Round 33: *Dec, Sc 6* all around (42)
Round 34: *Dec, Sc 5* all around (36)
Round 35: *Dec, Sc 4* all around (30)
Stuff firmly here. Continue stuffing after each round
Round 36: *Dec, Sc 3* all around (24)
Round 37: *Dec, Sc 2* all around (18)
Round 38: *Dec, Sc* all around (12)
Round 39: *Dec* all around (6)
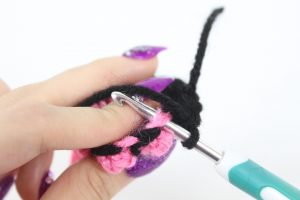
Finish off, leaving a tail. Sew closed and set the body aside for now.
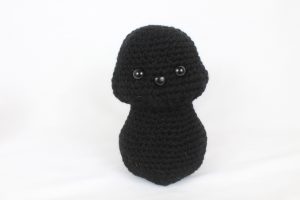
Ears: (Make 2)
In Black
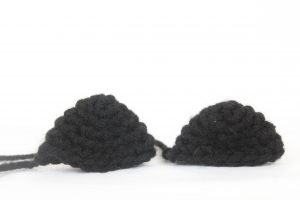
Round 1: 6 Sc in Magic Ring (6)
Round 2: *Sc* all around (6)
Round 3: *Inc* all around (12)
Round 4: *Sc* all around (12)
Round 5: *Inc, Sc* all around (18)
Round 6: *Sc* all around (18)
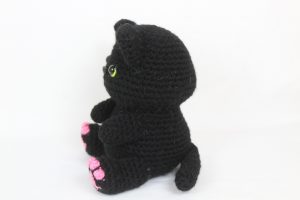
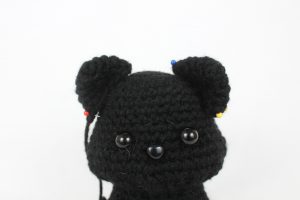
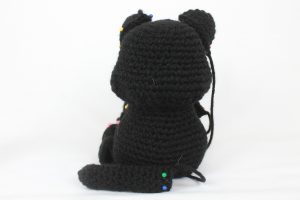
Finish off, leaving a long tail for sewing. Fold the ear in half and pin the ear to the head as shown. Sew on.
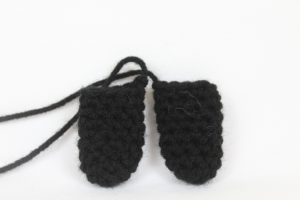
Legs: (Make 2)
In Pink
Round 1: 6 Sc in Magic Ring (6)
Round 2: *Inc* all around (12)
Round 3: Change to black. *Inc, Sc* all around (18)
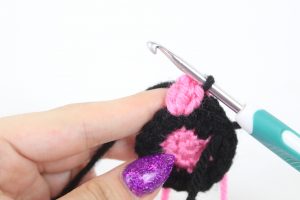
Round 4: Sc in the next 3 st. Repeat *Change to pink, 3 dc in the next st (Pic 1), Remove hook from current st and insert it into the first Dc made (Pic 2). Now also insert your hook into the current working loop (Pic 3). Yarn over with black (Pic 4) and pull through both loops (Pic 5-6). This makes 1 popcorn st. Now continuing in black, Sc in the next st (Pic 7)* 3 times, Sc in the next 9 st (18)
1. 2.
2.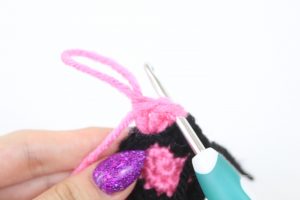
3. 4.
4.
5. 6.
6.
7. 8.
8.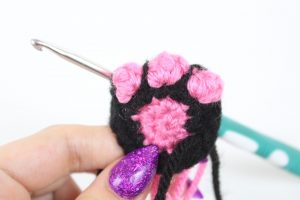
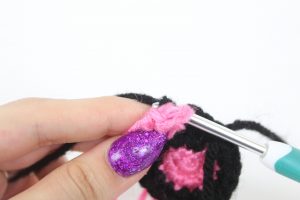
Round 5-6: *Sc* all around (18) Note: we made a total of 3 popcorn stitches in the previous round. Simply Sc where each popcorn stitch is (Pic 1-2).
1. 2.
2.
Round 7: Sc in the next 2 st, *Dec* 5 times, Sc in the next 6 st (13)
Round 8-13: *Sc* all around (13)
Finish off, leaving a long tail for sewing. Stuff the foot and leg now. Pin the legs on to each side of the body as shown and sew on.
Arms: (Make 2)
In Black
Round 1: 6 Sc in Magic Ring (6)
Round 2: *Inc, Sc* all around (9)
Round 3-9: *Sc* all around (9)
Finish off, leaving a long tail for sewing. I didn’t stuff the arms but if you’d like to I would lightly stuff the arms. Now pin each arm as shown, making sure they’re a little tilted.
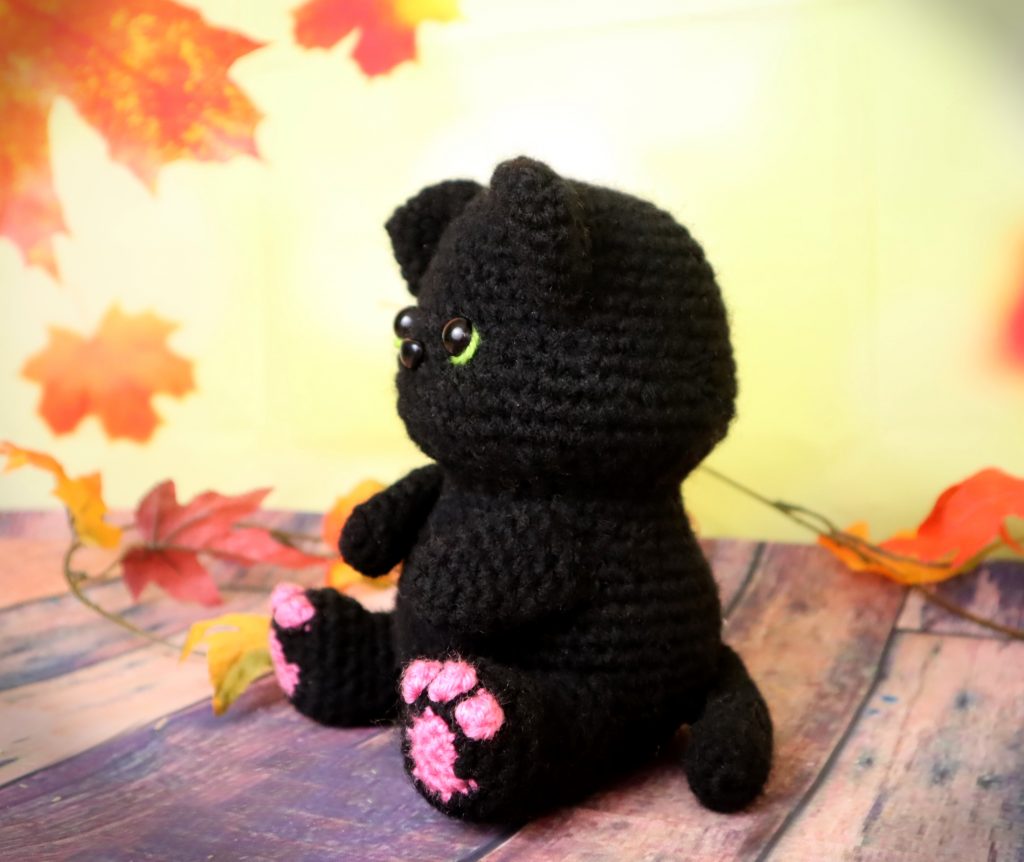
Tail:
In Black
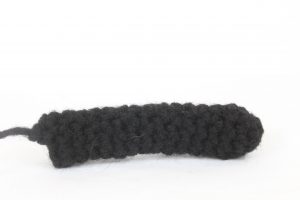
Round 1: 6 Sc in Magic Ring (6)
Round 2: *Inc, Sc in the next 2 st* all around (8)
Round 3-16: *Sc* all around (8)
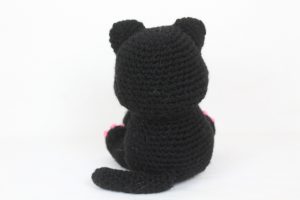
Finish off, leaving a long tail for sewing. Lightly stuff the tail. Now pin the tail to the back of the cat as shown and sew on.
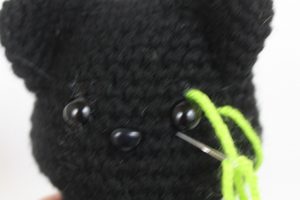
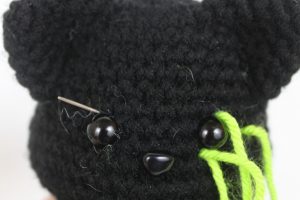
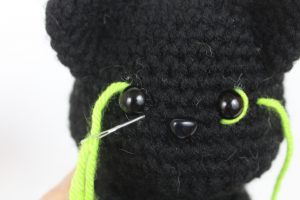
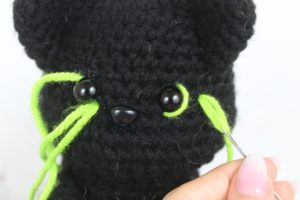
Eyes:
In Green
Insert needle with yarn close to the eye and pull needle into the top right corner of the right eye (Pic 1) Reinsert needle into the inner left corner of the right eye (Pic 2). Pull needle out at the top left corner of the left eye (Pic 3). Reinsert needle into the inner right corner of the left eye (Pic 4). Pull needle out at the original insertion spot (Pic 5). Tie ends firmly and weave into the cat.
1. 2.
2.
3. 4.
4.
5. 6.
6.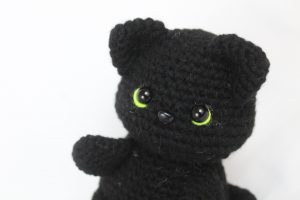
Done! If you made this cat I would really LOVE to see 🙂 Please add a photo to the comments below this post, or you can also “try” it on Pinterest.


40 Comments
Just in time for Hallowe’en this month! Such a cute kitty!
Oh my gosh that is so adorable! Your cat looks so fuzzy too, I LOVE that! 🥰 Thank you so much for sharing your adorable cat, those eyes are just beautiful too ❤️ I’m so impressed!
Are you making a knot in the green for the eyes before inserting? If so, how did you hide it?
Hi there Kristi! I didn’t knot it before putting in the yarn. Here’s what I do instead 🙂 I insert the yarn close to the eye, then put the yarn around the eyes, then after this I pull the yarn out of the same place I first inserted the yarn. Now the two tail ends of yarn will be coming out of the same stitch/hole. Tie both ends of yarn into a knot, then with your crochet hook pull this knot into the cat to hide. (I insert my crochet hook into the doll, then yarn over with both ends of yarn and pull it through the doll.) Now just cut the yarn to hide the excess yarn 🙂
I hope that was able to help! Please feel free to let me know if you have any questions!
Is there a video on making the cat?
Hi Chana! There isn’t a video tutorial on making this cat, sorry! I will definitely consider making one for the future, though 🙂
This pattern is awesome, thank you for uploading it. Really easy to follow for my first amigurumi.
Mmh… I think something went wrong following your pattern…
Wow that is so COOL! ❤️❤️❤️ You are so creative to look at a regular black cat pattern and make a red panda from it! (Or it could pass as a fox too, both super adorable). You did a fantastic job, I love it!!! 😍❤️
I also made the regular black cat (the paw are felt needle), and before you put the ears you can tell your self “It could be a bear or a marmot, even a dog”, I’ll probably make several of different kind…
Oh my gosh your cat came out SO cute! Like really, really cute 🙂 The way you made the cat it reminds me of a cartoon but I can’t put my finger on it. I think it reminds me of the black cat from Sailor Moon 🥰
I can totally see making lots of different variations using this pattern, maybe you could make a husky with it? 🙂
You really did an amazing job, the cat looks GREAT! I wish I had your skills 😍 Please show me if you make some more!
Hi. I’m working on this cute little kitty now. Just curious. What size is it supposed to be when completed?
Hi there Nikki! Thank you so much for your question 🙂 This cat comes out to be around 8″, but depending on your hook size, yarn size, and tension it may come out larger or smaller! I hope this was able to help answer your question 🙂 If you have any other questions along the way, please feel free to let me know!
I just finished this cute kitty as a graduation present. I added a removable grad cap. I love the little feet. I had some issues with placement for assembly and I don’t have safety eyes/nose but I think it came out ok. He’s a bit hole-y but I’m sure I just stuffed too much.
i just found your website and pattern today and i LOVE it! everything you make is soooo great and im looking forward to using more of your patterns. your website is super cute btw <33
Awww you are so sweet! Thank you so much for such kind words, it means so much to me 🙂 I’m really happy that you like my patterns, and I hope you’ll come back to see the new ones I put out each week!
I hope you have a fantastic day, and feel free to let me know if you ever have a question with one of my patterns!
Olive
I had fun creating this little kitty. Mine turned out being roughly 5 1/2″ tall and 4″ wide.
Thank you so much for the pattern! You’re amazing.
Thank you so much she came out super cute 🥰
Thanks for the pattern, love it!
Made myself one in tribute to my “black kitty” who I lost to Cancer a couple of months ago…thank you for the pattern…I need to work on the feet better as they didn’t come out like others I see in the pictures… I still love him! Thank you…
i love this pattern!!! so thorough and easy. i added a little witch hat in lieu of the second ear and i’m so in love with the result!
I love my little Kitty and his pumpkin
I forgot my pic
I made this little guy as a present for my dad, added a little collar and some whiskers to make it look like his cat Magic Simon. I absolutely love your designs, so adorable and patterns are very easy to follow 🙂
This is Magic Simon (aka Mr Magic)
It was so easy to make, I’m finishing up my wolf now that I’ve created based on this pattern!
Made this for my friend! Tysm for the tutorial :>
I am new to amigurumi, this is my second stringydingding pattern. They are very easy to follow and are very cute. I added a red collar the the black cat.
Thanks for the awesome patterns.
I absolutely loved this pattern! For it being my first crocheted amiguri it was definitely easy to follow. I see many more of these being made in my future. Thank you so much for sharing this pattern with us!
Made the black cat for my daughter in honor of a pet that passed away. She requested a blanket for him. Thank you for the pattern.
I really liked the pattern 🥰🥰🥰
Thank you for the free pattern, i absolutely love how he turned out!
Thanks, I’ve made two and I love both!!
whats the measurement ??
I made this little guy to give away as a prize at my granddaughter’s Halloween party for her 3rd grade class.
This pattern was easy and simple Thank you so much for this!
Very cute and easy pattern. My granddaughter asked for a pink kitty.
This pattern is easy to follow, and the cat is super cute!
Fantastic pattern, super easy to follow. I’m pretty new to crocheting and was able to follow along. I decided to felt on the feet part instead of crocheting the pink in.