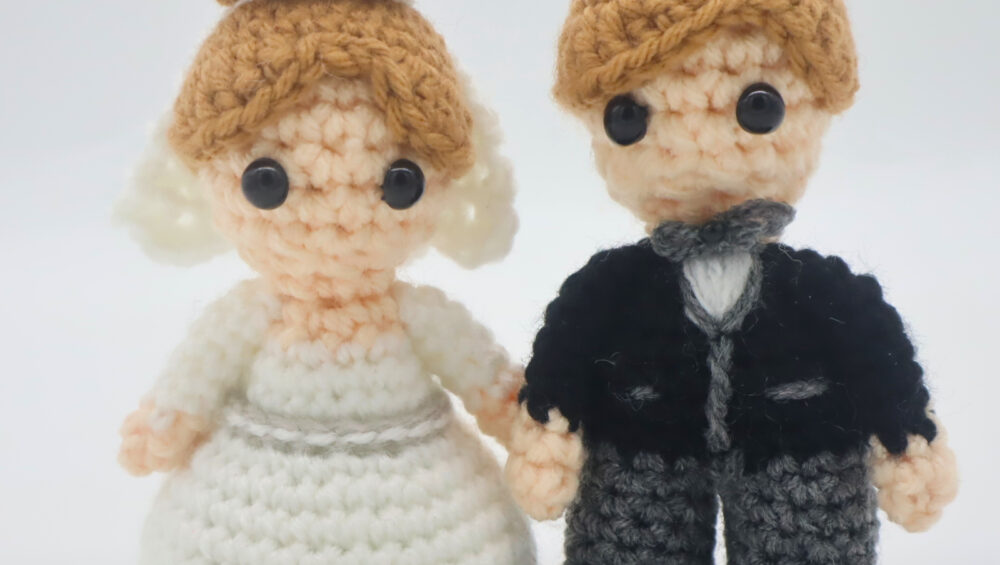
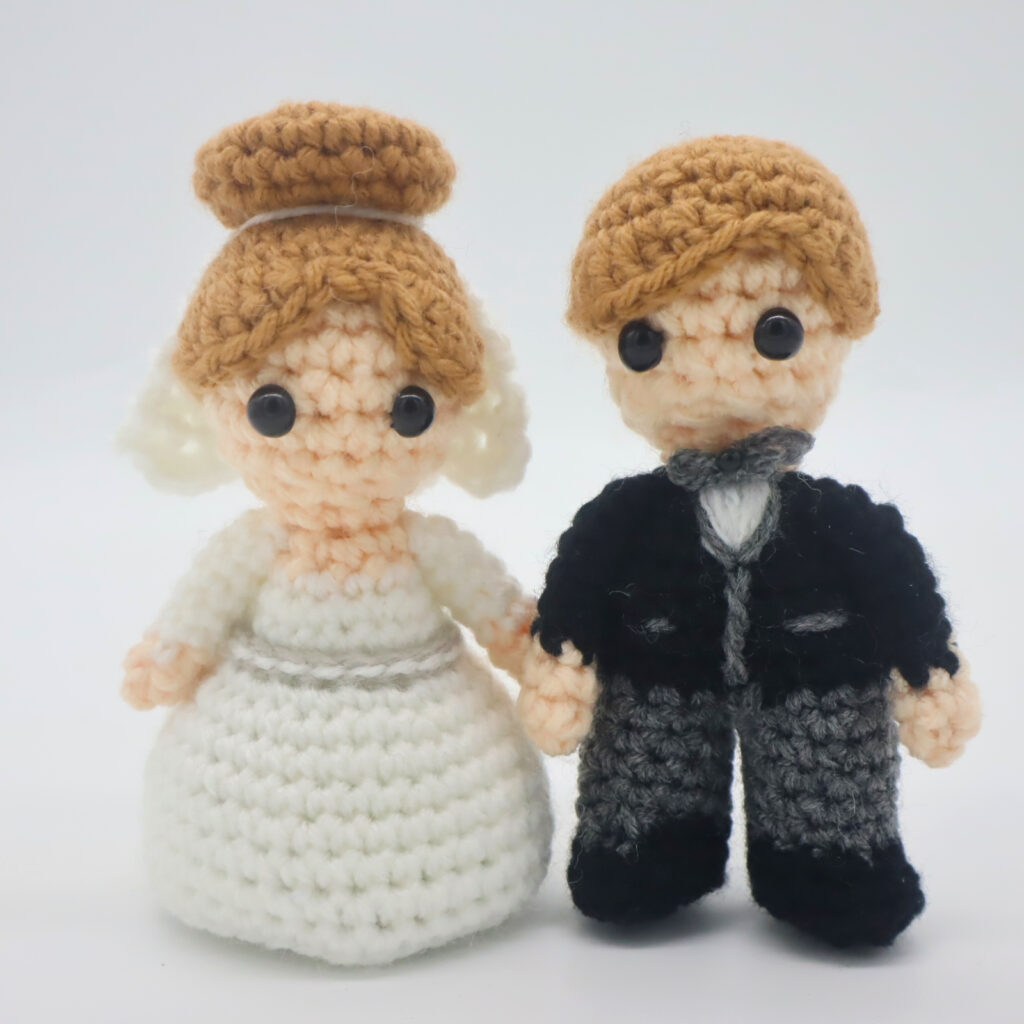
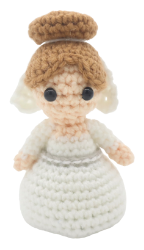
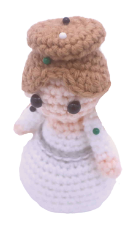
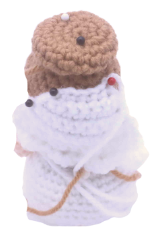
Bride and Groom Wedding Amigurumi – Free Crochet Pattern
Print this pattern out – purchase the PDF here!

 Supplies:
• Yarn 4/Medium Weight Yarn in…
Skin color, hair color, grey, black, white
•4mm Crochet Hook
•8mm Safety Eyes
•Tapestry needle
•Scissors
•Stuffing
•Cardboard (optional)
Additional Information:
•Difficulty: Intermediate
•Size: 5″ tall
This bride and groom set is perfect for the lovebirds in your life! This pair is a great gift for more than just newly weds — it’s also perfect to celebrate an anniversary or even prom! If you make this pair for prom, simply adjust the dress color for a more teen feel! You could also easily turn the bride and groom into a prince and princess if you change the colors and glue on some small gems.
The bride is very easy to make, the groom is also simple up until the legs. I will show you step-by-step how to form 2 legs afer finishing the body – all in one piece 🙂
Let’s get started!
Bride Body:
Start in Skin Color
Round 1: 6 Sc into a Magic Ring (6)
Round 2: *Inc* all around (12)
Round 3: *Inc, Sc in the next st* all around (18)
Round 4-6: *Sc* all around (18)
Now we will mark where to place the safety eyes. Add a different colored eye stitch marker into the 5th and 8th stitch in Round 6.
Round 7: *Sc* all around (18)
Round 8: *Dec, Sc in the next st* all around (12)
Round 9: *Dec, Sc in the next st* all around (8)
Add in 8mm safety eyes into the two marked areas from Round 6. Stuff the head now.
Round 10: In the FLO (Front Loop Only), *Sc* all around (8)
Round 11: In BOTH loops, *Inc, Sc in the next st* all around (12)
Round 12: Change to White. *Inc, Sc in the next 2 st* all around (16)
Round 13: *Inc, Sc in the next 3 st* all around (20)
Round 14: *Sc* all around (20)
Round 15: Change to grey. In the FLO, *SlSt* all around (20)
Round 16: Change to white. Working in the back loops we left in Round 15, repeat *Inc, Sc in the next st* all around (30)
Round 17: *Inc, Sc in the next 3 st* 7 times. Sc in the next 2 st (37)
Round 18-23: *Sc* all around (37)
Round 24: Work in the BLO (Back Loop Only) this entire round. Skip the next 2 st. Repeat *Dec, Sc in the next 4 st* 6 times (30)
Round 25: In BOTH loops, repeat *Dec, Sc in the next 3 st* all around (24)
Stuff the body firmly now. Now place the base of the toy’s dress onto a piece of cardboard. Trace around the circumference of the base onto the cardboard. You will have a circle. Cut the circle, then place the circle into the base of the dress. This will stabilize the base of the toy.
Round 26: *Dec, Sc in the next 2 st* all around (18)
Round 27: *Dec, Sc in the next st* all around (12)
Round 28: *Dec* all around (6)
Finish off, leaving a long tail for sewing. Sew the remaining stitches closed. Weave in ends and cut any excess yarn.
Bride Hair:
In Hair Color
Round 1: 6 Sc into a Magic Ring (6)
Round 2: *Inc* all around (12)
Round 3: *Inc, Sc in the next st* all around (18)
Round 4: *Inc, Sc in the next 2 st* all around (24)
Round 5-7: *Sc* all around (24)
Round 8: Dc in the next st. 2 Dc in each of the next 3 st. SlSt in the next 3 st. 2 Dc in each of the next 2 st. Dc in the next st. Sc in the next st. SlSt in the last st
Finish off, leaving a long tail for sewing. Pin the hair on as shown. Sew the hair on. Once done, weave in ends and cut any excess yarn.
Bride Hair Bun:
In Hair Color
Round 1: 6 Sc into a Magic Ring (6)
Round 2: *Inc* all around (12)
Round 3: *Inc, Sc in the next st* all around (18)
Round 4: *Inc, Sc in the next 2 st* all around (24)
Round 5-7: *Sc* all around (24)
Round 8: *Dec, Sc in the next st* all around (16)
Finish off, leaving a long tail for sewing. Don’t stuff the bun, it looks more natural unstuffed. Sew the bun to the toy’s head. Weave in ends, cutting excess yarn.
Bride Veil:
In White
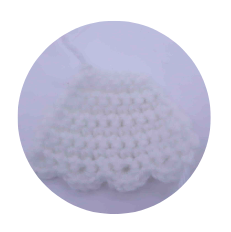
When making the slipknot to start making this veil, leave a long tail of yarn when starting. This tail of yarn will be used to sew on the veil.
Row 1: Ch 8. Sc in the 2nd Ch from the hook. Sc in the next 6 st (7)
Row 2: Ch 1 and turn. Inc in the next st, Sc in the next 4 st, Inc in the last st (8)
Row 3: Ch 1 and turn. Sc in the next 8 st (8)
Row 4: Ch 1 and turn. Inc in the next st, Sc in the next 6 st, Inc in the last st (10)
Row 5-6: Ch 1 and turn. Sc in the next 10 st (10)
Row 7: Ch 1 and turn. Inc in the next st, Sc in the next 8 st, Inc in the last st (12)
Row 8: Ch 1 and turn. Sc in the next 12 st (12)
Row 10: SlSt in the next st. Repeat *4 Sc in the next st, SlSt in the next 2 st* 3 times. 4 Sc in the next st, SlSt in the last st (24)
Finish off and weave in the ends of the yarn you just finished off. Place the tail of yarn from Row 1 onto your sewing needle. Pin the veil on as shown and sew on. Once done, weave in ends and cut any excess yarn.
Bride Arms:
In Skin Color
Round 1: 5 Sc into a Magic Ring (5)
Round 2-3: *Sc* all around (5)
Round 4-9: Change to black if making the groom. Change to white if making the bride. *Sc* all around (5)
Finish off, leaving a long tail for sewing. Pin the arms on as shown and sew on. Once sewn on, weave in ends and cut any excess yarn.
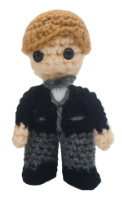
Groom Body:
In Skin Color
Round 1: 6 Sc into a Magic Ring (6)
Round 2: *Inc* all around (12)
Round 3: *Inc, Sc in the next st* all around (18)
Round 4-6: *Sc* all around (18)
Now we will mark where to place the safety eyes. Add a different colored eye stitch marker into the 5th and 8th stitch in Round 6.
Round 7: *Sc* all around (18)
Round 8: *Dec, Sc in the next st* all around (12)
Round 9: *Dec, Sc in the next st* all around (8)
Add in 8mm safety eyes into the two marked areas from Round 6. Stuff the head now.
Round 10: In the FLO (Front Loop Only), *Sc* all around (8)
Round 11: In BOTH loops, *Sc* all around (8)
Round 12: In the FLO, *Inc* all around (16)
Round 13: In BOTH loops, *Inc, Sc in the next 2 st* 5 times. Sc in the last st (21)
Round 14-18: *Sc* all around (21)
In the next round we will crochet the legs. This is done by creating a chain, connecting the chain down half the body, which will separate the body into the two legs.
Round 19: Sc in the next 2 st. Ch 2. Skip the next 9 st, Sc in the 10th st. Turn your work so you’re working on the chain. Working on the chain, Sc in the next 2 st. Working back on the leg (which is on your left), Sc in the next 9 st (11)
Now we will work a tube going from the 2 st where the chain was, to the 9 st on the rest of the leg.
Round 20-24: *Sc* all around (11)
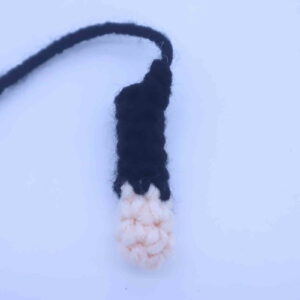
Round 25: Change to black. We will now work the shoes. In the FLO, Inc in the next st. In BOTH loops, Sc in the next 8 st. In the FLO, Inc in each of the next 2 st (14)
Round 26: Inc in the next st, Sc in the next 11 st, Inc in the next 2 st (17)
Round 27: Working in the BLO, *Dec* 8 times, Sc in the last st (9)
Finish off, leaving a long tail for sewing. Sew the remaining stitches. Weave the yarn firmly by inserting your needle/thread into the bottom of the shoe, then bring your needle up through the toy’s leg. Cut any excess yarn.
Groom Second Leg:
In Grey
Round 1: Insert your hook into the first stitch in the front of the leg area (Pic 1). Ch 1 (Pic 2). This Ch counts as the first st, add a stitch marker into this stitch (Pic 3).
1.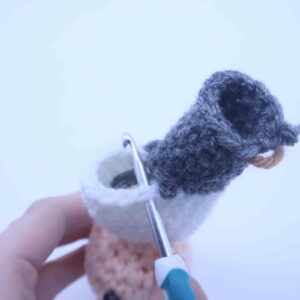 2.
2. 3.
3.
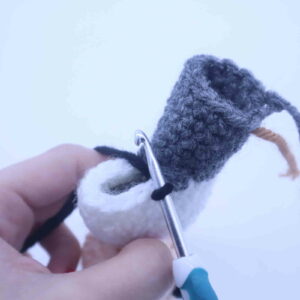
Sc in the next 8 st (Pic 4). Skip the next 2 st. Working on the chain that connects the legs (Pic 5), Sc in the next 2 st (Pic 6. Stitch Count: 11)
4. 5.
5.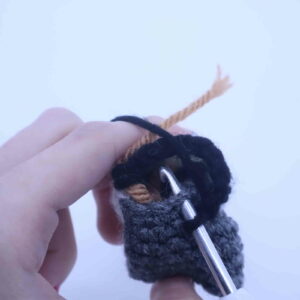 6.
6.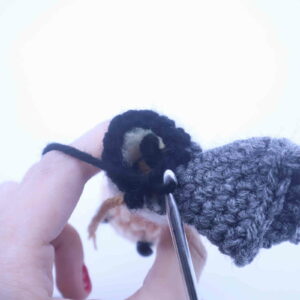
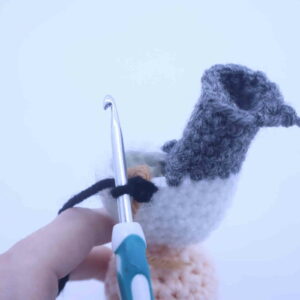
Round 2-6: *Sc* all around (11)
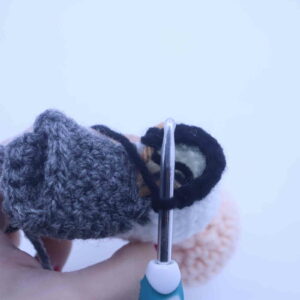
Round 7: Now we will make the shoe. Change to Black. Sc in the next 3 st. Working in the FLO, Inc in the next 3 st. Working in both loops, Sc in the next 5 st (14)
Round 8: Sc in the next 6 st, Inc in the next 3 st, Sc in the next 5 st (17)
Round 9: Working in the BLO, *Dec* 8 times, Sc in the last st (9)
Finish off, leaving a long tail for sewing. Sew the remaining stitches. Weave the yarn firmly by inserting your needle/thread into the bottom of the shoe, then bring your needle up through the toy’s leg. Cut any excess yarn.
Groom Hair:
In Hair Color
Round 1: 6 Sc into a Magic Ring (6)
Round 2: *Inc* all around (12)
Round 3: *Inc, Sc in the next st* all around (18)
Round 4: *Inc, Sc in the next 2 st* all around (24)
Round 5-7: *Sc* all around (24)
Round 8: Sc in the next st. 2 Dc in each of the next 3 st, Dc in the next st, Hdc in the next st, SlSt in the next 2 st, Hdc in the next st, Dc in the next 3 st, Sc in the next st, SlSt in the last st.
Finish off, leaving a long tail for sewing. Pin the hair on as shown. Sew on. Once sewn on, weave in ends and cut any excess yarn.
Groom Arms: (Make 2)
In Skin Color
Round 1: 5 Sc into a Magic Ring (5)
Round 2-3: *Sc* all around (5)
Round 4-9: Change to black if making the groom. Change to white if making the bride. *Sc* all around (5)
Finish off, leaving a long tail for sewing. Pin the arms on as shown and sew on. Once sewn on, weave in ends and cut any excess yarn.
Groom Bow:
In Grey
Make a mini bow, you can make one similar to how you tie your shoes, simply cut the long excess yarn (the two long strands coming off the bottom of the bow tie). Once done, hot glue or sew the bow onto the toy’s neck area.
Suit Embroidery:
In White
Embroider a “v” shape onto the suit area by inserting your needle into the middle neck area of the toy, then bringing it out to the top neck area of the toy. Repeat this until it’s as shown in the picture. Once done, weave in ends and cut yarn.
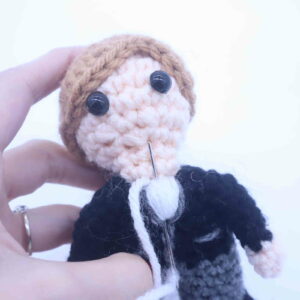
Using grey yarn, embroider small pockets by making a line on each side of the toy’s torso. Make a line from the tip of the white “v” to the end of the jacket. Then, outline the “v”. Once done, weave in ends and cut any excess yarn.
Done! If you made these, I would LOVE to see! You can show me by posting a picture in the comments section underneath this post.


2 Comments
What row do I start with the black yarn?
I am trying to figure out the same thing…
When is the color change for the black and grey of the suit on the groom?