

Supplies:
4mm crochet hook, 4/Medium weight yarn in Main Color, White, and Light Pink. 10mm safety eyes, tapestry needle, scissors, and stuffing.
Additional Information:
Difficulty: Easy
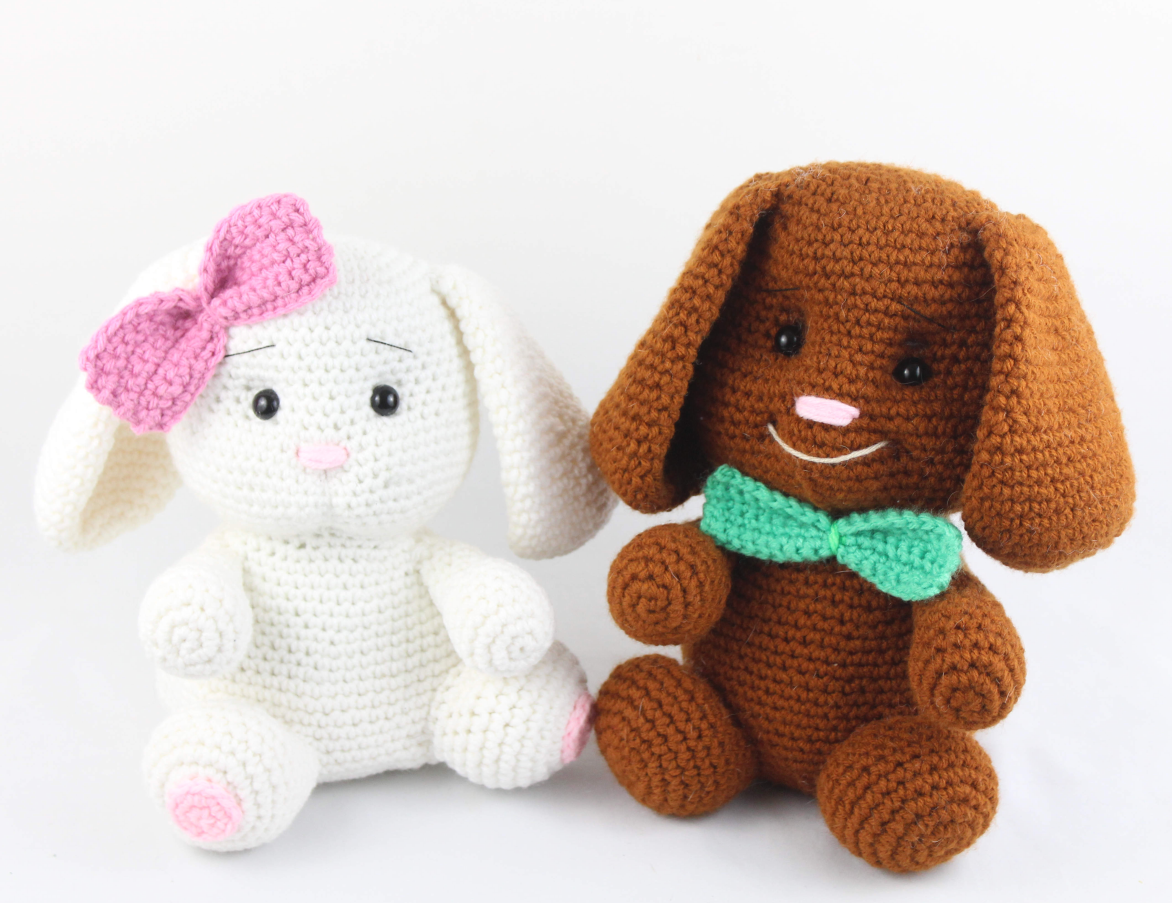
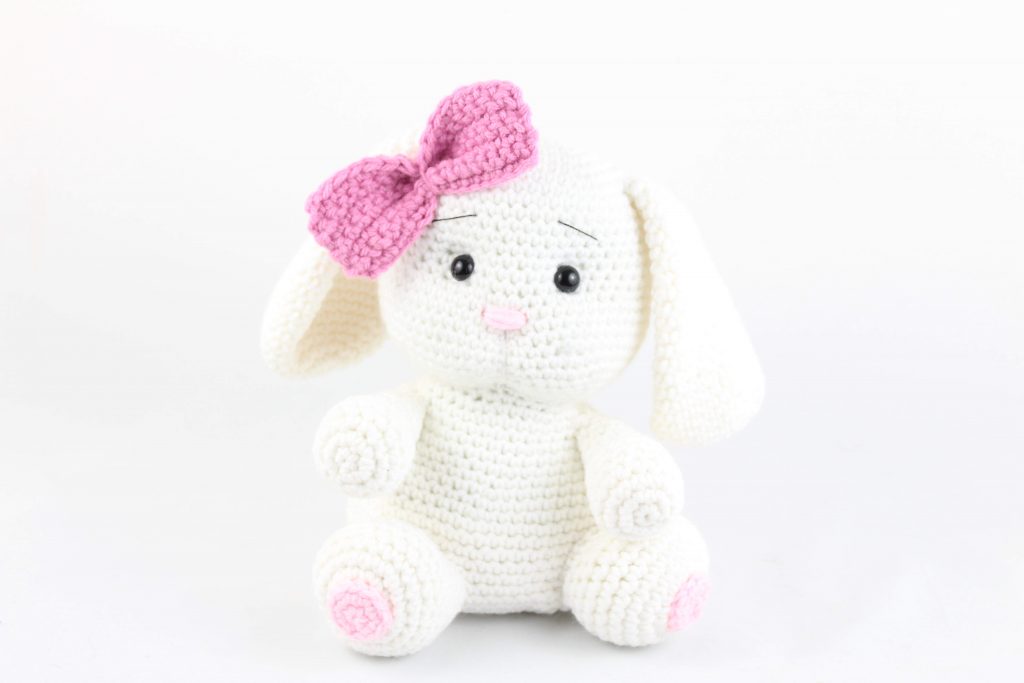
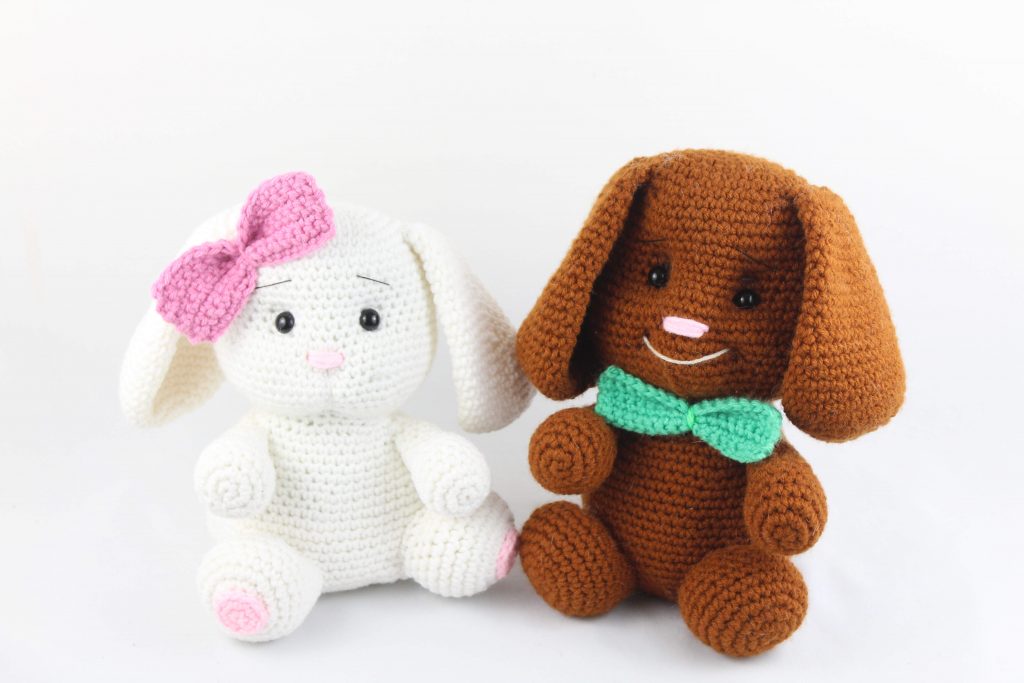
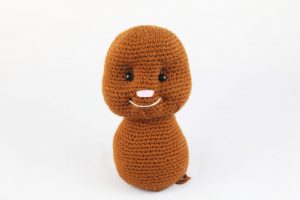
This pattern refers to “Main Color”. This is the main color you will use for your bunny. We start by making the head, and stop half way to create the face shaping. We then sew the nose and eyebrows. Next we continue making the body. We then make the feet, arms, and ears. Finally we make the tail!
Note: There are 2 options to the face shaping. Option 1 is for the smile, Option 2 is for a classic bunny mouth.
Purchase the PDF version here


Or purchase the entire Easter Amigurumi PDF Bundle here!
Head/Body:
In Main Color
Round 1: 6 Sc in Magic Ring (6)
Round 2: *Inc* all around (12)
Round 3: *Inc, Sc* all around (18)
Round 4: *Inc, Sc 2* all around (24)
Round 5: *Inc, Sc 3* all around (30)
Round 6: *Inc, Sc 4* all around (36)
Round 7: *Inc, Sc 5* all around (42)
Round 8: *Inc, Sc 6* all around (48)
Round 9-15: *Sc* all around (48)
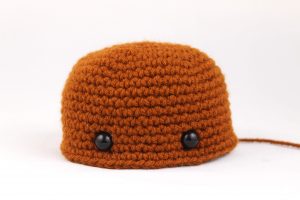
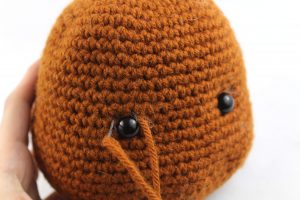
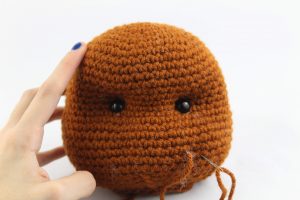
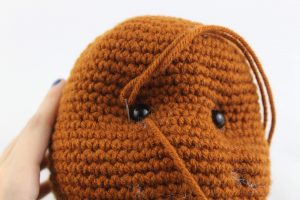
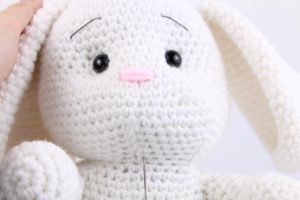
Round 16: Sc in the next 19 st, Sc in next st and add a different colored stitch marker to the Sc just made. This marks where to place the eye. Sc in the next 7 st. Sc in the next st and add a different colored st marker to Sc just made. Sc in the next 20 st (48)
Round 16 eye markers will look like the image below

Round 17: *Sc* all around (48)
Round 18: *Inc, Sc 3* all around (60)
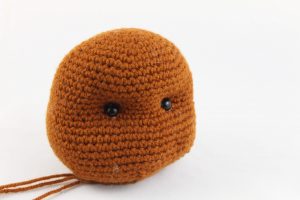
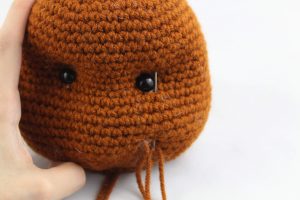
Add eyes in here
Round 19-24: *Sc* all around (60)
Round 25: *Dec, Sc 8* all around (54)
Round 26: *Dec, Sc 7* all around (48)
Round 27: *Dec, Sc 6* all around (42)
Round 28: *Dec, Sc 5* all around (36)
Round 29: *Dec, Sc 4* all around (30)
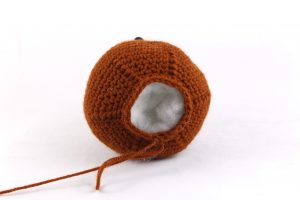
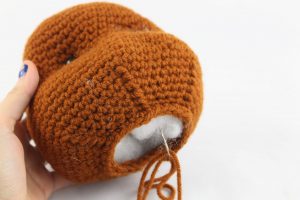
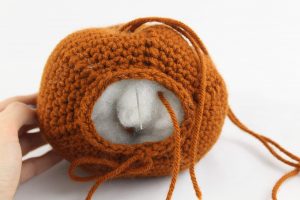
Stuff here
Round 30: *Dec, Sc 3* all around (24)
Round 31: *Inc, Sc 3* all around (30)
Stop here for right now. Refer ahead to the “face shaping” section. Once completing the face shaping, continue on with Round 32.
Round 32: *Inc, Sc 4* all around (36)
Round 33-34: *Sc* all around (36)
Round 35: *Inc, Sc 5* all around (42)
Round 36: *Sc* all around (42)
Round 37: *Inc, Sc 6* all around (48)
Round 38: *Sc* all around (48)
Round 39: *Inc, Sc 7* all around (54)
Round 40: *Sc* all around (54)
Round 41: *Inc, Sc 8* all around (60)
Round 42-49: *Sc* all around (60)
Round 50: *Dec, Sc 8* all around (54)
Round 51: *Dec, Sc 7* all around (48)
Round 52: *Dec, Sc 6* all around (42)
Round 53: *Dec, Sc 5* all around (36)
Stuff here. Continue stuffing after each round.
Round 54: *Dec, Sc 4* all around (30)
Round 55: *Dec, Sc 3* all around (24)
Round 56: *Dec, Sc 2* all around (18)
Round 57: *Dec, Sc* all around (12)
Round 58: *Dec* all around (6)
Finish off and sew closed.
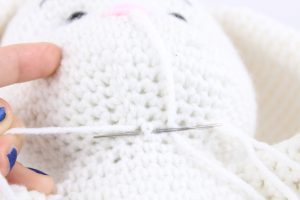
Eye Facial Shaping:
In Main Color
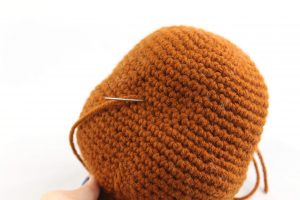
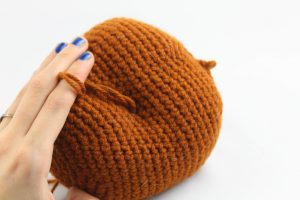
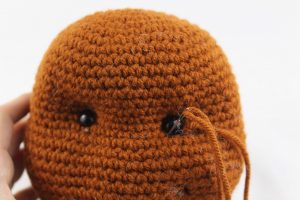
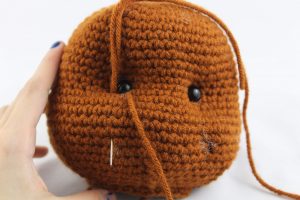
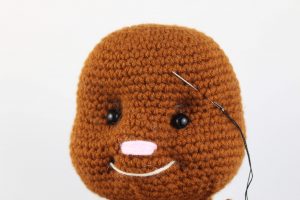
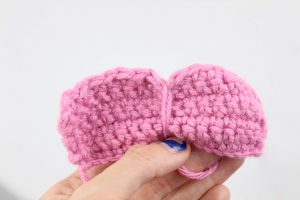
With a 3 foot long piece of yarn insert it into the back of the head, a little to the left as shown (Pic 1). Pull the thread out on the top right corner of the right eye (Pic 2).
1. 2.
2.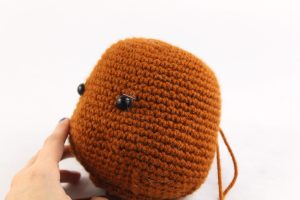
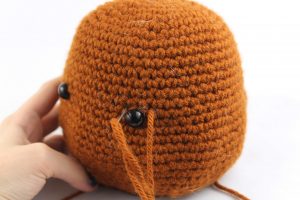
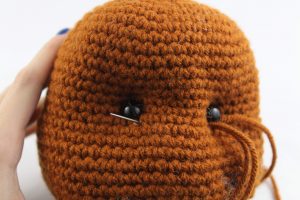
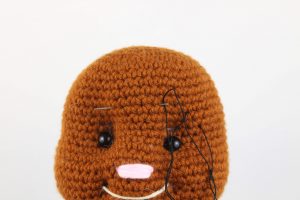
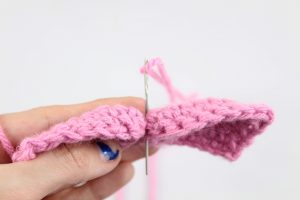
Pull the thread and reinsert into the top left corner of the right eye (Pic 3). Now, pull the thread out to the back, middle of the head (Pic 4).
3. 4.
4. 
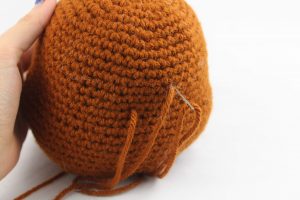
Reinsert back into the middle of the head, right into the same hole (Pic 5). Pull the thread out of the top right corner of the left eye (Pic 6).
5. 6.
6. 
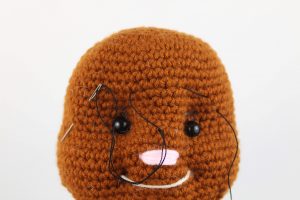
Reinsert the thread into the top left corner of the left eye (Pic 7). Pull the thread out to the original insertion point, where the tail of yarn is (Pic 8).
7. 8.
8. 
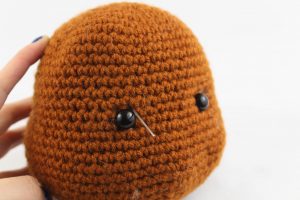
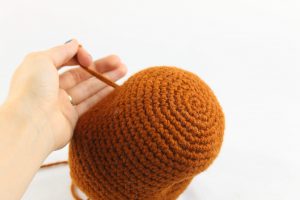
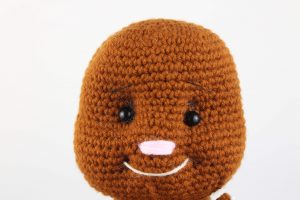
Now, pull firmly on both pieces of yarn at the same time (Pic 9-10). Tie a knot with these two ends of yarn (Pic 11), and sew the ends into the head. Stuff head to fill out dent if made in the back of the head.
9. 10.
10.
11. 12.
12. 
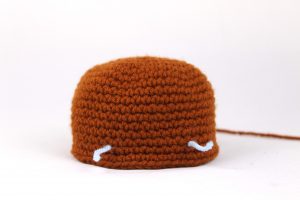
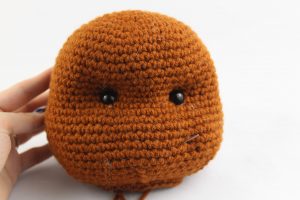
Option 1: Smile Facial Shaping
In Main Color
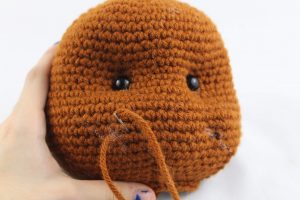
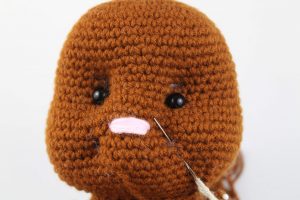
With a 3 foot long piece of yarn insert it into the bottom of the head (Pic 1). Pull the thread out of the right side of the mouth area (Pic 2).
1. 2.
2. 
Pull the thread and reinsert into the head, one stitch to the right (Pic 3). Now, pull the thread out to the side of the right eye (Pic 4).
3. 4.
4. 
Reinsert back into the head, in the inner corner of the right eye (Pic 5). Pull the thread out of the inner corner of the left eye (Pic 6).
5. 6.
6. 
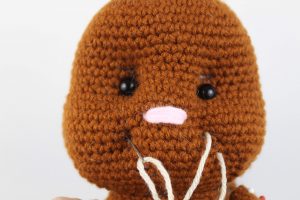
Reinsert the thread 1-2 stitches to the left of the left eye (Pic 7). Pull the thread out the left side of the mouth area as shown (Pic 8).
7. 8.
8.
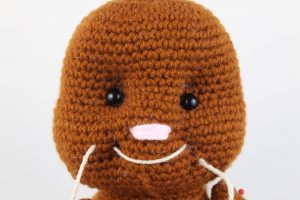
Reinsert needle one stitch to the right (Pic 9). Pull the thread out to the bottom of the head (Pic 10).
9. 10.
10.
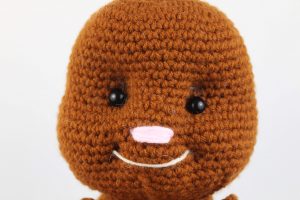
Pull both ends of yarn at the same time to tighten the head (Pic 11). Tie a knot with these ends of yarn and continue finishing the body.
11. 12.
12. 
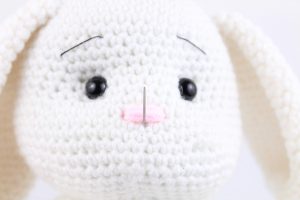
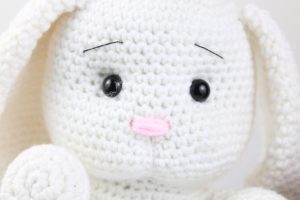
Nose:
In Light Pink
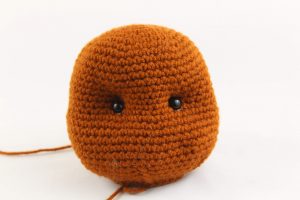
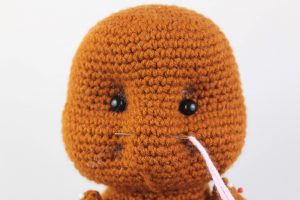
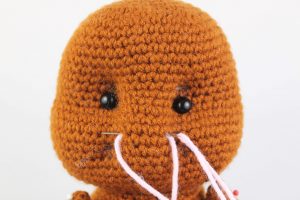
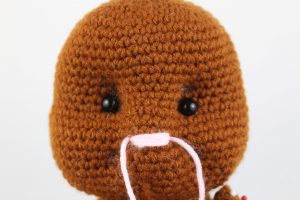
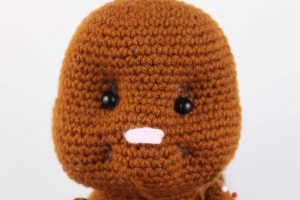
Insert the needle into the nose area as shown, and pull needle out 4 stitches away from original insertion spot (Pic 1). Now reinsert needle into original insertion spot, and pull needle out 4 stitches away a total of 4 times (Pic 2-4). Tie a knot with both ends of yarn and weave them into the head. Done!

Option 2: Facial Shaping
In Main Color
With a 12″ piece of yarn, insert the needle into the bottom of the head as shown (Pic 1). Pull the needle out right under the nose (Pic 2). Reinsert needle where the original insertion spot is (Pic 3). Firmly pull both ends of yarn at the same time to tighten the face (Pic 4). Tie a knot with both ends of yarn and weave the ends/knot into the head.

Smile:
In White
Insert needle with thread into the corner of the right cheek as shown, pull needle out 1 stitch up (Pic 1). Insert needle into the corner of the left cheek and pull needle out 1 stitch up (Pic 2). Tie a knot with both ends of yarn and weave them into the head. Done!
Eyebrows:
In Black Embroidery Thread
Insert needle with thread into the top right corner of the head, and pull needle out one stitch up (Pic 1). Reinsert needle diagonal and to the left, and pull needle out where shown (Pic 2). Reinsert needle where shown and pull out a few stitches away (Pic 3). Tie both ends of thread into a knot and weave into the head. Done!
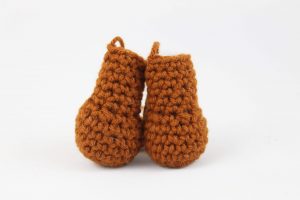
Feet: (Make 2)
In Main Color
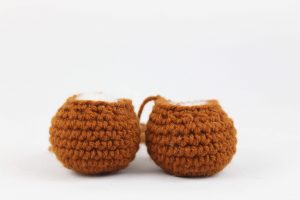
Round 1: 6 Sc in Magic Ring (6)
Round 2: *Inc* all around (12)
Round 3: *Inc, Sc* all around (18)
Round 4: *Inc, Sc 2* all around (24)
Round 5-9: *Sc* all around (24)
Round 10: Sc in the next 6 st, *Dec* in the next 6 st, Sc in the next 6 st (18)
Round 11: *Sc* all around (18)
Finish off and stuff. Pin to the bunny as shown and sew on.

Arms: (Make 2)
In Main Color
Round 1: 6 Sc in Magic Ring (6)
Round 2: *Inc* all around (12)
Round 3: *Inc, Sc 2* all around (16)
Round 4-7: *Sc* all around (16)
Round 8: *Dec, Sc* 5 times, Sc in the last st (11)
Round 9: In the FLO (Front Loop Only), *Sc* all around (11)
Round 10-14: In BOTH Loops, *Sc* all around (11)
Finish off and stuff. Pin to the bunny as shown and sew on.
Ears: (Make 2)
In Main Color

Round 1: 6 Sc in Magic Ring (6)
Round 2: *Inc* all around (12)
Round 3: *Inc, Sc* all around (18)
Round 4: *Inc, Sc 2* all around (24)
Round 5: *Inc, Sc 3* all around (30)
Round 6: *Inc, Sc 4* all around (36)
Round 7-14: *Sc* all around (36)
Round 15: *Dec, Sc 4* all around (30)
Round 16-19: *Sc* all around (30)
Round 20: *Dec, Sc 3* all around (24)
Round 21-23: *Sc* all around (24)
Round 24: *Dec, Sc 2* all around (18)
Round 25-26: *Sc* all around (18)
Round 27: *Dec, Sc* all around (18)
Finish off and pin to the head as shown. Sew on.
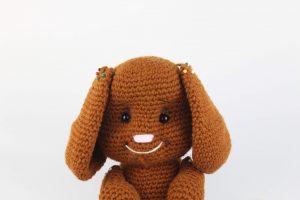
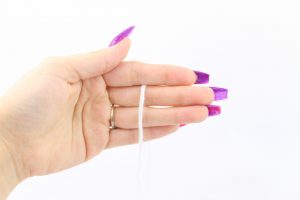
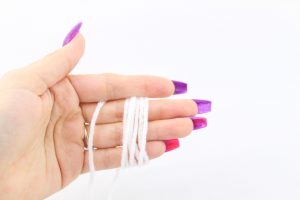
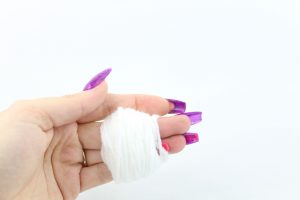
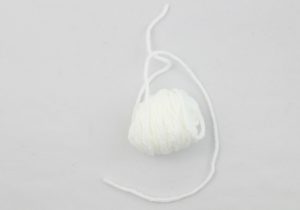
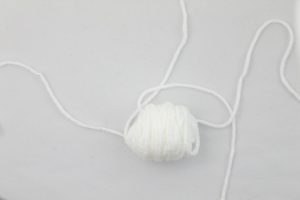
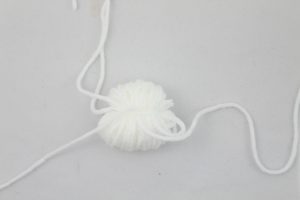
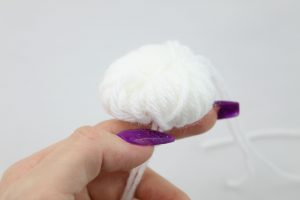
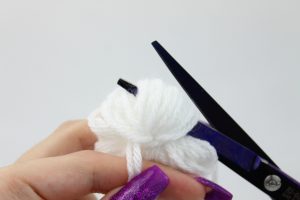
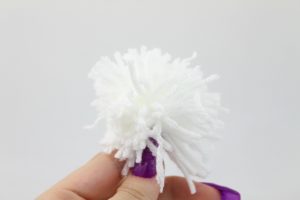
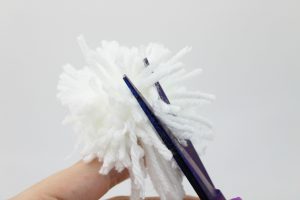
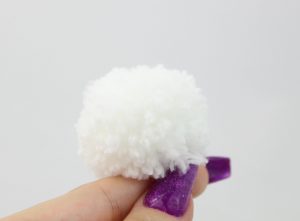
Pom-Pom
In White
First, cut a 12″ piece of white yarn and set aside for later. Now, take white yarn and wrap it around for 3 fingers 80 times (Pic 1, 2, & 3). Now take the yarn off your fingers (Pic 4). Wrap the 12″ piece of yarn around the yarn a few times (Pic 5-6). Do this tightly to secure. Now, cut the loops of yarn as shown (Pic 7-10). Be sure to cut all the longer pieces of yarn off to get a puffy ball. Finally, sew the pom pom to the back of the bunny.
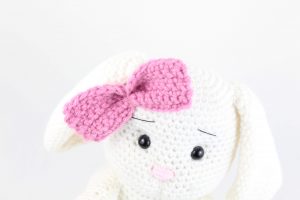
Bow:
In Any Color
Row 1: Ch 18. Sc in the 2nd Ch from hook. Sc in the next 16 st (17)
Row 2-7: Turn, Sc in the next 18 st (18)
Finish off but leave a 12″ tail. Weave the tail into the middle of the piece (Pic 1). Wrap this yarn around the middle of the bow 3 times (Pic 2). Now with your needle and thread, insert the needle directly in the middle (Pic 3). Pin the bow to the bunny as desired and sew on.
Done! If you made a bunny I would love to see it! “Try” it on Pinterest to show me your creation 🙂


6 Comments
I love your amigurumi animals and your free patterns!!! Thank you very much!
Thank you so much Jean!! You are so kind to let me know you’re enjoying the amigurumis I provide. I hope you have an amazing day <3
Is there a reason why when increasing the stitches around the magic circle/ring mine always ends up with frills?
you may be increasing to much make sure to only do 1 or 2 rounds of just increasing then do 1 sc 1 increase 2 sc 1 increase 3 sc 1 increase and so on
another reason is that your hook is to small. sorry i’m so late you prob’ worked it out aaaaages ago
i love this bunny doll pattern SO MUCH it always makes me feel like it’s easter even when it’s not