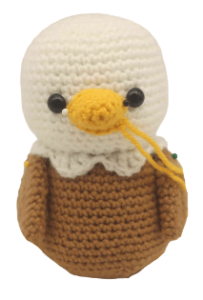
Eagle Amigurumi – Free Crochet Pattern
Print this pattern out – purchase the PDF version here!

 Supplies:
• Yarn 4/Medium Weight in:
white, cream, and brown
•4mm Crochet Hook
•Tapestry needle
•Scissors
•Stuffing
•12mm safety eyes
•Black Embroidery Thread
Additional Information:
•Difficulty: Easy
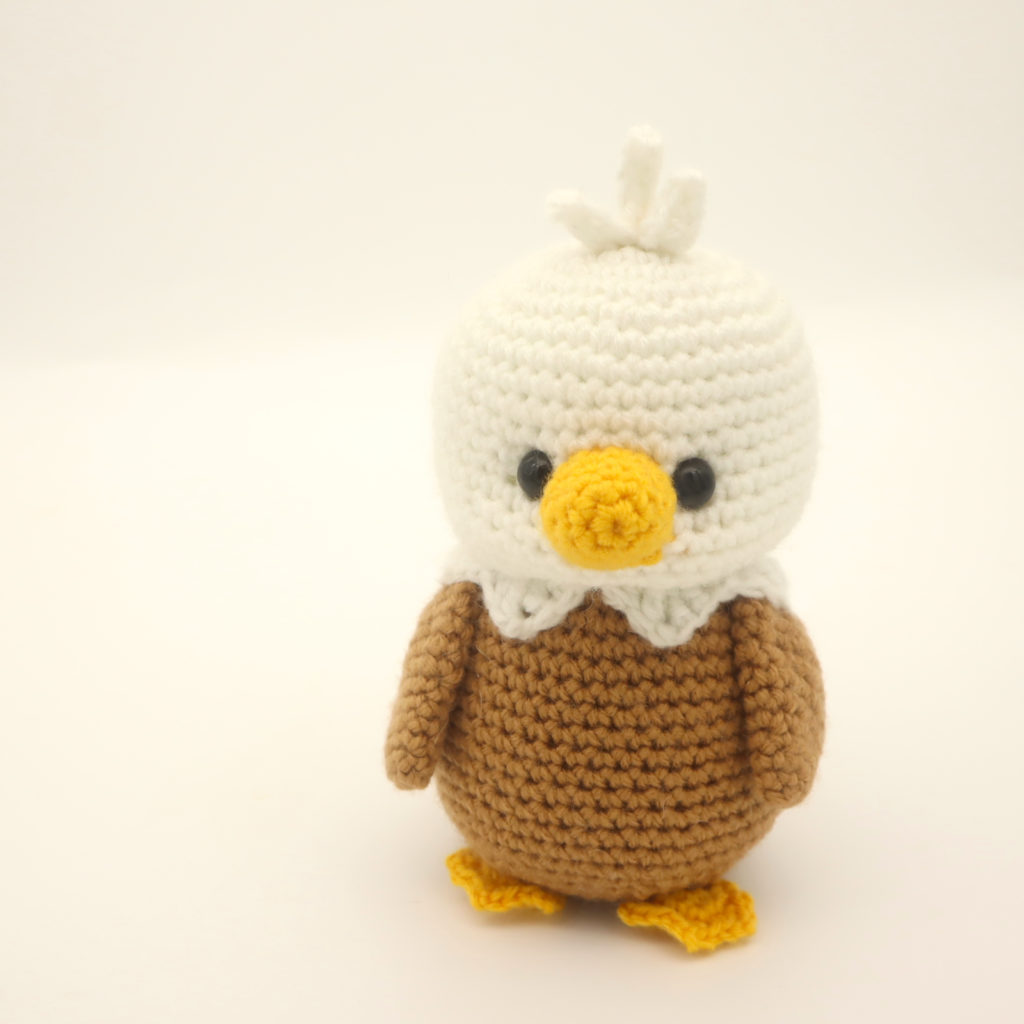
•Size: 7 inches tall
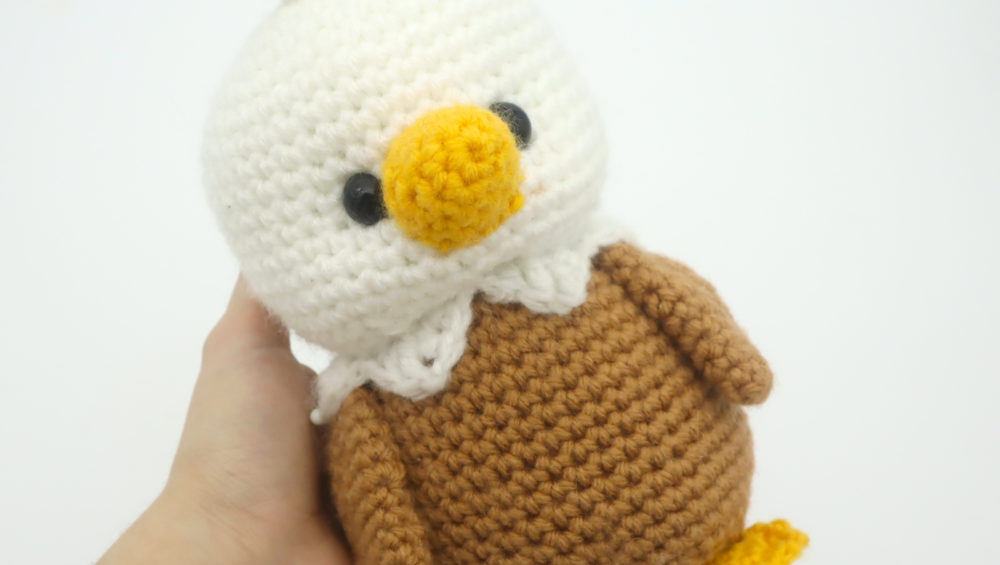
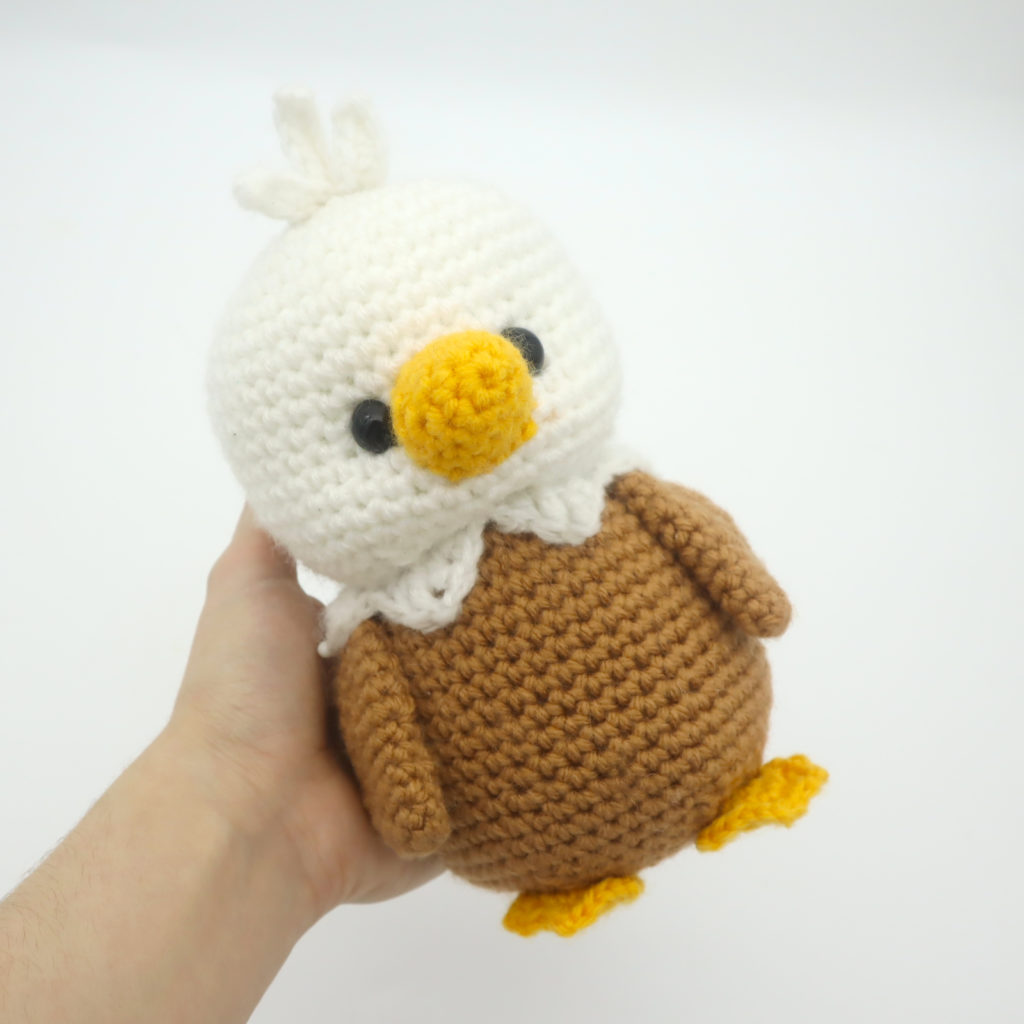
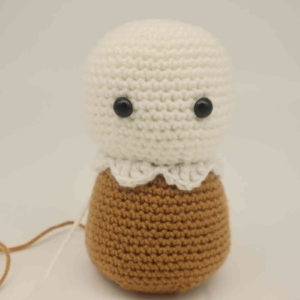
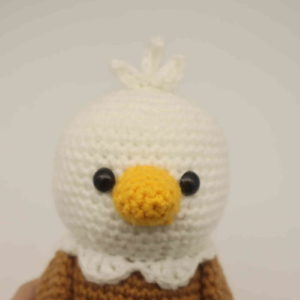
This eagle is super easy to make, and the results are too adorable. He makes for a fantastic patriotic gift, especially for Fourth of July! I also think eagles are so cute that he would be a cute companion for any bird lovers out there 🙂
First, we start by creating the head. The head then works into the body as one continuous piece. After we create the body, we will make the neck feathers. Then, we make the beak, hair, wings, and feet! Let’s get started.
Head/body:
In white

Round 1: 6 Sc into a Magic Ring (6)
Round 2: *Inc* all around (12)
Round 3: *Inc, Sc in the next st* all around (18)
Round 4: *Inc, Sc in the next 2 st* all around (24)
Round 5: *Inc, Sc in the next 3 st* all around (30)
Round 6: *Inc, Sc in the next 4 st* all around (36)
Round 7: *Inc, Sc in the next 5 st* all around (42)
Round 8-12: *Sc* all around (42)
Now we will mark where to place the eyes. Add a differently colored eye stitch marker into the 20th and 26th stitch.
Round 13-17: *Sc* all around (42)
Add safety eyes into the marked areas of Round 12 now.
Round 18: *Dec, Sc in the next 5 st* all around (36)
Round 19: *Dec, Sc in the next 4 st* all around (30)
Round 20: *Dec, Sc in the next 3 st* all around (24)
Round 21: Change to Brown. In the BLO (Back Loop Only) repeat *Inc, Sc in the next 3 st* all around (30)
Round 22: In BOTH loops, *Inc, Sc in the next 4 st* all around (36)
Round 23: *Inc, Sc in the next 5 st* all around (42)
Stuff the head firmly now.
Round 24-31: *Sc* all around (42)
Round 32: *Inc, Sc in the next 6 st* all around (48)
Round 33-35: *Sc* all around (48)
Round 36: *Dec, Sc in the next 6 st* all around (42)
Round 37: *Dec, Sc in the next 5 st* all around (36)
Round 38: *Dec, Sc in the next 4 st* all around (30)
Round 39: *Dec, Sc in the next 3 st* all around (24)
Stuff the body here. Continue stuffing after each round.
Round 40: *Dec, Sc in the next 2 st* all around (18)
Round 41: *Dec, Sc in the next st* all around (12)
Round 42: *Dec* all around (6)
Finish off, leaving a tail for sewing. Sew the remaining stitches closed and weave in ends.
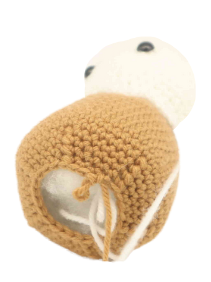
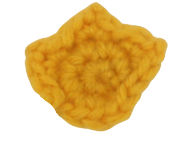
Feathers:
In white
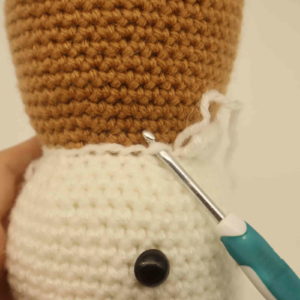
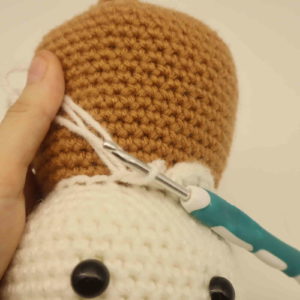
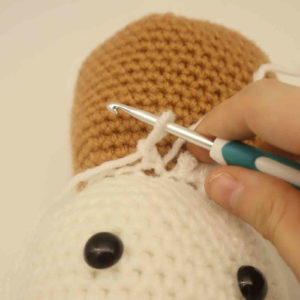
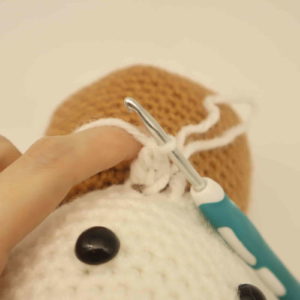
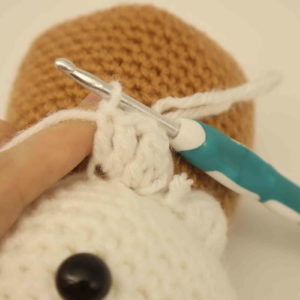
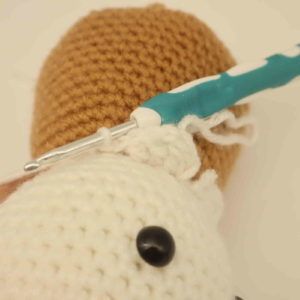
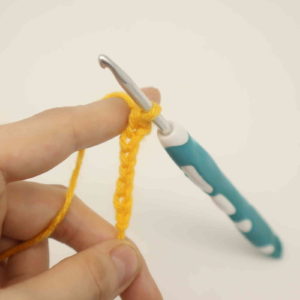
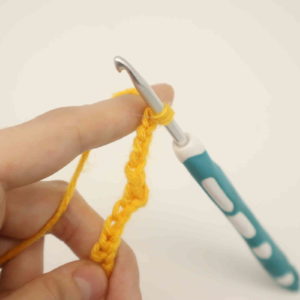
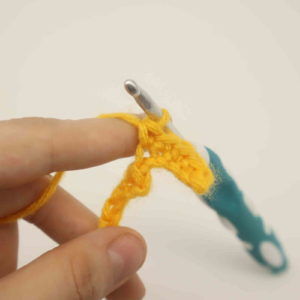
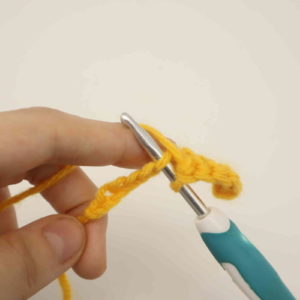
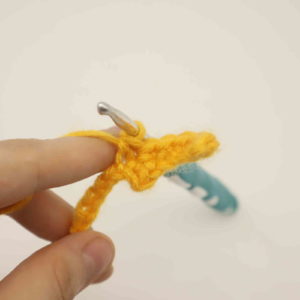
Attach your hook into the front loop we left in Round 21 (Pic 2). Yarn over with white yarn (Pic 3) and pull the yarn through the loop (Pic 4). Ch 2 (Pic 5). Trc into the same st. Ch 2, Trc in the next Ch, Dc into the same ch (Pic 7). SlSt in the next 2 st (Pic 8).
Repeat: *Dc in the next st, Trc into the same st, Ch 2, Trc into the next st, Dc into the next st. SlSt in the next 2 st* all around until you meet the end of the round.
1. 2.
2. 3.
3. 4.
4. 5.
5. 6.
6. 7.
7. 8.
8. 9.
9.
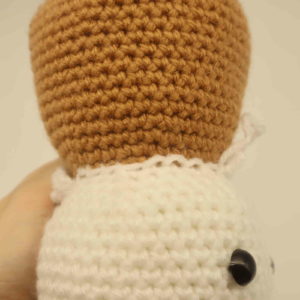
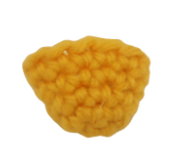
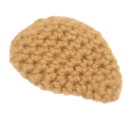
Beak:
In yellow
Round 1: 6 Sc into a Magic Ring (6)
Round 2: *Inc, Sc in the next st* all around (9)
Round 3: *Sc* all around (9)
Round 4: *Inc, Sc in the next 2 st* all around (12)
Round 5: *Sc* all around (12)
Finish off, leaving a long tail for sewing. Pin the beak on as shown and sew on. Stuff the beak firmly before fully sewing on. Once sewn on, weave in ends.
Hair:
In white
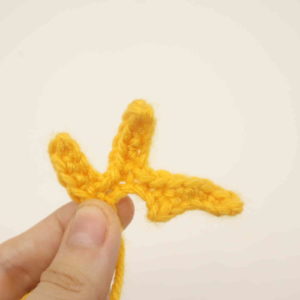
Row 1: Ch 7 (Pic 1). Sc in the 2nd ch from the hook. Repeat *Ch 6 (Pic 2). Sc in the 2nd Ch from the hook, Sc in the next 4 ch (Pic 3). Working back on the original piece, Sc in the next 2 ch (Pic 4-5)* 2 times.
1. 2.
2. 3.
3. 4.
4. 5.
5. Ch 6. Sc in the 2nd Ch from the hook, Sc in the next 4 st. SlSt into the last Ch to complete (Pic 6).
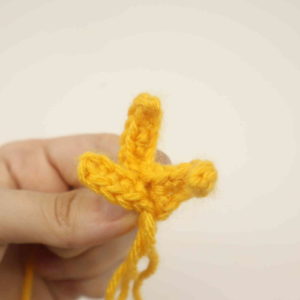
You will have 3 pieces of hair (Pic 6). Push the first and last piece together as shown (Pic 7). This will make the middle piece go back as shown. Now pin the hair to the top of the toy’s head as shown and sew on. Once done, weave in ends.
6. 7.
7. 8.
8.
Wings: (Make 2)
In brown
Round 1: 6 Sc into a Magic Ring (6)
Round 2: *Sc* all around (6)
Round 3: *Inc, Sc in the next st* all around (9)
Round 4: *Sc* all around (9)
Round 5: *Inc, Sc in the next 2 st* all around (12)
Round 6: *Sc* all around (12)
Round 7: *Inc, Sc in the next st* all around (18)
Round 8-11: *Sc* all around (18)
Round 12: *Dec, Sc in the next st* all around (12)
Round 13: *Dec* all around (6)
Finish off, leaving a long tail for sewing. Sew the remaining stitches closed. Pin the wing on as shown and sew on. Once sewn on, weave in ends.

Feet: (Make 2)
In yellow
Round 1: 6 Sc into a Magic Ring (6)
Round 2: *Inc, Sc in the next st* all around (12)
Round 3: Repeat *SlSt in the next 2 st. Ch 2, Sc into the same stitch we made in the round.* 3 times. Finish off and pin the foot to the bottom of the toy as shown. Sew on and weave in ends.

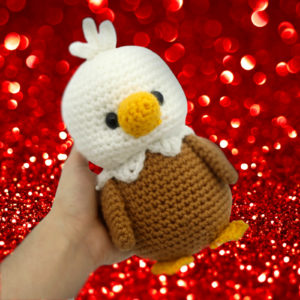
Done! If you made this eagle, I would LOVE to see 🙂 You can show me by posting a picture in the comments below this post.


19 Comments
So cute. Thank you for sharing your pattern.
hugs,
Gramz
Hi, I was just reading over your eagle pattern and wondered if you could clarify one of the rounds (on the foot) for me. The first round ends with 6sc, but then the second round says to *increase and sc* to get 12sc at the end of the round. My question is this- is the second round supposed to continue around until you reach 12 stitches, or is the count an error and supposed to only be 9 stitches? Maybe it should say *inc* around instead, in order to reach the end count of 12 stitches? Sorry for the confusion, I’m sure I’ll be able to figure it out once I have yarn in hand 🙂
I just love how he turned out. Your patterns are always easy to read. Thank you!
This is a cute eagle. I plan on crocheting one today. Thanks for posting the free pattern.
This was such a fun and simple pattern! Wanted a bigger toy so I did double strands. Worked great!
He turned out so cute!!
Thank you for all your patterns! So much fun to make!!
This is a great pattern and I have a suggestion for the website. In your animal category, you have multiple categories, but none for birds. This was confusing for me when I was looking for the pattern
The pattern was great, in having trouble adding photos though
So I’ll look for you on Facebook😉
Not sure if I was the only one not able to understand the feathers part but he turned out cute anyway (:
Maybe a video instead of pictures for the feathers would have been easier for me.
I didn’t understand it either, I think I’m just going to make a separate scalloped edge and sew it on. Yours turned out so cute, we used the same shade of brown!
Cute…I made mine up after researching “trc”… Maybe treble stitch?
So cute! My client wanted a purple eagle to rep our Sorority.
Thank you for sharing this adorable pattern. I love how cute this little eagle is.
🦅💕
Just to finished making this little guy. It was fun to make. Thank you for the pattern I love him
I made this for my daughter’s signing day next week. Her committed school’s mascot is an eagle that wears a red jersey, and her number will be 12. She absolutely loves it! I too had trouble with the neck feather instructions, but I figured something out. Thank you for the pattern!
I couldn’t understand the hair, but it was such a cute pattern. I made it for my dad for Christmas.
Hi! I was just wondering if I was allowed to sell the final product while giving pattern credits to you? All good if not. Thanks!
Made him for a friend’s baby and he turned out so cute! They are a family of Philadelphia Eagles fans so I used green yarn instead of brown, and crocheted the eyes so they’re safe for the baby. Otherwise used the pattern and it was very easy to follow! Thanks!