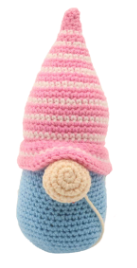
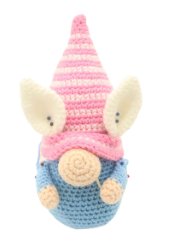
Easter Bunny Gnomes Amigurumi – Free Crochet Pattern
Print this pattern out – purchase the PDF version here!

 Supplies:
• Yarn 4/Medium Weight Yarn in…
Pink, white, blue, skin color, and white fuzzy yarn
•4mm Crochet Hook
•Tapestry needle
•Scissors
•Stuffing
•Small toy Easter Egg
•Hot glue gun
•Pink eye shadow or blush for inside of ears
Additional Information:
•Difficulty: Easy
•Size: 10″ tall
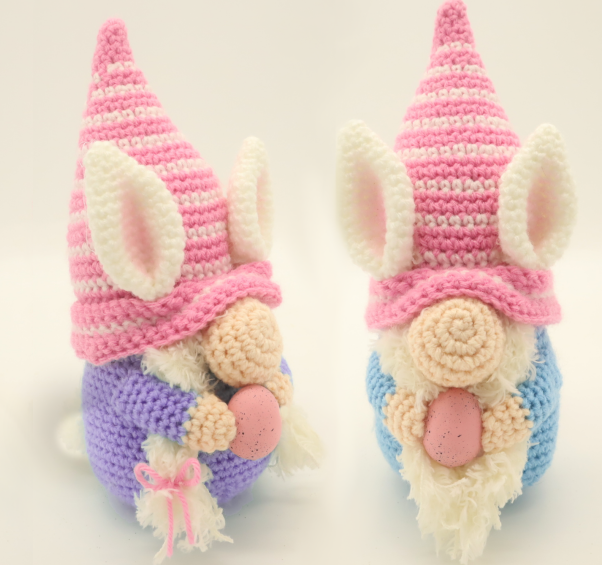
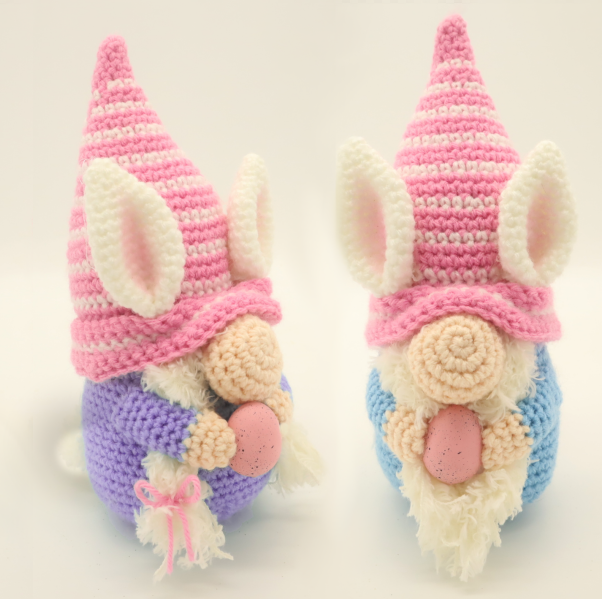
It’s time to start having some fun for Easter and Spring! This gnome decided to dress up as a bunny! Not only does he have super cute ears, but he even has a bushy tail. This pattern also includes instructions on how to make the girl gnome, which is very easy.
We will start by making the hat from the tip down. We will then crochet the body. The body is worked into the hat by working in the back loop only of the hat. After this we will make the beard, nose, and arms.
Let’s get started!
Hat:
Start in pink
Round 1: 6 Sc into a Magic Ring (6)
Round 2-3: *Sc* all around (6)
Round 4: *Inc, Sc in the next st* all around (9)
Round 5-6: *Sc* all around (9)
Round 7: Change to white. *Inc, Sc in the next 2 st* all around (12)
Round 8-9: Change to pink. *Sc* all around (12)
Round 10: Change to white. *Inc, Sc in the next st* all around (18)
Round 11-12: Change to pink. *Sc* all around (18)
Round 13: Change to white. *Inc, Sc in the next 2 st* all around (24)
Round 14-15: Change to pink. *Sc* all around (24)
Round 16: Change to white. *Inc, Sc in the next 3 st* all around (30)
Round 17-18: Change to pink. *Sc* all around (30)
Round 19: Change to white. Repeat *Inc, Sc in the next 4 st* all around (36)
Round 20-21: Change to pink. *Sc* all around (36)
Round 22: Change to white. Repeat *Inc, Sc in the next 5 st* all around (42)
Round 23-24: Change to pink. *Sc* all around (42)
Round 25: Change to white. *Sc* all around (42)
Round 26-27: Change to pink. *Sc* all around (42)
Round 28: Change to white. *Sc* all around (42)
Round 29-30: Change to pink. *Sc* all around (42)
In the next round we will be working in the front loop only. This will leave a back loop, which we will later attach our hook into the back loop to from the gnome’s body.
Round 31: Working in the Front Loop Only (FLO) *Sc* all around (42)
Round 32-33: Working in BOTH loops, *Sc* all around (42)
Round 34: Repeat *Inc, Sc in the next 6 st* all around (48)
Round 35: Repeat *Inc, Sc in the next 7 st* all around (54)
Round 36: Working in the FLO, *Dec, Sc in the next 7 st* all around (48)
Round 37: Working in BOTH loops, *Dec, Sc in the next 6 st* all around (42)
Round 38: Change to white. *Sc* all around (42)
Round 39-40: Change to pink. *Sc* all around (42)
Finish off the hat now. Weave in ends, cutting any excess yarn. Flip the hat up from Round 36 to make a brim.
Body:
Start in Blue
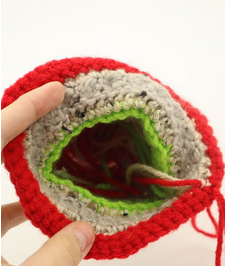
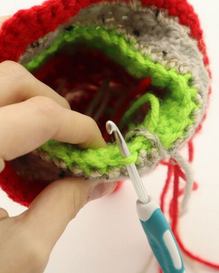
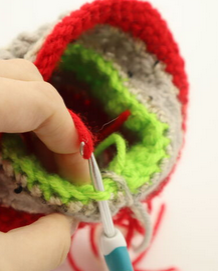
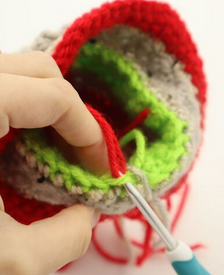
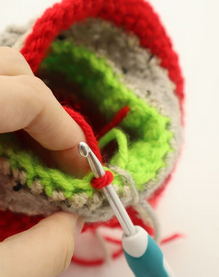
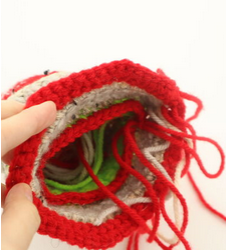
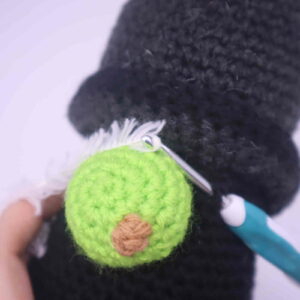
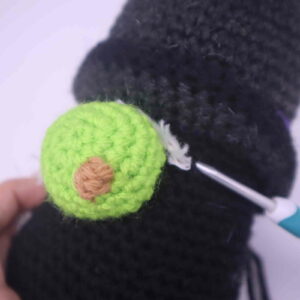
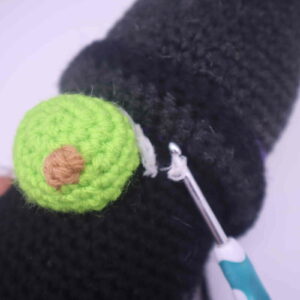
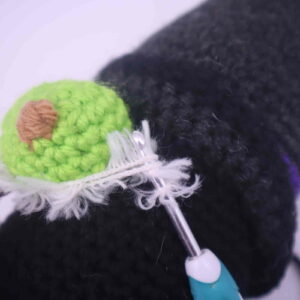
Round 1: Now we will work in the back loops we left in Round 31. Flip the hat’s brim outwards, and you will see a ridge of stitches (Pic 1). These are the back loop stitches. Insert your hook into any one of these loops (Pic 2), yarn over (Pic 3), and pull the yarn through (Pic 4-5). Ch 1. Sc in the next 41 st (Pic 6) (42)
1. 2.
2. 3.
3. 4.
4. 5.
5. 6.
6.
Round 2-12: *Sc* all around (42)
Round 13: *Inc, Sc in the next 6 st* all around (48)
Round 14: *Sc* all around (48)
Round 15: *Inc, Sc in the next 7 st* all around (54)
Round 16-18: *Sc* all around (54)
Round 19: *Dec, Sc in the next 7 st* all around (48)
Round 20: *Dec, Sc in the next 6 st* all around (42)
Round 21: *Dec, Sc in the next 5 st* all around (36)
Stuff the hat now. I don’t stuff the very top tip of the hat because it allows you to move the tip around to look bent.
Round 22: *Dec, Sc in the next 4 st* all around (30)
Round 23: *Dec, Sc in the next 3 st* all around (24)
Stuff the body now. Continue stuffing after each round.
Round 24: *Dec, Sc in the next 2 st* all around (18)
Round 25: *Dec, Sc in the next st* all around (12)
Round 26: *Dec* all around (6)
Finish off, leaving a long tail for sewing. Sew the remaining stitches closed and weave in ends.
Nose:
In Skin Color
Round 1: 6 Sc into a Magic Ring (6)
Round 2: *Inc* all around (12)
Round 3: *Inc, Sc in the next st* all around (18)
Round 4-6: *Sc* all around (18)
Round 7: *Dec, Sc in the next st* all around (12)
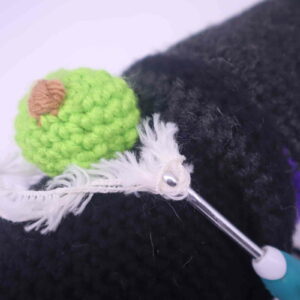
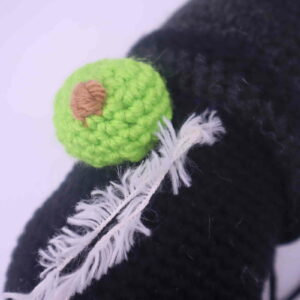
Finish off, leaving a long tail for sewing. Stuff the nose firmly now. Pin the nose on as shown and sew on.
Arms: (Make 2)
In Skin Color

Round 1: 6 Sc into a Magic Ring (6)
Round 2: *Inc, Sc in the next st* all around (9)
Round 3-4: *Sc* all around (9)
Round 5-12: In blue, *Sc* all around (9)
Finish off, leaving a long tail for sewing. Stuff the arms lightly. Pin the arms on as shown and sew on, weave in ends.

Ears: (Make 2)
Start in White
Round 1: 6 Sc into a Magic Ring (6)
Round 2: *Sc* all around (6)
Round 3: *Inc, Sc in the next st* all around (9)
Round 4: *Sc* all around (9)
Round 5: *Inc, Sc in the next 2 st* all around (12)
Round 6: *Sc* all around (12)
Round 7: *Inc, Sc in the next st* all around (18)
Round 8-15: *Sc* all around (18)
Round 16: *Dec, Sc in the next st* all around (12)
Round 17: *Sc* all around (12)
Round 18: *Dec* all around (6)
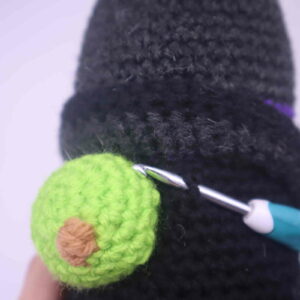
Finish off, leaving a long tail for sewing. Pin the ears on as shown (tucked inside the brim) and sew or hot glue on. Once on, weave in ends and cut any excess yarn. Lightly brush the inside of the ears with pink eye shadow or blush.
Beard:
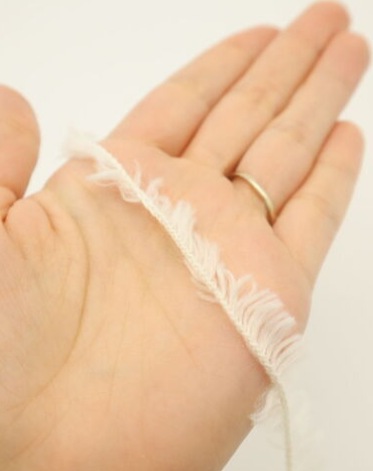
In Fuzzy Yarn
Cut 30 pieces of 9″ fuzzy yarn. You may cut less strands if you’re using thicker yarn than mine, see Pic 1 for size reference. Flip the brim of the hat up as shown (Pic 2). Insert your hook into Round 3 of the body (Pic 2).
1. 2.
2.
Fold the fuzzy yarn in half, and place the yarn onto your hook (Pic 3). Pull the yarn through (Pic 4-5).
3. 4.
4. 5.
5.
Yarn over with the yarn (Pic 6). Pull the strands through the loop (Pic 7). Done! (Pic 8). Repeat this process on below the hat and around the nose.
Note: If making braids for a female gnome, use regular white yarn and do not place yarn around the nose. Braid the hair and tie a bow in pink yarn to finish the braid.
6. 7.
7. 8.
8.
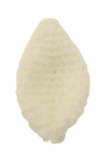
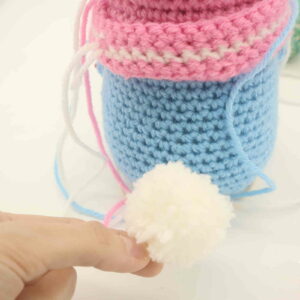
Tail:
In White
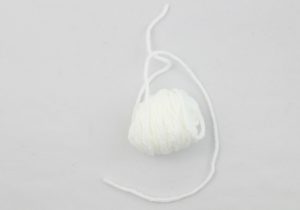
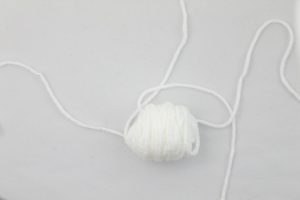
First, cut a 12″ piece of white yarn and set aside for later. Now, take white yarn and wrap it around for 3 fingers 80 times (Pic 1, 2, & 3).
1. 2.
2. 3.
3.
Now take the yarn off your fingers (Pic 4). Wrap the 12″ piece of yarn around the yarn a few times (Pic 5-6).
4. 5.
5. 6.
6.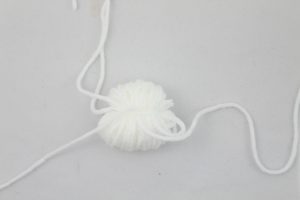
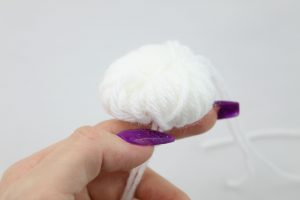
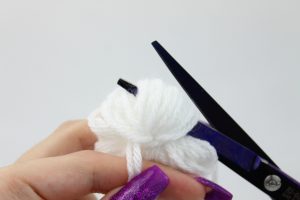
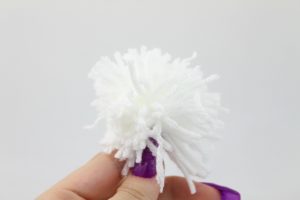
Do this tightly to secure. Now, cut the loops of yarn as shown (Pic 7-10). Be sure to cut all the longer pieces of yarn off to get a puffy ball.
7. 8.
8. 9.
9. 10.
10.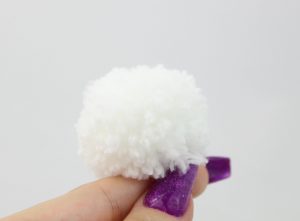
Finally, hot glue the pompom to the back of the gnome.
11. 12.
12.
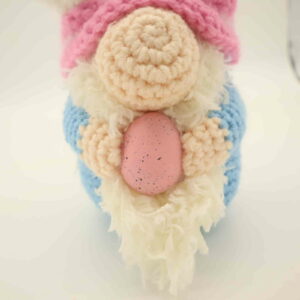
Egg Assembly:
Place hot glue on one side of the egg. Place the gnome’s hand onto this area and hold it in place for about a minute. Repeat this for the other side of the egg.
Done! If you made a gnome, I would LOVE to see! You can show me by posting a picture of yours in the comment section underneath this post :)easter


1 Comment
I love your site and have made some of your patterns. They were easy and fun. Thank you so much:)