Gardening Set: Onion, Turnip, Radish Amigurumi – Free Crochet Pattern


Print this pattern out – purchase the PDF version here!


 Supplies:
• Yarn 4/Medium Weight Yarn in…
Onion: Dark brown, brown, green, and creamy white
Turnip: Green, purple, and white
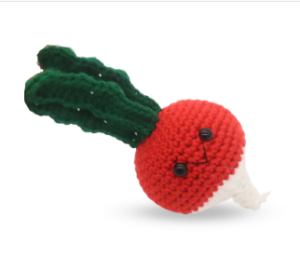
Radish: Dark green, red, and white
Soil: Brown. Use a tweed yarn. I use Big Twist’s Tweed in Chocolate.
•4mm Crochet Hook
•Tapestry needle
•Scissors
•Stuffing
•10mm safety eyes
•Cardboard
Additional Information:
•Difficulty: Easy, but the soil is time consuming. The vegetables are quick!
•Size: Each vegetable is about 8″ tall from bottom to top of leaf
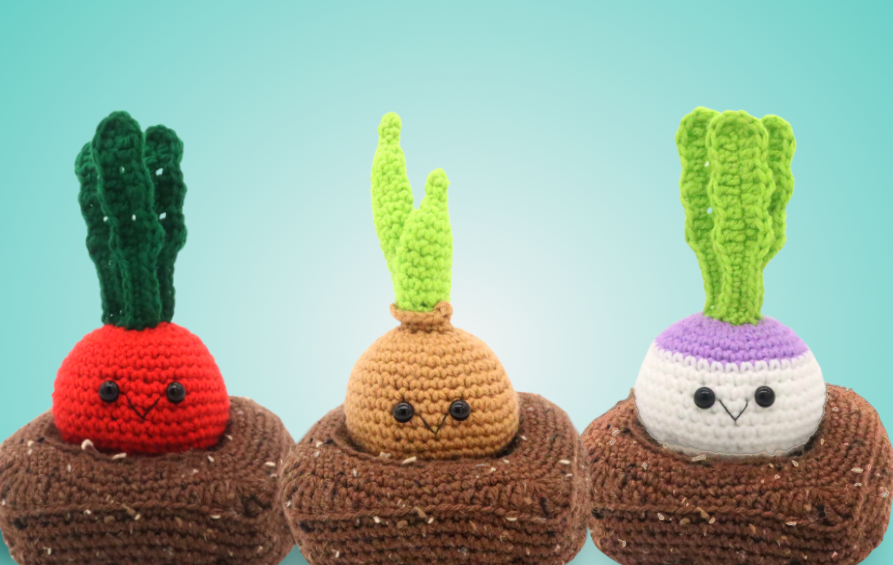
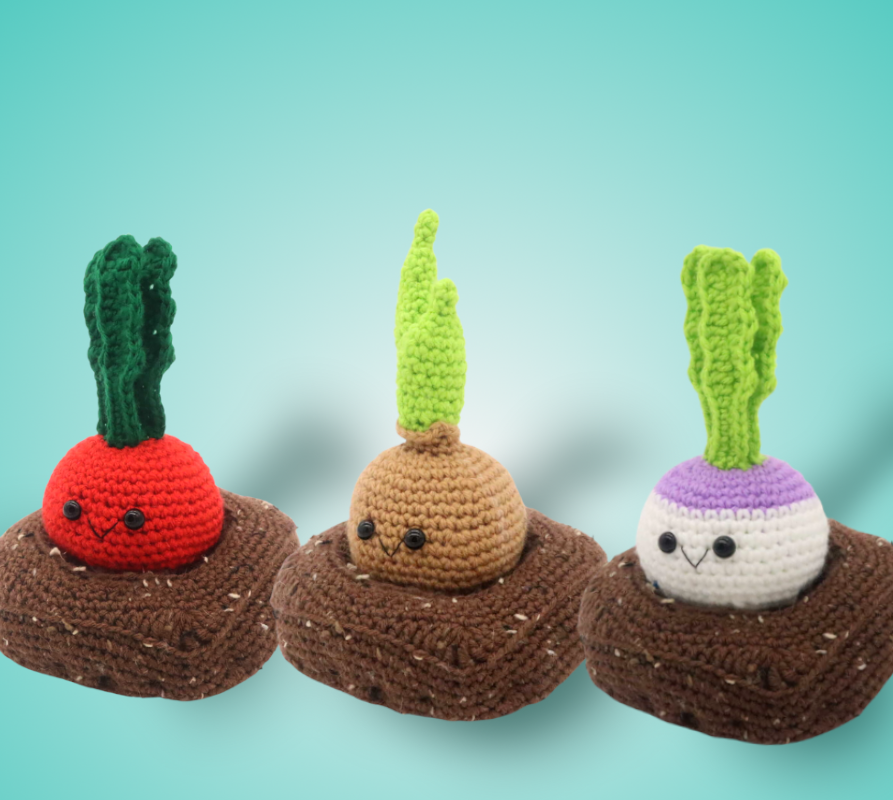
Not everybody loves vegetables… until now! These vegetables are so cute, everyone will love them! Included in this pattern is an onion, turnip, and radish, as well as dirt pattern to plant your vegetables in. This makes a great teaching toy for young children as well as an adorable gift for any veggie lover!
Let’s get started!
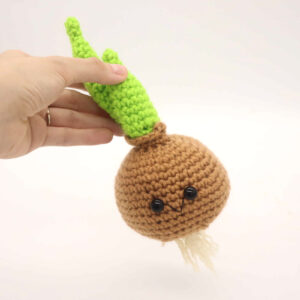
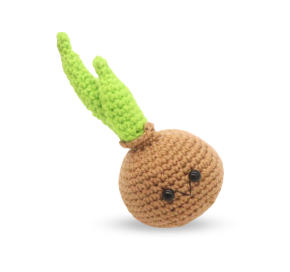
Onion:
Start in brown
Round 1: 6 Sc into a Magic Ring (6)
Round 2: *Inc* all around (12)
Round 3: In the Back Loop Only (BLO), *Sc* all around (12)
Round 4: *Inc, Sc in the next st* all around (18)
Round 5: In BOTH loops, *Inc, Sc in the next 2 st* all around (24)
Round 6: *Inc, Sc in the next 3 st* all around (30)
Round 7: *Inc, Sc in the next 4 st* all around (36)
Round 8-10: *Sc* all around (36)
Round 11: *Inc, Sc in the next 5 st* all around (42)
Now we will mark where to place the safety eyes. Add an eye stitch marker into the 20th and 24th stitch in Round 11.
Round 12-15: *Sc* all around (42)
Round 16: *Dec, Sc in the next 5 st* all around (36)
Round 17: *Dec, Sc in the next 4 st* all around (30)
Add the safety eyes into the marked areas now.
Round 18: *Dec, Sc in the next 3 st* all around (24)
Round 19: *Dec, Sc in the next 2 st* all around (18)
Stuff firmly now. Continue stuffing after each round.
Round 20: *Dec, Sc in the next st* all around (12)
Round 21: Change to Dark Brown. *Dec* all around (6)
Finish off, leaving a long tail for sewing. Sew the remaining stitches closed and weave in ends. Cut any excess yarn.
Onion Top:
In Brown
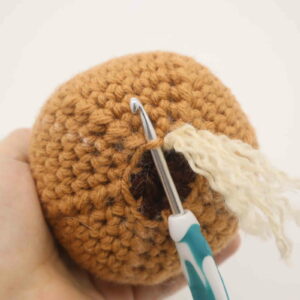
Attach your crochet hook into the front loops we left in Round 3 (Pic 1). Yarn over with brown yarn (Pic 1) and pull the yarn through (Pic 2).
1. 2.
2.
Ch 1. Sc in the next 4 st. Ch 2 (Pic 3), Sc in the 2nd Ch from the hook, continuing back on the onion, Sc in the next 5 st. Ch 2, Hdc in the 2nd Ch from the hook. Continuing back on the onion, Sc in the next 2 st.
Finish off and weave in ends. Cut excess yarn.
3. 4.
4. 5.
5. 6.
6.
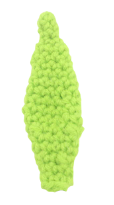
Big Onion Leaf:
In Green
Round 1: 4 Sc into a Magic Ring (4)
Round 2-3: *Sc* all around (4)
Round 4: *Inc* all around (8)
Round 5-6: *Sc* all around (8)
Round 11: *Inc, Sc in the next 3 st* (10)
Round 12-13: *Sc* all around (10)
Round 14: *Inc, Sc in the next 4 st* all around (12)
Round 15-16: *Sc* all around (12)
Round 17: *Dec, Sc in the next 2 st* all around (9)
Round 18-19: *Sc* all around (9)
Round 20: *Dec, Sc in the next st* all around (6)
Round 21-22: *Sc* all around (6)
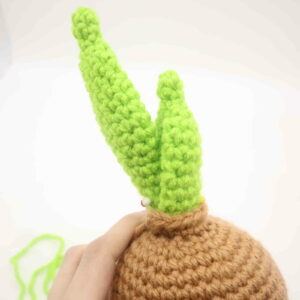
Finish off, leaving a long tail for sewing. Pin the leaf on the left side inside the onion skin as shown and sew on. Weave in ends and cut any excess yarn.
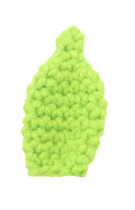
Small Onion Leaf:
In Green
Round 1: 4 Sc into a Magic Ring (4)
Round 2-3: *Sc* all around (4)
Round 4: *Inc, Sc in the next st* all around (6)
Round 5: *Inc, Sc in the next 2 st* all around (8)
Round 6: *Inc, Sc in the next st* all around (12)
Round 7-12: *Sc* all around (12)
Round 13: *Dec, Sc in the next 2 st* all around (9)
Finish off, leaving a long tail for sewing. Pin the leaf on as shown and sew on. Weave in ends and cut any excess yarn.
Onion Roots:
In Cream Color
Insert hook into the front loops we left in Round 21 (Pic 1).
1.
Yarn over with yarn and pull through (Pic 2-3).
2.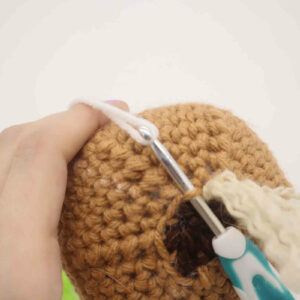 3.
3.
Yarn over with both strands of yarn (Pic 4-5).
4. 5.
5.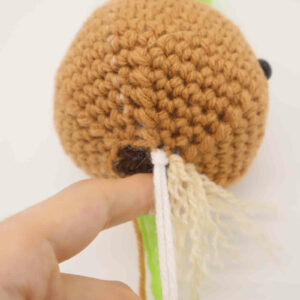
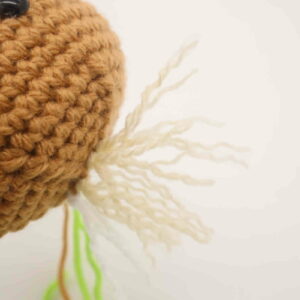
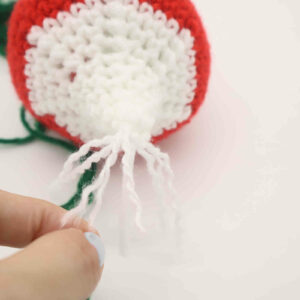
Cut the ends of yarn unevenly (Pic 6).
6.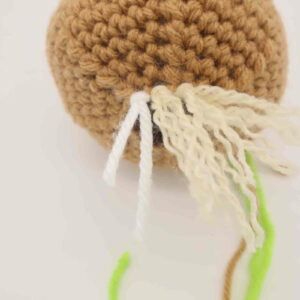
Unravel the ends of the yarn multiple times to make the yarn look like roots (Pic 7-8). Repeat this process every other stitch in the front loops of Round 21.
7.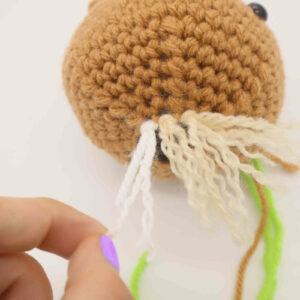 8.
8.
Turnip:
In Green

Round 1: 6 Sc into a Magic Ring (6)
Round 2: *Inc* all around (12)
Round 3: Change to purple. In the Back Loop Only (BLO), *Inc, Sc in the next st* all around (18)
Round 4: In BOTH loops, *Inc, Sc in the next 2 st* all around (24)
Round 5: *Inc, Sc in the next 3 st* all around (30)
Round 6: *Inc, Sc in the next 4 st* all around (36)
Round 7: *Sc* all around (36)
Round 8-9: Change to White. *Sc* all around (36)
Round 10: *Inc, Sc in the next 5 st* all around (42)
Now we will mark where to place the safety eyes. Add an eye stitch marker into the 20th and 24th stitch in Round 10.
Round 11-14: *Sc* all around (42)
Round 15: *Dec, Sc in the next 5 st* all around (36)
Round 16: *Dec, Sc in the next 4 st* all around (30)
Add the safety eyes into the marked areas now.
Round 17: *Dec, Sc in the next 3 st* all around (24)
Round 18: *Dec, Sc in the next 2 st* all around (18)
Stuff firmly now. Continue stuffing after each round.
Round 19: *Dec, Sc in the next st* all around (12)
Round 20: Working in the Front Loop Only (FLO), *Sc* all around (12)
Round 21: In BOTH loops, *Dec, Sc in the next 2 st* all around (9)
Round 22: *Sc* all around (9)
Round 23: *Dec, Sc in the next st* all around (6)
Round 24: *Sc* all around (6)
Finish off, leaving a long tail for sewing. Sew the remaining stitches closed and weave in ends. Cut any excess yarn.
Leaves: (Make 3)
In Green
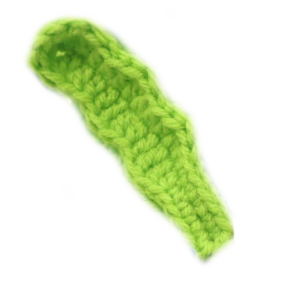
Row 1: Ch 18. Sc in the 2nd Ch from the hook, Sc in the next 5 ch.
•Repeat *Dc in the next ch, Trc in the next ch, Dc in the next ch, Hdc in the next ch* 2 times.
•Dc in the next ch, Trc in the next ch, Dc in the last Ch. Hdc 2 times into that same last Ch, Dc into that same Ch.
•Now working on other side of the Ch, Dc in the next st, Hdc in the next st.
•Repeat *Dc in the next st, Trc in the next st, Dc in the next st, Hdc in the next st* 2 times.
•Sc in the next 6 st.
Finish off, leaving a long tail for sewing. Pin the leaves on as shown, one in the front and two on the sides and sew on. Once sewn on, weave in ends and cut any excess yarn.

Roots:
In White
Take a few inches of white yarn and place it on a needle. Insert needle into the bottom of the turnip/radish (Pic 1) and have the ends of the yarn as shown (Pic 2).
1.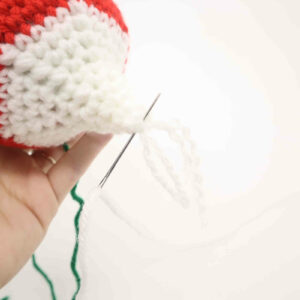 2.
2.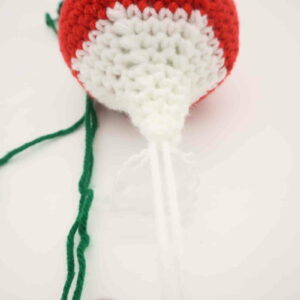
Using this yarn, tie a firm knot 1-2 times to secure. Now unravel the ends of the yarn to form the roots (Pic 3). Once done, cut the roots unevenly. Repeat this process one more time with a second piece of yarn.
3.
Radish:
In Dark Green
Round 1: 6 Sc into a Magic Ring (6)
Round 2: *Inc* all around (12)
Round 3: Change to Red. In the Back Loop Only (BLO), *Inc, Sc in the next st* all around (18)
Round 4: In BOTH loops, *Inc, Sc in the next 2 st* all around (24)
Round 5: *Inc, Sc in the next 3 st* all around (30)
Round 6: *Inc, Sc in the next 4 st* all around (36)
Round 7-9: *Sc* all around (36)
Round 10: *Inc, Sc in the next 5 st* all around (42)
Now we will mark where to place the safety eyes. Add an eye stitch marker into the 20th and 24th stitch in Round 10.
Round 11-14: *Sc* all around (42)
Round 15: *Dec, Sc in the next 5 st* all around (36)
Round 16: Change to White. *Dec, Sc in the next 4 st* all around (30)
Add the safety eyes into the marked areas now.
Round 17: *Dec, Sc in the next 3 st* all around (24)
Round 18: *Dec, Sc in the next 2 st* all around (18)
Stuff firmly now. Continue stuffing after each round.
Round 19: *Dec, Sc in the next st* all around (12)
Round 20: Working in the Front Loop Only (FLO), *Sc* all around (12)
Round 21: In BOTH loops, *Dec, Sc in the next 2 st* all around (9)
Round 22: *Sc* all around (9)
Round 23: *Dec, Sc in the next st* all around (6)
Round 24: *Sc* all around (6)
Finish off, leaving a long tail for sewing. Sew the remaining stitches closed and weave in ends. Cut any excess yarn.
Now…
Follow the leaf pattern that we use for the turnip, scroll up on the page to find it. Make three leaves, except in dark green rather than regular green. After this, follow the “roots” instructions we used on the turnip. Scroll up on the page to find the roots instructions.
Smile:
In Black Embroidery Thread
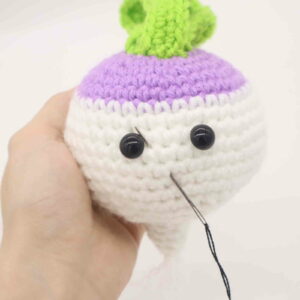
Insert needle with thread into the middle mouth area of the toy, and pull the needle out next to the toy’s left eye as shown (Pic 1).
1.
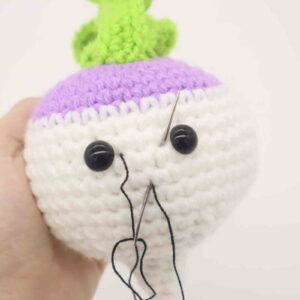
Reinsert needle into the middle mouth area (Pic 2) and pull needle out next to the right eye (Pic 2).
2.
Reinsert needle into the middle mouth area and pull needle out a few stitches over (Pic 3). Tie the ends of thread into firm knots and bring them inside the toy to hide. This will secure the smile. Done!
3. 4.
4.
Note: The smile is made the same for each vegetable.
Dirt Patch for Onion:
In Brown Tweed Yarn
This dart patch pattern is for the onion. The dirt patch for the turnip/radish is slightly different, be sure to follow the correct pattern based on which vegetable you’re making!
Round 1: 6 Sc into a Magic Ring (6)
Round 2: *Inc* all around (12)
Round 3: *Inc, Sc in the next st* all around (18)
Round 4: *Inc, Sc in the next 2 st* all around (24)
Round 5: *Inc, Sc in the next 3 st* all around (30)
Round 6: *Inc, Sc in the next 4 st* all around (36)
Round 7: *Inc, Sc in the next 5 st* all around (42)
Round 8: *Inc, Sc in the next 6 st* all around (48)
Round 9-15: *Sc* all around (48)
Round 16: Working in the BLO, repeat *Inc, Sc in the next 7 st* all around (54)
Round 17: In BOTH Loops, repeat *Inc, Sc in the next 8 st* all around (60)
Round 18: *Inc, Sc in the next 9 st* all around (66)
Round 19: *Inc, Sc in the next 10 st* all around (72)
In Round 20 we will make the corners of the dirt patch, which will turn the dirt form a circle to a square.
Round 20: Sc in the next 4 st, Hdc in the next 3 st, Dc in the next 3 st, Trc in the next 2 st. Trc in the next st, Ch 2, Trc into the same st. Trc in the next st, Dc in the next st, Hdc in the next st, Sc in the next 6 st, Hdc in the next 3 st, Dc in the next 2 st, Trc in the next 2 st, Trc in the next st, Ch 2, Trc 2 times back into that same st.
Trc in the next 2 st, Dc in the next 2 st, Hdc in the next st, Sc in the next 6 st, Hdc in the next 2 st, Dc in the next 2 st, Trc in the next st, Trc 2 times into the same st, Ch 2, Trc 2 times working back into that same st.
Trc in the next st, Dc in the next st, Hdc in the next st, Sc in the next 7 st, Hdc in the next st, Dc in the next 2 st, Trc in the next st. Trc 2 times into the next st, Ch 2, Trc 2 times working back into the same st. Trc in the next st, Dc in the next st, Hdc in the next st, Sc in the last 2 st (85)
Round 21: Working in the Back Loop Only (BLO), *Sc* all around (85)
Round 22-26: Working in BOTH loops, *Sc* all around (85)
Round 27: Working in the BLO, *Dec, Sc in the next 15 st* all around (80)
Round 28: Working in BOTH loops, *Dec, Sc in the next 6 st* all around (70)
Round 29: *Dec, Sc in the next 5 st* all around (60)
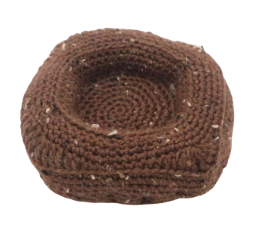
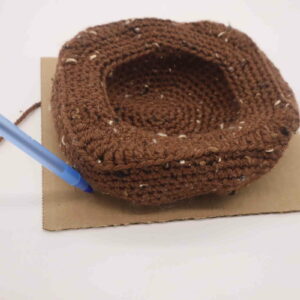
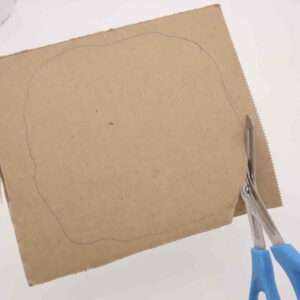
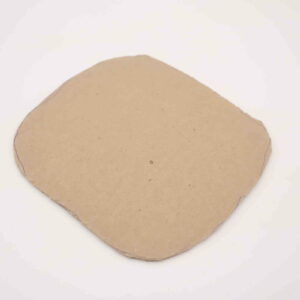
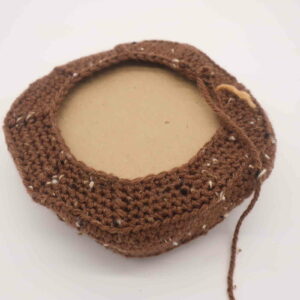
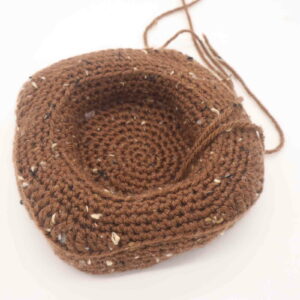
Now we will add cardboard into the soil to stabilize and flatten the bottom.
Place the soil onto a piece of cardboard (Pic 1). Trace around the edge (Pic 1). Cut around this outline (Pic 2). Stuff the soil, then place the cardboard into the soil (Pic 4). Your soil won’t look perfect yet, but we will make the middle hole look better later!
1. 2.
2. 3.
3. 4.
4.
Round 30: *Dec, Sc in the next 4 st* all around (50)
Round 31: *Dec, Sc in the next 3 st* all around (40)
Round 32: *Dec, Sc in the next 2 st* all around (30)
Round 33: *Dec, Sc in the next 1 st* all around (20)
Round 34: *Dec* all around (10)
Round 35: *Dec* all around (5)
Finish off, leaving a long tail for sewing. Sew the remaining stitches closed now and weave in ends. Cut any excess yarn.
Dirt Assembly:
In Brown Tweed Yarn
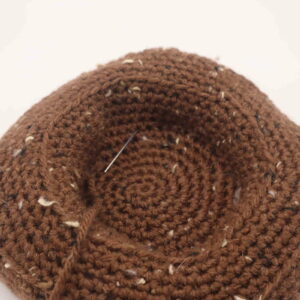
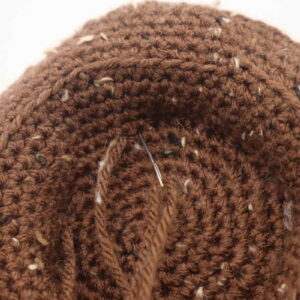
The middle dirt area will not be sunken in as it should, so we will fix that by sewing around the middle area. First, make a fist and rub your first in a circular motion around the middle dirt area for a few seconds. This will move the stuffing from the middle dirt area.
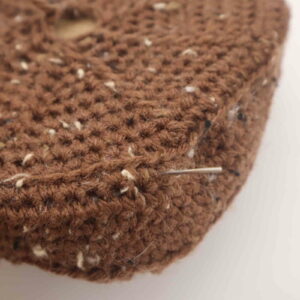
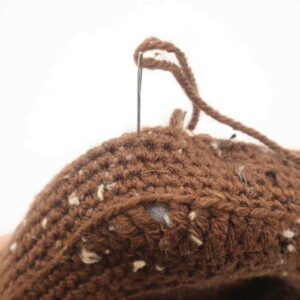
Place a very long strand of brown tweed yarn on a sewing needle. Insert needle going from the outside lower edge of the soil into the inside of the soil as shown (Pic 1).
1.
Insert needle 1 stitch to the right (Pic 2).
2.
Pull needle out at the bottom edge of the soil, one round above the decreases we made (Pic 3).
3.
Insert needle a stitch or two to the left (Pic 4).
4.
Pull needle out in the inside of the soil as shown (Pic 5), making progress each time pull the needle back inside the inside soil area. Do this until you complete sewing around the soil (Pic 6). Once done, weave in ends and cut any excess yarn.
5.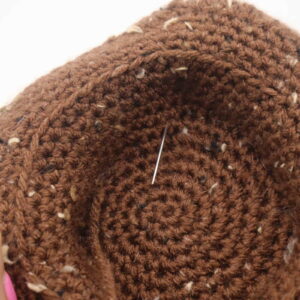 6.
6.
Dirt Patch for Turnip/Radish:
In Brown Tweed Yarn
This dart patch pattern is for the turnip/radish. The dirt patch for the onion is slightly different, be sure to follow the correct pattern based on which vegetable you’re making!
Round 1: 6 Sc into a Magic Ring (6)
Round 2: *Inc* all around (12)
Round 3: *Inc, Sc in the next st* all around (18)
Round 4-5: *Sc* all around (18)
Round 6: *Inc, Sc in the next 2 st* all around (24)
Round 7-8: *Sc* all around (24)
Round 9: *Inc, Sc in the next 3 st* all around (30)
Round 10: *Inc, Sc in the next 4 st* all around (36)
Round 11: *Inc, Sc in the next 5 st* all around (42)
Round 12: *Inc, Sc in the next 6 st* all around (48)
Round 13-17: *Sc* all around (48)
Round 18: Working in the BLO, repeat *Inc, Sc in the next 7 st* all around (54)
Round 19: In BOTH Loops, repeat *Inc, Sc in the next 8 st* all around (60)
Round 20: *Inc, Sc in the next 9 st* all around (66)
Round 21: *Inc, Sc in the next 10 st* all around (72)
In Round 22 we will make the corners of the dirt patch, which will turn the dirt form a circle to a square.
Round 22: Sc in the next 4 st, Hdc in the next 3 st, Dc in the next 3 st, Trc in the next 2 st. Trc in the next st, Ch 2, Trc into the same st. Trc in the next st, Dc in the next st, Hdc in the next st, Sc in the next 6 st, Hdc in the next 3 st, Dc in the next 2 st, Trc in the next 2 st, Trc in the next st, Ch 2, Trc 2 times back into that same st.
Trc in the next 2 st, Dc in the next 2 st, Hdc in the next st, Sc in the next 6 st, Hdc in the next 2 st, Dc in the next 2 st, Trc in the next st, Trc 2 times into the same st, Ch 2, Trc 2 times working back into that same st.
Trc in the next st, Dc in the next st, Hdc in the next st, Sc in the next 7 st, Hdc in the next st, Dc in the next 2 st, Trc in the next st. Trc 2 times into the next st, Ch 2, Trc 2 times working back into the same st. Trc in the next st, Dc in the next st, Hdc in the next st, Sc in the last 2 st (85)
Round 23: Working in the Back Loop Only (BLO), *Sc* all around (85)
Round 24-31: Working in BOTH loops, *Sc* all around (85)
Round 32: Working in the BLO, *Dec, Sc in the next 15 st* all around (80)
Round 33: Working in BOTH loops, *Dec, Sc in the next 6 st* all around (70)
Round 34: *Dec, Sc in the next 5 st* all around (60)
Now we will add cardboard into the soil to stabilize and flatten the bottom.
Place the soil onto a piece of cardboard (Pic 1). Trace around the edge (Pic 1). Cut around this outline (Pic 2). Stuff the soil, then place the cardboard into the soil (Pic 4). Your soil won’t look perfect yet, but we will make the middle hole look better later!
1. 2. 3. 4.
Round 35: *Dec, Sc in the next 4 st* all around (50)
Round 36: *Dec, Sc in the next 3 st* all around (40)
Round 37: *Dec, Sc in the next 2 st* all around (30)
Round 38: *Dec, Sc in the next 1 st* all around (20)
Round 39: *Dec* all around (10)
Round 40: *Dec* all around (5)
Finish off, leaving a long tail for sewing. Sew the remaining stitches closed now and weave in ends. Cut any excess yarn.
Now…
Follow the “dirt assembly” instructions, scroll up on this page to find those instructions. The instructions are the same for each dirt patch!
Done! If you made one of these vegetables I would LOVE to see! You can show me by posting a picture in the comments section underneath this post! 🙂


