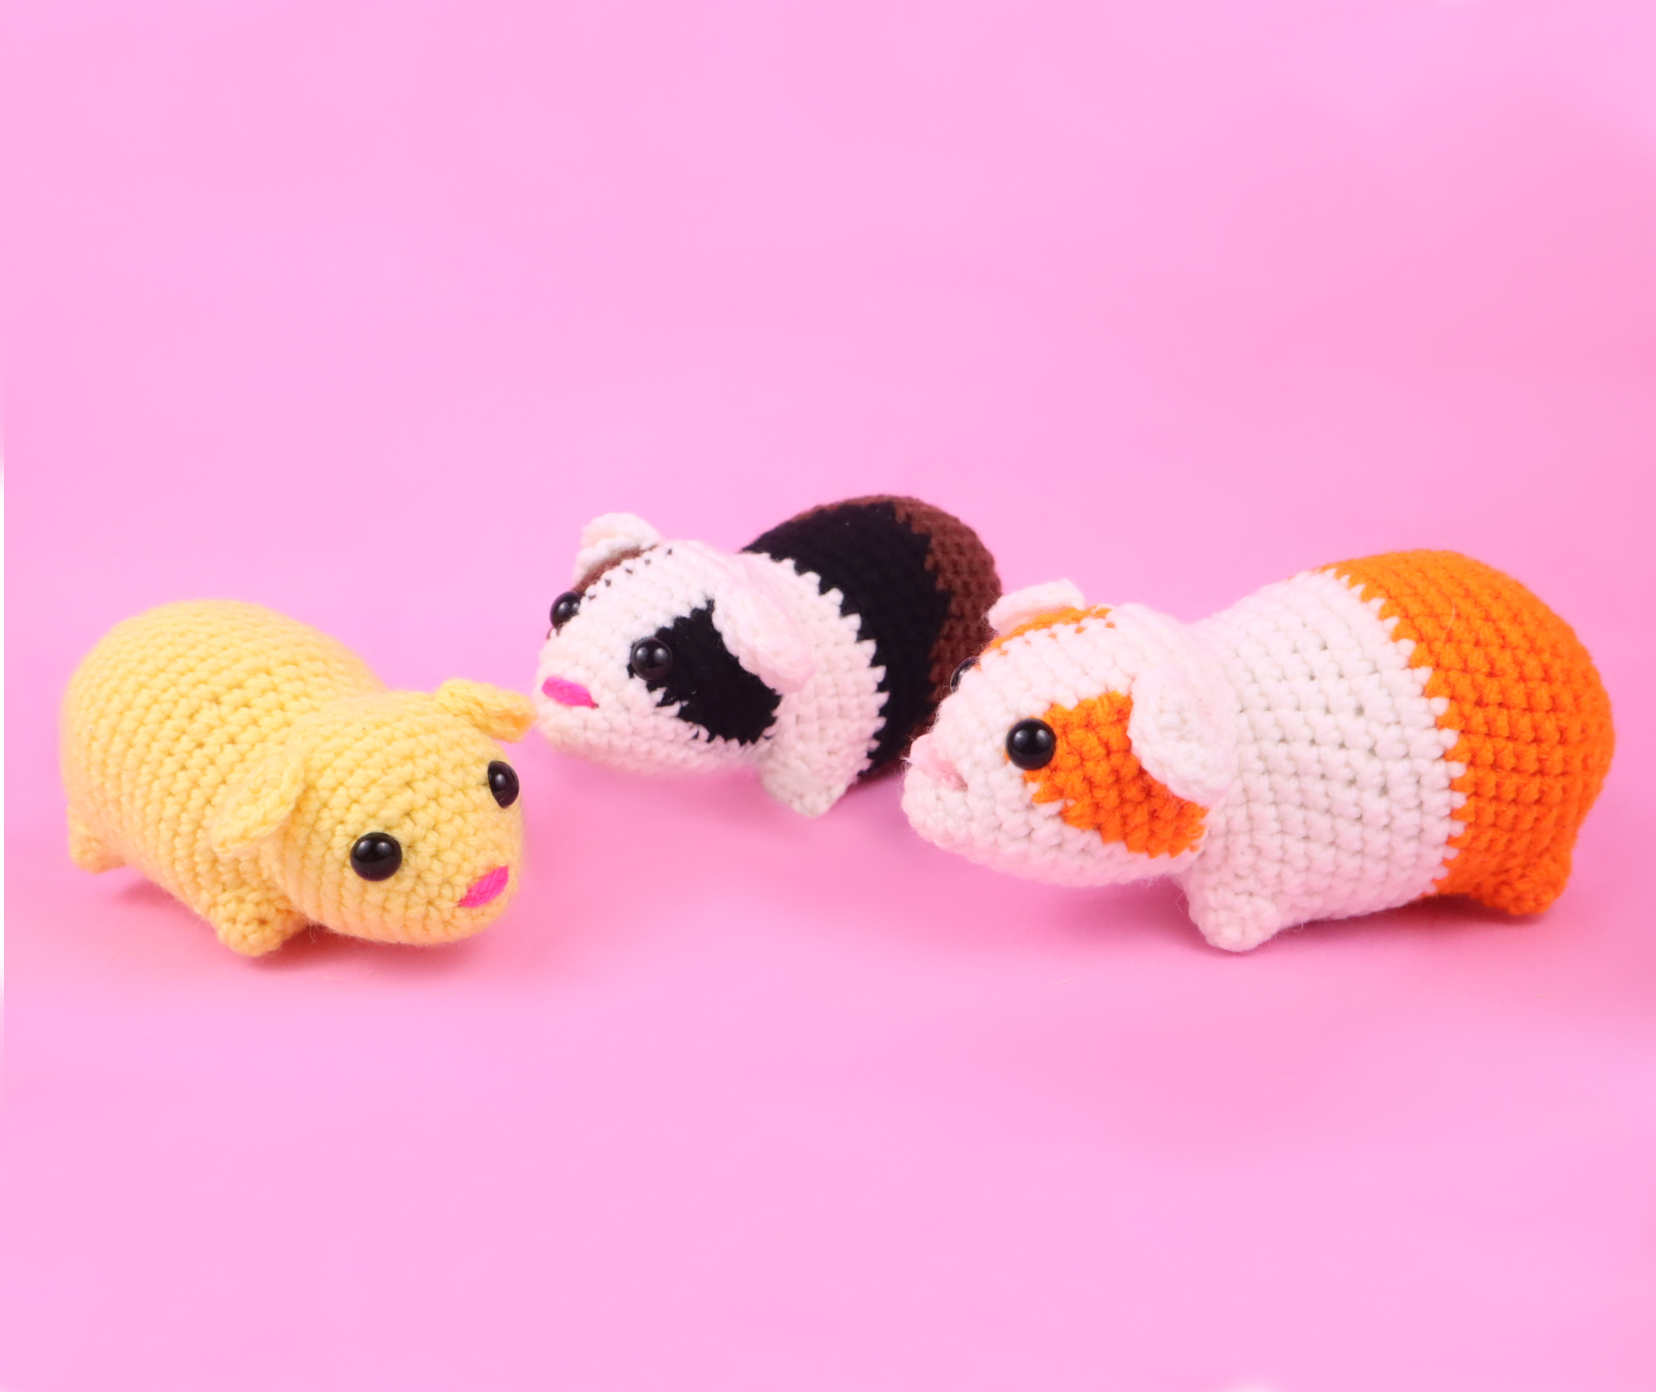

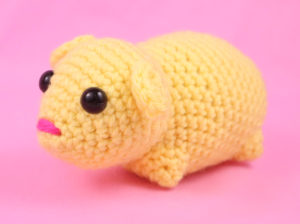
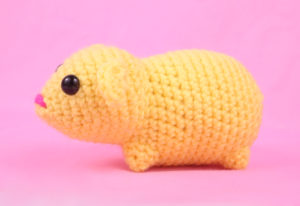
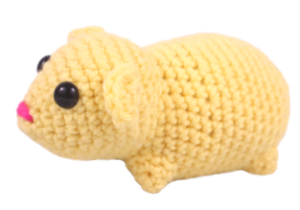
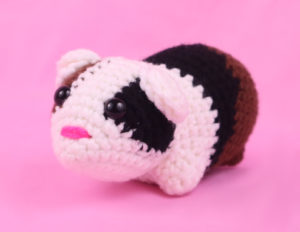
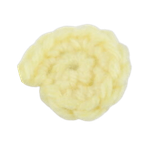
Enjoy this free guinea pig amigurumi crochet pattern! Scroll down past the pictures to the free pattern.
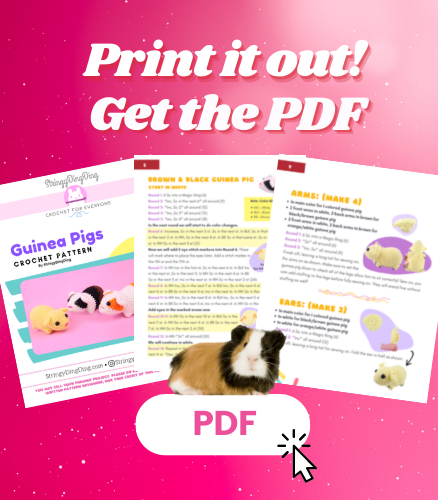
Print out this pattern! Purchase the PDF version here.

FROM FEB 21 2021 – MARCH 21 2021
Join the StringyDingDing Membership to Unlock this PDF + the NEWEST amigurumi PDFS!
I hope you like this free guinea pig amigurumi crochet pattern!
It was a lot of fun making it, as it was an easier pattern to make for me this time around. Sometimes it’s surprising what patterns are difficult to make! (I’m looking at you, wine glass amigurumi pattern…) This pattern would make a GREAT gift for kids, especially because this isn’t too girly of a pattern for little boys to enjoy! I’m sure a young boy would be just fine with a blue guinea pig 😂
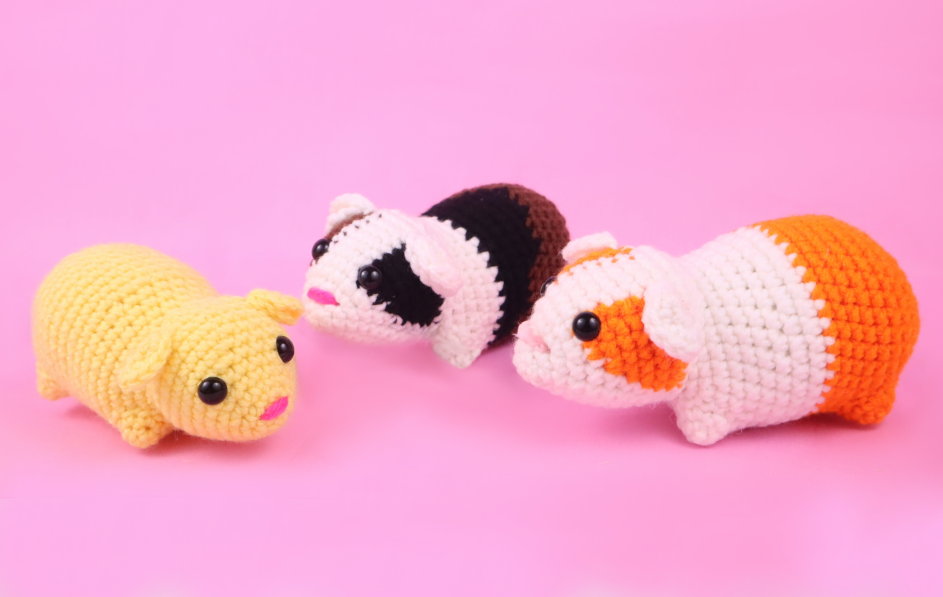
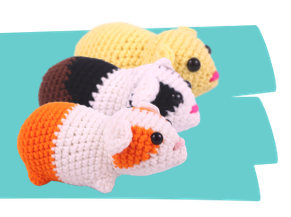
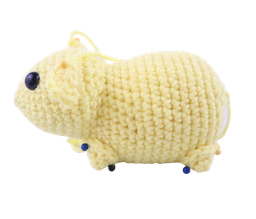
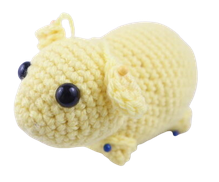
In this pattern there are 3 different guinea pigs you can make!
If you are relatively new to crochet or amigurumi, I recommend making the full colored guinea pig. This is because color changes are a bit hard for a total beginner. But at some point you have to try something new, so go for it if you want! The color changes are worth the practice because the end result is too cute!
I think my “rodent” patterns tend to do well, so I hope this pattern is no different! You all loved my hamster pattern from 2019. This is almost a more realistic spin on that pattern! I based that previous pattern on “Hamtaro”, a show I loved as a little kid. Honestly, you could call these guinea pigs a hamster and nobody would think twice!
Get creative with different yarns – here’s how.
Guinea pigs tend to have fluffy fur, so why not make a fluffy guinea pig? There is a huge variety of different fluffy yarns out there to pick from! One of my pattern testers made her guinea pig with slightly furry yarn and it looked adorable. Do note that working with furry yarn is a challenge at first. It’s hard to see your stitches, so you just have to feel for your stitches! I personally love furry yarns and this would be a great pattern for it 🙂 You can also brush out the guinea pig’s fur with a bristle brush! This is an easier solution for a furry effect without the hassle of using furry yarn.

Yarn colors in size 4/Medium Yarn…
•1 Colored Guinea Pig uses 1 Main Color
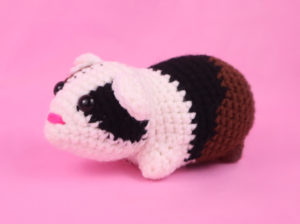
•White, Brown, & Black for 2nd Guinea Pig
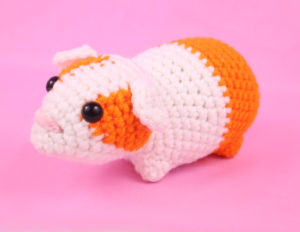
•Orange & White for 3rd Guinea Pig
• 4mm Crochet Hook
• 8mm safety eyes
• Tapestry needle
• Scissors
• Stuffing
Additional Information:
- Difficulty: Easy
- Pattern is in US Terms
- Size: 5.5″ long, 2.4″ tall
Getting Started
Included in this pattern are 3 different ways to make your guinea pig! They all use the same pattern, except when we change color will vary for each pattern.
You will find in this pattern each pattern for each guinea pig.
Color Abbreviations:
For easier reading, colors have been abbreviated in this pattern. I provide the full color name and it’s abbreviation on the necessary pages!
Important Note:
Since the head is a bit top-heavy, your guinea pig is likely to fall forward if you sit it on a flat surface. To fix this, you can place plastic beads into a secure bag like a sock or stocking. Then, firmly tie the bag closed and insert it into the body before it’s fully closed. After this, add stuffing once again after inserting the bag. DON’T do this method if you’re giving this guinea pig to a baby or child. The plastic pellets could be a choking hazard 🙁
• Recommended Yarns:
Red Heart
Big Twist
I Love This Yarn!
1 Color Guinea Pig:
Start in Main Color
Round 1: 6 Sc into a Magic Ring (6)
Round 2: *Inc, Sc* all around (9)
Round 3: *Inc, Sc 2* all around (12)
Round 4: *Inc, Sc 3* all around (15)
Round 5: *Inc, Sc 4* all around (18)
Round 6: *Inc, Sc 5* all around (21)
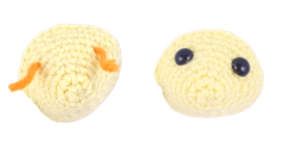
Now we will add 2 eye stitch markers. These will mark where to place the eyes later. Add a stitch marker in the 11th st and the 17th st.
Round 7: *Inc, Sc 6* all around (24)
Round 8: *Inc, Sc 7* (27)
Round 9: *Inc, Sc 8* all around (30)
Add eyes in the marked areas now
Round 10-12: *Sc* all around (30)
Round 13: Repeat in the FLO *Sc, Inc next st* 5 times. In BOTH Sc 4. *Dec, Sc* 5 times. Sc in the last st (30)
Round 14: In BOTH Loops, *Sc next 2 st, Inc next st* 5 times. In BOTH Sc 4. *Dec* 5 times. Sc in the last st (30)
Add stuffing to the head now. Add stuffing after every few rounds.
Round 15-18: *Sc* all around (30)
Round 19: Inc in the first st, Sc in the next 21 st. Repeat *Inc, Sc in the next st* 4 times (35)
Round 20-27: *Sc* all around (35)
Round 28: Repeat *Dec, Sc in the next 4 st* 5 times. Dec, Sc in the next 3 st (29)
Stuff again firmly here. Stuff after each round.
Round 29: Repeat *Dec, Sc in the next 3 st* 5 times. Dec, Sc in the next 2 st (23)
Round 30: Repeat *Dec, Sc in the next 2 st* 5 times. Dec, Sc in the next 1 st (17)
Round 31: Repeat *Dec, Sc in the next st* 5 times. Dec (11)
Round 32: *Dec* 5 times, Sc in the last st (6)
Finish off now, leaving a tail for sewing closed. Sew the remaining stitches closed.
Black and Brown Guinea Pig:
Start in White
Color Abbreviations:
- WH = White
- BLK = Black
- BR = Brown
Round 1: 6 Sc into a Magic Ring (6)
Round 2: *Inc, Sc in the next st* all around (9)
Round 3: *Inc, Sc 2* all around (12)
Round 4: *Inc, Sc 3* all around (15)
Round 5: *Inc, Sc 4* all around (18)
In the next round we will start to do color changes.
Round 6: Increase, Sc in the next 5 st. Sc in the next st. In BLK, Sc in that same st. Sc in the next 2 st. In WH, Sc in the next 4 st. In BR Sc in that same st. Sc in the next 2 st. In WH Sc in the next 3 st (21)
Now we will add 2 eye stitch markers. These will mark where to place the eyes later. Add a stitch marker in the 11th st and the 17th st.
Round 7: In WH Inc in the first st, Sc in the next 6 st. In BLK Inc in the next st, Sc in the next 3. In WH Sc in the next 4 st. In BR Sc in the next 3 st. Inc in the next st. In WH Sc in the next 2 st (24)
Round 8: In WH Inc, Sc in the next 7 st. In BLK Inc, Sc in the next 4 st. In WH Sc in the next 4 st. In BR Sc in the next 4 st, Inc in the next st. In WH Sc in the next 2 st (27)
Round 9: In WH Inc, Sc in the next 8 st. In BLK Inc, Sc in the next 5 st. In WH Sc in the next 4 st. In BR Sc in the next 5 st, Inc in the next st. In WH Sc in the next 2 st (30)
Add eyes in the marked areas now
Round 10-11: In WH Sc in the next 10 st. In BLK Sc in the next 7 st. In WH Sc in the next 4 st. In BR Sc in the next 7 st. In WH Sc in the next 2 st (30)
Round 12: In WH *Sc* all around (30)
We will continue in white.
Round 13: Repeat in the FLO *Sc, Inc next st* 5 times. In BOTH loops Sc in the next 4 st. *Dec, Sc in the next st* 5 times. Sc in the last st (30)
Round 14: In the FLO, Repeat *Sc next 2 st, Inc next st* 5 times. In BOTH loops Sc in the next 4 st. *Dec* 5 times. Sc in the last st (30)
Add stuffing to the head now. Add stuffing after every few rounds
Round 15-17: *Sc* all around (30)
Round 18: In BLK Sc in the next 6 st. In WH Sc in the next 12 st. In BLK Sc in the next 12 st (30)
Round 19: In BLK Inc in the next st, Sc in the next 5 st. In WH Sc in the next 12 st. In BLK Sc in the next 4 st. Repeat *Inc, Sc in the next st* 4 times (35)
Round 20: In BLK Sc in the next 5 st. In BR Sc in the next 17 st. In BLK Sc in the next 13 st (35)
Round 21: In BLK Sc in the next 3 st. In BR Sc in the next 23 st. In BLK Sc in the next 9 st (35)
Round 22: In BLK Sc in the next 3 st. In BR Sc in the next 24 st. In BLK Sc in the next 8 st (35)
Round 23: In BLK Sc in the next 2 st. In BR Sc in the next 29 st. In BLK Sc in the next 4 st (35)
Round 24: In BLK Sc in the next st. In BR Sc in the next 33 st. In BLK Sc in the next st (35)
Round 25-26: In BR *Sc* all around (35)
Round 27: Repeat *Dec, Sc in the next 4 st* 5 times. Dec, Sc in the next 3 st (29)
Round 28: Repeat *Dec, Sc in the next 3 st* 5 times. Dec, Sc in the next 2 st (23)
Stuff again firmly here. Stuff after each round.
Round 29: Repeat *Dec, Sc in the next 2 st* 5 times. Dec, Sc in the next 1 st (17)
Round 30: Repeat *Dec, Sc in the next st* 5 times. Dec (11)
Round 31: *Dec* 5 times, Sc in the last st (6)
Finish off now, leaving a tail for sewing closed. Sew the remaining stitches closed.
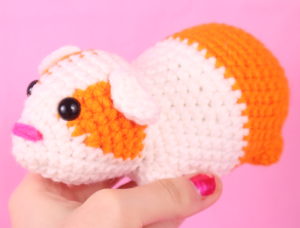
White & Orange Guinea Pig:
Start in White
Color Abbreviations:
WH = White
OR = Orange
Round 1: 6 Sc into a Magic Ring (6)
Round 2: *Inc, Sc in the next st* all around (9)
Round 3: *Inc, Sc 2* all around (12)
Round 4: *Inc, Sc 3* all around (15)
Round 5: *Inc, Sc 4* all around (18)
In the next round we will start to do color changes.
Round 6: Inc, Sc in the next 5 st. Sc in the next st. In OR Sc in that same st. Sc in the next 2 st. In WH Sc in the next 4 st. In OR Sc in that same st. Sc in the next 2 st. In WH Sc in the next 3 st (21)
Now we will add 2 eye stitch markers. These will mark where to place the eyes later. Add a stitch marker in the 11th st and the 17th st.
Round 7: In WH Inc in the first st, Sc in the next 6 st. In OR Inc in the next st, Sc in the next 3. In WH Sc in the next 4 st. In OR Sc in the next 3 st, Inc in the next st. In WH Sc in the next 2 st (24)
Round 8: In WH Inc in the first st, Sc in the next 7 st. In OR Inc in the next st, Sc in the next 4 st. In WH Sc in the next 4 st. In OR Sc in the next 4 st, Inc in the next st. In WH Sc in the next 2 st (27)
Round 9: In WH Inc in the first st, Sc in the next 8 st. In OR Inc in the next st, Sc in the next 5 st. In WH Sc in the next 4 st. In OR Sc in the next 5 st, Inc in the next st. In WH Sc in the last 2 st (30)
Add eyes in the marked areas now
Round 10-11: In WH Sc in the next 10 st. In OR Sc in the next 7 st. In WH Sc in the next 4 st. In OR Sc in the next 7 st. In WH Sc in the next 2 st (30)
Round 12: In WH *Sc* all around (30)
Round 13: Repeat in the FLO *Sc in the next st, Inc next st* 5 times. In BOTH loops Sc in the next 4 st. Repeat *Dec, Sc in the next st* 5 times. Sc in the last st (30)
Round 14: In BOTH Loops, Repeat *Sc next 2 st, Inc next st* 5 times. In BOTH loops Sc in the next 4 st. *Dec* 5 times. Sc in the last st (30)
Round 15-17: *Sc* all around (30)
Round 18: Inc in the first st, Sc in the next 21 st. Repeat *Inc, Sc in the next st* 4 times (35)
Round 19: *Sc* all around (35)
Round 20-26: In OR *Sc* all around (35)
Round 27: Repeat *Dec, Sc in the next 4 st* 5 times. Dec, Sc in the next 3 st (29)
Round 28: Repeat *Dec, Sc in the next 3 st* 5 times. Dec, Sc in the next 2 st (23)
Round 29: Repeat *Dec, Sc in the next 2 st* 5 times. Dec, Sc in the next 1 st (17)
Round 30: Repeat *Dec, Sc in the next st* 5 times. Dec (11)
Round 31: *Dec* 5 times, Sc in the last st (6)
Finish off now, leaving a tail for sewing closed. Sew the remaining stitches closed.
Arms: (Make 4)
- In main color for 1 colored guinea pig
- 2 front arms in white, 2 back arms in brown for black/brown guinea pig
- 2 front arms in white, 2 back arms in brown for orange/white guinea pig
Round 1: 6 Sc into a Magic Ring (6)
Round 2: *Sc* all around (6)
Round 3: *Inc, Sc* all around (9)
Finish off, leaving a long tail for sewing on. Pin arms on as shown. Make sure to set the guinea pig down to check all of the legs allow him to sit correctly! Sew on, you can add stuffing to the legs before fully sewing on. They will stand fine without stuffing as well!
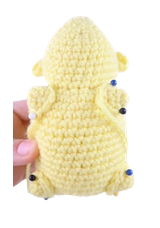
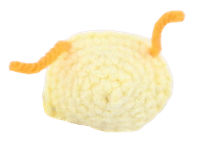
Ears: (Make 2)
- In main color for 1 colored guinea pig
- In white for black/brown guinea pig
- In white for orange/white guinea pig
Round 1: 6 Sc into a Magic Ring (6)
Round 2: *Inc* all around (12)
Finish off, leaving a long tail for sewing on. Fold the ear in half as shown.
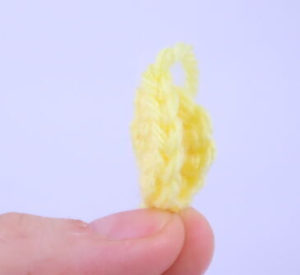
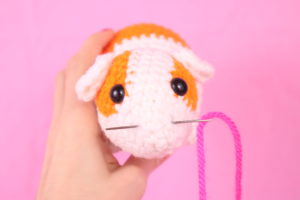
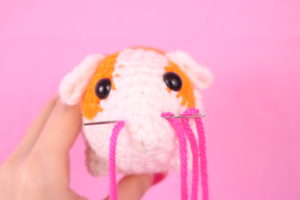
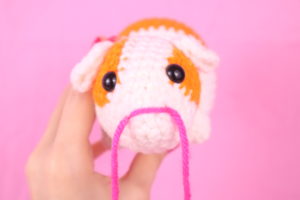
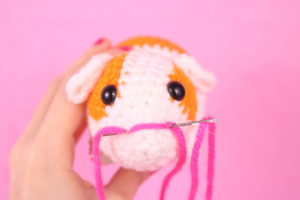
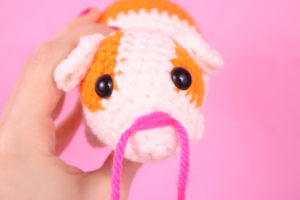
Nose:
In Pink
Place pink yarn on a sewing needle. Insert needle into the tip of the nose, and pull needle out at the opposite side (Pic 1). Reinsert needle into the original insertion spot. Pull needle out at the opposite side (Pic 2-3). Repeat 2-3 more times (Pic 4-5). Once done, tie the tail ends of yarn into very firm knots. Bring the knots into the head to hide. Cut excess yarn.
1. 2.
2.
3. 4.
4.
5. 6.
6.
Done! If you made a guinea pig I would LOVE to see it! You can post a picture in the comments below this post, or you can “try” it on Pinterest 🙂
If you liked this free guinea pig amigurumi crochet pattern, let me know what else you’d love to see in the comments!


18 Comments
Only recently started crochet a few days ago have made the 20min duck a few times but as soon as I saw this I knew I needed to try it. He’s not perfect but he’s so cute. My little ones have named him Bruce.
Definitely recommend giving it ago even if your new to the hobby like I am 🙂
Loved making this little guy, an almost exact replica of my childhood guinea pig scruffy!
could you explain to me how to do row 13-14 what part do i repeat? do i sc, 1 then inc next 5 then sc in the next 4 then dec 1 sc in the next 5? then repeat the same thing? any help i can get would be greatly appreciate. marilyn
You have to repeat the things in the **.
Here’s my little squeaker, thank you so much for the pattern
I am making my granddaughter, the white and brown guinea pig. I am a advanced crocheter, but I cannot figure out line 13 &14. It may be my starting point and the repeat could you explain it to me please thank you.. Marilyn
Hi there! I know it’s been awhile since you were wondering about this but I thought I’d try to help.
On Round 13 and 14 I only did FLO for the beginning of Round 13 where it states. Then used both loops for the rest of those rows. I did however invisible increase and decrease as well. Hope this helps!
You have to repeat the things in it **.
I can’t get row 13 to work! I tried over and over if I am reading correctly first part uses 10 stitches and second part used 35 and one SC on end! it’s just not working for me 🙁 am I reading it wrong?
did you ever figure this pattern out? I bought the pattern and still have not gotten through roll 13. I did email the lady waiting for a reply i can let you know when i hear.
I know this is a thread from a year ago but just in case anyone else struggles, I’ll try to help with Round 13:
Repeat in Front loops only (sc, inc) x5
Then both loops 4sc, then (dec, sc) x5
Sc in the last stitch.
Thank you for the pattern.
Turned out so cute. I did have to adjust row 13 to get it to work but otherwise perfect!
Turned out so cute
so cute. love it
i love this pattern. I’ve made 4 and there names are nibbles sniffles choc-tart and little G. i’m very happy with how they came out the’re super cute!!! 🙂
What’s the best way to handle the different colors of yarn? Do you recommend cutting each time and just use the ends as stuffing? How about dragging the yarn like you would in stranded knitting? I
Thanks.
Barbara
Hi Barbara,
I like to carry the yarn instead of cutting it. I find cutting the yarn more tedious because I’d have to knot the yarn so it wouldn’t loosen over time. I don’t crochet the carried yarn, I just leave it on the wrong side of the toy so you won’t see it anyways!