

Purchase the PDF version here

Supplies:
4mm crochet hook, 4/Medium weight yarn in any desired colors, and white for the teeth. 10mm safety eyes, tapestry needle, scissors, and stuffing.
Additional Information:
Difficulty: Easy
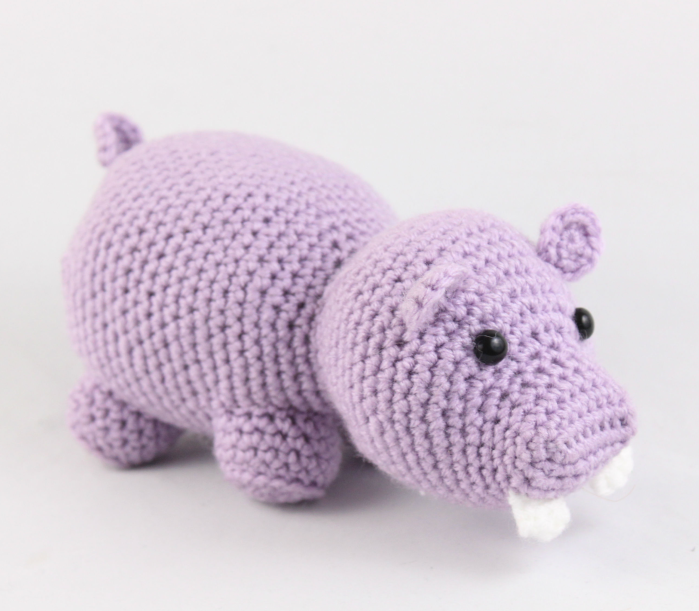
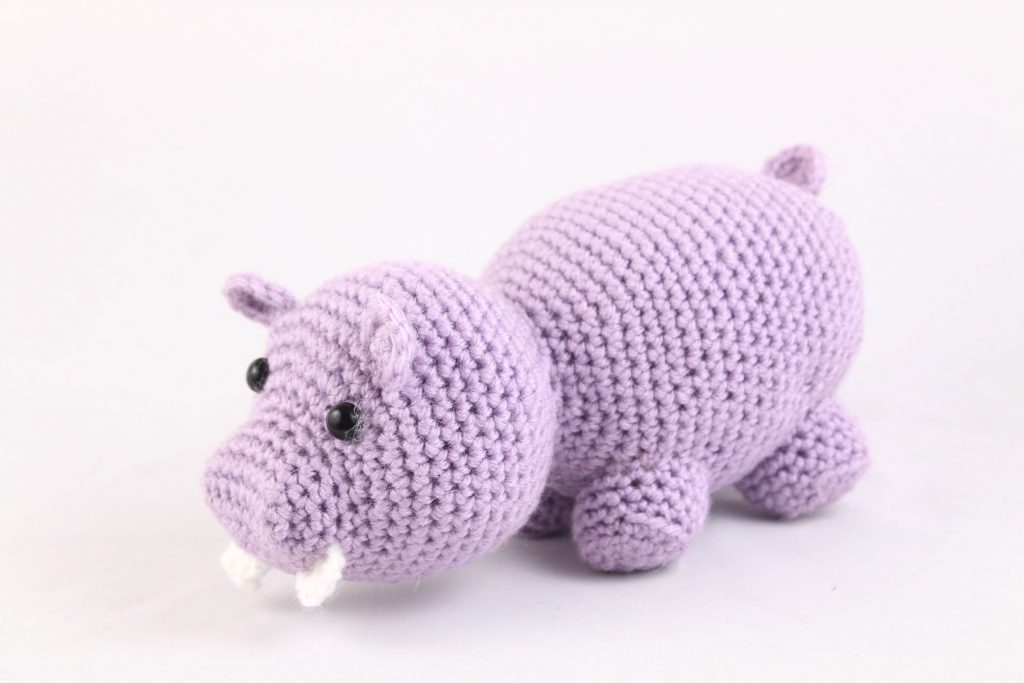
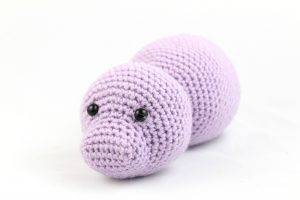
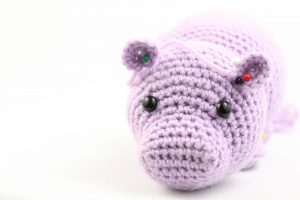
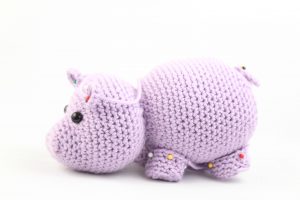
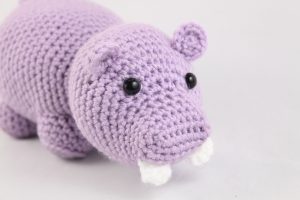
This pattern makes a hippo! This pattern refers to “Main Color”, which is the main color you want your hippo to be. I used purple as the “Main Color” for mine. You can use any “Main Color” you want. First, we start by making the head, which leads into the body. They are both one piece. Next, we make the ears, tail, and then teeth. Then we’re done!
Body:
In Main Color
Round 1: Ch 10. Sc in the 2nd ch from the hook. Sc in that same st. Sc in the next 7 st, Inc in the next st. Now we will be on the other side of the Ch. Sc in the next 7 st (18)
Round 2: *Inc* in the first st, Sc in the next 8 st, *Inc* in the next st, Sc in the next 8 st (20)
Round 3-5: *Sc* all around (20)
Round 6: Sc in the next 5 st, *Inc* in the next 6 st, Sc in the next 9 st (26)
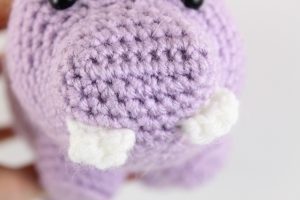
Round 7: Sc in the next 5 st, *Inc* in the next st, Sc in the next st. Sc in the next st and add a different colored st marker to the Sc just made. This marks where to place the eye. Sc in the same st. Sc in the next st. Repeat *Inc in the next st, Sc in the next st* 2 times. Sc in the next st. Sc in the same st and add a different colored st marker to the Sc just made. Sc in the next st, *Inc* in the next st, Sc in the last 10 st (32)
Round 7 eye markers will look like this
Round 8: Sc in the next 5 st, *Inc in the next st, Sc in the next 2 st* 6 times, Sc in the last 9 st (38)
Round 9: Sc in the next st, Repeat *Inc in the next st, Sc in the next 8 st* 4 times, Sc in the last st (42)
Round 10-17: *Sc* all around (42)
Round 18: *Dec, Sc 5* all around (36)
Round 19: *Dec, Sc 4* all around (30)
Round 20: *Dec, Sc 3* all around (24)
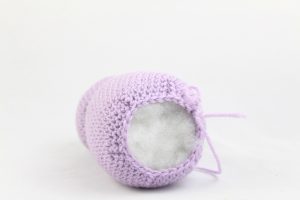
Add safety eyes here. Now stuff the head.

Round 21: *Dec, Sc 2* all around (18)
Round 22: *Inc, Sc 2* all around (24)
Round 23: *Inc, Sc 3* all around (30)
Round 24: *Inc, Sc 4* all around (36)
Round 25: *Inc, Sc 5* all around (42)
Round 26: *Inc, Sc 6* all around (48)
Round 27-42: *Sc* all around (48)
Round 43: *Dec, Sc 6* all around (42)
Round 44: *Dec, Sc 5* all around (36)
Round 45: *Dec, Sc 4* all around (30)
Stuff here. Add additional stuffing when doing the following rounds.
Round 46: *Dec, Sc 3* all around (24)
Round 47: *Dec, Sc 2* all around (18)
Round 48: *Dec, Sc* all around (12)
Round 49: *Dec* all around (6)
Finish off. Add any additional stuffing and sew closed.
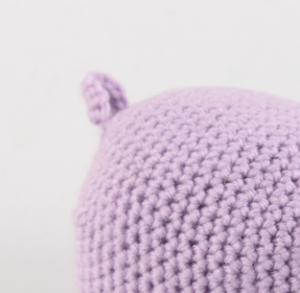
Ears: (Make 2)
In Main Color
Round 1: 6 Sc in Magic Ring (6)
Round 2: *Inc* all around (12)
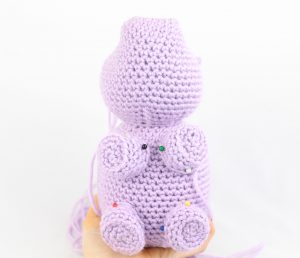
Finish off. Pin to the head as shown and sew on.
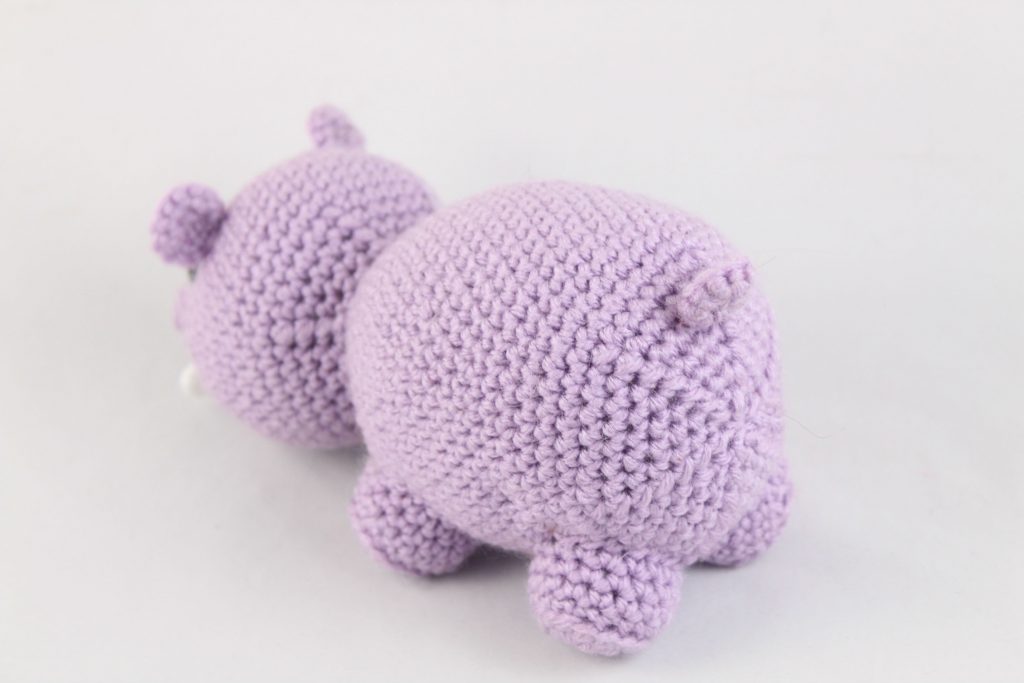
Tail:
In Main Color
Round 1: 6 Sc in Magic Ring (6)
Round 2: *Inc* all around (12)
Finish off. Pin to the butt as shown and sew on.
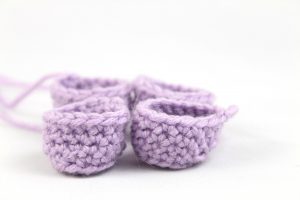
Legs: (Make 4)
In Main Color
Round 1: 6 Sc in Magic Ring (6)
Round 2: *Sc* all around (6)
Round 3: *Inc, Sc* all around (9)
Round 4: *Sc* all around (9)
Round 5: *Inc, Sc 2* all around (12)
Round 6: *Sc* all around (12)
Finish off and pin as shown. Sew on, and stuff before fully sewing on.
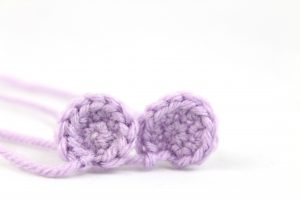
Teeth: (Make 2)
In White
Round 1: 6 Sc in Magic Ring (6)
Round 2: *Sc* all around (6)
Round 3: *Inc, Sc* all around (9)
Round 4: *Sc* all around (9)
Finish off and pin & sew on as shown.
 Done! If you finished this pattern, I would be SO HAPPY if you


7 Comments
Love love loved your pattern, thanks so much for sharing!
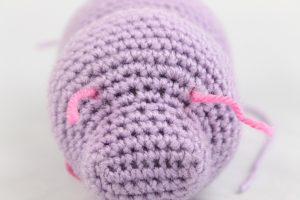
I made to tiny magic circles and stitched them to his snout for hippo nostrils, and I think they helped make his face extra hippo looking 🙂
Hi Katy, that’s so awesome I love that you enjoyed this pattern! The addition of nostrils is a great idea, I’m sure your hippo looks awesome. Thank you for sharing 🙂
Hi! How many yards of yarn does this pattern need?
Hi there Jama, usually I get the 364 yard skeins, and I used about 1/3rd of that. So that should be approximently 120 yards
Hello! When I follow the pattern for the legs, they come out looking more cone shaped instead of spherical like yours. Is there something I am missing?
Hi Alissa! You may want to re-check your stitch count to make sure you have the same number of stitches after each round 🙂 This will ensure that you are correctly following the pattern and the leg will come out with the correct shape! I’m happy to help figure out what may be going wrong, can you let me know how many stitches you have and what round of the leg you’re on? ❤️
Hello!
I have a question—is it possible there is an error in the posted pattern of the legs? The pattern posted doesn’t seem to match the photo and the legs turn out SO small and more rounded versus flat at the base of them.
The photo appears to have around 16 stitches (or definitely more than 12 or 14sts) and using back loops but the pattern doesn’t indicate either of those features.
Thank you for any help!