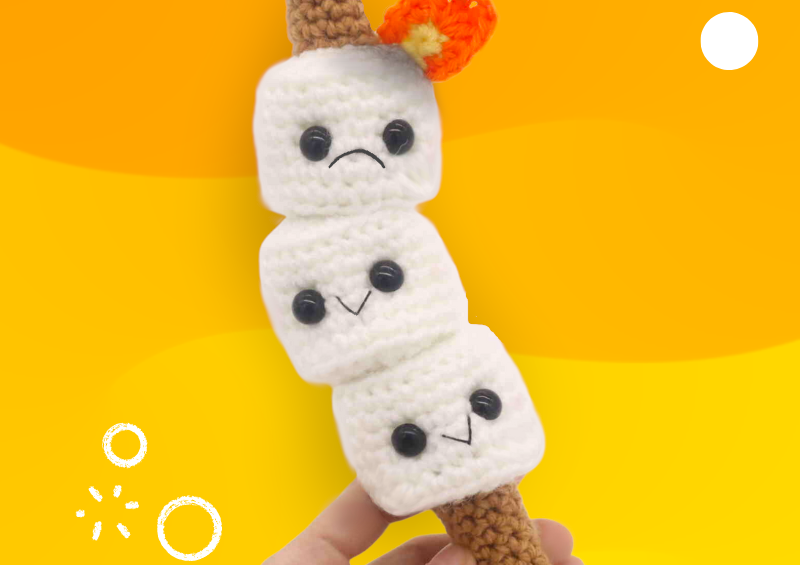
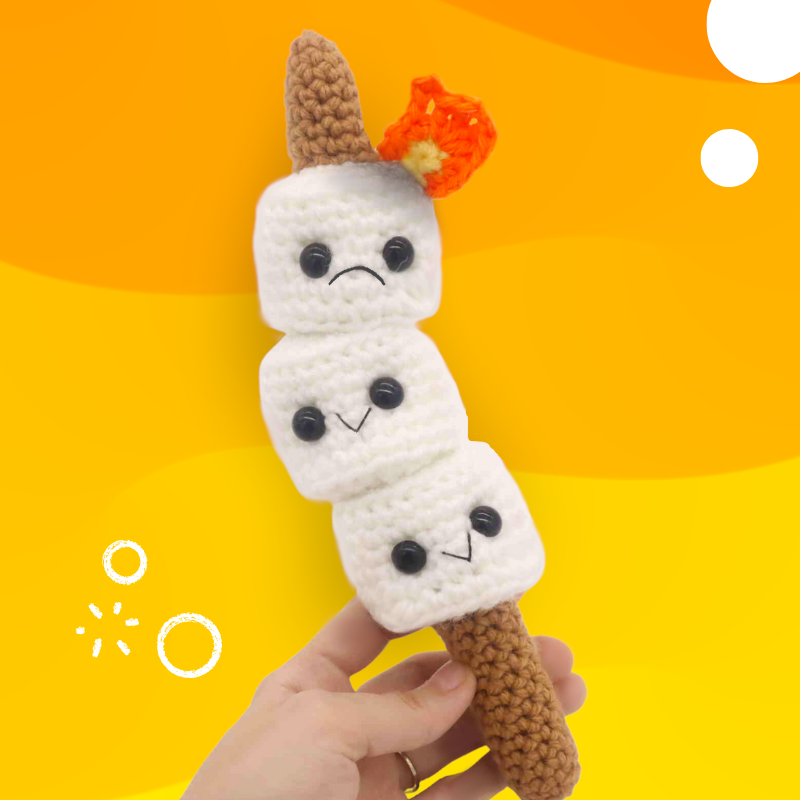
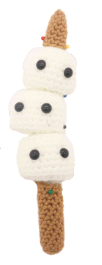
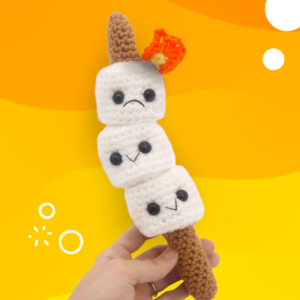
Marshmallow Buddies Amigurumi – Free Crochet Pattern
Print this pattern out – purchase the PDF here!

 Supplies:
• Yarn 4/Medium Weight Yarn in…
White, brown, yellow and orange
•4mm Crochet Hook
•Tapestry needle
•Scissors
•Stuffing
•10mm safety eyes
•Black eye shadow and brush for burnt marshmallow
•Wooden dowel (optional)
•Hot glue gun (optional)
Additional Information:
•Difficulty: Easy
•Size: 10″ tall
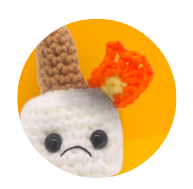
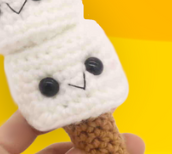
Roasting marshmallows is one of the best summer traditions ever! They’re fun and so delicious. Apparently marshmallows can also be cute! This crochet pattern is easy, quick, and fun! They make a great gift for anyone who loves camping.
Let’s get started!
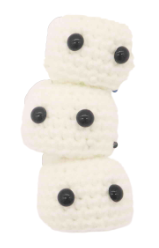
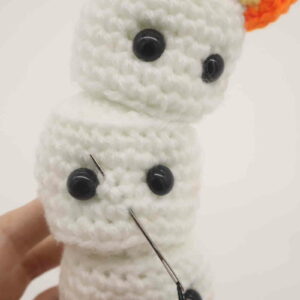
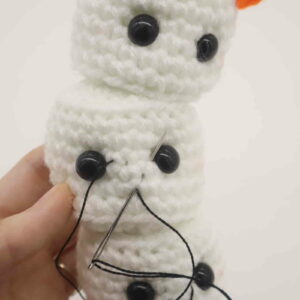
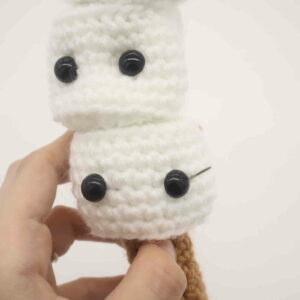
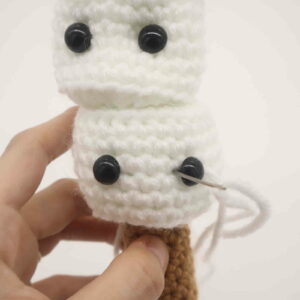
Marshmallow: (Make 3)
In White
Round 1: 6 Sc into a Magic Ring (6)
Round 2: *Inc* all around (12)
Round 3: *Inc, Sc in the next st* all around (18)
Round 4: *Inc, Sc in the next 2 st* all around (24)
Round 5: In the BLO (Back Loop Only), *Sc* all around (24)
Round 6-7: *Sc* all around (24)
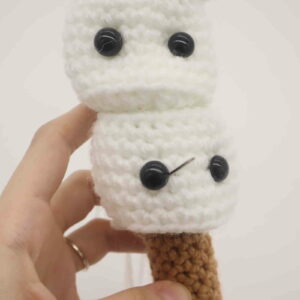
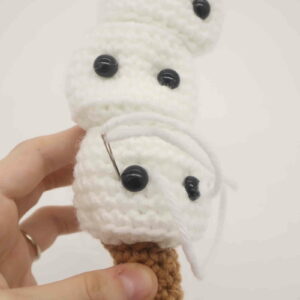
Now we will mark where to place the safety eyes. Add an eye stitch marker into the 10th and 14th stitch. We will place the eyes in these marked areas later.
Round 8-10: *Sc* all around (24)
Round 11: Working in the BLO, repeat *Dec, Sc in the next 2 st* all around (18)
Stuff the marshmallow here. Continue stuffing after each round.
Round 12: Working in BOTH loops, repeat *Dec, Sc in the next st* all around (12)
Round 13: *Dec* all around (6)
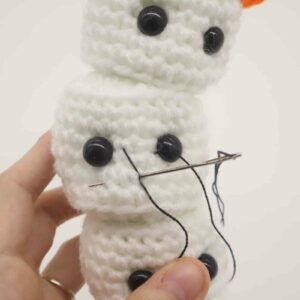
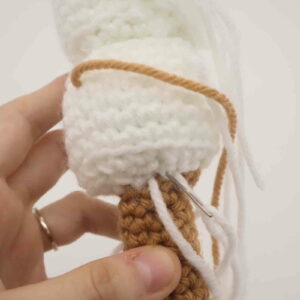
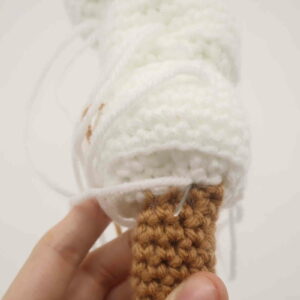
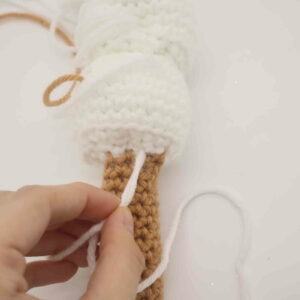
Finish off, leaving a long tail for sewing. Stack them on as shown and sew or hot glue on.
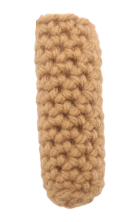
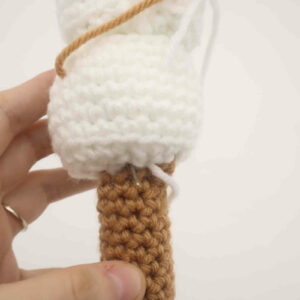
Bottom Stick:
In Brown
Round 1: 6 Sc into a Magic Ring (6)
Round 2: *Inc, Sc in the next st* all around (9)
Round 3: Working in the BLO, *Sc* all around (9)
Round 4-14: Working in both loops, *Sc* all around (9)
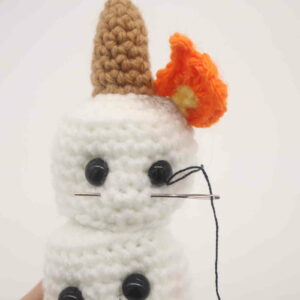
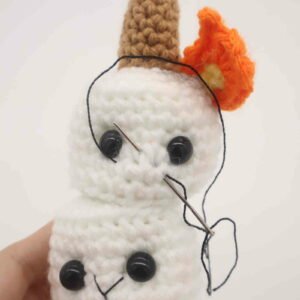
Finish off, leaving a long tail sewing. Stuff the stick firmly now, you can add in a dowel to stabilize the stick. Now pin the stick on as shown and sew on. Once sewn on, finish off and weave in ends. Cut any excess yarn.
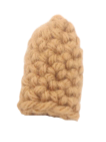
Top Stick:
In Brown
Round 1: 6 Sc into a Magic Ring (6)
Round 2: *Sc* all around (6)
Round 3: *Inc, Sc in the next st* all around (9)
Round 4-8: *Sc* all around (9)
Finish off, leaving a long tail for sewing. Stuff the stick firmly now. Now pin the stick on as shown and sew on. Once sewn on, finish off and weave in ends. Cut any excess yarn.
Smoke:
Take a small amount of black eye shadow and pat it onto a brush. Tap off excess powder, lightly swipe the brush onto a paper towel to get rid intense pigment. Now rub the bristles in circles onto the corner of the marshmallow to make the darkened effect. Go lighter on the edges and darker on the inside. Add more eye shadow onto the brush if needed.
Fire:
Start in Yellow
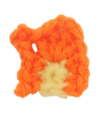
Round 1: 6 Sc into a Magic Ring (6)
Round 2: Change to orange. Inc in the next st. Sc in the next st, Hdc into the same st. Dc in the next st, Trc in the same st, Ch 2, Trc in the same st, Dc in the same st. Ch 3. Sc in the 2nd Ch from the hook, Sc in the next ch. Working back on the circle, Hdc in the next st, Sc in the same st. Inc in the next st.
Finish off, leaving a long tail for sewing. Pin the fire on as shown and sew on.
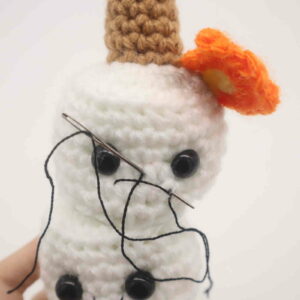
Smile:
In Black Embroidery Thread
Insert needle with thread into the middle mouth area of the toy, and pull the needle out next to the toy’s left eye as shown (Pic 1). Reinsert needle into the middle mouth area (Pic 2) and pull needle out next to the right eye (Pic 2). Reinsert needle into the middle mouth area (Pic 3) and pull needle out a few stitches over (Pic 3). Tie the ends of thread into firm knots and bring them inside the toy to hide. This will secure the smile. Done!
1. 2.
2. 3.
3. 4.
4.
Frown:
In Black Embroidery Thread
Insert needle with thread into the right side of the toy’s face and pull out a few stitches to the left (Pic 1). Reinsert needle into the original insertion spot (Pic 2) and pull needle out where shown, making sure the thread lands under the needle (Pic 2). Reinsert needle into the same insertion spot you just pulled out of, making sure the needle lands under the thread (Pic 3). Tie the ends of thread into firm knots and bring them inside the toy to hide. This will secure the frown. Done!
1. 2.
2. 3.
3. 4.
4.
Face Shaping:
In White
To make the marshmallow look puffier, we can “shape” the face! First, insert needle with thread into the back bottom of the marshmallow (Pic 1). Pull needle out at the toy’s right eye (Pic 2).
1. 2.
2.
Reinsert needle to the left side of the toy’s right eye (Pic 3). Pull needle out at the same back area, except one stitch over (Pic 4).
3. 4.
4.
Reinsert needle one stitch over (Pic 5) and pull needle out to the right side of the toy’s left eye (Pic 6).
5. 6.
6.
Reinsert needle to the left side of the toy’s left eye (Pic 7). Pull needle out to the same back area of the marshmallow where the tail of yarn is coming out of (Pic 8).
7. 8.
8.
Pull both ends of yarn to form the face (Pic 9). Tie both ends of yarn together to form a firm knot Bring the knot inside the toy to hide. Cut any excess yarn.
9. 10.
10.
Done! If you made these marshmallows on a stick, I would LOVE to see! You can show me by posting a picture in the comments section underneath this post 🙂


4 Comments
It is adorable and I love it. Keep up the good work. I want to thank you for the free patterns you give us and also let you know I think you’re an amazing designer. Thanks again…
Aw thank you, Nancy! I’m so happy that you like this pattern and that you think I’m a good designer 😄 That’s the best compliment I could ever get, thank you! I hope you have a fantastic day and happy crocheting!
Wow then is beautiful, I just want to say, that you make the best amigurumi pattern. I love them so much. You are fantastic to make patterns for amigurumi. Thanks a lot I appreciate your work so much. Just want to say – keep going. And Thanks so much again.
Thank you so much! I really appreciate such kind words, I love that you enjoy my patterns so much 🙂 You just made my day! 😍 Thank you!