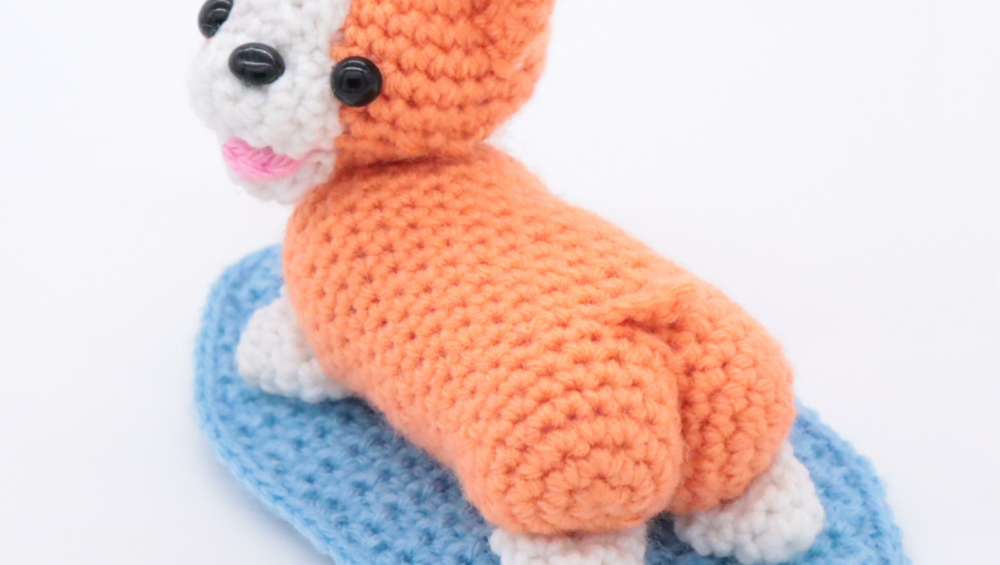
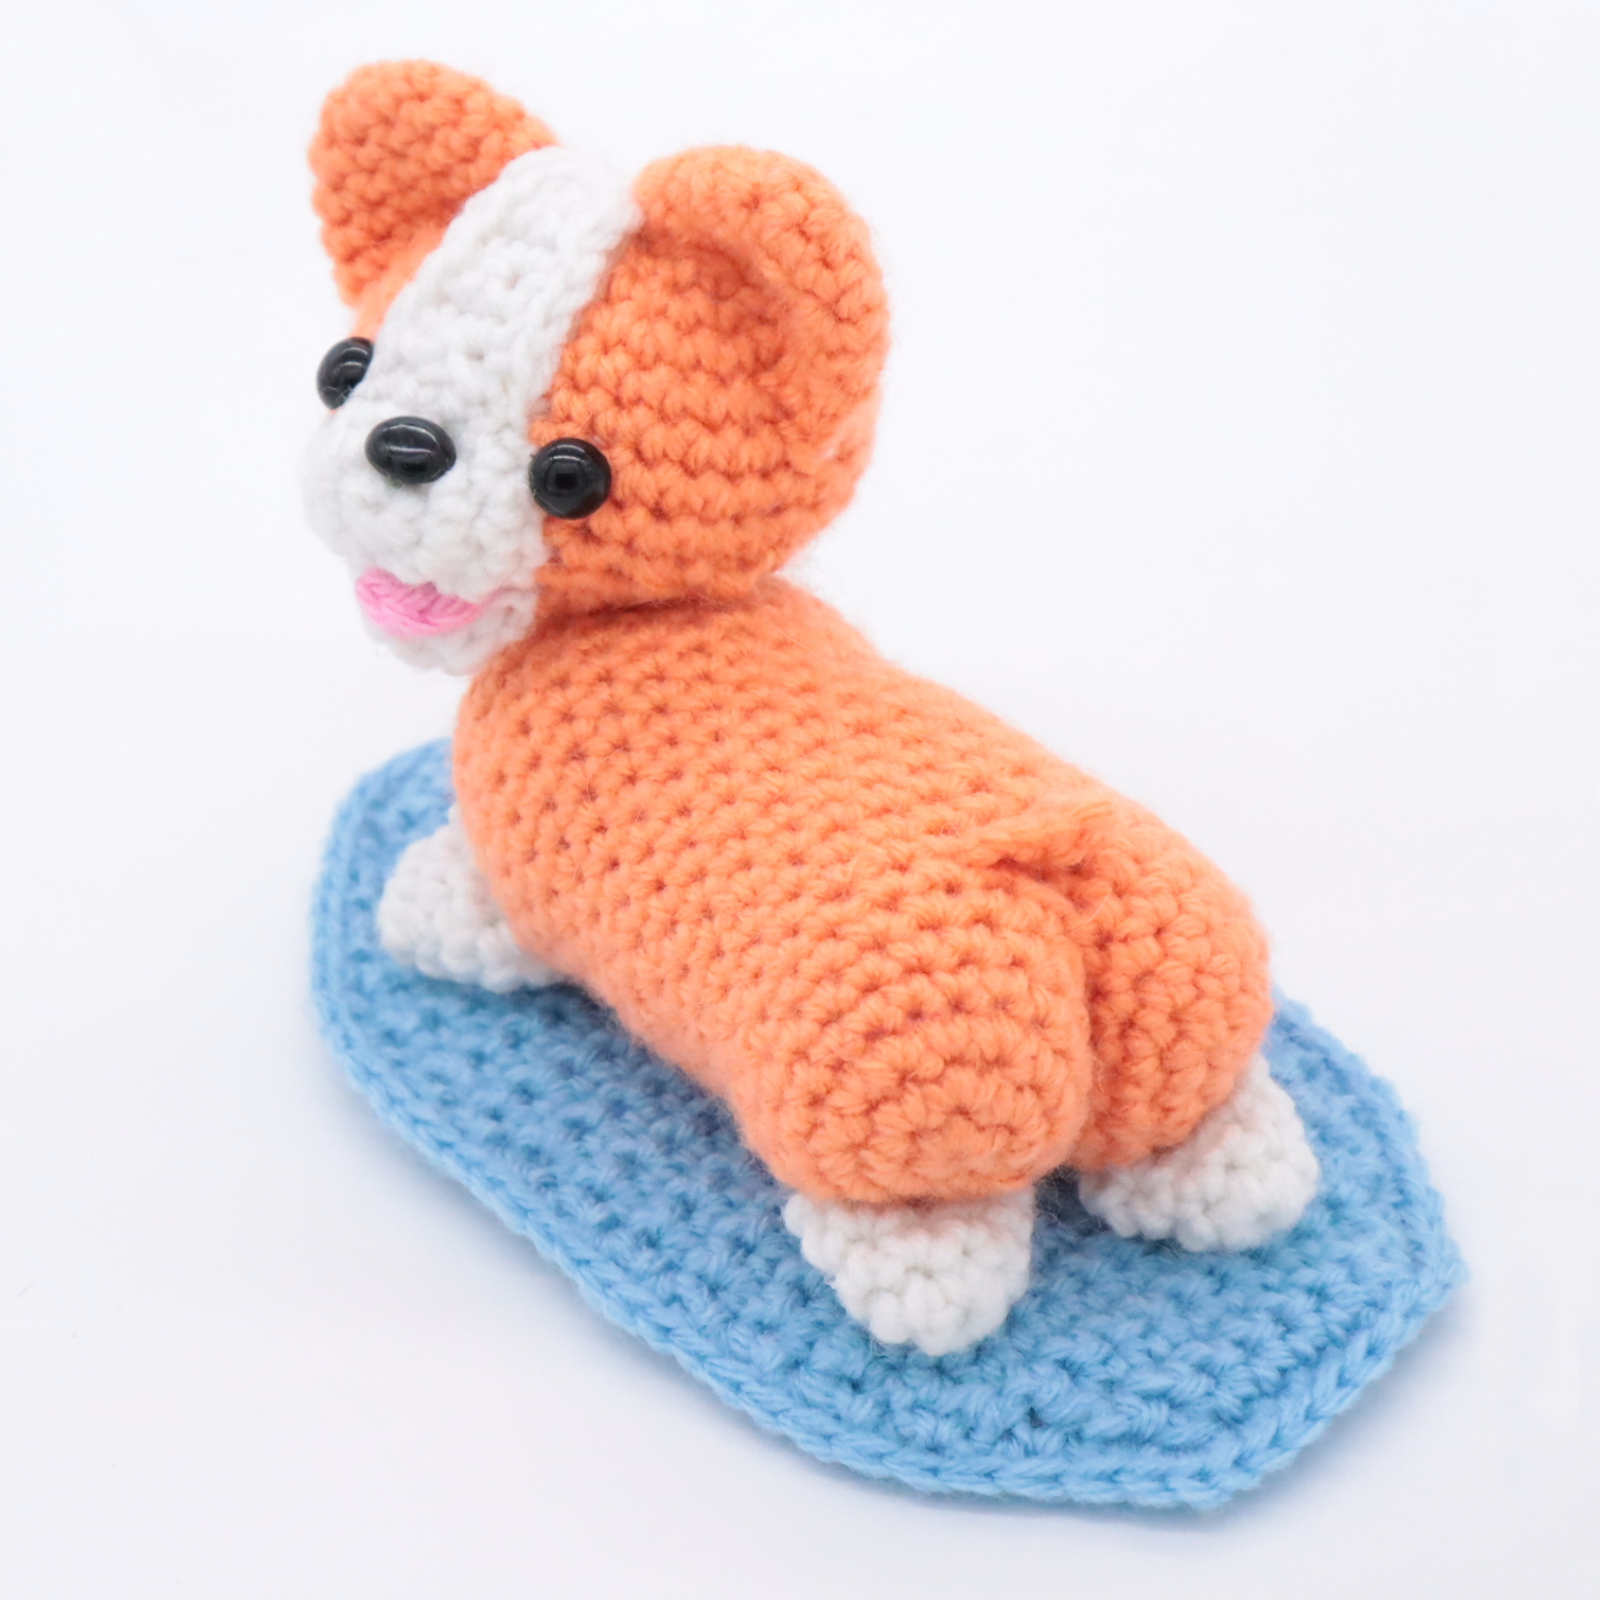
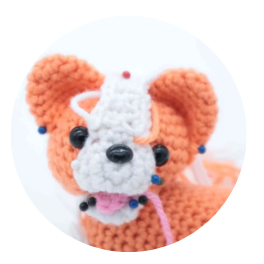
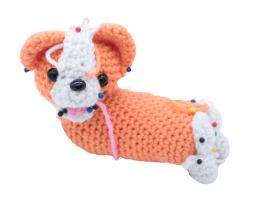
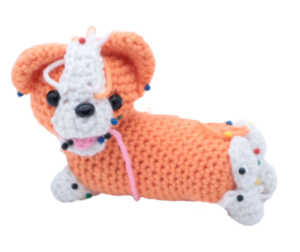
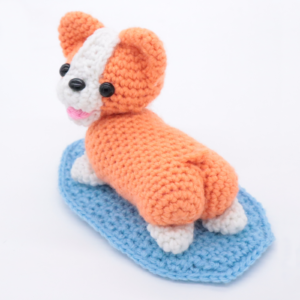
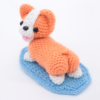
Corgi on a Surfboard Amigurumi – Free Crochet Pattern
Print this pattern out – purchase the PDF version here!

 Supplies:
• Yarn 4/Medium Weight Yarn in…
Light orange, white, pink, and blue
•4mm Crochet Hook
•10mm safety eyes, oval safety nose
•Tapestry needle
•Scissors
•Stuffing
•Hot glue (optional)
Additional Information:
•Difficulty: Easy | Size: Body is 5″ long | foot to head 4.5″ tall
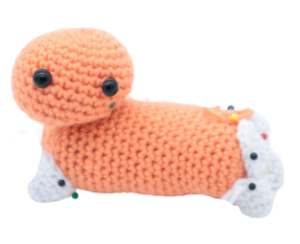
The cutest thing about Corgis are their adorable butts! I thought it would be hilarious to add a Corgi struttin’ his stuff while on a surfboard! While he’s super cute on a surfboard, this pattern is just as adorable if you choose to make it without the surfboard. This pattern is easy, however it does require crocheting multiple parts.
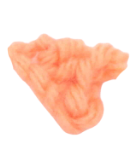
First butt piece:
In Orange
Round 1: 6 Sc into a Magic Ring (6)
Round 2: *Inc* all around (12)
Round 3: *Inc, Sc in the next st* all around (18)
Round 4-6: *Sc* all around (18)
Finish off now.
Second butt piece:
In Orange
Round 1: 6 Sc into a Magic Ring (6)
Round 2: *Inc* all around (12)
Round 3: *Inc, Sc in the next st* all around (18)
Round 4-5: *Sc* all around (18)
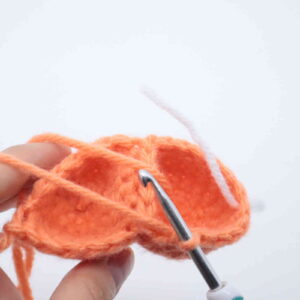
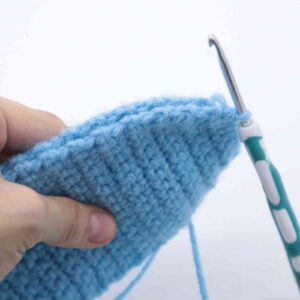
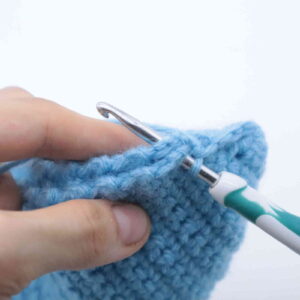
Round 6: Sc in the next 6 st. Now get the first butt piece and align the stitches to the second butt piece (Pic 1). Going through BOTH butt pieces at the same time (Pic 2), Sc in the next 6 st (Pic 3).
1.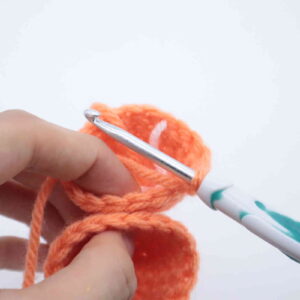 2.
2. 3.
3.
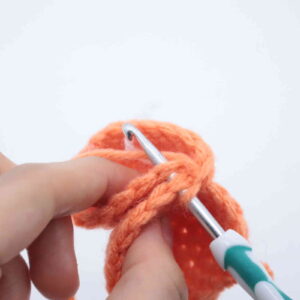
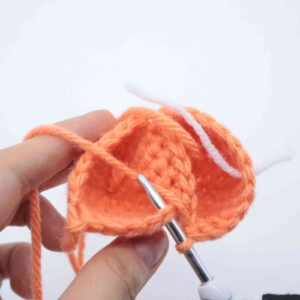
Now working back on the second butt piece (the one with the stitch marker in it, Pic 4), Sc in the next 6 st. (Stitch count: 6 stitches connecting the two butt pieces (we will not crochet over these 6 stitches in the next round), and 12 stitches on each butt piece.)
4.
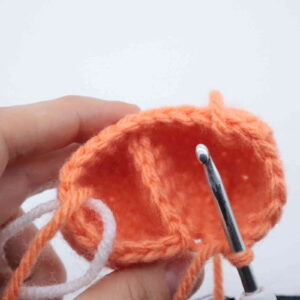
Round 7: Sc in the next 6 st (Pic 5).
5.
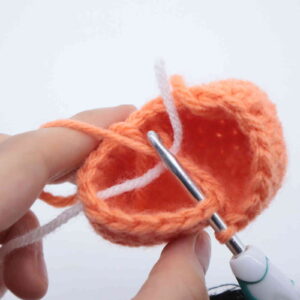
On the other butt piece, Sc in the next 12 st (Pic 6-7).
6. 7.
7.
Working back on the other piece (the one with the stitch marker in it), Sc in the next 6 st (Pic 8) (Stitch count: 24)
8.
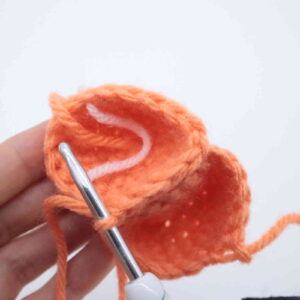
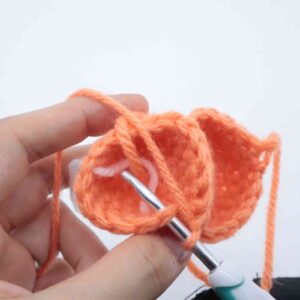
Round 8-21: *Sc* all around (24)
Stuff the body now. Continue stuffing after each round.
Round 22: *Dec, Sc in the next 2 st* all around (18)
Round 23: *Dec, Sc in the next st* all around (12)
Round 24: *Dec* all around (6)
Finish off, leaving a long tail for sewing. Sew the remaining stitches closed and weave in ends. Cut any excess yarn.
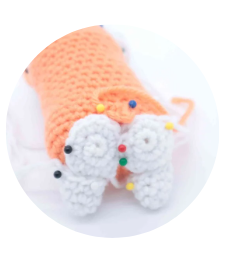
Butt Cheeks: (Optional)
In White
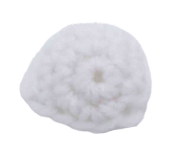
I ended up not using the butt cheeks for my corgi, this step is optional.
Round 1: 6 Sc into a Magic Ring (6)
Round 2: *Inc* all around (12)
Round 3: Sc in the next st, 2 Hdc in each of the next 2 st, Hdc in the next st, SlSt in the next st
Finish off. Pin each butt cheek on as shown and sew or hot glue on. Once done, weave in ends and cut any excess yarn.
Legs: (Make 2)
In White
Round 1: 6 Sc into a Magic Ring (6)
Round 2: *Sc* all around (6)
Round 3: Sc in the next 2 st, Inc in each of the next 2 st, Sc in the next 2 st (8)
Round 4-5: *Sc* all around (8)
Finish off, leaving a long tail for sewing. Pin the legs on as shown. Since the legs are small and will be squished down, they don’t require stuffing. Now sew or hot glue on. Once done, weave in ends and cut any excess yarn.
Tail:
In Orange
Row 1: Ch 4. SlSt in the 2nd Ch from the hook, Sc in the next st, Hdc in the next ch. Finish off, leaving a long tail for sewing. Pin on where shown and sew on. Once done, weave in ends and cut any excess yarn.
Head:
In Orange
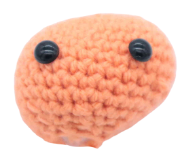
The head is decreased on one side to allow it to sit more flush with the body.
Round 1: 6 Sc into a Magic Ring (6)
Round 2: *Inc* all around (12)
Round 3: *Inc, Sc in the next st* all around (18)
Round 4: *Inc, Sc in the next 2 st* all around (24)
Round 5: *Inc, Sc in the next 3 st* all around (30)
Round 6-8: *Sc* all around (30)
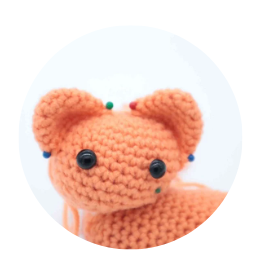
Now we will mark where to place the safety eyes. Since the head is slightly tilted, I found that adding the safety eyes 1 round apart made the eyes look better. They looked misaligned if they were placed on the same round. Because of this, we’re placing only 1 eye on Round 8. Mark the 6th stitch in Round 8 with a different colored stitch marker. Later we will replace this marker with a safety eye.
Round 9: *Sc* all around (30)
Now we will mark where to place the other safety eye. Add another differently colored stitch marker into Round 9 in the 1st stitch. Only move your round stitch marker in the next round, do not move your eye stitch marker.
Round 10: Sc in the next 8 st. Dec 6 times. Sc in the next 10 st (24)
Round 11-12: *Sc* all around (24)
Add the safety eyes into the marked areas now.
Round 13: *Dec, Sc in the next 2 st* all around (18)
Stuff the head firmly now. Continue stuffing after each round.
Round 14: *Dec, Sc in the next st* all around (12)
Round 15: *Dec* all around (6)
Finish off, leaving a long tail for sewing. Sew the remaining stitches closed and weave in ends. Cut any excess yarn. You can pin the head on as shown and sew/hot glue it on now, or wait until you have the head fully assembled with the ears, nose, mouth, etc.
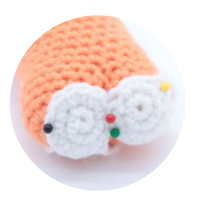
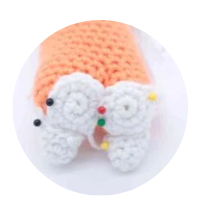
Ears: (Make 2)
In Orange
Round 1: 6 Sc into a Magic Ring (6)
Round 2: *Inc, Sc in the next st* all around (9)
Round 3: *Inc, Sc in the next 2 st* all around (12)
Round 4: *Sc* all around (12)
Round 5: *Inc, Sc in the next 3 st* all around (15)
Round 6: *Sc* all around (15)
Finish off, leaving a long tail for sewing. Pin the ears on as shown and sew on. Once done, weave in ends and cut any excess yarn.
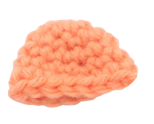
Nose:
In White
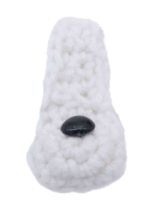
Round 1: 6 Sc into a Magic Ring (6)
Round 2: *Inc* all around (12)
Round 3: *Sc* all around (12)
Round 4-7: *Sc* all around (12)
Row 8: Ch 1 and turn, Sc in the next 3 st (3)
Row 9: Ch 1 and turn, Sc in the next st, skip the next st, Sc in the next st (2)
Row 10-14: Ch 1 and turn. Sc in the next 2 st (2)
I slip stitched around the edged of the rows to make a smoother finish, but this is optional.
Finish off, leaving a long tail for sewing. Pin the nose on as shown and sew the nose area on. You can sew or hot glue the upper nose area on. Once done, weave in ends and cut any excess yarn.
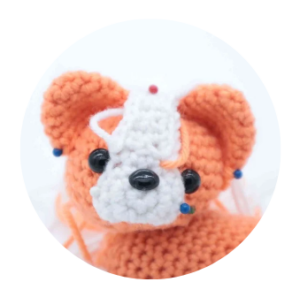
Mouth:
In White
Round 1: 6 Sc into a Magic Ring (6)
Round 2: *Inc, Sc in the next st* all around (9)
Finish off, leaving a long tail for sewing. Pin the mouth on as shown and sew on. Once done, weave in ends and cut any excess yarn.
Tongue:
In Pink
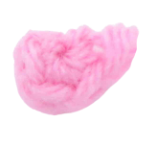
Round 1: Make 4 Sc into a Magic Ring. Tighten the ring, then finish off, leaving a long tail for sewing. Pin the tongue on as shown and sew or hot glue on. I find hot gluing this piece to be easier. Then weave in ends and cut any excess yarn.
Now you can sew/hot glue on the head if you haven‘t already.
Arms: (Make 2)
In White
Round 1: 6 Sc into a Magic Ring (6)
Round 2: *Sc* all around (6)
Round 3: Sc in the next 2 st, Inc in each of the next 2 st, Sc in the next 2 st (8)
Round 4-6: *Sc* all around (8)
Finish off, leaving a long tail for sewing. Pin the legs on as shown. Since the legs are small and will be squished down, they don’t require stuffing. Now sew or hot glue on. Once done, weave in ends and cut any excess yarn.
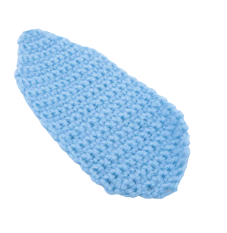
Surfboard: (Make 2)
In Blue
Row 1: Ch 3. Inc in the 2nd Ch from the hook. Inc in the next st (4)
Row 2: Ch 1 and turn. Inc in the next st, Sc in the next 2 st, Inc in the next st (6)
Row 3: Ch 1 and turn. Sc in the next 6 st (6)
Row 4: Ch 1 and turn. Inc in the next st, Sc in the next 4 st, Inc in the next st (8)
Row 5: Ch 1 and turn. Inc in the next st, Sc in the next 6 st, Inc in the next st (10)
Row 6: Ch 1 and turn. Sc in the next 10 st (10)
Row 7: Ch 1 and turn. Inc in the next st, Sc in the next 8 st, Inc in the next st (12)
Row 8: Ch 1 and turn. Inc in the next st, Sc in the next 10 st, Inc in the next st (14)
Row 9-29: Ch 1 and turn. Sc in the next 14 st (14)
Row 30: Ch 1 and turn. Dec 1 time, Sc in the next 10 st, Dec 1 time (12)
Row 31: Ch 1 and turn. Dec 1 time, Sc in the next 8 st, Dec 1 time (10)
Row 32: Ch 1 and turn. Dec 1 time, Sc in the next 6 st, Dec 1 time (8)
Row 33: Ch 1 and turn. Sc in the next 8 st (8)
Row 34: Ch 1 and turn. Dec 1 time, Sc in the next 4 st, Dec 1 time (6)
Finish off the first surfboard, leaving a tail for weaving in ends. Make the second surfboard, but do NOT finish off the second surfboard. Now we will continue with the assembly.
Surfboard Assembly:
In Blue
Align both surfboards together, making sure they match up. Going through BOTH stitches of both surfboards, Sc them together. When you meet the two lower corners of the surfboard (on the bottom of the surfboard) crochet 3 times into 1 stitch at each corner to make a more defined edge. Once done crocheting both surfboards together, complete with a SlSt, then weave in ends. Cut any excess yarn. Done!
You can hot glue the toy to the surfboard or leave them as two separate pieces.
 Done! If you made this corgi, I would LOVE to see! You can show me by posting a picture in the comments section underneath this post 🙂


1 Comment
Hy! Love this pattern ❤️
I have a question, do you have any tips for sewing circles ( Like the butt cheeks in this pattern)
Without it being visible?
I struggle a lot sewing and making it look neat
Thank you