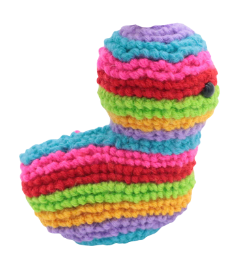
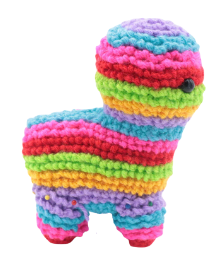
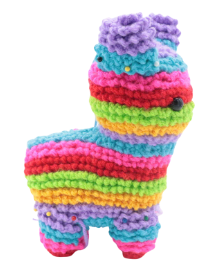
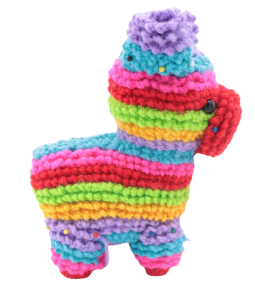
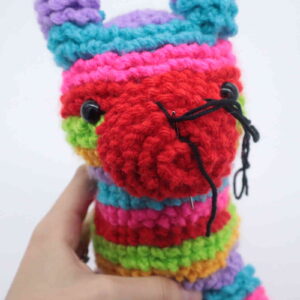
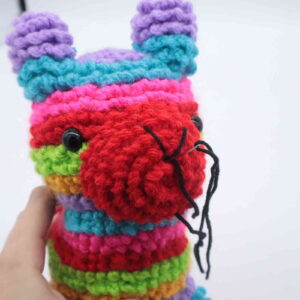
Pinata Amigurumi – Free Crochet Pattern

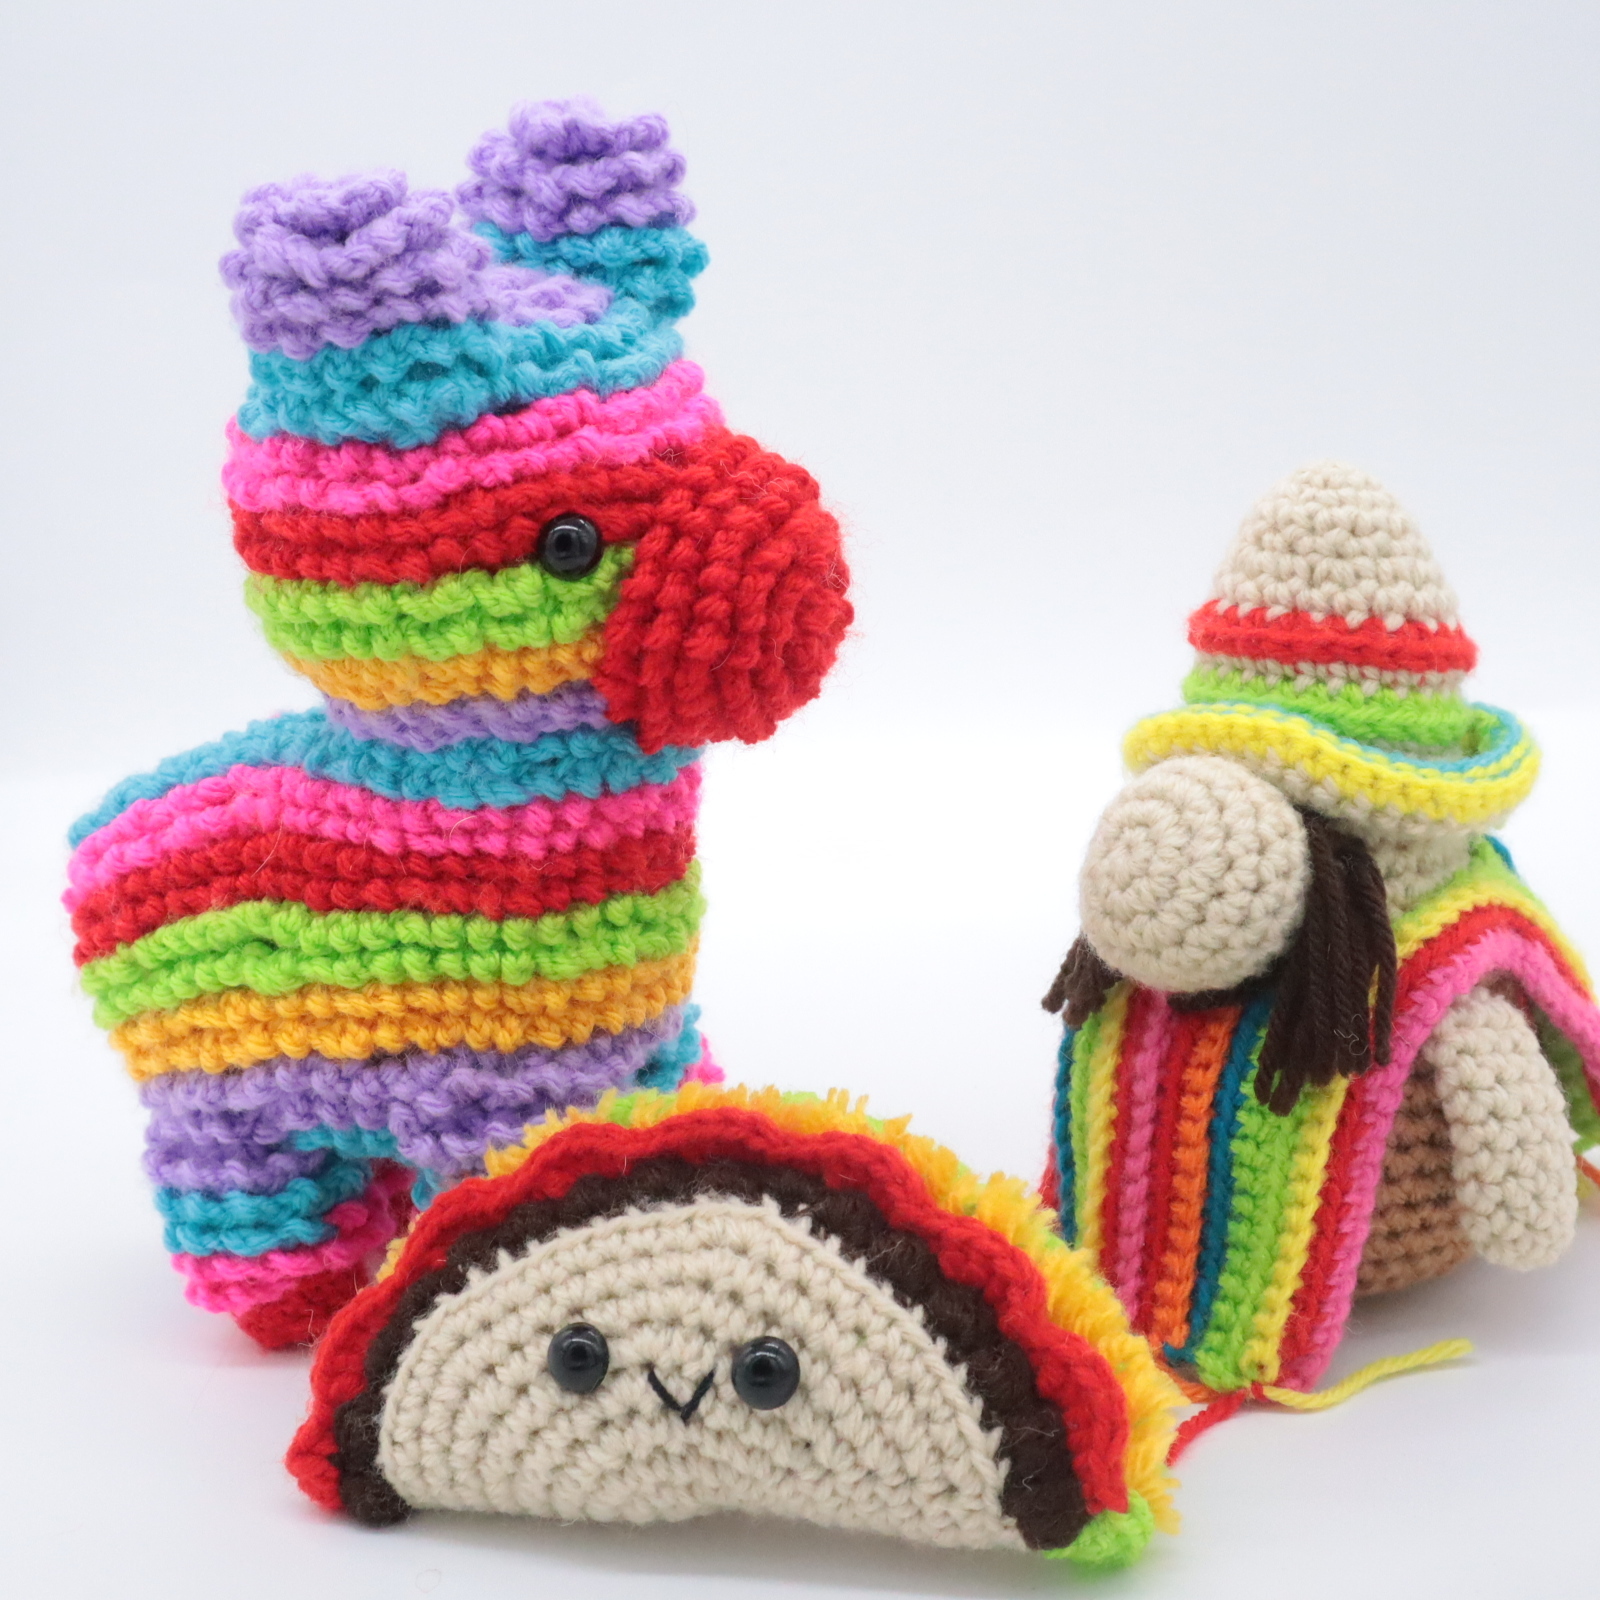
Check out the Cinco de Mayo pattern set here!

Print this pattern out – purchase the PDF version here!
 Supplies:
• Yarn 4/Medium Weight Yarn in…
Purple, blue, pink, red, green, and yellow
•4mm Crochet Hook
•12mm safety eyes
•Tapestry needle
•Scissors
•Stuffing
•Black embroidery thread
Additional Information:
•Difficulty: Intermediate
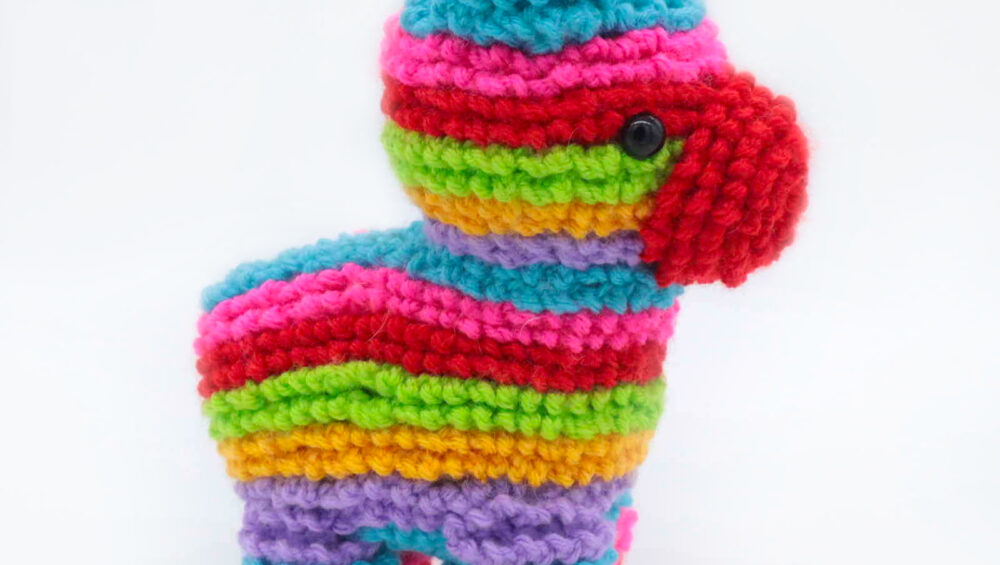
•Size: Tip of ear to foot is 8″ tall. 7″ long from butt to nose.
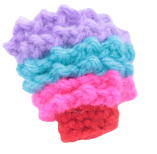
This pinata is so cute and the 3D detail paired with the rainbow color really makes this amigurumi stand out! This pattern takes a long time to work up because we do “surface crocheting” to make the 3D effect. However, it’s worth it!
Body:
Start in Purple
We will first create the body of the pinata. After the body is made, we work in the front loops we left and surface crochet on the 3D detail.
Round 1: 6 Sc into a Magic Ring (6)
Round 2: In the BLO, *Inc* all around (12)
Round 3: In the BLO, *Inc, Sc in the next st* all around (18)
Round 4: In the BLO, *Inc, Sc in the next 2 st* all around (24)
Round 5: Change to blue. In the BLO, *Inc, Sc in the next 3 st* all around (30)
Round 6: In the BLO, *Inc, Sc in the next 4 st* all around (36)
Round 7: Change to pink. In the BLO, *Inc, Sc in the next 5 st* all around (42)
Round 8: In the BLO, *Sc* all around (42)
Round 9-10: Change to red. In the BLO, *Sc* all around (42)
Round 11-12: Change to green. In the BLO, *Sc* all around (42)
Round 13: Change to yellow. In the BLO, *Sc* all around (42)
Round 14: In the BLO, *Dec, Sc in the next 5 st* all around (36)
Round 15: Change to purple. In the BLO, *Dec, Sc in the next 4 st* all around (30)
Round 16: In the BLO, *Dec, Sc in the next 3 st* all around (24)
In the next round we will form the back part of the body.
Round 17: Change to blue. In the BLO, Sc in the next 3 st. Ch 13. In the BLO, Sc 3 times in the 2nd Ch from the hook. Sc in the next 11 ch. Working back on the body and in the BLO, Sc in the next 21 st (38)
Round 18: In the BLO, Sc in the next 3 st. Working on the other side of the Ch, the side we haven’t crocheted on yet, Sc in the next 11 st. Working in the BLO, Inc in each of the next 3 st. Sc in the next 32 st (52)
Round 19-20: Change to pink. In the BLO, Sc in the next 52 st (52)
Round 21-22: Change to red. In the BLO, *Sc* all around (52)
Round 23-24: Change to green. In the BLO, *Sc* all around (52)
Stuff the head firmly now.
Round 25-26: Change to yellow. In the BLO, *Sc* all around (52)
Round 27: Change to purple. In the BLO, *Sc* all around (52)
Round 28: In the BLO, Sc in the next 13 st, *Dec* 6 times, Sc in the next 14 st, *Dec* 6 times, Sc in the next st (40)
Round 29: Change to blue. In the BLO, Sc in the next 11 st, *Dec* 4 times, Sc in the next 13 st, *Dec* 4 times (32)
Round 30: In the BLO, Sc in the next 9 st, *Dec* 4 times, Sc in the next 11 st, *Dec* 2 times (26)
Round 31: In the BLO repeat *Dec, Sc in the next 2 st* 6 times, Sc in the next 2 st (20)
Stuff the body firmly now. Continue stuffing after each round.
Round 32: In the BLO repeat *Dec, Sc in the next st* 6 times, Sc in the next 2 st (14)
Round 33: In the BLO *Dec* all around (7)
Finish off, leaving a long tail for sewing. Sew the remaining stitches closed and weave in ends, cutting any excess yarn.
Surface Crocheting the Details:
In Purple
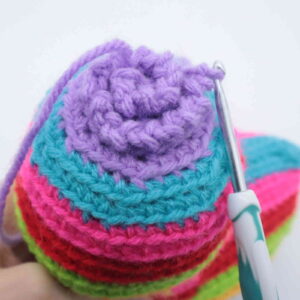
When you look at the toy, you will see a lot of loops going around the entire toy. These are the front loops we left as we crocheted the toy. We will insert our hook into the loop and crochet into that loop (Pic 1).
First, insert your hook into the very first stitch at the top of the head (Pic 1). Yarn over with purple and pull the yarn through the loop (Pic 2). Ch 2, then SlSt into the next st (Pic 3).
Repeat *Ch 2, SlSt into the next st* all around, making sure to change color as the next color comes up. (Pic 4)
1.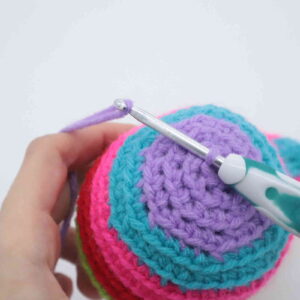 2.
2.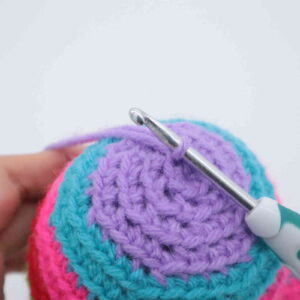 3.
3.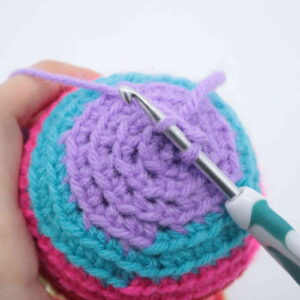 4.
4. 5.
5. 6.
6.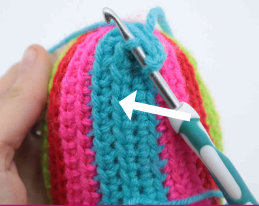
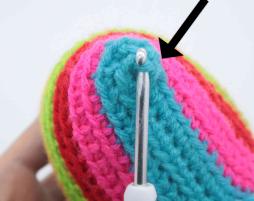
Note for the blue neck area: On Round 17, we made a chain to form the neck area. When you meet the first blue round at the neck area, continue doing the surface crochet for the first 3 stitches. Then, finish off. Attach your hook at the very top where shown (Pic 5) and yarn over with blue, Ch 2, and SlSt in the following stitch where shown (Pic 6). Repeat the surface crocheting down the body area. Your crochet will now correctly follow the path! Continue surface crocheting as normal.
Limbs: (Make 4)
In Red
Round 1: 6 Sc into a Magic Ring (6)
Round 2: *Inc* all around (12)
Round 3: Working in the BLO, *Sc* all around (12)
Round 4: Working in BOTH loops, *Sc* all around (12)
Round 5-6: Change to pink. In the BLO, *Sc* all around (12)
Round 7-8: Change to blue. In the BLO, *Sc* all around (12)
Round 9: Change to purple. In the BLO, Sc in the next 7 st.
Row 10: Ch 1 and turn. In purple in the FLO, Sc in the next 7 st
Finish off, leaving a long tail for sewing. Attach your hook into the first pink stitch in Round 5. Surface crochet by repeating *Ch 2, SlSt in the next st* all around. When you meet Row 10, simply turn your work and continue to surface crochet in Row 10’s FRONT loop for the remaining 7 stitches. Once done, finish off. Weave in any ends, keeping a long tail of yarn for sewing. Pin the legs on as shown and sew on. Make sure to add stuffing before fully sewing on.
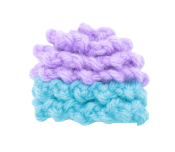
Ears: (Make 2)
In Purple
Round 1: 6 Sc into a Magic Ring (6)
Round 2: In the BLO, *Inc* all around (12)
Round 3-4: In the BLO, *Sc* all around (12)
Round 5-7: In blue and in the BLO, *Sc* all around (12)
Finish off, leaving a long tail for sewing.
Attach your hook to the very first stitch in the top of the ear. With purple, yarn over and pull through. Now surface crochet around the entire ear, making sure to change colors when the color of the ear changes to blue. Once done, finish off and weave in ends. Leave a tail end of yarn for sewing. Pin the ears on as shown and sew on. Once sewn on, weave in ends and cut any excess yarn.
Nose:
In Red
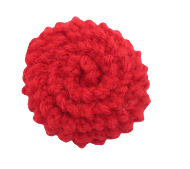
Round 1: 6 Sc into a Magic Ring (6)
Round 2: In the BLO, *Inc* all around (12)
Round 3: In the BLO, *Inc, Sc in the next st* all around (18)
Round 4: In the BLO, *Inc, Sc in the next 2 st* all around (24)
Round 5-7: In the BLO, *Sc* all around (24)
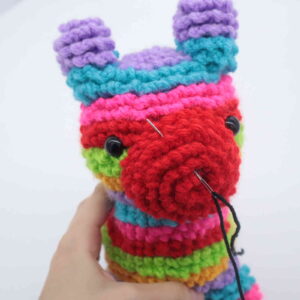
Finish off, leaving a long tail for sewing. Attach your hook into the first stitch in Round 1. Yarn over with red, Ch 2 and SlSt in the next st. Repeat surface crocheting around the entire nose. Once done, finish off, leaving a long tail for sewing. Pin the nose on as shown and sew on, making sure to add stuffing before fully sewing on. Once done, weave in ends and cut any excess yarn.
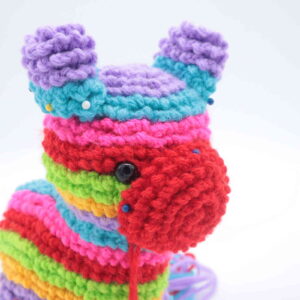
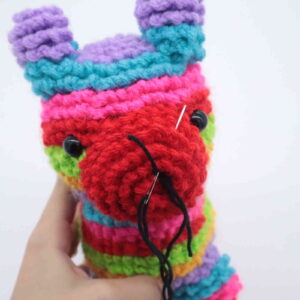
Nose Embroidery:
In Black Embroidery Thread
Insert needle with thread into the middle nose area, then pull out at the top left where shown (Pic 1). Reinsert needle into middle nose area, then pull needle out at the top right where shown (Pic 2). Reinsert needle into middle, then pull needle out at the bottom where shown (Pic 3). Reinsert needle in the nose area where shown (Pic 4). Pull needle out anywhere. Tie ends of yarn into firm knots, then bring the knots inside the toy to hide. Cut any excess yarn.
1. 2.
2. 3.
3. 4.
4.
Tail:
Hold blue and purple yarn together Crocheting with them at the same time, Ch 15. Sc in the 2nd Ch from the hook, Sc in the next 13 st. Finish off and pin on the butt area, sew on. Add small strands of yarn at the end of the tail for hair. Done!
Done! If you made a pinata, I would LOVE to see! You can show me by posting a picture in the comments underneath this post 🙂


1 Comment
These are so cute, thank you