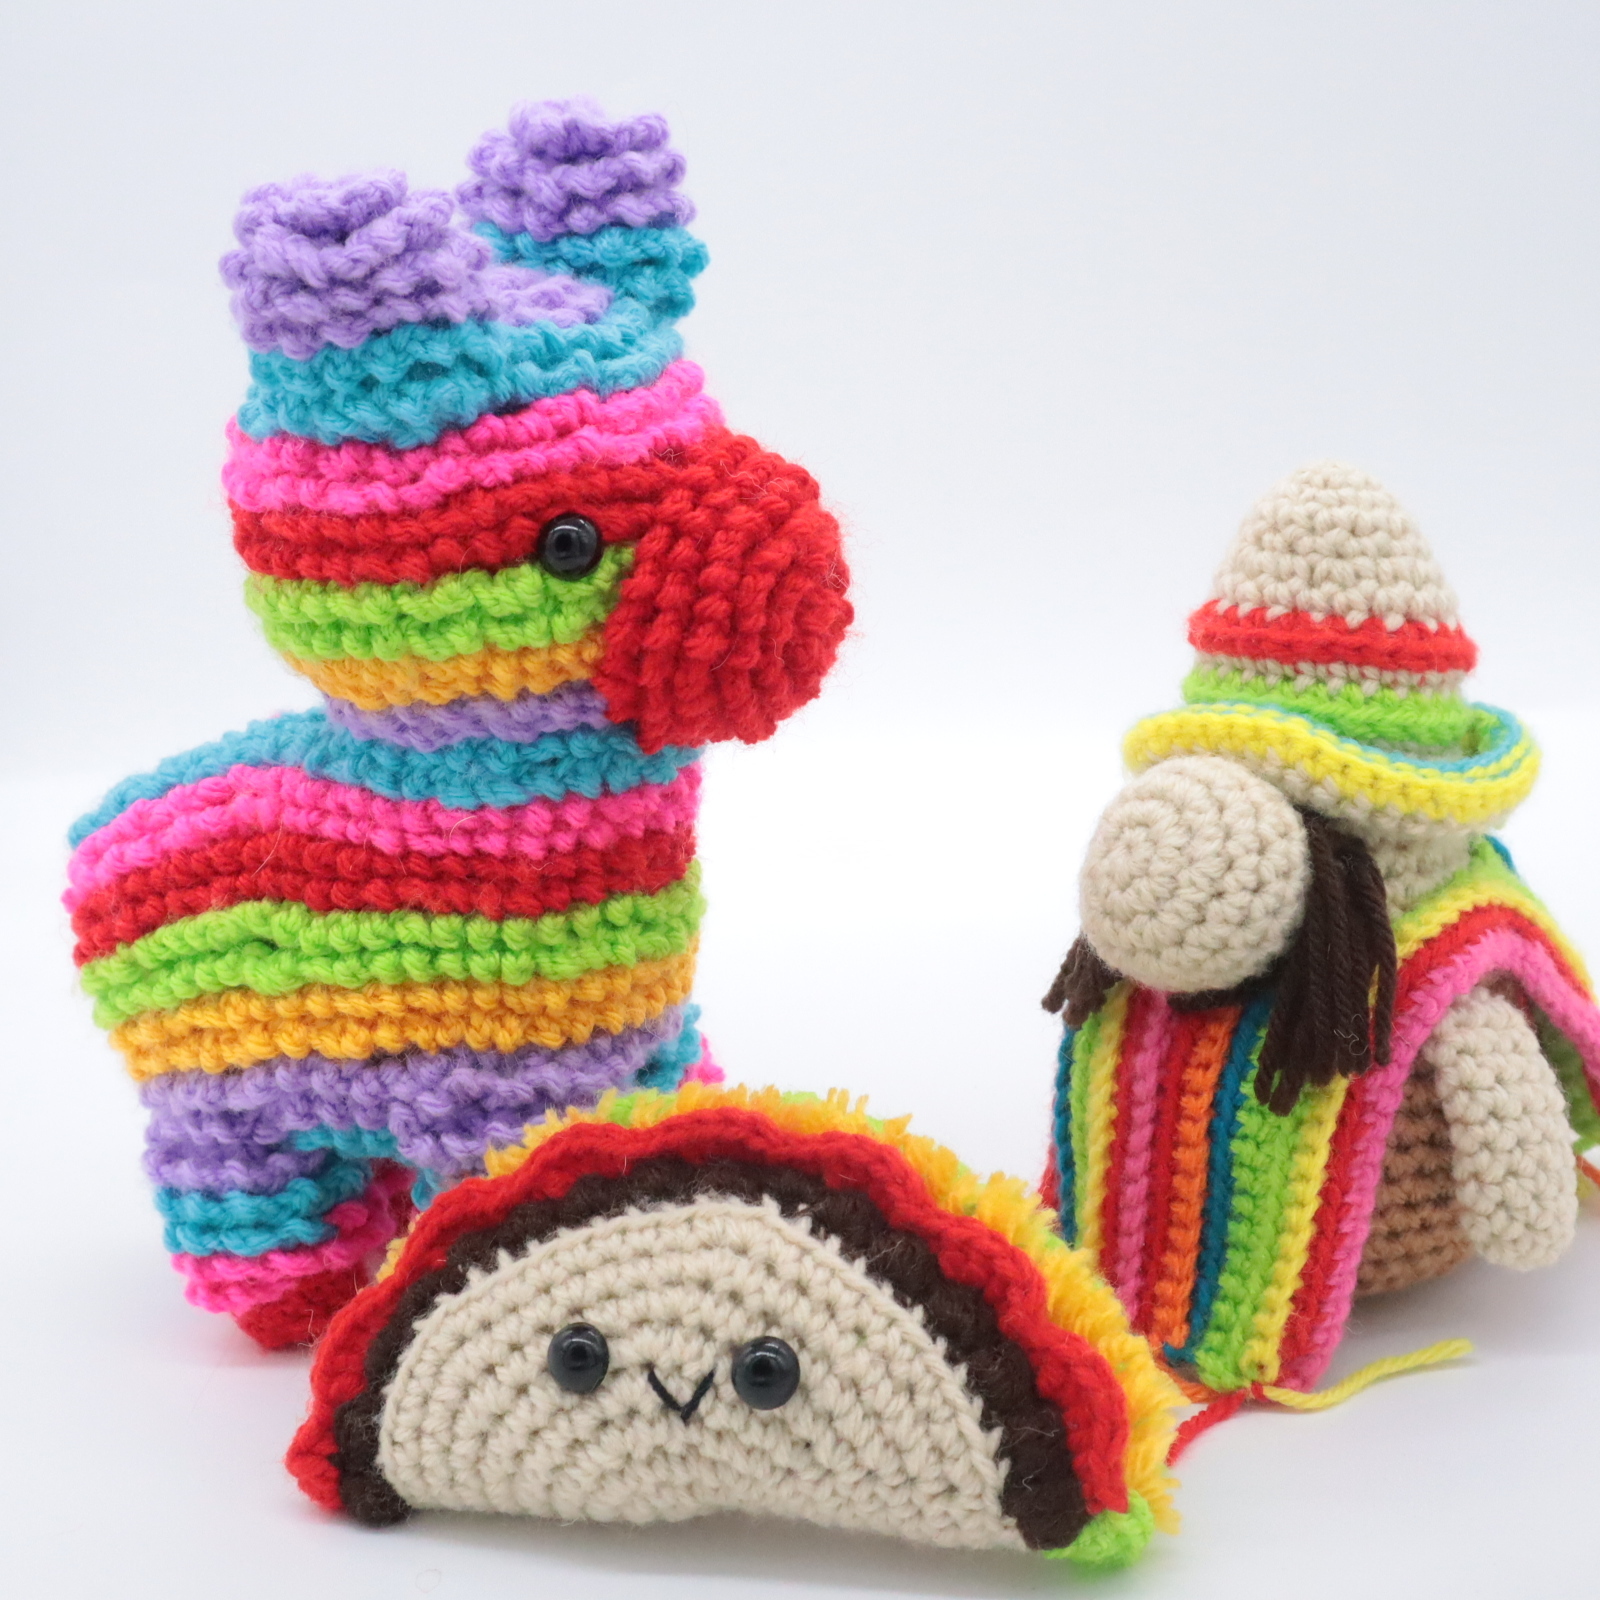
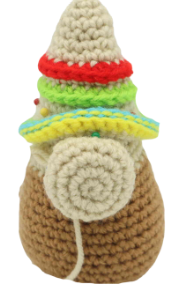
Mexican Gnome Amigurumi – Free Crochet Pattern
Check out the Cinco de Mayo pattern set here!

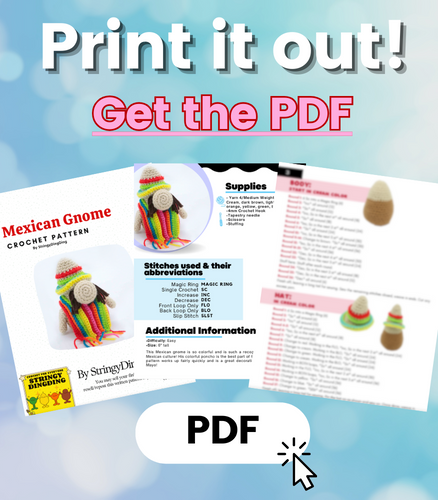
Print this pattern out – purchase the PDF version here!
 Supplies:
• Yarn 4/Medium Weight Yarn in…
Cream, dark brown, light brown, red, orange, yellow, green, blue, and pink
•4mm Crochet Hook
•Tapestry needle
•Scissors
•Stuffing
Additional Information:
•Difficulty: Easy
•Size: 6″ tall
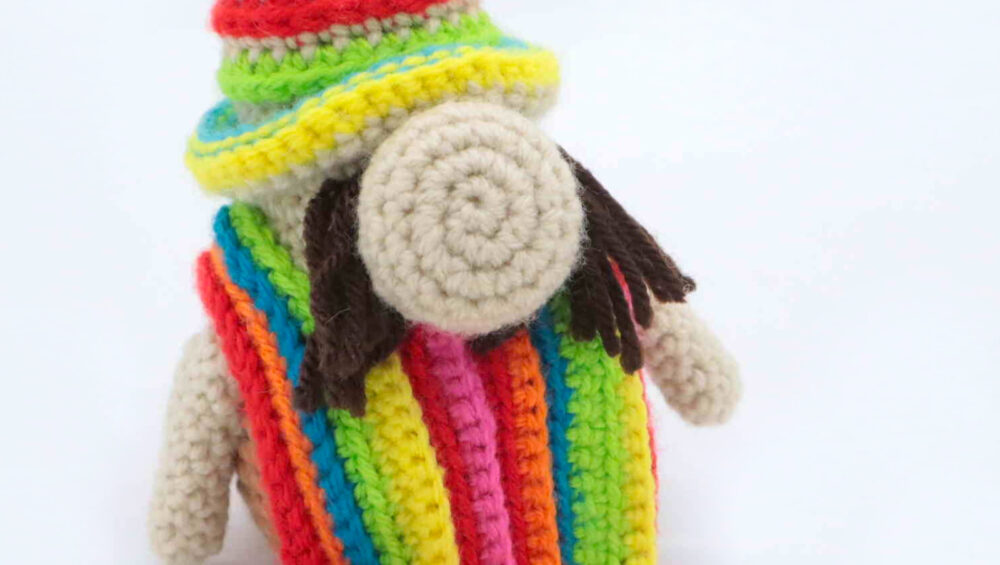
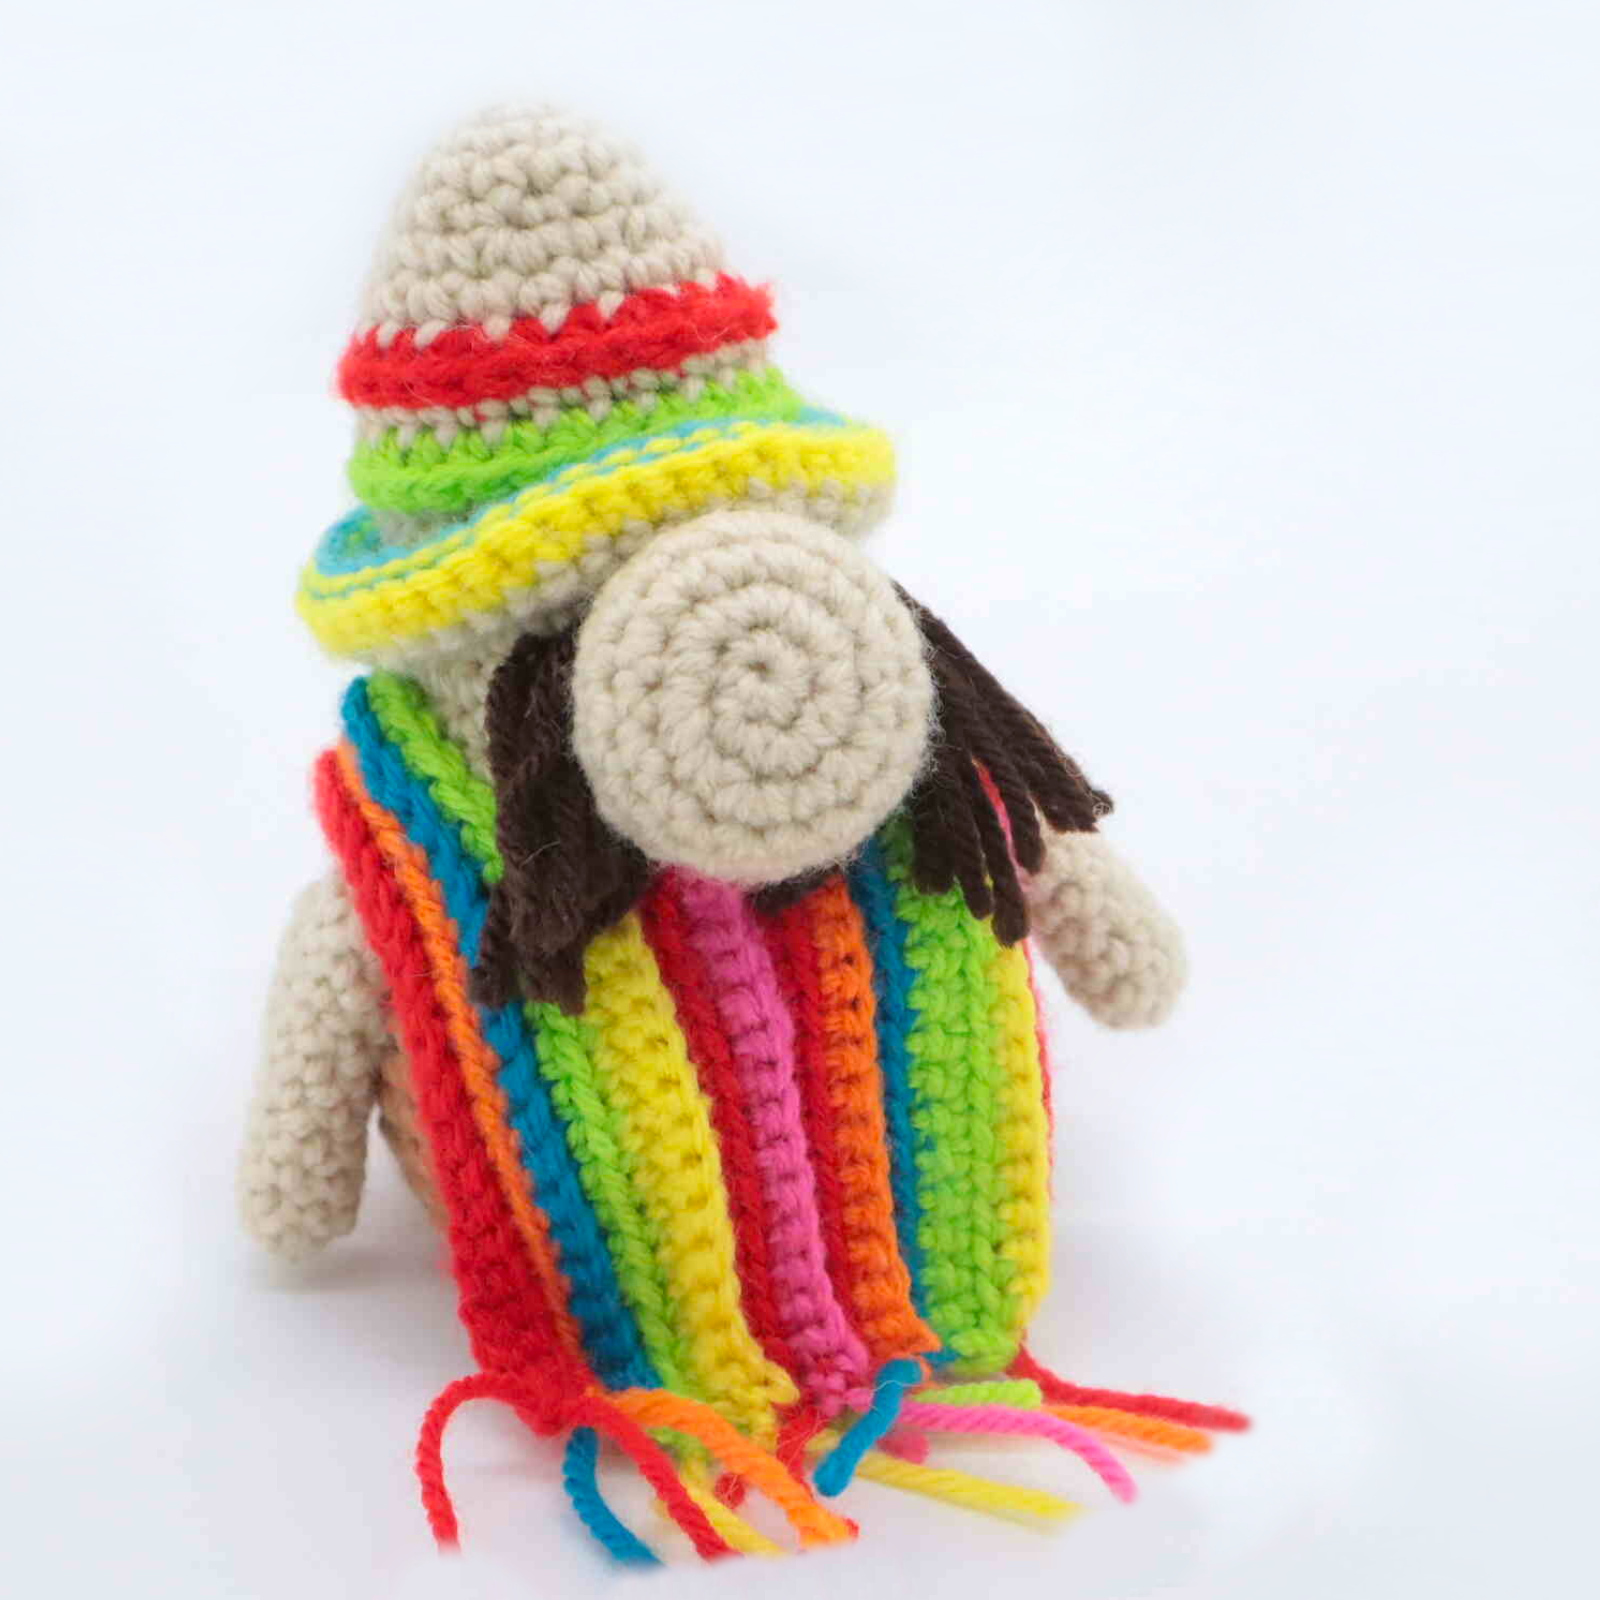
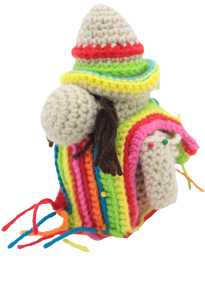
This Mexican gnome is so colorful and is such a recognizable icon of Mexican culture! His colorful poncho is the best part of this pattern. This pattern works up fairly quickly and is a great decoration for Cinco de Mayo!
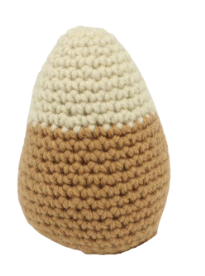
Body:
Start in Cream Color
Round 1: 6 Sc into a Magic Ring (6)
Round 2: *Inc* all around (12)
Round 3: *Sc* all around (12)
Round 4: *Inc, Sc in the next st* all around (18)
Round 5: *Sc* all around (18)
Round 6: *Inc, Sc in the next 2 st* all around (24)
Round 7-9: *Sc* all around (24)
Round 10: *Inc, Sc in the next 3 st* all around (30)
Round 11-14: Change to brown. *Sc* all around (30)
Round 15: *Inc, Sc in the next 4 st* all around (36)
Round 16-21: *Sc* all around (36)
Round 22: *Dec, Sc in the next 4 st* all around (30)
Round 23: *Dec, Sc in the next 3 st* all around (24)
Stuff here. Stuff after each round.
Round 24: *Dec, Sc in the next 2 st* all around (18)
Round 25: *Dec, Sc in the next st* all around (12)
Round 26: *Dec* all around (6)
Finish off, leaving a long tail for sewing. Sew the remaining stitches closed, weave in ends. Cut any excess yarn.
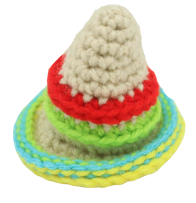
Hat:
In Cream Color
Round 1: 6 Sc into a Magic Ring (6)
Round 2: *Sc* all around (6)
Round 3: *Inc* all around (12)
Round 4-5: *Sc* all around (12)
Round 6: *Inc, Sc in the next st* all around (18)
Round 7: *Sc* all around (18)
Round 8: Change to red. Working in the FLO, *Inc, Sc in the next 2 st* all around (24)
Round 9: Change to cream. Working in the BLO, *Sc* all around (24)
Round 10: Change to green. Working in the FLO, *Sc* all around (24)
Round 11: Change to cream. Working in the BLO, *Sc* all around (24)
Round 12: Working in BOTH loops, *Sc* all around (24)
Round 13: Working in the FLO, *Inc, Sc in the next 2 st* all around (30)
Round 14: Working in BOTH loops, *Inc, Sc in the next 3 st* all around (36)
Round 15: Change to yellow. *Sc* all around (36)
Round 16: Change to blue. *Sc* all around (36)
Round 17: Change to green. *SlSt* all around (36)
Finish off, leaving a long tail for sewing. Pin the hat on as shown and sew on. Once done, weave in ends and cut any excess yarn.
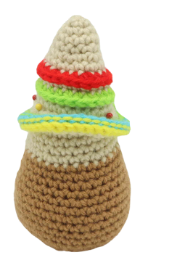
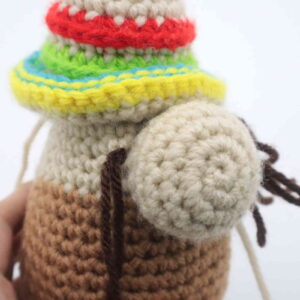
Nose:
In Cream Color
Round 1: 6 Sc into a Magic Ring (6)
Round 2: *Inc* all around (12)
Round 3: *Inc, Sc in the next st* all around (18)
Round 4-6: *Sc* all around (18)
Round 7: *Dec, Sc in the next st* all around (12)
Finish off, leaving a long tail for sewing. Pin the nose on as shown and sew on. Stuff before fully sewing on. Once done, weave in ends and cut any excess yarn.
Poncho:
Start in Red
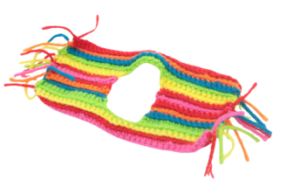
Row 1: In red, Ch 37. Sc in the 2nd Ch from the hook. Sc in the next 35 st (36)
Row 2: Change to orange. Ch 1 and turn. Working in the BLO, Sc in the next 36 st (36)
Row 3: Change to blue. Ch 1 and turn. Working in the FLO, Sc in the next 36 st (36)
Row 4: Change to green. In the BLO Sc in the next 36 st (36)
Now we will form one side of the poncho, pictured right.
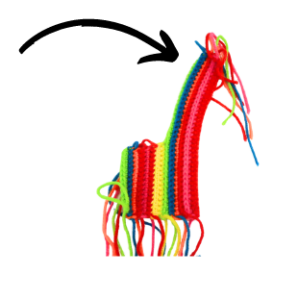 Row 5: Change to yellow. Ch 1 and turn. Working in the FLO, Sc in the next 15 st (15)
Row 6: Continuing in yellow, Ch 1 and turn. In BOTH loops, Sc in the next 15 st (15)
Row 7: Change to red. Ch 1 and turn. Working in the FLO, Sc in the next 15 st (15)
Row 8: Change to pink. Ch 1 and turn. Working in the BLO, Sc in the next 15 st (15)
Row 9: Change to red. Working in the FLO, Sc in the next 15 st (15)
Row 10: Change to orange. Working in the BLO, Sc in the next 15 st (15)
Row 11: Change to blue. Working in the FLO, Sc in the next 15 st (15)
Row 12: Change to green. Working in the BLO, Sc in the next 15 st (15)
Finish off here.
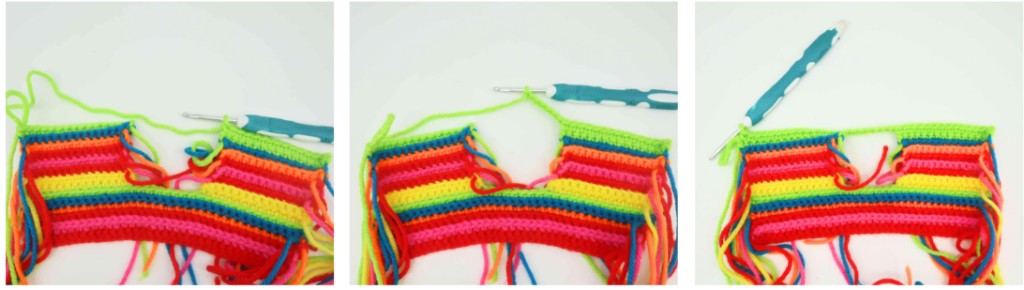
Row 13: Attach your hook to the other side of the poncho (Pic 1-2). Make sure your hook is inserted in to the back loop only. Yarn over with yellow. Ch 1. This Ch 1 counts as a stitch. In the BLO, Sc in the next 14 st (15)
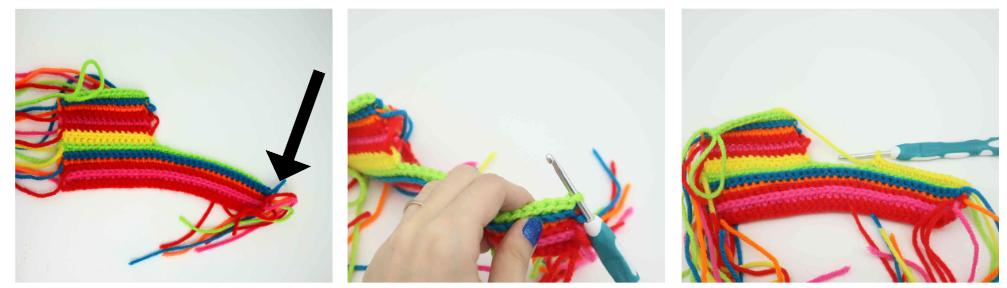
Row 14: Ch 1 and turn. In yellow and in BOTH loops, Sc in the next 15 st (Pic 3) (15)
Row 15: Change to red. Ch 1 and turn. Working in the BLO, Sc in the next 15 st (15)
Row 16: Change to pink. Ch 1 and turn. In the FLO, Sc in the next 15 st (15)
Row 17: Change to red. Ch 1 and turn. In the BLO, Sc in the next 15 st (15)
Row 18: Change to orange. Ch 1 and turn. In the FLO, Sc in the next 15 st (15)
Row 19: Change to blue. Ch 1 and turn. In the BLO, Sc in the next 15 st (15)
Row 20: Change to green. Ch 1 and turn. In the FLO, Sc in the next 15 st (15)
Row 21: Ch 1 and turn. In BOTH loops, Sc in the next 15 st (Pic 1). Ch 6 (Pic 2). Continuing on the other side, working in BOTH loops, Sc in the next 15 st (Pic 3) (36)
Row 22: Change to yellow. Ch 1 and turn. In the FLO, Sc in the next 15 st. Working on the Ch, Sc in the next 7 st. Working back on single crochets, in the FLO Sc in the next 15 st (36)
Row 23: Change to red. In the BLO, Sc in the next 36 st (36)
Row 24: Change to pink. In the FLO, Sc in the next 36 (36)
Finish off. You will have a lot of tail ends of yarn from changing color on the edges of the poncho. Tie these ends of yarn together then trim. This will form the poncho’s trim. For tail ends of yarn near the neck of the poncho, weave in and cut any excess yarn.
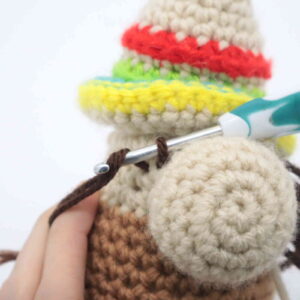
Mustache:
In Brown
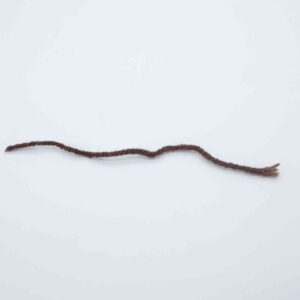
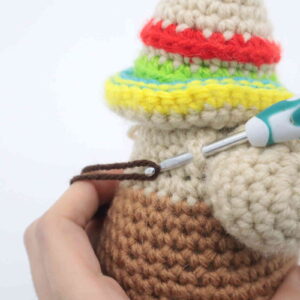
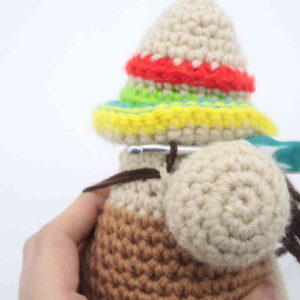
Cut a piece of ~5″yarn. Insert your hook where shown (Pic 2). Yarn over with the brown yarn as shown (Pic 2). Pull the yarn through the body as shown (Pic 3). Yarn over with both ends of yarn (Pic 4). Pull this yarn through the loop (Pic 5). Repeat this a few times in this area until the mustache is thicker. Trim the mustache to your liking.
1. 2.
2. 3.
3. 4.
4. 5.
5. 6.
6.
Arms: (Make 2)
In Cream Color
Round 1: 6 Sc into a Magic Ring (6)
Round 2-10: *Sc* all around (6)
Finish off, leaving a long tail for sewing. Pin the arms on as shown and sew on. Once done, weave in ends and cut any excess yarn.
Done! If you made this gnome, I would LOVE to see! You can show me by posting a picture in the comments section underneath this post 🙂


