

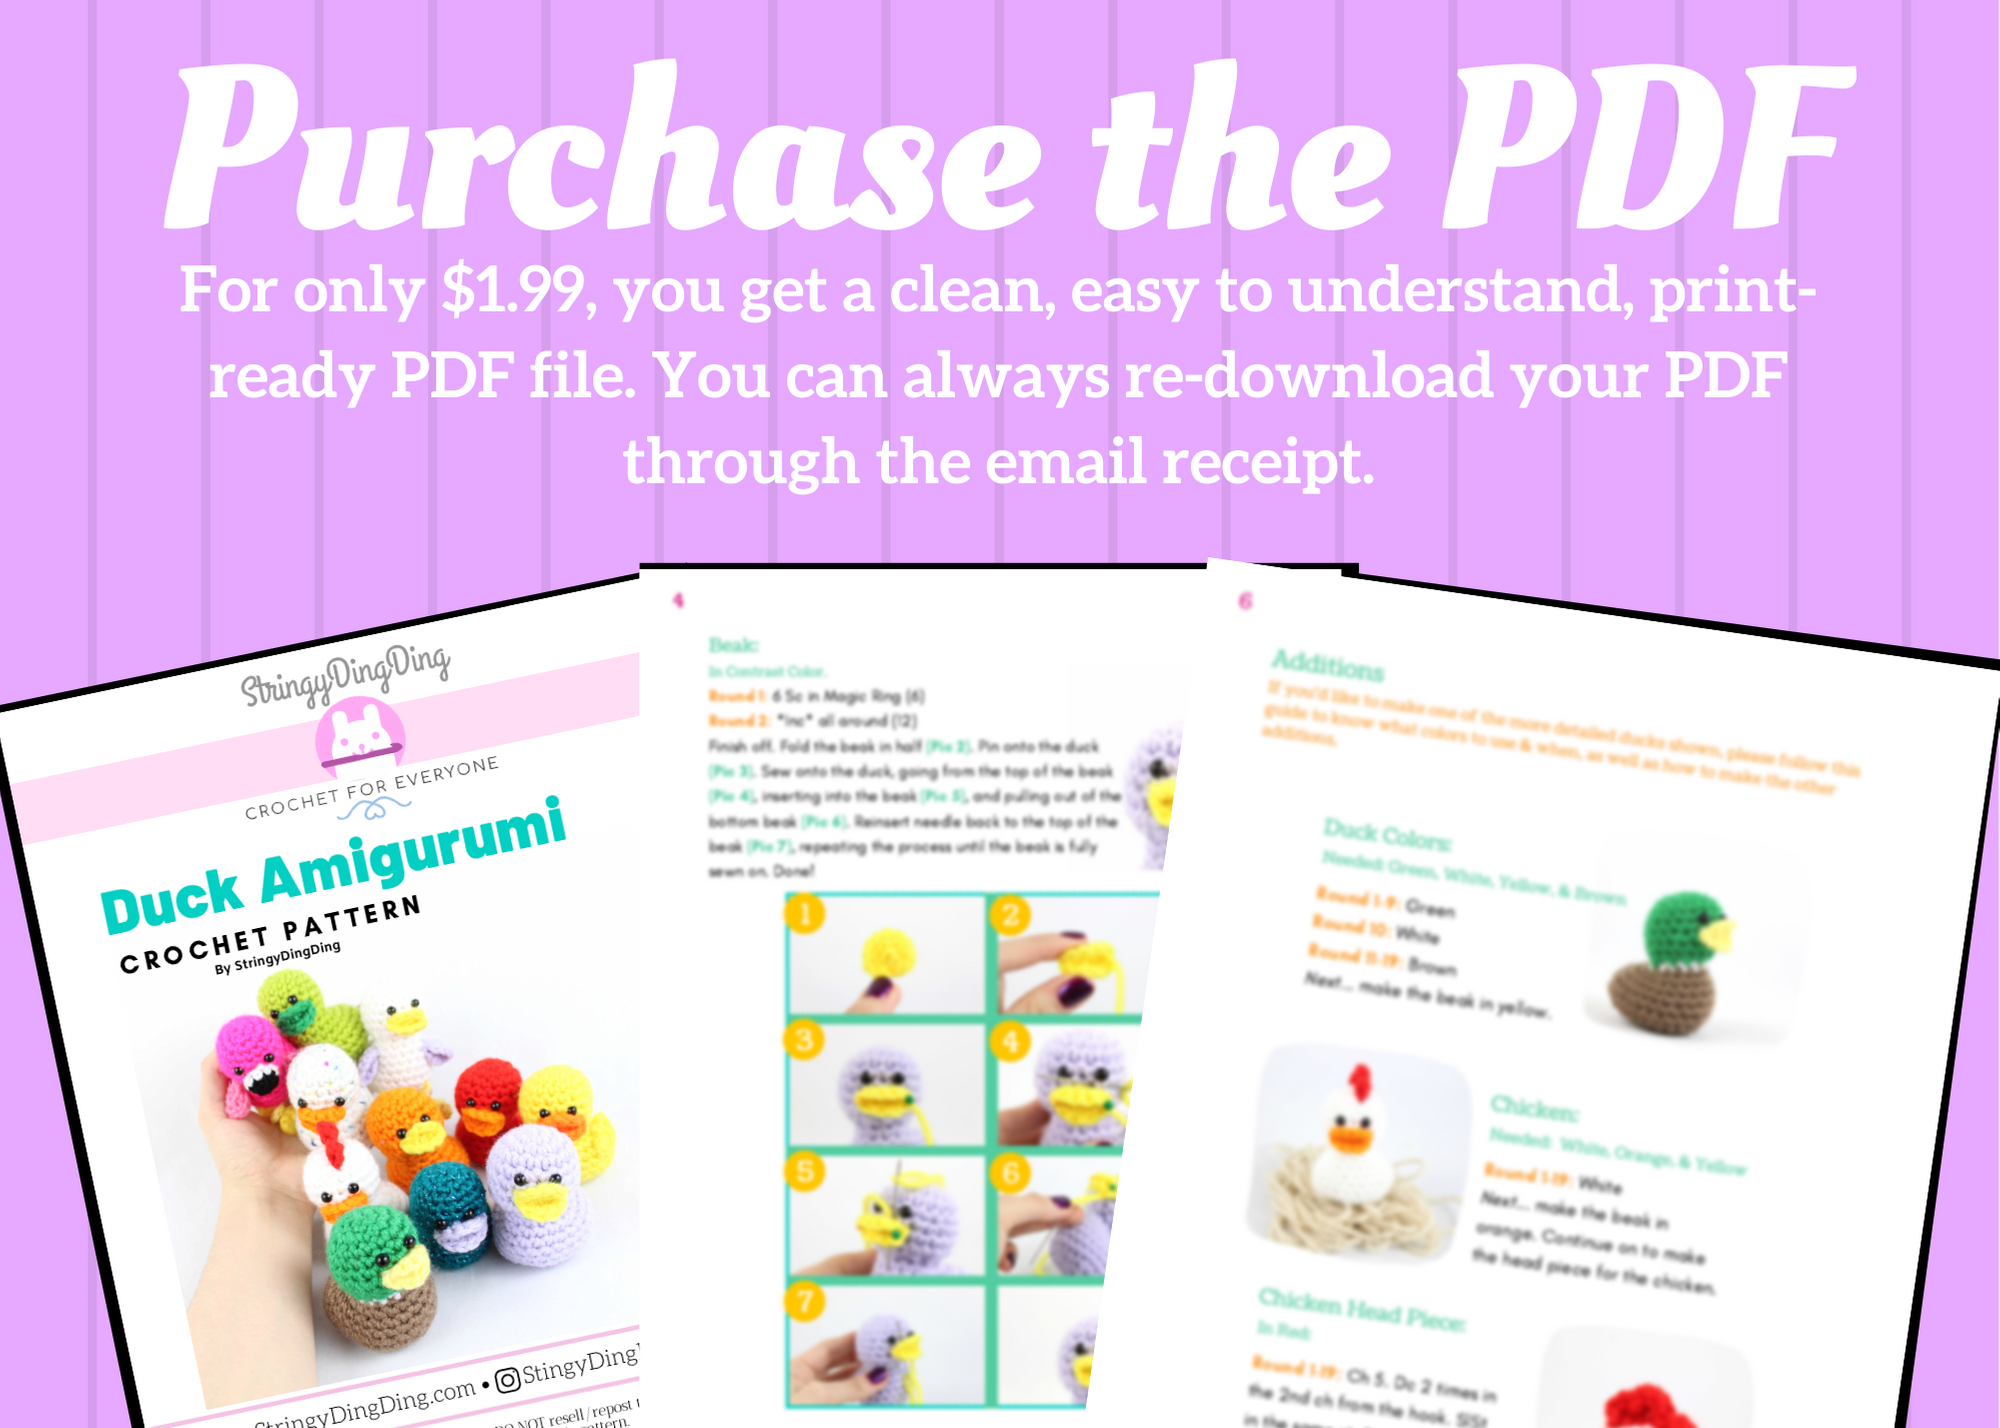
Purchase the PDF version here

Join my Amigurumi Membership to watch this detail video tutorial!
Perfect for beginners. Unlock tons more perks like current & upcoming PDF patterns, amigurumi video tutorials, crochet business video tutorials, a monthly coupon, and crochet chat community!
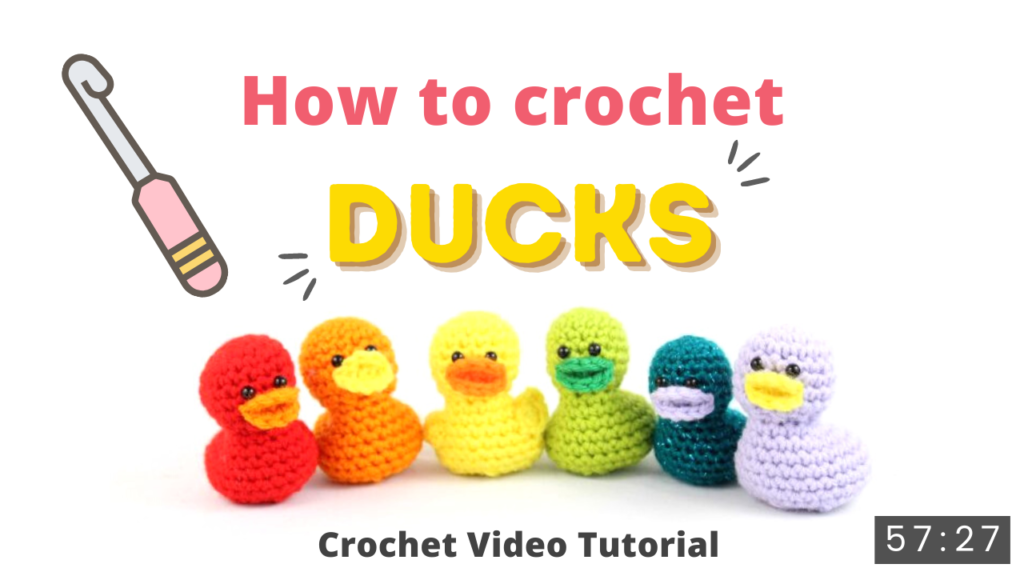
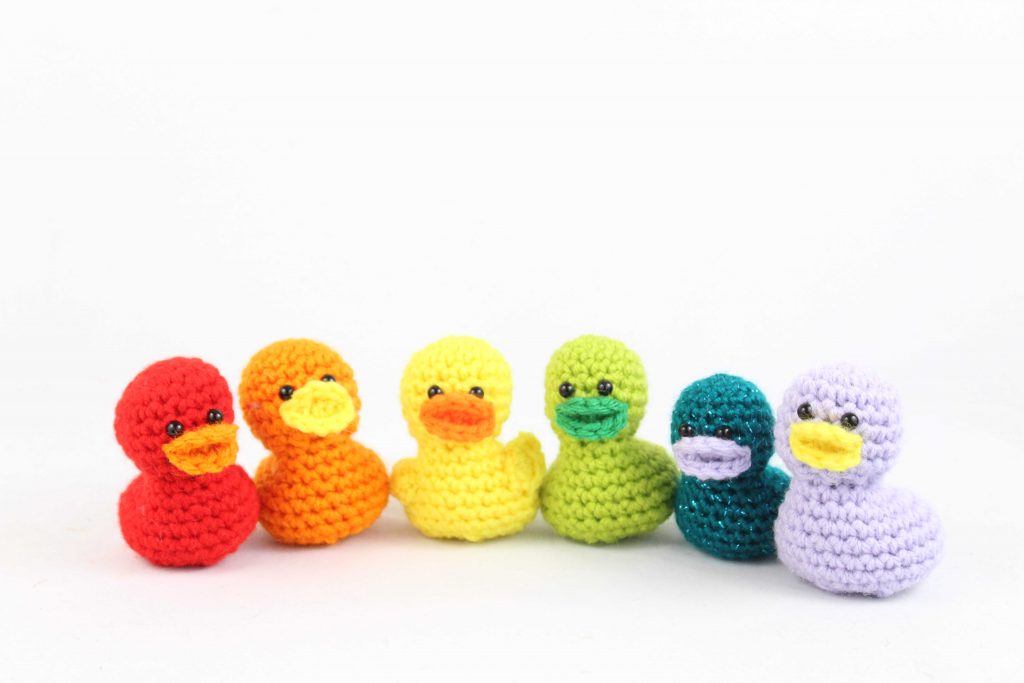
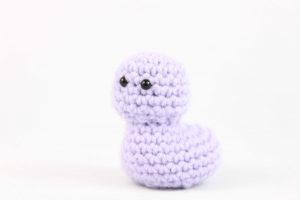
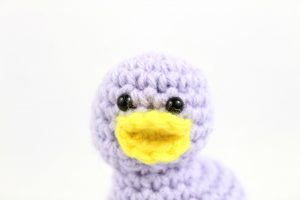
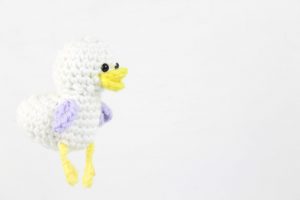
I hope you enjoy this very easy and fun crochet pattern. I was surprised it only took me 20 minutes to make a little duck! These are a great addition to my free Scraptacular series.
Supplies:
4mm crochet hook, 4/Medium weight yarn in any desired colors. 6mm safety eyes, tapestry needle, scissors, and stuffing.
Additional Information:
Difficulty: Easy
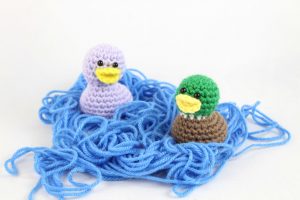
This pattern uses “Main Color”, meaning the main color you’d like to make your duck. “Contrast Color” means a different color you’d like to use for the beak. We start by making the head, then work into making the body. They are one piece. Next, we make the beak, and also make optional additions if you want to make a flamingo, chicken, seagull, etc. The additional pieces and color information for them is included in this pattern.
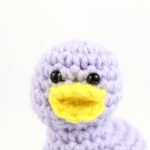
Head/Body:
In Main Color
Round 1: 6 Sc in Magic Ring (6)
Round 2: *Inc* all around (12)
Round 3: *Inc, Sc* all around (18)
Round 4-5: *Sc* all around (18)
Round 6: Sc in the next 4 st, Sc in the next st and add a different colored st marker to the Sc just made. This marks where to place the eye. Sc in the next st. Sc in the next st and add a different colored st marker to the Sc just made. Sc in the last 11 st (18)
Round 7-8: *Sc* all around (18)
Round 9: *Dec* all around (9)
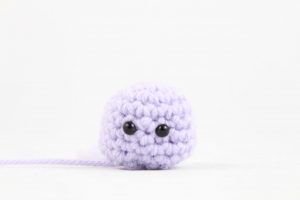
Add safety eyes in marked areas here. Stuff now.
Round 10: *Inc* in the first st, Sc in the next 5 st, *Inc* in the next 3 st (13)
Round 11: *Inc* in the first st, Sc in the next 7 st, *Inc* in the last 5 st (19)
Round 12: *Inc* in the first st, Sc in the next 12 st, *Inc* in the next 6 st (26)
Round 13: Sc in the next 19 st, *Inc* in the next 3 st, Sc in the last 4 st (29)
Round 14-15: *Sc* all around (29)
Round 16: Sc in the next 21 st, *Dec* 3 times, Sc in the last 2 st (26)
Round 17: *Dec in the next st, Sc in the next 2 st* 6 times, *Dec* in last st (19)
Round 18: *Dec, Sc* 6 times, Sc last st (13)
Stuff here
Round 19: *Dec* 6 times, Sc in the last st (7)
Finish off. Sew closed.
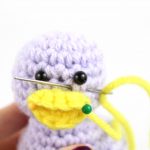
Beak:
In Contrast Color
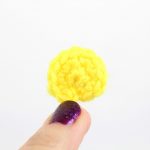
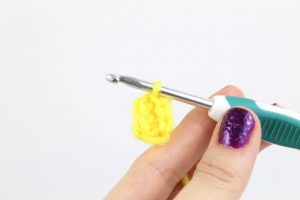
Round 1: 6 Sc in Magic Ring (6)
Round 2: *Inc* all around (12)
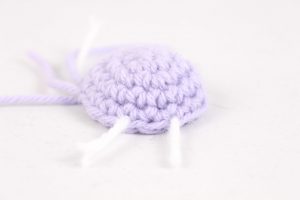
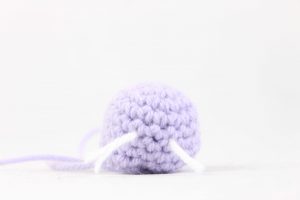
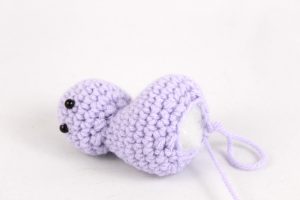
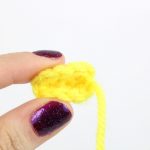
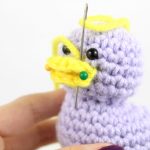
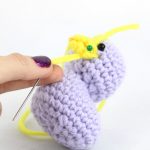
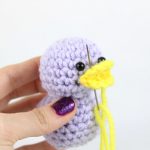
Finish off. Fold the beak in half (Pic 2). Pin onto the duck (Pic 3). Sew onto the duck, going from the top of the beak (Pic 4), inserting into the beak (Pic 5), and pulling out of the bottom beak (Pic 6). Reinsert needle back to the top of the beak (Pic 7), repeating the process until the beak is fully sewn on. Done!

Wings: (Make 2, Optional)
In Main Color
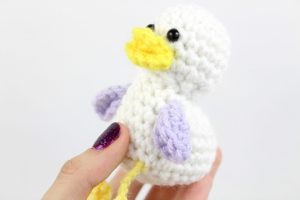
Round 1: 6 Sc in Magic Ring (6)
Round 2: *Inc* all around (12)
Finish off. Fold in half and pin on. Sew on.
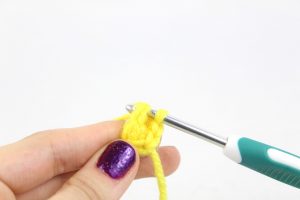
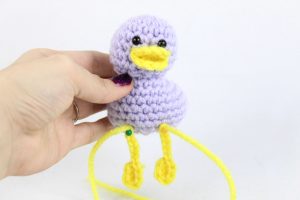
Legs: (Make 2, Optional)
In Yellow
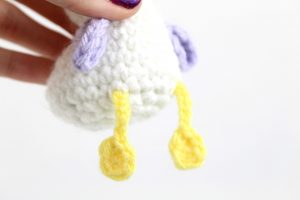
Round 1: In a Magic Ring, Sc 2, Dc 2, Sc 2, SlSt to the first Sc in the magic Ring. Ch 6.
Finish off and pin the leg to the duck. Sew on.

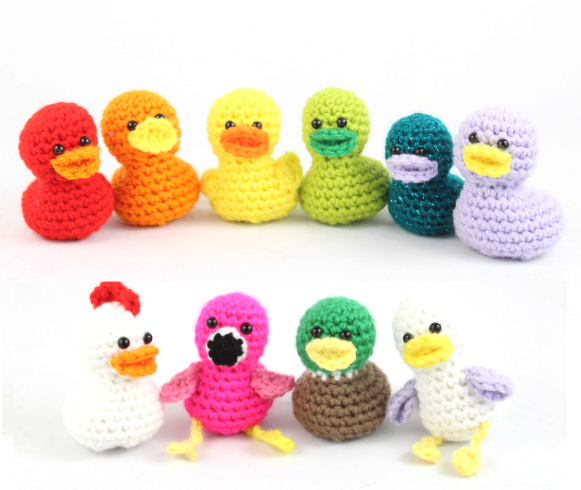
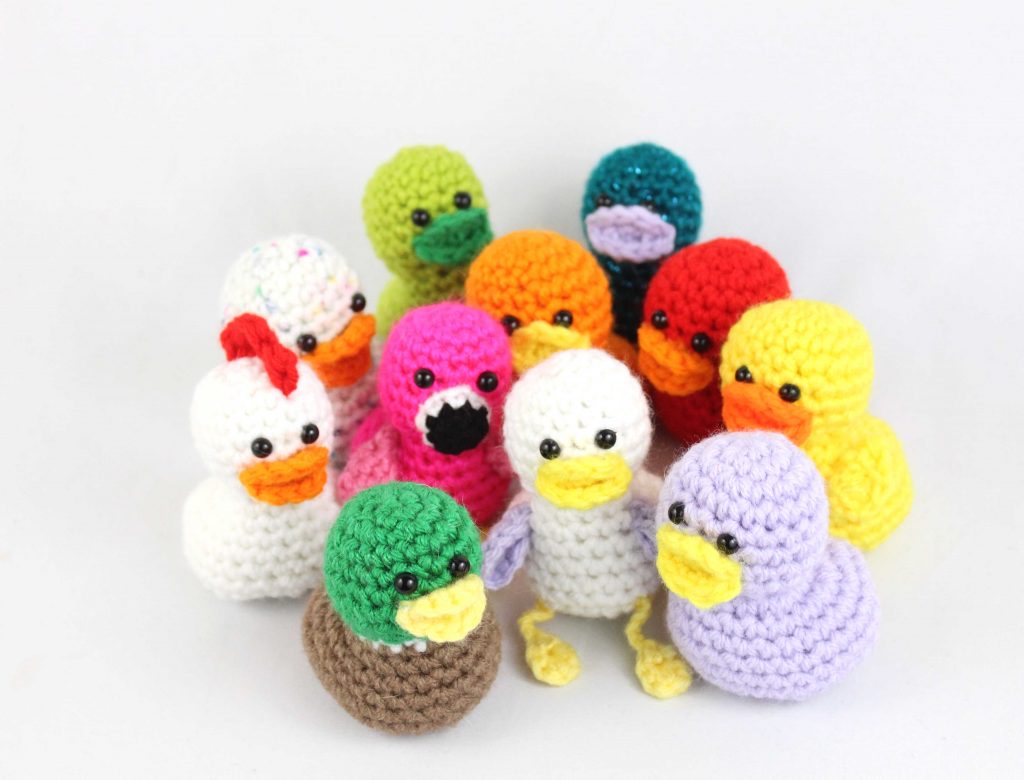
Additions:
If you’d like to make one of the more detailed ducks shown, please follow this guide to know what colors to use & when, as well as how to make the other additions.
Duck Colors:
Colors Needed: Green, White, & Brown
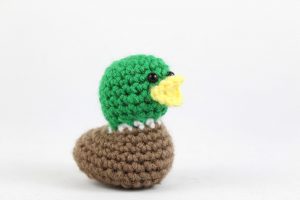
Round 1-9: Green
Round 10: White
Round 11-19: Brown
Next… make the beak in yellow.
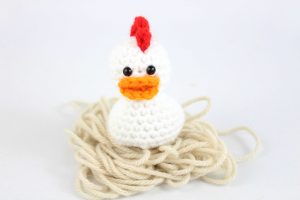
Chicken:
Colors Needed: White, Red, & Orange
Round 1-19: White
Next… make the beak in orange. Continue on to make the head piece for the chicken.
Chicken Head Piece:
In Red

Round 1-19: Ch 5. Dc 2 times in the 2nd ch from the hook. SlSt in the same st. Repeat *Dc 2 times in next st, SlSt in same st* 3 times. Finish off and sew on.
Flamingo:
Colors Needed: Pink, Light Pink, White, Black, & Yellow
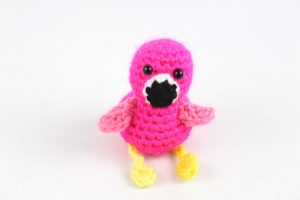
Round 1-19: Pink
Next, make the beak mentioned below.
Flamingo Beak:
In Black
Round 1: 6 Sc in Magic Ring (6)
Round 2: *Inc, Sc 2* all around (8)
Switch to White
Round 3: *Sc* all around (8)
Finish off. Pin on and sew on. Next, make 2 wings in Light Pink. Finally, make 2 legs in yellow.
Seagull:
Colors Needed: White, Grey, & Yellow
Round 1-19: White
Next… make the beak in yellow. Next, make 2 wings in Grey. Finally, make 2 legs in yellow.
Done! If you made one of these ducks, please “try” it on Pinterest! I would love to see your creations.


99 Comments
OMG, this is so FUN!!!! I love the options that you have of making many differents amigurumis just fromone pattern! Smart girl! Keep on Rollin!You are my Idol!!! LOL
Haha aw thank you! I hope you found one you want to make 🙂 You always give me such positive feedback and I appreciate that! YOU are my idol Chantale!! Happy crocheting <3
Love the duck however I am stuck
On the body round 17.dec sc,Scin next 2st 6 times,dec last 2st
Round 16 had 26 stitches Round 17 decreases to 19…the directions note only 2 dec which would make it 24 instead of 19. Forgive me as I am self taught via youtube and I am miss reading the pattern
Hi Leigh, thank you so much for your kind comment! I’m really happy to hear that you like the duck pattern 🙂
I looked at Round 17 and the stitch count is correct, however, it may have been written a little confusing so I went ahead and fixed it up so it’s easier to follow! Originally it said: Round 17: *Dec* in the next st, Sc in the next 2 st* 6 times, *Dec* in last st (19)
The *Dec* part might throw you off, so now its: Round 17: *Dec in the next st, Sc in the next 2 st* 6 times, *Dec* in last st (19)
So now that it’s a little easier to follow, let’s take a look at the stitch count! We will end up with 19 stitches at the end of Round 17 since: 26-6-1=19!
26=the number of stitches we have in Round 16. 6=the number of times we decrease 1=the last time we decrease in round 17.
I hope this can help you out! I apologize for any confusion, you read the pattern just fine but Round 17 was written a little odd with the extra asterisk. If you have any other questions or if I can explain further, please let me know! 🥰 I am always happy to help! Also, after you finish your duck I would love to see it! You can post a finished photo to this comments section. Take care Leigh! ❤️
I know it’s been 3 years since your comment but I’m just finding this pattern. Did you ever figure out round 17? I’m having the same issue and the explanation didn’t help.
Nevermind, I just read a better explanation farther down in the comments
round 17: (dec, 2SC ) x6, dec (19)
Thanks for the free duck pattern, I will try it.
I just found this and was wondering how to attach the eyes. Could someone explain. Do I uise glue?
Safety eyes have a screw on the back of it
Thank you for sharing the duck pattern freely. It is soooo cute and easy to follow but most importantly than it taking me just a few minutes to make, it was uplifting to see my daughter’s face light up after I surprised her just after she completed her online grade school classes. She has it on her desk! Again thank you for helping make our days staying home a little brighter!😊
Hi Jakira, you are so sweet to post such a nice comment. I am so happy that you made your daughter smile with a cute, handmade gift. I’m sure she loves it 🙂 Thank you again for such a nice comment and I hope you have a great day!
Any tips on getting the ducks to sit up??? mine keeps falling over beak first! I may have stuffed the head too much or the bottom not enough, but I wasn’t sure if there’s anything I can do now that I finished it. I love the pattern! I cant wait to try the different styles!
Hi Jessica! You may have put too much stuffing in the head as you suggested. There’s an easy way to fix this if you’ve already finished your duck. Just insert the non hook end of your crochet hook into the back of the head of the duck. Now you can push the stuffing from the head to the body with the end of your hook. I’ve had to do this a number of times to fix areas that don’t have enough stuffing. The only thing to watch out for is not make a big hole when you remove your hook. If you accidentally do this, you can move the stitches around the hole area and it will sort of close that hole. I hope this can help!
I LOVE these!!! My sister is a Headstart teacher. I made a bunch for her class room and put small magnetic buttons in the butt lol she’s using them for matching games for her kids!!!! p.s. helps then sit better to if your an over stuffer like me !
Aw wow I’m so happy you and your sister like them! That’s honestly so awesome to hear that she uses them in her classroom, such a cute and creative way to use these ducks 🙂 How cute! Thank you for sharing <3
divino me encanto
Muchas gracias 🥰
I’m pretty new to crochet, I love this pattern because ducks are my favorite animal and I can just make these over and over! I’ve made five with all the parts, but haven’t actually put them together because I don’t fully understand how to attach the beak from the pictures. Can you give me some advice?
Hi Josie, I’m so happy to hear that you like this pattern and have made so many ducks! Thank you for your question, I’m happy to help. So after you create the beak you will have basically a circle.
1. Fold this circle in half and it will look like a beak. (If it helps, you can sew the beak down the middle of where you folded so it holds in place).
2. Pin the beak onto the duck so secure it in place.
3. Place the yarn from the beak onto a needle. Now, insert the needle just above the beak, on the duck.
4. Now insert your needle into the beak, making sure youre pulling the needle downwards.
5. Pull the needle out completely. Now we will be at the bottom of the beak.
6. Reinsert needle right below the bottom of the beak.
7. Pull needle to the very top of the beak. We will be right above the beak, so now we repeat the process of Steps 3-7 until the beak is sewed on completely.
I hope that was able to help, but if you have any questions or need clarification please don’t hesitate to let me know!
Really like the instructions. Easy to understand and try, even for beginners (like me).
Just one little thing, the *inc, 2sc* were only understandable for me because I have seen something like that before. For total beginners, it would be really great if you put the explanation of *xx* at the top of your instructions.
Already signed up for your newsletter. Love those amigurumis!
Thank you so much! I’m happy to hear that this pattern was easy, that’s the goal! Great suggestion you have. That’s definitely something that would help out beginners, so I will try to see if I can make something like that happen 🙂 Maybe a blog post explaining how to read a crochet pattern would be good. Happy crocheting!
I have an Etsy shop and I was wondering if I could sell items made with this pattern if I credit you. The pattern is so cute and I love the variations!
Hi Amelia, you can sell any finished object you make from my patterns on your shop! No need to credit me since you did all the hard work of crocheting the ducks, but you can if you want! Thank you so much for your kind words, I really appreciate it 😍
Hello. I love simplicity of this duck pattern, but I could use a little bit of clarification on round 17 of the body. I don’t really understand what it means by “Sc in the next 2 st* 6 times”. It would be great if someone could explain this part for me. Thank you!
Hi Kassidy! I’m glad you like the pattern so far . I hope I can help you with this!
It says: Round 17: *Dec* in the next st, Sc in the next 2 st* 6 times, *Dec* in last st (19)
So we will * make a decrease stitch, then make 1 single crochet in the next 2 stitches. * Repeat the sequence inside of the *stars* a total of 6 times. (Note that we’re not making 2 single crochets into one stitch, we’re making 1 single crochet in the next 2 stitches.)
After this we will make a decrease stitch with the last 2 stitches available. At the end of this round you will have (19) stitches!
I hope this was able to help out a bit! If you need any clarification or have any questions just let me know 🥰
Thank you for sharing this! I made one for my brother for his birthday (22) as a joke. He loves it! Instructions were easy to follow, I shall have to try some of your other patterns 🙂
Hi Tayla! Thank you so much for the kind comment 🙂 Haha that’s so nice of you to make that for his birthday, I’m so glad ot hear he likes it! These little amigurumis make great gifts, maybe if you know somebody who loves pigs you can give my scraptacular pig pattern a try! https://stringydingding.com/product/scraptacular-pig-amigurumi-pdf/
Thank you!! I will be making these lucky ducks of yours for a nursing home where I volunteer at and also for my niece’s classroom!! Bless you for sharing your patterns and easy to follow directions!!
Thank you for making this available! I had another free toy duck pattern bookmarked for my Rubber Duck Debugging class, but realized it was from Ravelry and I’m trying to run an inclusive site so that was right out.
Hi Avrila! Thank you so much for your extremely kind comment 🥰 That’s so awesome you’re going to be making this for your class! I hope you enjoy making it, that’s such a fun thing to do! I’m also so happy to hear that you like my website, I always want everyone to feel welcome here no matter what 😍
I’m not sure if you go over Linux related things on your class, but I have a free Tux pattern you might like: https://stringydingding.com/tux-the-linux-penguin-amigurumi-free-crochet-pattern/
Let me know if you have any questions! I’m always happy to help ❤️
Love this cute little duck pattern! I have made 2 already, but each time the eye placement stitches did not come out correctly. They turned out to be on the side of the head instead of in the front. I just pulled the eyes out and repositioned them, but am I doing something wrong?
Hi Deb, I’m so happy to hear that you like it! That’s awesome 🙂
When it comes to the eye placement, the eyes may end up slightly askew depending on your tension. I had it with one duck where the stitch count was completely correct, but due to a slightly looser tension, the eyes came out too far to the right. In this case, you can just do what you’ve been doing and move them one stitch over!
However, it would be worth slightly changing this pattern if you want to make a lot of ducks 🙂 Try this next time, this version will make the eyes come out more to the right, but might be centered for you based on your tension:
Round 6: Sc in the next 3 st, Sc in the next st and add a different colored st marker to the Sc just made. This marks where to place the eye. Sc in the next st. Sc in the next st and add a different colored st marker to the Sc just made. Sc in the last 12 st (18)
Or you can try this version, which will make the eyes come out one stitch over but to the left, but it may center better for your tension:
Round 6: Sc in the next 5 st, Sc in the next st and add a different colored st marker to the Sc just made. This marks where to place the eye. Sc in the next st. Sc in the next st and add a different colored st marker to the Sc just made. Sc in the last 10 st (18)
I hope this was able to help! You’re not doing anything wrong, it’s just a slight matter of tension 🙂 Please feel free to let me know if you have any questions!
Thank you for the reply, and I will try your suggestions. I’m making these cute little ducks into ornaments for my grandkids, and I know they will love them!
Aww no way, that is a very cute idea! You could even make the ducks have a santa or elf hat 🙂 That’s so sweet of you Deb, they for sure will love them! If you ever get a chance, I would love to see a picture of them hanging on the Christmas tree! 🙂
Awesome.Thank you for the pattern.
I love the duck pattern. I participate in what Jeep owners call Duck Duck Jeep and instead of buying rubber ducks I’ve made these to gift to other Jeep owners. Thank you for making an easy pattern to follow
Hi Jessica, oh my gosh that is hilarious! What a cute idea, I think the crochet ducks have a lot more character than a regular rubber duck ❤️ Thank you so much for sharing, I am very happy that you like the pattern!
Speaking of making hats, do you happen to have a pattern of one for these little guys??
I don’t have one for these ducks, but I found a mini santa hat pattern that should fit pretty good on these ducks! Here is the free hat pattern: https://www.crochetspot.com/crochet-pattern-mini-santa-hat/
It should fit since the hat is only 16 stitches 🙂 I think it would look so adorable on the ducks, if you give it a try please show me!
I will
Thank you.
I just want you to know how much I appreciate this! We are Jeep owners since COVID, our Jeep community has been ducking other Jeep owner around the world just to bring a smile! I have gifted over 150. My 2 year old grand daughter is now obsessed with the ducks, she FaceTimed me and was mad I didn’t have my ducks. I whipped up one super fast so after her nap she could be happy with her Nani again! So truly thank you!
This is really amazing so hear, Sandi! It’s really cute to hear that the Jeep community if gifting ducks to other jeep owners, the little things like that can really change somebody’s day 🙂 Oh my goodness you have gifted a LOT of ducks! That’s amazing 😍 Did you make 150 of them, or did you buy some and make some? If you made all of them that is insane!
Your granddaughter sounds ADORABLE by the way, it seems like she already has a favorite animal at 2! Haha what a cute story 🙂 Thank you so much for the super kind and fun comment, keep making your ducks and making people happy! ❤️
I love the quick and easy pattern!! I am a new Jeeper and plan on making a bunch to do #duckduckjeep with!
I am so happy to hear that, it seems like so many people are using it for the jeeps which is so so awesome! Glad that you enjoy the pattern, thank you so much for the kind comment! 🙂
Hi. Thank you for the brilliant patterns. As everyone here is enjoying making lots of them, I was wondering if you had heard of The Little Yellow Duck Project? (Google it 👍). It was created by Emma Harris in memory of her best friend who died of cystic fibrosis before a suitable lung donor was found. She had been a yellow rubber duck lover. Now people all around the world handcraft little ducks, and leave them as ‘a random act of kindness’ for someone to find. Each duck has wears a special tag inviting the finder to take it home, visit the website, and register where it was found. The idea is that people will read the personal stories and information there, and be encouraged to pledge their own random act of kindness by registering to donate blood, bone marrow, organs tissues. There is a world map and huge searcheable list of all the ‘registered as found’ ducks. To date the number is 12,506 ducks in 106 countries. Unfortunately a lot of ducks found are not registered, so who knows exactly how many have actually been made and left 😊. Just a suggestion for anyone who is interested, and your patterns are ideal!!!
I left a duck (Shelby) at the North Cape in Norway in 2016, and it is still the most northerly found and registered duck 😊.
Sorry, attached poppy photo by mistake 🙄
Thank you for sharing this info!! I made my first duck yesterday…..will practise a few more and then start leaving them around!
Hi , if i use chunkier wool would it make the ducks bigger? I would love to make this for a friend but would love to try and make it bigger
Hi Bell! If you use a chunky wool it will definitely come out bigger 🙂 I would even use a larger hook if you want the duck to come out larger, it depends how big you want it! I’m positive your friend will love the duck you’re making! Please feel free to let me know if you have any questions 😍 ❤️
Hi yes i do have a tiny questing so I just finished round 11 and it’s curing up and down should I keep going or should I do a different stitch
Hi there Giovanna! I’m so sorry but I’m having a hard time picturing what your duck may currently look like 🙁 Could you upload a picture by chance? You can do so right under these comments! That way I can see what your duck looks like and maybe I can see if there’s a mistake made, or a yarn issue. Thank you so much!
Hey I’m stuck on round 10 so round 9 ends up being 9 idk how to get round 10 up to 13 😳😳
It always ends up being 12
Hi there Ravyn! Thanks for your question, I hope to help 🙂
So glad that Round 9 works out for you! Round 9 ends up with 9 stitches, so we will work into all 9 of these stitches in Round 10. Here’s Round 10:
Round 10: *Inc* in the first st, Sc in the next 5 st, *Inc* in the next 3 st (13)
Here we will make 1 Increase in the first stitch (so 2 sc into 1 stitch. Then, we will make 1 single crochet in the next 5 st (so Sc in the next 5 st). After this, we will make 1 increase stitch in the next 3 stitches (so 1 increase in the next stitch. 1 increase in the stitch after that. 1 increase in the stitch after that.
This will use up all 9 stitches from Round 9, meaning we’ve just completed Round 10! At the end of this round we should have 13 stitches. Here’s why: 2 (the increase stitch) + 5 (the 5 single crochets) + 6 (the 3 increase stitches we made)= 13!
If Round 10 still doesn’t work, make extra sure Round 9 has 9 stitches. If Round 9 has the wrong number of stitches, Round 10 will also be wrong.
Then, make sure you’re making every stitch needed in Round 10. If anything specifically is confusing you, please let me know! I’m always happy to help 🙂
oh man thanks 😂😂
Thanks for the pattern it works up so cute. Will be making several of these for Cruising Ducks Hide and Seek for the cruise I am taking in Nov.
Thank you so much, I’m glad that you liked the pattern 😍 That’s such a cute idea for the cruise, I’m sure you’ll make so many people happy when they come across some of your ducks! Have fun on your trip in November, that’s so exciting! ❤️
Hello! I just did the pink flamingo for a gift and I loved it so much. It was easy and cute. Thank you for these patterns. I just changed the wings a little bit.
Oh my gosh that is so cute, your flamingo looks perfect! I love how you did the wings on yours, by the way 😍 I’m really happy that you liked the pattern, hopefully you can make a few more sometime! ❤️
I have made so many of these practicing with different needles and yarns. My favorite were the oversized batch with Bernat Baby Blanket yarn.
Oh my gosh I LOVE how they have their own little seats! Haha that’s too adorable, they almost look like the duck could be a handle to hold onto and their seat could be made form scrubby yarn so you could wash with them 😍 Just my crazy crochet mind going on about the possibilities lol 🙂 Did they come out pretty large since you used bernat baby yarn? Good job making all of them, they came out so wonderful!
Hi there, love these wee ducks and I am keen to make a set for my daughter to sing the five little ducks song with. My question is, how would I go about making a larger “mother” size duck using the same weight yarn? Can I adapt the pattern somehow or would it be a whole new pattern? I am fairly new to crochet but have picked up the terms pretty quickly. Thanks 😊
Hi there Rachel, thanks so much for your question! What an adorable idea you have, I know your daughter will love the duck set you’re going to make 😍
To make the large mother duck, there’s a few things you can do. The easiest being to go up a hook size – I would recommend making the mother duck with a 6mm hook. The next thing you can do is to use blanket yarn! This will make the duck quite large, but I actually think it would be the perfect size to use for the mother duck. I usually use Bernat blanket yarn, here’s a link to their colors:
https://www.yarnspirations.com/bernat-blanket-brights-yarn–300g-10.5-oz-/161212.html?dwvar_161212_color=Race%20Car%20Red&cgid=yarn
https://www.yarnspirations.com/bernat-blanket-yarn–300g-10.5-oz-/161110.html?dwvar_161110_color=Almond#prefn1=brand&prefv1=Bernat&start=1
The last thing you can do is to crochet using 2 strands of the same color yarn at once. Be sure to use a larger hook when you do this, possibly a 6mm hook or whatever feels best 🙂 If you only have 1 skein of the yarn you’d like to use, usually a skein will have 2 different places to pull your yarn from. One being from the center of the yarn, and the other being around the outside of the skein. Pull yarn from both of those sections at once and then crochet the duck with those 2 pieces of yarn at the same time 🙂 I hope this made sense, but please feel free to let me know if I can help clarify anything or answer any questions!
Thanks so much and good luck on making your ducks! That’s seriously such a cute idea 🙂
These are perfect for Duck,Duck,Jeep
How do you make the wings that are pictured on the yellow ducky?
My duck 😂😂😂😂
I initially tried your pattern for Ducks for a keep club. I then discovered cruising ducks. Everyone on the cruise ships are gaga for them. So much fun! Thank you!
That’s supposed to say jeep club! LOL
These ducks are so cute! I’ve only been crocheting for two weeks and this was we’re I started. Today I’ve made my 15th and decided to make it twice as big!
Hi, this is my first amigurumi project and I am softly confused. In the pattern it calls for decreasing in the last stitch on some rows. The only way I know how to decrease is with the invisible decrease, which uses 2 stitches (insert in first front loop, pull up a loop, insert in next front loop, pull up a loop, pull a loop through all loops on hook) is this what you are referring to or is there a another method I don’t know about? I can’t find any other decreases on line, but maybe I’m not searching the right thing? Thank you so much!!
Thank you for your cute duck, I’ve made my first one and plan to make as many as I can before 17th February, which is random act of kindness day then I’ll be leaving them around my local area and the college I work at, in special bags with a note attached. As I live rainbows they will all have a rainbow ribbon around their necks.
I love this pattern so very much. I am making a bunch of ducks for our next cruise. They have a FB page called Cruising Duck where most are rubber ducks. I posted one on our specific cruise page and had others asking if i could “hide” one in their mail box. HAHAHA
As others have stated I am also making some up for Duck Duck Jeep. Although I’m a Dune Buggy driver I have been Ducked by Jeeps so in addition to my Jeep Resin Duck key chains i have another fun addition.
Soooo cute!
I love this pattern!! I’ve been making lots of fluffy ducks for no particular reason other than they are really cute! still haven’t put the beaks on cause I kinda like the way they look lol, might get around to it tho one day… they’re so fun and easy to make😁.
thank you xx
I made this pattern today. I’m checking out different patterns to make as key chain hangers as a gift for my students at the end of the year. However.. The eyes of the duck were on the back of the head. I don’t know what I did wrong… But I’m going to try again 🙂 It was a funny sight! And I made it with yarn that was to thin… It’s really small and thus difficult to crochet at times.
Thank you for this pattern… It gives me so much ideas ..
This design is so cute. I made one for my friend and now another for my sister who I gave the nick name “duck”. Now I’m off to go make myself one.
I’m having trouble me with r17 being 19 and then r18 being 13. Not making sense to me
Thanks
I had the same problem was driving me batty. R10, inc, sc 5, inc 3x’s (13) that last inc 3 times was kicking my booty….just breathe and re read the pattern. I had a chocolate break and had that Aha moment abd read it correctly. It really is a very cute pattern and am now having a ducky fest!
Hi I would love to make one of your ducks with the extra thick bernat yarn. Ik some MC patterns need readjusting with bigger sized yarn. Do you have any suggestions on how I would do that or how I can go about skipping the MC all together?
I just found your pattern for little ducks. Could you tell me what you mean by “Inc” & “Dec” in the pattern? Round 3 shows “Inc, Sc”. I’m used to increasing say “2 sc in next st”. How do you decrease on these? I’ve crocheted a lot of years but I can’t figure out what those directions are. Thanks!!
Thank you so much for providing so many free patterns. I’m still new to crochet so it’s great to have free resources while I learn. I made this duck for a coworker. Can’t wait to try out the next pattern!
How tall are these with a 4 mm hook?
Thank you for this pattern! I needed a quick project this morning and this was perfect. I used Bernat Blanket Baby with a K hook.
I’m confused on the head. It says yo stop and stuff. The picture looks like it’s pulled into a ball? But then it says to continue on in the round?
I love this pattern, I already make 5 of them, I just learn to crochet a few months ago and this is so fun. I was looking now for a pattern to make accesories for the ducks, like hats.
Thank you 😊
Hi! I purchased your pattern for crochet ducks a year or so ago. My heads seem to be coming out tall instead of nice and round. Do I need to stuff it better or what? Maybe I need to move the eyes up a row.
Love this quick, easy pattern! I made these to give to two of my grandsons for Easter. They didn’t fit into the plastic eggs I found, but were a perfect fit in plastic bunnies. I have so many plans for using this pattern; love the creativity as well as generosity of the artist. Thank you!
Rows 10,11, 13 have to many stitches If I use all the stitches called for in row10 I will have 21 stitches instead of 13 so goes riw 11 and 12
I LOVE this pattern! Easy to follow and absolutely adorable!!! Thank you for sharing
I love these so much. My little town has annual duck races and I am making a ton of these to sell there next year. I am sure they will do great because they are just so cute!
Is this worked in continuous rounds.
Aha! Finally I snapped, sooooo sorry, misread the pattern! Working ok now, thank you so much for the lovely pattern!
Gloria
Thank you so much for this pattern! I just love how you made it so you can make many different ways to make the duck! I was having trouble finding the perfect pattern for making this, but I found it!
Thank you for this cute and easy pattern!
Here is my duck 🦆
Does anyone know how to watch the video tutorial for members? I can’t figure out how to watch it and my emails are going unanswered 🙁
Thanks for these fun pattern. I am wondering what yarn you used for your ducks?
Thanks Julie
I LOVE YOUR PATTERNS! This duck is absolutely adorable and took no time at all!! I’m going to make a whole army of them!! When my cousin saw these she immediately wanted one! I only had trouble with the safety eyes. I marked where the pattern told me to but they were on the wrong side of the head. No big deal though, I managed to move them!!
I loooove this pattern, and have made 6 ducks so far, was wondering if you were okay with people selling the finished product if they give credit to you! I looked on the pattern page, but couldn’t find anything, considering making more tiny ones to turn into earrings, but I’ll only give away to friends and family if you don’t want people selling them!