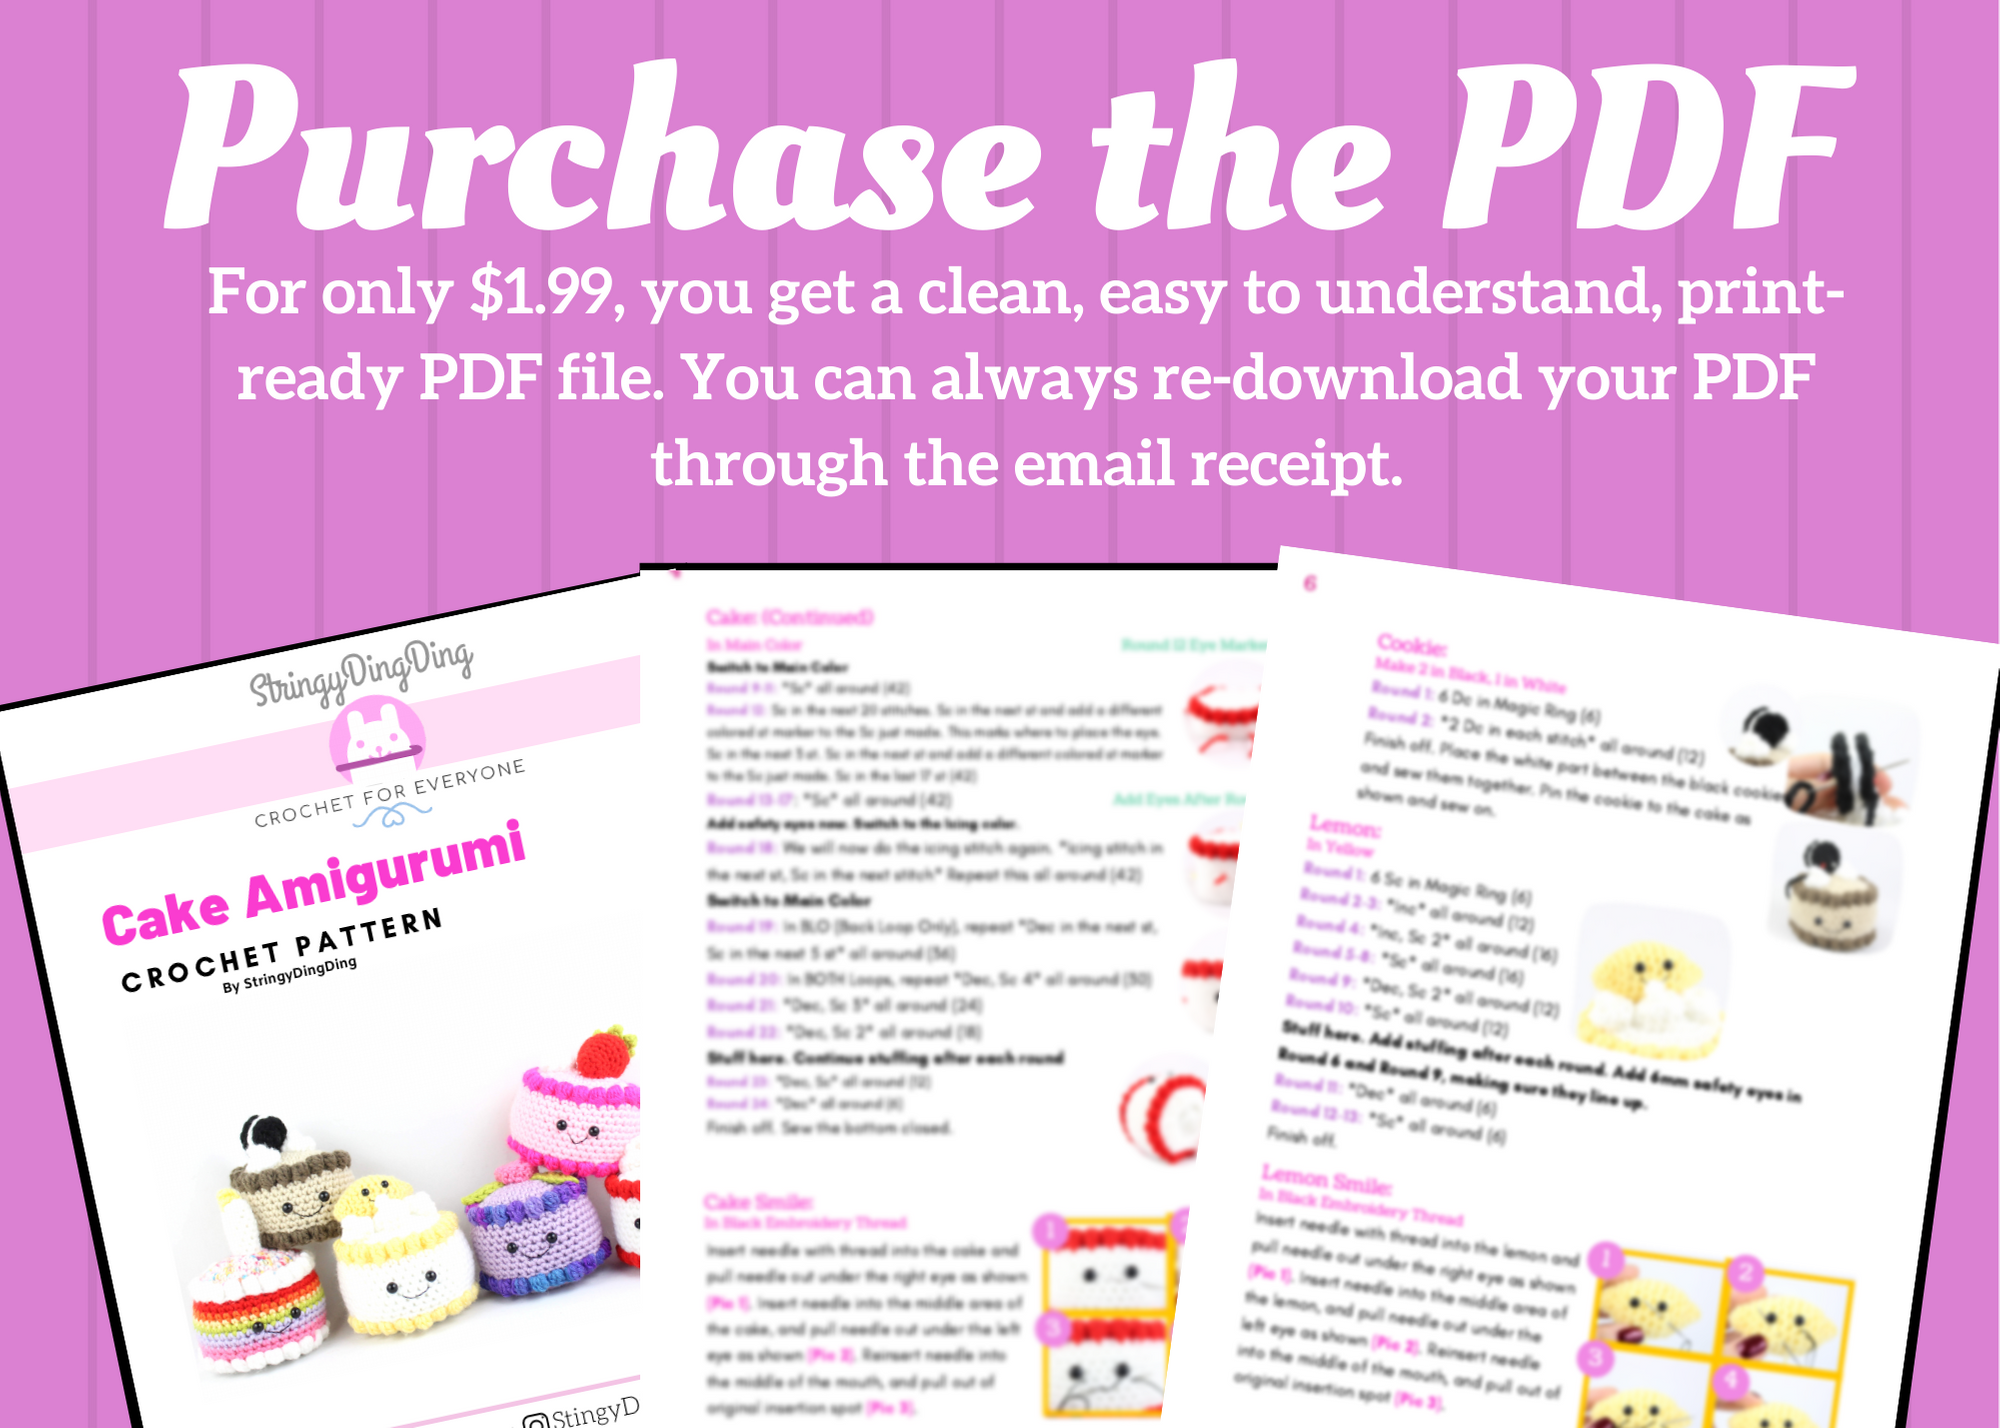
Purchase the PDF version here

Supplies:
4mm crochet hook, 4/Medium weight yarn in Main Color and Icing color. 8mm safety eyes for cake, 6mm safety eyes for the lemon, tapestry needle, scissors, and stuffing.
Additional Information:
Difficulty: Easy
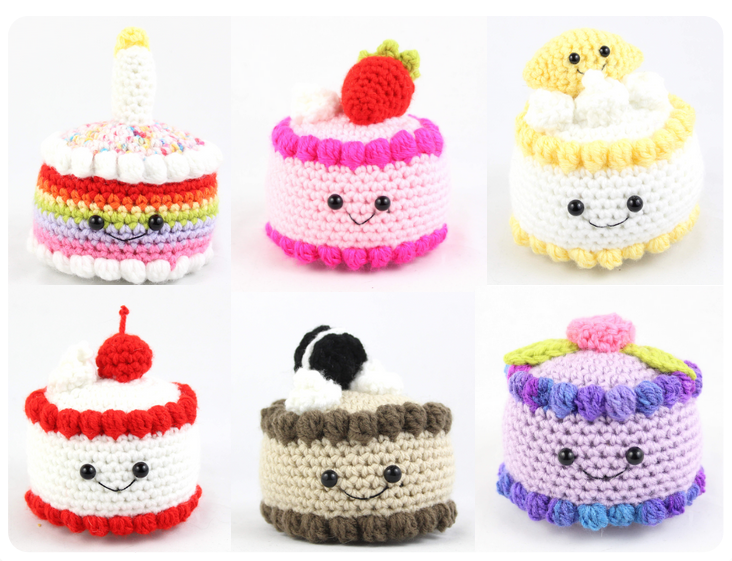
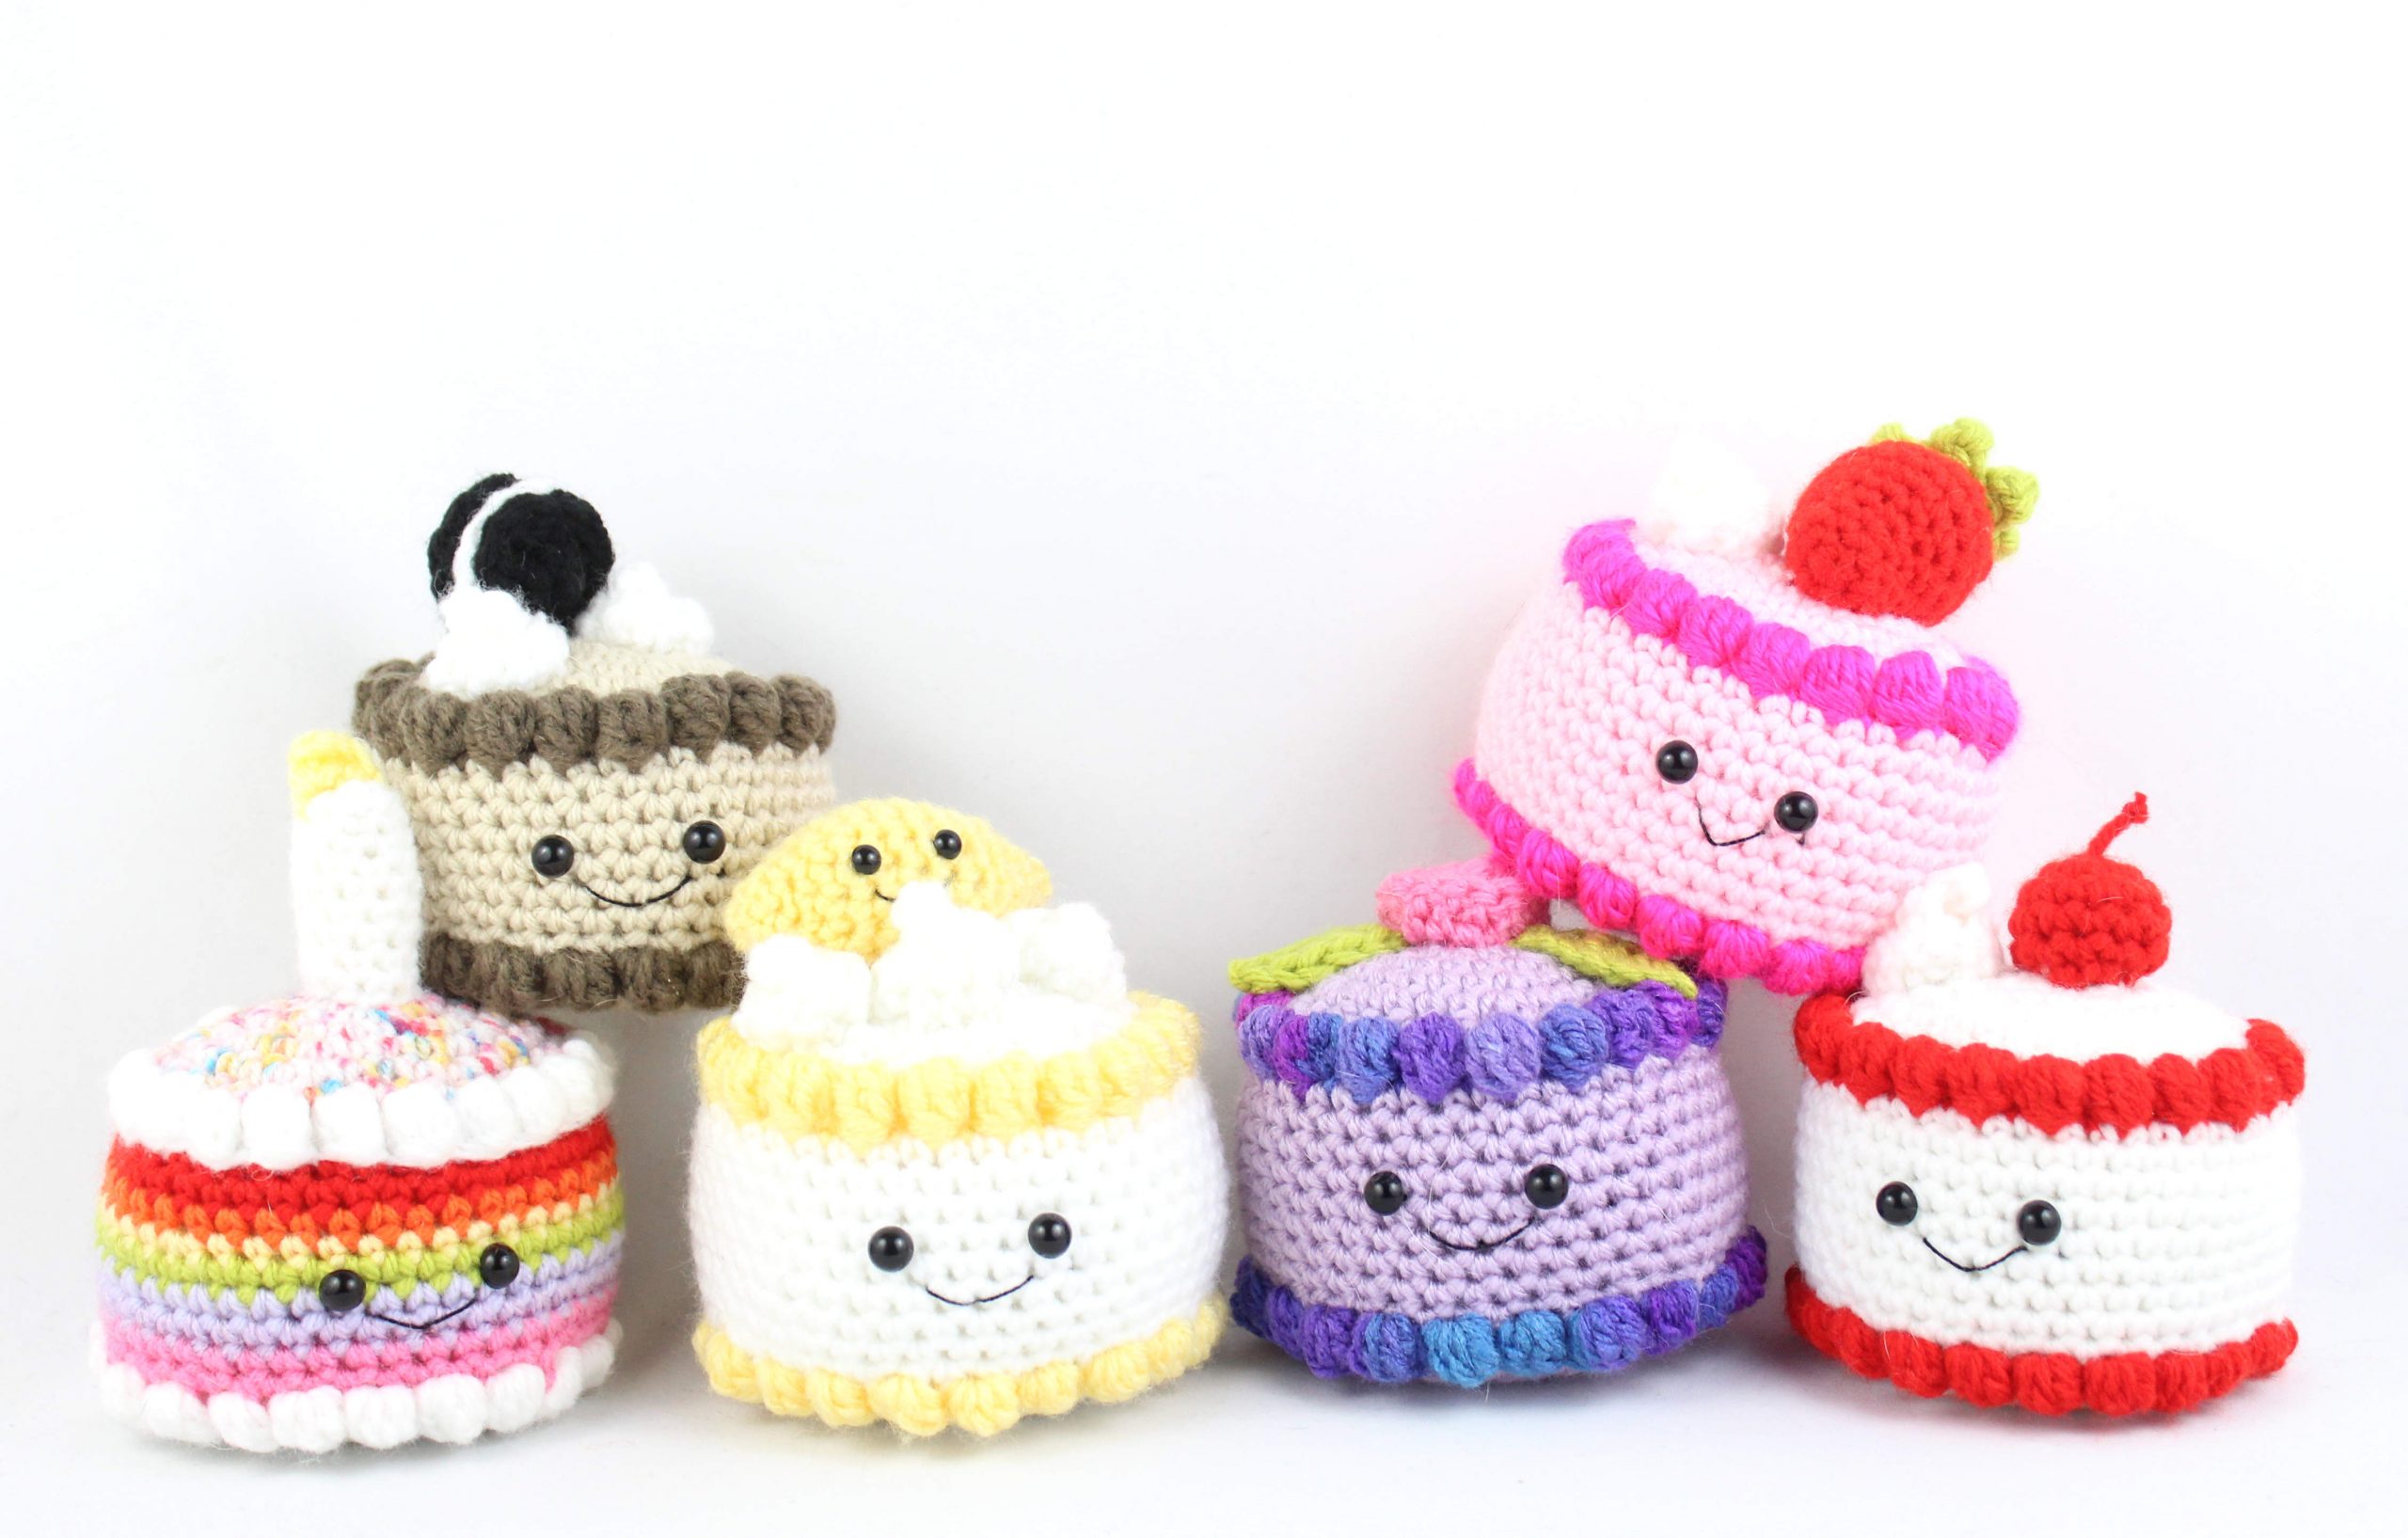
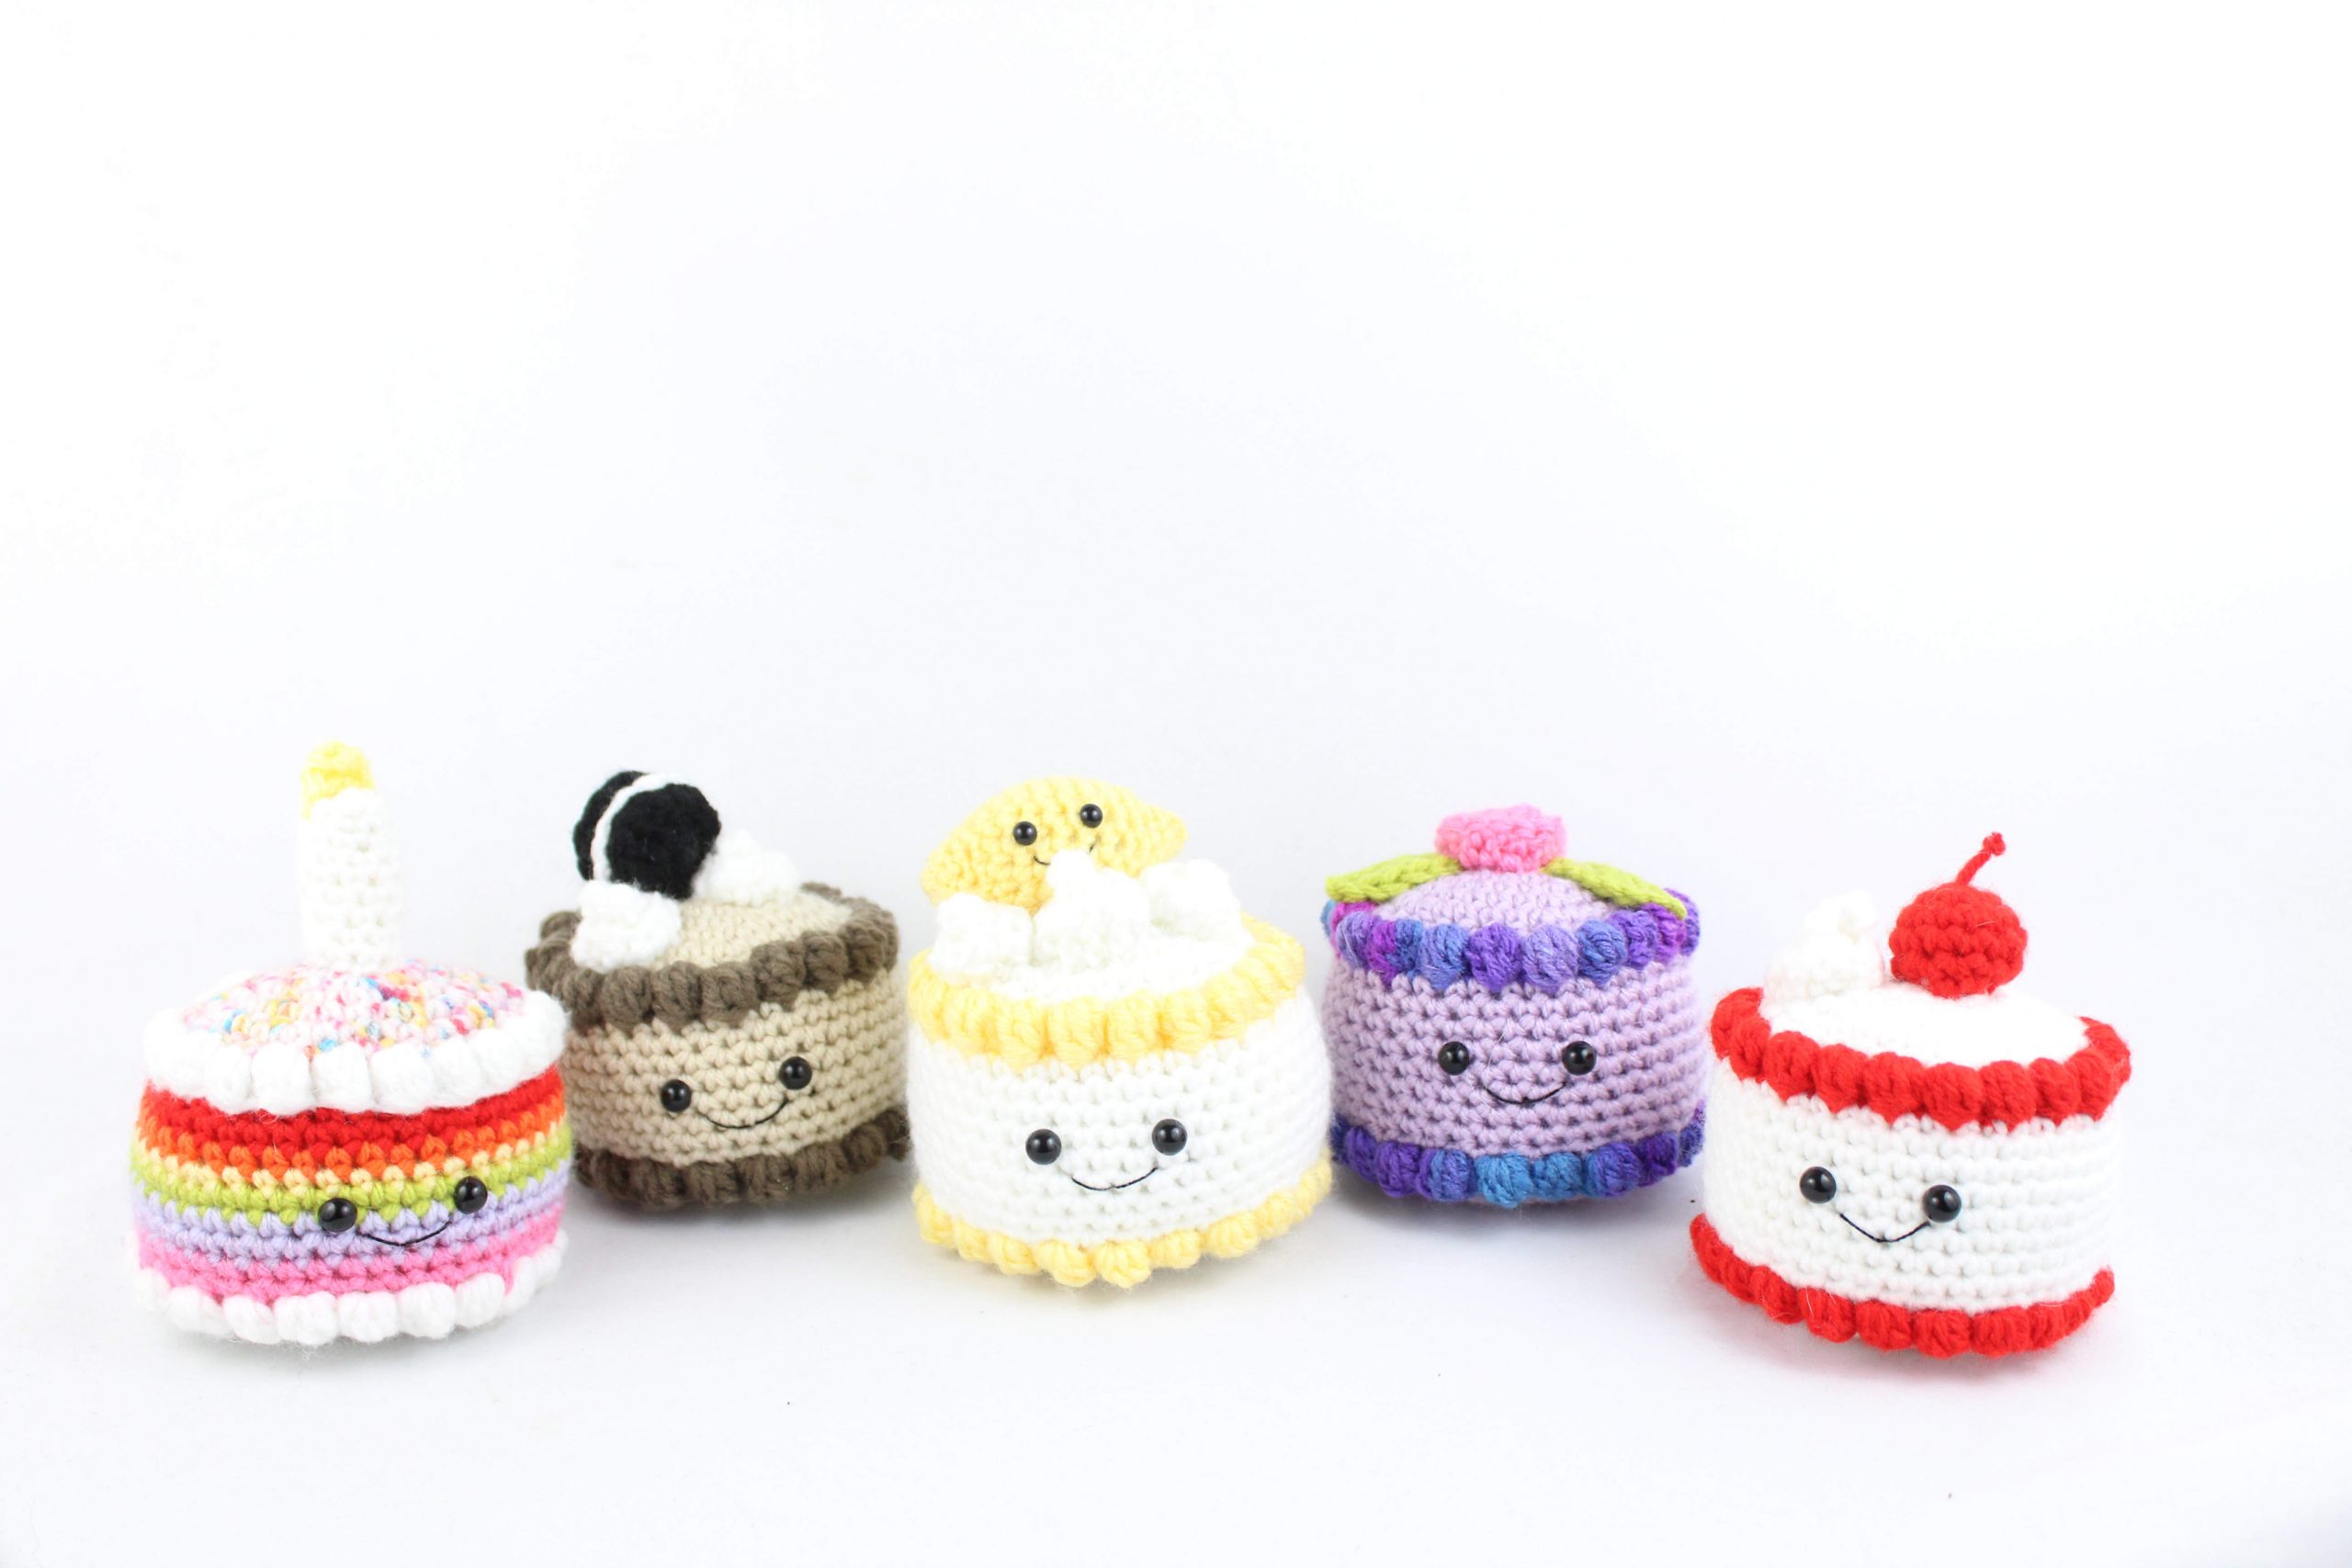
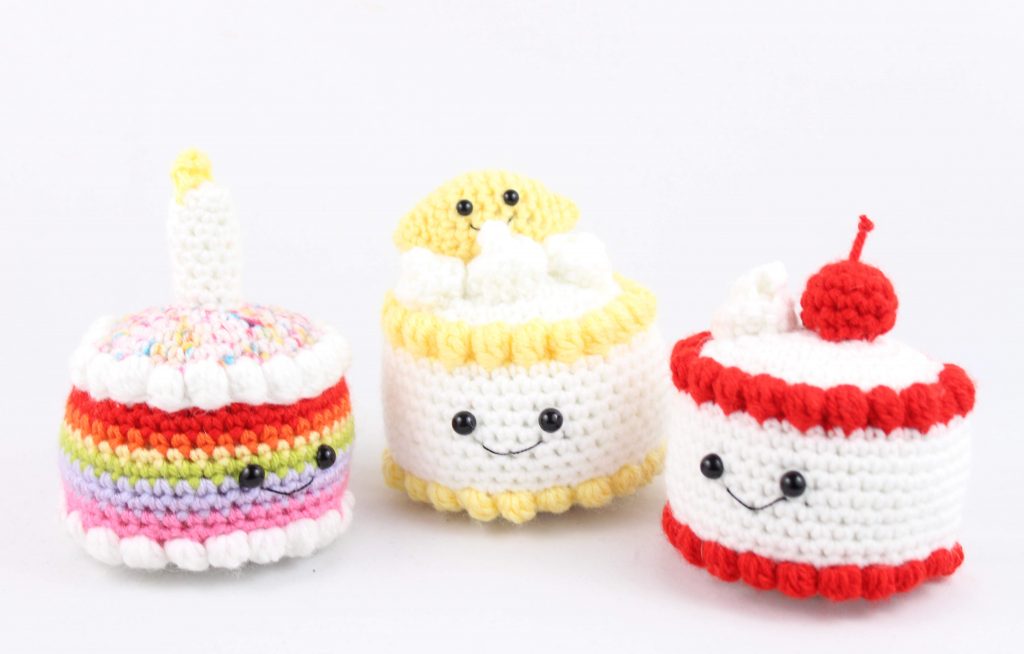
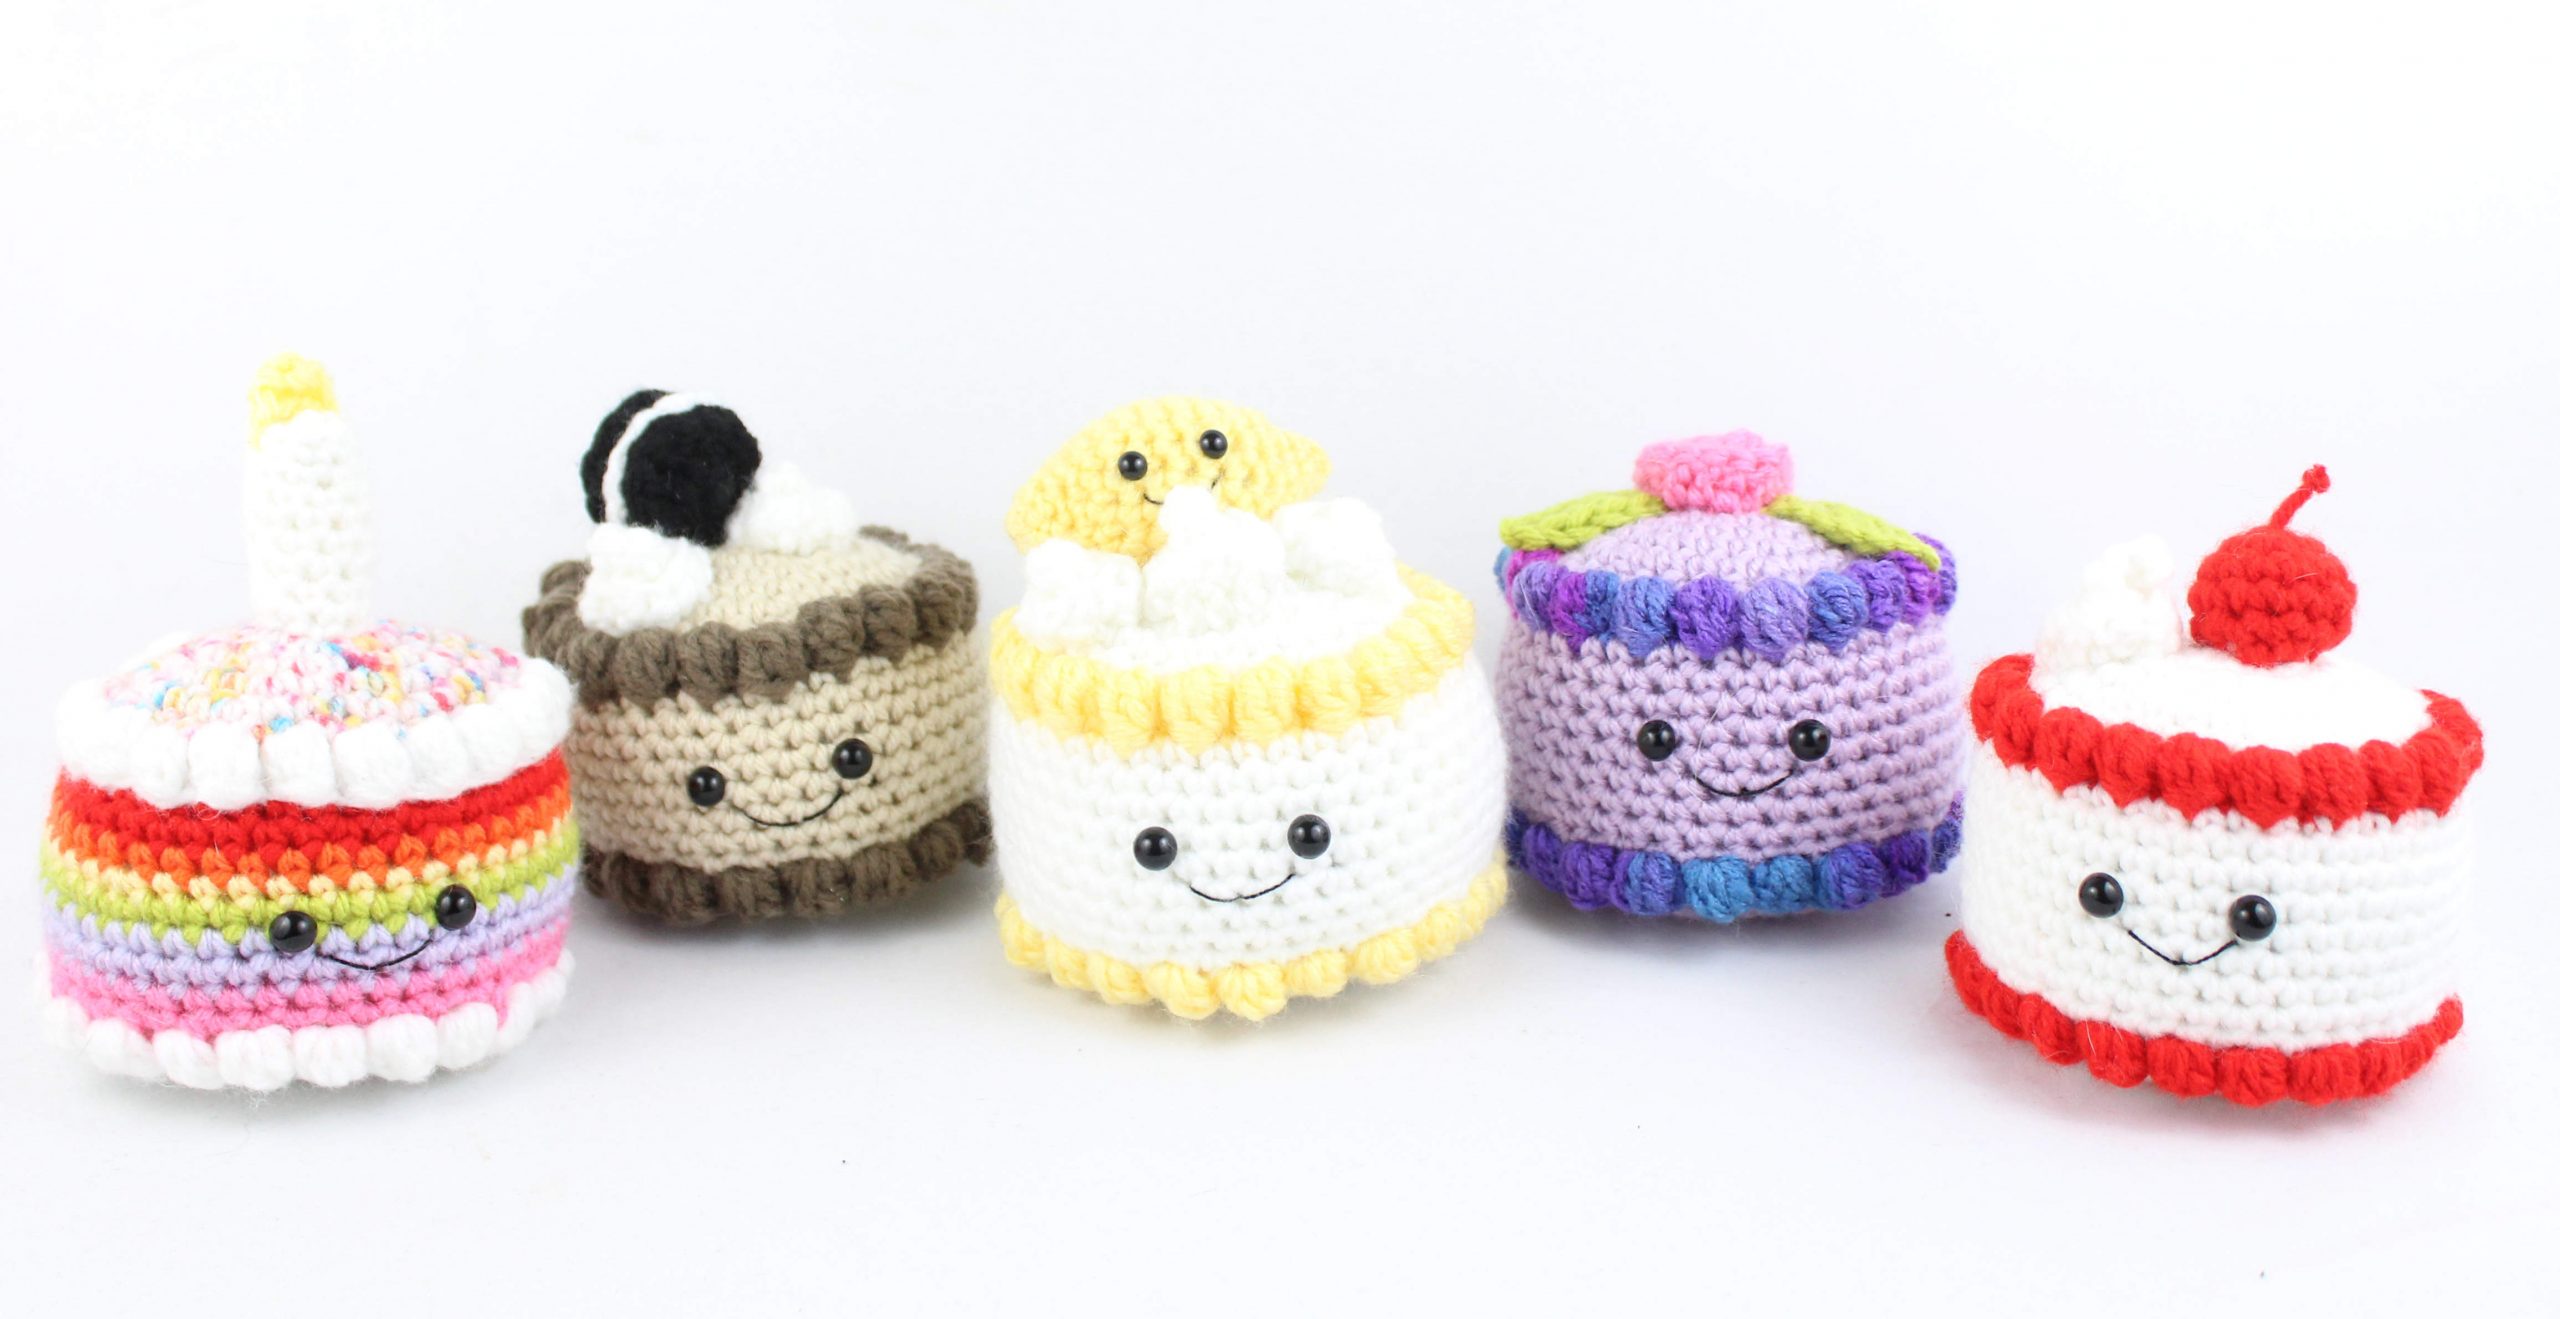
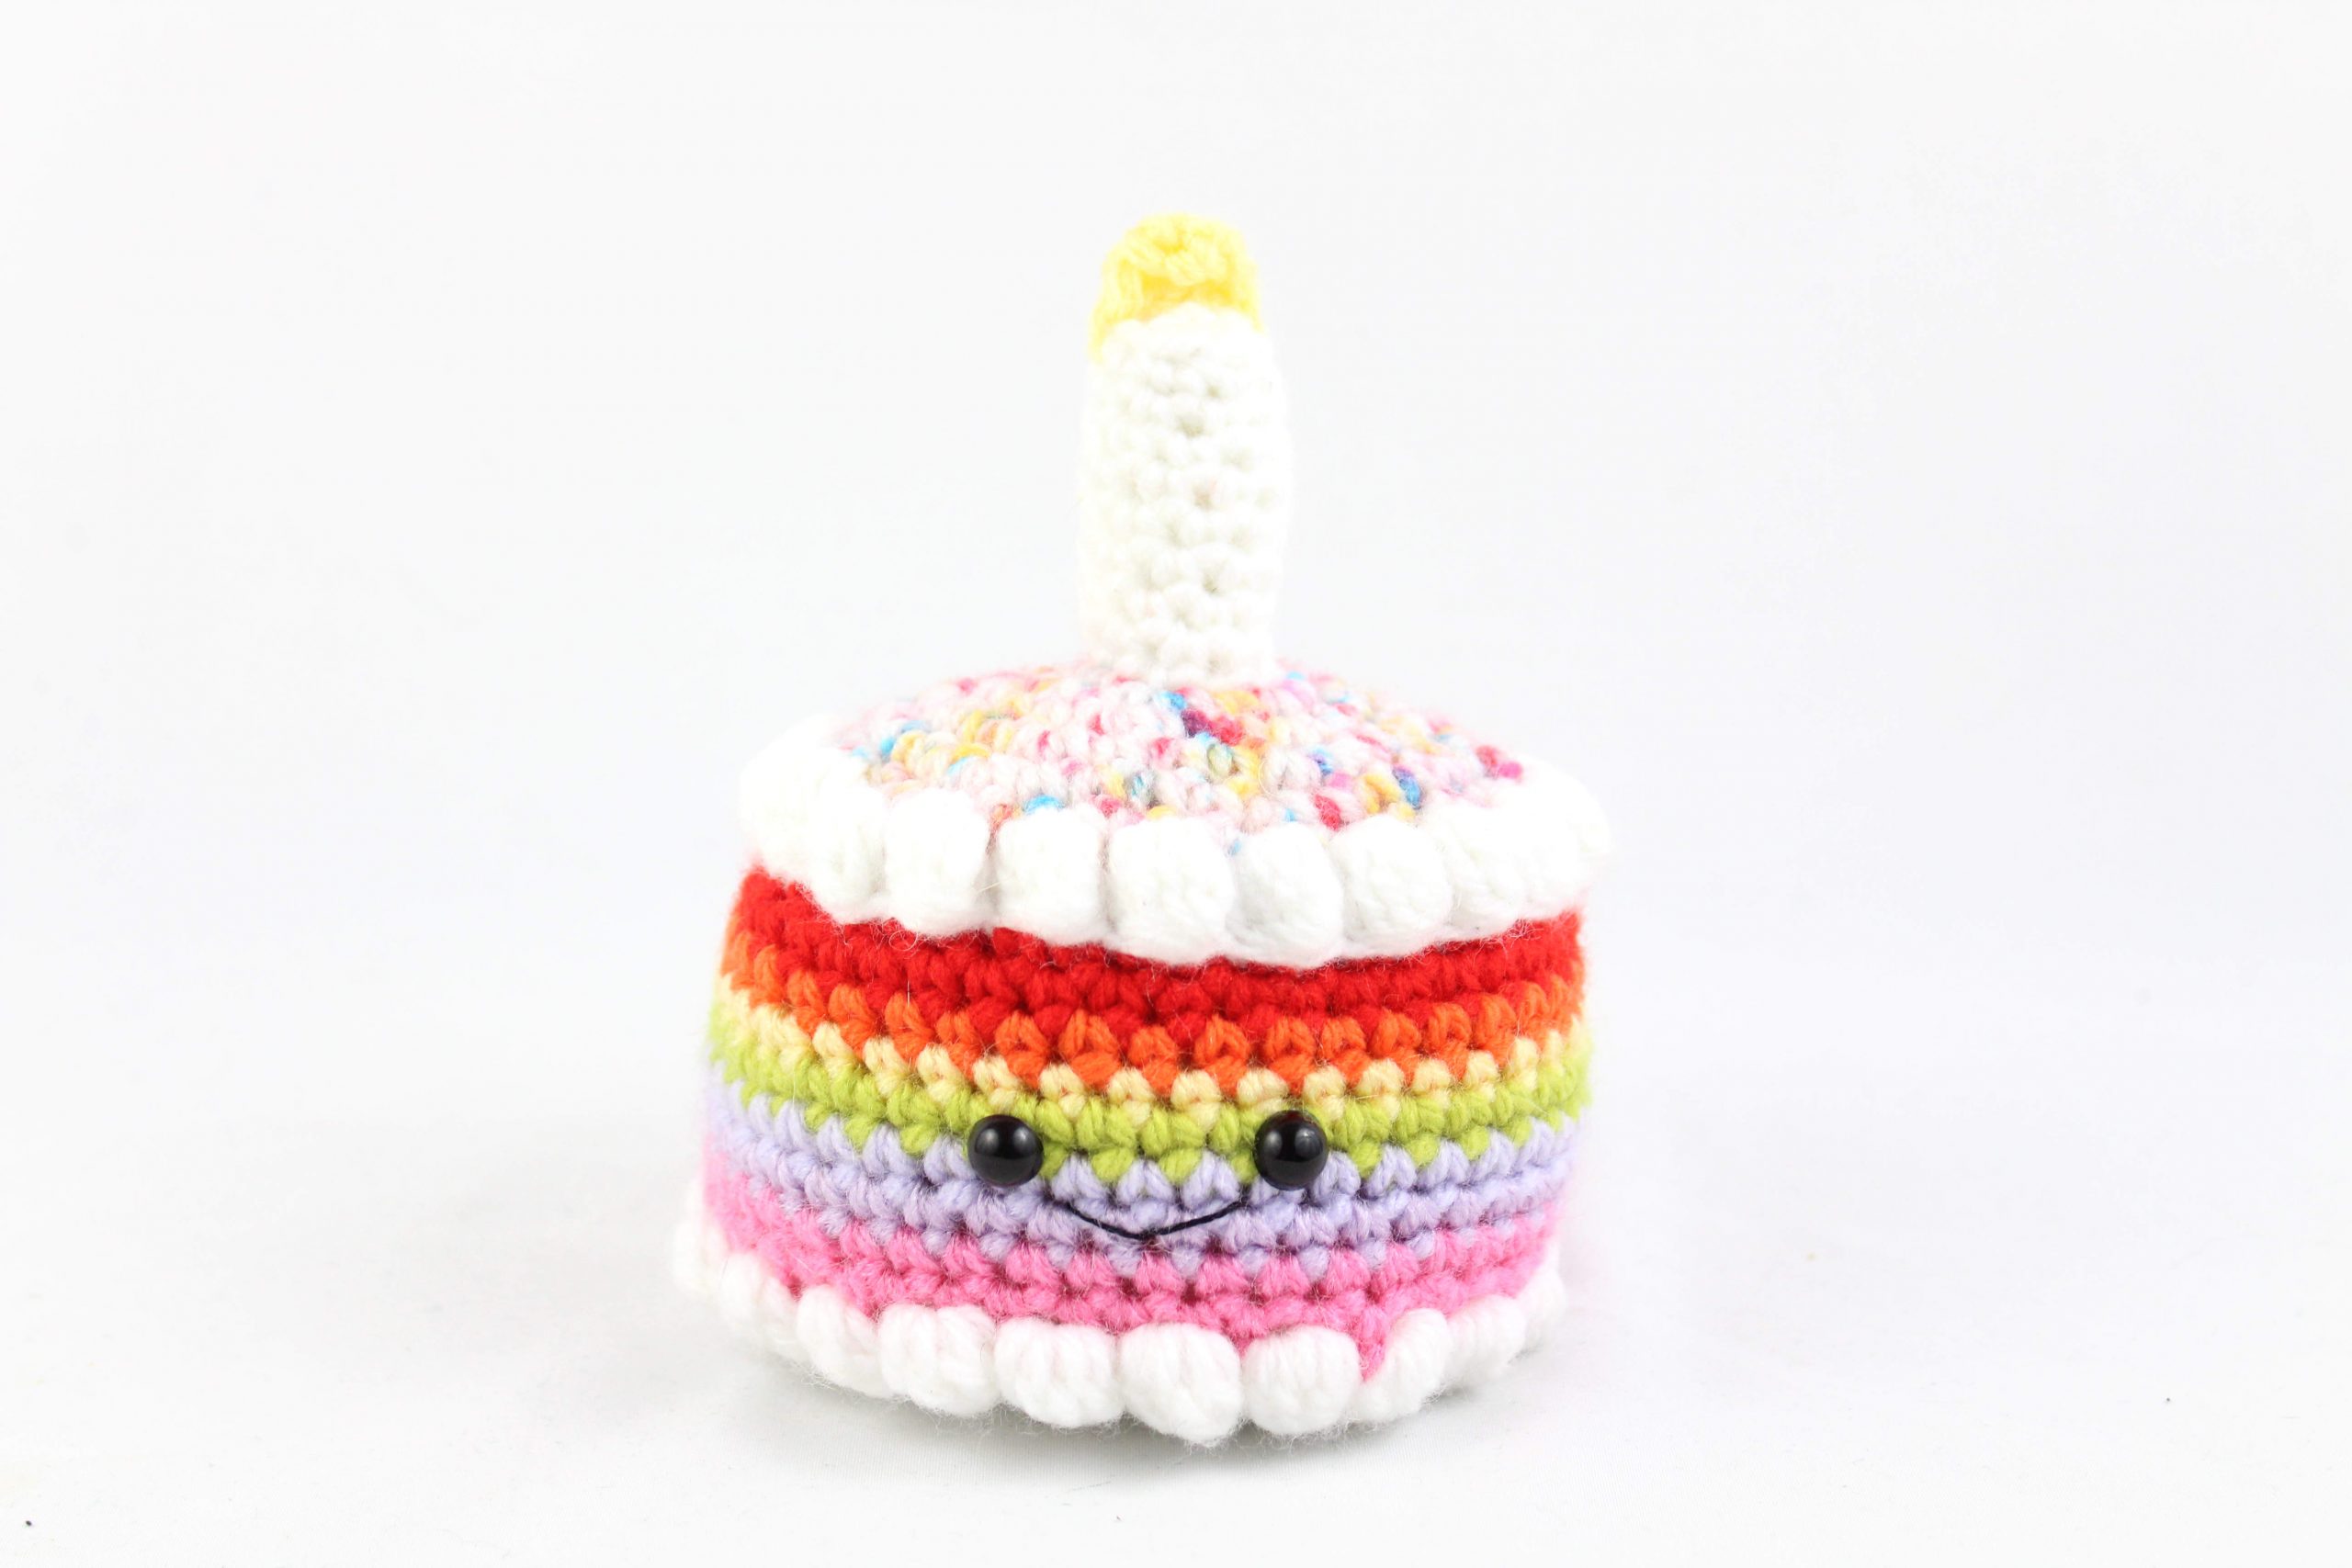
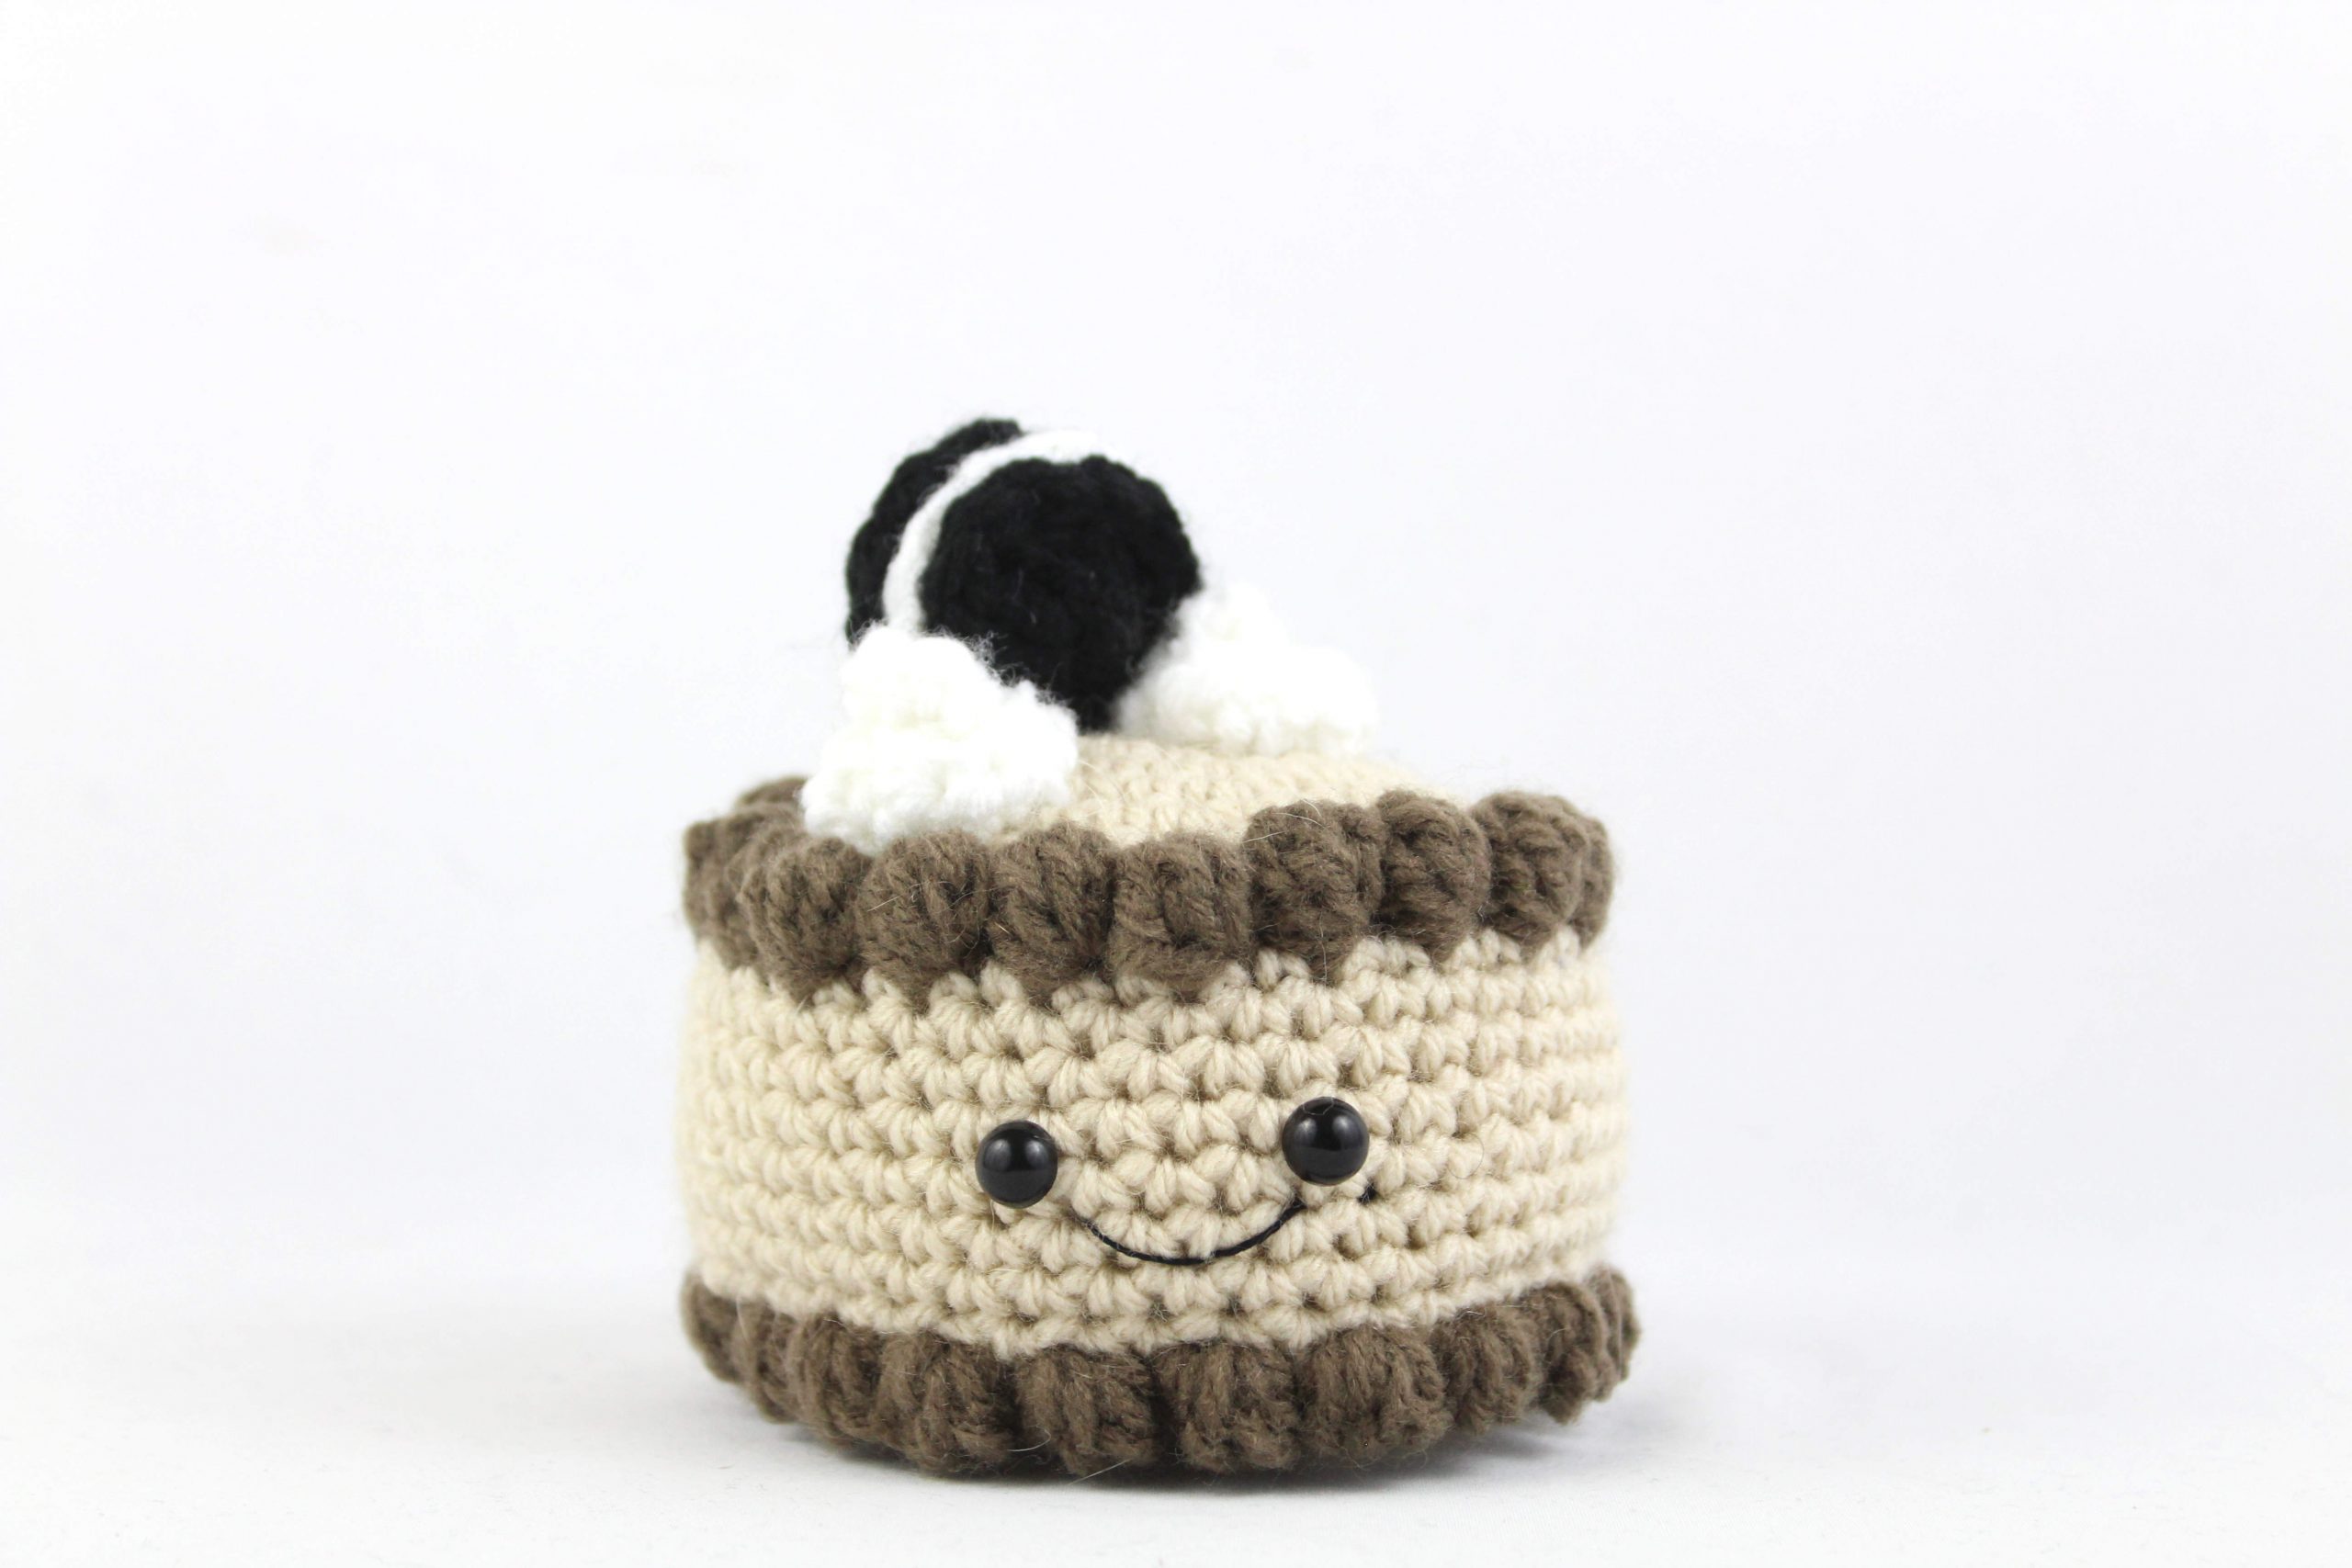
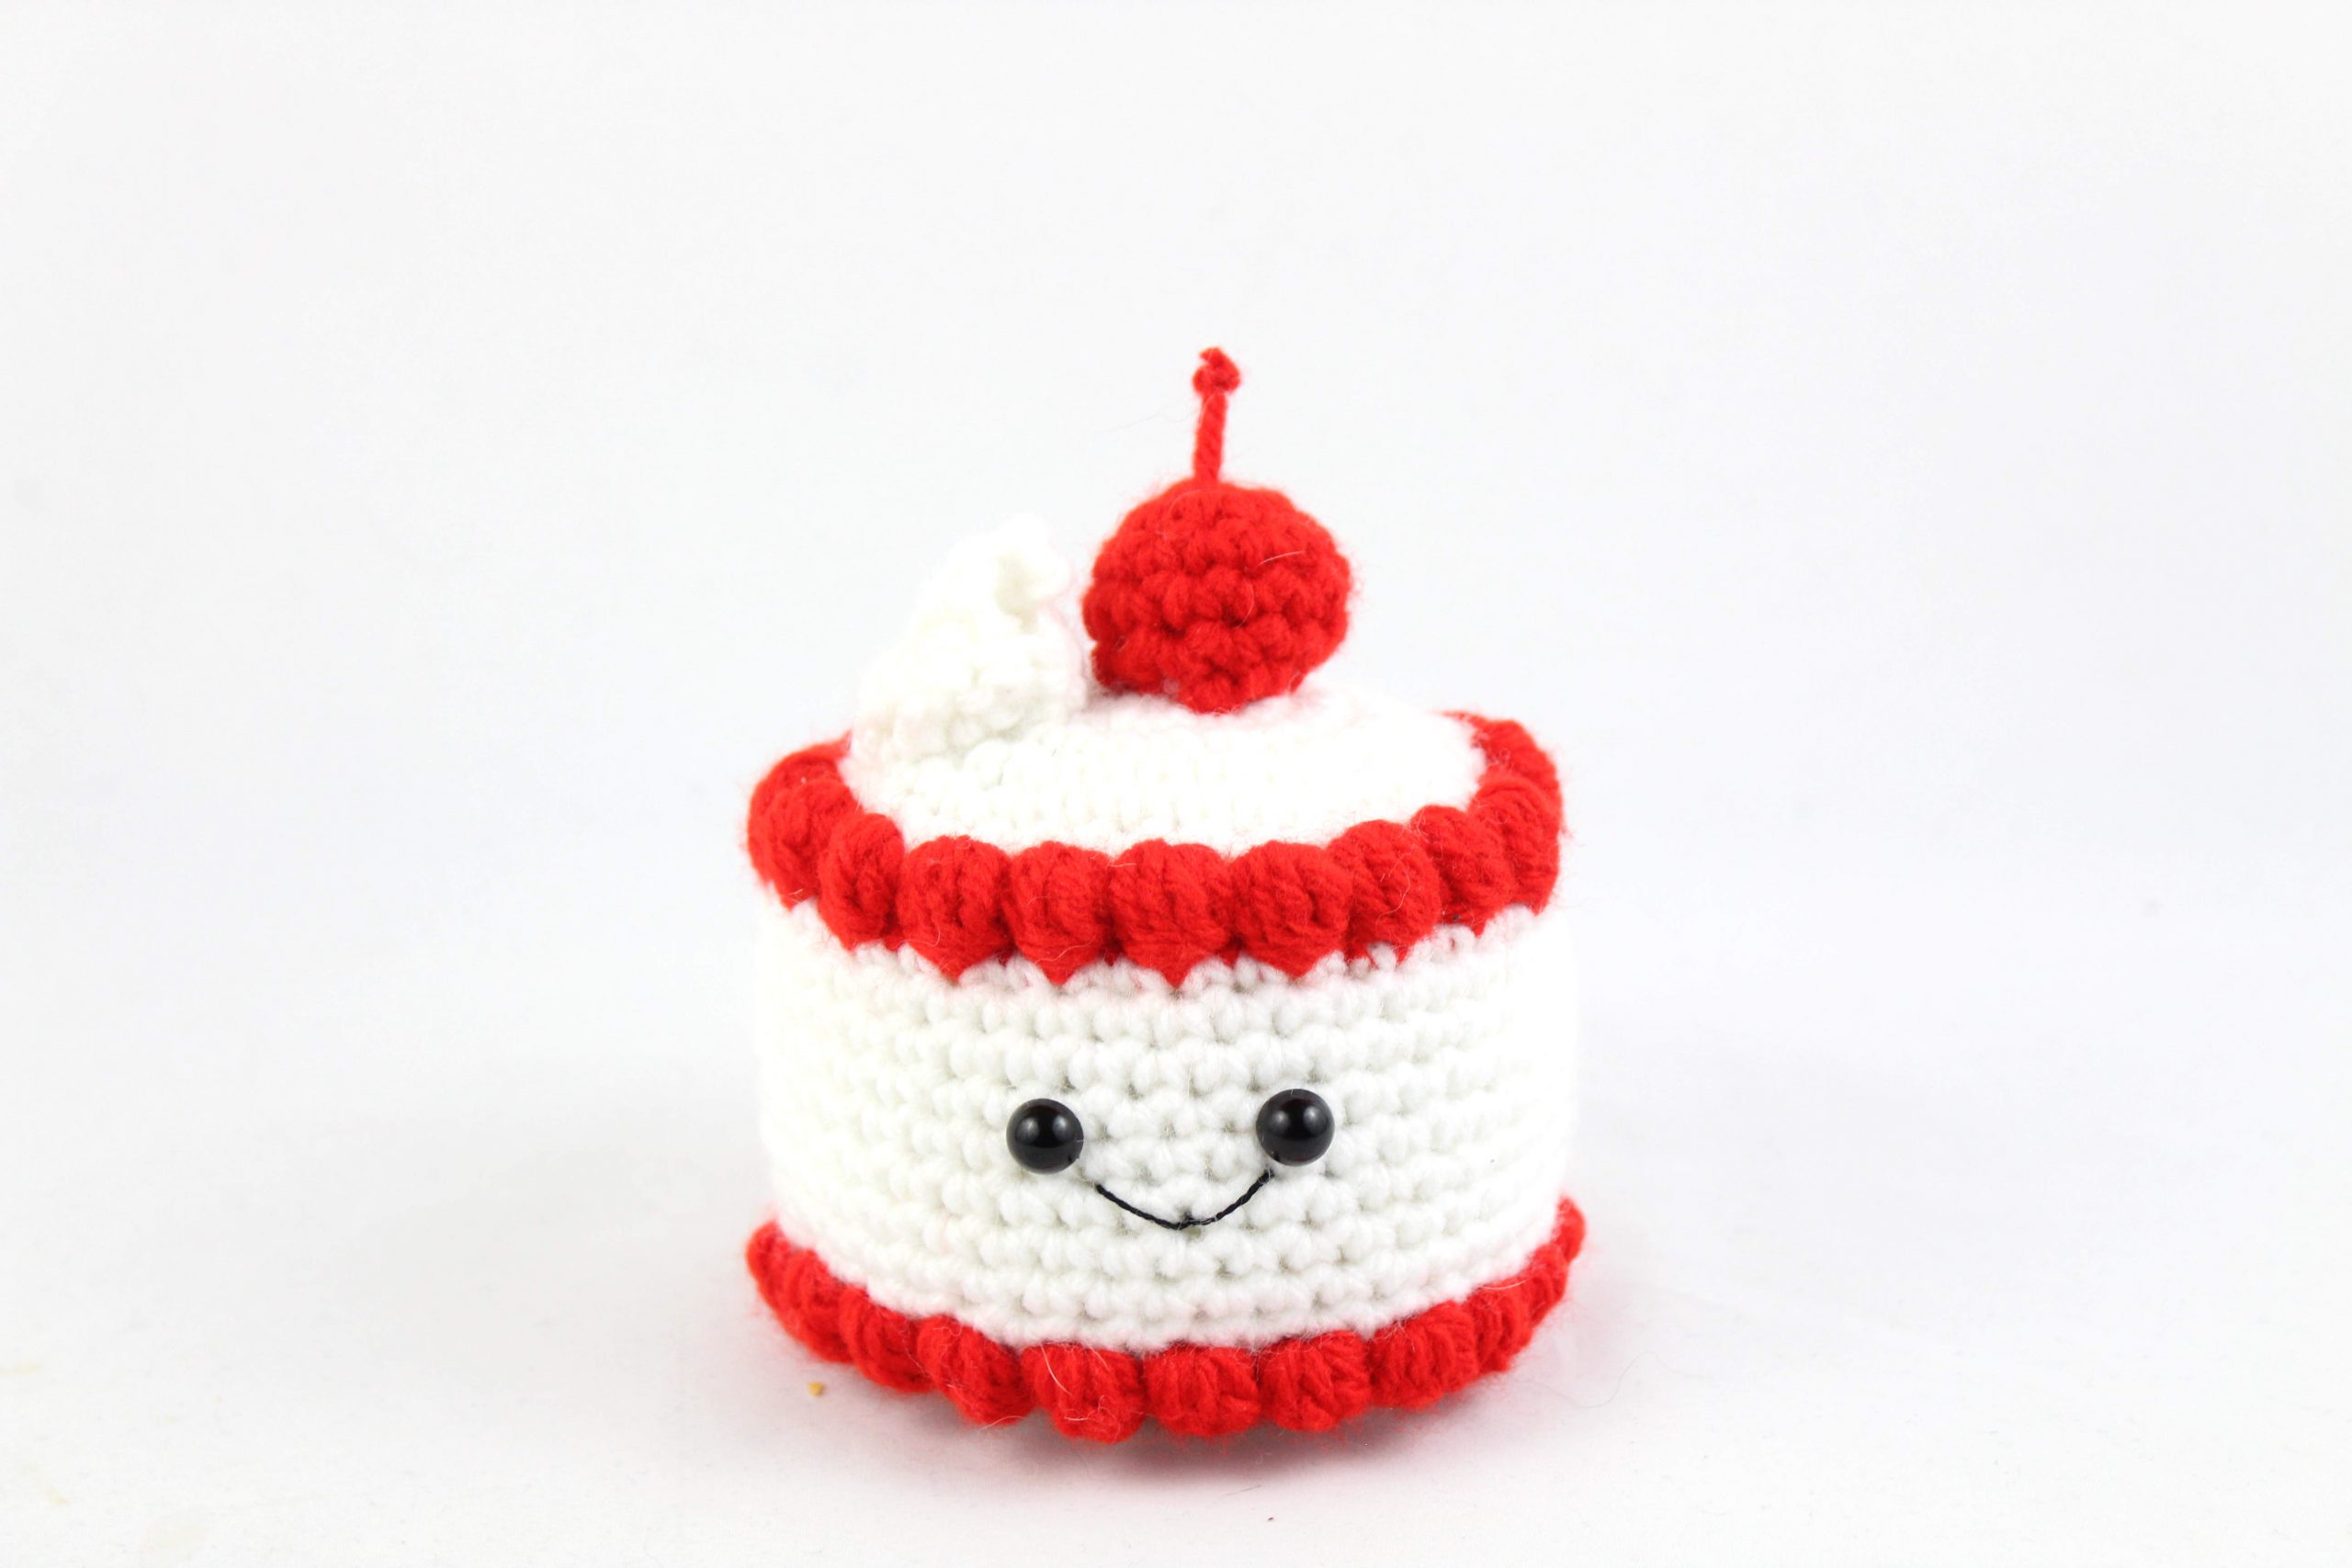
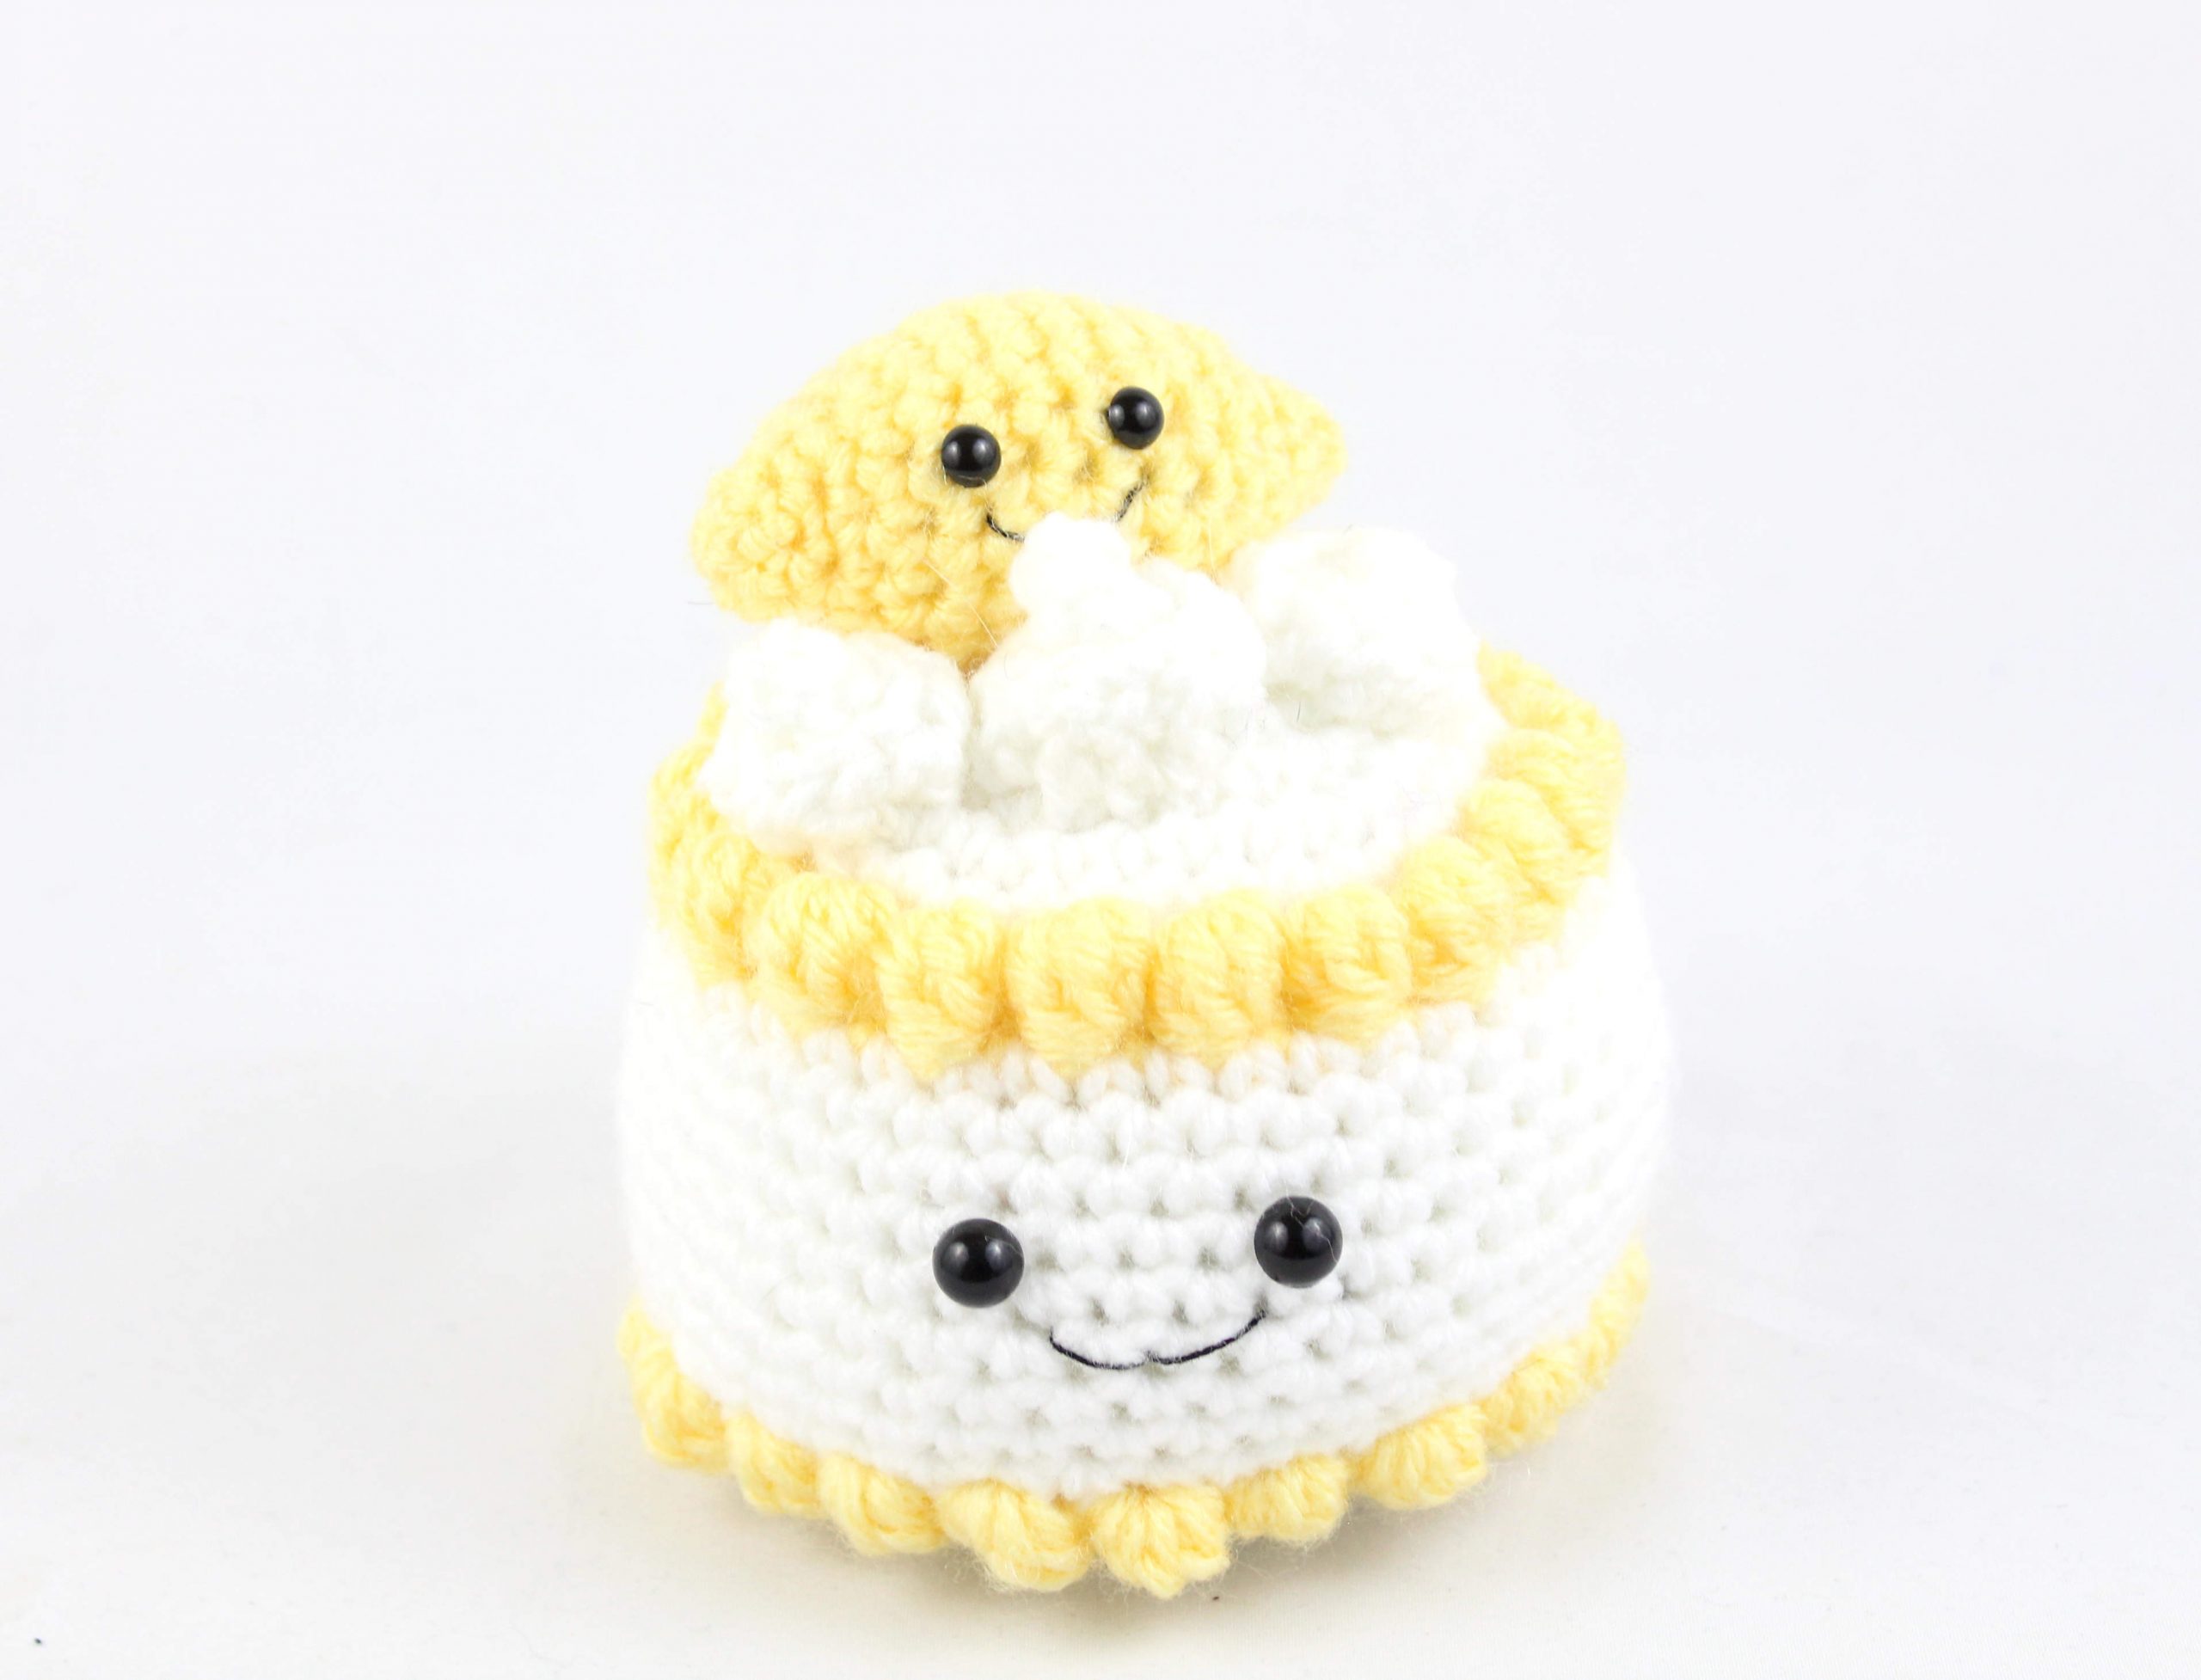
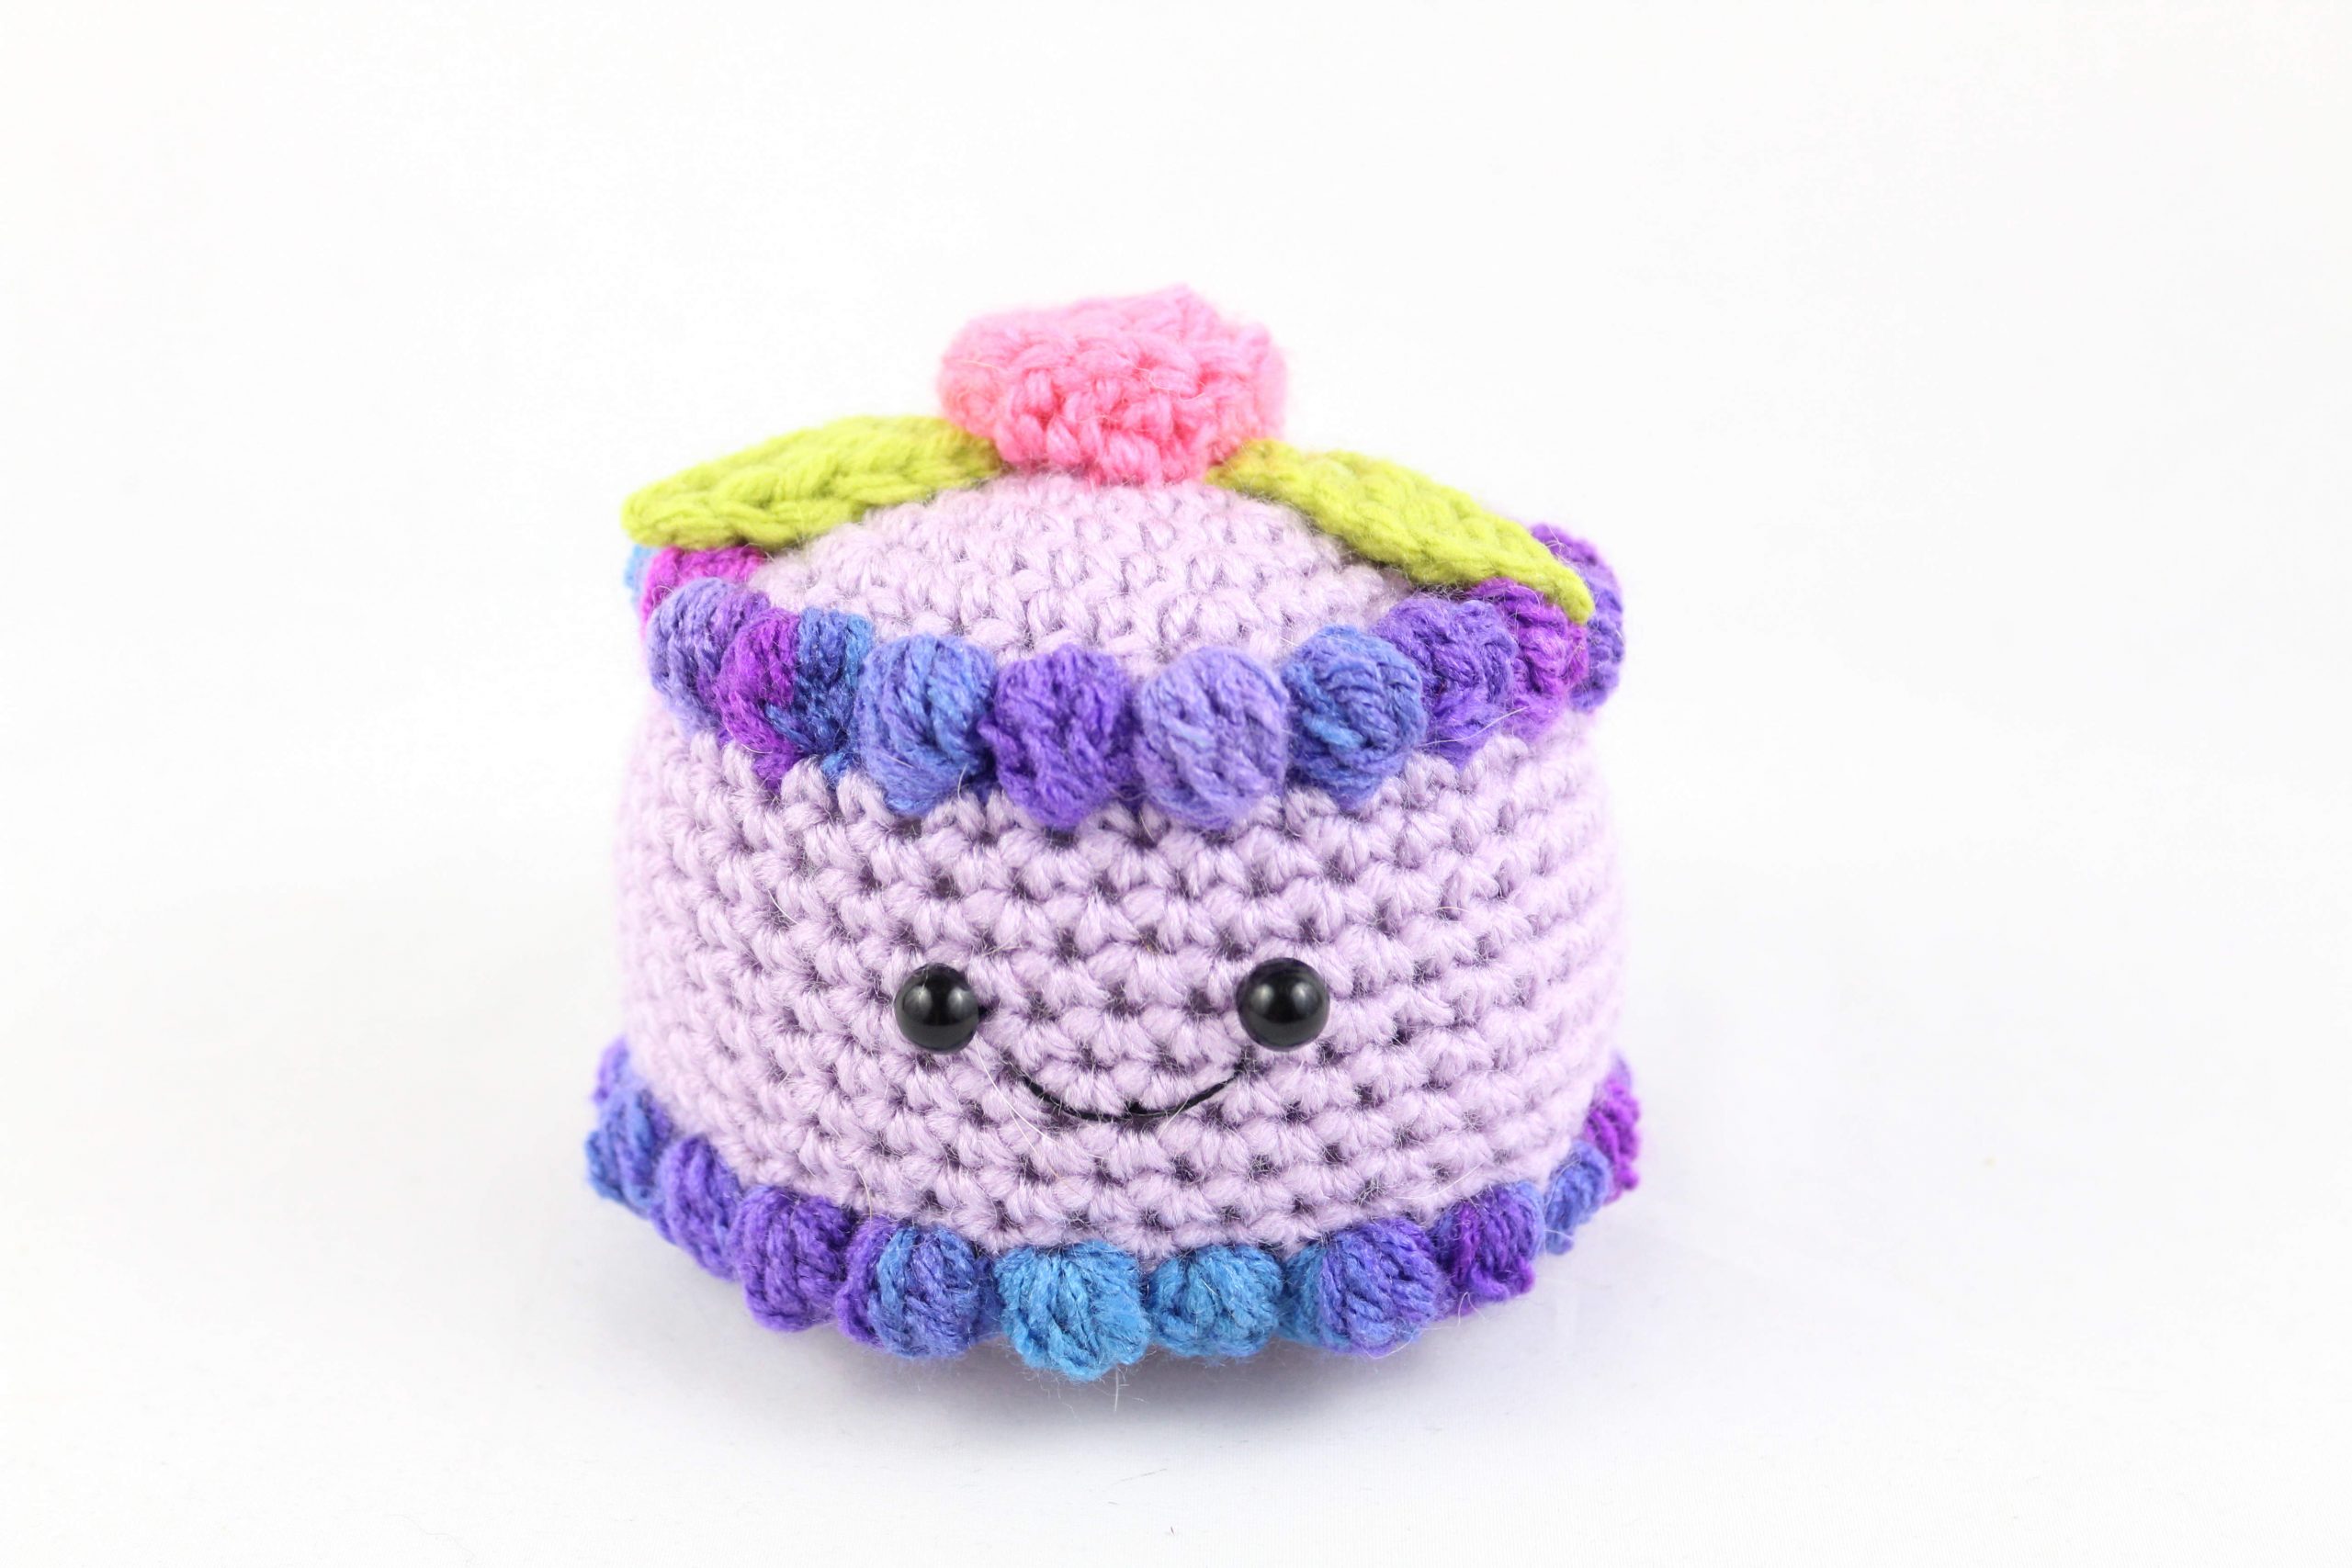
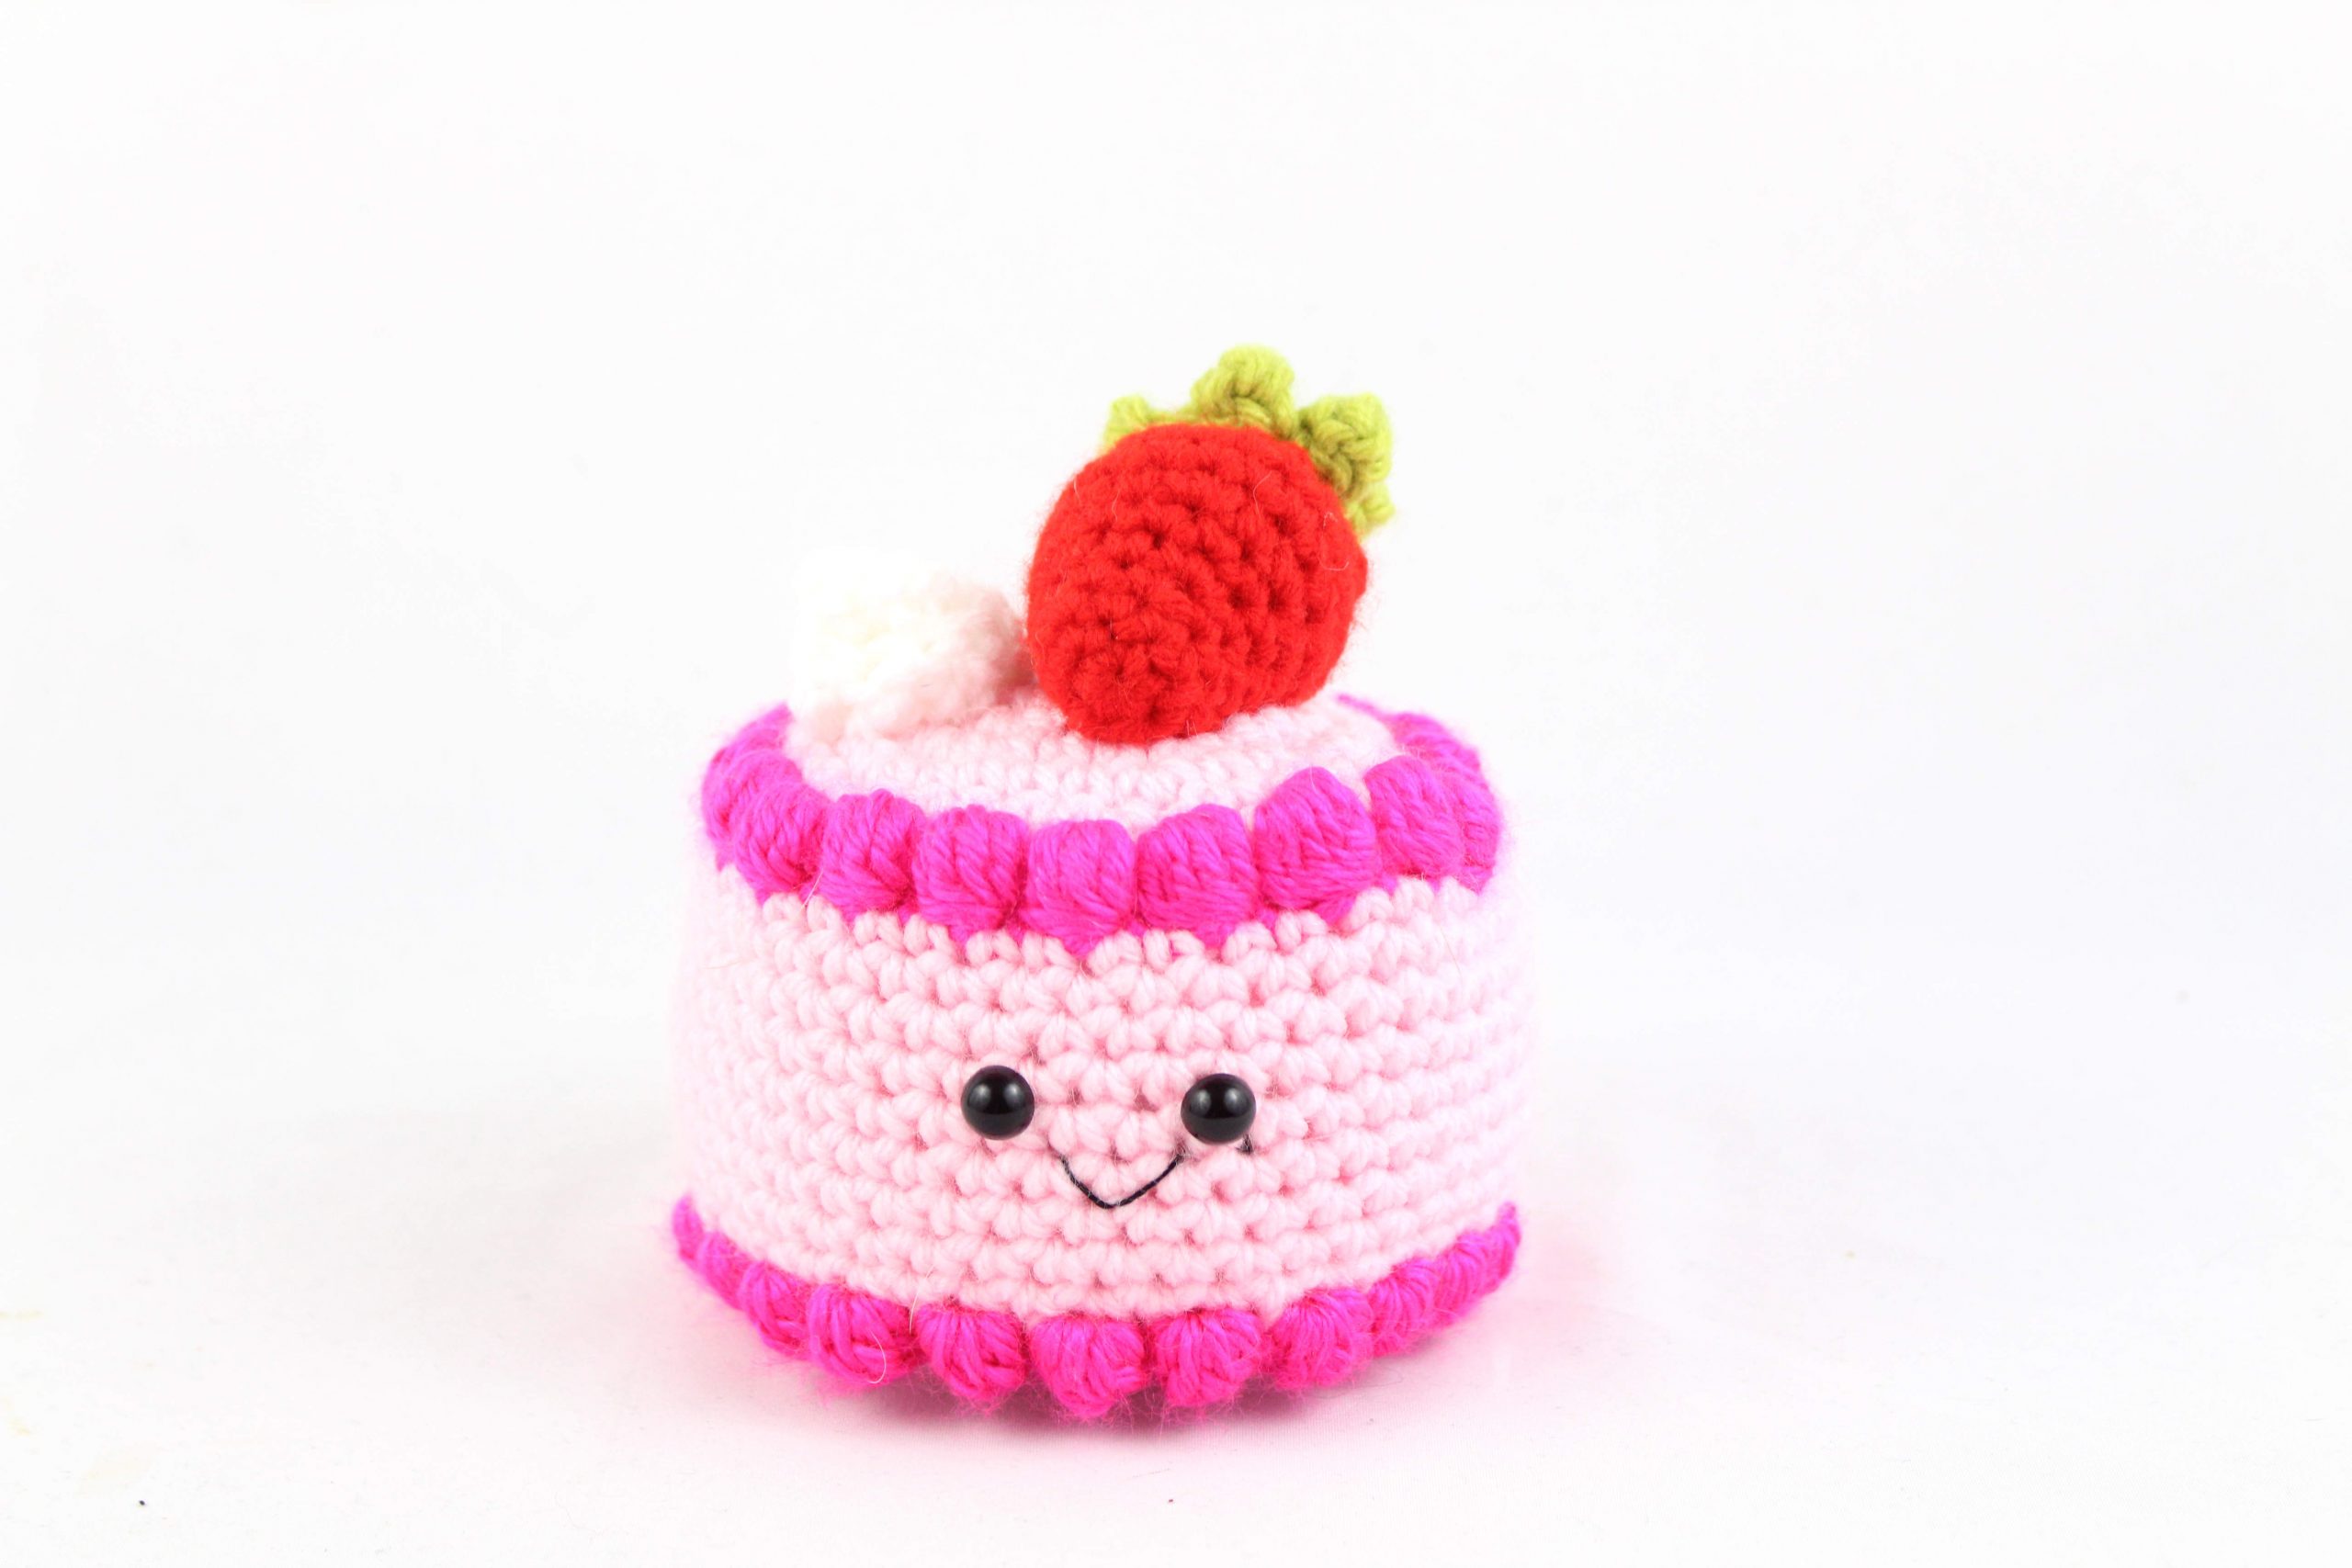
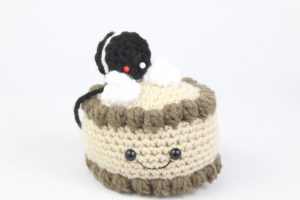
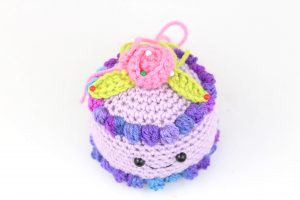
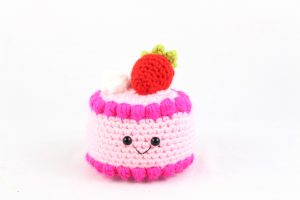
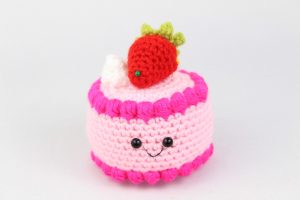
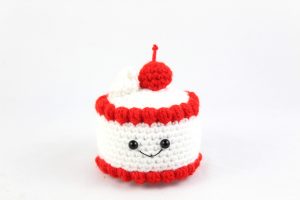
This pattern refers to “Main Color”. This is the main color you will use for your cake. I used white for the example in this pattern. “Icing Color” is the color you want the icing to be. I used red for the example in this pattern. We start by making the cake. We then make any toppings and sew the toppings on. Done!
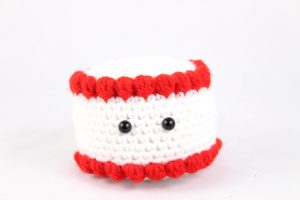
Cake:
In Main Color
Round 1: 6 Sc in Magic Ring (6)
Round 2: *Inc* all around (12)
Round 3: *Inc, Sc* all around (18)
Round 4: *Inc, Sc 2* all around (24)
Round 5: *Inc, Sc 3* all around (30)
Round 6: *Inc, Sc 4* all around (36)
Round 7: *Inc, Sc 5* all around (42)
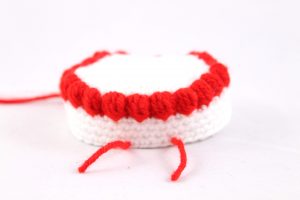
Switch to Icing Color
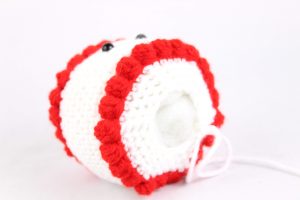
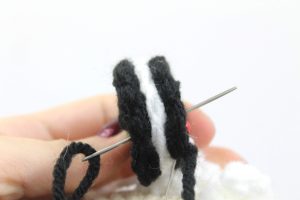
Round 8: We will now do the icing stitch. *Yarn over (Pic 1) and insert hook into the next stitch (Pic 2). Yarn over again (Pic 3), and pull through the stitch (Pic 4-5). Yarn over (Pic 6) and pull through 2 of the loops on your hook (Pic 7). Repeat steps 1-7 a total of 6 times. (Pic 9). You will have a total of 7 stitches on your hook. Yarn over (Pic 10) and pull through all loops on your hook (Pic 11). This completes 1 icing stitch. Sc in the next stitch* Repeat this all around (42)


Switch to Main Color
Round 9-11: *Sc* all around (42)
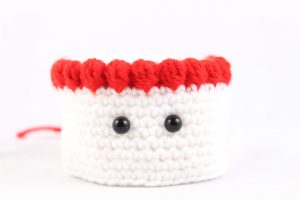
Round 12: Sc in the next 20 stitches. Sc in the next st and add a different colored st marker to the Sc just made. This marks where to place the eye. Sc in the next 3 st. Sc in the next st and add a different colored st marker to the Sc just made. Sc in the last 17 st (42)
Round 13-17: *Sc* all around (42)
Add safety eyes now. Switch to the Icing color.
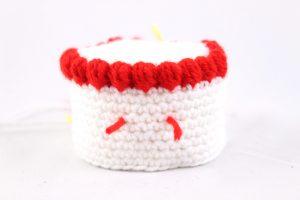
Round 18: We will now do the icing stitch again. *Icing stitch in the next st, Sc in the next stitch* Repeat this all around (42)
Switch to Main Color
Round 19: In BLO (Back Loop Only), repeat *Dec in the next st, Sc in the next 5 st* all around (36)
Round 20: In BOTH Loops, repeat *Dec, Sc 4* all around (30)
Round 21: *Dec, Sc 3* all around (24)
Round 22: *Dec, Sc 2* all around (18)
Stuff here. Continue stuffing after each round
Round 23: *Dec, Sc* all around (12)
Round 24: *Dec* all around (6)
Finish off. Sew the bottom closed.
Cake Smile:
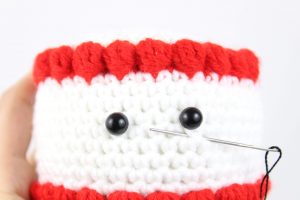
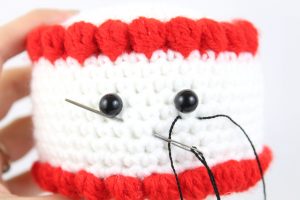
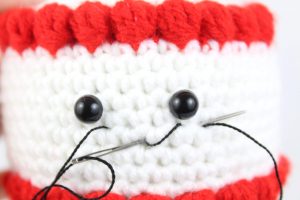
In Black Embroidery Thread
Insert needle with thread into the cake and pull needle out under the right eye as shown (Pic 1). Insert needle into the middle area of the cake, and pull needle out under the left eye as shown (Pic 2). Reinsert needle into the middle of the mouth, and pull out of original insertion spot (Pic 3).

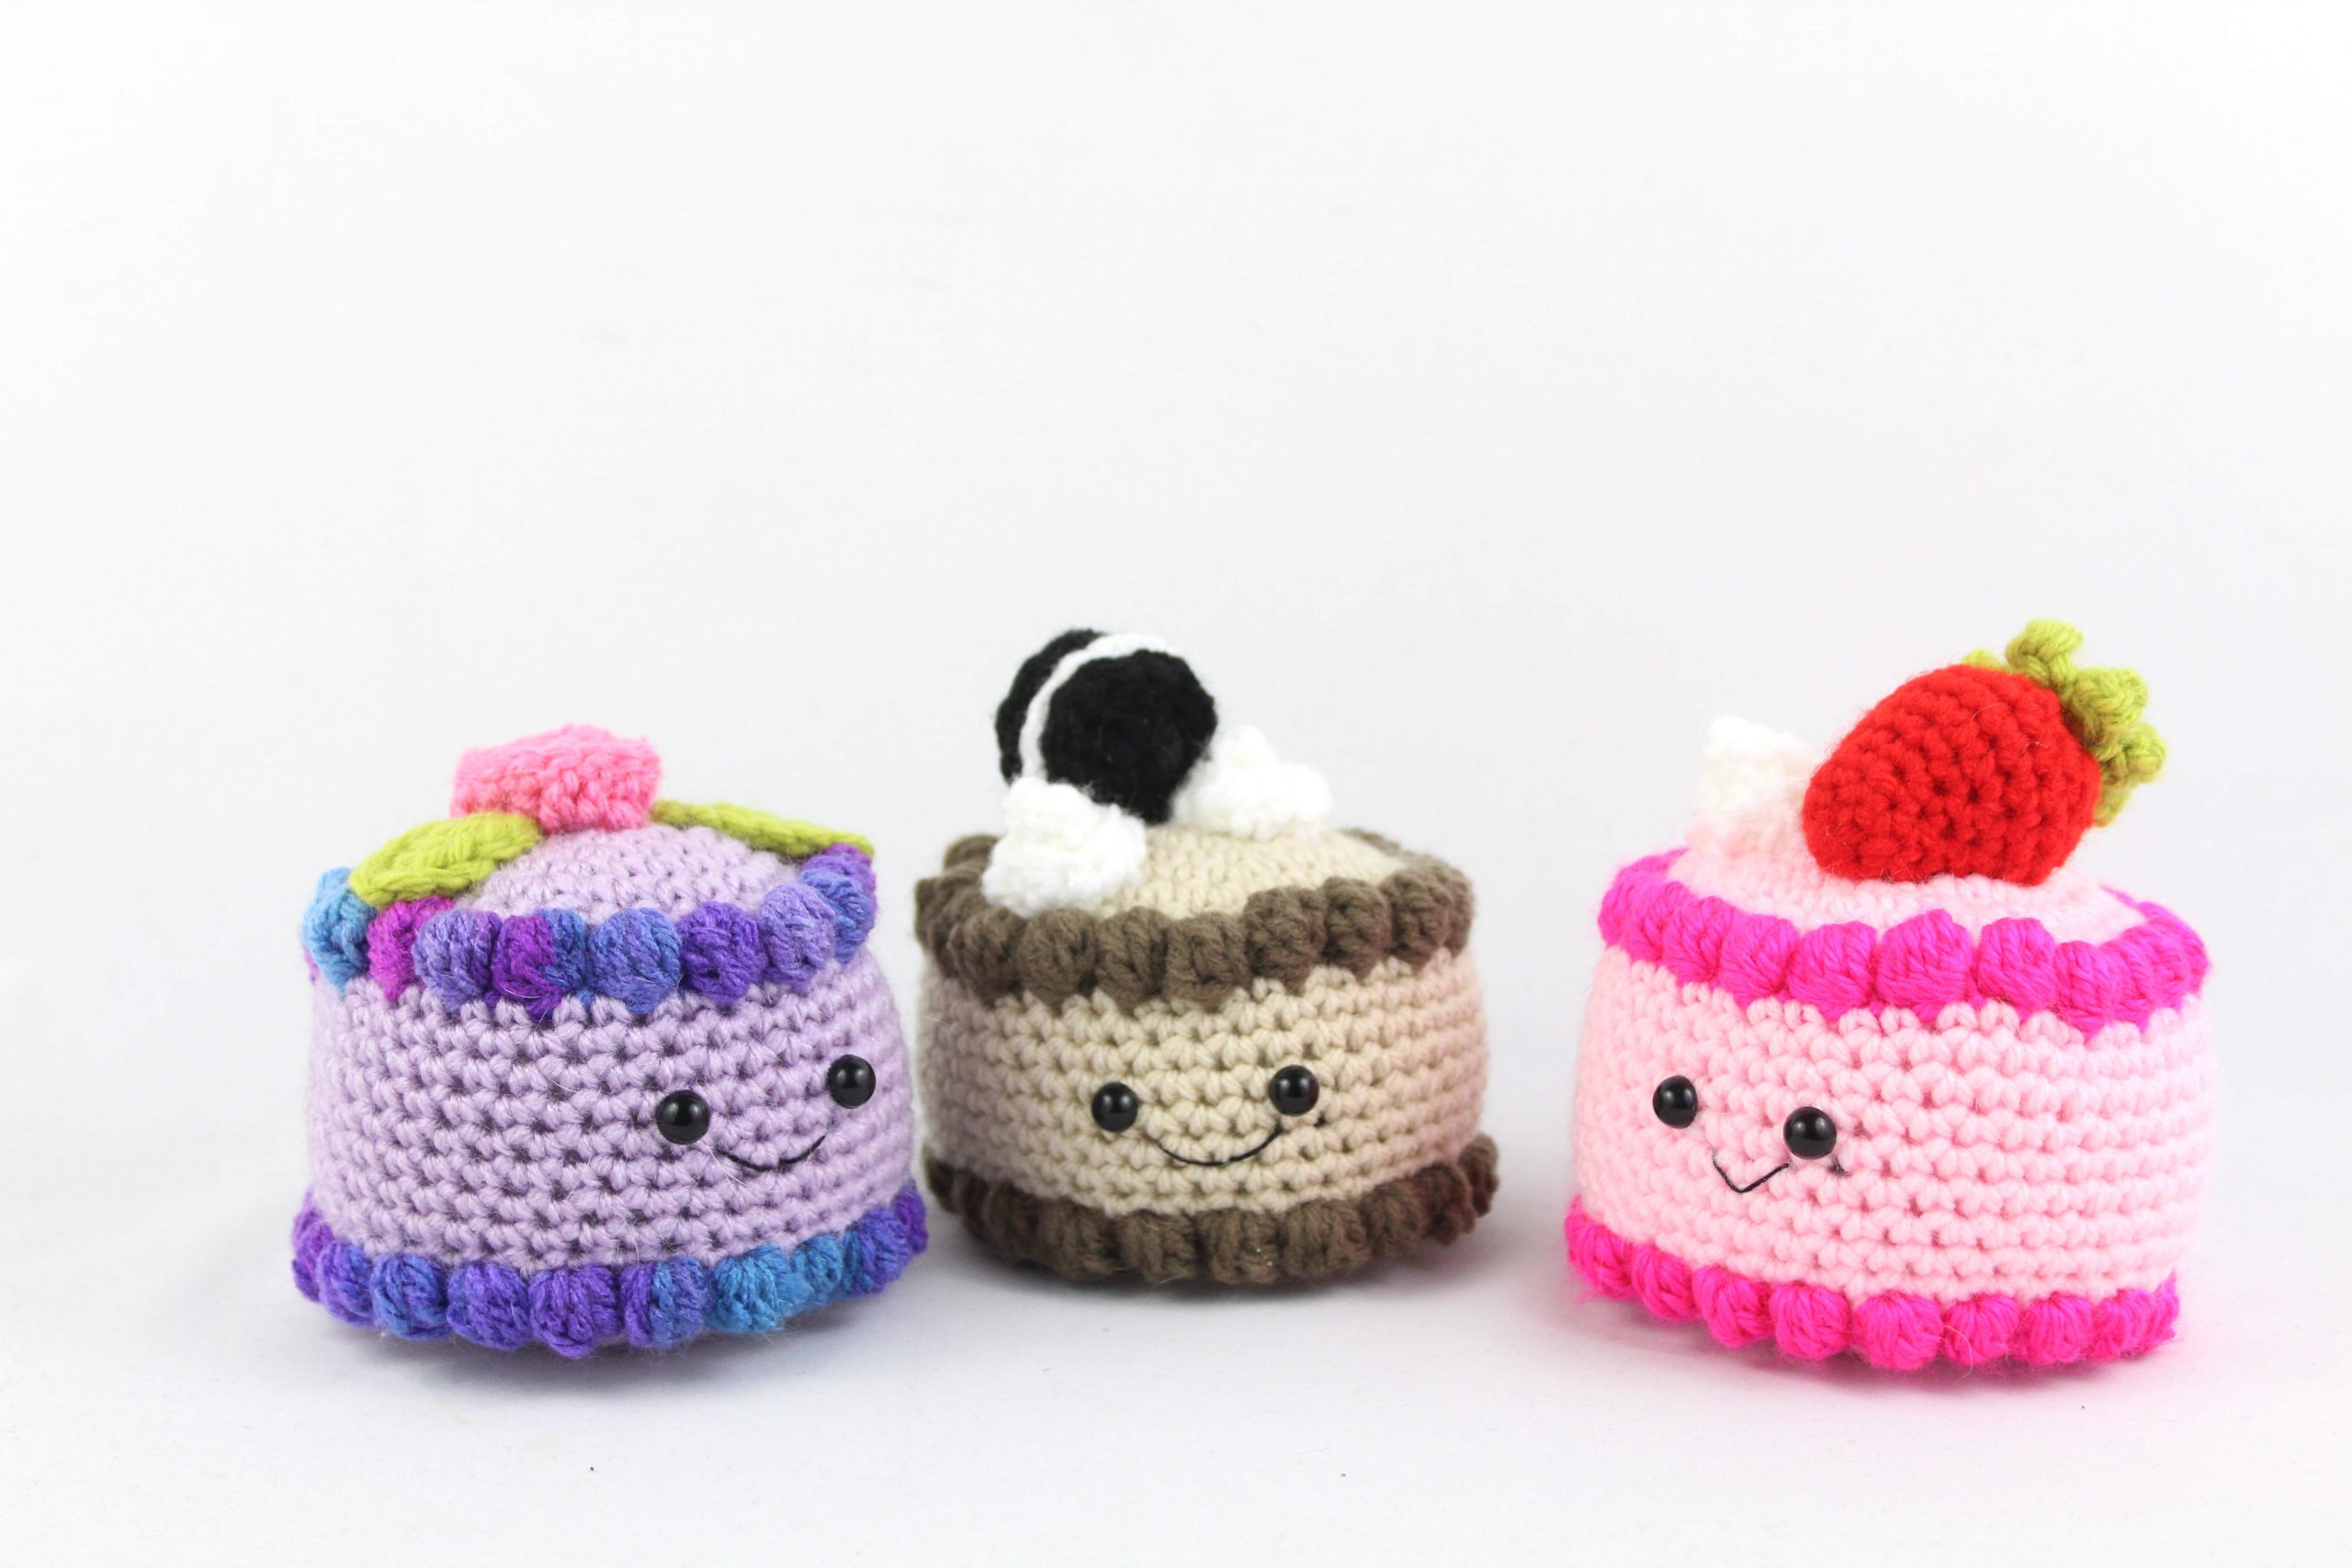
Toppings
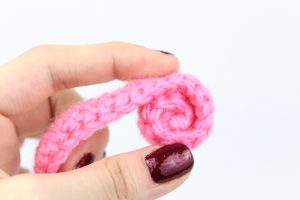
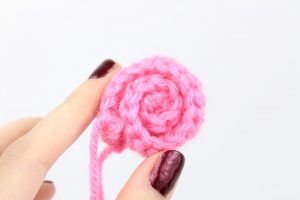
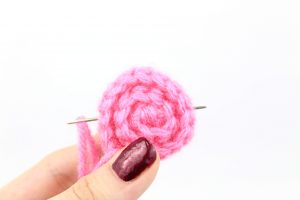
Icing Swirl:
In White
Row 1: Ch 19. Sc in the 2nd Ch from hook. Sc in the next 3 st, Hdc (You can do Dc here for a larger swirl) in the next 14 st (18)
Finish off.
Hold the Sc part and fold it up as shown (Pic 2). Now twist the rest of the piece around (Pic 3-4). Sew the cream in place and place on the cake as shown above.


Cookie:
Make 2 in black, 1 in white
Round 1: 6 Dc in Magic Ring (6)
Round 2: *2 Dc in each stitch* all around (12)
Finish off. Place the white part between the black cookies, and sew them together. Pin the cookie to the cake as shown and sew on.
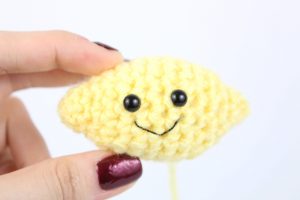
Lemon:
In Yellow
Round 1: 6 Sc in Magic Ring (6)
Round 2-3: *Sc* all around (6)
Round 4: *Inc* all around (12)
Round 5: *Sc* all around (12)
Round 6: *Inc, Sc 2* all around (16)
Round 7-10: *Sc* all around (16)
Round 11: *Dec, Sc 2* all around (12)
Round 12: *Sc* all around (12)
Stuff here. Add stuffing after each round. Add 6mm safety eyes in Round 7 and Round 10, making sure they line up.
Round 13: *Dec* all around (6)
Round 14-15: *Sc* all around (6)
Finish off.
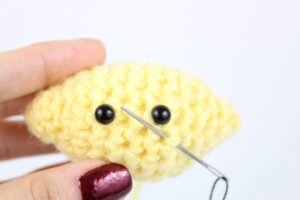
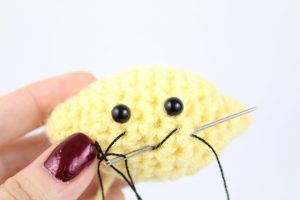
Lemon Smile:
In Black Embroidery Thread
Insert needle with thread into the lemon and pull needle out under the right eye as shown (Pic 1). Insert needle into the middle area of the lemon, and pull needle out under the left eye as shown (Pic 2). Reinsert needle into the middle of the mouth, and pull out of original insertion spot (Pic 3).

Pin onto the cake as shown and sew on.

Flower:
In Pink or Red

Row 1: Ch 30. Dc in the 2nd Ch from the hook. Dc in the next 27 st (30)
Finish off. Roll the flower from one end to the other to form the flower (Pic 1-3). Sew the flower together (Pic 4). Pin to the cake and sew on.

Flower Leaf: (Make 2)
In Green

Row 1: Ch 7. Sc in the next st, Dc in the next 2 st, Trc in the next st, Dc in the next st, Sc in the last st.
Finish off. Pin onto the cake, next to the flower.
Strawberry:
In Red
Round 1: 6 Sc in Magic Ring (6)
Round 2: *Inc, Sc 2* all around (8)
Round 3-4: *Sc* all around (8)
Round 5: *Inc, Sc* all around (12)
Round 6: *Sc* all around (12)
Round 7: *Inc, Sc* all around (18)
Round 8-9: *Sc* all around (18)
Round 10: *Dec, Sc* all around (12)
Round 11: *Dec* all around (6)
Stuff now. Finish off and sew closed.
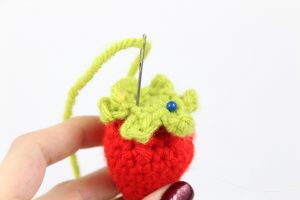
Strawberry Top:
In Green
Round 1: 6 Sc in Magic Ring (6)
Round 2: *Sc in the next st. Ch 3. Sc in the 2nd ch from hook. Sc in next Ch.* 6 times. SlSt in the next st to complete.
Finish off. Pin and sew to the top of the strawberry.
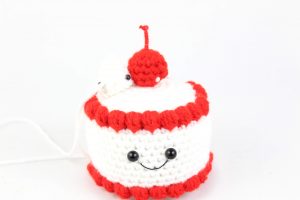
Pin the strawberry to the top of the cake and sew on.
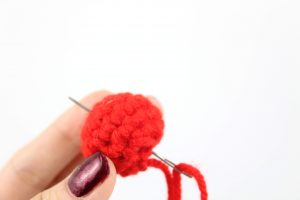
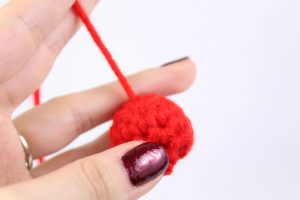
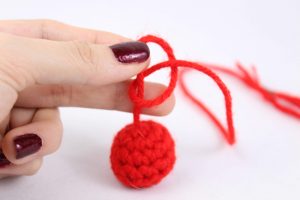
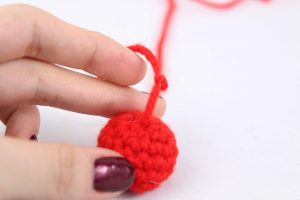
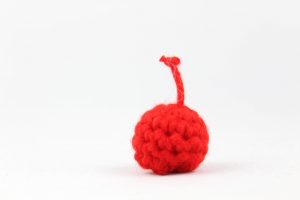
Cherry:
In Red
Round 1: 6 Sc in Magic Ring (6)
Round 2: *Inc* all around (12)
Round 3-5: *Sc* all around (12)
Round 6: *Dec* all around (6)
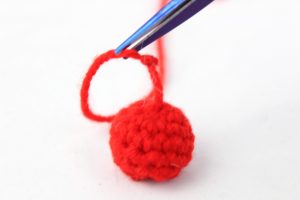
Stuff now. Finish off leaving a long tail. Sew closed. Now pull the long tail to the very top of the cherry. Tie a knot 2-3 times as shown. Cut the thread above the knot. Now pin onto the cake and sew on.
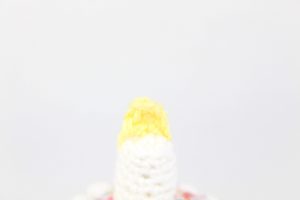
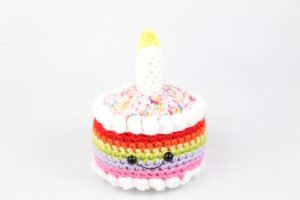
Birthday Candle:
In White

Round 1: 6 Sc in Magic Ring (6)
Round 2: *Inc, Sc 2* all around (8)
Round 3: In BLO (Back Loop Only), *Sc* all around (8)
Round 4: In BOTH Loops, *Sc* all around (8)
Round 5-10: *Sc* all around (8)
Finish off. Stuff and pin to the middle of the cake. Sew on.
Candle Light:
In Yellow
Round 1: Ch 4. Sc in the 2nd Ch from hook. Dc in the next ch, Trc in the last ch.
Finish off and pin to the top of the candle. Sew on.
All done! If you made a cake I would really love to see it. You can “try” it on Pinterest to show me 🙂 Have a great day and I hope you enjoyed the pattern I made.


25 Comments
hi my name is Sophia i’m 10 years old,I started to crochet 2 years ago I have a question, how big is the lemon cake? are they all the same size?
Hi Sophia! I think it’s great you know how to crochet at 10 years old. You must be a very smart young lady 🙂 The lemon cake is about 3″ wide by 3″ tall. The cakes all come out the same size! Let me know if you have any questions 🙂
thanks!
hello! I’m struggling to know how to change the color from cream to the main color and it would be great if you explained more how to!
Hi there Nithya! When working the icing we will have to change color with the last icing stitch. Usually when we change color we work the very last stitch, but yarn over with the new color when completiting the very last stitch. So this is what we will be doing for the last icing stitch!
Make the 6 double crochets needed for the last stitch. You will have 6 loops on your hook since we haven’t completed the icing stitch yet. Now, yarn over with the main color. Pull through all 6 loops on your hook with the main color yarn. Now you have just completed a color change!
I hope that was able to help 🙂 Please let me know if I can help explain anything further!
I’m making the lemon cake for my daughter Le friends birthday and it’s so great except I didn’t understand the written instructions for icing and had to look up a YouTube tutorial which makes them different but still good. Thanks!
I finished 🥳🥳🥳
Wow you did a fantastic job, Lana! I know your daughter’s friend will be so happy to get that gift from you 🙂 Handmade gifts are so much more personal and you can really feel the love when you get a gift like that! I think even with using a different technique for the icing, it came out looking awesome! You made such a cute cake and thank you for sharing a picture 🥰 Your dog is adorable too, I looooove dogs so much. He/she looks like spoiled pup with that adorable sweater!
I made the birthday cake to celebrate each of my kitties’ birthdays. Thank you for the pattern
Oh my gosh, both of your cats are so cute! 😍 I love both of them, I wish it was possible to pet them through the internet lol! They’re seriously soooo cute. I love their green eyes! I think it’s so fun that you made them their very own cake for their birthday, what lucky kitties! How old are they turning?
Thank you so much for sharing these pictures – I can’t get enough on how adorable this is!
Zazzy and the birthday cake
I want to ask permission to make this amigurumi and upload it on my youtube channel. Can I? i am really love this ami😍
Hi Tagya! Thank you so much for your kind comment, I think it’s wonderful that you love this amigurumi so much! I truly appreciate that you would love to make a video of this cake, you can share your finished object in your video! I only ask to not share the pattern itself 🙂 I hope this was able to answer your question, please feel free to let me know if you have any other questions. I’m always happy to help 😍
I love this cake! It’s easier than other cake patterns I’ve seen. I’m making one for my friend who’s turning 11 this year. I just started crocheting last year, so thanks for the easy pattern! Thank you for sharing!
This was great fun thank you!!
Q: What yarn did you use for the top of the birthday cake one that makes it look like sprinkles? I Love It!
For the icing is it just a partial pobble stitch?
I really loved this pattern it’s begginer friendly and the finale cake its so cuteee
Hi I was wondering if I’d be allowed to sell the finished product with credit to you?
After I make the first top icing. Then change colors where do i start when using the main colors white?
My cream puff didn’t turn out great but the rest went fine I think!
What size hook did you use?
I used F and my cake is 4-5 inches across.
I was hoping for something a bit smaller.
Also, do you sl st at the end of each round and then chain 1 before starting the next round in the same stitch?
I’m using old glory (red, white and blue variegated yarn) for the icing. Happy Birthday, USA.
I adjusted the pattern a little but he still turned out great.
Thank you so much for posting this adorable pattern! I made the candle cake for my friend’s birthday and will definitely be making more in the future n_n
Love this pattern
Thanks for sharing!
Just made this for my mum’s 93rd birthday
Christine