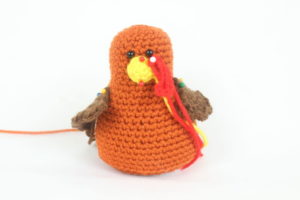
Pin this now!
Purchase the PDF here

Supplies:
• Yarn 4/Medium Weight Yarn in…
Turkey: Brown, Dark Brown, Yellow, Red, Orange, and Brown
Chicken: White, Red, and Yellow
• 4mm Crochet Hook
•6mm safety eyes
•Tapestry needle
•Scissors
•Stuffing
•Card Board for Sign & Bottom
Additional Information:
Difficulty: Intermediate
• Before we start…
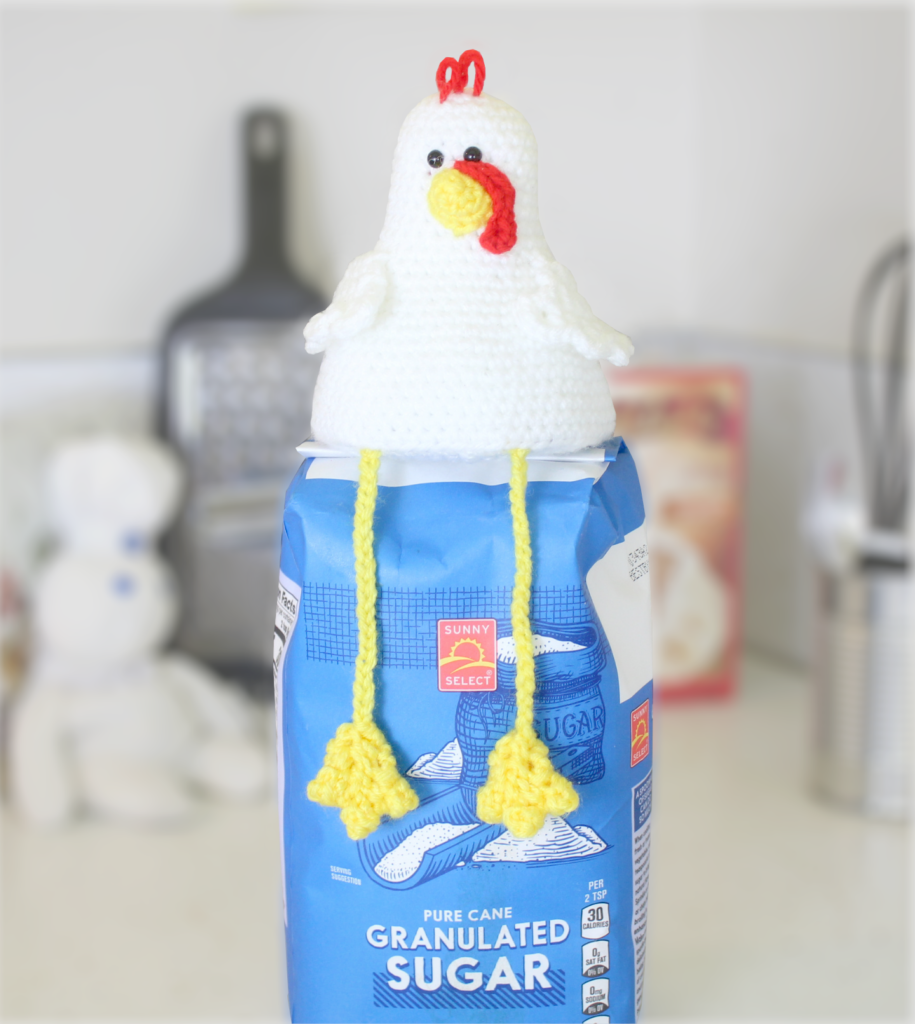
This pattern works for making both a turkey and a chicken! The only change we make is their colors, and we don’t make the feathers and sign for the chicken.
• Getting started
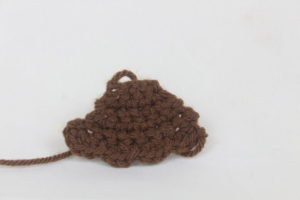
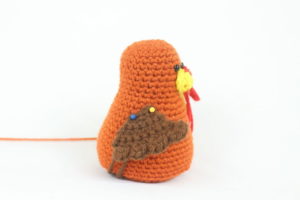
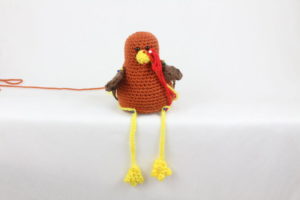
We first start at the top of the head. The head works down to the body as one continuous piece. We then make the beak, wattle, arms, legs, tail, and feathers.
• Also included in this pattern!
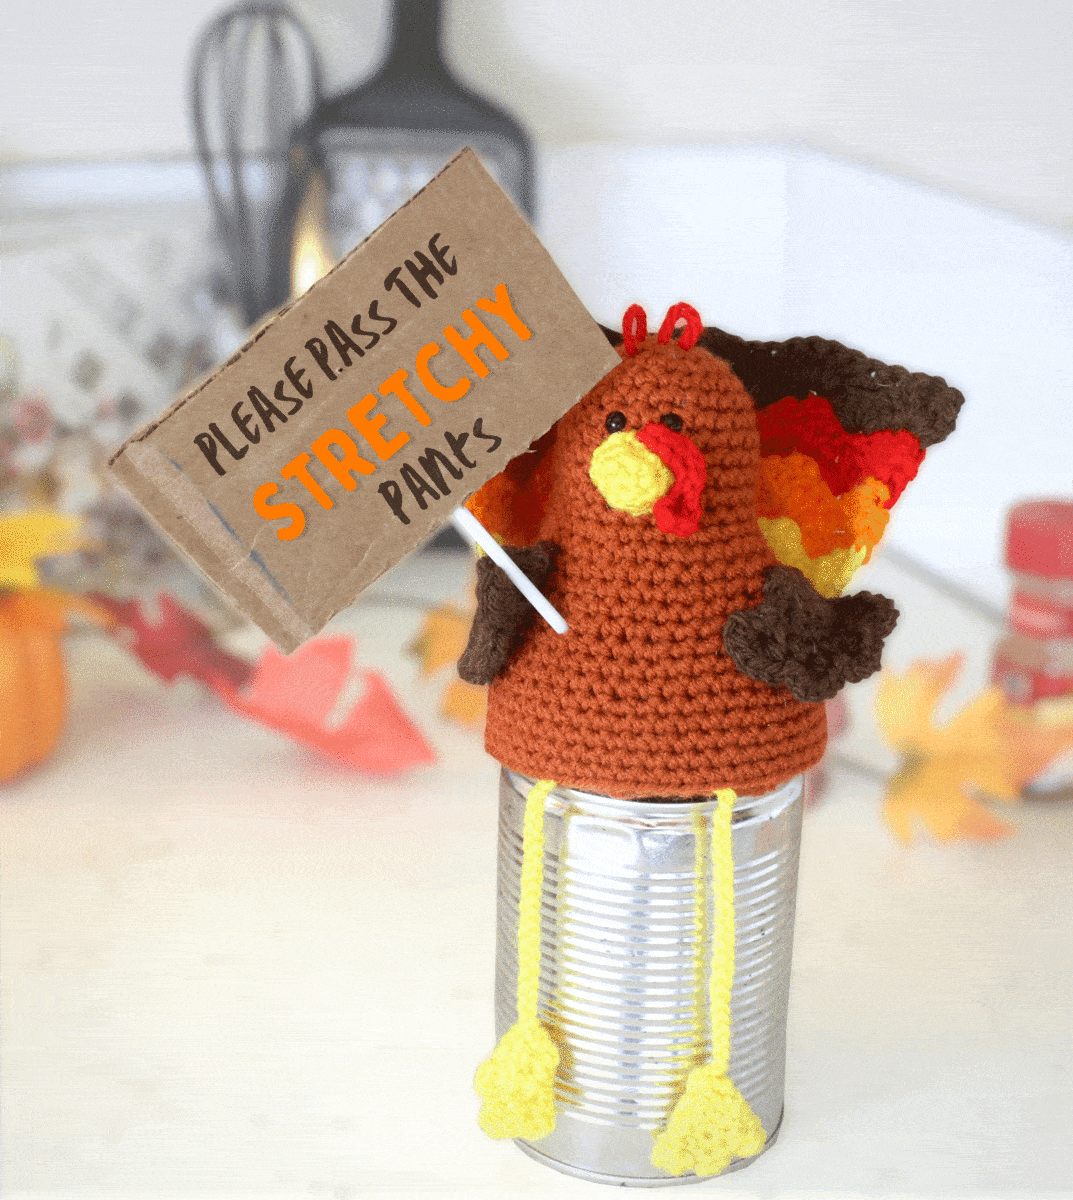
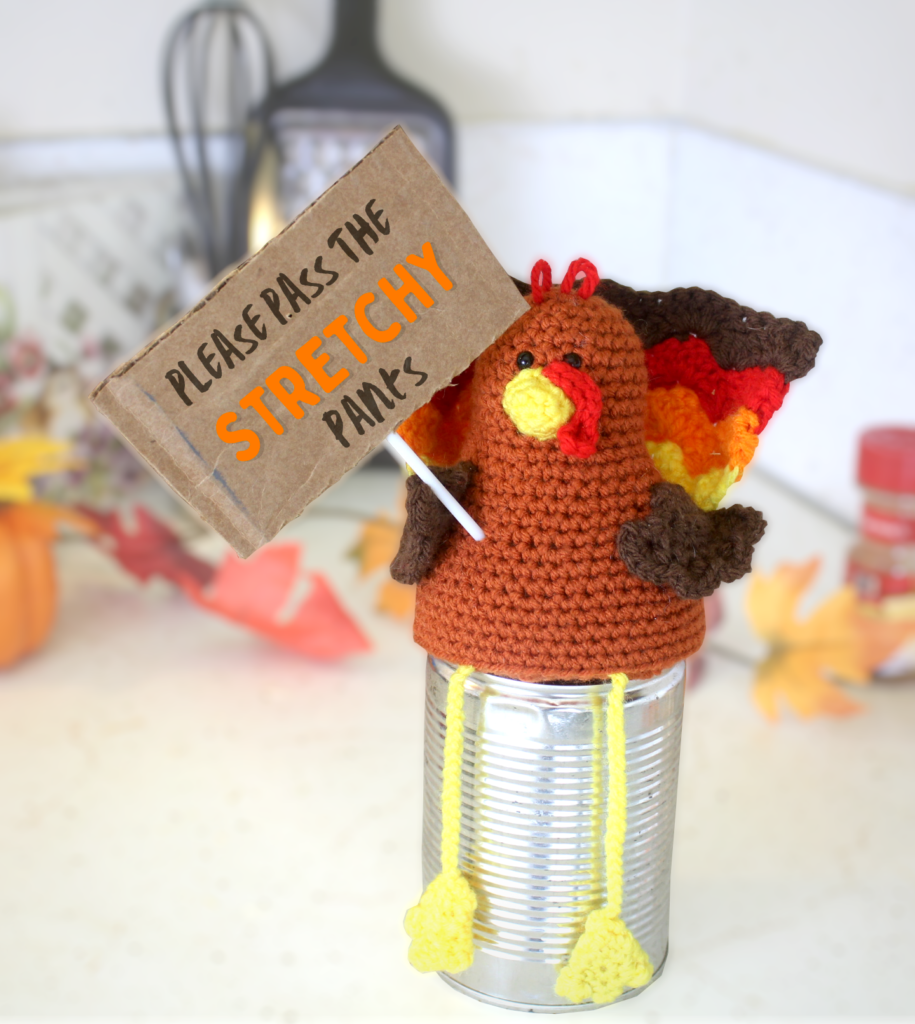
In this pattern is a printable sheet to make the “Please pass the stretchy pants” sign! I give you instructions on how to make the sign as well.
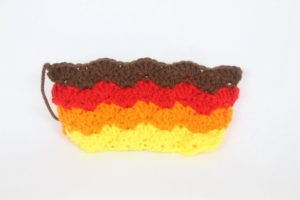
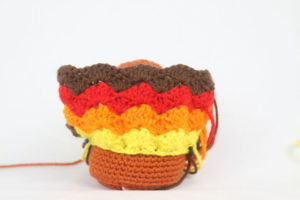
Body:
Let’s start by making the body. We will start at the top of the head and work our way down!
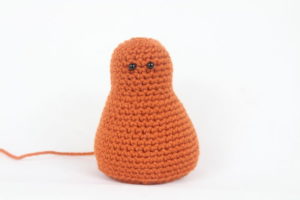
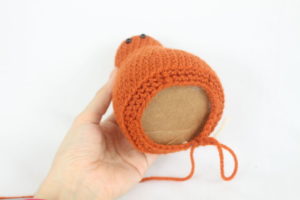
Head:
In Main Color
Round 1: 6 Sc into a Magic Ring (6)
Round 2: *Inc* into each stitch all around (12)
Round 3: *Inc, Sc next st* all around (18)
Round 4: *Inc, Sc next 2 st* all around (24)
Round 5-12: Sc into each stitch all around (24)
Insert 6 mm safety eyes between rounds 7 & 8, 2 st apart
Round 13: *Inc, Sc next next 3 st* all around (30)
Round 14-15: Sc into each stitch all around (30)
Round 16: *Inc, Sc next 4 st* (36)
Round 17-18: Sc into each stitch all around (36)
Round 19: *Inc, Sc next 5 st* all around (42)
Round 20-21: Sc into each stitch all around (42)
Round 22: *Inc, Sc 6 st* all around (48)
Round 23-26: Sc into each stitch all around (48)
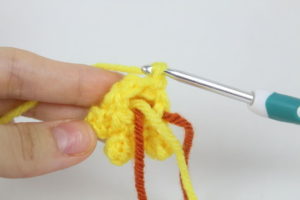
Round 27: In the BLO (Back Loop Only), repeat *Dec, Sc next 6 st* all around (42)
Round 28: In BOTH Loops, repeat *Dec, Sc 5* all around (36)
Round 29: Repeat *Dec, Sc 4* all around (30)
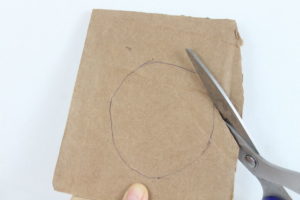
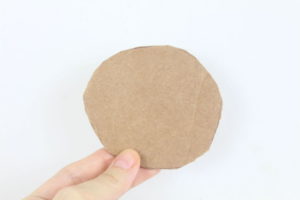
TIP: To have the chicken sit flat, I highly recommend cutting a piece of cardboard into a circle. Let me show you how I do it before going on to the next rounds!
Before we put in the cardboard, be sure to add in the rest of the stuffing needed! We won’t add anymore stuffing after placing in the cardboard.
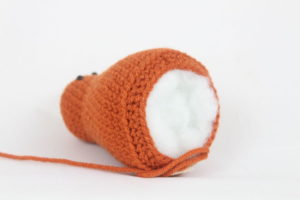
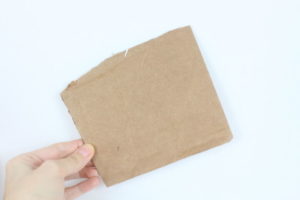
Take a piece of cardboard (Pic 1). Place the body onto the cardboard as shown and outline around it (Pic 2). You will have a circle on your cardboard, go ahead and cut it around the outline (Pic 3-4). Now place it into the chicken (Pic 5), you will have to fiddle around to get it completely in!
1. 2.
2.
3. 4.
4.
5.
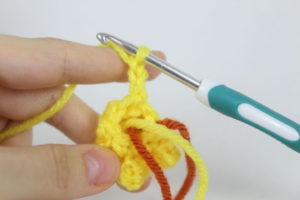
Round 30: Repeat *Dec, Sc 3* all around (24)
Round 31: Repeat *Dec, Sc 2* all around (18)
Round 32: Repeat *Dec, Sc* all around (12)
Round 33: Repeat *Dec* all around (6)
Finish off and sew the end closed.
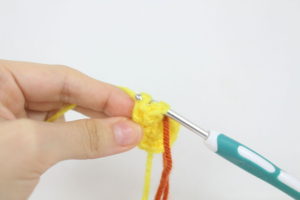
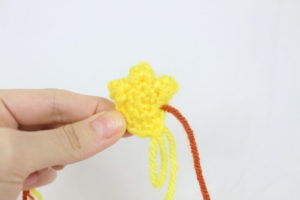
Beak:
In Yellow
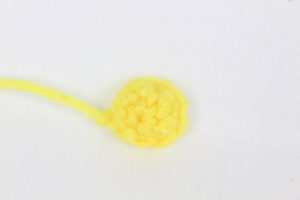
Round 1: 6 Sc into a Magic Ring (6)
Round 2: Sc into each stitch all around (6)
Round 3: Repeat *Inc, Sc next st* all around (9)
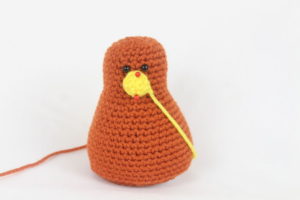
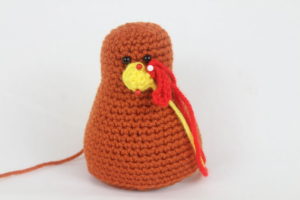
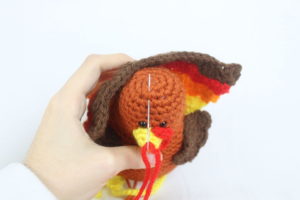
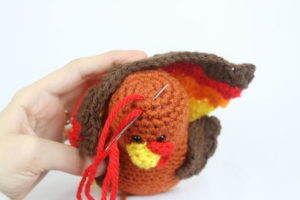
Finish off, leaving a long tail for sewing. Pin the beak on as shown. (The top of the beak will be on Round 8, and the bottom of the beak on Round 12.)
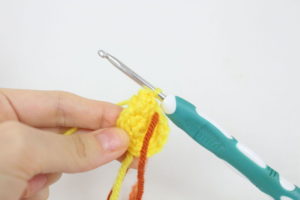
Wattle:
In Red
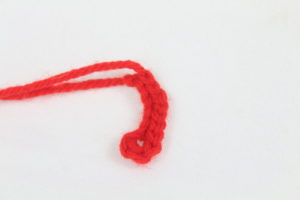
Row 1: Ch 9. SlSt 3 times into the 2nd Ch from the hook. SlSt in the next 2 st, SlSt 2 times into the next st, SlSt in the next 5 st (10)
Finish off, leaving a long tail for sewing. Pin the waddle above the beak and to the right. Sew on.
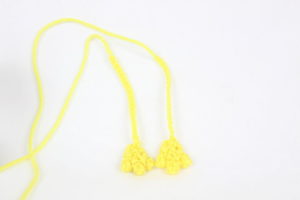
Arms: (Make 2)
In white for chicken, in darker brown for turkey
Row 1: Ch 5. Sc in the 2nd ch from the hook, Sc in the next 3 st (4)
Row 2: Ch 1 & Turn. *Inc* in the first st, Sc in the next 2 st, *Inc* in the last st (6)
Row 3: Ch 1 & Turn. Sc in the next 6 st (6)
Row 4: Ch 1 & Turn. *Inc* in the first st, Sc in the next 4 st, *Inc* in the last st (8)
Row 5: Ch 1 & Turn. Sc in the next 8 st (8)
Row 6: Ch 1 & Turn. Repeat *Make 5 Sc into the next stitch, SlSt in the next st* 4 times.
Finish off, leaving a long tail for sewing. Weave this tail end of yarn up to the first row. Pin the arms on as shown. Specifically pin the top of the wing between Round 14 & 15, and pin the bottom of the wing between Round 16 & 17.
Legs: (Make 2)
In Yellow
Note: When you make your magic ring, make sure to have a long tail of yarn when making it, and don’t finish off this tail. We will use this tail to sew the foot closed later!
Like shown in this image! -> 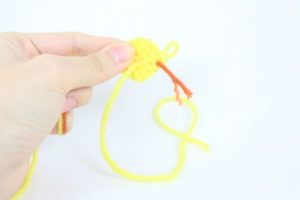
Round 1: 6 Sc into a Magic Ring (6)
Round 2: *Inc* all around (12)
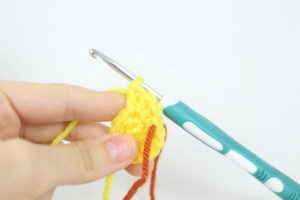
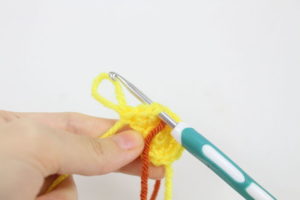
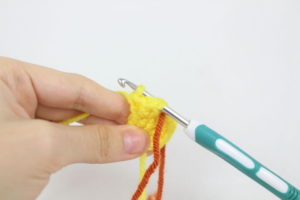
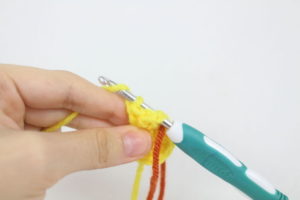
We will be making popcorn stitches for the toes. I will show how in the photo tutorial, below Round 3!
Round 3: Repeat *Sc in the next st, Popcorn stitch in the next st* 3 times. Sc in the next 6 st (12)
How to make a popcorn stitch: Make 3 Dc into the next stitch (Pic 2). Remove your hook from the current stitch and place your hook into the first Dc made (Pic 3). Now place your hook into the current working loop (Pic 4). Yarn over and pull through both loops at the same time (Pic 5-6). (1 popcorn stitch makes 1 stitch!)
1. 2.
2.
3. 4.
4.
5. 6.
6.
7.
Round 4: *Dec* all around (6)
Note: Remember, 1 popcorn stitch makes 1 stitch, so above the popcorn stitch it will look like a regular single crochet (Pic 1). We will decrease on top of them (Pic 2-3) as well as the Sc we made in Round 2 (Pic 4-5)!
1. 2.
2.
3. 4.
4.
5.
Turn the foot so the front facing you. SlSt into the very same st we just made. We do this so the right side of the chain faces towards us!
Ch 20 (Pic 6-8). Finish off. We will sew the foot closed & pin on at the next page.
6. 7.
7.
8. 9.
9.
Take the tail of yarn left over from making the magic ring, and sew the foot closed (Pic 1-3). Pin the legs on as shown, specifically on Round 29, about 7 stitches apart. Sew on the legs!
1. 2.
2.
3. 4.
4.
5.
Tail:
In brown for turkey in white for chicken
Row 1: Ch 8. Sc 2nd ch from hook, Sc next 6 st (7)
Row 2: Ch 1 & Turn. *Inc* in the first st, Sc in the next 5 st, *Inc* in the last st (9)
Row 3: Ch 1 & Turn. Sc in the next 10 st (9)
Row 4: Ch 1 & Turn. *Inc* in the first st, Sc in the next 7 st, *Inc* in the last st (11)
Row 5: Ch 1 & Turn. Sc in the next 11 st (11)
Row 6: Ch 1 & Turn. Repeat *Sc 5 times into the next st, Sc in the next st* 5 times. Make 5 Sc into the last st. (35)
Finish off, leaving a long tail for sewing. Sew the tail end of yarn to the very first row of the tail. Pin the tail on as shown now for the chicken, if making the turkey we will pin and sew on the tail later.
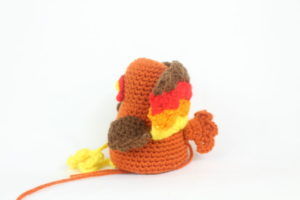
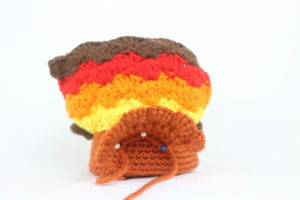
Feathers:
For turkey only. Start in yellow
Row 1: Ch 26. Sc in the 2nd Ch from the hook. Skip the next 2 st, make 5 Dc into the next stitch. Skip the next 2 st, Sc in the next st. Repeat *Skip next 2 st, 5 Dc in that next st, Skip next 2 st, Sc in next st* 3 times (25)
Row 2: Ch 3 and turn. Make 2 dc into the first stitch. The Ch 3 does count as a double crochet! Now skip the next 2 st, Sc in the next st. Repeat *Skip the next 2 st, make 5 Dc into the next st, Skip the next 2 st, Sc in the next st* 3 times. We will have 3 stitches left. Skip the next 2 st and make 2 Dc into the last st. Make another Dc into that last st, but change to orange when making that last Dc (25)
Row 3: Ch 1 and turn. Make 1 Sc into the first st. Skip the next 2 st, make 5 Dc into the next st. Skip the next 2 st, Sc in the next st. Repeat *Skip next 2 st, 5 Dc in that next st, Skip next 2 st, Sc in next st* 3 times (25)
Row 4: Ch 3 and turn. Make 4 dc into the first stitch. The Ch 3 does count as a double crochet! Now skip the next 2 st, Sc in the next st. Repeat *Skip the next 2 st, make 5 Dc into the next st, Skip the next 2 st, Sc in the next st* 3 times. We will have 3 stitches left. Skip the next 2 st and make 4 Dc into the last st. Make another Dc into that last st, but change to red when making that last Dc (29)
Row 5: Ch 1 and turn. Skip the next 2 st and make 1 Sc into the next st. Skip the next 2 st, make 5 Dc into the next st. Skip the next 2 st, Sc in the next st. Repeat *Skip next 2 st, 5 Dc in that next st, Skip next 2 st, Sc in next st* 2 times. Skip next 2 st, 5 Dc in that next st, Skip next 4 st, Sc in the last st (25)
Row 6: Ch 3 and turn. Make 4 dc into the first stitch. The Ch 3 does count as a double crochet! Now skip the next 2 st, Sc in the next st. Repeat *Skip the next 2 st, make 5 Dc into the next st, Skip the next 2 st, Sc in the next st* 3 times. We will have 3 stitches left. Skip the next 2 st and make 4 Dc into the last st. Make another Dc into that last st, but change to brown when making that last Dc (29)
Row 7: Ch 1 and turn. Skip the next 2 st and make 1 Sc into the next st. Skip the next 2 st, make 5 Dc into the next st. Skip the next 2 st, Sc in the next st. Repeat *Skip next 2 st, 5 Dc in that next st, Skip next 2 st, Sc in next st* 2 times. Skip next 2 st, 5 Dc in that next st, Skip next 4 st, Sc in the last st (25)
Row 8: Ch 3 and turn. Make 4 dc into the first stitch. The Ch 3 does count as a double crochet! Now skip the next 2 st, Sc in the next st. Repeat *Skip the next 2 st, make 5 Dc into the next st, Skip the next 2 st, Sc in the next st* 3 times. We will have 3 stitches left. Skip the next 2 st and make 4 Dc into the last st. Make another Dc into that last st, but change to brown when making that last Dc (29)
Pin feathers on as shown, on Round 19. Sew on with yellow yarn, sew on at the first yellow row. Now also pin the tail on as shown and sew on.
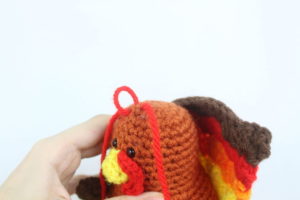
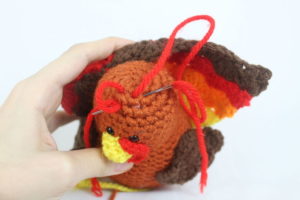
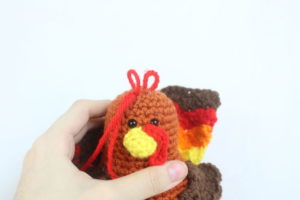
Hair:
In Red
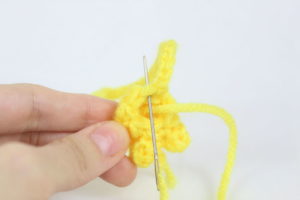
Place red thread onto a needle. Insert the needle into the head as shown, and pull the needle one stitch up (Pic 1). Reinsert needle into that original insertion spot, and pull the needle out one stitch up and to the right (Pic 2). Don’t pull the yarn all the way through, as this will make the hair (Pic 3). Reinsert needle one stitch to the right and pull the needle out at the original insertion spot (Pic 4). Again, don’t pull the yarn all the way through so we can make the hair (Pic 5). Tie both ends of yarn into a knot and weave in.
1. 2.
2.
3. 4.
4.
5.
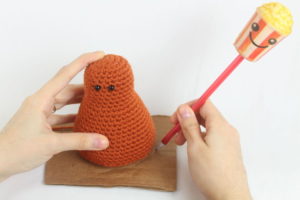
Sign:
1. Cut out a piece of cardboard. It should be 4.5″/11.5cm length by 2.5″/6.5cm tall.
2. Take a stick about 2.5″/6.5cm tall and glue the top of the stick and place it into the cardboard.
3. Print out the image below. That image is sized to fit most printer papers. Cut out the image below, near the dotted lines.
![]()
4. Glue that paper to the sign with a glue stick or any suitable glue, or tape it to the sign.
5. Let the turkey hold it! I stuck the sign into the turkey and wrapped his hand around the stick, but you can take yarn and tie it through the wing and the stick. Tie a firm knot with this yarn and snip off any excess yarn.
Done!


5 Comments
Hello Olive! So adorable!!! I am making him right now, because I have already made last years turkey, and think they will look cute together. I will share him with you when I’m done. Thank you so much! 🙂
Aw thank you so much, Sima! I think they will look so cute together, this new turkey looks more like the mom, and last years turkey looks more like the baby 🙂 I really hope you like the pattern, please feel free to let me know if you have any questions 🥰 Can’t wait to see how your turkey comes out!!
Thanks for all your great pattens, they are all amazing. It is truly amazing to be able to get them for free . I only make things for my family ,I am sure these turkeys and chicken will bring fun to the table .
You are extremely nice for saying this, Anita! Thank you ❤️ I am always to happy to bring fun patterns to people, and I love hearing that you’ll be making some cute amigurumis for your family 🙂 I keep the chicken and turkey as decorations in my kitchen, they would be awesome at the table! If you make them please show me 😍
He was so fun to make! I was so excited that I forgot his feet in this picture, but he has them now. I will be doing a chicken for my adult daughter now.