Chinese Food Take Out Box Amigurumi – Free Crochet Pattern
This is only 1 of 8 patterns in this free bundle! Click here for the other patterns!

Print this pattern out – purchase the PDF version here!

 Supplies:
• Yarn 4/Medium Weight Yarn in…
White, red, and yellow
•4mm Crochet Hook
•Tapestry needle
•Scissors
•Stuffing
•10mm safety eyes
•Black Embroidery Thread
Additional Information:
•Difficulty: Easy
•Size: 4″ tall, 4″ wide
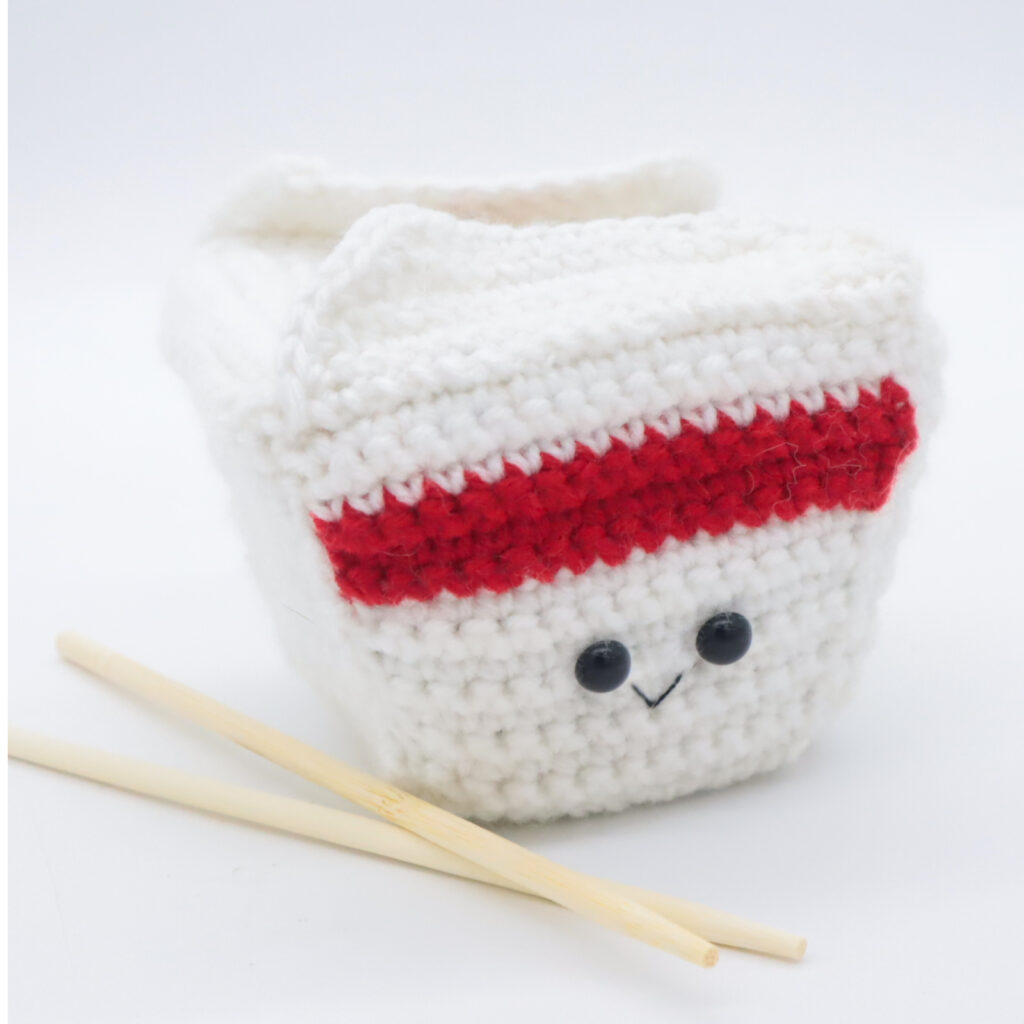
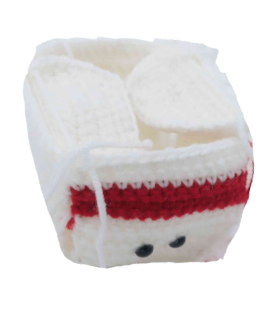
This Chinese takeout box stores more than just noodles – it can store your crafting supplies like a measuring tape! I put a measuring tape in mine to look like noodles. This take out noodle box is easy to make and only uses simple single crochets, increases, decreases, and rows. Let’s get started!
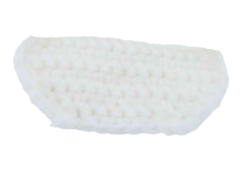
Bottom of Box:
In White
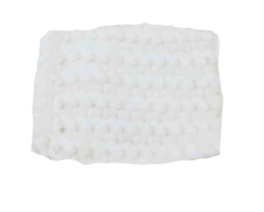
Row 1: Ch 13. Sc in the 2nd Ch from the hook. Sc in the next 11 st (12)
Row 2-11: Ch 1 and turn. Sc in the next 12 st (12)
Finish off, leaving a long tail for sewing.
Front of Box:
In White
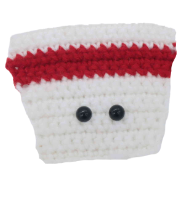
Row 1: Ch 13. Sc in the 2nd Ch from the hook. Sc in the next 11 st (12)
Row 2-4: Ch 1 and turn. Sc in the next 12 st (12)
Row 5: Ch 1 and turn. Inc in the next st, Sc in the next 10 st, Inc in the next st (14)
Row 6: Ch 1 and turn. Sc in the next 14 st (14)
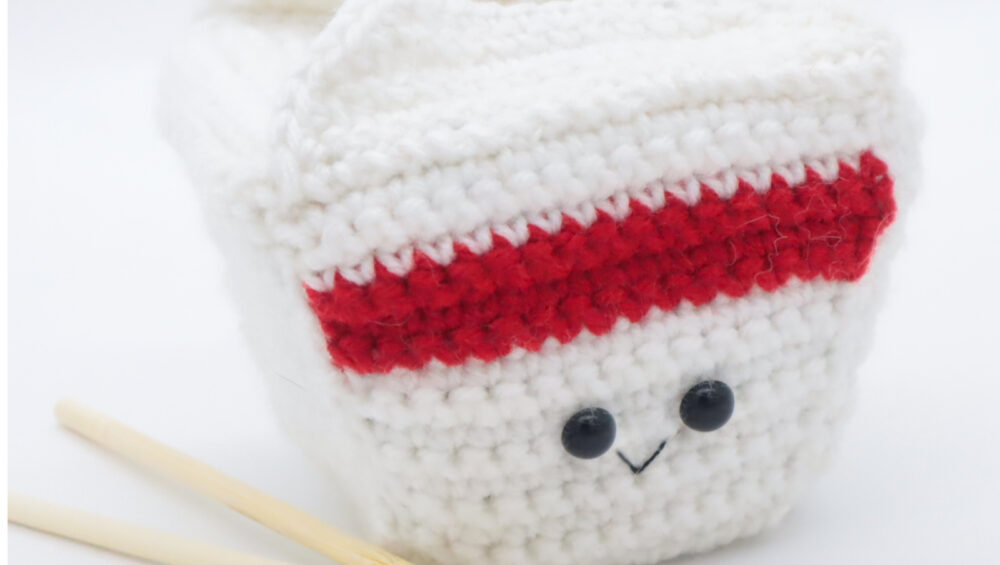
Now we will mark where to place the safety eyes. Add a different colored stitch marker into the 5th and 8th stitch. Later we will replace these markers with safety eyes.
Row 7-8: Ch 1 and turn. Sc in the next 14 st (14)
Row 9: Change to red. Ch 1 and turn. Inc in the next st, Sc in the next 12 st, Inc in the next st (16)
Row 10-11: Ch 1 and turn. Sc in the next 16 st (16)
Row 12-14: Change to white. Ch 1 and turn. Sc in the next 16 st (16)
Finish off, leaving a long tail for sewing. Add the safety eyes into the areas where shown.
Sides of Box: (Make 3)
In White
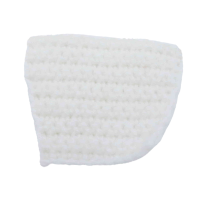
Row 1: Ch 12. Sc in the 2nd Ch from the hook. Sc in the next 10 st (11)
Row 2-4: Ch 1 and turn. Sc in the next 11 st (11)
Row 5: Ch 1 and turn. Inc in the next st, Sc in the next 9 st, Inc in the next st (13)
Row 6-8: Ch 1 and turn. Sc in the next 13 st (13)
Row 9: Ch 1 and turn. Inc in the next st, Sc in the next 11 st, Inc in the next st (15)
Row 10-14: Ch 1 and turn. Sc in the next 15 st (15)
Finish off, leaving a long tail for sewing.
Assembly:
In White
Place the bottom of the box in the middle. Place the front of the box at the front where shown. Place each side where shown and sew on.
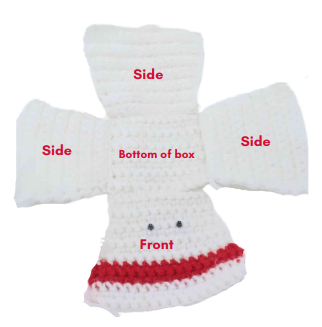
Then, sew the sides together by aligning each side and sewing together.
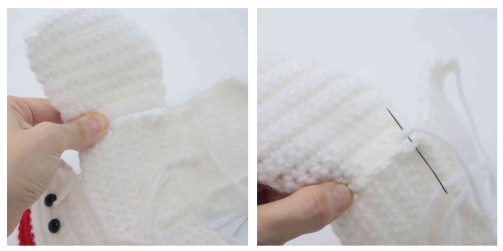
After sewing all pieces on and together, tie ends of yarn into firm knots and cut excess yarn. This will secure the ends.
Left and right side tops: (Make 2)
In White
Row 1: Ch 16. Sc in the 2nd Ch from the hook. Sc in the next 14 st (15)
Row 2-3: Ch 1 and turn. Sc in the next 15 st (15)
Row 4: Ch 1 and turn. Dec, Sc in the next 11 st, Dec (13)
Row 5: Ch 1 and turn. Dec, Sc in the next 9 st, Dec (11)
Row 6: Ch 1 and turn. Dec, Sc in the next 7 st, Dec (9)
Row 7: Ch 1 and turn. Dec, Sc in the next 5 st, Dec (7)
Row 8: Ch 1 and turn. Dec, Sc in the next 3 st, Dec (5)
Row 9: Sc around the edges of the piece – making 2 sc into each corner. When you reach the top of the first row we made, make a slip stitch into each stitch. Continue making single crochets around the edges until you complete crocheting around the entire piece. Once done, finish off and weave in ends.
Front and Back Tops: (Make 2)
In White

Row 1: Ch 18. Sc in the 2nd Ch from the hook, Sc in the next 16 st (17)
Row 2-3: Ch 1 and turn. Sc in the next 17 st (17)
Row 4: Ch 1 and turn. Dec, Sc in the next 13 st, Dec (15)
Row 5: Ch 1 and turn. Dec, Sc in the next 11 st, Dec (13)
Row 6: Ch 1 and turn. Dec, Sc in the next 9 st, Dec (11)
Row 7: Ch 1 and turn. Dec, Sc in the next 7 st, Dec (9)
Row 8: Sc around the edges of the piece – making 2 Sc into each corner. When you reach the top of the first row we made, make a slip stitch into each stitch. Continue making single crochets around the edges until you complete crocheting around the entire piece. Once done, finish off and weave in ends.

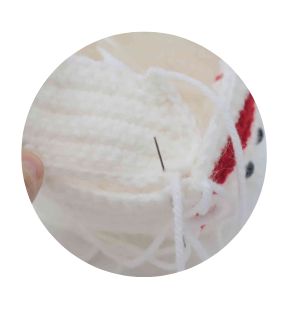
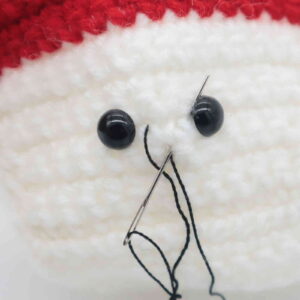
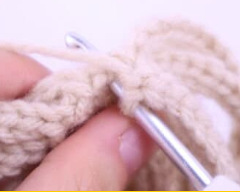
Smile:
In Black Embroidery Thread
Insert needle into the middle area of the toy as shown (Pic 1) and pull needle out at the left of the toy’s eye as shown (Pic 1).
1.
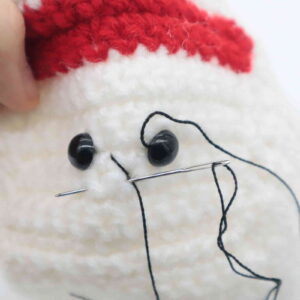
Reinsert needle into the middle of the toy (Pic 2) and pull needle out next to the toy’s right eye (Pic 2).
2.
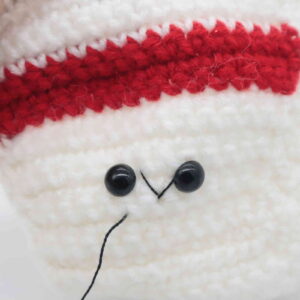
Reinsert needle into the middle of the toy as shown (Pic 3) and pull needle out nearby. Tie ends of thread into firm knots and bring knots inside the toy to hide. Cut any excess yarn.
3. 4.
4.
TIP!
If you’d like the noodle box to be sturdier, you can place the side of the box on top of cardboard. Then, trace around the cardboard and cut out the shape. Hot glue this piece into the takeout box for sturdiness. Repeat this for all sides and the bottom of the box. If you want this piece to blend in more, use white cardboard or paint the cardboard white.
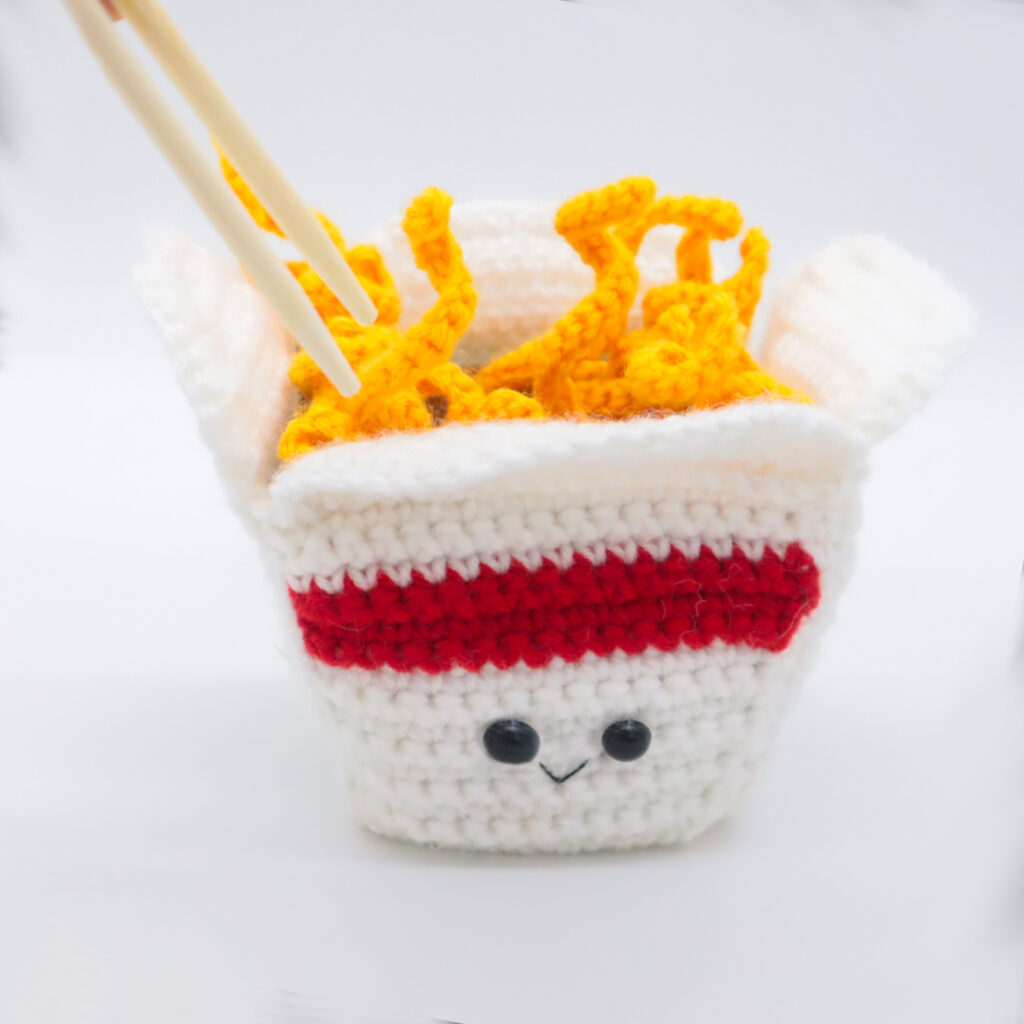
Noodles:
In Yellow
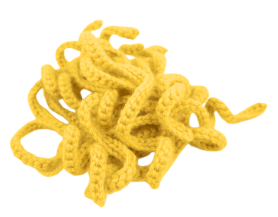
The noodle strands are all worked into the same one piece. This means there’s no sewing spaghetti strands together, and you’ll also not have to worry about losing so many strands of noodles!
Round 1: 6 Sc into a Magic Ring (6)
Round 2: *Inc* all around (12)
Round 3: *Inc, Sc in the next st* all around (18)
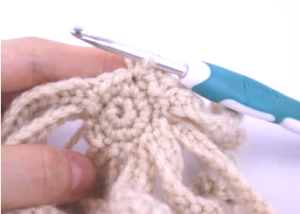
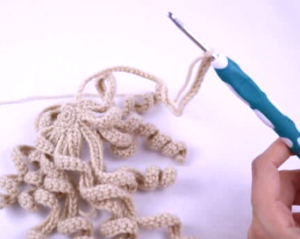
In the next round we will make long chains, work our way down that chain, then make a stitch back onto the circle. This will keep all of the spaghetti pieces attached together.
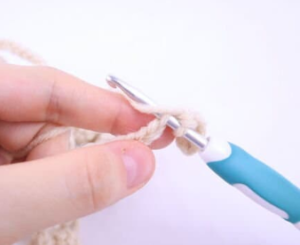
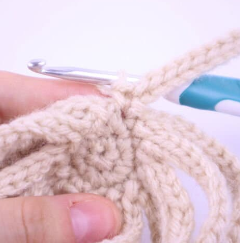
Round 4: Repeat *SlSt into the next st. Ch 30. SlSt in the 2nd Ch from the hook. SlSt in the next 28 Ch.* 18 times. SlSt into the next st to complete. (You will have 18 noodles) Finish off now and weave in ends.
1. 2.
2. 3.
3. 4.
4. 5.
5.
6.
Done! If you made this Chinese food takeout box, I would LOVE to see! You can show me by posting a picture in the comments underneath this post 🙂


2 Comments
i was wondering why youu cant print the pattern
hi. the pdf version ( the one you can print) is not free ( but it is very cheap) this is same for all other patterns . and of course all the patterns have a free version too 🙂