
Purchase the PDF version here

From Nov 8 – Dec 20
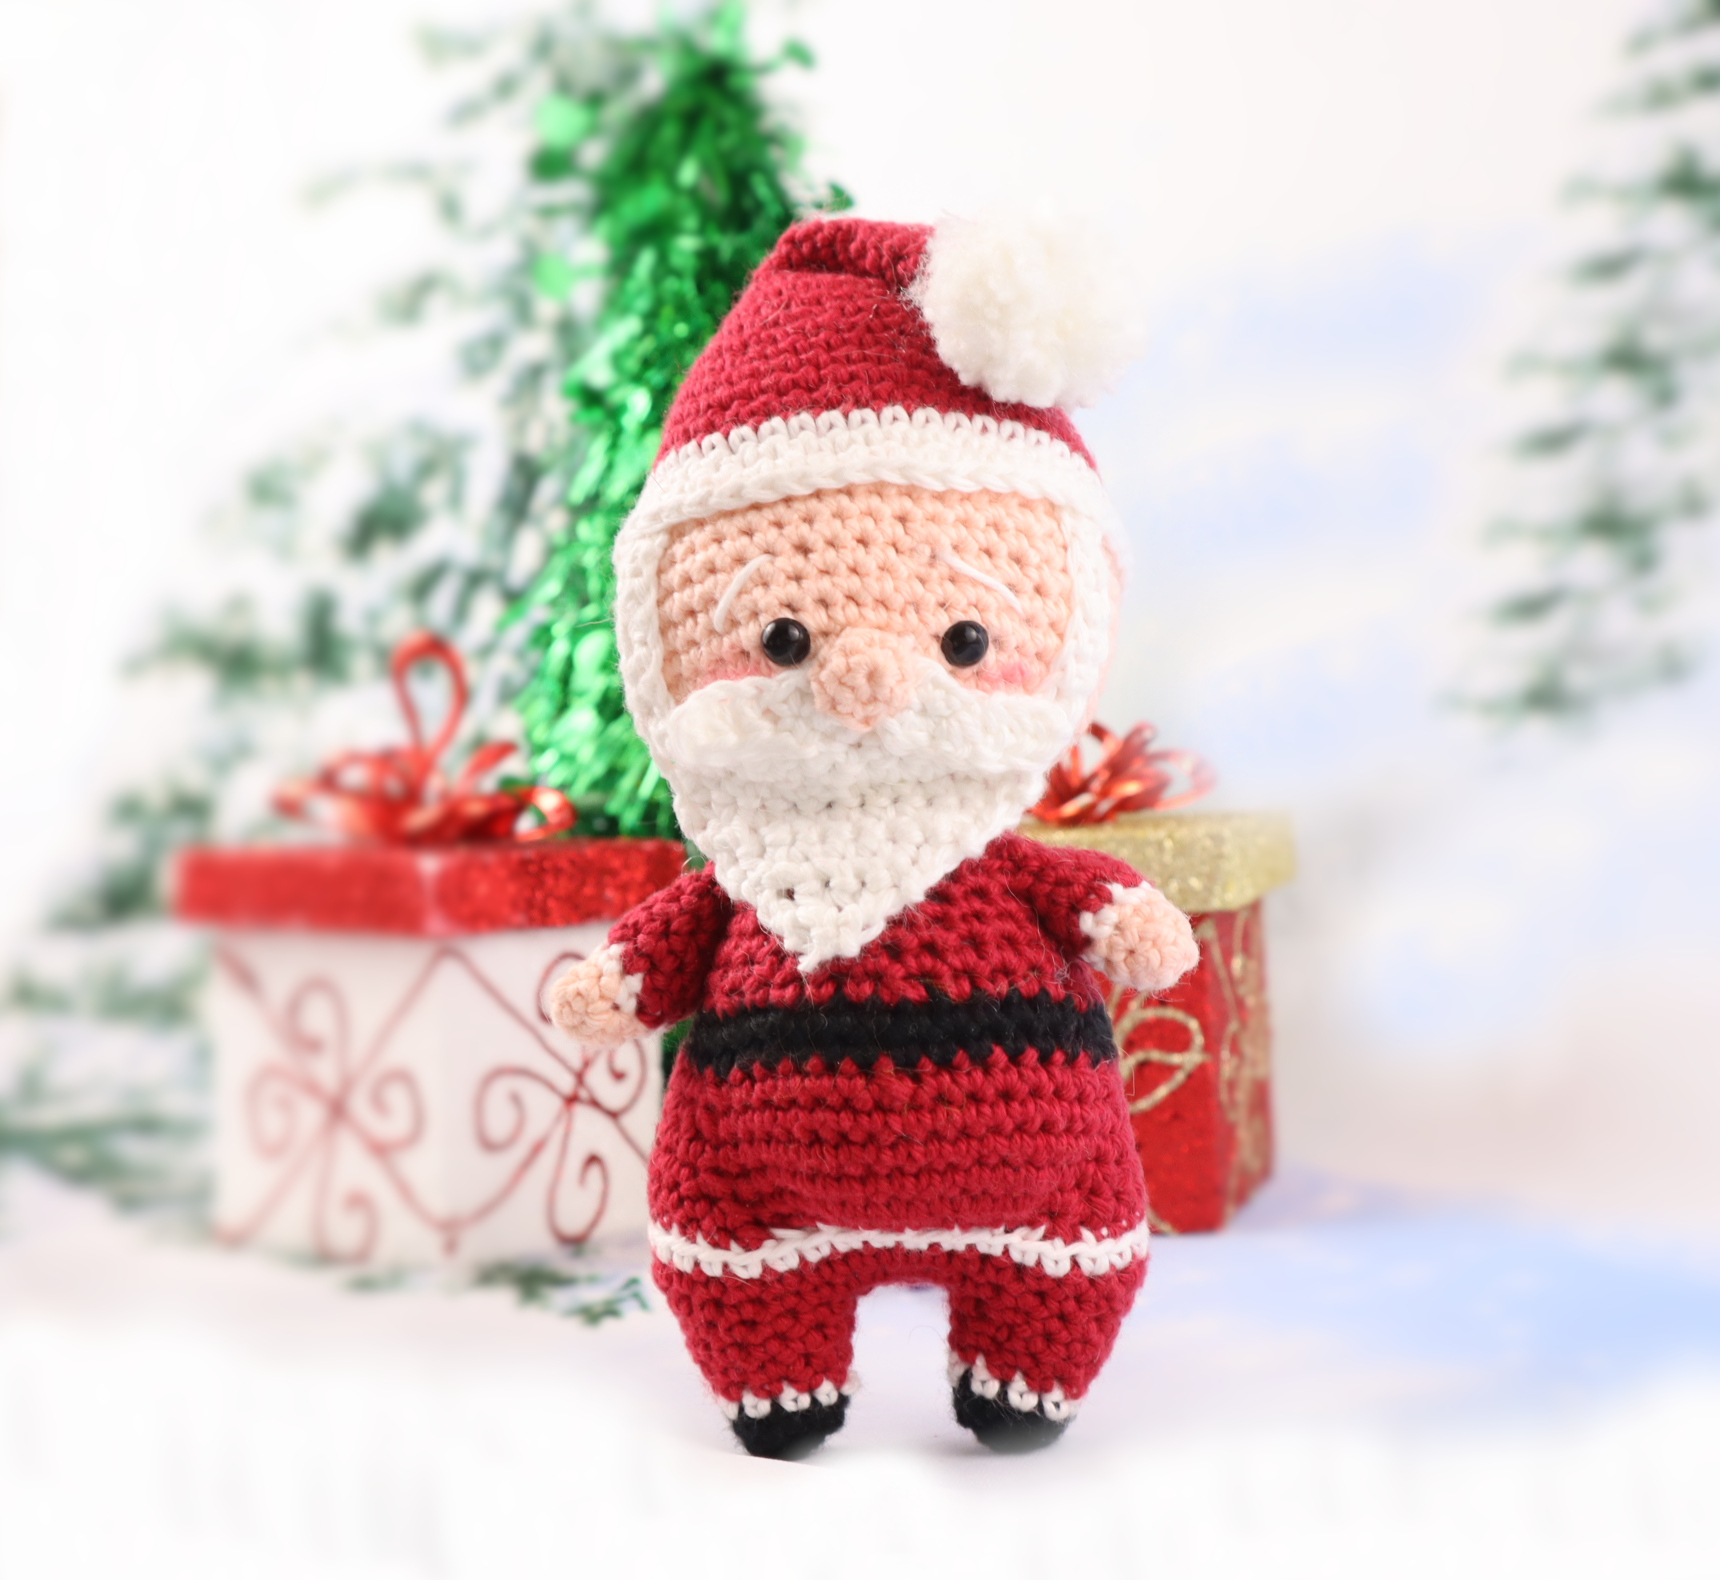
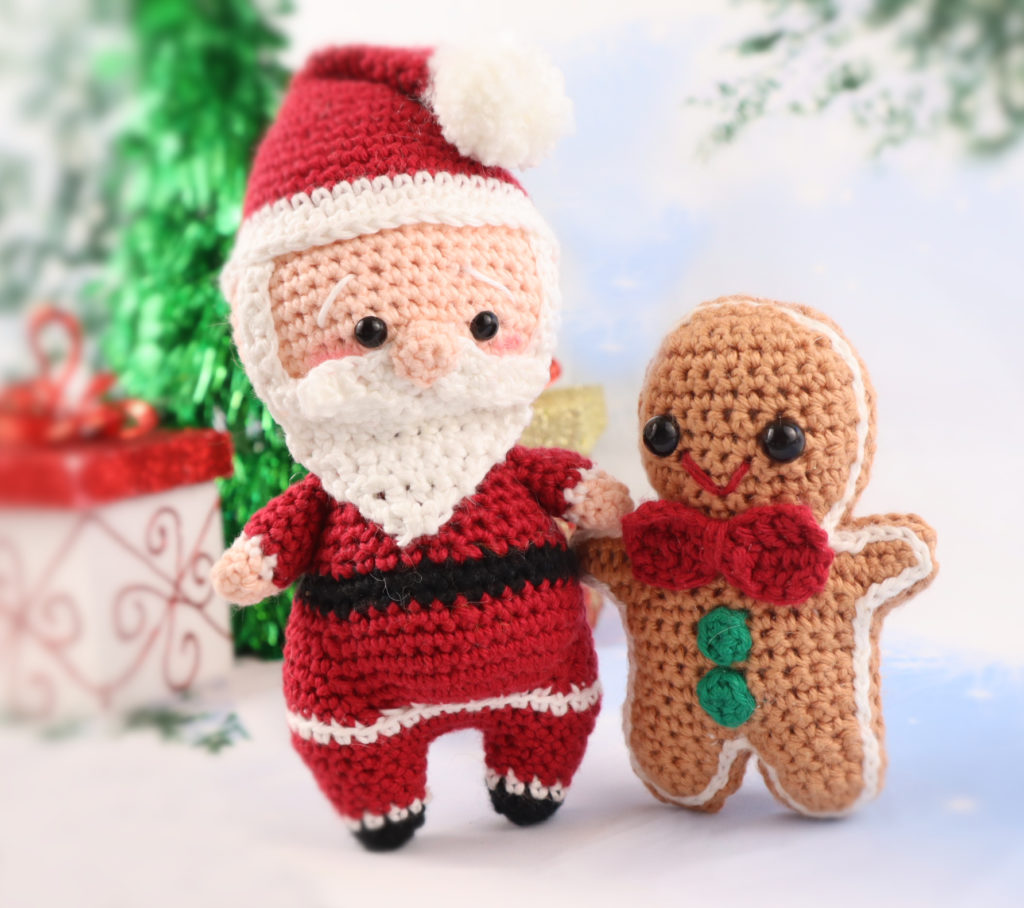
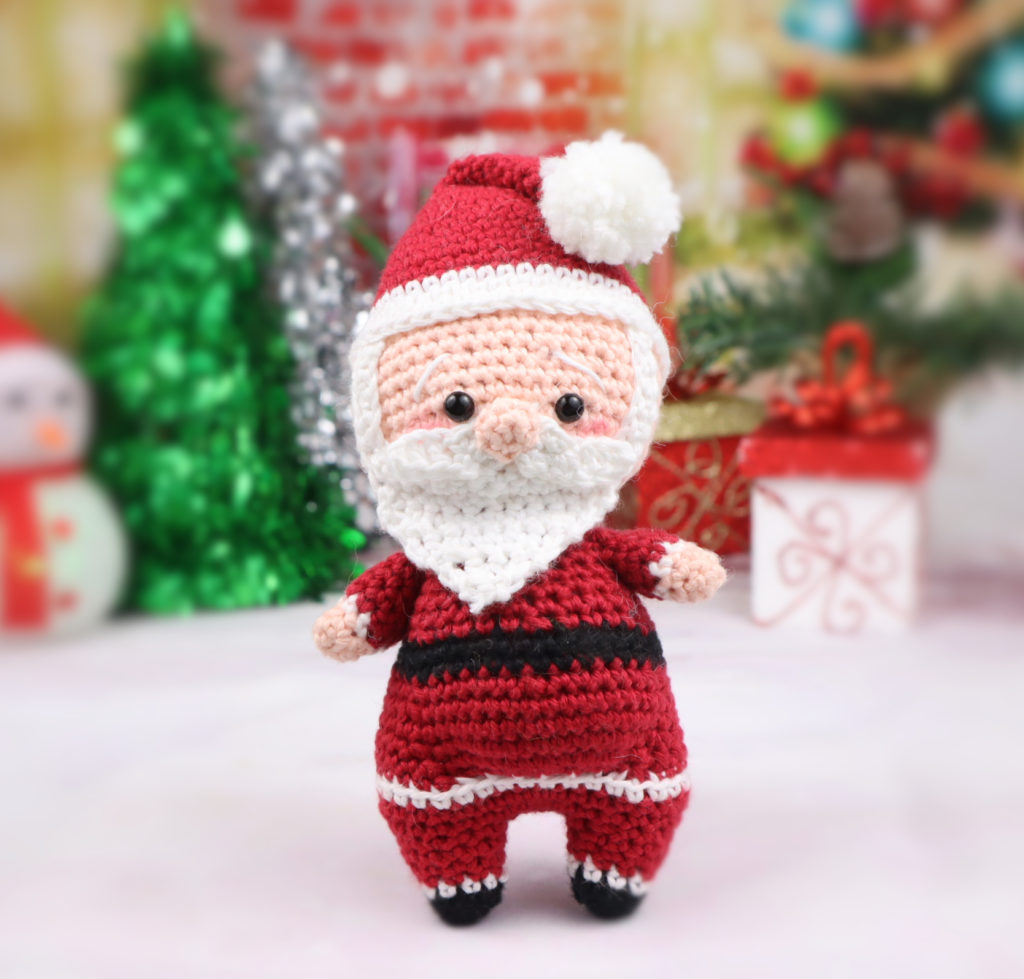
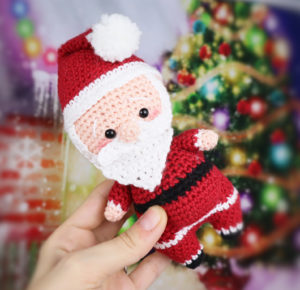
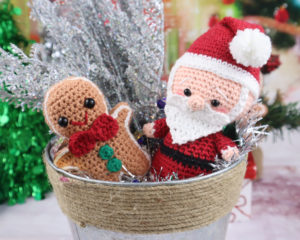
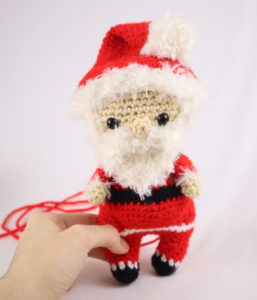
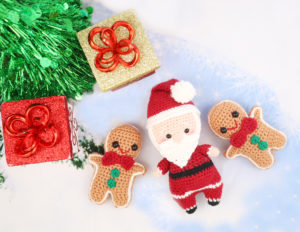
Make a Santa from this crochet pattern and enter it in our Christmas Crochet Along for a chance to win a $100 gift card to a craft store of your choice!

Supplies:
• Yarn colors in 4/Medium Weight OR 1/Fingering Yarn…
Skin Color, White, Fuzzy Yarn (Optional), Green, Yellow, Black
• 4mm Crochet Hook, or use 3mm hook if using size 1 yarn
•10mm safety eyes, or use 6mm safety eyes if using size 1 yarn
•Tapestry needle
•Scissors
•Stuffing
Additional Information:
Difficulty: Easy
• Getting Started…
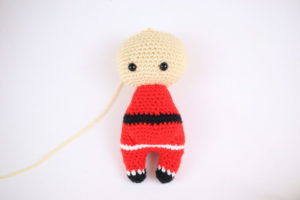
We start by making two legs and connecting the legs. They will then form the body and head as one continuous piece. After this we will make the face, hat, arms, and bag.
• Note about yarn…
In one amigurumi I used size 1 cotton yarn to make a smaller, cleaner looking Santa. However, you can use regular size 4/Medium weight yarn with a 4mm hook! The pattern will work out exactly the same, only difference being the Santa would come out bigger.
Legs:
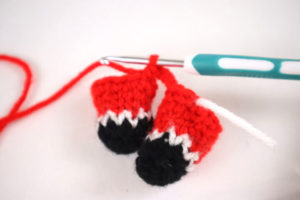
To start the body we will make 2 legs and connect them to start forming the body. As the pattern states, only finish off the first leg!
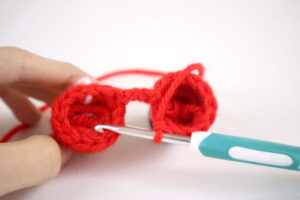
Legs: (Make 2)
In Black
Round 1: 6 Sc into a Magic Ring (6)
Round 2: *Inc, Sc* all around (9)
Round 3: *Sc* all around (9)
Round 4: Change to White. *Sc* all around (9)
Round 5: Change to Red. *Sc* all around (9)
Round 6: *Inc, Sc 2* all around (12)
Round 7: *Sc* all around (12)
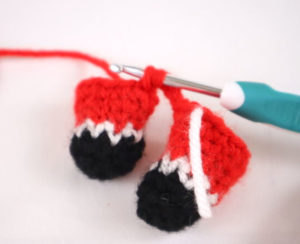
Finish off the first leg you make here. DON’T finish off the second leg you make. Continue on the second leg to Round 9.
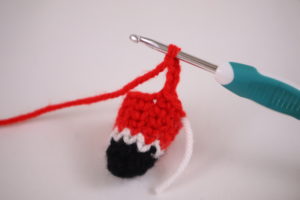
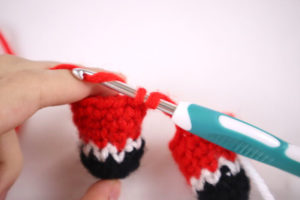
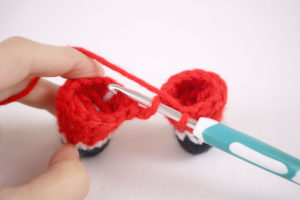
Round 8: On second leg Sc in the next 3 st (Pic 1). Be sure to add your stitch marker to the very first Sc made in this round. Ch 4 (Pic 2). Take the other leg and Sc into any stitch on the other leg (Pic 3-9).
1. 2.
2.
3.  4.
4.
5. 6.
6.
7. 8.
8.
9.
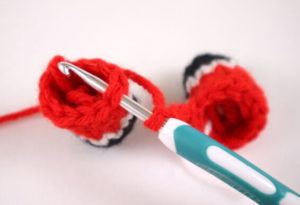
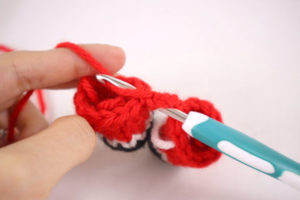
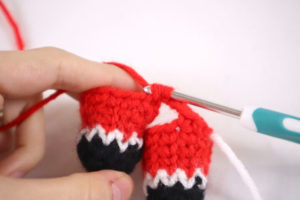
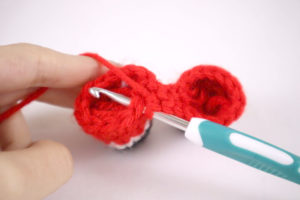
Round 8: (Continued) Sc in the next 11 st on that leg (Pic 10). Now we meet the chain. Sc in the next 4 st along the chain (Pic 11). Now we meet the other leg (Pic 12). Sc in the next 9 st on the other leg (Pic 13-15). (32)
10.  11.
11.
12.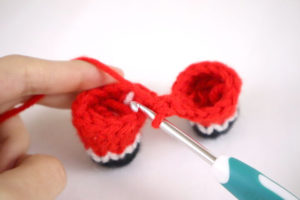 13.
13.
14. 15.
15.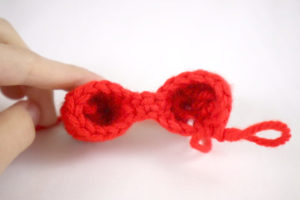
Round 9: Sc in the next 12 st, *Inc* in the next 3 st, Sc in the next 13 st, *Inc* in the next 3 st, Sc in the last st (38)
Round 10: *Sc* all around (38)
Round 11: Change to White. *Sc* all around (38)
Round 12: Change to Red. In the BLO, Sc in the next 20 st, *Dec* in the next st, *Inc* in the next 6 st, *Dec* in the next st, Sc in the next 8 st (42)
Round 13: In BOTH Loops, Sc in the next 19 st, *Dec* in the next st, *Inc, Sc in the next st* 6 times, *Dec* in the next st, Sc in the next 7 st (46)
Round 14: Sc in the next 19 st, *Dec* 1 time, Sc in the next 17 st, *Dec* 1 time, Sc in the next 6 st (44)
Round 15: *Sc* all around (44)
Round 16: Sc in the next 19 st, *Dec* 1 time, Sc in the next 16 st, *Dec* 1 time, Sc in the next 5 st (42)
Round 17: *Dec, Sc 5* all around (36)
Round 18-19: Change to Black, *Sc* all around (36)
Round 20: Change to Red. *Dec, Sc 4* all around (30)
Round 21-22: *Sc* all around (30)
Round 23: *Dec, Sc 3* all around (24)
Round 24-27: *Sc* all around (24)
Round 28: *Dec* all around (12)
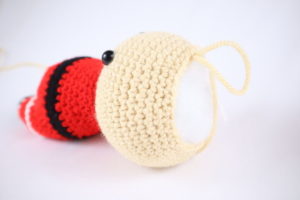
In the next and following rounds we will now start forming the head!
Round 29: Change to Skin Color. In the FLO *Inc* all around (24)
Round 30: *Inc, Sc 2* all around (32)
Round 31: *Inc, Sc 3* all around (40)
Round 32: *Inc, Sc 4* all around (48)
Round 33-42: *Sc* all around (48)
Round 43: *Dec, Sc 4* all around (40)
Round 44: *Dec, Sc 3* all around (32)
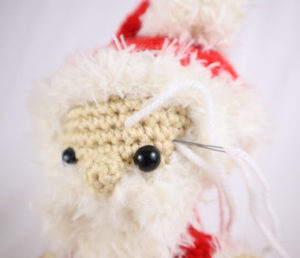
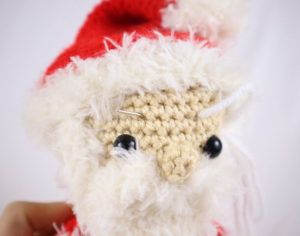
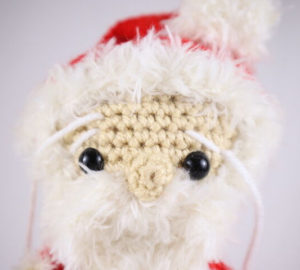
Add the safety eyes in now. Place them between Round 35 & 36, 6 stitches apart.
Round 45: *Dec, Sc 2* all around (24)
Stuff the head very firmly here. Keep adding stuffing after each round.
Round 46: *Dec, Sc 1* all around (16)
Round 47: *Dec* all around (8)
Finish off now, leaving a tail for sewing. Sew the remaining stitches together and tie the tail end of yarn into a firm knot. Hide it in the head, and weave in the remaining tail ends of yarn.
Beard:
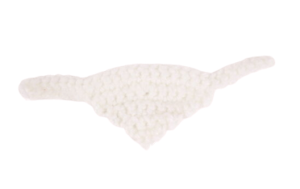
The beard in made all in one piece. We make a chain and work down the chain. Then, we work in the middle of the chain to start forming the beard starting in Row 3!
Row 1: Ch 28. Sc in 2nd Ch from hook. Sc in the next 26 st (27)
Row 2: Don’t Ch 1, Turn. SlSt in the next 7 st. Sc in the next 13 st
Row 3: Ch 1 & Turn. Sc in the next 13 st (13)
Row 4: Ch 1 & Turn. *Dec* 1 time, Sc in the next 9 st, *Dec* 1 time (11)
Row 5: Ch 1 & Turn. *Dec* 1 time, Sc in the next 7 st, *Dec* 1 time (9)
Row 6: Ch 1 & Turn. *Dec* 1 time, Sc in the next 5 st, *Dec* 1 time (7)
Row 7: Ch 1 & Turn. *Dec* 1 time, Sc in the next 3 st, *Dec* 1 time (5)
Row 8: Ch 1 & Turn. *Dec* 1 time. Sc in the next st, *Dec* 1 time (3)
Row 9: Ch 1 & Turn. Sc in the next 3 st (3)
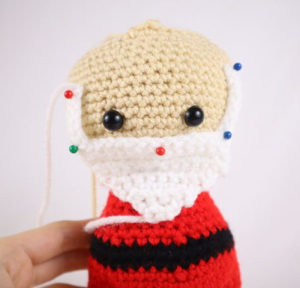
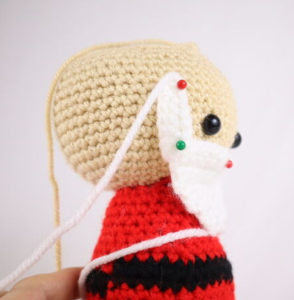
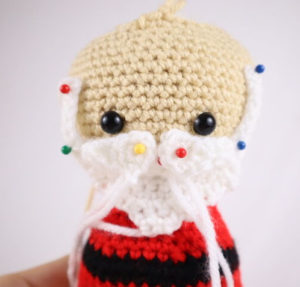
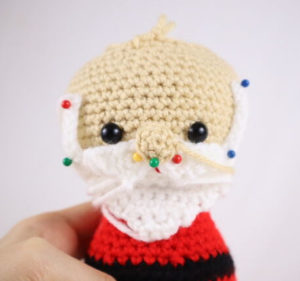
Finish off, leaving a long tail for sewing. Weave the tail end of yarn to the very top of the side-burn. Pin the beard on as shown. (Specifically, pin beard tops onto Round 40, 13 st apart from each side-burn. Pin beard middle on Round 34.) Sew on starting from the side-burn, then sew on across the beard, then sew on the other side-burn.
Mustache:
We will make 2 different mustache, 1 for the left side and 1 for the right.
Left Mustache:
In White
Round 1: 6 Sc into a Magic Ring (6)
Round 2: Sc in the next st. Ch 4. Sc in the 2nd Ch from the hook, Hdc in the next ch, Dc in the next ch. Sc in the next st on the circle, SlSt in the next st
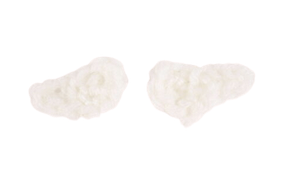
Finish off, leaving a long tail for sewing. Turn the mustache so the long side is going left. Pin the mustache on as shown, 1 round above the beard. Sew on and weave in any ends of yarn.
Right Mustache:
In White
Round 1: 6 Sc into a Magic Ring (6)
Round 2: Sc in the next st. Ch 4. Turn the piece so the wrong side is facing you. Insert hook going from the back of the chain, NOT from the front of the chain like we usually do. We do this so the beard points the correct way for the right side of the mustache. Now, Sc in the 2nd Ch from the hook, Hdc in the next ch, Dc in the next ch. Sc in the next st on the circle, SlSt in the next st
Finish off, leaving a long tail for sewing. Pin the mustache on as shown, above the beard. Sew on and weave in any ends of yarn.
Nose:
In Skin Color
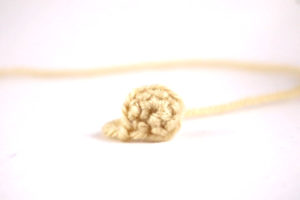
Round 1: 6 Sc into a Magic Ring (6)
Round 2: *Sc* all around (6)
Finish off, leaving a long tail for sewing. Pin the nose above the mustaches and sew on. Weave in any tail ends of yarn.
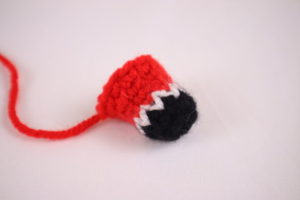
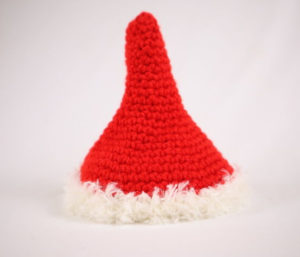
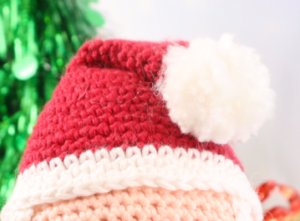
Hat:
In Red
Round 1: 6 Sc into a Magic Ring (6)
Round 2: *Inc, Sc* all around (9)
Round 3-4: *Sc* all around (9)
Round 5: *Inc, Sc 2* all around (12)
Round 6-9: *Sc* all around (12)
Round 10: *Inc, Sc 3* all around (15)
Round 11: *Sc* all around (15)
Round 12: *Inc, Sc 4* all around (18)
Round 13-14: *Sc* all around (18)
Round 15: *Inc, Sc 2* all around (24)
Round 16: *Sc* all around (24)
Round 17: *Inc, Sc 3* all around (30)
Round 18: *Sc* all around (30)
Round 19: *Inc, Sc 4* all around (36)
Round 20: *Sc* all around (36)
Round 21: *Inc, Sc 5* all around (42)
Round 22: *Inc, Sc 6* all around (48)
Round 23-24: *Sc* all around (48)
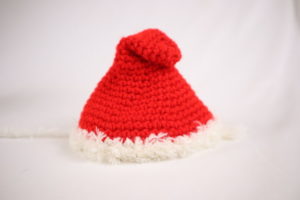
Round 25-27: Change to White or Fuzzy Yarn. *Sc* all around (48)
Finish off, leaving a long tail for sewing.
Hat Assembly:
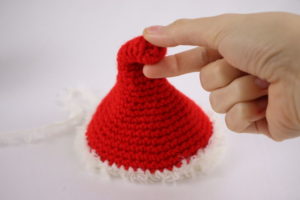
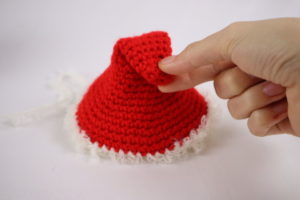
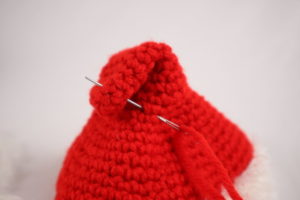
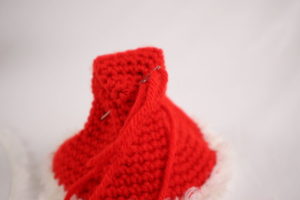
Bend the very tip of the hat to the side as shown (Pic 1-2). Sew in place with red yarn, going from the hat to the tip (Pic 2-3). Tie the tail ends of this yarn into knots and pull them into the hat to hide.
1. 2.
2.
3. 4.
4.
5.
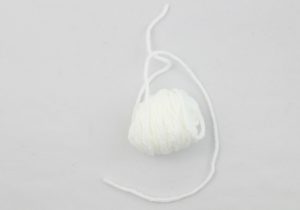
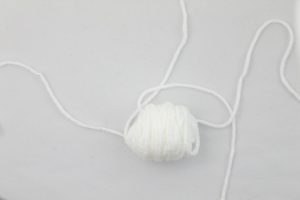
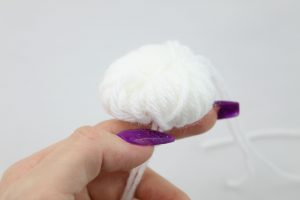
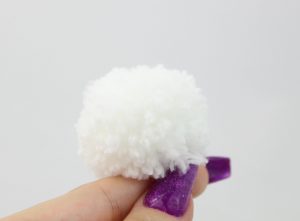
Pom Pom:
In White
First, cut a 12″ piece of white or fuzzy yarn and set aside for later. Now, take white or fuzzy yarn and wrap it around for 3 fingers 80 times for worsted yarn or 50 times for fuzzy yarn (Pic 1, 2, & 3). Now take the yarn off your fingers (Pic 4).
1. 2.
2.
3. 4.
4.
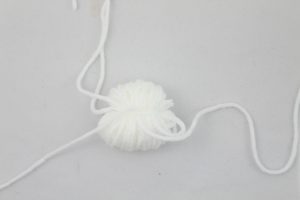
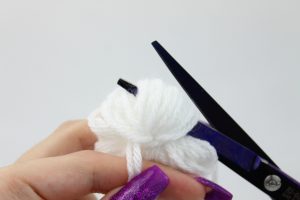
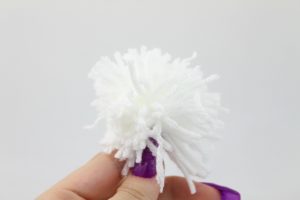
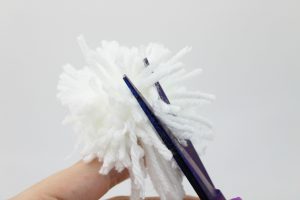
Wrap the 12″ piece of yarn around the yarn a few times (Pic 5-6). Do this tightly to secure. Now, cut the loops of yarn as shown (Pic 7-10). Be sure to cut all the longer pieces of yarn off to get a puffy ball.
5. 6.
6.
7. 8.
8.
9. 10.
10.
Finally, sew the pom pom to the tip of the hat (Pic 12).
11. 12.
12.
Hat Assembly:
Pin the hat on as shown. (Specifically, pin the front part of the hat between rounds 41 & 42. Pin back between rounds 33 & 34). Sew on with white or fuzzy yarn. Weave in any tail ends.
Arms: (Make 2)
In Skin Color
Round 1: 6 Sc into a Magic Ring (6)
Round 2-3: *Sc* all around (6)
Round 4: Change to White and *Sc* all around (6)
Round 5: Change to Red and *Inc, Sc* all around (9)
Round 6-9: *Sc* all around (9)
Finish off, leaving a long tail for sewing. Pin the arms on as shown, (Specifically, between Rounds 28 for the top of the arm and 23 for the bottom of the arm). Sew on, Tie the ends into firm knots and bring into the body to hide. Weave in any ends.
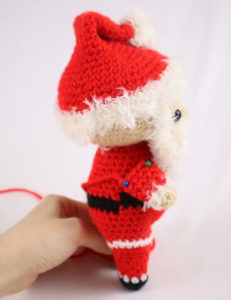
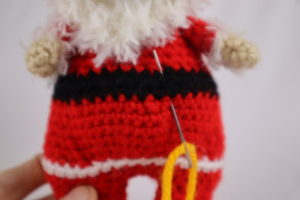
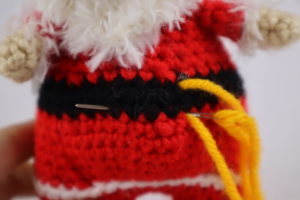
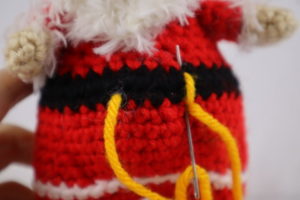
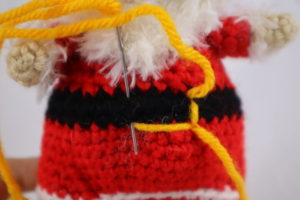
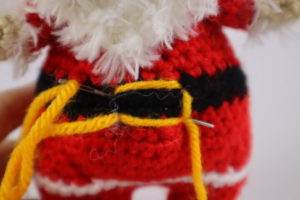
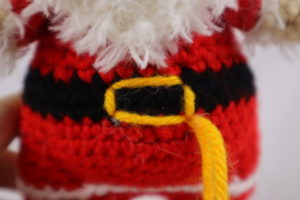
Belt:
In Yellow
Insert needle with thread where shown, and pull out 2 stitches up (Pic 1). Reinsert needle into the very first insertion spot and pull out 4 stitches away (Pic 2). Reinsert into the first insertion spot and pull out 2 stitches up (Pic 3). Insert needle 4 stitches away and pull out 2 stitches down (Pic 4). Reinsert needle 2 stitches up and pull out where shown (Pic 5). Tie the tail ends of yarn into a knot and pull into the body to hide.
1. 2.
2.
3. 4.
4.
5. 6.
6.
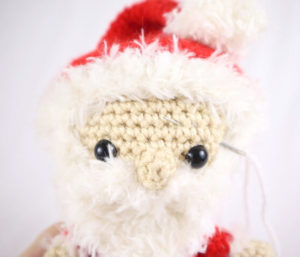
Eyebrows:
In White
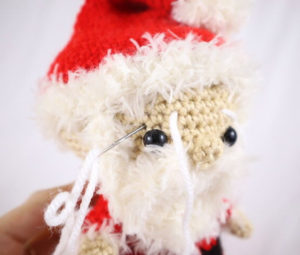
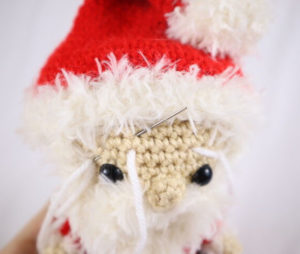
Insert needle with thread above the right eye and pull needle out diagonal and to the left as shown (Pic 1). Reinsert needle into the original insertion spot (Pic 2). Pull needle out about 4 stitches to the left of the top eyebrow (Pic 3). Reinsert needle diagonal and to the bottom left as shown (Pic 4). Pull needle out a few stitches away (Pic 5). Tie tail ends of yarn into firm knots and bring into the head to hide. Cut any excess yarn.
1. 2.
2.
3. 4.
4.
5. 6.
6.
Bag:
In Green
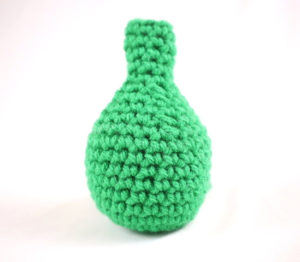
Round 1: 6 Sc into a Magic Ring (6)
Round 2: *Inc* all around (12)
Round 3: *Inc, Sc* all around (18)
Round 4: *Inc, Sc 2* all around (24)
Round 5-11: *Sc* all around (24)
Round 12: *Dec, Sc 4* all around (20)
Round 13: *Dec, Sc 3* all around (16)
Round 14: *Sc* all around (16)
Round 15: *Dec, Sc 2* all around (12)
Add stuffing to the bag now, making sure it’s stuffed very firmly.

Round 16: *Dec, Sc 1* all around (8)
Round 17-21: *Sc* all around (8)
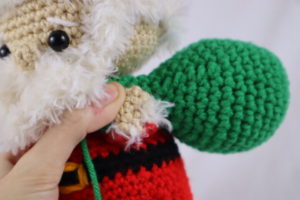
Finish off, leaving a long tail for sewing. Place the long end of the bag over his arm as shown (Pic 1-2). Sew on going from the hand to the bag until it’s firmly sewed on. Tie the tail end of yarn into a firm knot and bring into the hand to hide. Weave in any ends.
1.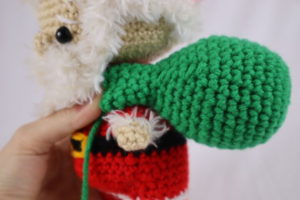 2.
2.
 Done! If you made this Santa, don’t forget to enter him into our Christmas Crochet Along on the StringyDingDing members forum! You can read more about that here:
If you made this Santa I would LOVE to see! Post a picture in the comments so show me 🙂


7 Comments
Thank you, I struggle with placements of body parts and have brought several of your patterns I really love the 1 piece pig and the Dino that I can make in one piece although I made it both ways and I also brought your big Dino pattern and my grandson loves them all so thank you again , stay safe 🌈
Hi Danni! I am so sorry to hear that placing limbs is a struggle! In my newer patterns I am making an effort to add what exact rounds to place limbs, so hopefully that can help! It just takes some practice though, one tip I have is to sew around the entire limb first, then sew down the limb at the sides to the body so it lays naturally 🙂
Aw thank you for buying my patterns, I really appreciate it, and I hope you like them! The one piece amigurumis are really fun like you said, they’re quick and no sewing! What’s not to love? 😁
Your grandson is so so adorable, what a cute smile 🥰 Thank you so much for the kind words, I am excited to bring you more of the no sew amigurumis!!! 🥰❤️
Hello I’ve tried really hard on making this amazing Santa but I’m struggling to join the legs together,I’m not getting the right stitch count and have pulled it out many times,I want to know where I’m going wrong…I love all your patterns and would really live to make this please help 😊
Hi Wendy! I’m so sorry to hear that there’s some trouble when it comes to connecting the legs. I think I know why you might be getting a different stitch count! In Round 8 (the round when we connect the legs) be sure to count the chain 4 we made on BOTH sides of the leg! We do this since we work through the chain 4 on one side, then the other side. So the chain 4 will actually equal 8 stitches 🙂
Round 8: On second leg Sc in the next 3 st (3 stitches made). Be sure to add your stitch marker to the very first Sc made in this round. Ch 4 (4 stitches) . Take the other leg and Sc into any stitch on the other leg (1 stitch) . Sc in the next 11 st on that leg (11 stitches). Now we meet the chain. Sc in the next 4 st along the chain (4 stitches). Now we meet the other leg. Sc in the next 9 st on the other leg (9 stitches). (32)
So now let’s add the stitches all together, they are bolded above: 3+4+1+11+4+9=32
I hope that is able to help out with the stitch count! If you’re still having trouble please let me know 🙂 Good luck on your Santa! If you get a chance after making him, I would love to see a picture! 😍
Hi! Thank you so much for the free pattern- it’s one of my favorites! Your patterns are incredible. I do have one problem though: I can’t seem to find the pattern for the sideburns. Forgive me if I’m blind and it’s right in front of me, but I’ve just finished up the beard and I’m not sure where the sideburns are.
Thank you for your trouble!
Hi there Stella! I am really grateful for such a kind comment, it truly means a lot that you like the pattern so much 😍
For the sideburns, it’s hard to miss so your confusion is totally understandable 🙂 The sideburns are worked into the beard, so the beard and sideburns are one piece! The sideburns are the very first rows of the beard, then we decrease to make the actual beard part. To attach the sideburns, pin the beard on below the nose. Then you will have two long flaps at each side of the head. Those are the sideburns, so angle them up towards the face and pin on.
I hope that was able to make sense! Please feel free to let me know if you have any other questions, I’m happy to help in any way I can ❤️
In the chubby Santa amigurumi, In row 13, I can’t count 46 stitches. What am I missing? 19 + 1 + 12 + 1 + 7 = 40.