
Purchase the PDF version here


Supplies:
4mm crochet hook, 4/Medium weight yarn in Main Bear Color, Main Dress Color, White for Dress, Hat Color, Flower Color, and Shoe Color. 12mm safety eyes & nose, tapestry needle, scissors, and stuffing.
Additional Information:
Difficulty: Easy
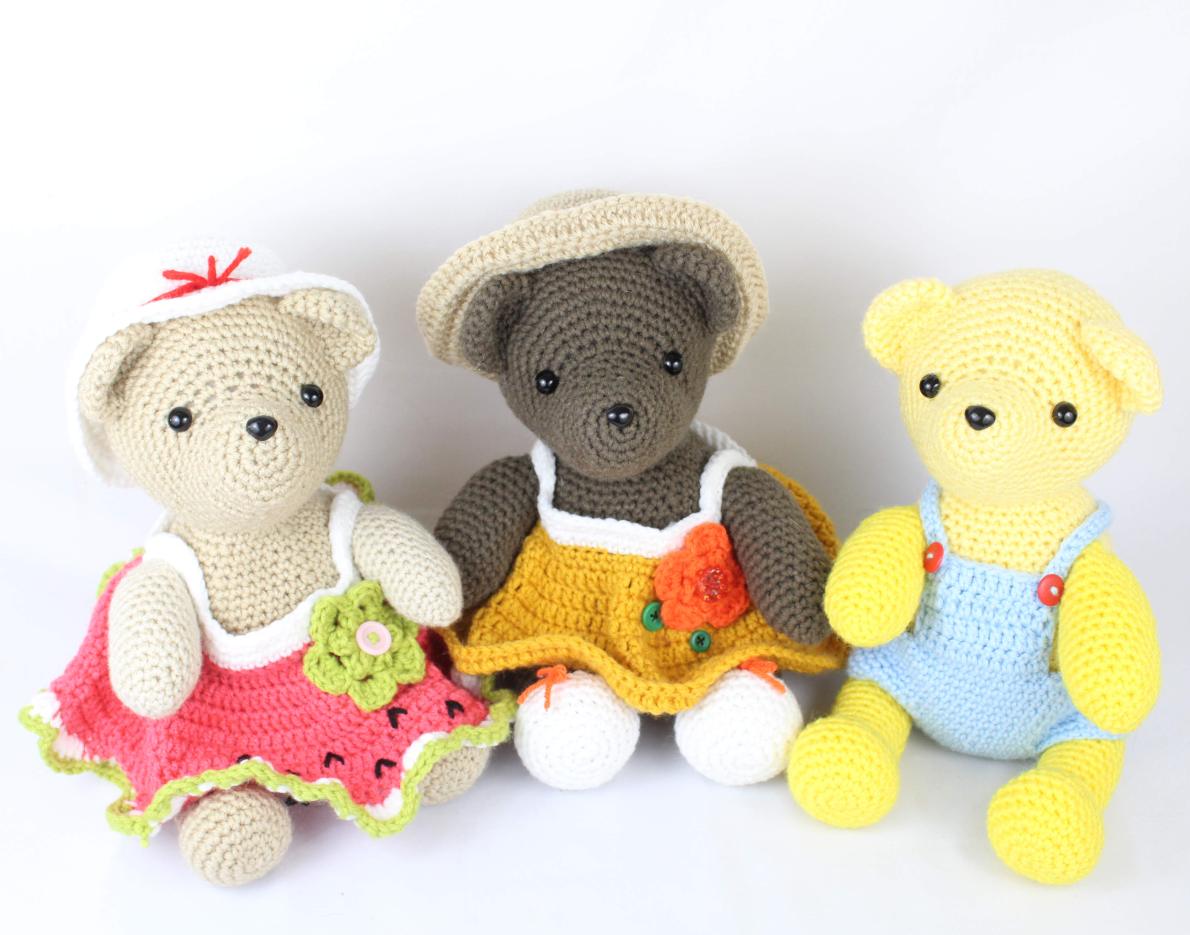
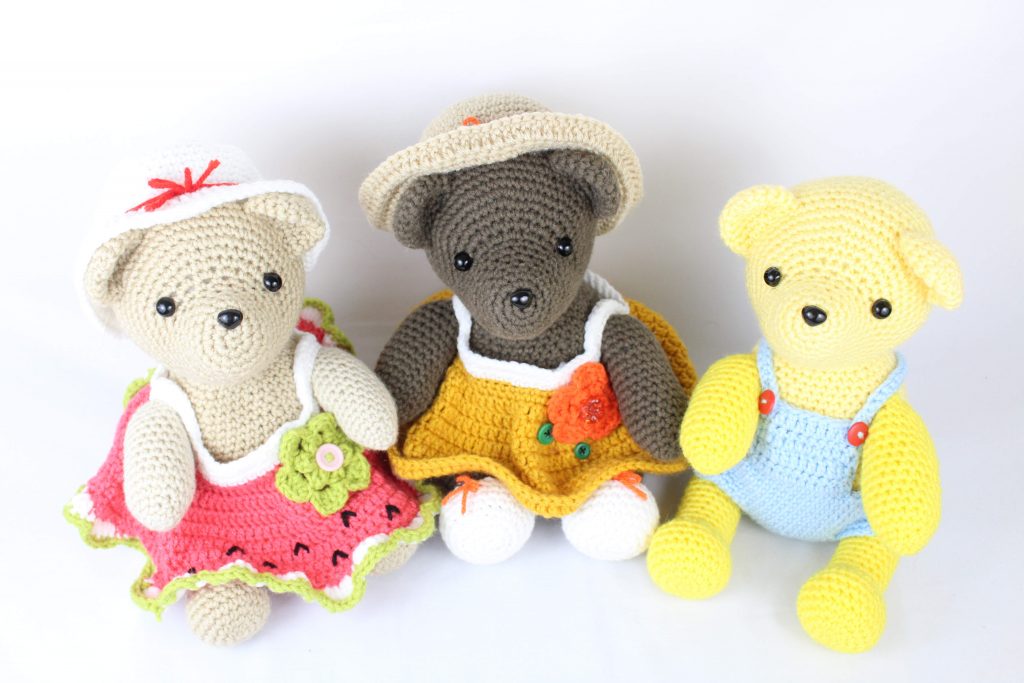
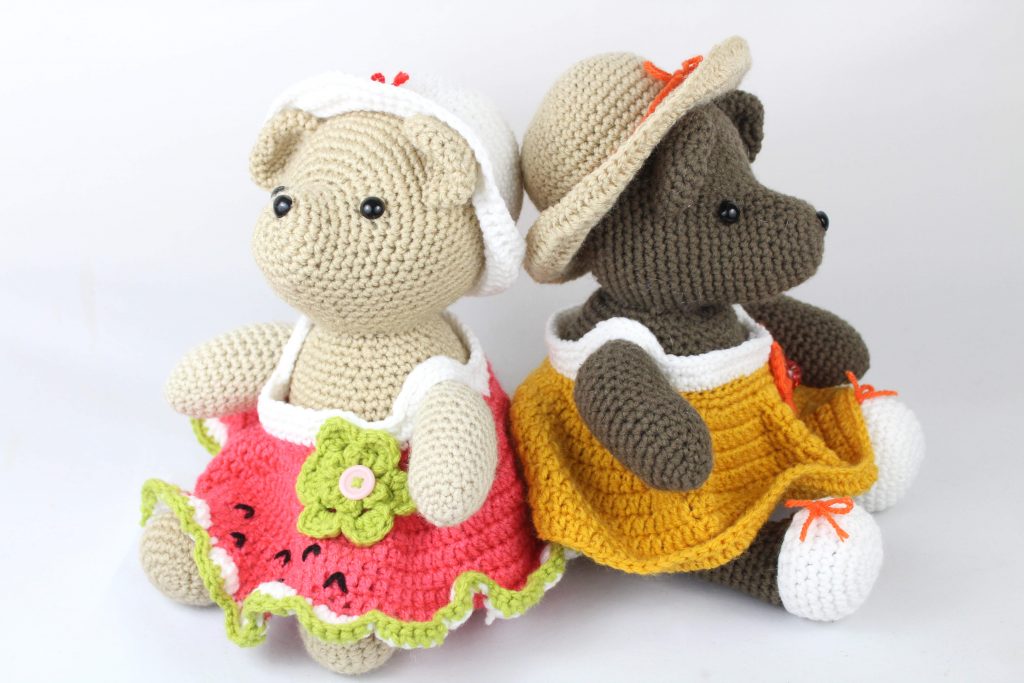
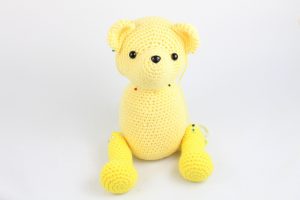
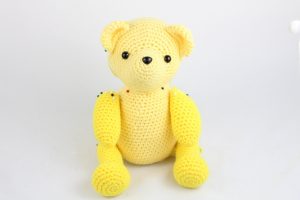
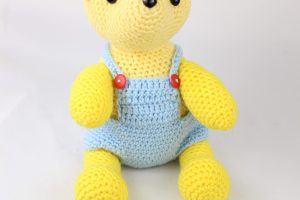
This pattern refers to “Main Color”. This is the main color you will use for your bear/dress. I used brown for the main color of one of my bears. I used yellow for the main color of one of my dresses. We start by making the head, ears, then body and limbs. We sew them all together. We then make the dress by making the bottom first, then make the dress top. Next, we make overalls. We can then make the hat, flower, and shoes. Done!
Head:
In Main Color
Round 1: 6 Sc in Magic Ring (6)
Round 2: *Inc* all around (12)
Round 3: *Inc, Sc* all around (18)
Round 4-6: *Sc* all around (18)
Round 7: *Inc, Sc 2* all around (24)
Round 8: *Sc* all around (24)
Round 9: Sc in the next 8 st, *Inc* in the next 6 st, Sc in the last 10 st (30)
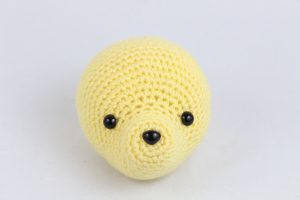
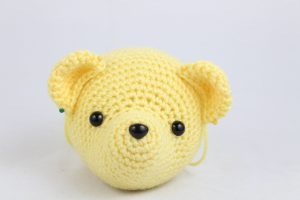
Round 10: Sc in the next 8 st, Sc in the next st and add a different colored st marker to the sc just made This marks where we will place the eye. Sc in the same st. Sc in the next st Repeat *Inc in the next st, Sc in the next st* 4 times. Sc in the next st. Sc in that same st and add a different colored st marker to the sc just made. Sc in the same st. Sc in the next 10 st (36)
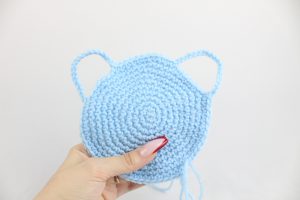
Round 10’s eye markers will look like the image below
Round 11: Sc in the next 8 st, Repeat *Inc in the next st, Sc in the next st 2* 6 times. Sc in the next 10 st (42)
Round 12: Sc in the next 8 st, Repeat *Inc in the next st, Sc in the next st 3* 6 times. Sc in the next 10 st (48)
Round 13: *Inc, Sc 7* all around (54)
Round 14-24: *Sc* all around (54)
Round 25: *Dec, Sc 7* all around (48)
Round 26: *Dec, Sc 6* all around (42)
Round 27: *Dec, Sc 5* all around (36)
Round 28: *Dec, Sc 4* all around (30)
Round 29: *Dec, Sc 3* all around (24)
Stuff head here. Continue stuffing after each round. Add safety eyes in marked areas from Round 10. Add a safety nose in the muzzle area.
Round 30: *Dec, Sc 2* all around (18)
Round 31: *Dec, Sc* all around (12)
Round 32: *Dec* all around (6)
Finish off and sew closed. Set head aside for now.
Ears: (Make 2)
In Main Color
Round 1: 6 Sc in Magic Ring (6)
Round 2: *Inc* all around (12)
Round 3: *Inc, Sc* all around (18)
Round 4-7: *Sc* all around (18)
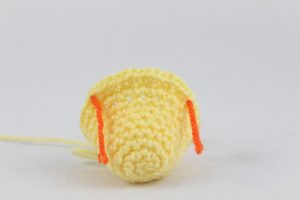
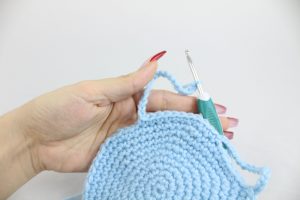
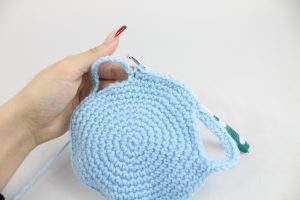
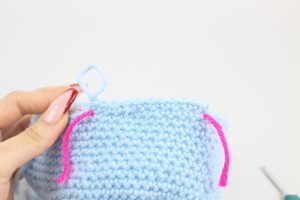
Finish off. Pin onto the head as shown, making sure the ear bends in at the middle. Sew on.
Body:
In Main Color
Round 1: 6 Sc in Magic Ring (6)
Round 2: *Inc* all around (12)
Round 3: *Inc, Sc* all around (18)
Round 4: *Inc, Sc 2* all around (24)
Round 5: *Inc, Sc 3* all around (30)
Round 6: *Inc, Sc 4* all around (36)
Round 7: *Inc, Sc 5* all around (42)
Round 8: *Inc, Sc 6* all around (48)
Round 9: *Inc, Sc 7* all around (54)
Round 10-22: *Sc* all around (54)
Round 23: *Dec, Sc 7* all around (48)
Round 24-27: *Sc* all around (48)
Round 28: *Dec, Sc 6* all around (42)
Round 29: *Sc* all around (42)
Round 30: *Dec, Sc 5* all around (36)
Round 31-32: *Sc* all around (36)
Round 33: *Dec, Sc 4* all around (30)
Round 34: *Sc* all around (30)
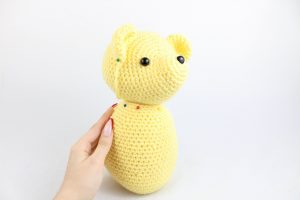
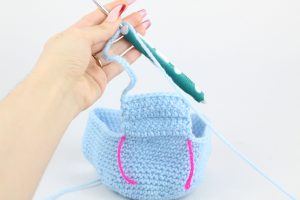
Stuff and finish off, leaving a long tail for sewing. Pin the head to the body as shown. Sew on.
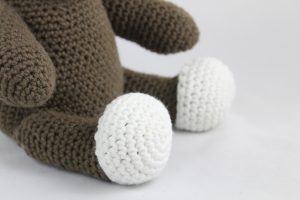
Legs: (Make 2)
In Main Color
Round 1: 6 Sc in Magic Ring (6)
Round 2: *Inc* all around (12)
Round 3: *Inc, Sc* all around (18)
Round 4: *Inc, Sc 2* all around (24)
Round 5-9: *Sc* all around (24)
Round 10: Sc in the next 8 st, *Dec* 5 times, Sc in the next 6 st (19)
Round 11: Sc in the next 8 st, *Dec* 3 times, Sc in the next 5 st (16)
Stuff here
Round 12-24: *Sc* all around (16)
Stuff here
Round 25: *Dec* all around (8)
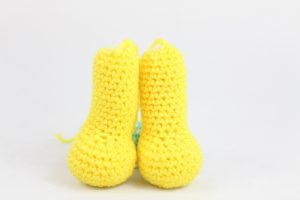
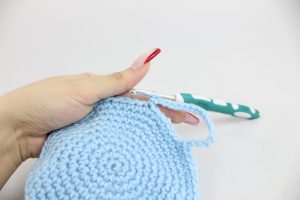
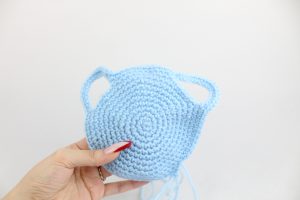
Finish off and sew closed. Pin onto the bear as shown. Sew on.
Arms: (Make 2)
In Main Color
Round 1: 6 Sc in Magic Ring (6)
Round 2: *Inc, Sc* all around (9)
Round 3: *Sc* all around (9)
Round 4: *Inc, Sc 2* all around (12)
Round 5: *Inc, Sc* all around (18)
Round 6-18: *Sc* all around (18)
Stuff here
Round 19: *Dec* all around (10)
Finish off and sew closed. Pin onto the bear as shown. Sew on.
Dress Bottom:
In Main Dress Color
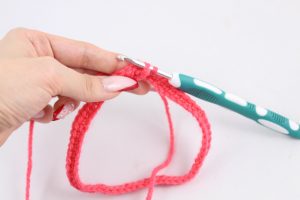
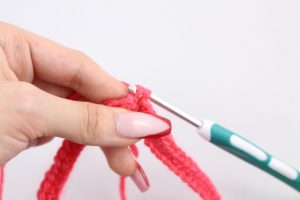
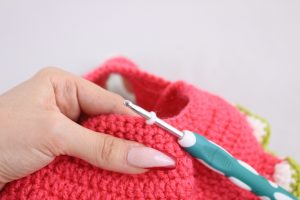
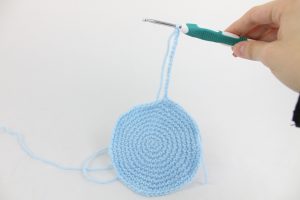
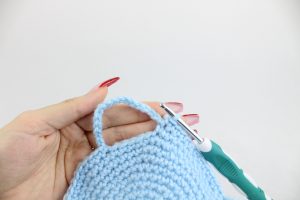
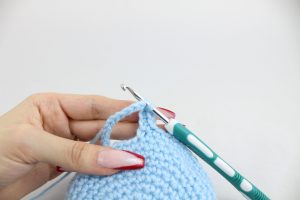
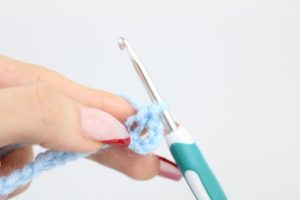
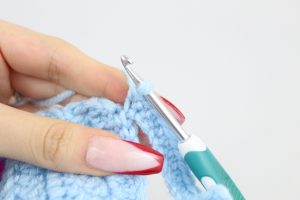
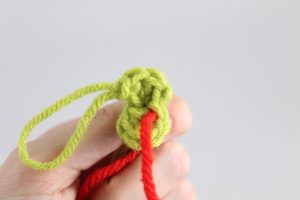
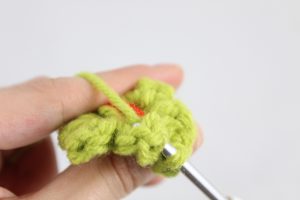
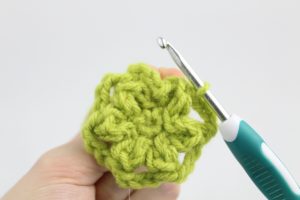
Row 1: Ch 61 (Pic 1)
1.
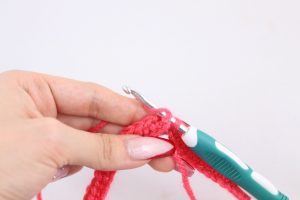
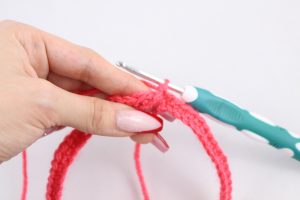
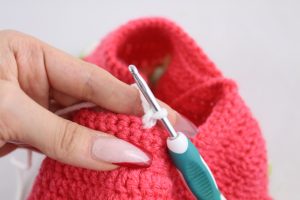
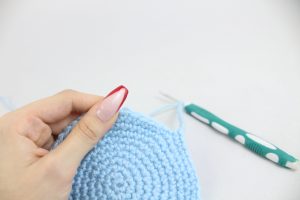
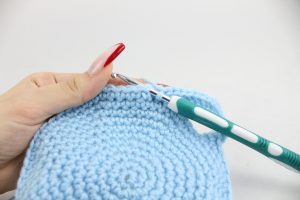
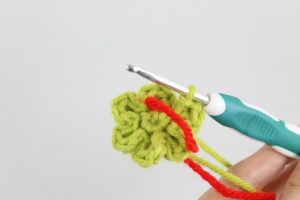
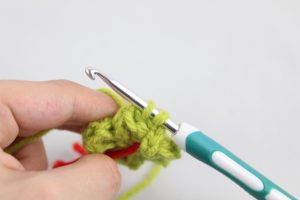
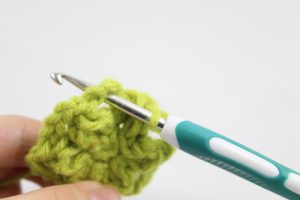
Row 2: Sc in the 2nd Ch from hook. Sc in the next 59 st (Pic 2) (60)
2.
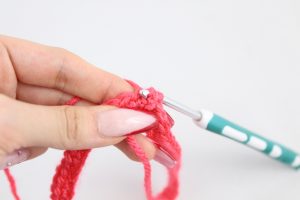
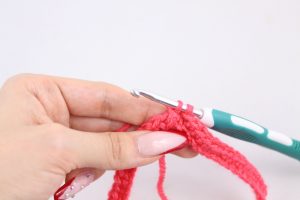
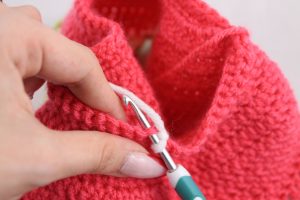
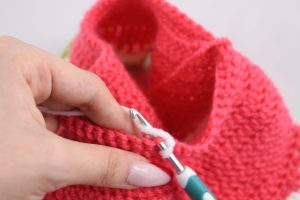
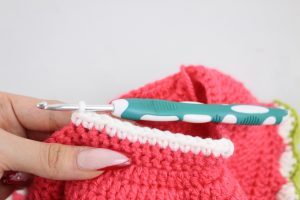
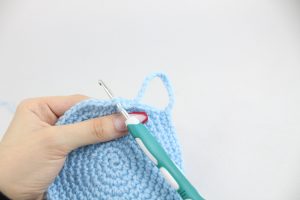
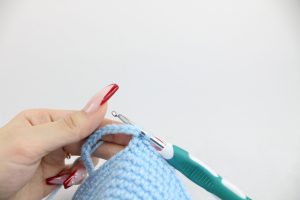
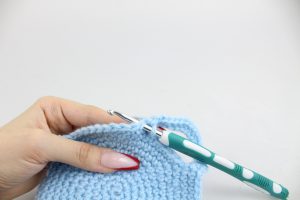
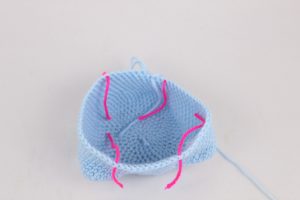
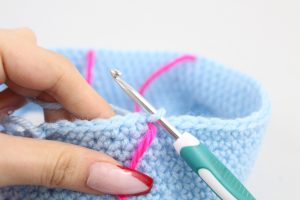
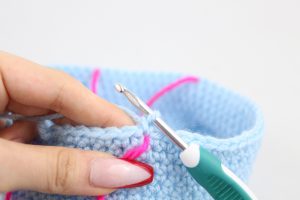
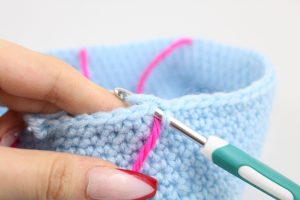
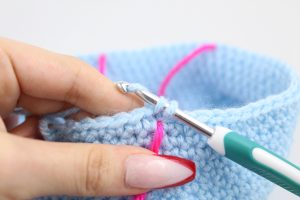
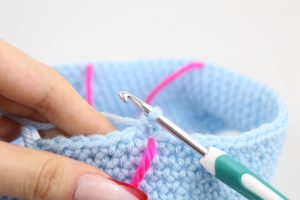
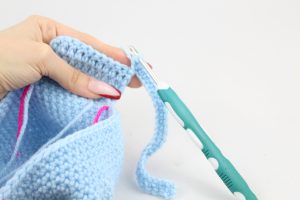
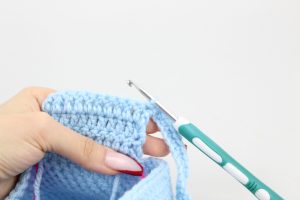
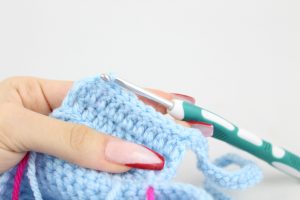
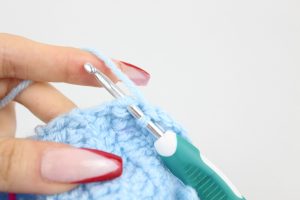
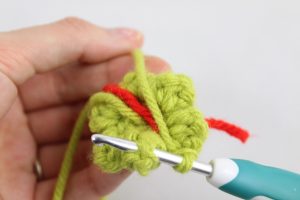
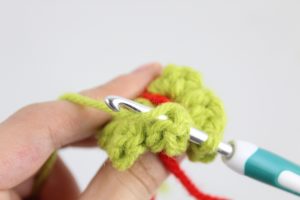
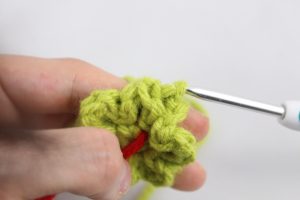
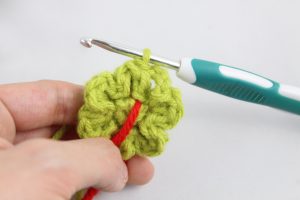
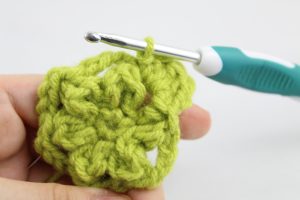
Round 3: Turn and Sc to first stitch of row (Pic 3-9) (Note to make sure to not twist the row when connecting to the first stitch). This will make a circle. Add a stitch marker to Sc just made. We will now work in rounds.
3. 4.
4. 
5. 6.
6. 
7. 8.
8.
9.
Round 3: *Sc* all around (60)
Round 4: *2 Dc in the next st, Dc in the next 3 st* all around (75)
Round 5: *2 Dc in the next st, Dc in the next 4 st* all around (90)
Round 6: *2 Dc in the next st, Dc in the next 5 st* all around (105)
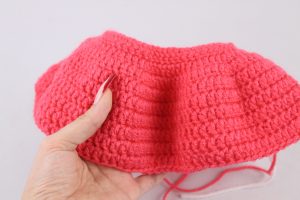
Round 7-11: *Dc* all around (105)
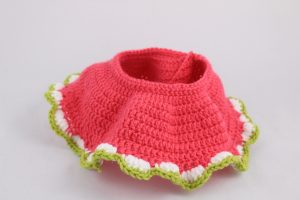
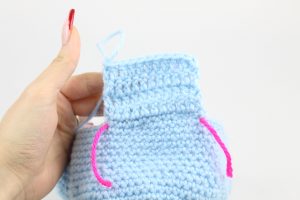
Your dress will now look like the image below. Finish off here if you don’t want en edging. Continue to Round 12 if you would like an edging.
Edging: (Optional)
Switch to White
Round 12: *Dc 3 in each of the next 2 st, SlSt in the next 2 st* 26 times, Sc in the last st (209)
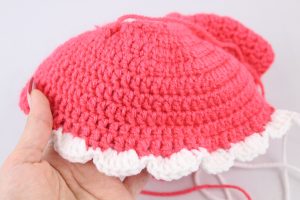
Switch to Main Dress Color (Or green for watermelon dress)
Round 13: *Sc in next 6 st, SlSt in next 2 st* all around (209)
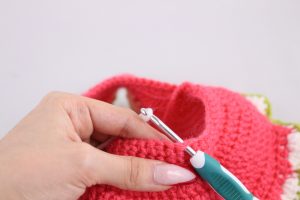
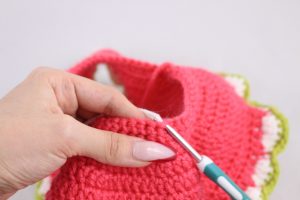
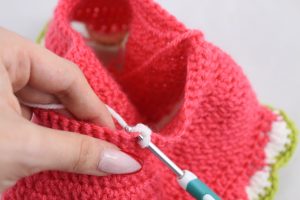
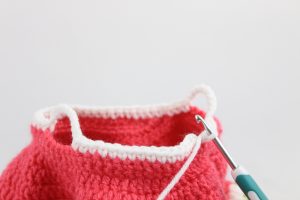
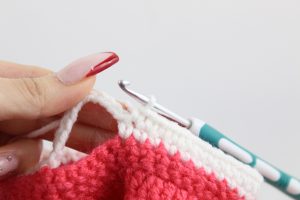
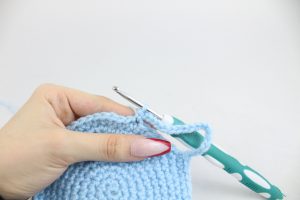
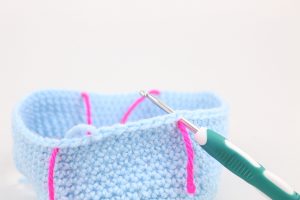
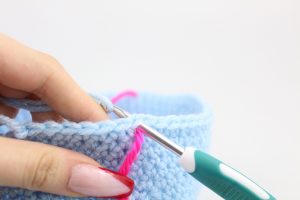
Dress Top:
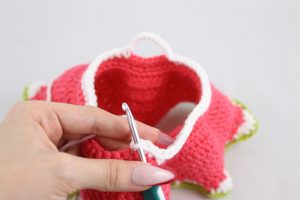
In White
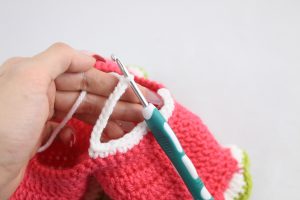
Round 1: Attach white yarn to top of dress as shown (Pic 1-4).
1.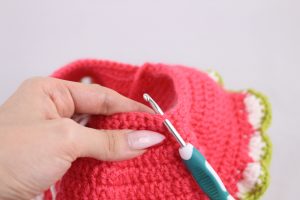 2.
2. 
3. 4.
4. 
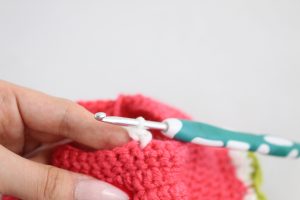
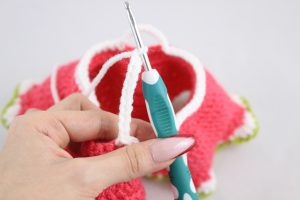
Ch 1 (Pic 5) and sc into the same st you attached yarn in (Pic 6-12).
5. 6.
6. 
7. 8.
8. 
9. 10.
10. 
11. 12.
12. 
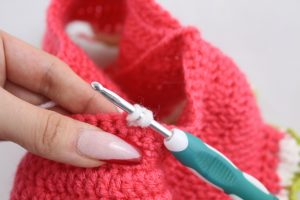
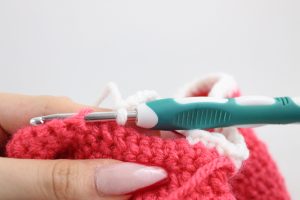
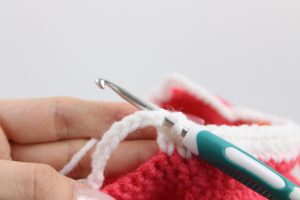
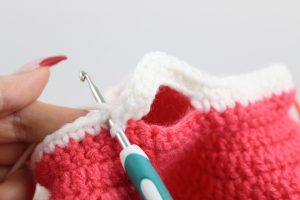
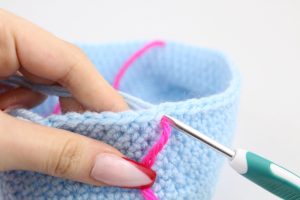
Round 1: (Continued) Sc in the next 14 st (Pic 13). Ch 11 (Pic 14). Skip the next 7 st, and Sc in 8th stitch (Pic 15-16). Sc in the next 25 st (Pic 17). Ch 11 (Pic 18). Skip the next 7 st, and Sc in 8th stitch (Pic 19-20). Sc next 5 st (Pic 21).
13. 14.
14.
15.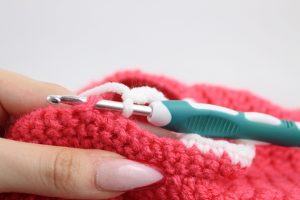 16.
16.
17. 18.
18. 
19. 20.
20.
21.
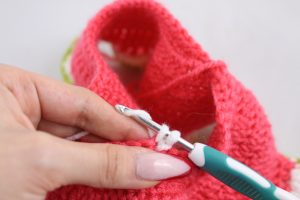
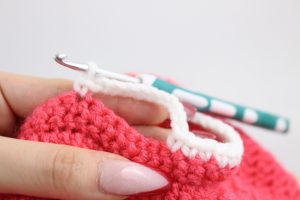
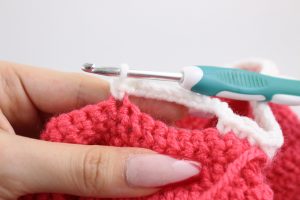
Round 2: Sc in the next 15 st. Now we meet the chain (Pic 1). Sc in the next 11 st of the chain (Pic 2). Now we meet the dress. Sc in the next 25 st (Pic 3). Now we meet the chain. Sc in the next 11 st of the chain. Now we meet the dress. Sc in the next 5 st.
1. 2.
2. 
3.
Round 3: Sc in the next 11 st. *Dec* 2 times. Sc in the next 47 st. *Dec* 2 times, Sc in the last st (63)
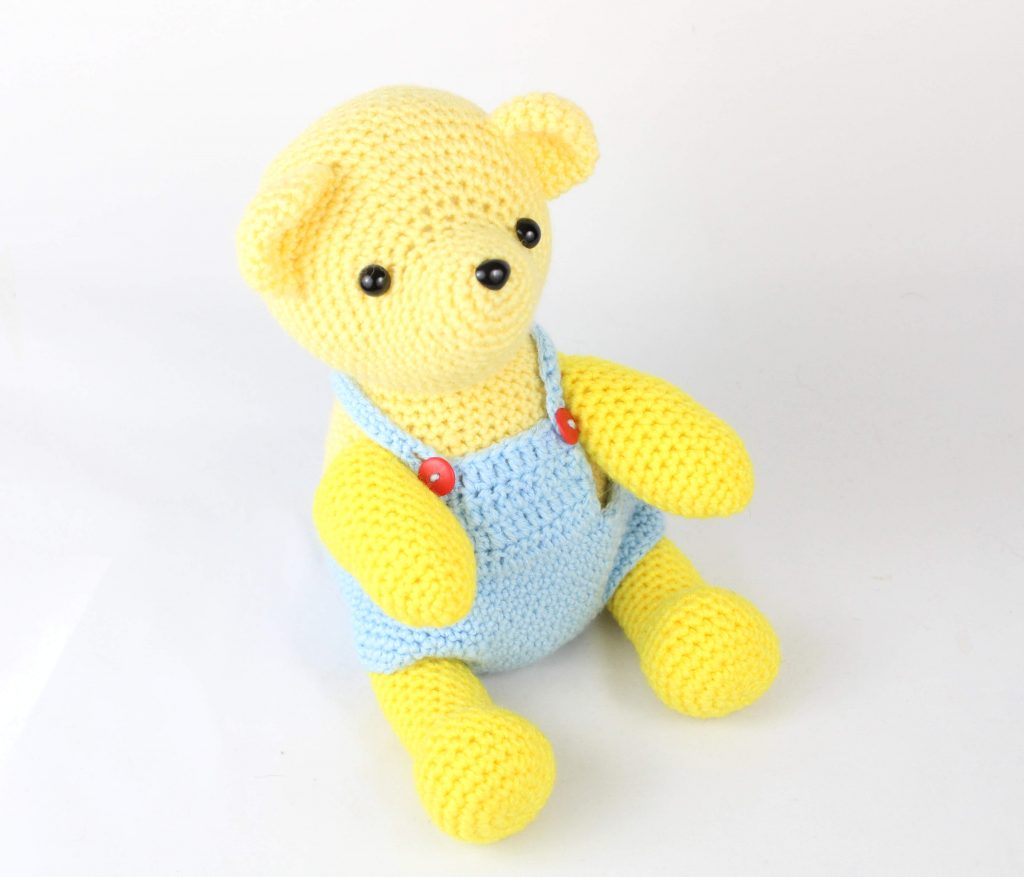
Overalls:
In Blue
Round 1: 6 Sc in Magic Ring (6)
Round 2: *Inc* all around (12)
Round 3: *Inc, Sc* all around (18)
Round 4: *Inc, Sc 2* all around (24)
Round 5: *Inc, Sc 3* all around (30)
Round 6: *Inc, Sc 4* all around (36)
Round 7: *Inc, Sc 5* all around (42)
Round 8: *Inc, Sc 6* all around (48)
Round 9: *Inc, Sc 7* all around (54)
Round 10: *Inc, Sc 8* all around (60)
Round 11: Sc in the next 25 st. Ch 18 (Pic 1), Skip the next 5 st and Sc in the 6th st (Pic 2-4).
1. 2.
2. 
3. 4.
4.
Round 11: (Continued) Sc next 11 st (Pic 5). Ch 18 (Pic 6), Skip the next 5 st and Sc in the 6th st (Pic 7-8). Sc in the next 12 st (86)
5. 6.
6. 
7. 8.
8. 
9.
Round 12: Sc in the next 25 st. Now we meet the chain (Pic 1). Sc in the next 18 st along the chain (Pic 2), Now we meet the overalls. Sc in the next 12 st (Pic 3-4), Now we meet the other chain. Sc in the next 18 st along the chain (Pic 5). Now we meet the overalls. Sc in the next 25 st (Pic 6-7) (86)
1. 2.
2.
3. 4.
4. 
5. 6.
6. 
7.
Round 13: *Dec, Sc 4* 14 times, Sc in the last 2 st (72)
Round 14: *Sc* all around (72)
Round 15: *Dec, Sc 10* all around (66)
Round 16-20: *Sc* all around (66)
Round 21: Sc in the next 3 st. Sc in the next st and add a different colored st marker to Sc just made. This marks where we will crochet the overall “flaps” later. Sc in the next 21 st. Sc in the next st and add a different colored st marker to the Sc just made. Sc in the next 10 st. Sc in the next st and add a different colored st marker to Sc just made. Sc in the next 22 st. Sc in the next st and add a different colored st marker to the Sc just made. Sc in the next 6 st.
Round 21 Will Look Like This
Overall Flaps:
In Blue
Row 1: Insert your hook into the right stitch marker in the back of the overalls as shown (Pic 1). Attach blue yarn as shown (Pic 2-4)
1. 2.
2. 
3. 4.
4. 
Row 1: (Continued) Ch 1 (Pic 5) and Sc into same st (Pic 6-8). Sc in the next 11 st (Pic 9).
5. 6.
6. 
7. 8.
8.
9.
Row 2-5: Turn, Dc in the next 11 st (11)
Row 6: Ch 23 (Pic 1). Sc in the 9th Ch from hook (Pic 2-3), Sc next 14 Ch (Pic 4). SlSt in the original Dc on the overall flap (Pic 5). Sc in the next 9 st (Pic 6). Ch 23, Sc in 9th Ch from hook. Sc next 14 Ch. SlSt in the next st on overalls flap (Pic 7-9).
1. 2.
2. 
3. 4.
4. 
5. 6.
6. 
7. 8.
8.
9.
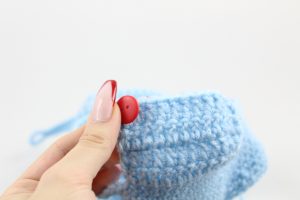
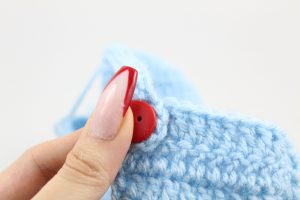
Repeat Rows 1-5 for the front marked areas of the overalls (Pic 1). Don’t do Row 6 for the front overalls. Now take two buttons and put them on the front overalls (Pic 2). Now take the overall strap and make sure the button can fit through the strap’s hole (Pic 3). Sew the buttons on. Done!
1. 2.
2. 
3. 4.
4.
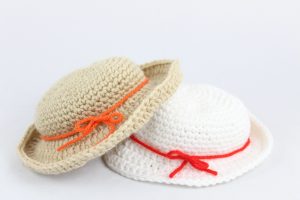
Hat:
In Hat Color
Round 1: 6 Sc in Magic Ring (6)
Round 2: *Inc* all around (12)
Round 3: *Inc, Sc* all around (18)
Round 4: *Inc, Sc 2* all around (24)
Round 5: *Inc, Sc 3* all around (30)
Round 6: *Inc, Sc 4* all around (36)
Round 7: *Inc, Sc 5* all around (42)
Round 8: *Inc, Sc 6* all around (48)
Round 9: *Inc, Sc 7* all around (54)
Round 10-16: *Sc* all around (54)
Round 17: In FLO, *2 Dc in the next st, Dc in the next 8 st* all around (60)
Round 18: In both loops, *2 Dc in the next st, Dc in the next 9 st* all around (66)
Round 19: *2 Dc in the next st, Dc in the next 10 st* all around (72)
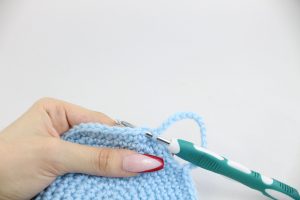
Finish off and pin to the head. You can sew the hat on if desired. If you do, stuff the hat before completely sewing shut. I also tied yarn around my hat with a bow at the front.

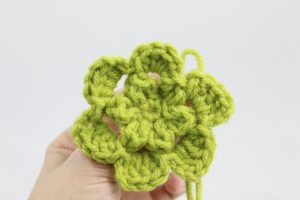
Flower:
In Any Color
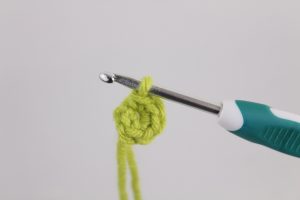
Round 1: 6 Sc in Magic Ring (Pic 1)(6)
Round 2: In FLO (Front Loop Only), *SlSt in the next st, Dc 3 times into that same st, SlSt into that same st* all around (Pic 2-3) (30)
1. 2.
2.
3.
Round 3: *Ch 4 (Pic 4), Insert hook into the back of the middle Dc (Pic 5-6)
4. 5.
5.
6.
Round 3: (Continued) and slst into it (Pic 7-10).* all around (Pic 11)
7. 8.
8. 
9. 10.
10.
11. 12.
12.
Round 4: SlSt into the next hole (Pic 12), Ch 2, Dc 3 times into the same hole (Pic 13)* all around (Pic 14) Finish off. Sew a button to the middle if desired. Sew onto the dress.
13. 14.
14.
15.
Shoes: (Make 2, Optional)
In Any Color
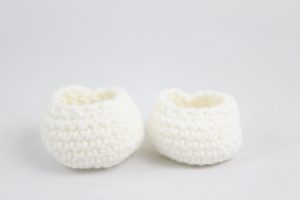
Round 1: 6 Sc in Magic Ring (6)
Round 2: *Inc* all around (12)
Round 3: *Inc, Sc* all around (18)
Round 4: *Inc, Sc 2* all around (24)
Round 5-9: *Sc* all around (24)
Round 10: Sc in the next 8 st, *Dec* 5 times, Sc in the last 6 st (19)
Finish off. You can tie a bow to the shoe if desired, or glue on a fabric flower
If you made this I would LOVE to see! You can “try” it on Pinterest to show me.


15 Comments
Why can’t I print this pattern if it is free? Will not post to Pinterest until this is cleared up.
Hi – online the pattern is free and can be viewed anytime from a computer, phone, or tablet. This pattern took many many hours to create so I charge $1.99 for the printable, cleanly formatted PDF version. I hope you understand 🙂 If you would like to learn more about why I do this for the printable PDF version you can see that here: https://stringydingding.com/how-a-crochet-pattern-comes-to-life/
Lovely pattern! What size is the bear?
Hi Flor, thank you! They are about 11″ tall 🙂
After row 10 of the head is your work supposed to look like a cap with a bib or is it supposed to be an even circle?
Hi there, after Round 10 the head will look sort of like a cap, not an even circle. this is because we made the “pointy-ish” nose, then continue to increase on one side of the head and not the other. This will make the head at Round 10 look like a cap. I hope that helps! Please let me know if you have any other questions 🙂
Thanks for answering my question. I have not worked on it anymore. Actually, since I was unsure of it, I took it apart and started the baby bear pattern. I may try again now that I think I was doing it correctly. I have just started using your patterns. So far I find them easy to follow. Thanks for giving us free patterns.
“looking a gift horse in the mouth”–I would like to know finished sizes and amount of yarn. Thanks again!!!
Hello! This is a beautiful pattern. I’m curious if these can be washed, etc? I was thinking of making it for my future niece and I’m not sure what the care would be.
Hi! Yes these can be washed, I would just be sure to stitch everything firmly so limbs don’t fall off while washing. Also, I would suggest using embroidered eyes since you’re giving it to a baby – just so the eyes don’t get pulled off and eaten. You can never bee too careful, right? Haha 🙂
Hi, super cute pattern thank you for sharing it.
In row 11, I increase twice and then 1 single crochet in the next stitch. But that’s giving me WAY more stitches than the 42 I should have? Please help!
Hi Kat! Thank you so much, I’m glad you think they’re cute!
I checked Round 11 and there’s a slight error that would give you too many stitches like you suggested. It’s corrected now! Here’s what was written and what was changed:
Round 11: Sc in the next 8 st, Repeat *Inc in the next 2 st, Sc in the next st* 6 times. Sc in the next 10 st (42)
Fixed:
Round 11: Sc in the next 8 st, Repeat *Inc in the next st, Sc in the next 2 st* 6 times. Sc in the next 10 st (42)
The 2 was in the wrong place, I hope this helps! Please feel free to let me know if you have any questions 🥰
Hi, this is a lovely pattern. Thank you so much for making it, but I’m so confused by row 11 of the legs.
SC in next 8 stitches, decrease 3, SC in next 6 (16)
But it’s adding up to 17 for me no matter how many times I try it. 8+3+6= 17
Dol decrease twice only or do I do 5 SC instead? Or am I reading this completely wrong?
Hi there, I’m so glad you like this pattern! I see what you mean about the legs, it looks like there was an extra stitch at the end of the round. I went ahead and fixed Round 11, now it should all work 🙂 Please feel free to let me know if I can answer any other questions! ❤️❤️❤️
Just finished making this, and it turned out so adorable! I was wondering if you have any recommendations for sewing on the limbs in any specific way? In the past when I’ve made amigurumi I attached the limbs parallel to the body, but in this pattern I followed the picture so that the arms and legs sit more perpendicular to the body (facing forward instead of to the side). It looks great but I worry that it is less secure, do you have any advice for that?
Very easy patten to follow, with clear instructions. Thank you!