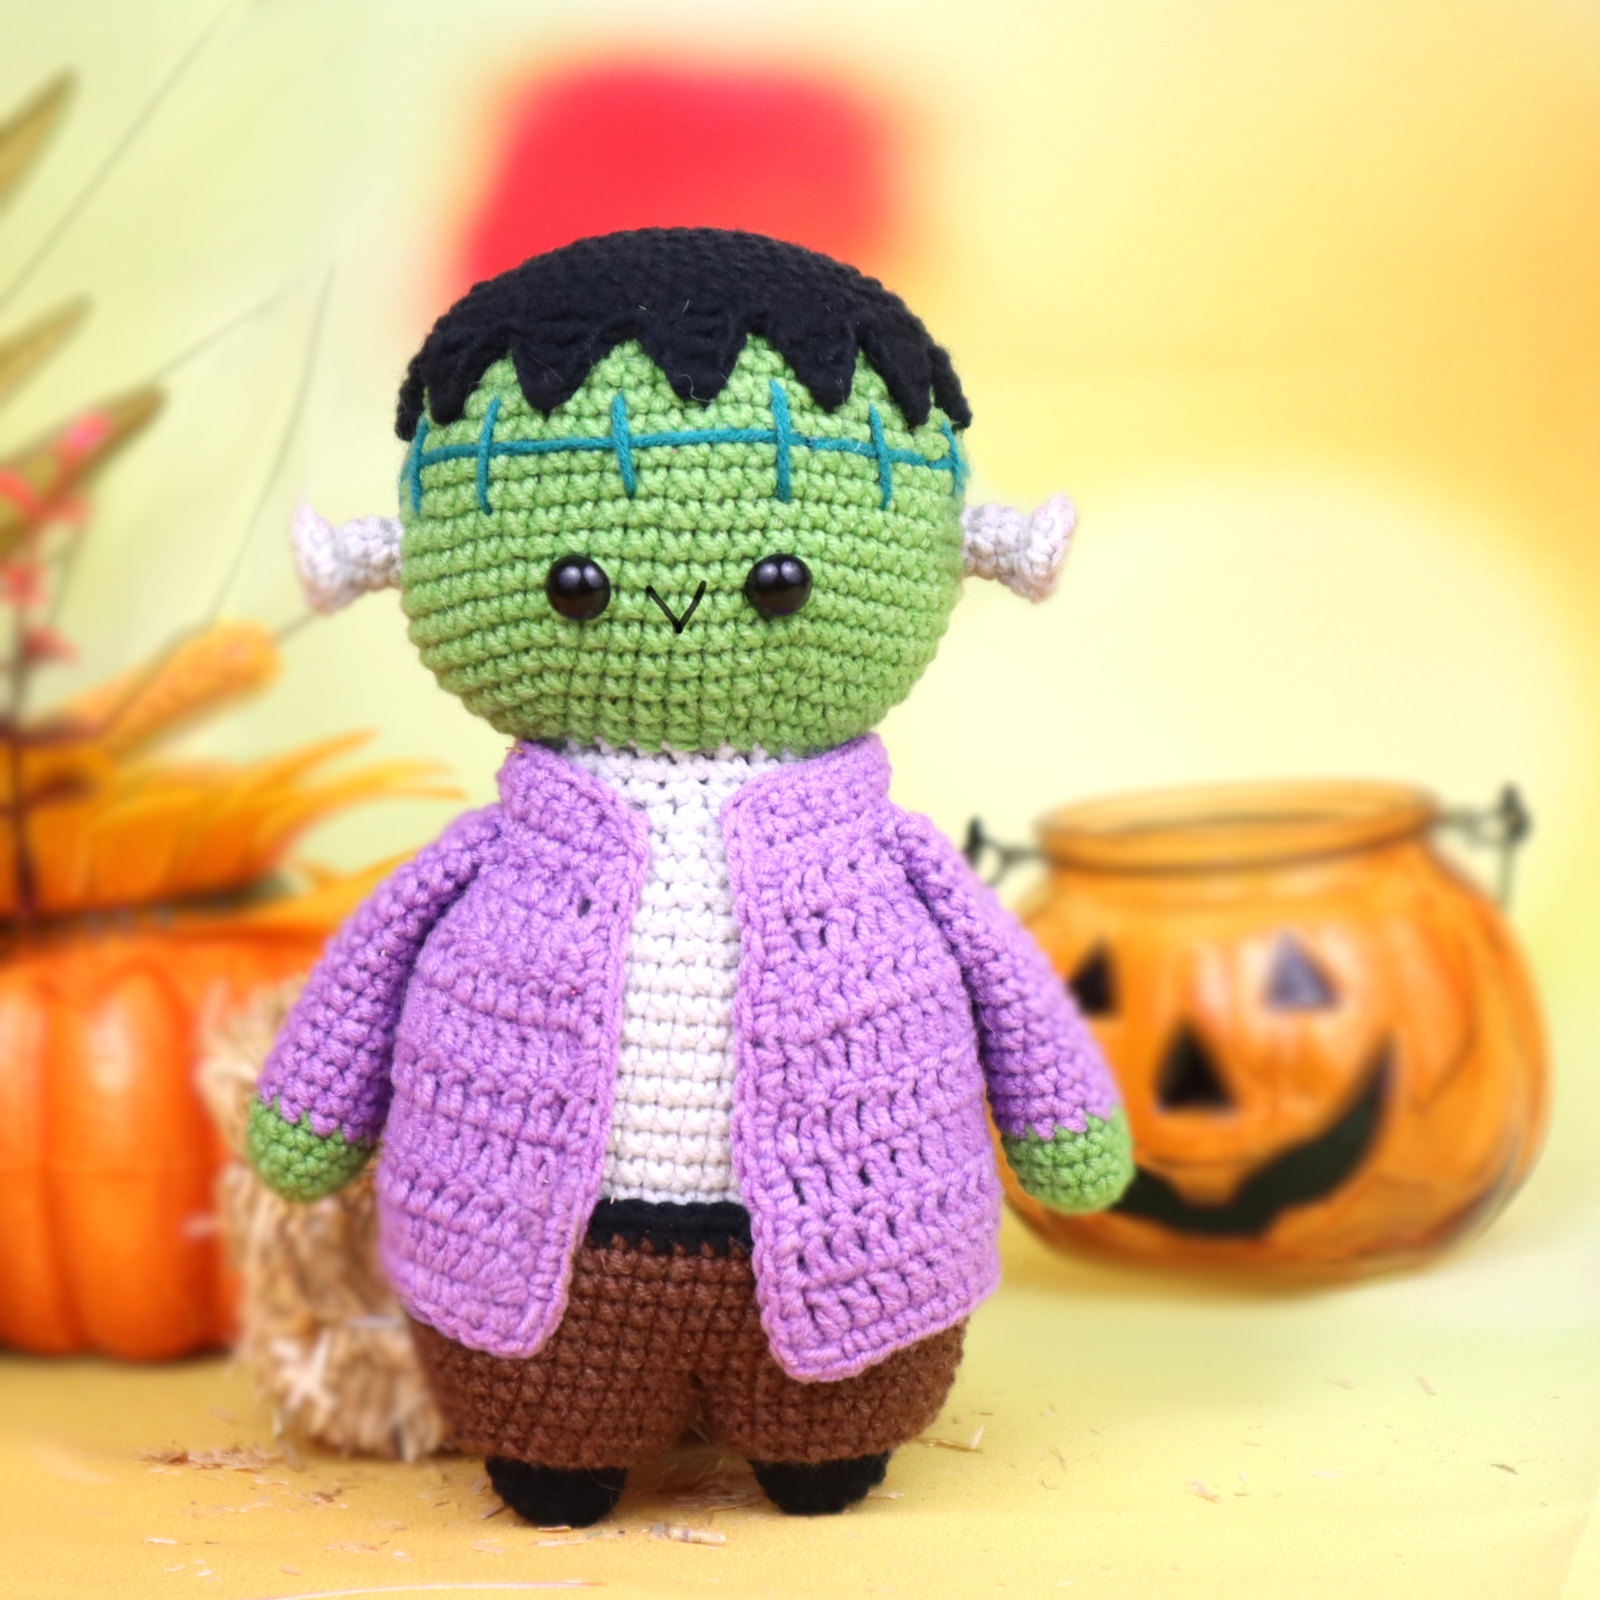
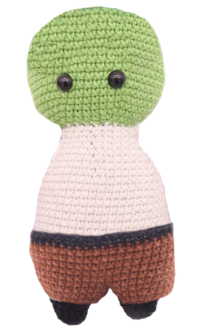
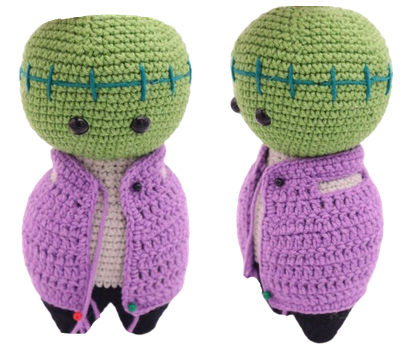
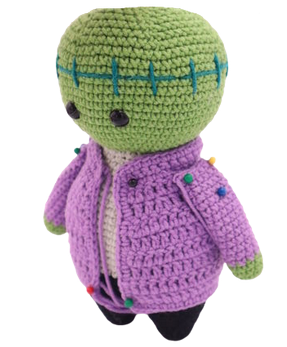
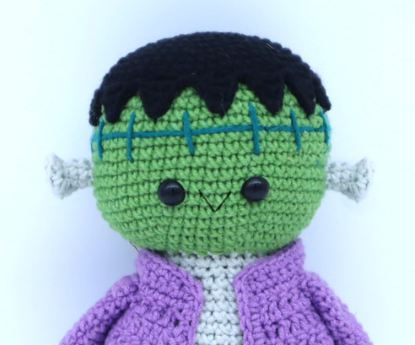
Frankenstein Halloween Doll Amigurumi – Free Crochet Pattern
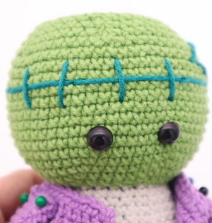
Hello, everyone! This week I’m bringing you a FREE crochet pattern for a super cute Frankenstein Halloween doll – I just love this one! He’s really fun to see coming together as you make him. I think the part I enjoyed the most was adding the stitches going all around his head. Hopefully I stitched good enough so they won’t come undone, then his brain would fall out!
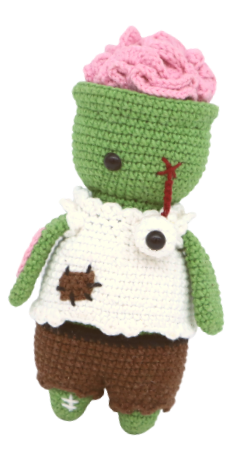 Speaking of brains falling out… I have a pattern for that! Frankenstein’s freaky friend is a zombie whose suffered the misfortune of having an eye hanging out, his brain exposed, and his clothes are all tattered. I show you how to make him from start to finish on this page!
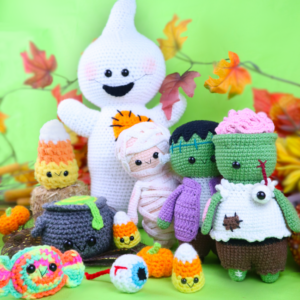
If free Halloween patterns interest you, keep reading! This year I’m releasing my biggest free Halloween bundle yet, with 10 free patterns. (3 of those patterns are my “Freaky Friends”!)
If you’d like to see those other upcoming patterns, here’s a picture. (You can click on the picture of the set below and you’ll be taken to a post which shows each upcoming pattern’s release date.)
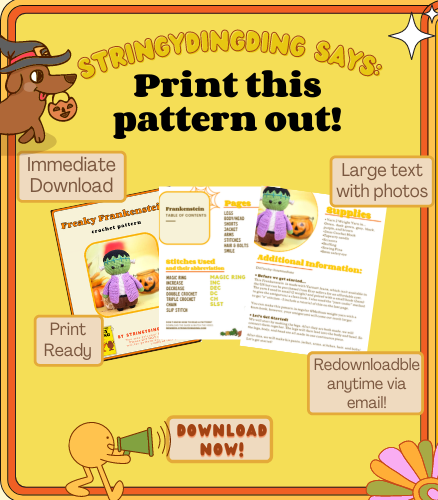
Print this pattern out – purchase the PDF version here!


This is just 1 out of 10 patterns included in the Spooky Halloween Amigurumi Bundle! Every week 1 or more Halloween themed amigurumis will be released.
Want to see the other Halloween patterns and their release date? See them here!
Become a member to unlock each PDF pattern as they’re released!
Supplies:
• Yarn 2 Weight Yarn in…
Green, dark green, grey, black, purple, and brown
•2mm Crochet Hook
•Tapestry needle
•Scissors
•Stuffing
•Sewing Pins
•8mm safety eye
Additional Information:
Difficulty: Intermediate
• Before we get started…
This Frankenstein is made with Yarnart Jeans, which isn’t available in the US but can be purchased from Etsy sellers for an affordable cost. The yarn I used is small (2 weight) and paired with a small hook (2mm) to give the amigurumi a clean look. I also used the “yarn under” method to get “x” stitches – I include a tutorial of this at the end of this post.
You can make this pattern in regular 4/Medium weight yarn with a 4mm hook, however, your amigurumi will come out much larger.
• How it’s made
We will start by making the legs. After they are both made, we will connect them together. The legs will then lead into the body and head. So the legs, body, and head are all made in one continuous piece. After this, we will make his pants, jacket, arms, stitches, hair, and bolts!
Let’s get started!
We will start by making the legs, then we will connect them together. The legs will then form up into the body, then the head. Let’s get started! Note: The pictures use green yarn, as using black yarn was too dark to see. Please use black yarn for this section!
Legs: (Make 2)
In Black

Round 1: 6 Sc into a Magic Ring (6)
Round 2: *Inc* all around (12)
Round 3-4: *Sc* all around (12)
Round 5: *Inc, Sc in the next st* all around (18)
Round 6-7: *Sc* all around (18)
Round 8: *Inc, Sc in the next 2 st* all around (24)
Round 9: *Sc* all around (24)
What we will do from here will be different depending on which leg you’re making. If you’re making the first leg, continue on the next 2 rounds below:
First leg, Round 10: *Inc, Sc in the next 3 st* all around (30)
First leg, Round 11: *Sc* all around (30)
Finish off the first leg now.
If you’re making the second leg, continue on the next round:
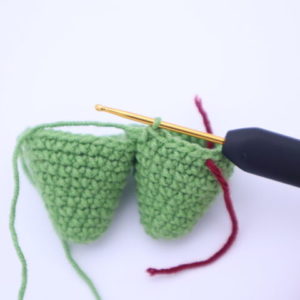
Second leg, Round 10: *Inc, Sc in the next 3 st* all around (30)
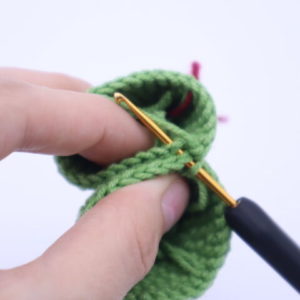
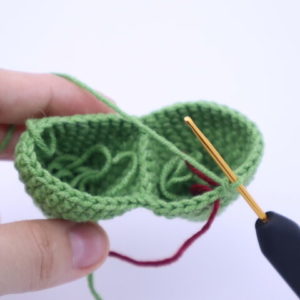
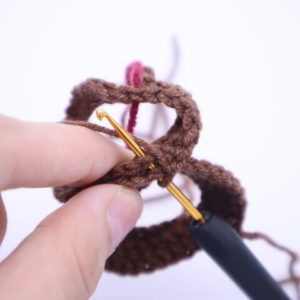
Second leg, Round 11: Sc in the next 6 st (Pic 1). Line the second and first leg’s stitches together (Pic 2) and going through BOTH legs, Sc in the next 6 st (Pic 3-10).
1. 2.
2.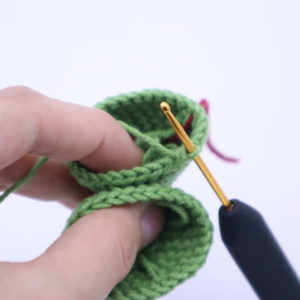
3. 4.
4.
5. 6.
6.
7. 8.
8.
9. 10.
10.
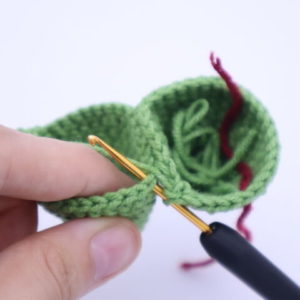
Working back on the second leg (Pic 11) Sc in the remaining 18 st (Pic 12, Stitch count: 6 stitches connecting the legs, 24 stitches on each leg)
11. 12.
12.
Tip: Now that we have the legs connected, they will start leading up to the body, then the head,
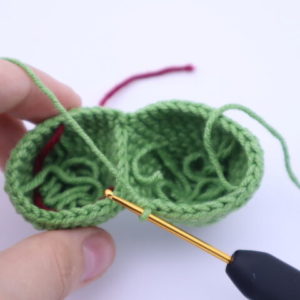
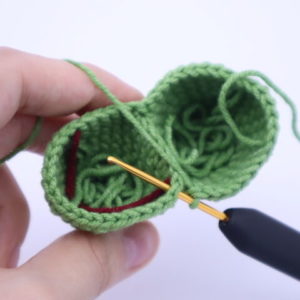
Round 12: Sc in the next 6 st (Pic 1). Now we meet the other leg, Sc in the next 24 st (Pic 2-3). Now we meet the other leg, Sc in the next 18 st (Pic 4-5) (48)
1. 2.
2.
3. 4.
4.
5.
Round 13-15: *Sc* all around (48)
Round 16-25: Change to grey. *Sc* all around (48)
Round 26: *Dec, Sc in the next 6 st* all around (42)
Round 27: *Sc* all around (42)
Round 28: *Dec, Sc in the next 5 st* all around (36)
Round 29: *Sc* all around (36)
Round 30: *Dec, Sc in the next 4 st* all around (30)
Round 31: *Sc* all around (30)
Round 32: *Dec, Sc in the next 3 st* all around (24)
Round 33: *Sc* all around (24)
Stuff the legs and body firmly now.
Round 34: Change to green. In the FLO, *Inc, Sc in the next 3 st* all around (30)
Round 35: *Inc, Sc in the next 4 st* all around (36)
Round 36: *Inc, Sc in the next 5 st* all around (42)
Round 37: *Inc, Sc in the next 6 st* all around (48)
Round 38: *Inc, Sc in the next 7 st* all around (54)
Round 39-48: *Sc* all around (54)
Insert safety eyes in between Round 40 and 41, 6 stitches apart. Keep this safety eyes centered to his body 🙂
Round 49: *Dec, Sc in the next 7 st* all around (48)
Round 50: *Dec, Sc in the next 6 st* all around (42)
Round 51: *Dec, Sc in the next 5 st* all around (36)
Round 52: *Dec, Sc in the next 4 st* all around (30)
Round 53: *Dec, Sc in the next 3 st* all around (24)
Round 54: *Dec, Sc in the next 2 st* all around (18)
Round 55: *Dec, Sc in the next st* all around (12)
Round 56: *Dec* all around (6)
Finish off and sew the remaining stitches closed. Weave in ends.
Shorts:
IN Brown
The shorts are made by creating two leg holes, then crocheting them together.
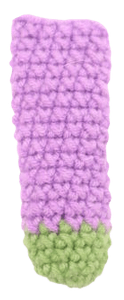
Pant Legs: (Make 2)
Round 1: Ch 26. Sc in the first Ch to connect and form a ring, making sure NOT to twist the chain. Add a stitch marker into the first Sc just made. Sc in the next 25 ch
Round 2: *Sc* all around (26)
Round 3: *Inc, Sc in the next 4 st* 5 times. Sc in the next st (31)
Now the pattern will be different depending on which let you’re making. If you’re making the first pant leg, continue on to the next round. If you’re making the second pant leg, skip the following section and continue on to the next:
First Pant Leg, Round 4: *Sc* all around (31)
Finish off the first pant leg and weave in ends.
Left leg:
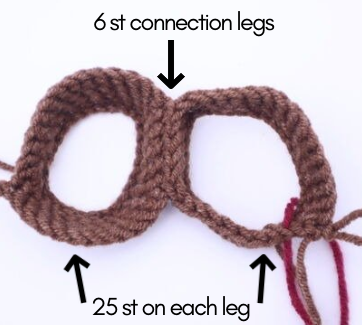
Second Pant Leg, Round 4: Sc in the next 18 st (Pic 1). Line up the first pant leg to the second together, making sure the stitches line up (Pic 2). Inserting your hook through BOTH the pant leg’s stitches, Sc next 6 st (Pic 3-4). Continuing back on the second pant leg, Sc in the next 7 st (Stitch count: 6 stitches connecting the legs, 25 stitches on each leg)
1. 2
2
3. 4.
4.
Round 5: Sc in the next 18 st. Now we meet the other leg. Sc in the next 25 st. On the other leg, Sc in the next 7 st (50)
Round 6-10: *Sc* all around (50)
Round 11: Change to black. *Sc* all around (50)
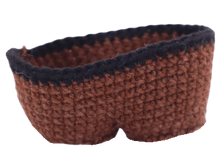
Finish off now, leaving a long tail for sewing. Place the pants onto Frankenstein shown, making sure the black part of the pants meets the grey part of shirt. Sew on and weave in ends!
Jacket:
In Purple
Row 1: Ch 50. Dc in the 3rd Ch from the hook. Dc in the next 47 st (48)
Row 2-5: Turn. Dc in the next 47 st (48)
Row 6: Turn. Repeat *Dec, Dc in the next 4 st* 8 times (40)
Row 7: Turn. Repeat *Dec, Dc in the next 3 st* 8 times (32)
In the next round we will make the arm holes for the jacket. We will do this by making a chain, then skipping some stitches, and crocheting in the following stitches. The chain and skipped stitches will create an open hole for the arm to go through!
Row 8: Turn. Dc in the next 5 st. Ch 8, skip the next 6 st. Dc in the next st. Dc in the next 9. Ch 8, skip the next 6 st, Dc next in the next st. Dc in the next 4 st (36)
Row 9: Turn. Sc in the next 5 st. Now we meet the chain, Sc 1 stitch along the next 8 chains. Working back on the jacket, Sc in the next 10 st. Now we meet the other chain, Sc 1 stitch along the next 8 chains. Working back on the jacket, Sc in the next 5 st (36)
Row 10-11: Turn. Sc in the next 36 st (36)
Finish off, leaving a long tail for sewing.
Now we will place a smooth edge all around the jacket. Place your hook into the bottom corner of the jacket and yarn over with purple yarn (Pic 1-2). Make 1 single crochet around the edge of the jacket all around (Pic 3-7) – once you meet the next corner or collar of the jacket, place 3 Sc into 1 stitch (Pic 8). Continue to make 1 single crochet all around (Pic 9), but placing 3 Sc into 1 stitch of each corner/collar. Once done, finish off and weave in ends.
1/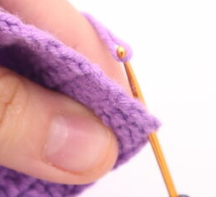 2.
2.
3. 4.
4.
5. 6.
6.
7. 8.
8.
9.
Place the jacket onto the doll as shown. We’re putting the jacket on now because it will help us determine where to place the arms accurately.
Arms: (Make 2)
In Green
Round 1: 6 Sc into a Magic Ring (6)
Round 2: *Inc* all around (12)
Round 3-5: *Sc* all around (12)
Round 6-19: Change to purple. *Sc* all around (12)
Finish off, leaving a long tail for sewing. I added a little bit of stuffing at the hand area, but left no stuffing at the top of the arm. Pin the arm into the hole of the sleeve and sew on. Weave in ends.
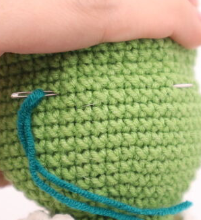
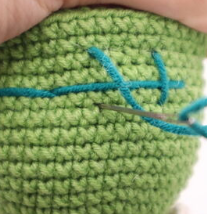
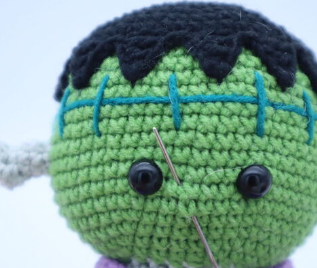
Stitches:
In Dark Green
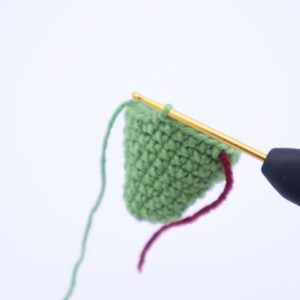
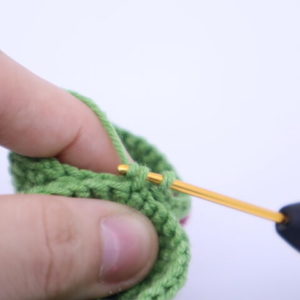
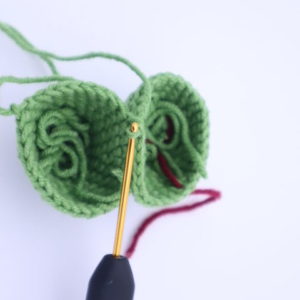
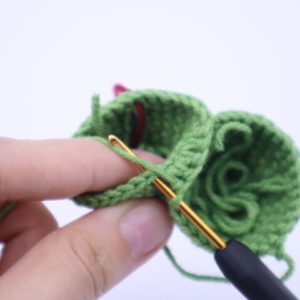
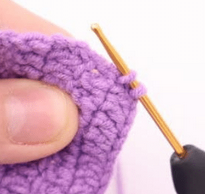
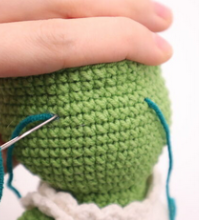
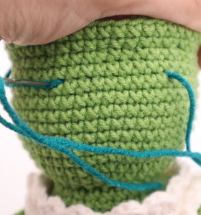
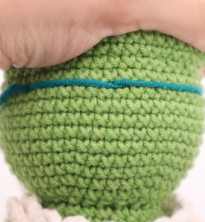
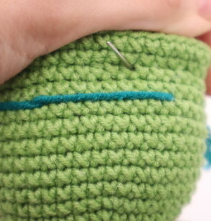
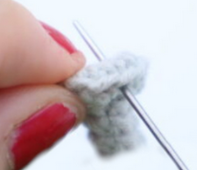
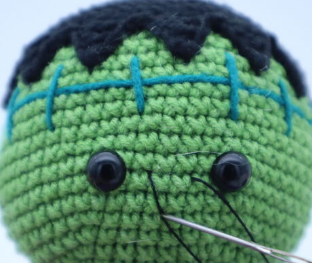
Take a long piece of yarn and place it onto a needle. Insert your needle between Round 45 and 46 (Pic 1), and pull needle out about 8 stitches away (Pic 1). Reinsert needle into the spot you first placed your needle into (Pic 2). Pull needle out about 8 stitches away (Pic 3). Reinsert needle into the line just made, making sure to insert your needle into the middle of the yarn to result in a straighter line (Pic 4). Repeat the process shown in Pics/Step 3-4 until you’ve made a line all around it’s head (Pic 6).
1. 2.
2.
3. 4.
4.
5. 6.
6.
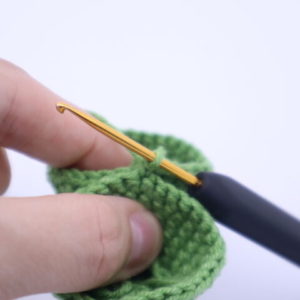
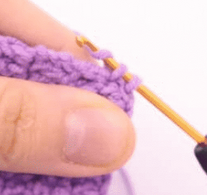
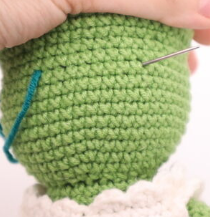
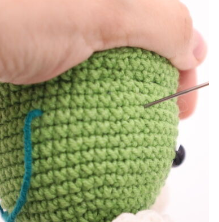
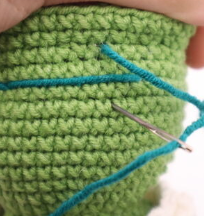
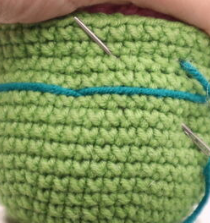
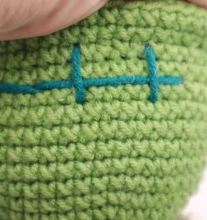
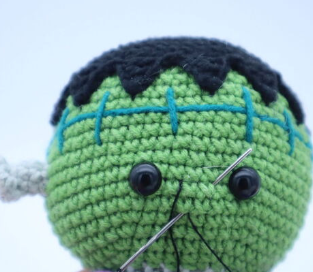
To make the stitches, pull needle out at the top of Round 47 (Pic 7). Insert needle a few rounds down (at the bottom of Round 44, Pic 8). Repeat Pics/Steps 7-8, spacing lines about 4 stitches apart, until you’ve done this around the entire head (Pic 9-12). Weave in ends.
7. 8.
8.
9. 10.
10.
11. 12.
12.
Hair:
In Black
Round 1: 6 Sc into a Magic Ring (6)
Round 2: *Inc* all around (12)
Round 3: *Inc, Sc in the next st* all around (18)
Round 4: *Inc, Sc in the next 2 st* all around (24)
Round 5: *Inc, Sc in the next 3 st* all around (30)
Round 6: *Inc, Sc in the next 4 st* all around (36)
Round 7: *Inc, Sc in the next 5 st* all around (42)
Round 8: *Inc, Sc in the next 6 st* all around (48)
Round 9: *Inc, Sc in the next 7 st* all around (54)
Round 10-11: *Sc* all around (54)
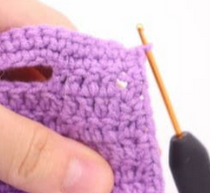
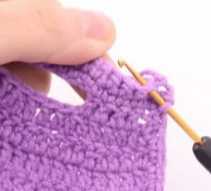
Round 12: Repeat *Ch 4. Sc in the 2nd Ch from the hook, Dc in the next Ch, Trc in the next Ch. Working back on the circle, SlSt in the next 2 st* all around. SlSt in the last 2 st (Stitch Count: 13 hair peaks made).
1. 2.
2.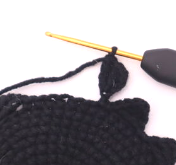
3.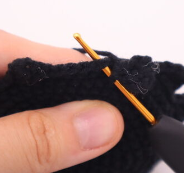 4,
4,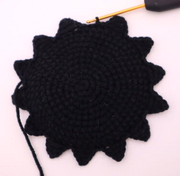
Finish off and leave a long tail for sewing. Pin the hair on so each peak lands between each dark green stitch as shown (Pic 5). Sew on – I sewed down each peak as that made it secure enough. Weave in ends.
5.
Bolts: (Make 2)
In Grey
Round 1: 6 Sc into a Magic Ring (6)
Round 2: *Inc* all around (12)
Round 3: In the BLO, *Dec* all around (6)
Round 4: In the FLO, *Sc* all around (6)
Round 5-6: In BOTH loops, *Sc* all around (6)
Finish off, leaving a long tail for sewing. Squish the top part as shown. Take a new piece of grey yarn and sew these pieces together to form a more flat piece. Once done, secure this by tying the end of yarn into a firm knot and bringing it into the bold to hide the knot.
Now place the bolt onto the head as shown (the bottom of the bolt will be on Round 42, and the top of the bolt will be on Round 44). Don’t stuff, and sew on. Weave in ends.
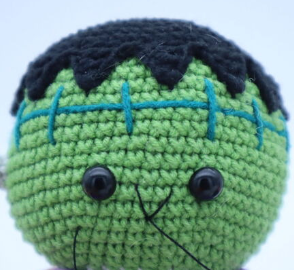
Smile:
In Black Embroidery Thread
Insert needle with thread where shown, and pull out one stitch over from the left eye (Pic 1). Reinsert needle into the original insertion area (Pic 2) and pull needle out one stitch over from the right eye (Pic 2). Insert needle into the original insertion spot (Pic 3). Now you’re done! (Pic 4). Just tie the ends of thread into firm knots, then bring the knots inside the toy to hide, cutting off any excess yarn.
1. 2.
2.
3. 4.
4.
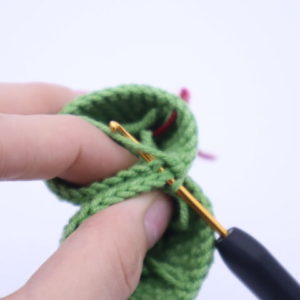
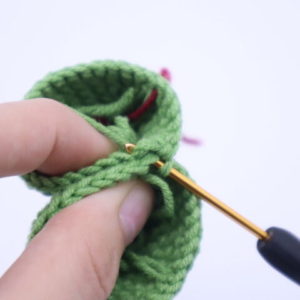
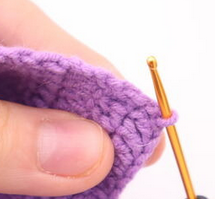
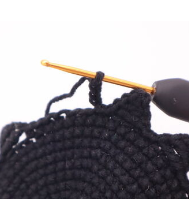
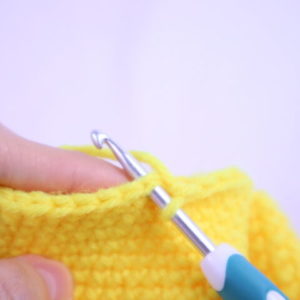
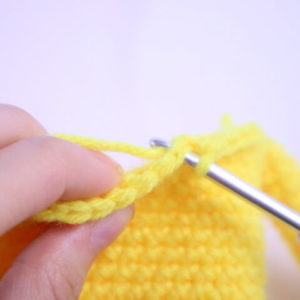
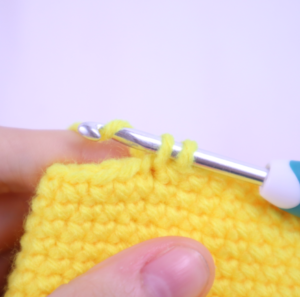
How to do the “x” single crochet stitch:
Insert hook into the next stitch (Pic 1). Yarn under by having your hook above the yarn (Pic 2). Pull the yarn through (Pic 3-4). You will have 2 loops on your hook, make sure these loops are the same height as shown (Pic 4)
1. 2.
2.
3. 4.
4.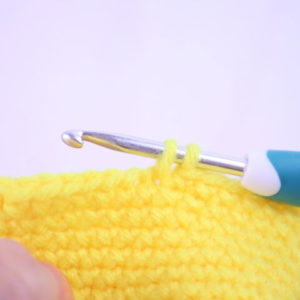
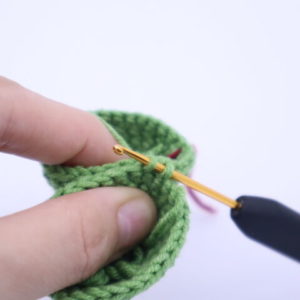
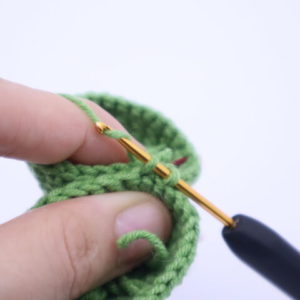
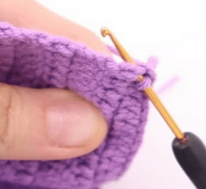
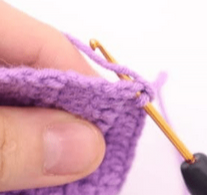
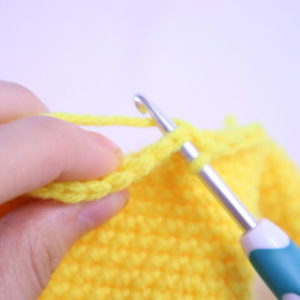
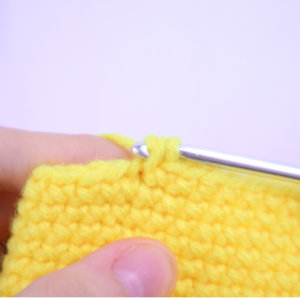
Now yarn over as you usually do (Pic 5). Pull the yarn through both loops (Pic 6). Done! (Pic 7).
5. 6.
6.
7.
Important note: You must have tight tension when yarning under and bringing that yarn under through the stitch. Your yarn over should also have tight tension, but not AS tight as your yarn under tension. This is what I’ve found works for me to get the perfect “x” shape.


11 Comments
Hi, I think you forgot to add when to change colors when doing the body and head
Hi Tati! Thank you so much for letting me know – oopsies 😵💫 I corrected that hahah! I appreciate that you let me know, thank you so much!
Finished my Frankenstein! Used a 3.75 hook and 4 weight yarn and normal sc. He’s cute and hopefully my customer will love him!
Awwww I love him! The purple and green you used go so well together 😍 I love him so much, I’m sure your customer will be over the moon for him! Thank you so much for sharing, I love your Frankenstein!
For the hair section of the pattern, did you mean…
2nd ch from hook, 1sc, 1dc, 1tc, **SKIP 2 ST**, slst in next 2 st, then repeat
I am wondering that also. What did you end up doing? I am trying to figure it out ugh.
Hope it worked out for you~
Do you sew the arms onto the jacket or onto the body? Do you sew the jacket onto the body?
When you turn on the jacket, are you supposed to do any chains when you turn? I’m also a little confused about the rows 2-5. It says DC 47 stitches, but has (48) in parenthesis.
I’m confused about the jacket, it says dec so you have 32 stitched but then you need 36 so where do the other 4 come from?
Love this little guy
Love this little guy – my first Halloween ghoul