

Purchase the PDF version here!

From Nov 8 – Dec 20
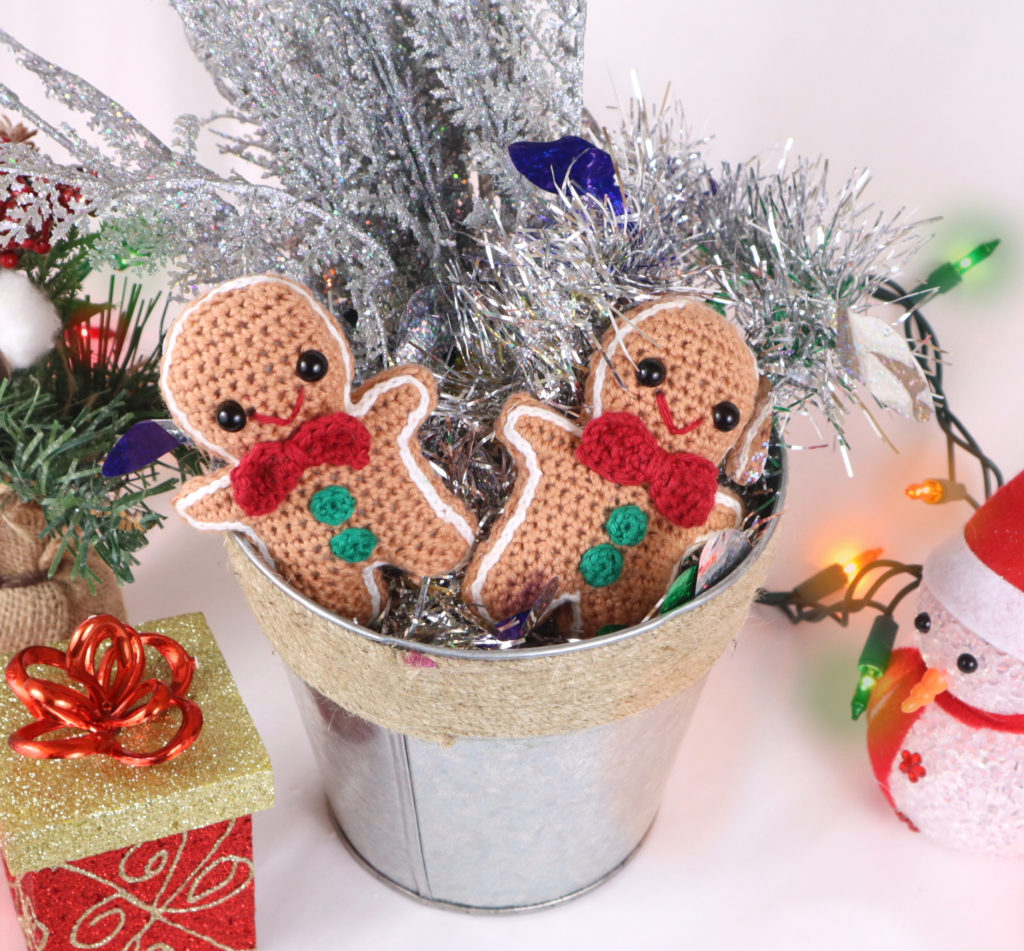
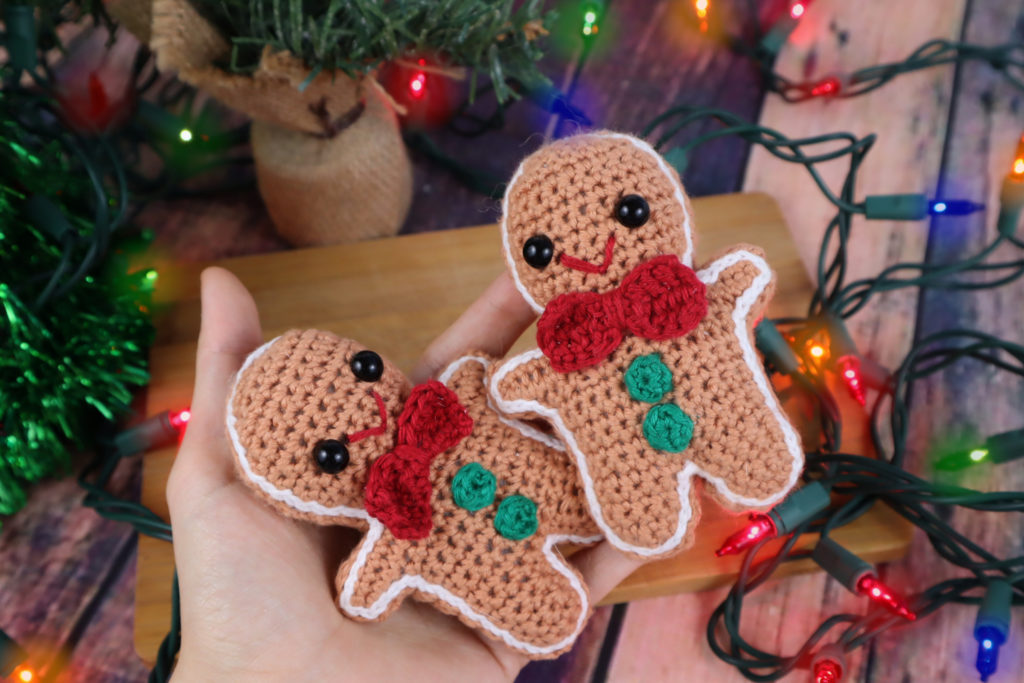
Make a gingerbread man from this crochet pattern and enter it in our Christmas Crochet Along for a chance to win a $100 gift card to a craft store of your choice!

Supplies:
• Yarn 1/Fingering Weight Cotton Yarn in…
Brown, Red, Green, & White
• 3mm Crochet Hook
•8mm safety eyes
•Tapestry needle
•Scissors
•Stuffing
Additional Information:
Difficulty: Easy
• Yarn Note
I used a small hook and yarn to make these gingerbread, but you can totally make them in regular 4/medium weight yarn and a 4mm hook! You will have to size up the eyes to 12mm eyes. This will work out just fine, only difference being it the gingerbread man turn out larger.
• Getting started…
This gingerbread man is worked in rows. We start with making 2 feet and connecting them. The feet will then work into the body, arms, and head. This is all done in one continuous piece. We will make 2 of these bodies, then crochet them together to make the gingerbread man!
After this, we will make the icing, bow, buttons, and smile.
Let’s Get Started!
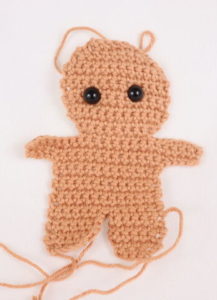
We will make 2 flat pieces and crochet them together to make 1 entire gingerbread man. Make the back of the gingerbread first by following the pattern instructions below. After that, make the front of the gingerbread man. The pattern will state the slight differences between the front & back.
Legs: (Make 2)
In Brown
Row 1: Ch 5. Sc in the 2nd Ch from the hook. Sc in the next 3 st (4)
Row 2: Ch 1 and turn. *Inc* in the next st, Sc in the next 2 st, *Inc* in the last st (6)
Row 3-5: Ch 1 and turn. *Sc* in the next 6 st (6)
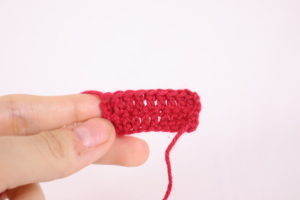
Finish off the first leg now. DON’T finish off the second leg, instead continue on with Row 6.
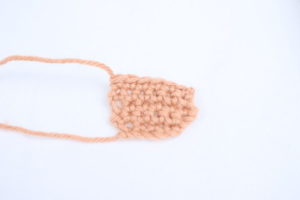
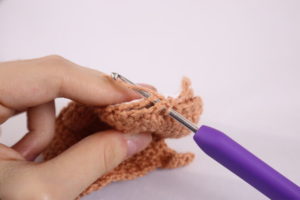
Row 6: Ch 1 & turn. Sc in the next 6 st Pic 1. Ch 1 Pic 2. Now take the first leg made and Sc in the next st of the leg Pic 3-9. Continuing on that leg, Sc in the next 5 st Pic 10-11 (13)
1. 2.
2.
3. 4.
4.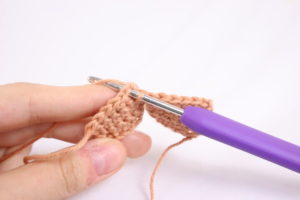
5. 6.
6.
7. 8.
8.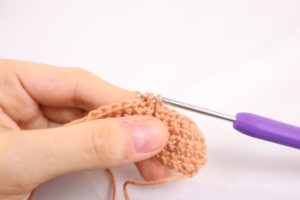
9. 10.
10.
11.
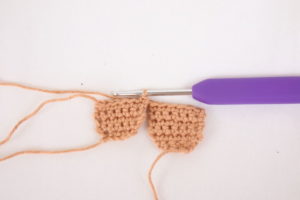
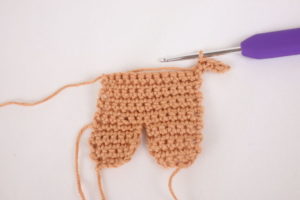
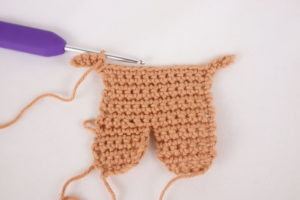
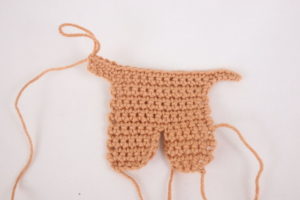
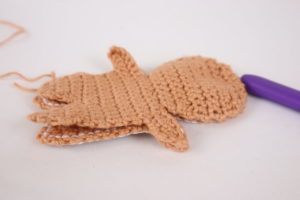
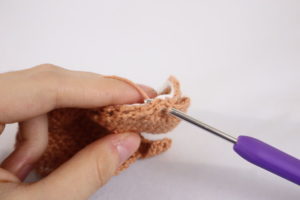
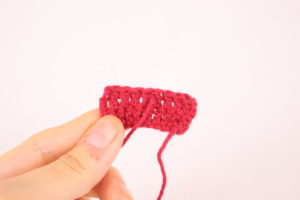
Row 7-13: Ch 1 & turn. Sc in the next 13 st (13)
Row 13 Will Look Like This
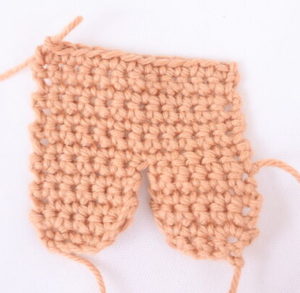
We will add the arms in the next row.
Note for Row 14: The second pic numbers show the example when working the sequence the 2nd time
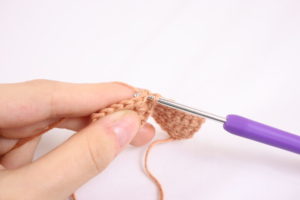
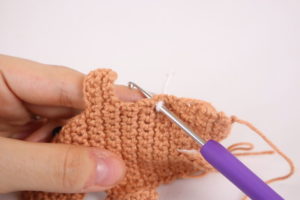
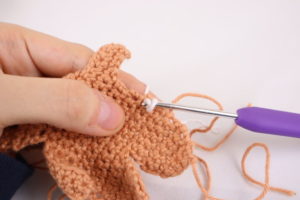
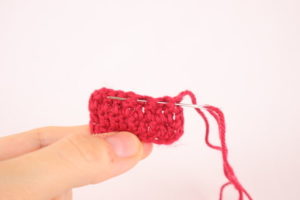
Row 14: Repeat *Ch 5 & Turn Pic 1, 7. Going through the BACK of the chain Pic 3, not the front like we usually do Pic 2, Sc in the 2nd Ch from the hook. Continuing in the back of the ch, Sc in the next 3 st Pic 4, 8. This makes the arm. Sc next 13 st on the body Pic 6, 10.* 2 times. Sc in the next 4 st of arm (21)
1. 2.
2.
3. 4.
4.
5. 6.
6.
7. 8.
8.
9. 10.
10.
11. 12.
12.
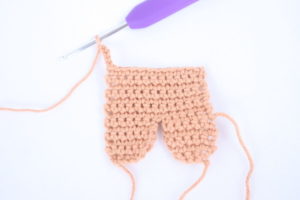
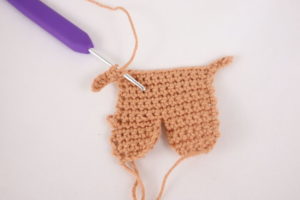
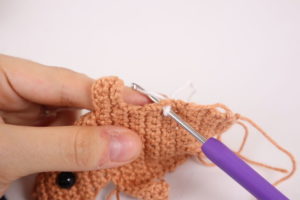
In the next row we will start forming the head.
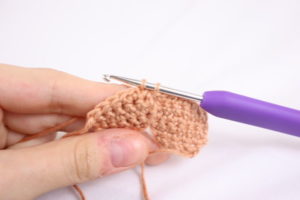
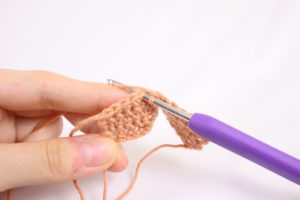
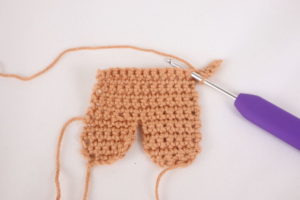
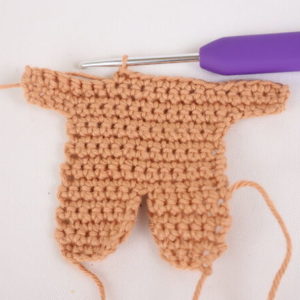
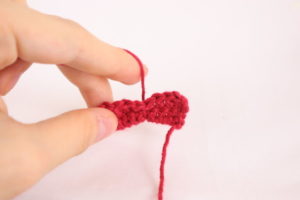
Row 15: Ch 1 & turn. Sc in the next 21 st
Row 16: Ch 1 & turn. Sc in the next 4 of the arm, SlSt in the next 3 st, Sc in the next 7 st (You will not meet the end of the row. Continue on to Row 17!)
Row 16 Pictured Below
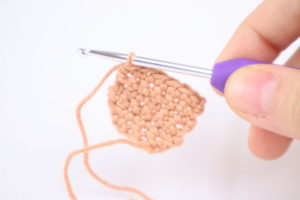
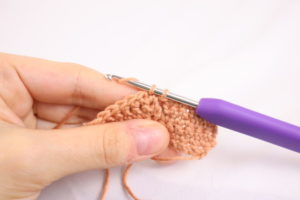
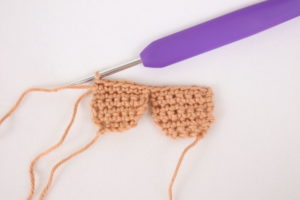
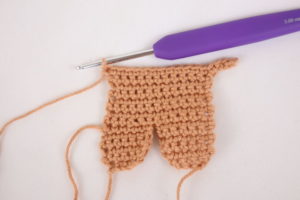
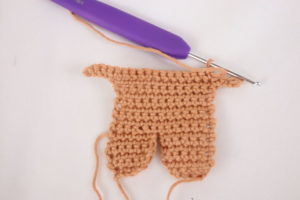
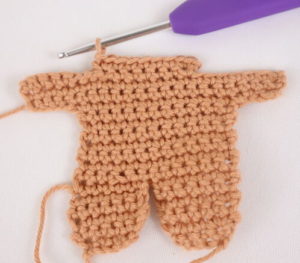
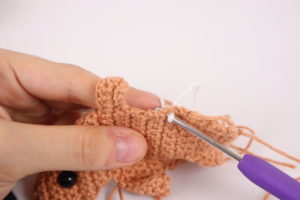
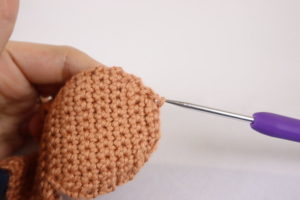
Row 17: Ch 1 & turn. *Inc* in the next st, Sc in the next 5 st, *Inc* in the next st (9)
Row 17 Pictured Below
Row 18: Ch 1 & turn. *Inc* in the next st, Sc in the next 7 st, *Inc* in the next st (11)
Row 19: Ch 1 & turn. *Inc* in the next st, Sc in the next 9 st, *Inc* in the next st (13)
Row 20-21: Ch 1 & turn. *Sc* in the next 13 st (13)
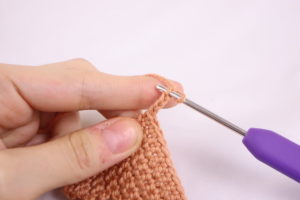
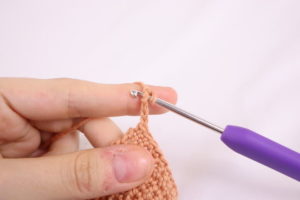
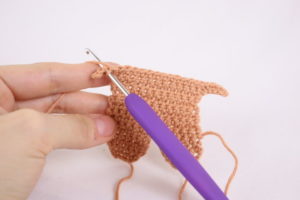
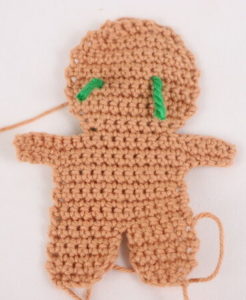
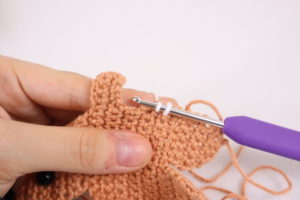
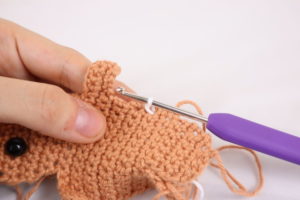
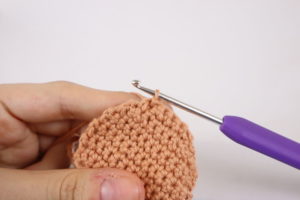
In the next row we will add stitch markers to mark where to place the eyes later. If you’re making the back of the gingerbread man, do Row 22 Back!
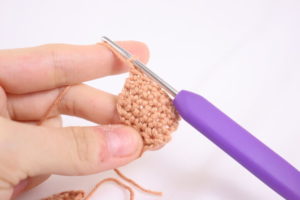
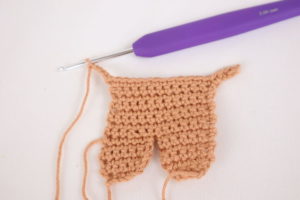
Row 22 Front: Ch 1 & turn. Sc in the next 4 st. Sc in the next st and add a stitch marker to the Sc just made. This marks where to place the eye later. Sc in the next 4 st. Sc in the next st and add a stitch marker to the Sc just made. Sc in the next 3 st (13)
Row 22 Front Pictured Below

Row 22 Back: Ch 1 & turn. *Sc* in the next 13 st (13)
Row 23-25: Ch 1 & turn. *Sc* in the next 13 st (13)
Row 26: Ch 1 & turn. *Dec* 1 time, Sc in the next 9 st, *Dec* 1 time (11)
Row 27: *Dec* 1 time, Sc in the next 7 st, *Dec* 1 time (9)
Row 28: *Dec* 1 time, Sc in the next 5 st, *Dec* 1 time (7)
Row 29: *Dec* 1 time, Sc in the next 3 st, *Dec* 1 time (5)
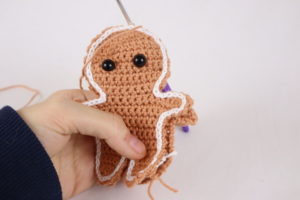
Finish off the back piece now. DON’T finish off the front piece. We will continue using the front piece.
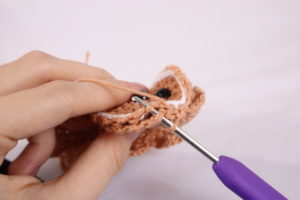
Add safety eyes in the marked areas now.
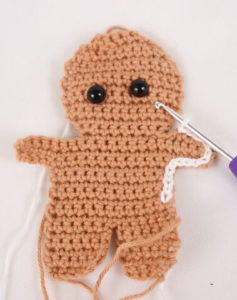
Icing:
In White Yarn
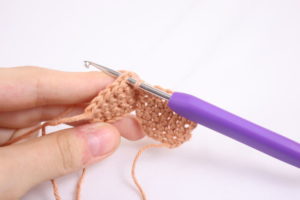
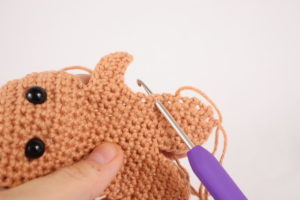
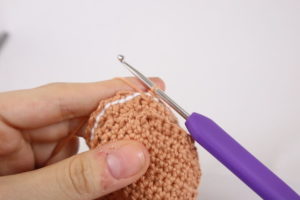
To make the icing we will “surface” slip stitch onto the front of the gingerbread man. Only do this for the front, not the back.
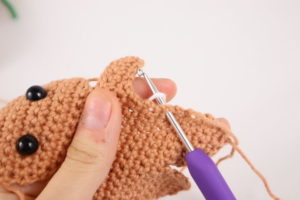
Insert hook into the very edge of the stitch as shown (Pic 1). Yarn over with white (Pic 2) and pull this yarn through the stitch (Pic 3-4). *Insert hook into the next stitch edge (Pic 5). Yarn over (Pic 6) and pull this yarn through the stitch (Pic 7).
1. 2.
2.
3. 4.
4.
5. 6.
6.
7.
You will have 2 loops on your hook (Pic 8). Pull the first loop through the second loop to make a slip stitch (Pic 9-10).* Repeat steps 5-10 all around until you meet back to the first icing stitch (Pic 11-12). Finish off. Bring the tail end of yarn to the back and tie a firm knot with the 2 tail ends of yarn. Cut excess yarn.
8. 9.
9.
10. 11.
11.
12.
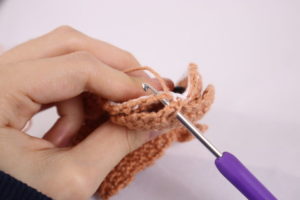
Connecting the Body:
In Brown Yarn
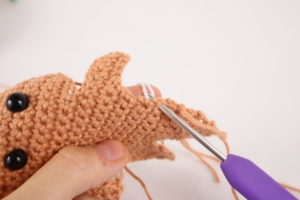
Now we will connect the 2 pieces of the gingerbread man together! Remember, if it’s too hard to crochet it together just sew it together.
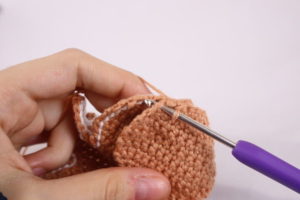
Place both side of the gingerbread together, making sure the right sides are facing out (Pic 1-2). Make sure the stitches align (Pic 3). Insert crochet hook into the next stitch of the back piece (Pic 4), now insert hook into next stitch on front piece (Pic 5). NOTE: It may be difficult to put hook into the front piece due to the icing stitches. It’s easier if you put only 1 of the 2 loops from the next stitch on you hook. If this is still too difficult, you can sew the pieces together.
1. 2.
2.
3. 4.
4.
5.
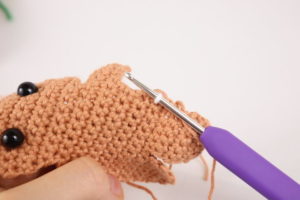
Yarn over (Pic 6) and pull this loop through the stitch (Pic 7-8). Pull the first loop through the second loop to complete a slip stitch (Pic 9-10)
6. 7.
7.
8. 9.
9.
10.
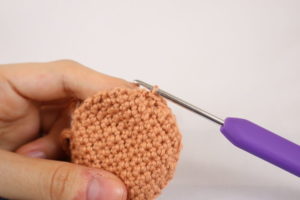
Repeat inserting hook into the next stitch of the back and front (Pic 11-12), and making a slip stitch (Pic 13). Be sure to add stuffing before fully sewing closed (Pic 14). Continue slip stitching until closed (Pic 15). Finish off and weave the tail ends of yarn in to secure. Cut excess yarn.
11. 12.
12.
13. 14
14
15.
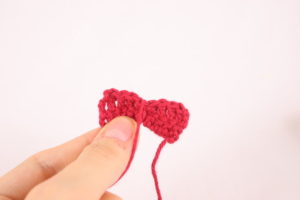
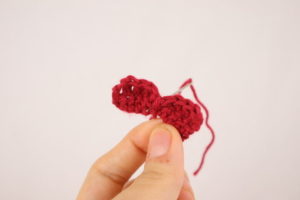
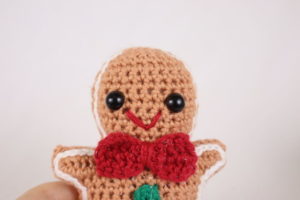
Bow:
In Red
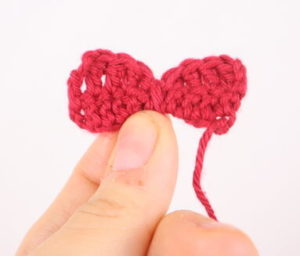
Row 1: Ch 11. Dc in the 3rd Ch from the hook. Dc in the next 8 st (9)
Row 2: Ch 2 & turn. Dc in the next 9 st (9)
Finish off, leaving a very long tail. We will use this tail for sewing and for synching the middle of the bow.
Bow Assembly:
Weave the tail of yarn to the middle of the bow (Pic 2-3). Now tie this yarn around the bow firmly a few times (Pic 4-6). Sew the tail of yarn through the middle of the bow to secure (Pic 7) and pin the bow on as shown (Pic 8). Sew on and weave in any ends.
1. 2.
2.
3. 4.
4.
5. 6.
6.
7. 8.
8.
Buttons: (Make 2)
In Green
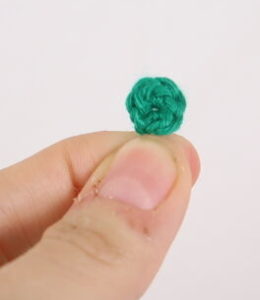
Round 1: 6 Sc into a Magic Ring (6)
Finish off, leaving a tail for sewing. Pin the buttons on as shown. Sew on firmly. Tie the tails ends of yarn into firm knots and bring into the body to hide. Cut any excess yarn.
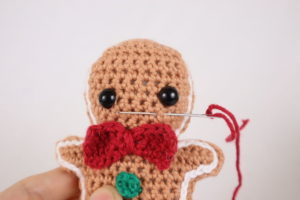
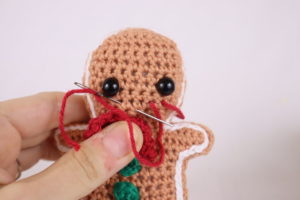
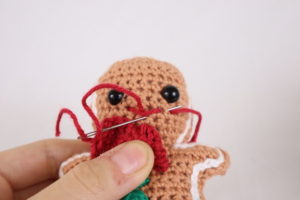
Smile:
In Red Embroidery Thread
Insert needle close to the right eye and pull out one stitch left to the right eye Pic 1. Reinsert needle 2 stitches over and pull out 1 stitch down, middle area Pic 2. Pull the thread through, making sure the thread lands ABOVE the smile yarn Pic 3. Reinsert into the same stitch, but BELOW the smile yarn and pull out at the original insertion spot Pic 4. Tie ends of thread into firm knots and bring into the wreath to hide. Cut any excess yarn.
1. 2.
2.
3. 4.
4.
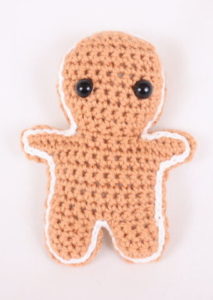
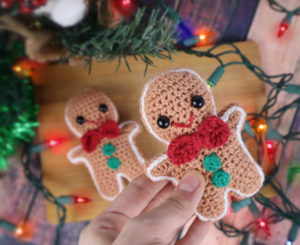 Done! I hope you liked this pattern 🙂 If you made it I would LOVE to see! You can show me by posting a picture in the comments, or by “trying” it on Pinterest.


16 Comments
I have not made this yet but i am so happy it is out now! Thank you!
Very cute, Olive
Thank you so much! I appreciate the kind words 😍 I hope you can make one!
Thank you so much for this cute little guy. My first crochet project in very long time, and your pattern and photos were so easy to follow. My daughter has fallen in love with the gingerbread man, and he now sitting front and center on our Christmas tree
Oh my gosh this is so awesome! I totally know what it’s like taking a crochet hiatus, it’s a little wonky getting back into. That being said, it’s really great to hear that you had an easy time making the pattern! 😍 Your gingerbread man came out SO CUTE and makes the perfect little ornament 🙂 I love that you’re displaying him at the front of the tree!
I hope you and your daughter have a wonderful Christmas ❤️ Thank you so much for the very kind comment and for sharing a picture of your cute gingerbread man!
Here is mine completed!
Oh my gosh that is so darn cute, Kasey! I am so happy you made him 🙂 Haha it was so exciting to release it, I was thinking about how you asked when the pattern was coming out! Thank you so much for sharing your adorable little gingerbread guy 😍 Such a cutie 🙂
Thank you!
So adorable! Thanks for sharing your pattern Olive 😘
Awww what a cute little gingerbread man! He looks so fantastic, especially next to your Christmas center piece 😍 He goes perfect with it! Aww I hope you had fun making him, he’s super adorable ❤️ Thank you for sharing a picture, your gingerbread man brought a big smile to my face 🙂
Again an extremely adorable pattern. Thank you for sharing this. Love from India.
Thank you so much, I loved this pattern. Keep up the great work!
Awww I’m so glad to hear it, Kim! Thank you so much for your very kind words, I really appreciate that you’d say this 😍 I hope you have a wonderful day and happy crocheting!
I love my little Gingerbread Man! ❤️ The pattern is so clear and easy to follow with lots of pictures!
Hi Olive,
Theses are adorable! I’d love to make and sell some of your Stringydingding things to raise money for my local cat rescue, I’m sure they would be very popoular. Would that be ok?
Used this pattern for the 3rd thing I’ve ever crocheted. The instructions are super clear and easy to grasp, even for a beginner. Thank you for the beautiful pattern. I didn’t have the right yarn and colours, yet I am sort of pleased with how the little guy turned out. 😊