Purchase the PDF version here

Or purchase the entire PDF bundle here
Supplies:
4mm crochet hook, 4/Medium weight yarn in main color, and eyelash yarn in main color, 4 weight contrast color. 10mm safety eyes, black embroidery thread tapestry needle, scissors, and stuffing.
Additional Information:
Difficulty: Easy
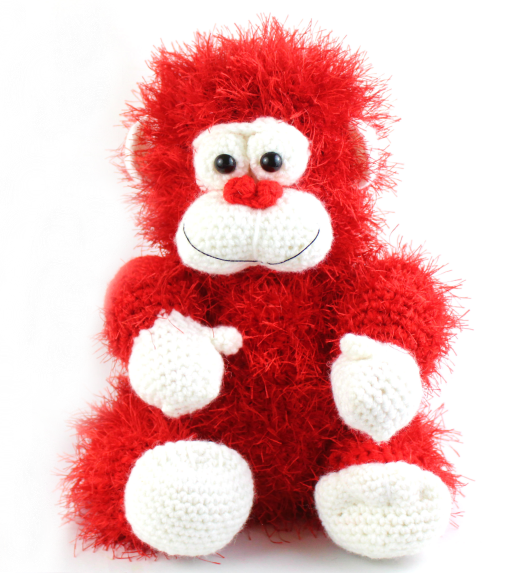
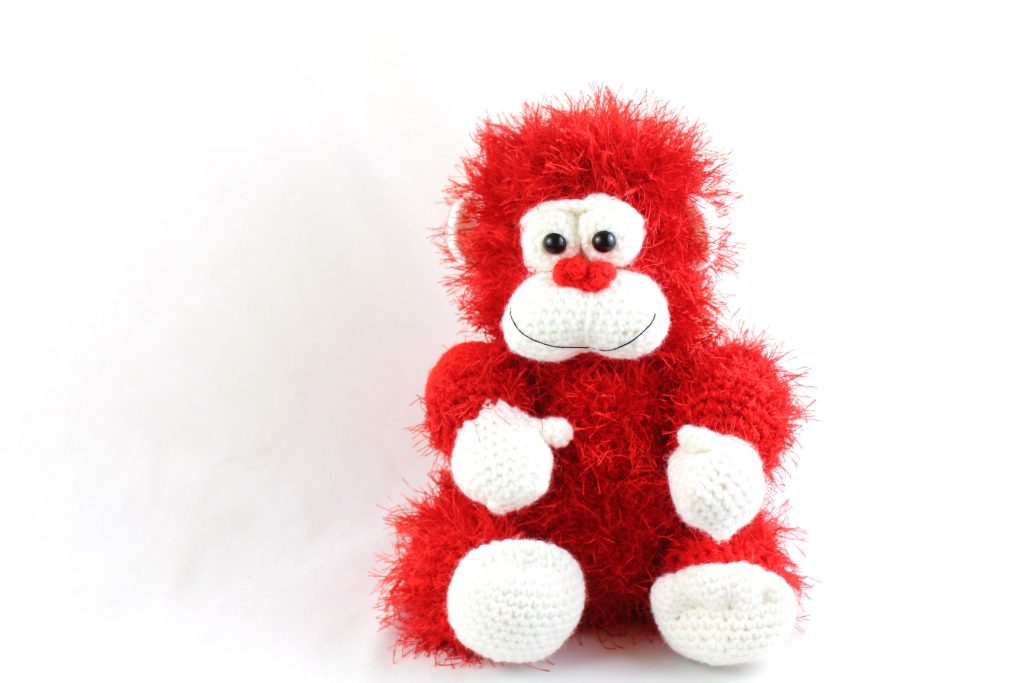
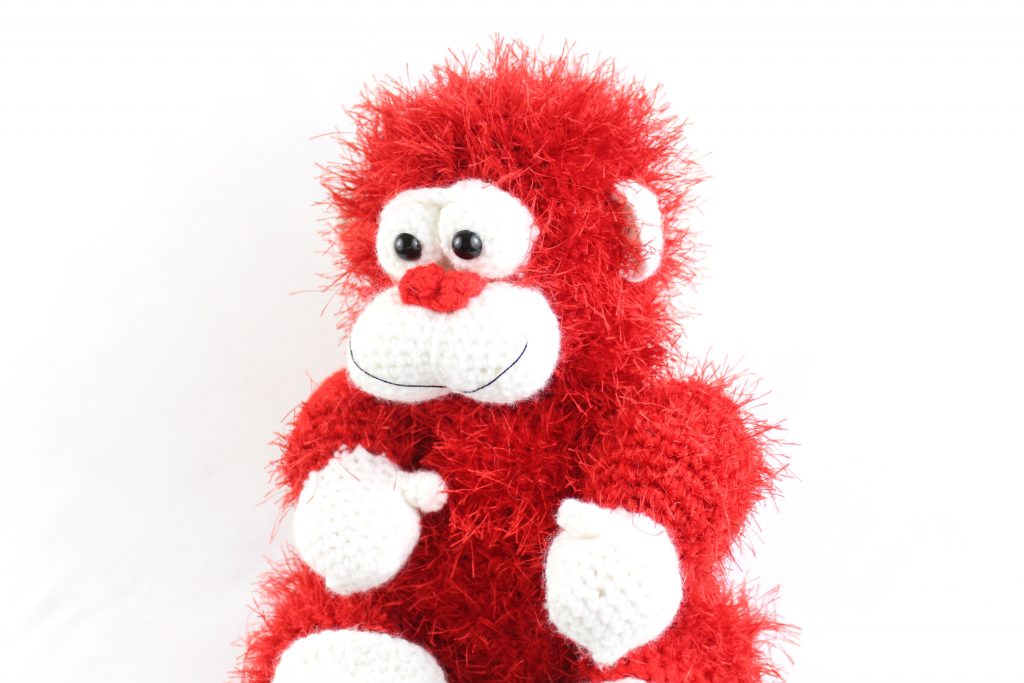
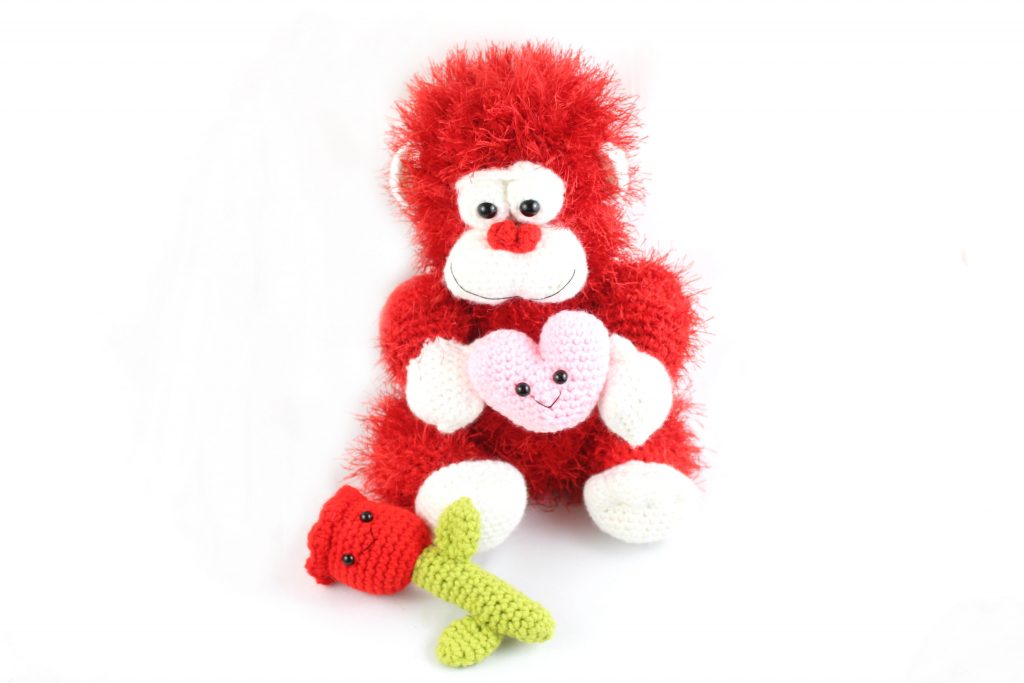
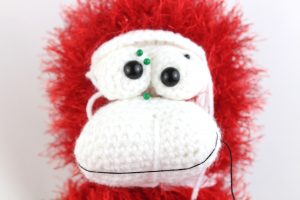
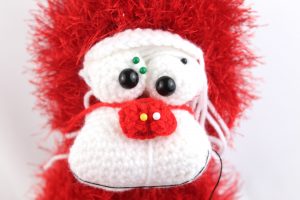
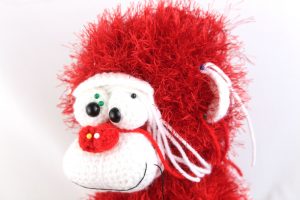
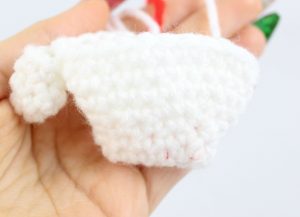
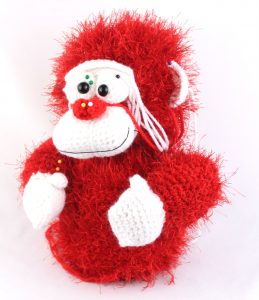
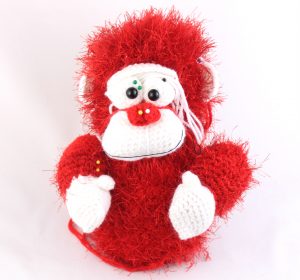
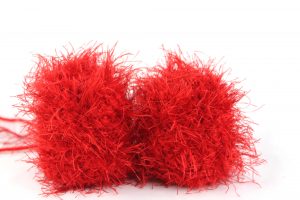
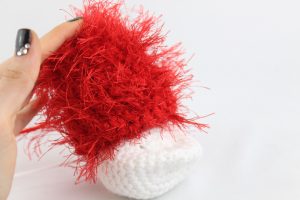
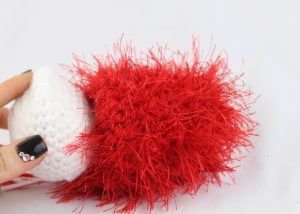
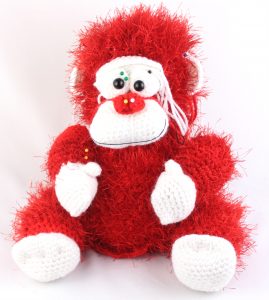
For this pattern, I used 3 skeins of Lion Brand’s fun fur yarn in red. I paired this yarn with a regular 4 weight yarn, and crocheted with them together. This makes the stitches much easier to see and work with. This also makes the total yarn weight feel like a 5 bulky weight yarn. You can also use Red Heart Hygge, or a similar bukly-ish furry yarn for the main color. I used a regular 4 weight yarn for the contrast color. The terms “main color” refers to the main color used for the gorilla. I used red. “Contrast color” refers to the opposite color used, and I used white for that. We start by making the head, then work the body. They are one piece. We them make the face, and then the limbs.
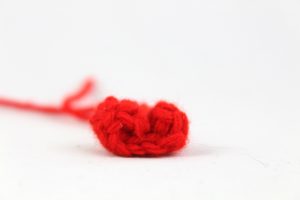
Body:
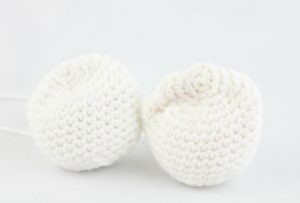
In Main Color

Round 1: 6 Sc in Magic Ring (6)
Round 2: *Inc* all around (12)
Round 3: *Inc, Sc* all around (18)
Round 4: *Inc, Sc 2* all around (24)
Round 5: *Inc, Sc 3* all around (30)
Round 6: *Inc, Sc 4* all around (36)
Round 7: *Inc, Sc 5* all around (42)
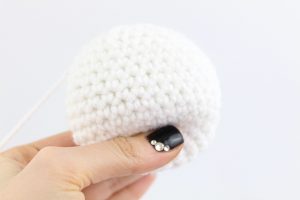
Round 8-20: *Sc* all around (42)
Round 21: *Dec, Sc 5* all around (36)
Round 22: *Dec, Sc 4* all around (30)
Round 23: *Dec, Sc 3* all around (24)
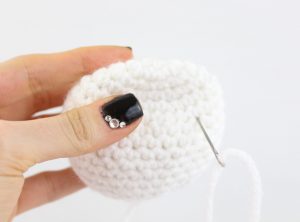
Stuff head here
Round 24: *Dec, Sc 2* all around (18)
Round 25: *Inc, Sc 2* all around (24)
Round 26: *Inc, Sc 3* all around (30)
Round 27: *Inc, Sc 4* all around (36)
Round 28: *Inc, Sc 5* all around (42)
Round 29: *Inc, Sc 6* all around (48)
Round 30-45: *Sc* all around (48)
Round 46: *Dec, Sc 6* all around (42)
Round 47: *Dec, Sc 5* all around (36)
Round 48: *Dec, Sc 4* all around (30)
Stuff body here. Continue stuffing after each round.
Round 49: *Dec, Sc 3* all around (24)
Round 50: *Dec, Sc 2* all around (18)
Round 51: *Dec, Sc* all around (12)
Round 52: *Dec* all around (6)
Finish off and add any additional stuffing. Sew closed.
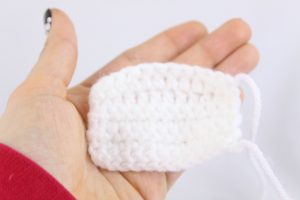
Muzzle:
In Contrast Color
Round 1: Ch 11. Sc in 2nd Ch from hook, Sc 2 more times in same st. Sc in next 8 st, Sc 3 times in next st. Now we are on the other side of the ch. Sc in last 8 st (22)
Round 2: *Inc* in the next 3 st, Sc in the next 8 st, *Inc* in the next 3 st, Sc in last 8 st (28)
Round 3:*Inc, Sc* 3 times, Sc in the next 8 st, *Inc, Sc* 3 times, Sc in last 8 st (34)
Round 4-7: *Sc* all around (34)
Round 8: *Dec, Sc 6* 4 times, Sc in the last 2 st (30)
Round 9: *Sc* all around (30)
Round 10: *Dec, Sc 3* all around (24)
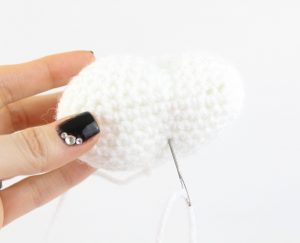
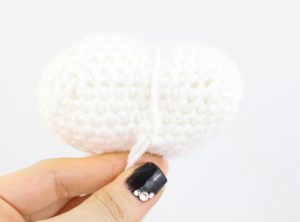
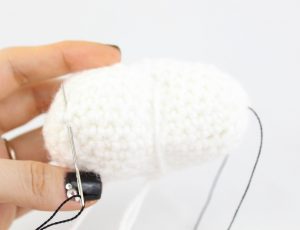
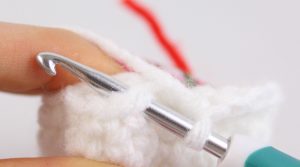
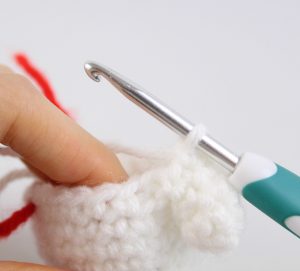
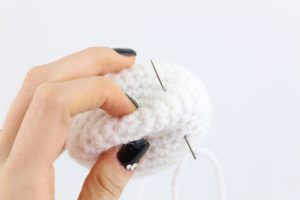
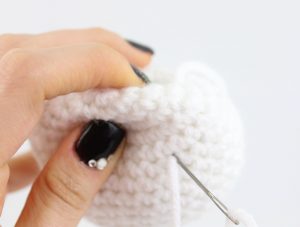
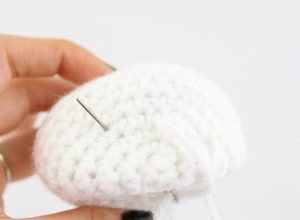
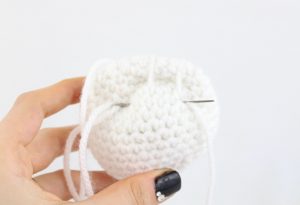
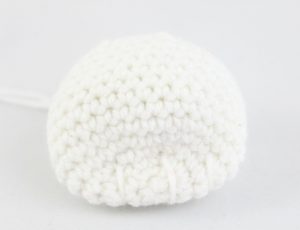
Finish off. Stuff the muzzle. Now cut a ~7″ piece of contrast color yarn. Insert it in the bottom middle area of the muzzle (Pic 1), and pull out the top middle area of the muzzle (Pic 2). Reinsert needle next to original insertion spot (Pic 3). Pull both ends of yarn to tighten and finish off. Weave in ends.

Muzzle:
In Black Embroidery Thread:
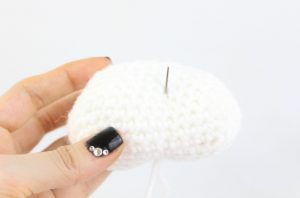
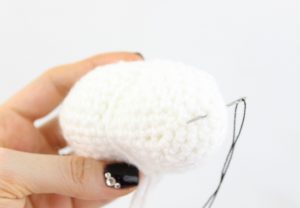
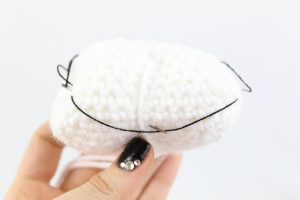
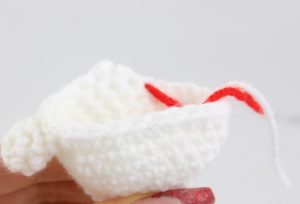
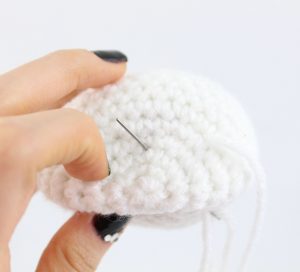
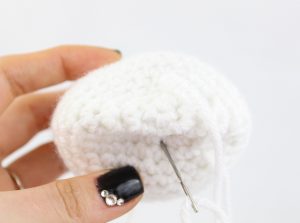
Insert needle on the right side of the mouth where shown (Pic 1). Pull needle out on the opposite side of the mouth as shown and reinsert needle one stitch over (Pic 2). Pull needle out to the middle of the mouth (Pic 3). Reinsert needle one stitch below as shown (Pic 4). Pull needle out in original insertion spot to finish off. Weave in ends.

Pin on as shown. Sew on.

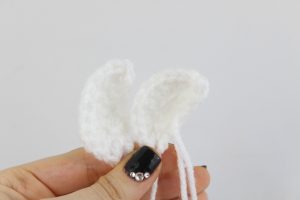
Eyebrow:
In Contrast Color
Row 1: Ch 13. Sc in 2nd Ch from hook, Sc in the next 11 st (12)
Row 2-5: Turn, Sc next 12 st (12)
Row 6-7: Turn, Sc in the next st, Hdc in the next 2 st, Dc in the next 6 st, Hdc in the next 2 st, Sc in the last st (12)
Finish off and pin on as shown, but don’t sew down yet.

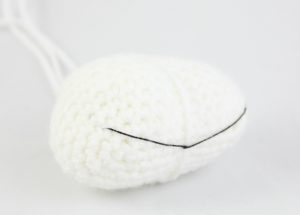
Eyes: (Make 2)
In White
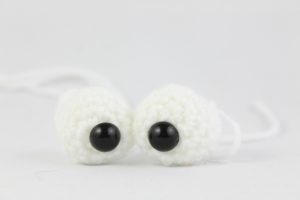
Round 1: 6 Sc in Magic Ring (6)
Round 2: *Inc* all around (12)
Round 3-4: *Sc* all around (12)
Finish off. Add the safety eye in the eye. Stuff the eyes and pin on as shown. Now fold the eyebrow we made previously, over the eyes. Now sew the pieces on.
Nose:
In Main Color
Row 1: Ch 12. Dc in the 2nd Ch from the hook. Dc in the next 10 st (11)
Finish off. Fold each piece inward as shown and sew to secure.

Now pin on as shown.
Ears: (Make 2)
In Contrast Color
Row 1: Ch 3. Dc 3 times in the 2nc Ch from hook. Dc 3 times in the next Ch (6)
Row 2: Turn, Dc 2 times in each of the next 6 st (12)
Finish off and pin on as shown. Sew on.
Thumb: (Make before hand)
In Contrast Color
Round 1: 6 Sc in Magic Ring (6)
Round 2: *Sc* all around (6)
Finish off and set aside for now.
Hand:
In Contrast Color
Round 1: Ch 8. Sc 2 times in the 2nd Ch from the hook. Sc in the next 5 st, Sc 2 times in the next st. Now we’re on the other side of the ch. Sc in the next 5 st (14)
Round 2-3: *Sc* all around (14)
Round 4: *Inc, Sc in the next 2 st* 4 times, Sc in the last 2 st (18)
Round 5: *Inc, Sc 2* all around (24)
Round 6-7: *Sc* all around (24)
Round 8: Sc in the next 16 st. Line up the thumb and the hand’s stitches together (Pic 1). Going through both the thumb and the hand, Sc in the next 3 st (Pic 2-3). Now we’re working on the hand. Sc in the next 5 st (Pic 4) (24)
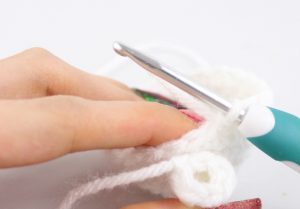


Round 9: Sc in the next 16 st. Now we meet thumb (Pic 1). Sc in next 3 st along the thumb (Pic 2). Now we meet the hand (Pic 3). Sc in the last 5 st on the hand (24)

Round 10: *Dec, Sc 2* all around (18)
Round 11: *Dec, Sc* all around (12)
Switch to Main Color
Round 12: *Inc, Sc* all around (18)
Round 13: *Inc, Sc 2* all around (24)
Round 14-15: *Sc* all around (24)
Hold the top half of the hand flat. Stuff the rest of the hand.
Continue the following rounds:
Round 16-22: *Sc* all around (24)
Round 23: *Dec, Sc 2* all around (18)
Stuff here
Round 24: *Dec, Sc* all around (12)
Round 25: *Dec* all around (6)
Finish off and add any additional stuffing. Sew closed.
Pin onto the gorilla as shown. Sew on.
Legs: (Make 2)
In Main Color
Round 1: 6 Sc in Magic Ring (6)
Round 2: *Inc* all around (12)
Round 3: *Inc, Sc* all around (18)
Round 4: *Inc, Sc 2* all around (24)
Round 5-16: *Sc* all around (24)
Finish off. Stuff and set aside for now.
Feet: (Make 2)
In Contrast Color
Round 1: 6 Sc in Magic Ring (6)
Round 2: *Inc* all around (12)
Round 3: *Inc, Sc* all around (18)
Round 4: *Inc, Sc 2* all around (24)
Round 5: *Inc, Sc 3* all around (30)
Round 6-13: *Sc* all around (30)
Round 14: *Dec, Sc 3* all around (24)
Hold the bottom half of the foot shut. Stuff the rest of the foot.
Round 15: *Dec, Sc 2* all around (18)
Round 16: *Dec, Sc* all around (12)
Finish off. Add any additional stuffing and sew closed.
Foot Assembly:
In Contrast Color
With a long piece of contrast color yarn,insert the needle shown (Pic 1). Pull out the opposite side (Pic 2). Reinsert needle into original insertion area (Pic 3). Now, pull needle out in the area shown (Pic 4). Reinsert needle on opposite side as shown (Pic 5). Pull needle out as shown (Pic 6), Reinsert needle as shown (Pic 7). Pull both ends of thread tightly and weave in ends.
Foot Assembly:
Place the foot on the leg as shown. Sew on.

Pin the legs to the body as shown. Sew on.


7 Comments
I absolutely LOVE this! What a great idea, pairing the two yarns for the body so the stitches are easier to see! I have CTS and have a few textured yarns that I can’t use because I can’t feel where the stitches are. I’m excited now to give your idea a try. I’ll definitely be giving this gorilla a go. Thank you so much for sharing your patterns!
Hi there, I’m really happy that you think this technique will work for you! It’s really difficult to work with the furry yarn so when you work it with a sturdy yarn it also helps build the amigurumi more firm, especially since you can’t feel the yarn. Also a little tip is you can flip your amigurumi piece inside out so the wrong side is facing out, and it will be much fuzzier. Of course you don’t need to flip the regular yarn pieces such as the muzzle or feet inside out since they aren’t using the fuzzy yarn. I hope that helps! Good luck on your gorilla 🙂
Can you make this without the furry yarn and maybe brush it?
Hi Kelly, yes that would be a great alternative to fuzzy yarn! I would suggest that if you’re going to brush out the yarn instead, use a thicker 4 weight yarn. This is because I paired the gorilla with regular 4 weight yarn with fuzzy yarn, thus it made a thicker yarn strand. So to make the gorilla as close to the pattern as possible, I would use a thicker 4 weight yarn (such as Caron One Pound). I hope that makes sense!
hola, lindo trabajo, estoy un poco confusa en la parte de la ceja o cara, que significa la sigla HDC y Dc, gracias
¡Hola! Muchas gracias 🙂 Dc significa “punto vareta” y Hdc significa “media vareta”. ¡Espero que eso ayude! Por favor hazme saber si tienes preguntas ❤️
Can you explain the muzzle bit a little further? I understand ch 11, 2nd stitch from hook throw 3 stitches in, sc 8, 3 in 1 but then you say sc 8 again and that it’s where I’m lost.