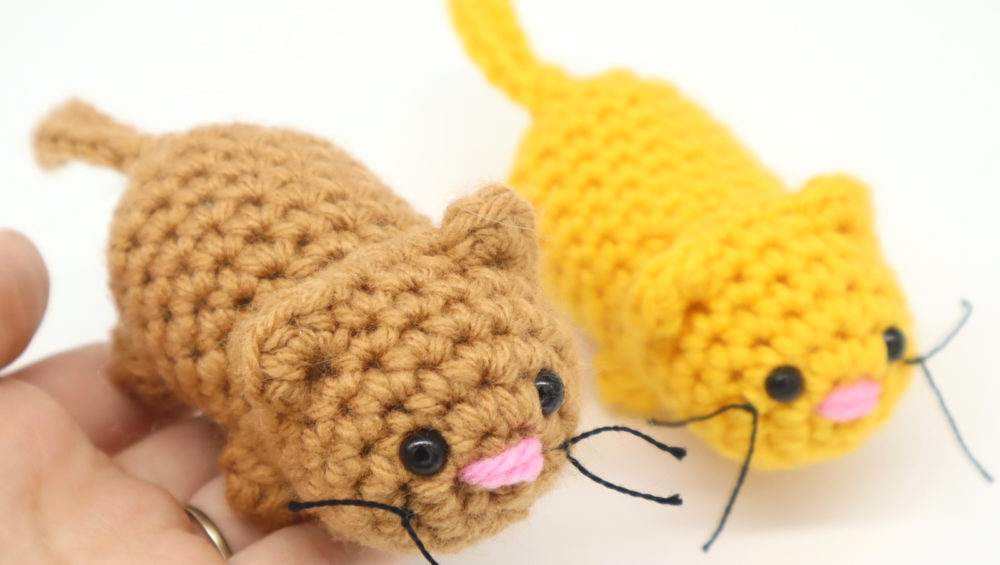
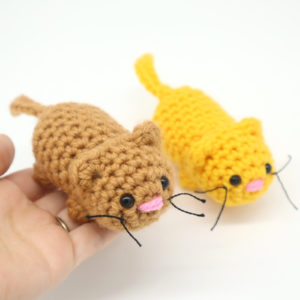
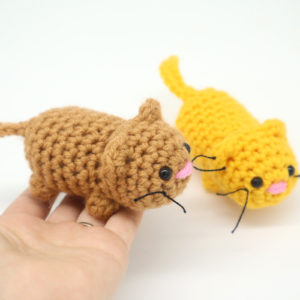
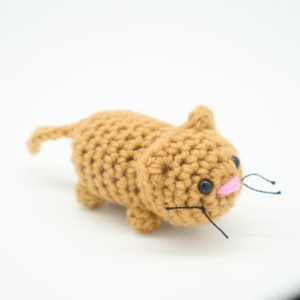
Scraptacular Cat Amigurumi – Free Crochet Pattern
Hello! This week we’re releasing a FREE scraptacular cat crochet pattern! Scrap patterns are so fun and easy – I personally love making scrap amigurumis because it allows you to make lots of amigurumis in a short time. If you enjoy this pattern, try making a super large cat by simply using a larger hook and a large crochet hook! Next week, there may be a new scraptacular buddy to go with these cats. Be sure to check back next week for the new pattern!
Print this pattern out – purchase the printable PDF version here!

 Supplies:
• Yarn 4/Medium Weight in any color for the body and pink for the nose
•4mm Crochet Hook
•Tapestry needle
•Scissors
•Stuffing
•6mm safety eyes
•Black Embroidery Thread
Additional Information:
Difficulty: Easy-Intermediate
Let’s get started!
This cat is super fun to make and best of all – there’s no sewing involved! The body, ears, arms, legs, and tail, are all made in one continuous piece!
We will first start by making the head and working our way to the body. The ears and arms are worked in during this process by creating special stitches. After this, we will make the tail.
Once we’ve completed the body, we will stitch on a nose and tie on the whiskers. Let’s get started!
Head:
In Main Color
To start the cat, we make the head which works into the body. The head, ears, arms/legs, and tail are all made in one piece.
Round 1: 6 Sc into a Magic Ring (6)
Round 2: *Inc* all around (12)
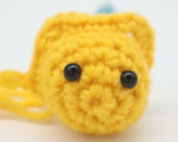
Now we will mark where to place the eyes later. Add a differently colored stitch marker into the 5th and 9th stitch in Round 2. We use a different colored stitch marker to make sure we don’t confuse the eye stitch markers for the round stitch markers.
Round 2 eye markers will look like the photo below:
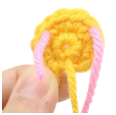
Round 3: *Inc, Sc in the next 2 st* all around (16)
Round 4-5: *Sc* all around (16)
Add safety eyes into the marked areas from Round 2 now.

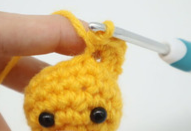
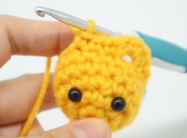
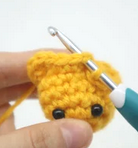
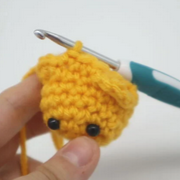
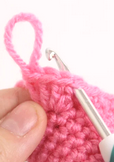
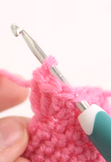
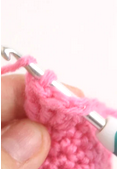
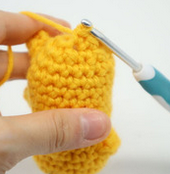
Round 6: Sc in the next 8 st. In the FLO (Front Loop Only, Pic 1) of the next stitch *Hdc 2, Sc 1, Hdc 1* (Pic 2). In BOTH Loops, Sc in the next 3 st (Pic 3). In the FLO of the next stitch, *Hdc 2, Sc 1, Hdc 1* (Pic 5). In BOTH loops, Sc in the next 3 st (Pic 6) (Stitch Count: 22)
1.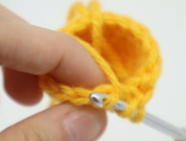 2.
2. 3.
3. 4.
4. 5.
5. 6.
6.
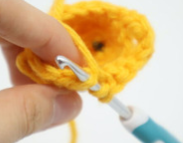
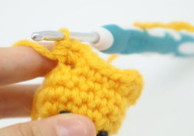
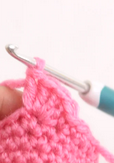
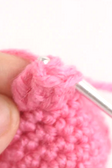
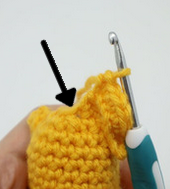
Round 7: Sc in the next 8 st (Pic 1). Now we meet the ear. Fold the ear towards you (Pic 2). Behind the ear will be the back loop we left since we crocheted only in the front loop earlier (Pic 2). Single crochet one time in that back loop (Pic 3-4). Now continuing in both loops (don’t crochet on the ear, crochet on the head), Sc in the next 3 st. (Pic 5-6) Fold the second ear towards you and Sc one time in the back loop (Pic 7). Continuing in BOTH loops. Sc in the next 3 st (16)
1. 2.
2. 3.
3. 4.
4. 5.
5. 6.
6. 7.
7. 8.
8.
Round 8: *Dec, Sc in the next 2 st* 4 times (12)
Round 9: In the FLO, *Inc, Sc in the next st* all around (18)
Round 10: Sc in the next st. Now we will make the arms. Dc 4 times in the next st (Pic 1). Remove your hook from the current working loop and insert it into the first Dc made (Pic 2). Now also reinsert your hook into the current working loop (Pic 3). You will have two loops on your hook. Yarn over (Pic 4) and pull through both loops (Pic 5). You have just made one popcorn stitch (Pic 6). Sc in the next 3 st, Popcorn stitch in the next st, Sc in the next 12 st (18)
1. 2.
2. 3.
3. 4.
4. 5.
5. 6.
6.
Round 11-14: *Sc* all around (18)
Round 15: Sc in the next 3 st, Popcorn in the next st, Sc in the next 3 st, Popcorn in the next st, Sc in the next 10 st (18)
Round 16: *Dec, Sc in the next st* all around (12)
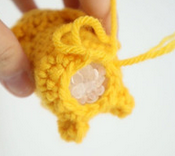
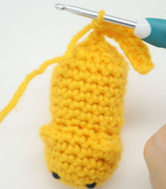
Stuff the rest of the body now (Pic 1), leaving a little bit unstuffed after Round 17. Add plastic pellets to the rest of the butt – this will help weight down the cat so it won’t topple over (Pic 2). If you don’t have plastic pellets, you can use lentils.
1.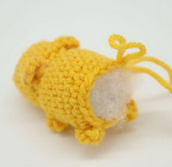 2.
2. 3.
3.
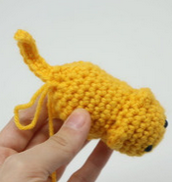
Round 17: *Dec* 5 times. Sc in the next st. Ch 9 (Pic 2), Sc in the 2nd Ch from the hook. Sc in the next 7 st (Pic 3). SlSt in the original St on the cat (Pic 4-5).
Finish off, leaving a long tail of yarn for sewing. Sew the remaining stitches closed (Pic 6).
1. 2.
2. 3.
3. 4.
4. 5.
5. 6.
6.
Whiskers:
In black embroidery thread
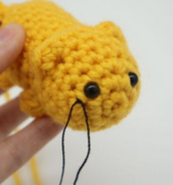
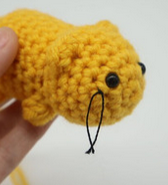
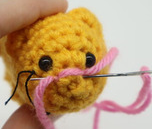
Take 2 pieces of ~4″ black embroidery thread (Pic 1). Place the thread in a needle and insert the needle slightly under the left of the toy’s eye as shown (Pic 2). When pulling the needle through, bring only half of the thread through. This will leave an even amount of thread on both sides as shown (Pic 3). Using both ends of thread, tie a firm knot 2 times (Pic 4-5). This will secure the whiskers. Trim them to the length you want (Pic 6). Repeat on the other side!
1. 2.
2.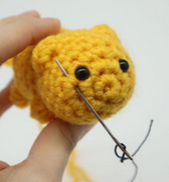 3.
3.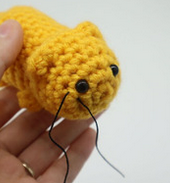 4.
4. 5.
5. 6.
6.
Nose:
In pink yarn
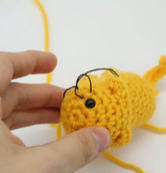
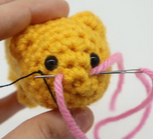
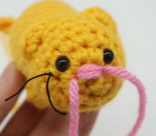
Insert needle with yarn next to the toy’s right eye and pull out next to the left eye as shown (Pic 1). Repeat this 2 more times (Pic 2-3). Once done, tie both ends of yarn into firm knots and bring the knots into the toy to hide. Cut any excess yarn.
1.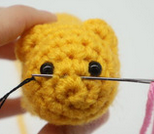 2.
2. 3.
3. 4.
4.


17 Comments
I really think this little cat is just the cat’s meow. It makes up quick and using fuzzy yarn it makes the cutest little key chain.
Unless I’m reading the instructions wrong, shouldn’t row 3 be 18 stitches? If row 2 is 12 stitches, and row 3 is *in, 2 sc* that equals 18, not 16. Maybe I’m doing something wrong?
I’m sorry, Susan, I didn’t mean this as a repky to you, I meant it for the author.
And now I feel incredibly stupid because I read the instructions one more time and see where I went wrong. 🙄
I agree, I had a lot of issues with this pattern. I made the cat word for word how the pattern was written and my cat is all over the place.
Got a bit muddled on the instructions but managed to correct by looks. Not a bad looking kitty for a first try. Will definitely try another and maybe use a slightly bigger hook with acrylic so I don’t have to go looking for smaller eyes
I have tried to make this cute little guy four times now, and can’t get past row 6. Does anyone have any videos/more detailed explanation on how to make the ears??
Love the little kitty. My first attempt is a little lop sided but cute. I will try again. Thanks for the awesome website!
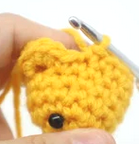
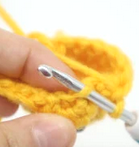
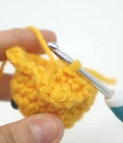
Is there a trick to along the ears look pointy? Mine came out rounded.
Hi Jacki,
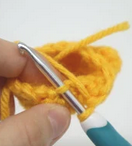
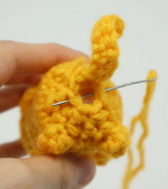
I know it’s been a few months since you posted this but thought I would reply in case others have the same question. I also have rounded ears so i took the large needle used for sewing crochet items (you can see it in the picture) and put it in the middle of the top of the ear and pulled. You can see it’s a little pointier. I’m going to do it several times until I get it where I like it then I’ll try spraying the ear with spray starch to see if that holds it. I’ll take a piece of material and cover the rest of the kitty so it won’t have starch all over. I’m hoping that will work. 🙂
It’s been quite some time, but in case others want another pointy ear option, here’s what I did:
For round 6: sc 7, ear 1: in FLO of next stitch *HDC, ch 2, sl st to back bump of first ch (picot), HDC*, both loops *sc 4*, ear 2: copy ear 1, sc 3.
Round 7: sc 7, loose sc in BLO behind the ear, sc 4, loose sc in BLO behind the ear, sc 3.
Hi Jacki,
I know it’s been a few months since you posted this but thought I would reply in case others have the same question. I also have rounded ears so i took the large needle used for sewing crochet items (you can see it in the picture) and put it in the middle of the top of the ear and pulled. You can see it’s a little pointier. I’m going to do it several times until I get it where I like it then I’ll try spraying the ear with spray starch to see if that holds it. I’ll take a piece of material and cover the rest of the kitty so it won’t have starch all over. I’m hoping that will work. 🙂
Very cute kitty. Thanks for the great pattern. Even though I had a little trouble I got it eventually and I really like it.
This is wonderful and I made several of them, but they always end up completely crooked ! Eyes, ears, paws and tail almost form a spiral, the closest I got was the head tilted… I think I’m following the pattern correctly, does someone know where my problem could come from ?
Read entire post before trying this! When made following the instructions, on mine the ears kept turning out off center with the eyes. To remedy this, I start the first ear after 7 sc, continue as pattern says, but then finish round with 4 sc (instead of 3). Don’t forget to compensate for this on the next round by beginning with 7 sc, then one sc in loop behind ear, follow pattern instructions, then finish round with 4 sc. I also reversed the order of the stitches for the second ear to be: 1hdc,1sc, 2hdc, making the ears more symmetrical. I Hope this helps others!
It’s been over a year but I’m leaving this in case anyone else wants to know. This happens with just about any crochet work, certain yarns or stitches can have different degrees of this spiral effect. If you just adjust where in the round you make the appendages, it looks much better.
I’ve got 2 things to address. You don’t include the instruction for when to stuff the head. I solved the problem of separation in the neck area by rolling the stuffing in my hands like clay to make a little ball. Then similarly for the body. Then using sharp scissors I made a slit to put the lentils into. The second issue is about the back legs. The direction has them off kilter by a quarter turn so I just used the front legs directions. Otherwise cute critter.