
Purchase the printable PDF here!


FROM FEB 7 2021 – MARCH 7 2021
Join the StringyDingDing Membership to Unlock this PDF + the NEWEST amigurumi PDFS!

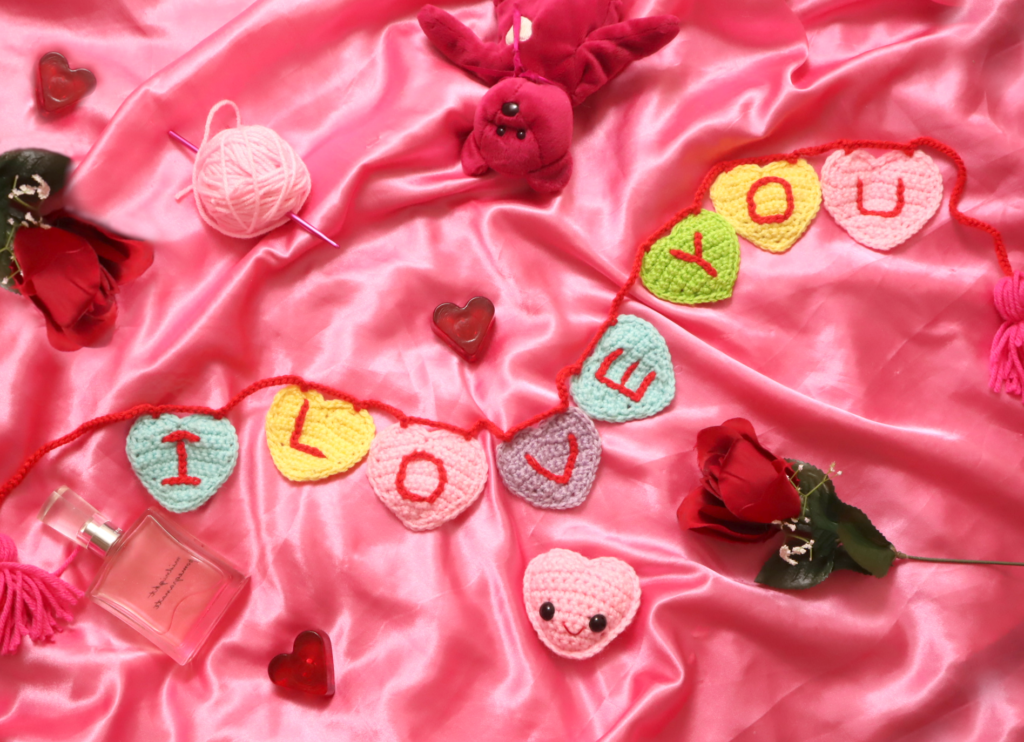
This pattern is so perfect for Valentines Day! I was really excited to make it, and to my surprise it was super quick to make. Obviously it will take longer than 7 minutes to make the heart amigurumi, or a heart with special letters, but the heart itself only took me 7 minutes! It goes quicker the more hearts you make so your very first heart may take longer but after that it will go quicker, I got down to even 6 minutes 🙂
If you’re a very beginner of course it will probably take longer than that. I just had to add this disclaimer so you know what to expect. It is definitely a 7 minute pattern for me! Hope you enjoy this pattern!
Supplies:
• Yarn colors in size 4/Medium Yarn…
Any Main Color, Red Yarn
• 4mm Crochet Hook
•12mm safety eyes (Optional)
•Tapestry needle
•Scissors
•Stuffing (Optional)
•Red Embroidery Thread for Smile (Optional)
Additional Information:
• Before we start…
This pattern goes very quickly, especially once you’ve made a few. Of course it will take longer than 7 minutes to make an amigurumi or special letters, but the heart takes only 7 minutes! (I got down to even 6 minutes!)
• Getting started…
This pattern uses the exact same pattern to make either an amigurumi or a regular heart for a garland. The only difference being how we assemble the hearts.
• Recommended Yarns:
JoAnn Fabric’s “Big Twist” Yarn
Red Heart Super Saver Yarn
Hobby Lobby’s “I Love This Yarn!”
Let’s Get Started!
We are working in rows. If you are making an amigurumi heart, make the front with eyes first, then back the back without eyes.
Heart:
In Main Color
Row 1: Ch 3. Inc in 2nd ch from hook. Inc next ch (4)
Row 2: Ch 1 & turn. *Inc* in the first st, Sc in the next 2 st, *Inc* in the last st (6)
Row 3: Ch 1 & turn. *Inc* in the next st, Sc in the next 4 st, *Inc* in the last st (8)
Row 4: Ch 1 & turn. Sc in the next 8 st (8)
Row 5: Ch 1 & turn. *Inc* in the first st, Sc in the next 6 st, *Inc* in the last st (10)
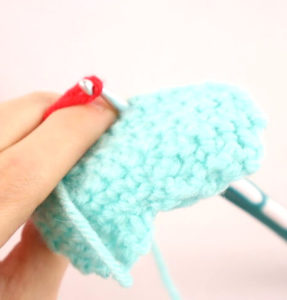
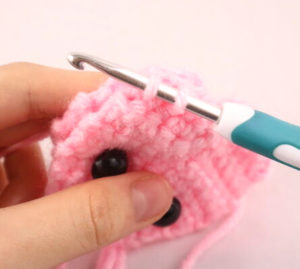
If you’re making a heart amigurumi, add eye stitch markers after making the next row (row 6). Add the stitch markers on the 4th and 9th stitch. Only do this for the 1st piece of the heart
Row 6: Ch 1 & turn. *Inc* in the first st, Sc in the next 8 st, *Inc* in the last st (12)
Row 6 eye stitch markers shown below
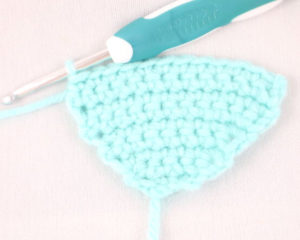
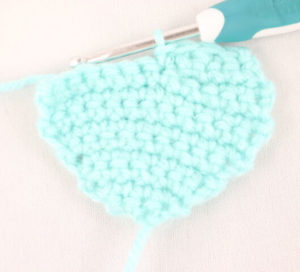
Row 7-9: Ch 1 & turn. Sc in the next 12 st (12)
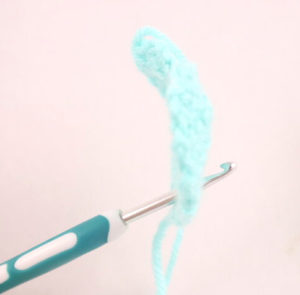
Pic 1 below shows what heart will look like after Row 9
1.
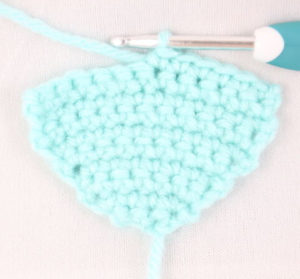
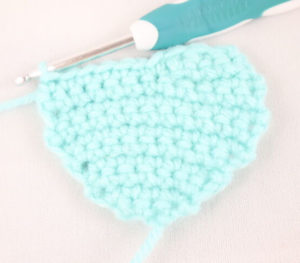
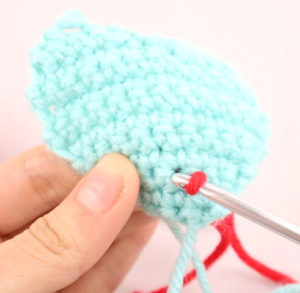
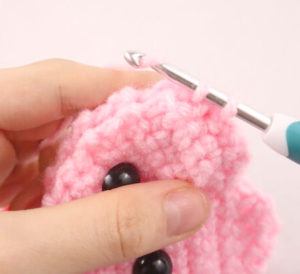
Row 10-11: Ch 1 & turn. Sc next 6 st (Pic 2 below) (6)
2.
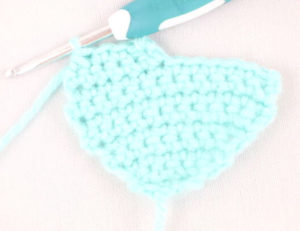
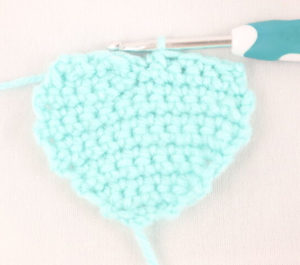
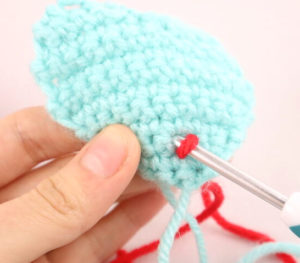
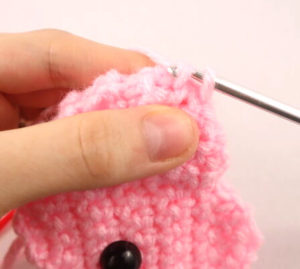
Row 12: Ch 1 & turn. *Dec* next st, Sc next 2 st, *Dec* next st (Pic 3 below) (4)
3.
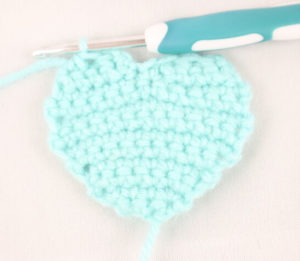
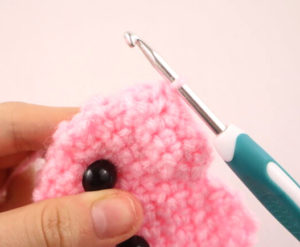
Row 13: Ch 1 & turn. *Dec* 2 times (Pic 4 below) (2)
4.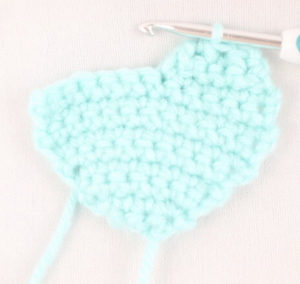
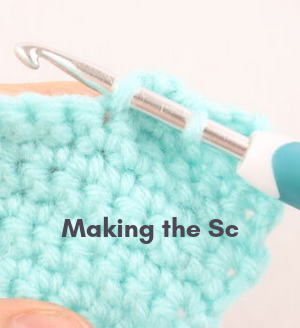
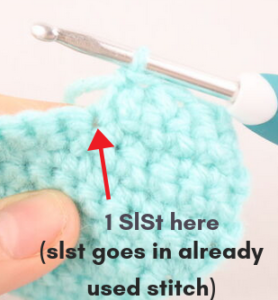
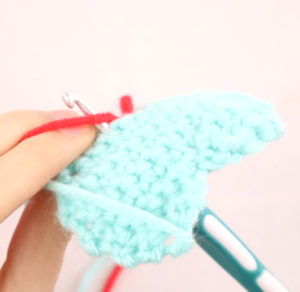
Note: In row 14 we will crochet into 2 previously used stitches in order to get down the “hump” so we can make the next hump.
Row 14: Ch 1 & turn. Sc in the next 2 st. Now we will crochet down the side of the “hump”, Sc next 3 st going down the side of the heart hump (Pic 1-3), SlSt next st (this st goes in previously used st) (Pic 3-5). Sc next 6 st (Pic 6).
1.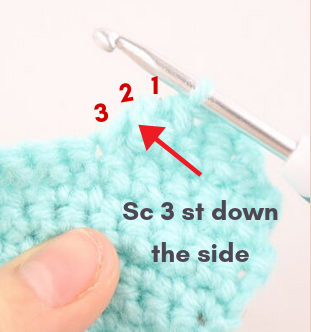 2.
2.
3. 4.
4.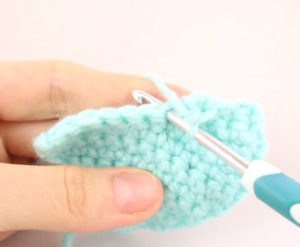
5. 6.
6.
Row 15: Ch 1 & turn. Sc in the next 6 st (6)
Row 16: Ch 1 & turn. *Dec* 1 time, Sc next 2 st, *Dec* 1 time (Pic 7 below) (4)
7.
Row 17: Ch 1 & turn. *Dec* 2 times (Pic 8 below) (2)
8. 
- If making a regular garland heart, finish off now – unless you’d like to single crochet around the entire heart for a cleaner look.
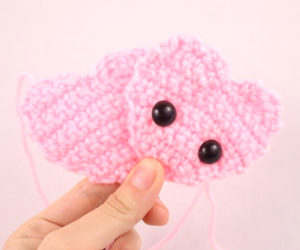
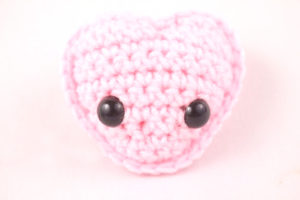
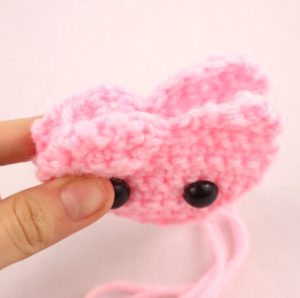
- If making an amigurumi heart, only finish off the first heart. Don’t finish off the second back of the heart. Add safety eyes in now. Continue amigurumi by scrolling past the letter instructions.
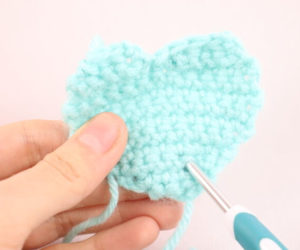
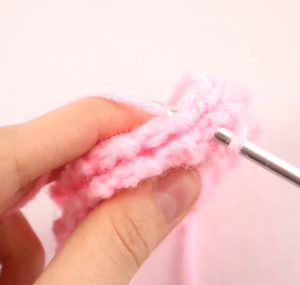
Single Crocheting Around the Heart
IMPORTANT NOTE: When crocheting around the heart (this also applies when crocheting both pieces of amigurumi hearts together), at the very bottom tip of the heart (picture below), make 3 single crochets into one stitch.
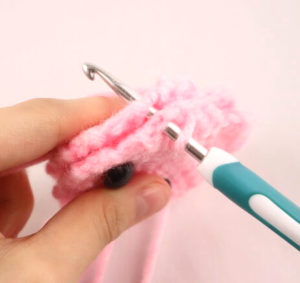
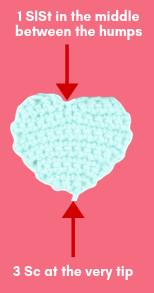 Continue single crocheting around the heart until you meet the middle section between the two humps. Make 1 SlSt between those two humps (pictured left). Continue making single crochets around.
We do this to the heart to it keeps the heart shape. Without doing this, the heart will look less distinct.
Crocheting Letters
In Red Yarn
To make each letter we will “surface slip stitch” onto the heart. When making your letters, try to keep straight lines by going through directly the next row, whether that’s up/down or left/right. To make softer corners (say for an O) go diagonal for a stitch instead of straight for 1 stitch. Then continue going straight.
Let’s Get Started!
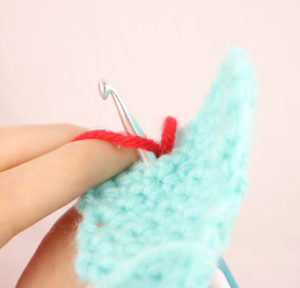
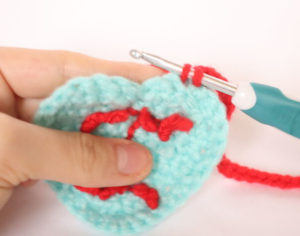
Insert your crochet hook into any stitch of the heart. This is where we will start our letter (Pic 1-2). Yarn over with red yarn (Pic 3). Pull the hook with yarn to the front of the heart (Pic 4-5).
1. 2.
2.
3. 4.
4.
5.
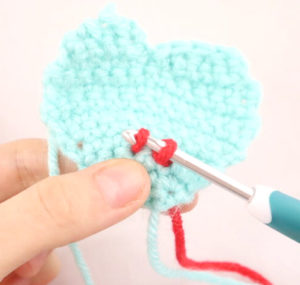
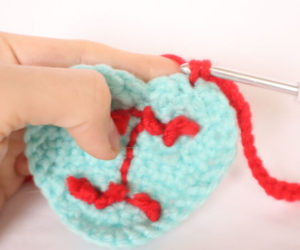
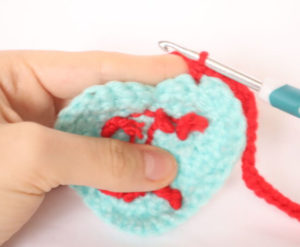
Insert hook into the next stitch of the heart (Pic 6-7). Yarn over with red yarn (Pic 8-9). Bring the hook and yarn through to the front (Pic 10). Make a slip stitch by pulling the left loop through the right loop with your hook (Pic 11-12). This completes a surface slip stitch!
6. 7.
7.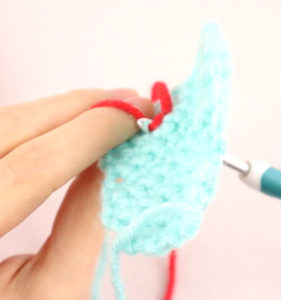
8. 9.
9.
10.
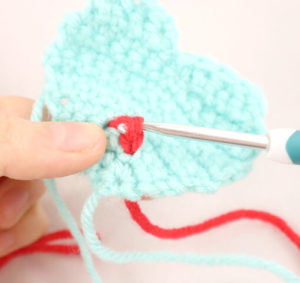
Continue this process…
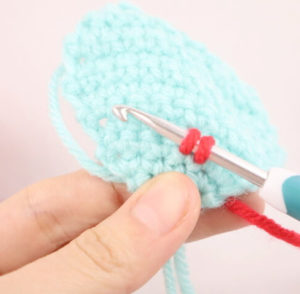
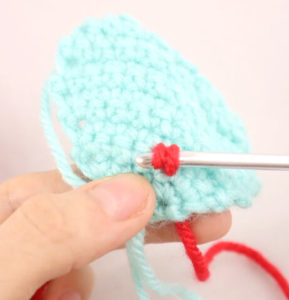
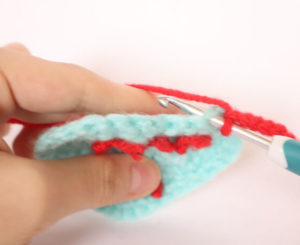
Repeat the process of inserting your hook into the next stitch and yarning over with red (Pic 1). Bring the yarn to the front of the heart (Pic 2). Make a slip stitch by pulling the left loop through the right loop (Pic 3-4).
1. 2.
2.
3. 4.
4.
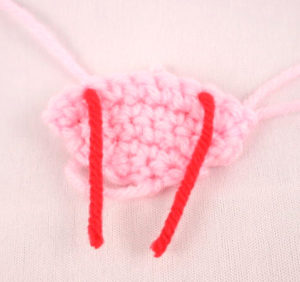
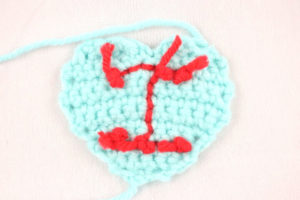
For certain letters…
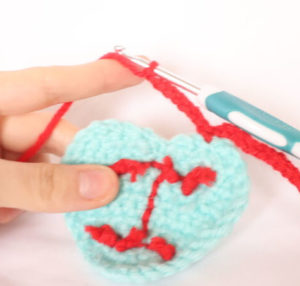
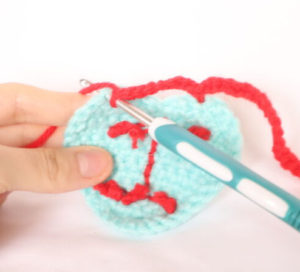
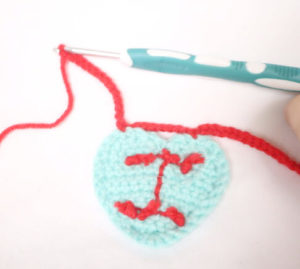
Some letters will require you to finish off your current surface slip stitch and continue somewhere else (such as the capital letters I, R, T, Y, A, F, H, K, and X). This is because they can’t be crocheted in one go. For example my I (Pic 1) has 3 separate places I started and finished off (Pic 2-3). For these letters just tie the ends into firm knots and cut the excess yarn!
1.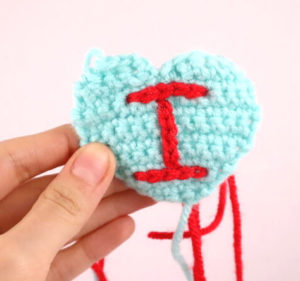 2.
2.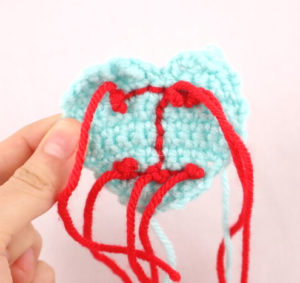
3.
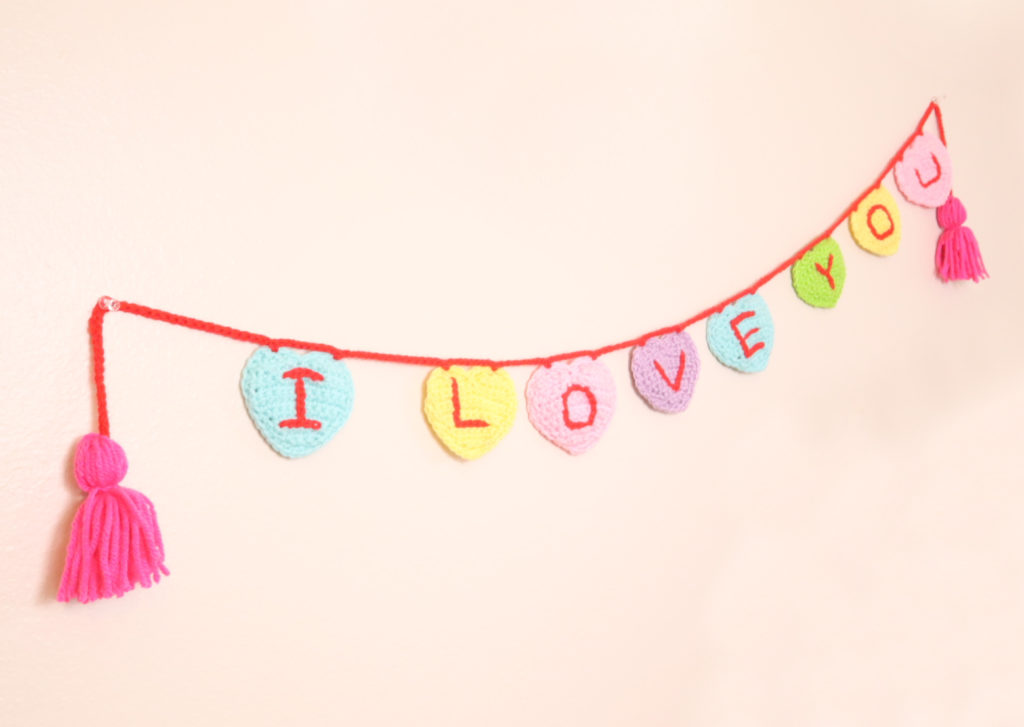
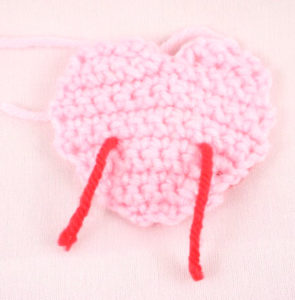
Garland Line:
In Red
Depending on which letters and words you’re making you will space out the letters and words with a certain amount of chains.
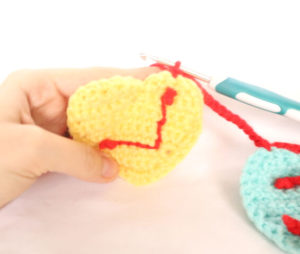
IMPORTANT NOTE: Always have the wrong side of the heart facing you when we crochet onto the heart. This is so the direction of the words will go correctly.
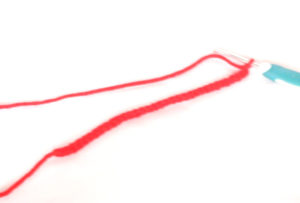
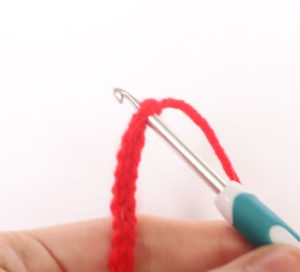
For the very beginning of the garland: Ch 35. (Pic 1)
1.
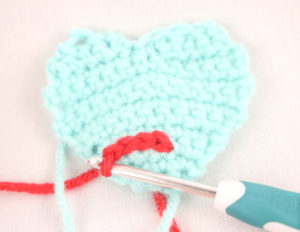
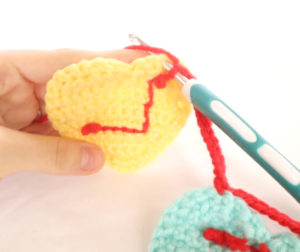
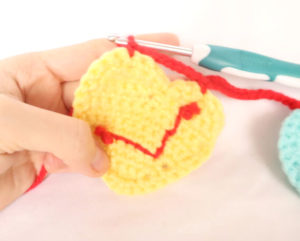
For Crocheting onto the hearts: Sc onto the top of the heart hump (Pic 1-5). Ch 8 (Pic 6). Sc onto next hump of the heart (Pic 7).
2. 3.
3.
4. 5.
5.
6. 7.
7.
If you’re spacing out a letter to a new word: Ch 14 (always ch 14 to space out a letter to a new word, Pic 8).
8. 9.
9.
10. 11.
11.
To space out letters to another letter in the same word: Ch 9 (always Ch 9 to space out a letter from another that’s in the same word).
For the very end of the garland: Ch 35. Finish off.
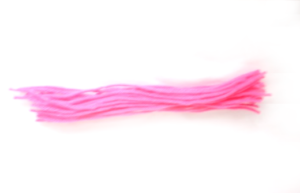
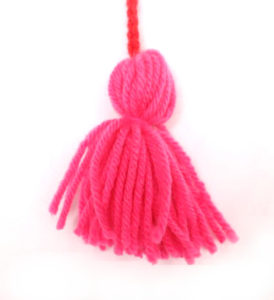
Tassels: (Optional)
In Pink or Purple
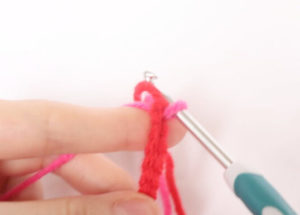
Take a contrast color such as pink or purple. Cut up about 25 pieces of yarn, about 6″ long (Pic 1). Insert your crochet hook into the very first or last chain of the garland (Pic 2). Yarn over with one strip (Pic 3). Pull only half of the yarn through (Pic 4-5).
1. 2.
2.
3.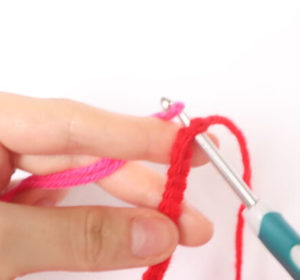 4.
4.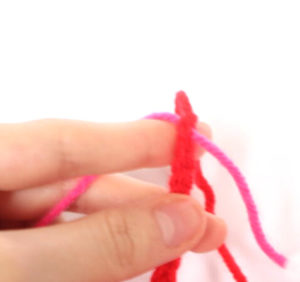
5.
Repeat this with all strands (Pic 6). Take one more 6″ strand and tie it around the tassels a few times (Pic 7-8). Let this strand fall with the rest of the tassels. Now cut the tassels in one straight line so they all match in length (Pic 9). Done!
6. 7.
7.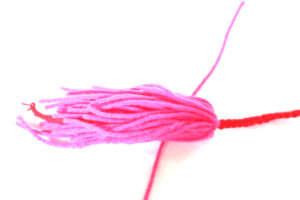
8. 9.
9.
10.
Repeat this to the last chain of the garland.
Do note that using more strands of yarn will result in a thicker tassel. If your tassel is too thin, try adding more strands of yarn!
Amigurumi Assembly:
In Main Color
Take both the front and back of the heart (Pic 1). Align both together so the stitches line up, right sides facing out (Pic 2-3). Insert crochet hook through the current working loop you left on the back of the heart, and insert hook going through BOTH the front and back of the heart, making sure the front of the heart faces you (Pic 4)
1. 2.
3. 4.
4.
Yarn over and pull the yarn through (Pic 5-7). Yarn over and pull through both loops (Pic 8-10). You have just made 1 single crochet! Continue to Sc the heart closed, make sure to make 3 Sc into the very bottom tip of the heart, and 1 SlSt between the two heart humps (refer back up to the “single crocheting around the heart” more details). Be sure so add stuffing before fully crocheting the heart closed (Pic 11). Finish off.
5. 6.
6.
7. 8.
8.
9. 10.
10.
11. 12.
12.
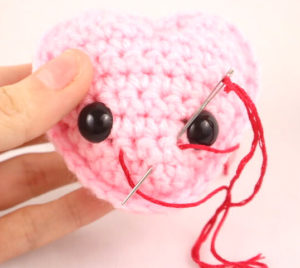
Smile Assembly:
In Red Yarn/Embroidery Thread
Insert needle with thread one stitch over from the right eye, and pull needle out 3 stitches to the left (Pic 1). Reinsert needle into the original insertion spot and pull needle out where shown. Make sure the needle lands ABOVE the thread (Pic 2). Reinsert needle into the same stitch, but BELOW the thread, and pull needle out to original insertion spot (Pic 3). Tie both ends of thread into a firm knot and bring into the piece to hide. Cut any excess yarn (Pic 4).
1. 2.
2.
3. 4.
4.
Done!


2 Comments
Thank you so much for sure you are so kind. I love how colourful your page is for each Amigurumi you created. You put such great effort into your work ! Love it
Hi Yammie! Aww YOU are the the kind one, it means so much that you’d compliment me on my silly crochet patterns 😍 I really appreciate that you like them and I promise to keep making more!