Purchase the PDF version here!

FROM JAN 31 2021 – FEB 31 2021
Join the StringyDingDing Membership to Unlock this PDF + the NEWEST amigurumi PDFS!

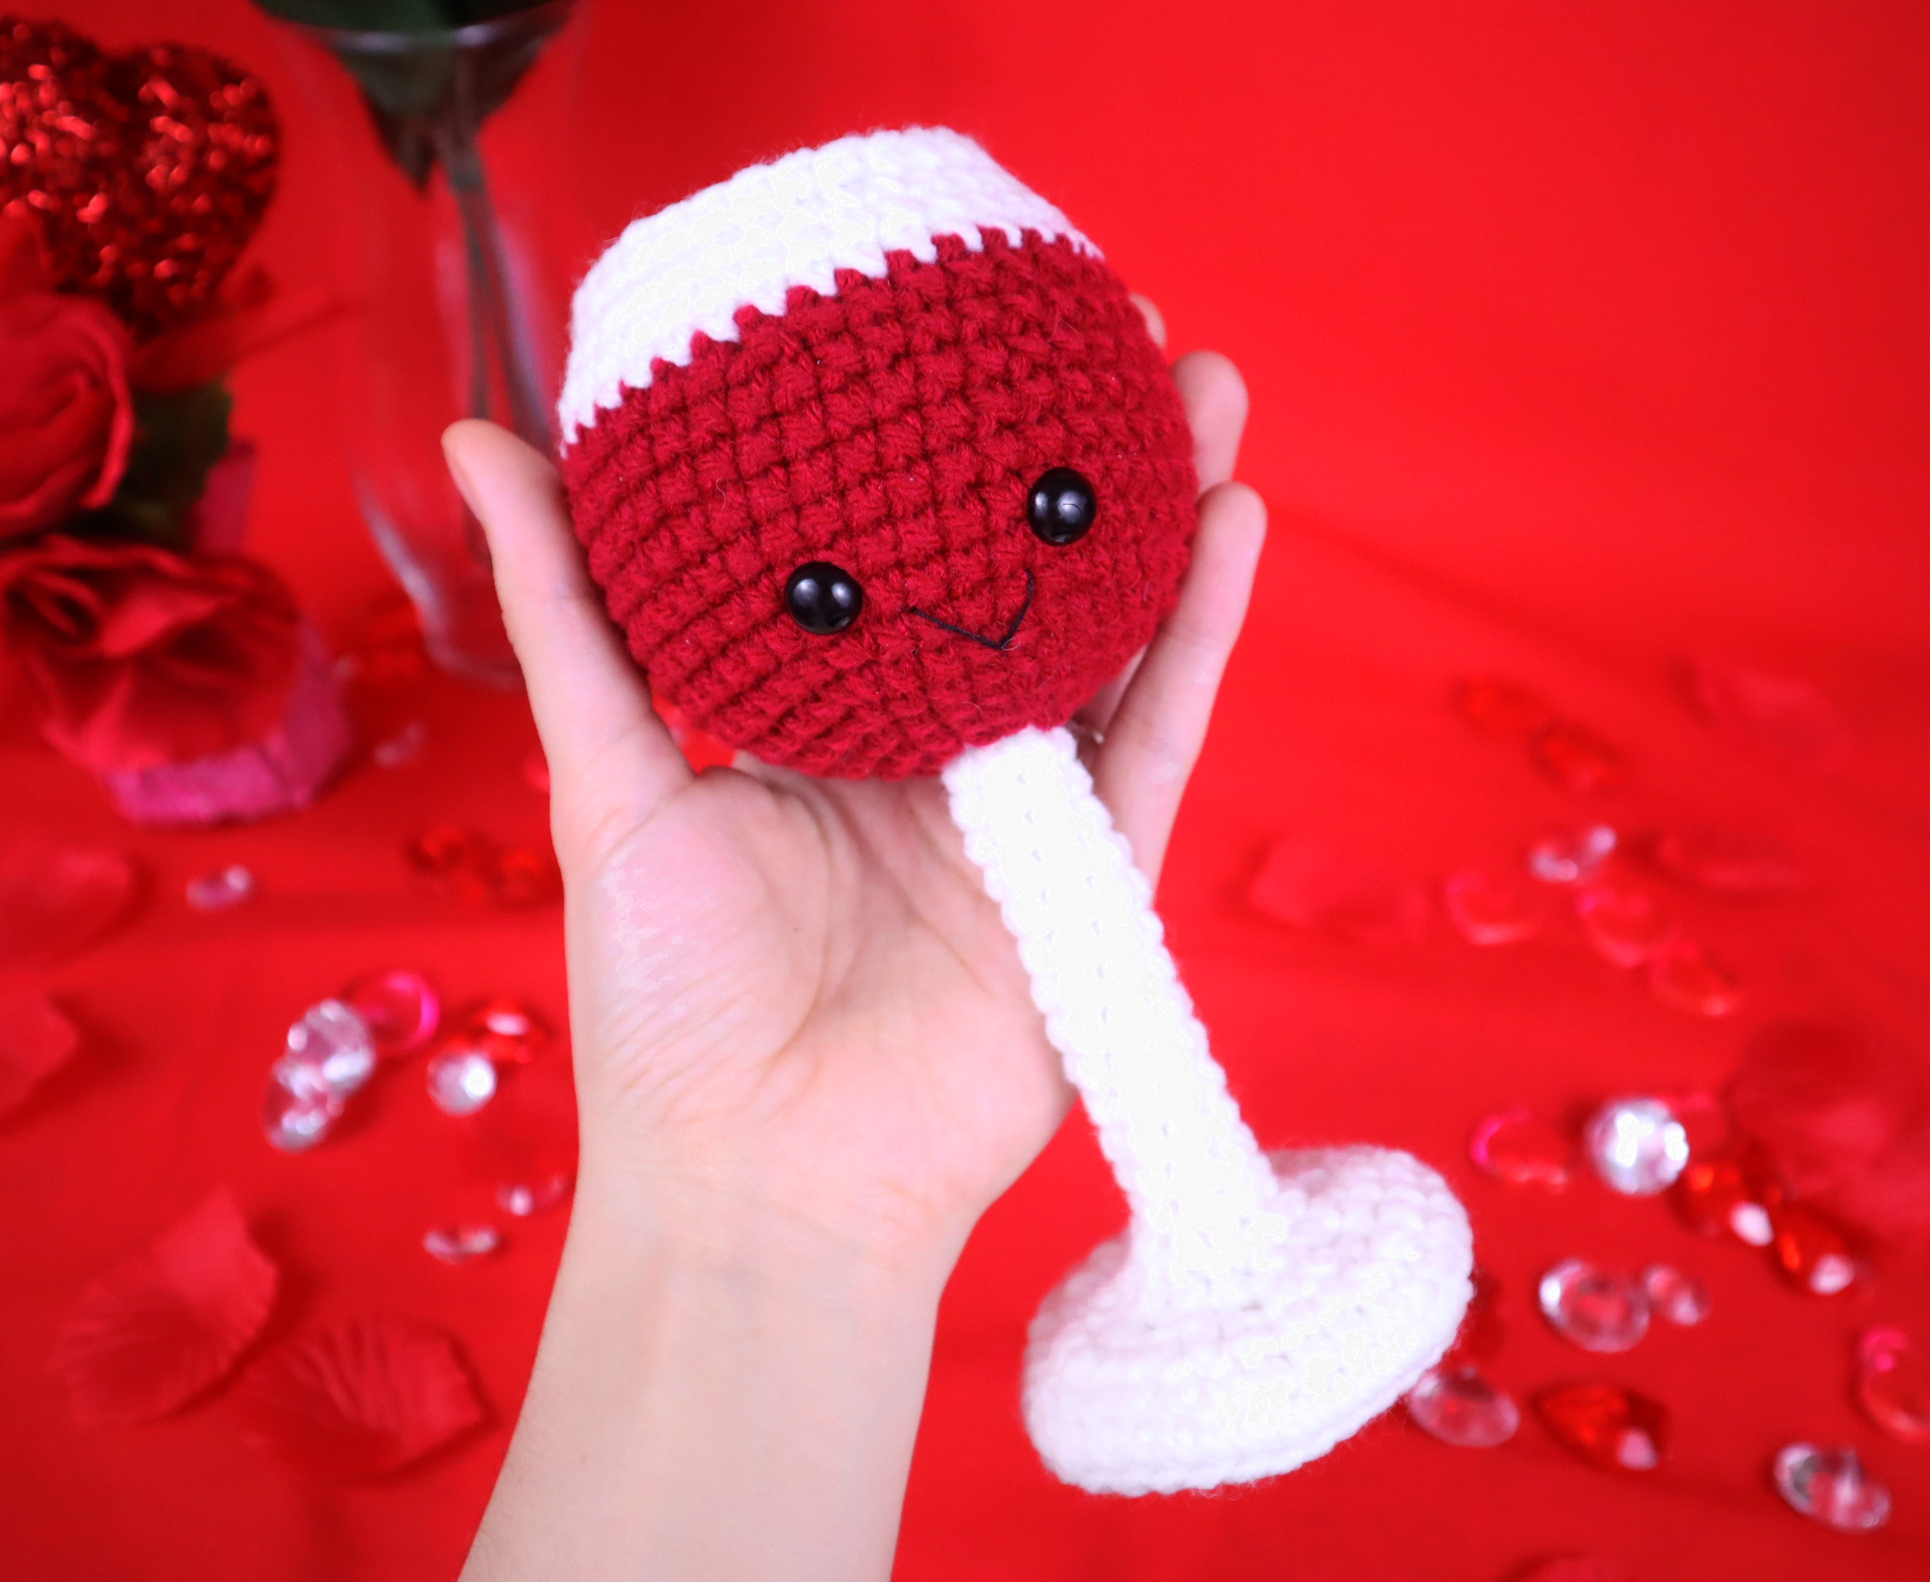
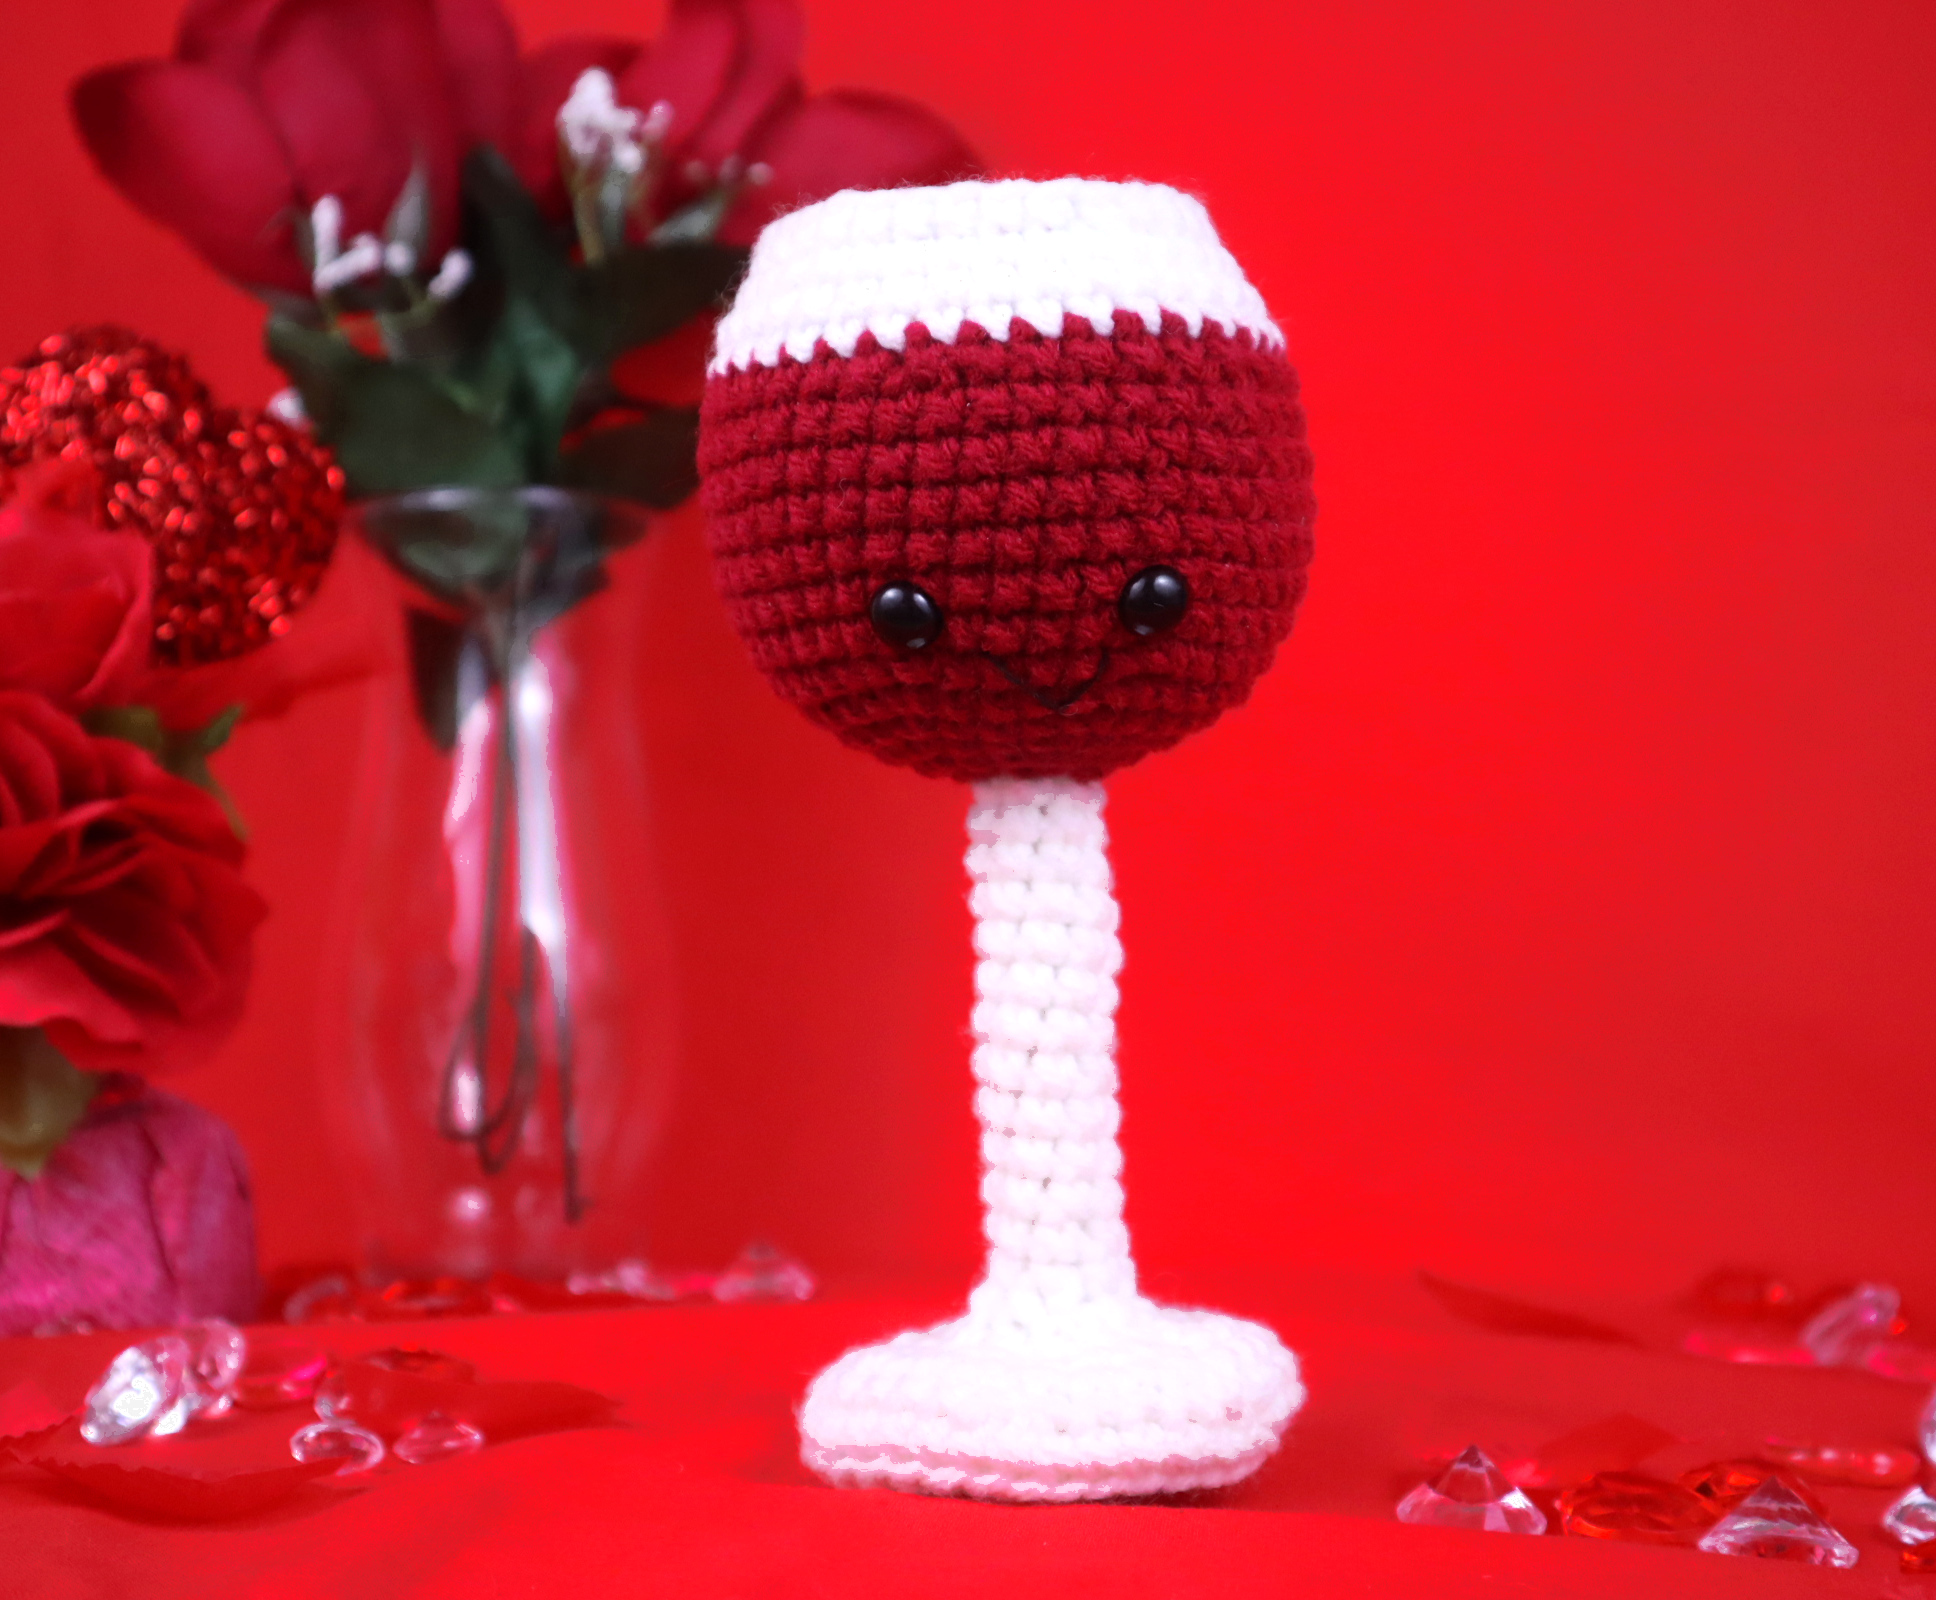
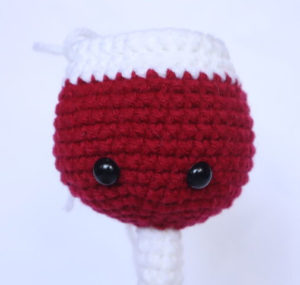
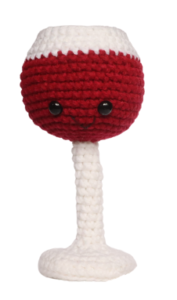
Hello! This pattern is made for Valentine’s Day, but obviously this wine glass can be made for anytime of the year 🙂 I hope you have fun with this pattern. If anything is unclear or you have questions, please just feel free to leave a comment at the very bottom of this post! I will be sure to get back to you ❤️
The funny thing about this pattern is I thought it would be so easy to create. However, I just couldn’t get the wine glass to look right. It wasn’t coming out right so I asked my crochet friends on my StringyDingDing forum for feedback. They helped give me feedback to make this wine look just right, so I hope you enjoy it!
Supplies:
• Yarn colors in size 4/Medium Yarn…
Deep Red and White
• 4mm Crochet Hook
• 10mm safety eyes
• Tapestry needle
• Scissors
• Stuffing
• Black Embroidery Thread
• Pipe cleaners or Dowel for stem of glass stability (optional)
Additional Information:
• Difficulty: Easy
• Pattern is in US Terms
• Getting Started
We will start by making the bottom of the wine glass and working our way up to the top. The wine glass is all made in one continuous piece, no sewing parts together required.
• Recommended Yarns:
Red Heart
Big Twist
I Love This Yarn!
Let’s Get Started!
We are staring by making the very bottom of the wine glass. The entire wine glass is crocheted in one continuous piece.
Wine Glass:
Start in White

Round 1: 6 Sc into a Magic Ring (6)
Round 2: *Inc* all around (12)
Round 3: *Inc, Sc* all around (18)
Round 4: *Inc, Sc 2* all around (24)
Round 5: *Inc, Sc 3* all around (30)
Round 6: *Inc, Sc 4* all around (36)
Round 7: In the BLO (Back Loop Only) *Sc* all around (36)
Round 8: In BOTH Loops, *Dec, Sc 4* all around (30)
Round 9: *Dec, Sc 3* all around (24)
Round 10: *Dec, Sc 2* all around (18)
Round 11: *Dec, Sc 1* all around (12)
Round 12: *Dec, Sc 1* all around (8)
Lightly stuff the bottom of the wine glass here. It looks big right now, but later we will sew this part down to be slimmer and stand firmer.
Round 13: *Dec* 1 time. Sc next 6 st (7)
In rounds 14-26 we will form the stem of the glass. To make the glass stand straight, add a dowel or a few pipe cleaners as you progress, then add stuffing firmly.
Round 14-26: *Sc* all around (7)
Round 27: Change to red. In the FLO Sc in the first st,*Inc* in the next 5 st, Sc in the last st (12)
Round 28: *Inc, Sc 1* all around (18)
Round 29: *Inc, Sc 2* all around (24)
Round 30: *Inc, Sc 3* all around (30)
Round 31: *Inc, Sc 4* all around (36)
Round 32: *Inc, Sc 5* all around (42)
Round 33: Sc in the next 17 st. Sc in the next st and add a different colored St marker to the Sc just made. This marks where to place the eye later. Sc in the next 5 st. Sc in the next st and add a different colored st marker to the Sc just made. Sc in the next 18 st (42)
Round 34-39: *Sc* all around (42)
Round 40: *Dec, Sc 5* all around (36)
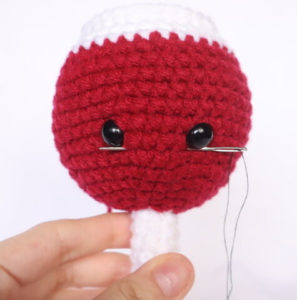
Add safety eyes in the marked areas now
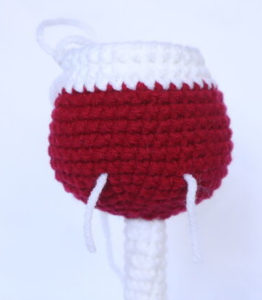
Round 41-43: Change to White. *Sc* all around (36)
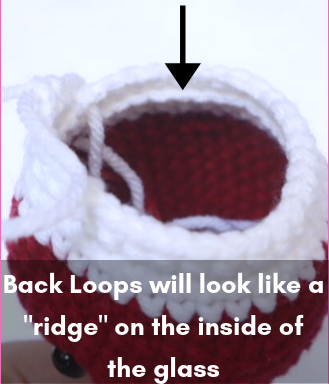
In the next round we work in the front loops only. We do this because later we will crochet in the 36 back loops that are remaining, in order to close off the top of the wine glass.
Round 44: In the FLO *Dec, Sc 8* 3 times, *Dec* 1 time, Sc in the next 4 st (32)
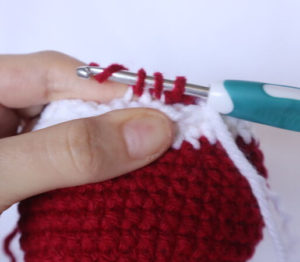
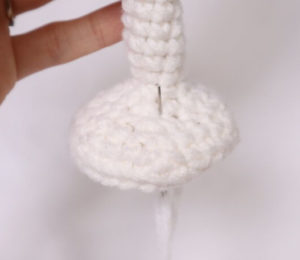
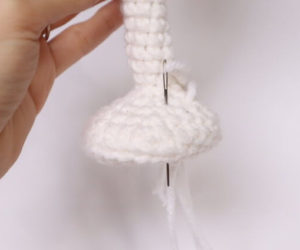
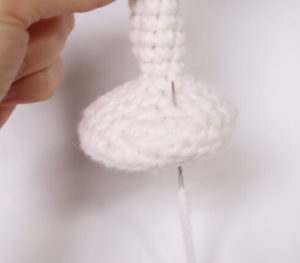
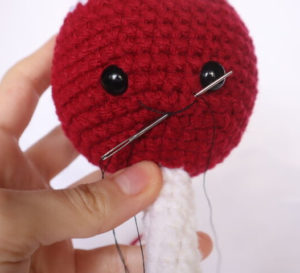
Finish off white yarn and SlSt to the next st to make the glass even. Fold the “lip” of the wine glass towards you. This will expose the back loops left in the previous round (Pic 1).
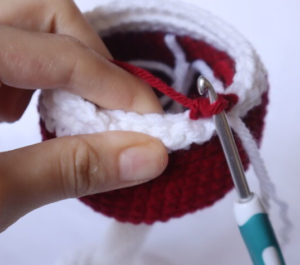
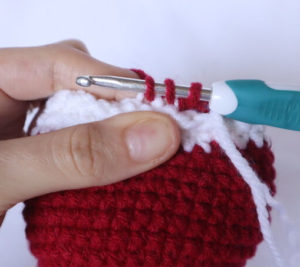
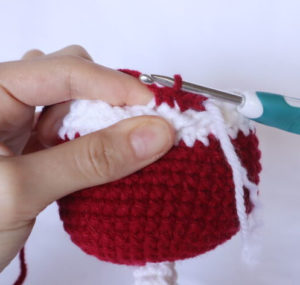
Insert hook into the back loop left in the previous round. We will have 36 back loops that we left from Round 44 (Pic 1). Attach red yarn. Follow the next round:
1.
Round 45: *Dec, Sc 4* all around (30)
As you can see we are using the back loops left behind (Pic 2-5). Stuff the top very firmly now (Pic 6). Add any additional stuffing after each round.
2. 3.
3.
4. 5.
5.
6.
Round 46: *Dec, Sc 3* all around (24)
Round 47: *Dec, Sc 2* all around (18)
Round 48: *Dec, Sc 1* all around (12)
Round 49: *Dec* all around (6)
Finish off and sew the remaining stitches closed.
Wine Bottle Assembly:
In White
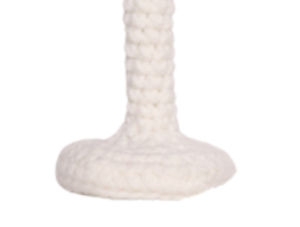
The bottom of the wine bottle may look too large and be unstable. This is an easy fix – we will sew the bottom in order to make it look better and sit correctly
Take a long piece of white yarn and insert it into a needle. Going through Round 8 (the base of the wine glass) insert needle from the bottom of the bottle to the top of the bottle (Pic 1). Reinsert needle into the next stitch and bring it to the bottom of the bottle (Pic 2). Repeat this process of going from the bottom to the top until you’ve done this all the way around (Pic 4). Tie ends of yarn into firm knots and bring into the crochet piece to hide. Cut any excess yarn.
1. 2.
2.
3. 4.
4.
Smile:
In Black Embroidery Thread
Insert needle one stitch over from the right eye, and pull needle out one stitch over from the left eye (Pic 1). Reinsert needle into the original insertion spot, and pull needle out at the middle area as shown making sure the needle lands ABOVE the thread (Pic 2). Reinsert needle into the same stitch, making sure the needle lands BELOW the thread this time. Pull needle out at original insertion spot (Pic 3). Tie both ends of thread into firm knots and pull into the crochet piece to hide. Cut any excess yarn.
1. 2.
2.
3. 4.
4.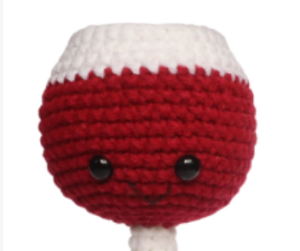
Done! If you made this wine I would LOVE to see! You can post a photo in the comments, or you can “try” it on Pinterest 🙂


7 Comments
This was super fun to make, especially since I liked the small challenges with the structural aspects! (I actually cut out and used the bottom of yogurt cups to flatten the base as well as top of the wine glass and a disposable wooden chopstick for the stem. 😛) I’ve had a lot of fun looking through and making several of your patterns for my friends/family! 🙂
Hi Stacy! Oh my goodness this is so cute! Your wineglass came out super awesome, the stem looks fantastic the way you did it! Hahaha it seems like the wine glass used some recycled items, which is really cool! I wish I had your idea and used a chopstick for the stem!
You did a really great job on both the wine glass and cupcake 😍 Thank you so much for sharing a picture of both! I am so happy to hear that you enjoy my patterns and that you even a lot of them your your friends and family! They are lucky to have you in their life, it’s so kind to hand make toys for the people you love 🥰❤️ I hope to keep bringing you lots more cute patterns in the future!
I would like to print out the free pattern but cannot. Can you help me?
Hi Carol! Thank you so much for your question 🙂 The free pattern isn’t able to be printed, but you can always purchase the PDF pattern here: https://stringydingding.com/product/wine-glass-amigurumi-pdf/
I hope you have fun making this wine glass! Please feel free to let me know if I can help answer any questions along the way 😍
Thank you! I’m new to amigurumi & your pattern was easy to follow. Instead of using a dowel in the stem, I taped 4 q-tips together & used that in the stem. Kathy
My friend – as real italian- loves Aperol Spritz and wished to receive one of my amigurumi. I can’t tell you how excited I got when I found your pattern. Thank you so much, with a slight color change it became the perfect present… and it was a lot of fun doing it! Looking forward for more of your patterns 🙂
Thank you for this cute pattern!