Purchase the printable PDF!

FROM JAN 24 2020 – FEB 24 2020
Join the StringyDingDing Membership to Unlock this PDF + the NEWEST amigurumi PDFS!

Supplies:
• Yarn colors in size 4/Medium Yarn…
Vase Color, Brown for Soil, Green, Yellow, Red, Purple
• 4mm Crochet Hook
•12mm safety eyes
•Tapestry needle
•Scissors
•Stuffing
Additional Information:
Difficulty: Experienced
Pattern is in US Terms
Getting started…
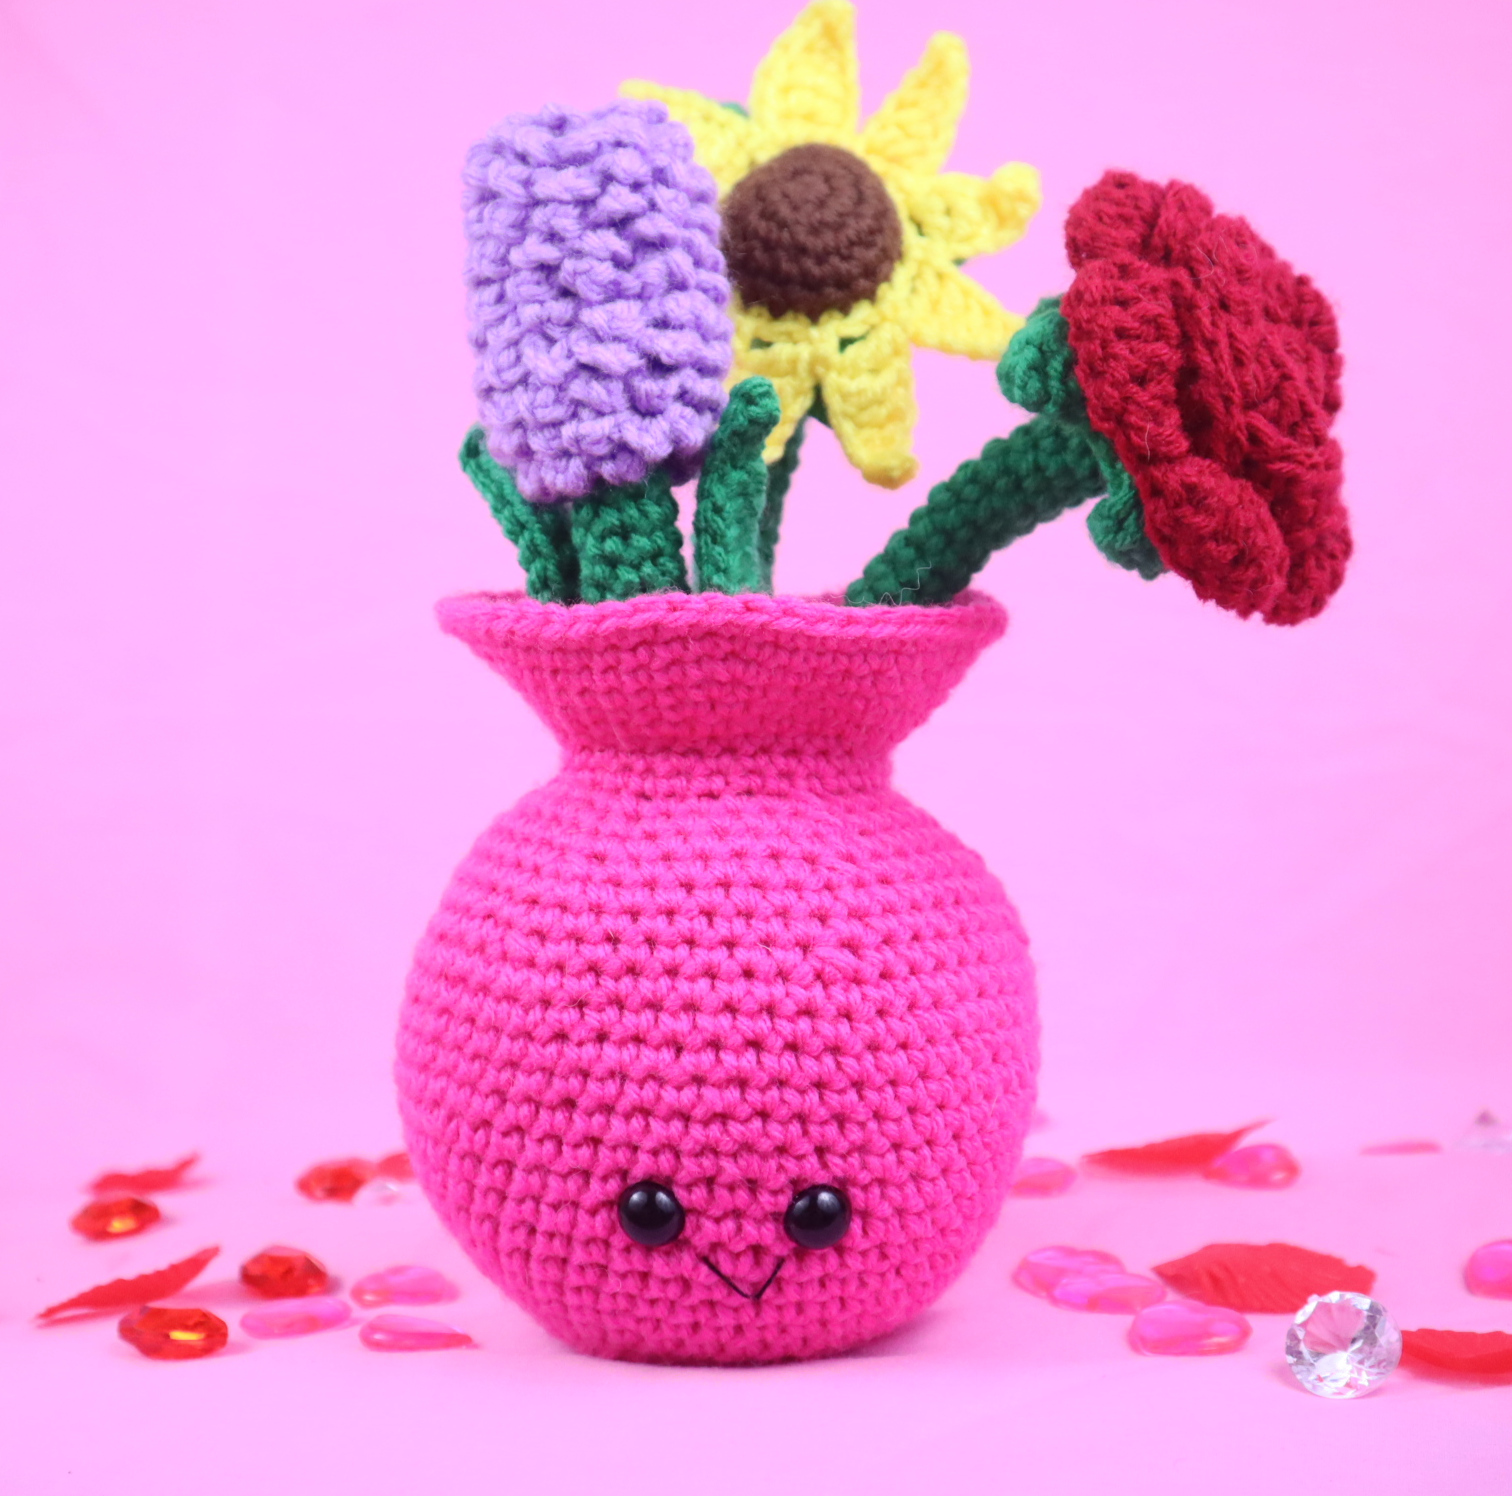
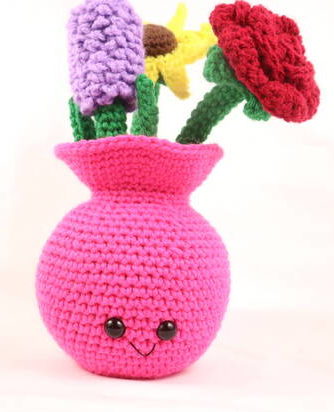
We will first make the vase! To do this, we start at the bottom and work our way up. After this, we will form the soil. Then, we will make the rose, sunflower, and lavender. Last, we will sew the flowers to the vase!
Recommended Yarns:
JoAnn Fabric’s “Big Twist” Yarn
Red Heart Super Saver Yarn
Hobby Lobby’s “I Love This Yarn!”
Overview:
We will start by making the bottom of the vase and work our way up. A little before finishing the top of the vase, we will stop the actual vase and attach brown yarn to make soil. After this we will go back to making the vase!
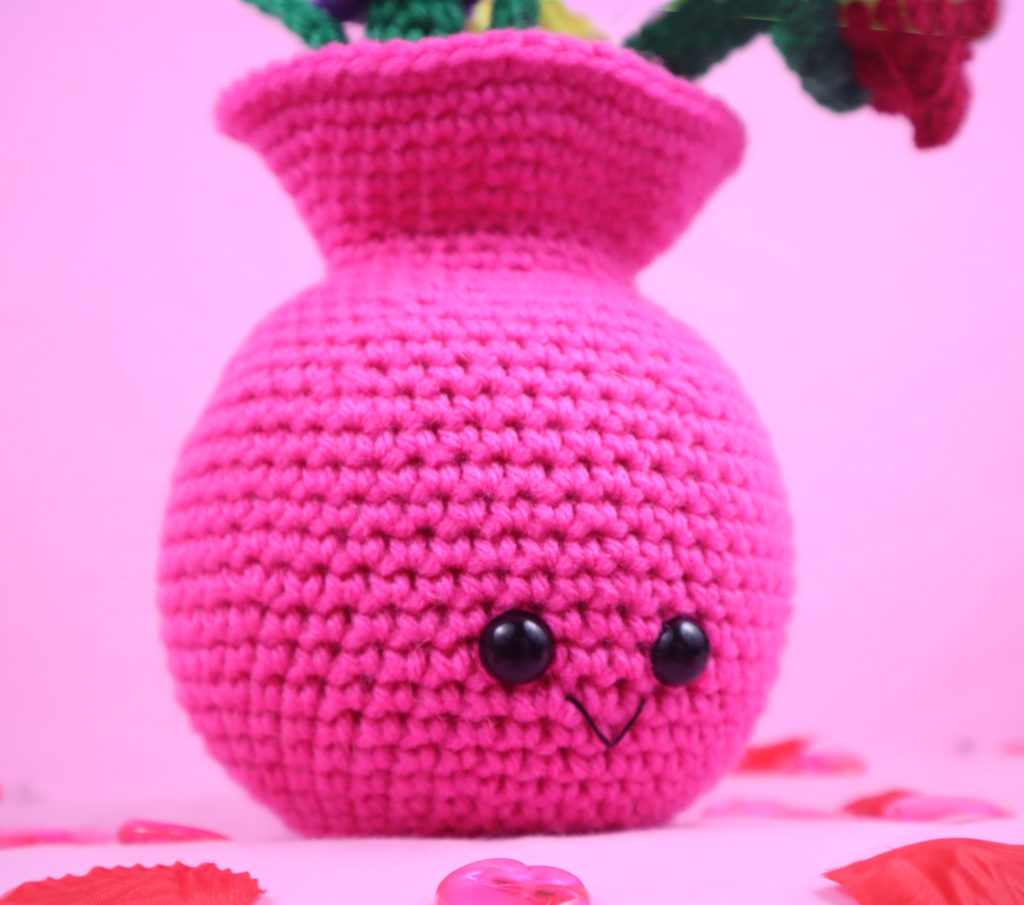
Vase:
Start in Vase Color
Round 1: 6 Sc into a Magic Ring (6)
Round 2: *Inc* all around (12)
Round 3: *Inc, Sc* all around (18)
Round 4: *Inc, Sc 2* all around (24)
Round 5: *Inc, Sc 3* all around (30)
Round 6: *Inc, Sc 4* all around (36)
TIP: I highly recommend using this method for making the vase sit flat! Place Round 6 over a piece of cardboard. Trace around the circle onto the cardboard. Then, cut out the circle. Place this cardboard circle into the vase in Round 20
Round 7: In the BLO, Sc all around (36)
Round 8: In BOTH Loops, Sc all around (36)
Round 9: *Inc, Sc 5* all around (42)
Round 10-11: *Sc* all around (42)
Round 12: *Inc, Sc 6* all around (48)
Round 13-14: *Sc* all around (48)
Round 15: *Inc, Sc 7* all around (54)
Round 16-20: *Sc* all around (54)
Round 21: *Dec, Sc 7* all around (48)
Round 22: In BOTH Loops, Sc all around (48)
Round 23: *Dec, Sc 6* all around (42)
Round 24: *Dec, Sc 5* all around (36)
Round 25: *Dec, Sc 4* all around (30)
Round 26: In the FLO, Sc all around (30)
Round 27-28: In BOTH Loops, *Sc* all around (30)
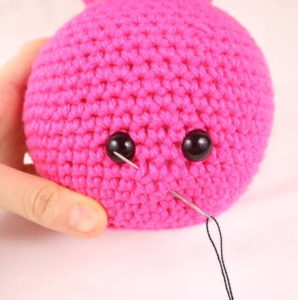
Place eyes between Round 14 & 15, 4 stitches apart. Stop here! Don’t finish off. Continue on the “dirt” section, we will do Round 29-33 later.
Round 29: *Inc, Sc 5* all around (36)
Round 30: *Inc, Sc 6* all around (42)
Round 31: *Inc, Sc 7* all around (48)
Round 32-33: *Sc* all around (48)
Finish off.
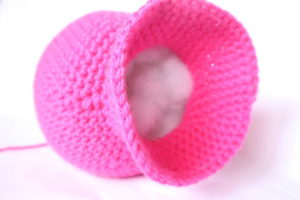
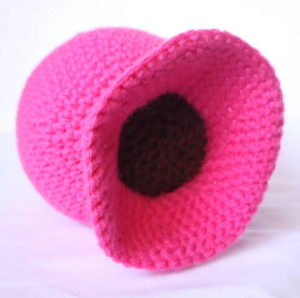
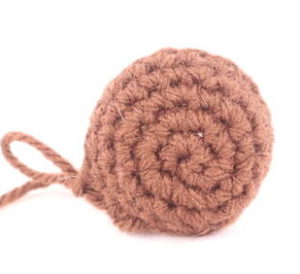
We will briefly stop making the flower pot here. Now we will make the dirt using the back loops left in Round 26.
Dirt:
Use Brown Yarn
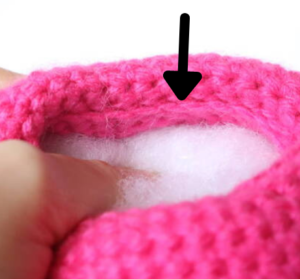
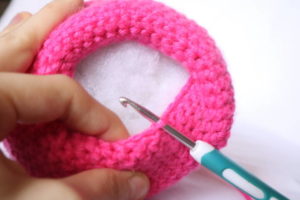
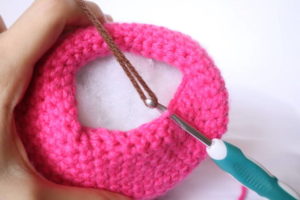
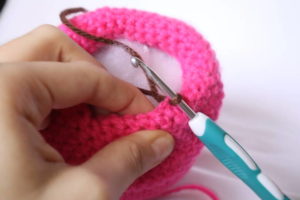
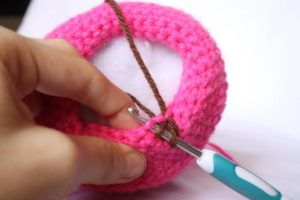
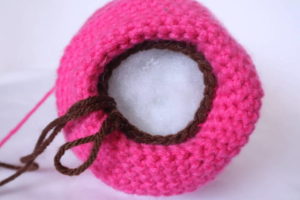
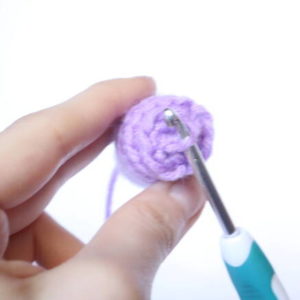
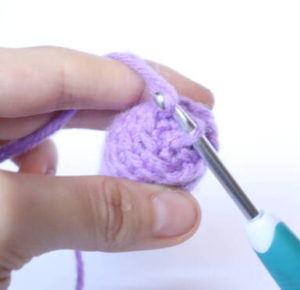
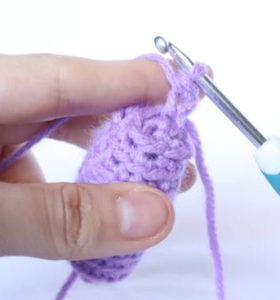
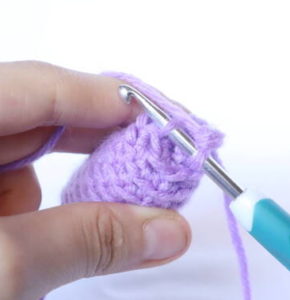
Stuff the vase firmly now (Pic 1). Fold the “lip” of the vase towards you. This will expose the back loops that were left in Round 26. These back loops will look like a ridge (Pic 2). Place your hook into that back loop (Pic 3). Yarn over with brown yarn (Pic 4-5). Continue on to Round 29.
1. 2.
2.
3. 4.
4.
5. 6.
6.
7. 8.
8.
Round 1: *Dec, Sc 3* all around (Pic 7, Stitch Count: 24)
Round 2: *Dec, Sc 2* all around (18)
Round 3: *Dec, Sc 1* all around (12)
Round 4: *Dec* all around (6)
Finish off, leaving a tail for sewing. Sew the remaining stitches closed (Pic 8).
Continue finishing the vase by going back to the vase section. Start doing the vase again on Round 29.
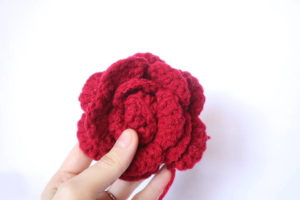
Rose:
In Red Yarn
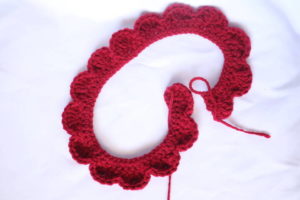
Row 1: Ch 80. Dc in the 3rd Ch from the hook. Dc in the next 77 ch.
Row 2: Ch 2 and turn. Trc in the next Ch, Repeat *4 Trc in the next ch, Trc in the next st, SlSt in the next 2 ch, Trc in the next st* 15 times. Trc 4 times in the next st, Trc in the last st (78)
Finish off now, leaving a long tail for sewing (about 8″).
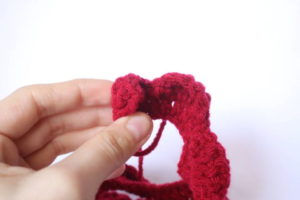
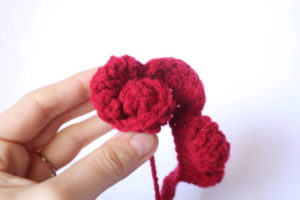
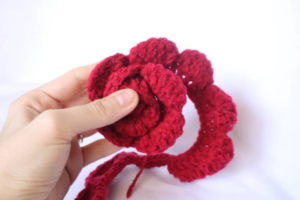
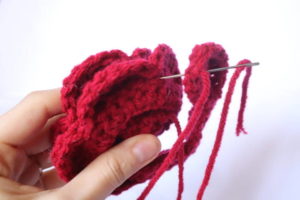
You will have a long strip (Pic 1). Take one end and fold it, making sure the wrong side is facing you and the right side is facing away from you (Pic 2). Continue folding the flower around clockwise (Pic 3-5). Place the long tail of yarn onto a needle. Sew the flower in place, going from the outside of the flower, to the middle inside of the flower, back to the other outside of the flower (Pic 6). Once sewed together, tie the end into a firm knot. Bring into the flower to hide, cut excess yarn.
1. 2.
2.
3. 4.
4.
5. 6.
6.
To make the rose stem follow the section after the Sunflower.
Sunflower
The sunflower is made in 2 pieces that we will crochet together, then form the petals. First, make the brown piece of the sunflower.
Sunflower Front:
In Brown Yarn
Round 1: 6 Sc into a Magic Ring (6)
Round 2: *Inc* all around (12)
Round 3: *Inc, Sc* all around (18)
Round 4-5: *Sc* all around (18)
Finish off.
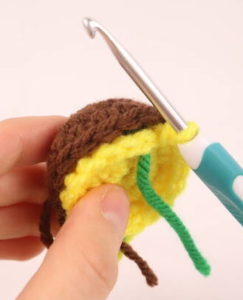
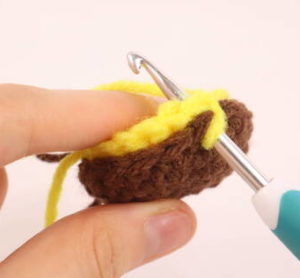
Sunflower Back:
In Yellow Yarn
Round 1: 6 Sc into a Magic Ring (6)
Round 2: *Inc* all around (12)
Round 3: *Inc, Sc* all around (18)
Round 4-5: *Sc* all around (18)
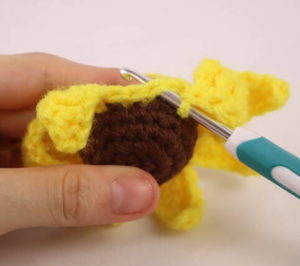
Round 6: Place the yellow and brown pieces together making sure the stitches align (Pic 1). Going through BOTH the stitches of the yellow piece and the brown piece, *Sc* in the next 18 stitches (18). Tip: Make sure the brown side is facing you, and insert your hook going from the brown side to the yellow side (Pic 2) This will ensure the stitches show on the right side.
1. 2.
2.
3k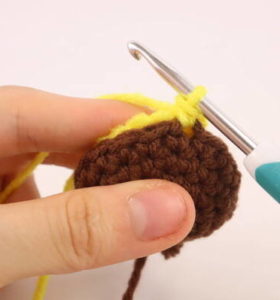
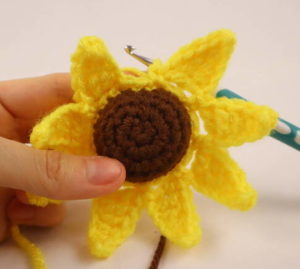
Round 7: Repeat *Ch 7, Sc in the 2nd Ch from the hook, Sc in the next Ch, Dc in the next 2 ch, Trc in the next 2 ch. Skip the next stitch on the round, Sc in the next st* 9 times.
1.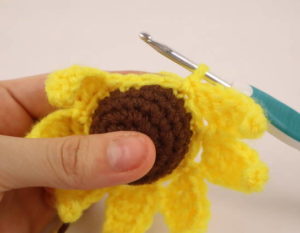 2.
2.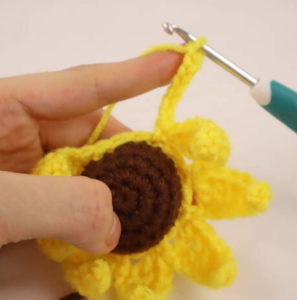
3.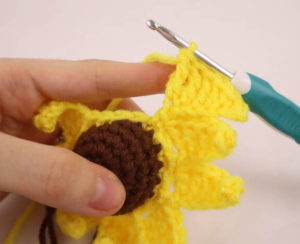 4.
4.
5. 6.
6.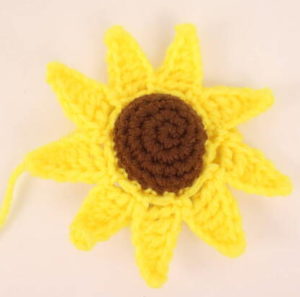
Finish off, and weave in any ends. Now let’s make the stem!
Rose & Sunflower Stem:
Use Green Yarn
Round 1: 6 Sc into a Magic Ring (6)
Round 2-16: *Sc* all around (6)
If you’re making a sun flower, you may want a longer stem. If you do, *Sc* all around for an extra 5 rounds. Continue on to the next round.
Round 17: *Inc* all around (12)
Round 18: *Inc, Sc* all around (18)
Round 19: Sc in the first st. Repeat *Sc in the next st, Ch 5. Sc in the 2nd Ch from the hook, Dc in the next ch, Trc in the next 2 ch. Now skip the next 2 stitches on the stem, Sc in the next st* 4 times. Sc in the last st (26)
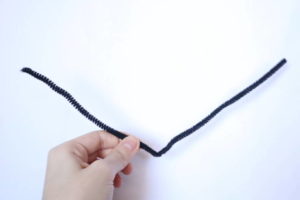
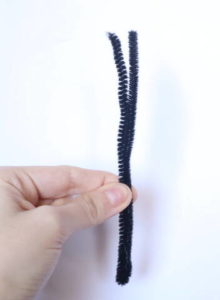
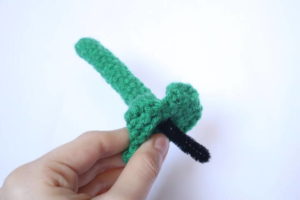
Finish off, leaving a long tail for sewing. Take a pipecleaner and fold it in half (Pic 1-2). Place it next to the stem, if the pipecleaner needs to be shorter simply fold it even more. Place it into the stem (Pic 3). (Insert 2 pipecleaners for the rose, or just 1 pipecleaner for the sunflower.)
1. 2.
2.
3. 4.
4.
Pin the rose or sunflower to the stem as shown (Pic 4). Sew on using the tail of yarn from the stem.
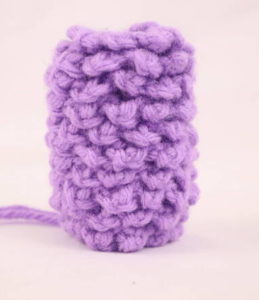
Lavender:
Use Purple Yarn
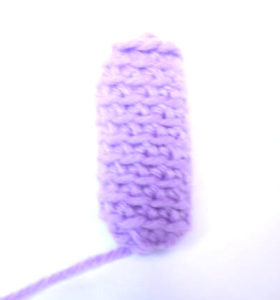
Round 1: 6 Sc into a Magic Ring (6)
Round 2: *Inc* all around (12)
Round 3-10: In the BLO, *Sc* all around (12)
Stuff here
Round 11: *Dec* all around (6)
Finish off and leave a tail for sewing. Sew closed.
To make the texture of the lilac, we will work in the front loops we left. That’s what the “ridges” are on the lavender! Place your hook under the first front loop (Pic 1). Repeat *Ch 2, Sc in the 2nd Ch from the hook, Sc in the next st on the lavender* all around (Pic 6). Finish off and weave in any ends.

Lavender Stem:
In Green Yarn
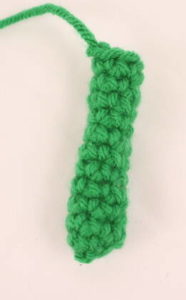
Round 1: 6 Sc into a Magic Ring (6)
Round 2-11: *Sc* all around (6)
Finish off, leaving a long tail for sewing. Take a pipecleaner and fold it in half. Place it next to the stem, if the pipecleaner needs to be shorter simply fold it even more. Place it into the stem.
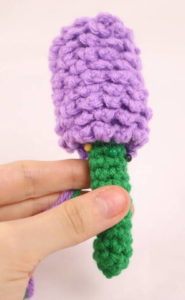
Pin the lavender to the stem and sew on using the tail end of yarn from the stem.
Lavender Leafs: (Make 2)
In Green Yarn
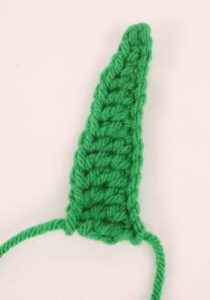
Row 1: Ch 14. Sc in the 2nd Ch from the hook. Sc in the next 2 st, Dc in the next 4 st, Trc in the next 6 st (13)
Finish off, leaving a long tail for sewing. We will pin the leafs next to the lavender after sewing the lavender to the dirt.
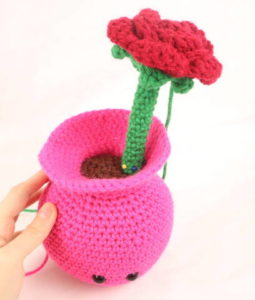
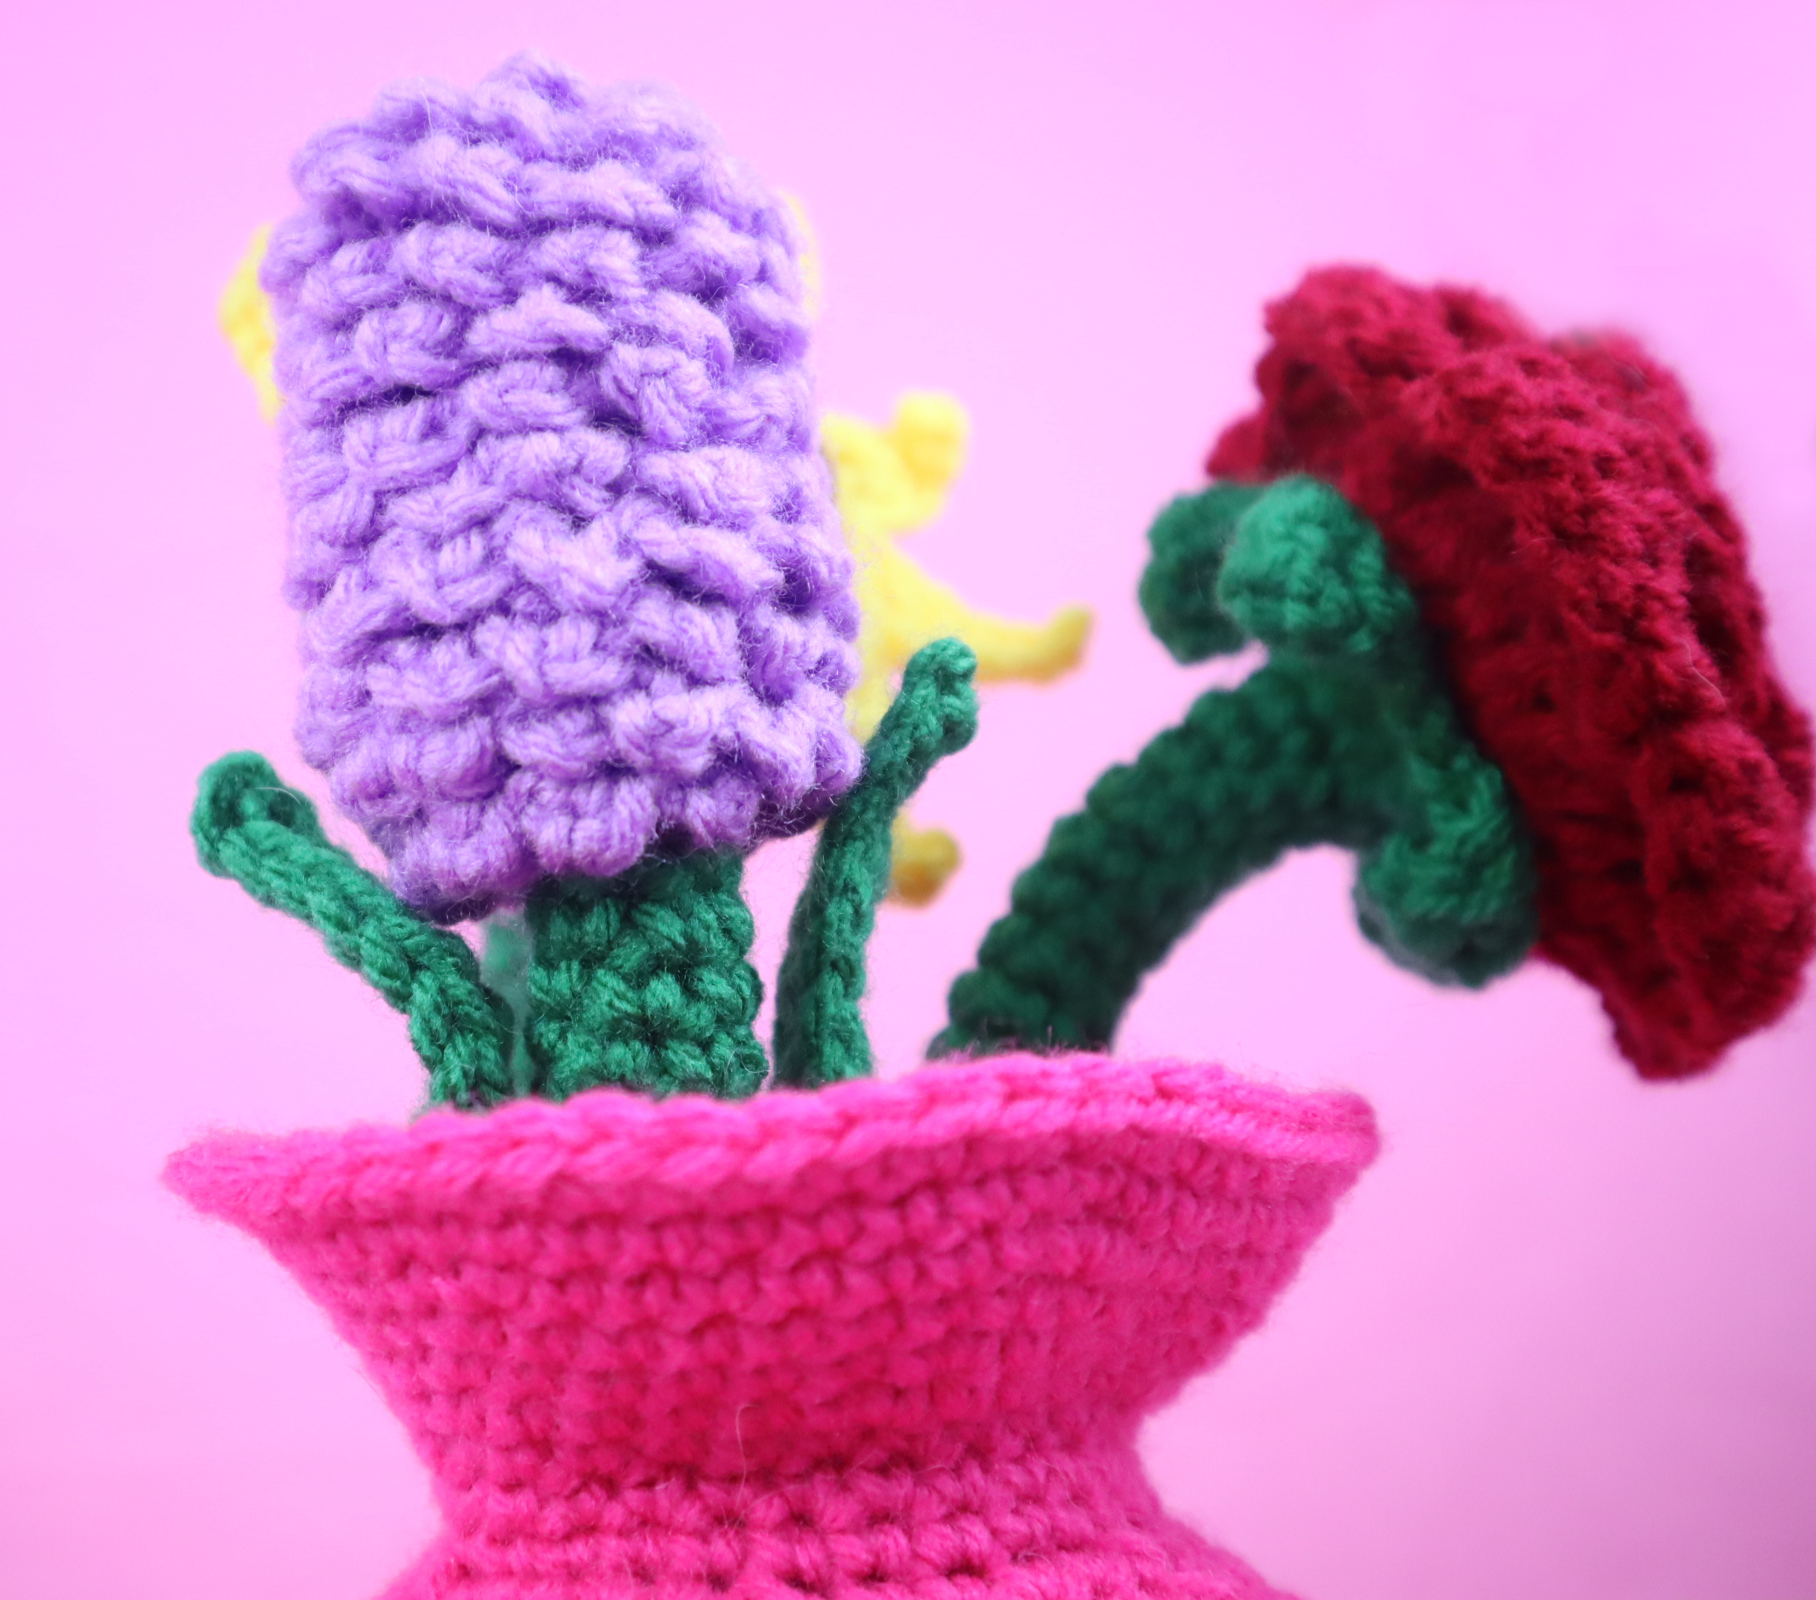
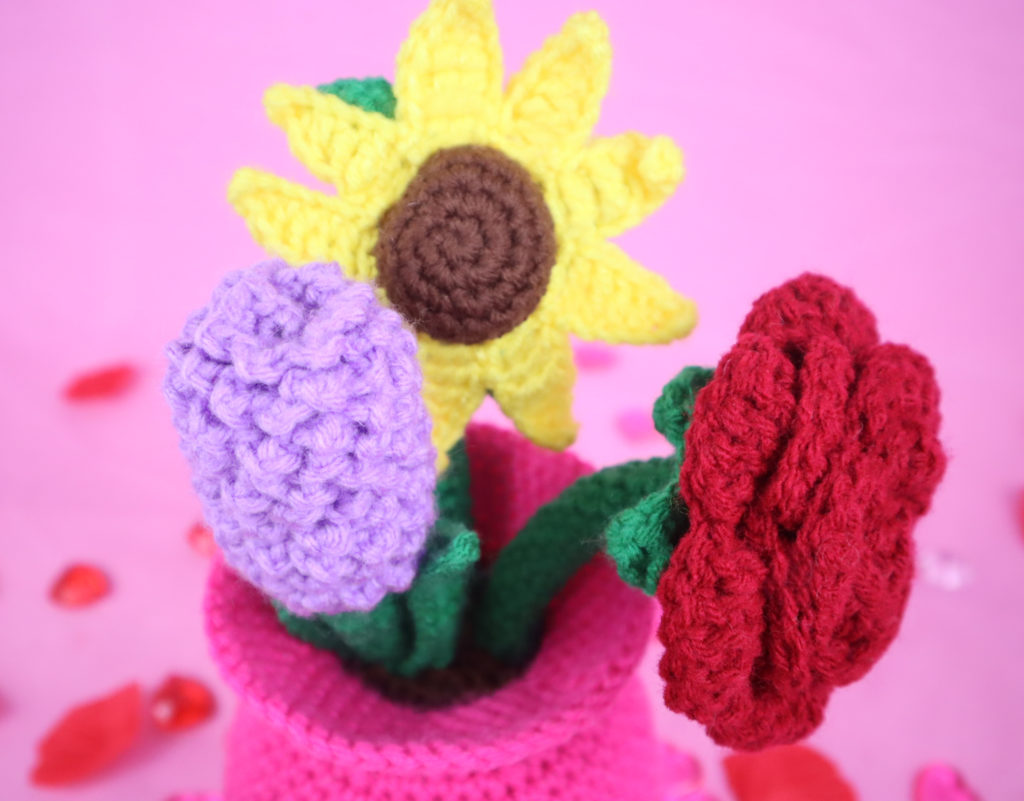
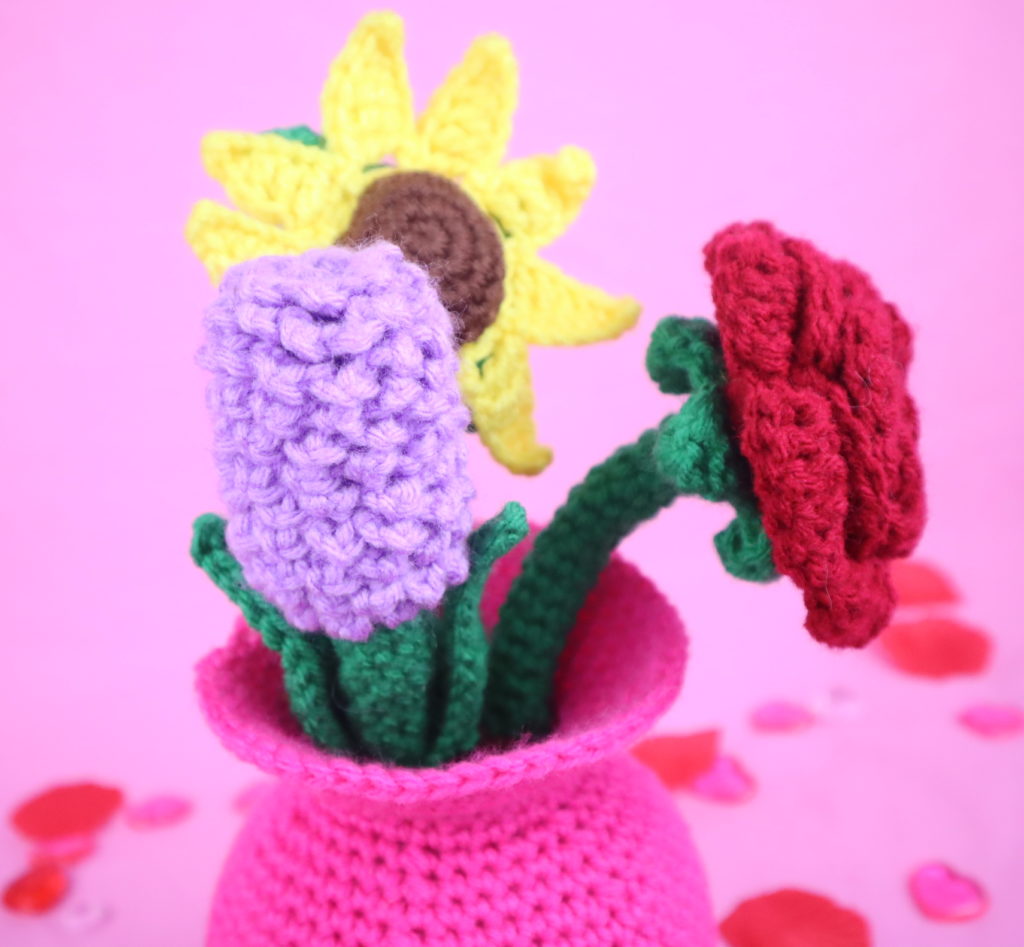
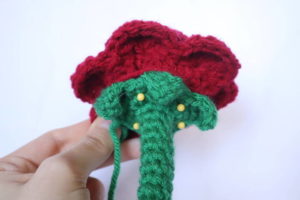
Pin the flowers on as shown. I pinned the rose on the right, the lavender on the left, and the sunflower at the back. Sew on.
Pin the lavender stems next to the lavender and sew on.
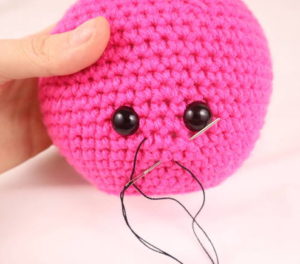
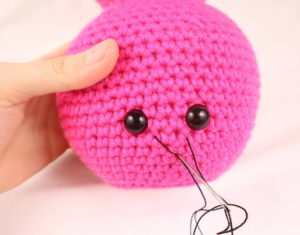
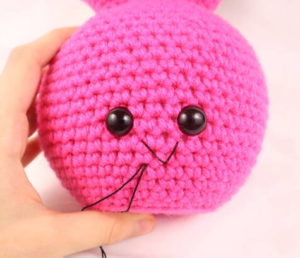
Smile:
In Black Thread
Insert needle with thread going from the middle area and bring it out diagonal and to the left (Pic 1). Reinsert needle into the same middle area and bring out diagonal and to the right (Pic 2). Reinsert into the middle area (Pic 3). Tie both tail ends of thread into a firm knot and bring into the vase to hide. Cut any excess thread.
1. 2.
2.
2. 4.
4.
Done! If you made this amigurumi I would LOVE to see! You can post a picture in the comments underneath this post, or you can “try” it on Pinterest.


10 Comments
How do we print this Free pattern. Thank you
Hi Pauline! ❤️ If you’d like to print the pattern I have a very well put together PDF you can purchase! You can find that here: https://stringydingding.com/product/flower-vase-amigurumi-pdf/
Fab pattern thankyou !
Oh my gosh this is sooo cute, Julie! Your flowers came out so beautiful, and I love how happy your flower pot looks!
Thank you so much for sharing a picture with me, I am so impressed with your work! ❤️ You did such a great job 🙂
Thank you for your amazing patterns!! I enjoy making them so much!!
Thank so much 😘😘
Thank you for really good patern, easy to follow and result is amazing.
Pls send a video that how to knit it
I truly enjoyed making this!
It was so much fun that I added a heart balloon.
Thank you so much!
Cute and easy pattern. Thank you for the pattern 😊