
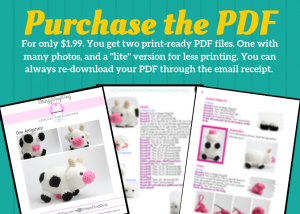
Purchase the PDF version here
Supplies:
4mm crochet hook, 4/Medium weight yarn in white, black, pink, and tan. 10mm safety eyes, black embroidery thread, tapestry needle, scissors, and stuffing.
Additional Information:
Difficulty: Easy
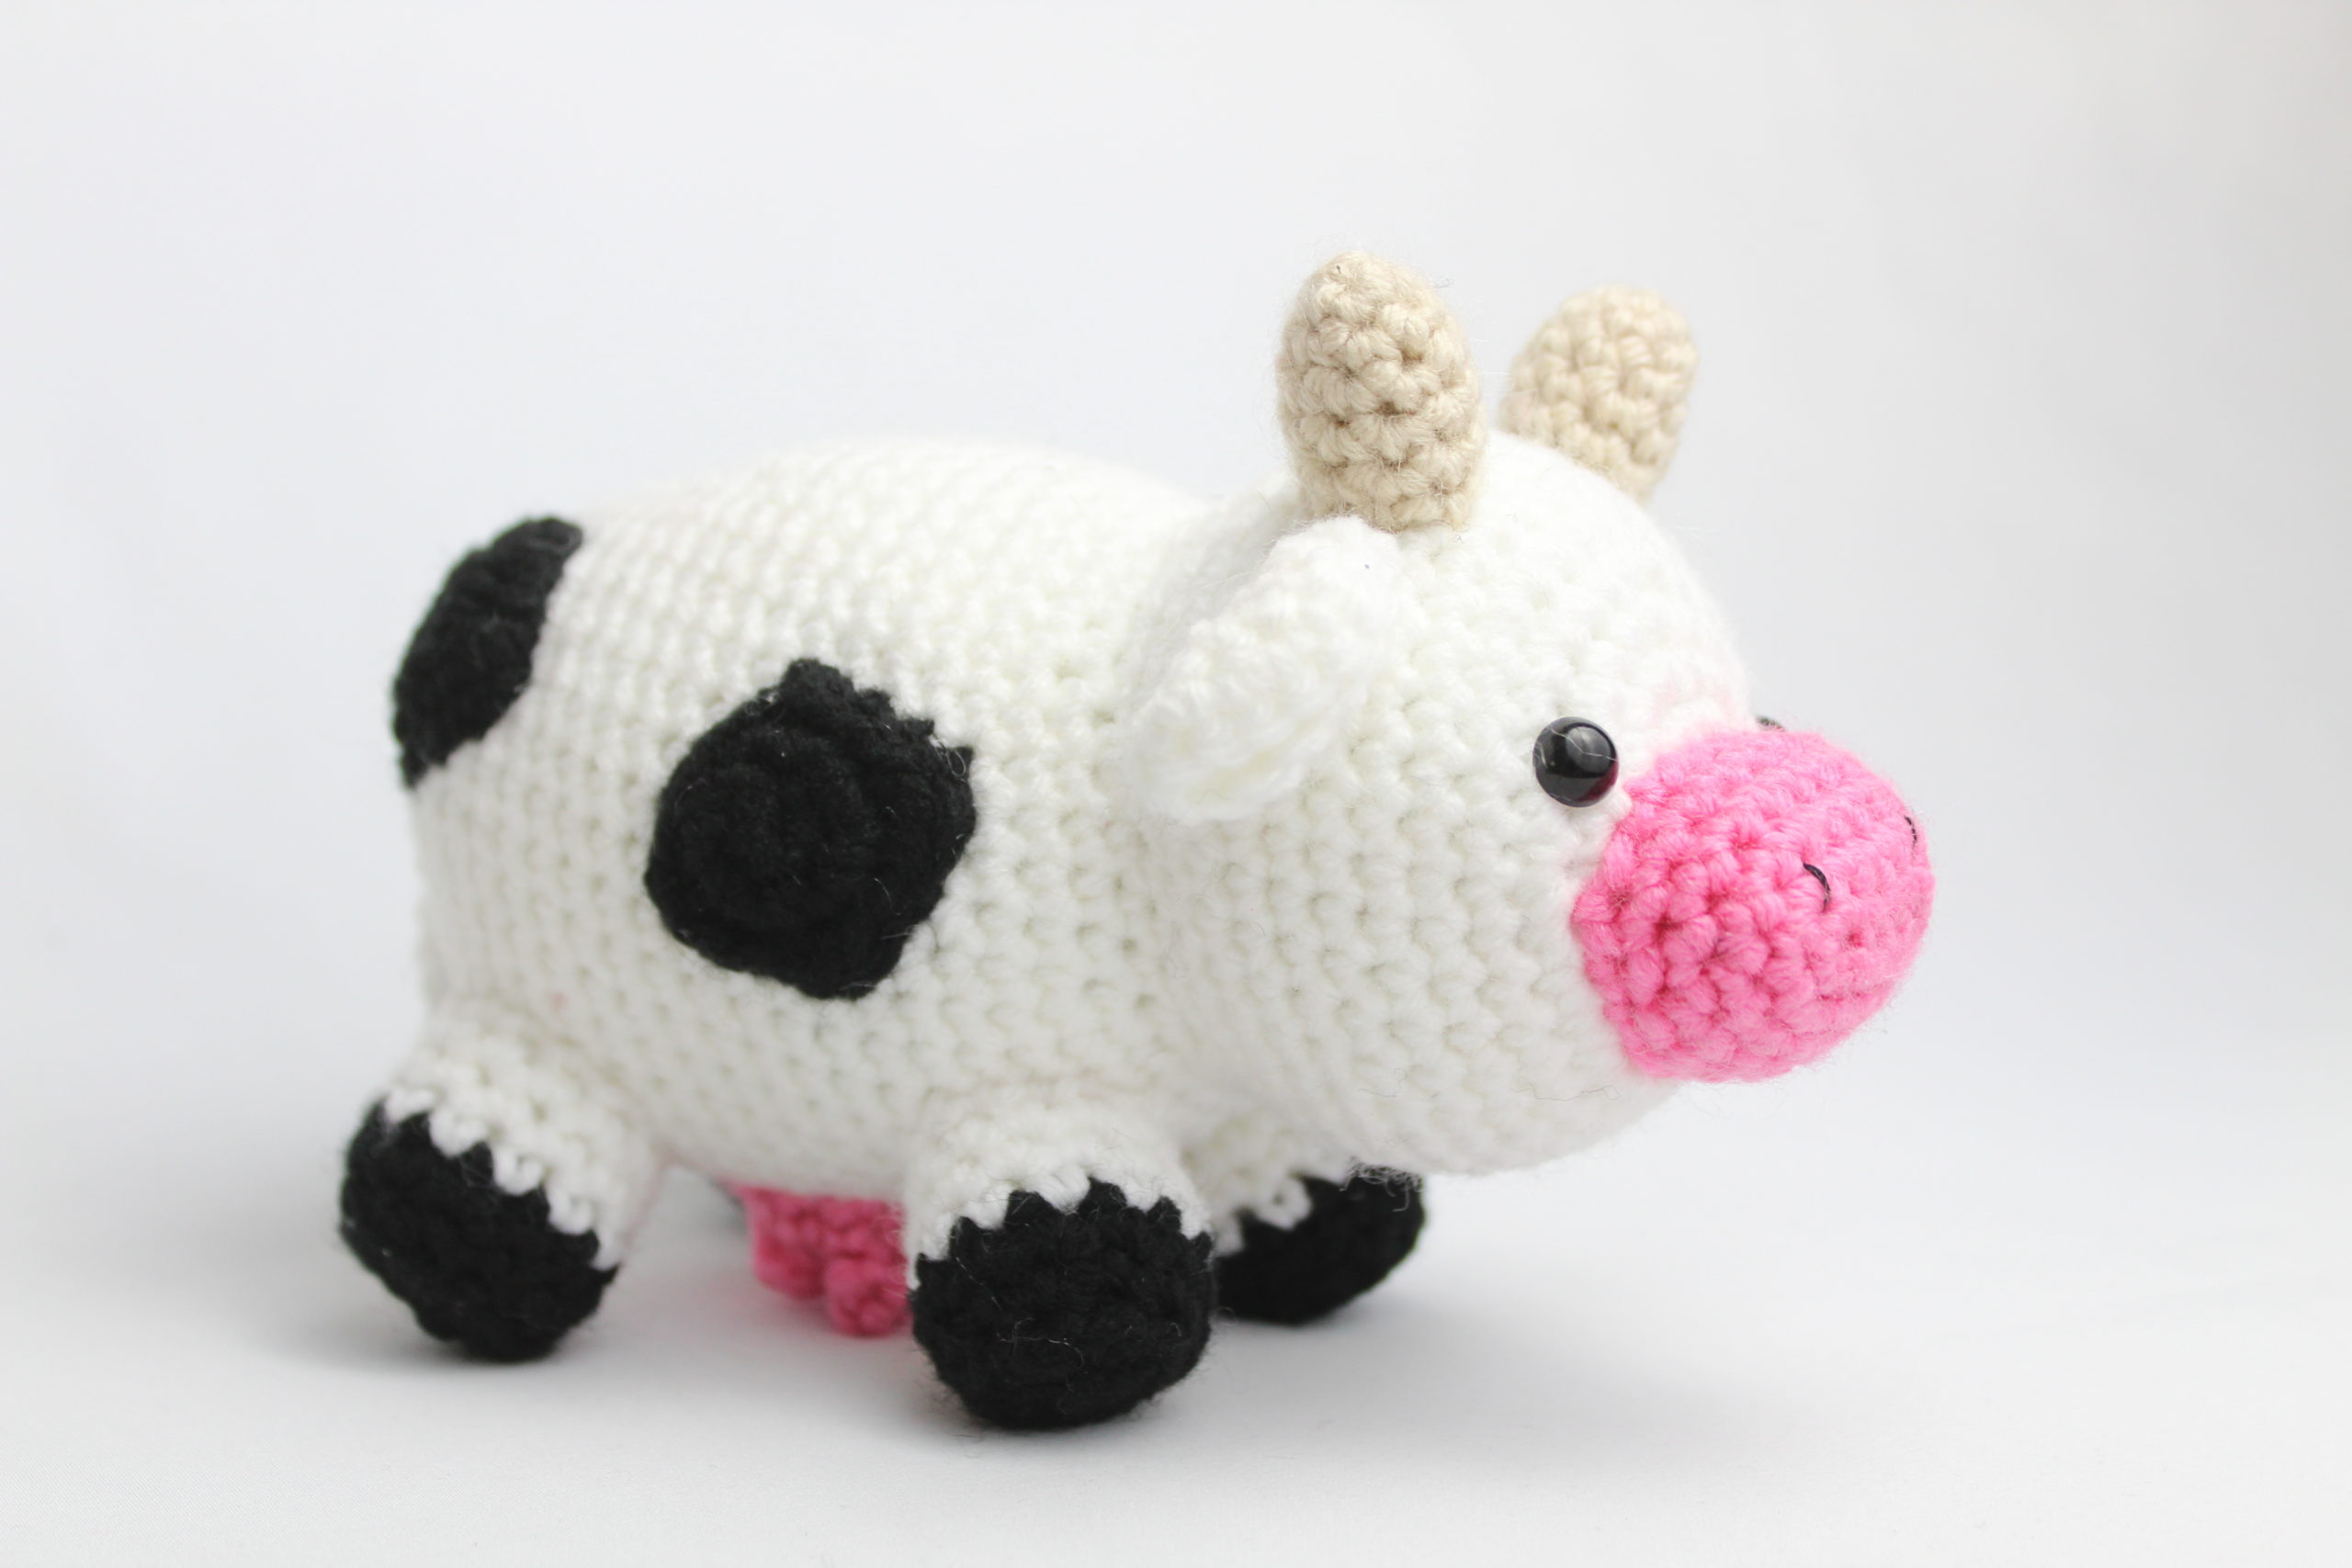
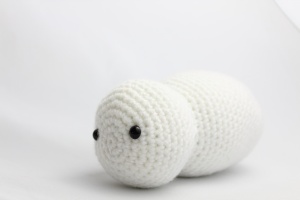
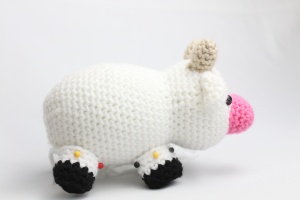
The head and body are one piece. We start by making the head, which works into the body. Then we create the face pieces and assemble them. After this, we make the limbs and utter, and then the cow spots, and tail.
Head:
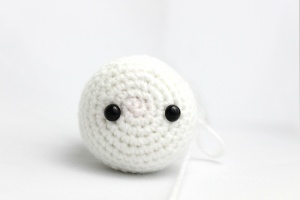
In White
Round 1: 6 Sc in Magic Ring (6)
Round 2: *Inc* all around (12)
Round 3: *Inc, Sc* all around (18)
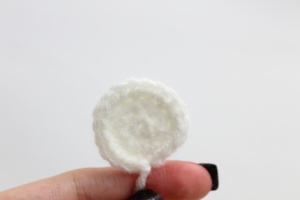
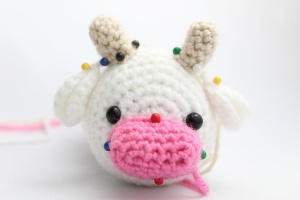
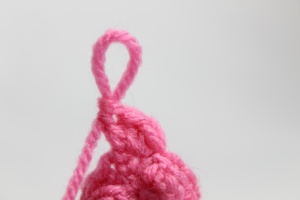
Round 4: Inc in next St, Sc in next 2 St, Inc in next St, Sc in next st. Sc in next St and add different colored St marker to Sc just made. This marks where to place the eye. *Inc in next St, Sc in next 2 St* 2 times, Inc in next St, Sc in next St, Sc in next St and add different colored St marker to Sc just made. Inc in next St, Sc in last 2 St (24)
Round 4 Pictured Below
Round 5: *Inc, Sc 3* all around (30)
Round 6: *Inc, Sc 4* all around (36)
Round 7-13: *Sc* all around (36)
Round 14: *Dec, Sc 4* all around (30)
Round 15: *Dec, Sc 3* all around (24)
Round 16: *Inc, Sc 3* all around (30)
Round 17: *Inc, Sc 4* all around (36)
Round 18: *Inc, Sc 5* all around (42)
Add in safety eyes. Stuff head here.
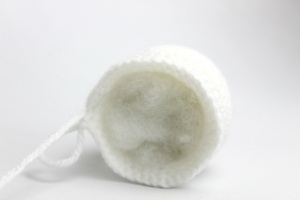
Round 19-34: *Sc* around (42)
Round 35: *Dec, Sc 5* all around (36)
Round 36: *Dec, Sc 4* all around (30)
Round 37: *Dec, Sc 3* all around (24)
Round 38: *Dec, Sc 2* all around (18)
Stuff here.
Round 39: *Dec, Sc* all around (12)
Round 40: *Dec* all around (6)
Finish off and add any additional stuffing. Sew closed.
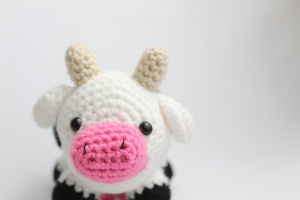
Nose:
In Pink

Round 1: Ch 5
Round 2: Sc in 2nd Ch from hook. Sc in same St, Sc in next 2 St, Inc 2 times in next St. Turn to the other side of the Ch, Sc in next 2 St, Inc in last St (12)
Round 3: *Inc* in next 2 St, Sc in next 3 St, *Inc* in next 3 st, Sc in next 3 St, Inc in last St (18)
Round 4-6: *Sc* all around (18)
Finish off and pin to the head.
Ears: (Make 2)
In White
Round 1: 6 Sc in Magic Ring (6)
Round 2: *Inc* all around (12)
Round 3: *Inc, Sc* all around (18)
Finish off. Bend the very bottom part of the ear in half and sew it together. Pin to the top of the head.
Horns: (Make 2)
In Tan
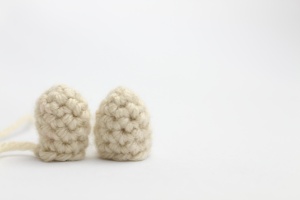
Round 1: 4 Sc in Magic Ring (4)
Round 2: *Inc* all around (8)
Round 3-6: *Sc* all around (8)
Finish off and pin next to the ears.
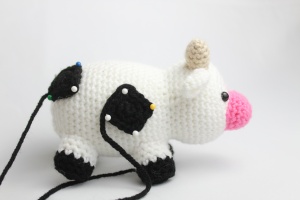
Face Assembly:
Each piece should be pinned on as shown. Start by sewing on the nose, then the ears, then the horns.
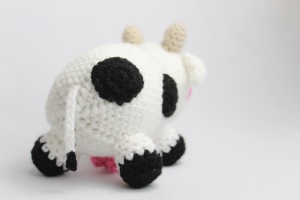
Limbs: (Make 4)
In Black
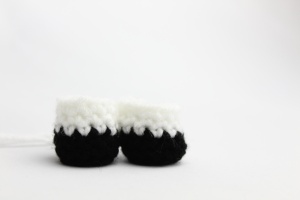
Round 1: 6 Sc in Magic Ring (6)
Round 2: *Inc* all around (12)
Round 3: *Sc* around in BLO (12)
Round 4: *Sc* all around (12)
Round 5-7: Switch to White, *Sc* around (12)
Finish off and stuff. Pin to the bottom of the body.
Assembly of limbs:
Pin to the body as shown. Stuff the leg before fully sewing on.
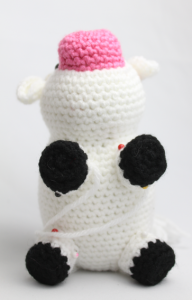
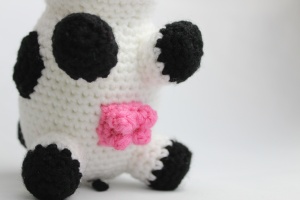
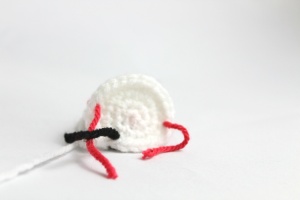
Utter:
In Pink

Round 1: 8 Sc in Magic Ring (8)
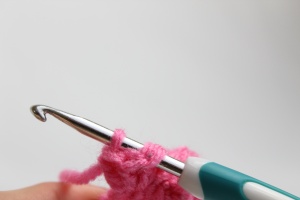
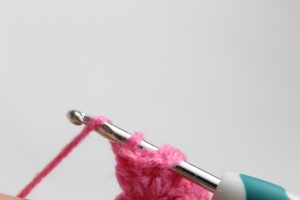
Round 2: *Inc in next St, 3 Dc in next St. Remove hook from current St and insert it into first Dc. Now also insert it into 3rd Dc. Yarn over, and pull through all 3 loops* 4 times (12) Refer to pictures below to see the DC technique.

Round 3: *Sc* all around (12)
Finish off and pin on the belly.
Spots: (make 3)
In Black
Round 1: 6 Sc in Magic Ring (6)
Round 2: *Inc* all around (12)
Round 3: *Inc in next St, Slst in next 2 St* all around (15)
Finish off and pin to the body.
Tail:
In White
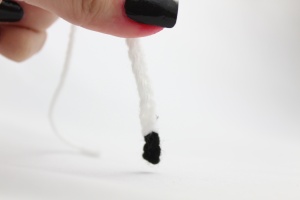
Round 1: Ch 8. Switch to Black and Ch 2.
Finish off and pin to the back of the cow.
Yay! All done!
If you finished this pattern, I would be SO HAPPY if you “try” it on Pinterest, or tag me on Instagram @StringyDingDing


28 Comments
i can not download the free pattern of the little cow,
rita
Hi Rita, unfortunately because of many hours of work that goes into creating the PDF download, I charge $1.99 for it. However, you can view the cow pattern on my site for free 🙂 I hope you enjoy it and can make a cute cow!
Hi,
I was just wondering if you could tell me the size of the finished cow?
Would it be the right size for a keyring?
thanks
Hi there, the finished cow is about 8″ long and 3.5″ tall. So I don’t think it would work for a keyring 🙁 You could side down your hook to maybe a 2mm and use baby yarn to get it much smaller!
hi! thanks so much for the pattern! I’m beyond happy that I figured out about your website. I’m in the construction of a cow, I just finished the body. thank you!
Aw thank you so much, Cam! I’m so happy you like my website, it means a lot to hear that 🙂 Yay I hope your cow is coming along great! I would love to see a picture of it if you get a chance 🥰
Please feel free to let me know if you have any questions!
Hi 🙂 thanks for the great pattern, I’m still in construction and will post photos on Ravelry when I’m done.
Two corrections: the nose should have more rows, 5 maybe? And ‘utter’ should be ‘udder’.
Hi there, I would love to see your finished object! I hope you enjoy the pattern. I’ll also add extra rounds to the pattern, you can add a few more if you’d like it a little longer, or just 1 for a stubbier nose. Also thank you for helping me out with the correct spelling. I always spell it with d’s instead of t’s… I have no idea why!! Haha thank you and I hope you have a great day 🙂
Hi! Love this pattern! Quick question, may I sell this finished project? Just trying to brighten someone’s day and make some quick cash. Not sure of the rules here!
Hi Martha, thank you for your comment – I am so glad to hear you enjoyed the pattern 🙂 Yes, you can sell the finished project. You don’t need to credit me for the written pattern since after all, you made the crochet toy! I hope you can sell some cute amigurumis and make others happy!
I also have some crochet patterns for quick toys. You can make them up real fast and use little yarn for them, so they may be good sellers for you. Take a look: https://stringydingding.com/category/scrap-yarn/
Good luck! Please feel free to let me know if you have any questions.
Thank you for the pattern, I used it to do some yarn bombing in a street name Cow Lane 😀
https://inside-uranus.com/yarn-bombing-4-les-vaches-de-cow-lane/
Haha how cute ❤️ I would love to visit cow lane! I’m sure people are going to love to see that! Thank you for sharing 🙂
Just wondered would this work with thick soft yarn with a big hook . What size would you recommend
Hi Sue! This pattern would work with big yarn and a hook, it of course will come out super big! I would recommend getting Bernat Blanket Yarn in the colors mentioned below:
Use Coal for Black
Use Vintage White for White
Use Almond for Cream horns
Use Terracotta Rose for pink
You can view these colors on their website here: https://www.yarnspirations.com/bernat-blanket-yarn–300g-10.5-oz-/161110.html?dwvar_161110_color=Almond
For hook size, I always use a 6mm crochet hook with blanket yarn for tight stitches, but a 6mm-8mm should work for you! It just depends on which hook size would be most comfortable, though it does recommend an 8mm hook on the website!
I hope this helps! Please let me know if you have any questions 🙂 I would love to see your cow when you make it!
I made this little cow for a friend last week. It came out so perfect, thanks to your awesome placement photos. I have never come across a pattern with such detailed explanations for attaching the bits and pieces. I always have trouble getting it all put together, even after doing this for 15 years now! Thank you so very much for your patterns!
That’s so nice of you to make a cow for your friend! I hope they loved it, because it came out so cute 🥰 He looks perfect out in the grass too!
Thank you SO much for your beyond kind words. That means a lot, especially since you are basically a crochet expert with 15 years of experience! If you ever come across one of my patterns and it’s not detailed enough, please let me know! Thank you so much again Tammi. This is so sweet of you to write and to share. I hope your friend adores the little cow you made!
hi just wondering how the nose starts is it with a slip not? im new to crochet so not the best haha
Hi Brooke! You’re correct, the nose has to be started with a slipknot 🙂 Anytime we make a chain we have to make a slipknot first, so we can get the yarn onto our hook! Please feel free to let me know if you have any questions, I’m happy to help answer any beginner questions 🥰
I just made this with Bernat baby blanket yarn and it turned out huge! The only time I struggled was when I got to the udder and I thought “Dc” meant decrease instead of double crochet 😅 Thank you for the great pattern!
Wow your cow came out huge! I love that, such an adorable idea and it came out amazing! You have definitely inspired me to make a big cow with blanket yarn, he could be used as a neck pillow 😍 Comfy!
I’m so glad to hear that you liked the pattern – it was totally worth the effort! Thank you so much for sharing ❤️❤️❤️
I love the cow pattern. Here is how mine turned out.
I am nearly finished! Just stuck on the udder. Is there a video somewhere by chance?
How do I hide the yarn tails from the tail?
I think she turned out so cute! I love it
Hi! I’m crocheting this cow for my girlfriend and I cannot for the life of me get the udder to turn out like the picture and I’ve tried it probably 5 times super slowly, trying to follow every direction carefully. Do you (or anyone) happen to know if there would be a video somewhere showing me how to do this? I usually figure things out way easier if I can actually see it being done. It’s a super cute cow btw! I’m just still pretty new to crocheting 🙂
Hey, I was struggling too but there is a comment that says it’s double crochet, not decrease. Does this help?
Would anyone be able to make a video showing how to crochet the udder? I keep trying to follow the directions carefully but I can’t seem to get it right. I tend to understand better if I can see it. The rest of the cow is turning out great, I’m just struggling with this one part! Thanks 🙂
just realized I essentially said the same thing twice, my original comment wasn’t showing up at first🤦🏻♂️