
Purchase the PDF version here

Supplies:
4mm crochet hook, 4/Medium weight yarn in any color for the body and ice cream, tan or brown for the cone, red for the cherry (optional), 9mm safety eyes, black embroidery thread, tapestry needle, scissors, and stuffing.
Additional Information:
Difficulty: Easy
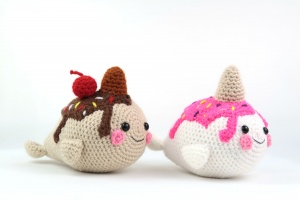
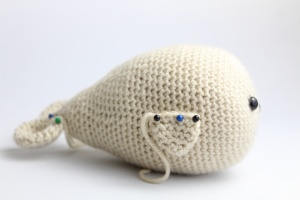
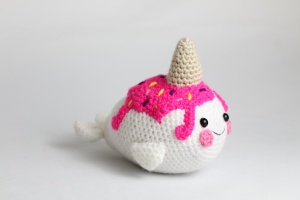
Main Color means the color you want to use for the narwhal’s body. I used white for one and tan for the other. It’s your choice to use any color you’d like.
We start by making the body. Then we make the tail, arms, and ice cream for the head. Next we make the cone and optional cherry. Finally, we make the cheeks and assemble the face.
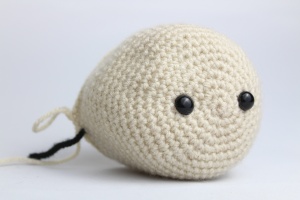
Body:
In Main Color
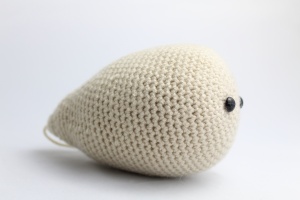
Round 1: 6 Sc in Magic Ring (6)
Round 2: *Inc* all around (12)
Round 3: *Inc, Sc* all around (18)
Round 4: Inc in next St, Sc in next 2 St, Inc in next St, Sc in next st. Sc in next St and add different colored St marker to Sc just made. This marks where to place the eye. *Inc in next St, Sc in next 2 St* 2 times, Inc in next St, Sc in next St, Sc in next St and add different colored St marker to Sc just made. Inc in next St, Sc in last 2 St (24)
Round 5: *Inc, Sc 3* all around (30)
Round 6: *Inc, Sc 4* all around (36)
Round 7: *Inc, Sc 5* all around (42)
Round 8: *Inc, Sc 6* all around (48)
Round 9: *Inc, Sc 7* all around (54)
Round 10-22: *Sc* all around (54)
Round 23: *Dec, Sc 7* all around (48)
Round 24-27: *Sc* all around (48)
Round 28: *Dec, Sc 6* all around (42)
Round 29: *Sc* all around (42)
Round 30: *Dec, Sc 5* all around (36)
Round 31: *Dec, Sc 4* all around (30)
Round 32: *Sc* all around (30)
Round 33: *Dec, Sc 3* all around (24)
Stuff here and add in safety eyes.
Round 34-37: *Sc* all around (24)
Round 38: *Dec, Sc 2* all around (18)
Round 39-40: *Sc* all around (18)
Round 41: *Dec, Sc 1* all around (12)
Round 42: *Dec* all around (6)
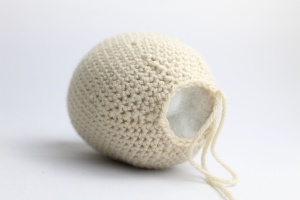
Finish off and add any additional stuffing. Sew closed and weave in ends.
Tail: (Make 2)
In Main Color
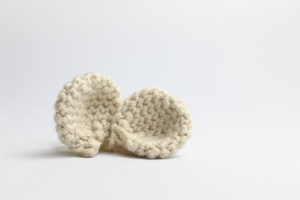
Round 1: 6 Sc in Magic Ring (6)
Round 2: *Inc* all around (12)
Round 3: *Inc, Sc* all around (18)
Round 4-7: *Sc* all around (18)
Round 8: *Dec, Sc* all around (12)
Round 9: *Dec* all around (6)
Finish off and pin each tail to the end of the body.
Arms: (Make 2):
In Main Color
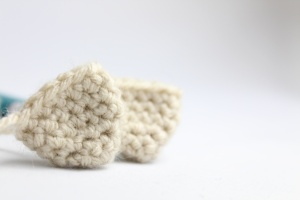
Round 1: 6 Sc in Magic Ring (6)
Round 2: *Sc* all around (6)
Round 3: *Inc* all around (12)
Round 4-6: *Sc* all around (12)
Finish off and pin to the sides of the body.
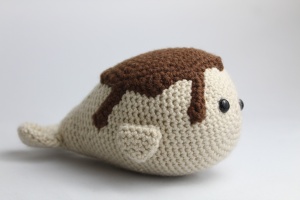
Ice Cream:
In Any Color
Round 1: 6 Sc in Magic Ring (6)
Round 2: *Inc* all around (12)
Round 3: *Inc, Sc* all around (18)
Round 4: *Inc, Sc 2* all around (24)
Round 5: *Inc, Sc 3* all around (30)
Round 6: *Inc, Sc 4* all around (36)
Round 7: *Inc, Sc 5* all around (42)
Round 8: *Inc, Sc 6* all around (48)
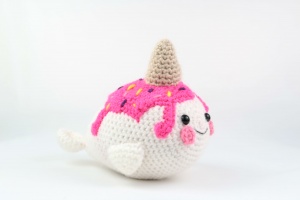
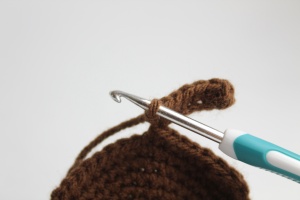
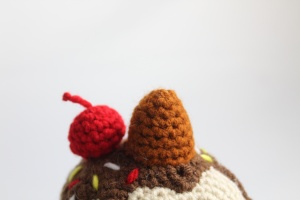
Round 9: Sc in next 2 St, Repeat *Dc in next St, Trc in next 2 St, Dc in next St, Sc in next 4 St. Ch 7. 3 Hdc in 2nd Ch from hook. Sc in next 5 St. Sc in same St you made Ch. Sc in next 3 St* 4 times, Sc in next St, Slst in last St. (Refer to pictures on the right)
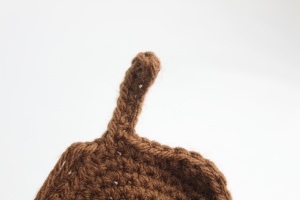
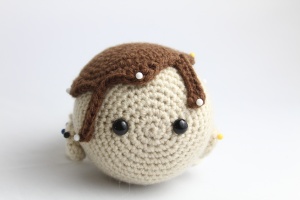
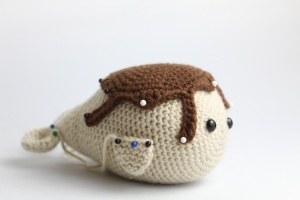
Finish off and pin to the top of the head. I pinned it on slightly crooked, falling the left for a cuter look.
Assembly:
Now sew on each part we have pinned to the body. Start with the tail, then the arms, then finally the ice cream. Be sure to sew each stitch on the ice cream, and take your time to it is sewed on cleanly.
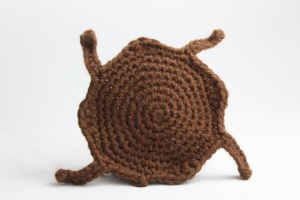
Ice Cream Cone:
In Tan or Brown
Round 1: 6 Sc in Magic Ring (6)
Round 2: *Inc, Sc* all around (9)
Round 3: *Sc* all around (9)
Round 4: *Inc, Sc 2* all around (12)
Round 5: *Sc* all around (12)
Round 6: *Inc, Sc 3* all around (15)
Round 7: *Sc* all around (15)
Finish off and pin to the center of head, making sure it’s on the ice cream.
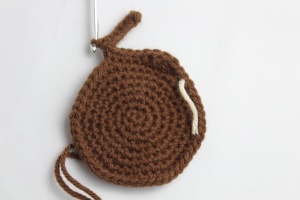
Cherry: (Optional)
In Red
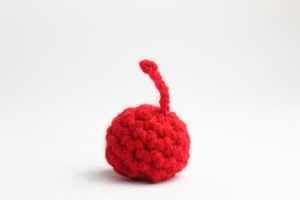
Round 1: 6 Sc in Magic Ring (6)
Round 2: *Inc* all around (12)
Round 3-5: *Sc* all around (12)
Round 6: *Dec* all around (6)
Stuff here
Sew shut. Pull a string through the top of the cherry and tie a small knot at the very top of the string. Finish off and pin to the side of the cone. Sew on. Finally sew on sprinkles with 3 different colors of your choosing.
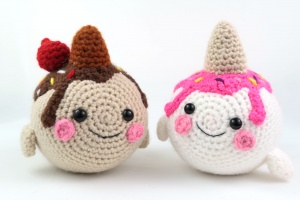
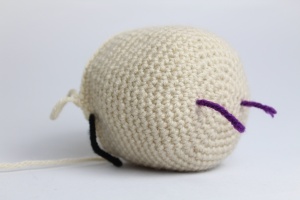
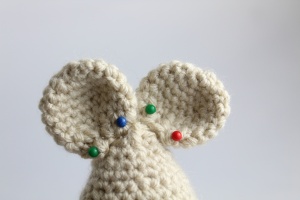
Cheeks: (Make 2)
In Pink
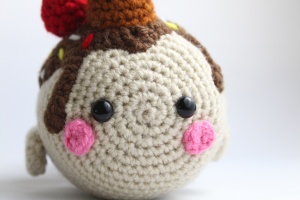
Round 1: 6 Sc in Magic Ring (6)
Finish off and pin each as shown. Sew on.
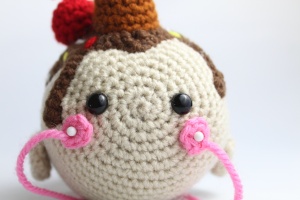
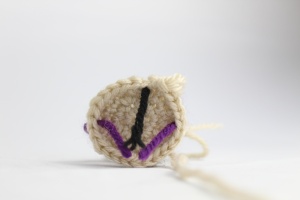
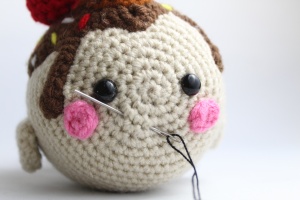
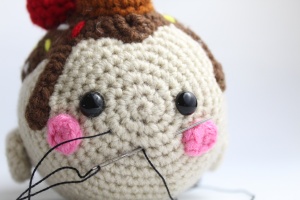
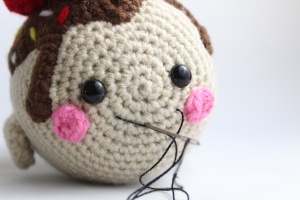
Smile Assembly:
With Black Embroidery Thread
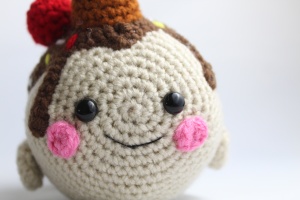
Insert needle in the middle of the mouth, and pull it out where shown on Pic 1. Reinsert needle back into the middle of the smile, and pull out on opposite side as shown on Pic 2. Finally, reinsert needle into the middle of the smile and pull through as Pic 3. Weave in ends. All done.
![]()

All Done! If you finished this pattern, I would be SO HAPPY if you “try” it on Pinterest, or tag me on Instagram @StringyDingDing
More free amigurumi patterns…


8 Comments
your new models are very beautiful thank you for sending me the explanation i will try to make them
Thank you so much, I’m so happy you like them! If you make them I would love to see a photo 🙂 Please let me know if you have any questions ❤️
Love this pattern! I have made 7 and am currently working on #8 & 9.
Oh my gosh Marissa it makes me so happy to see that you really like this pattern!! Aww this is so nice 🙂 Every single narwhal you’ve made is too adorable! My favorite is the very top because of the colors 😍 I had to show my spouse this and he says he really likes the green mint looking one at the bottom middle 😆 Oh my gosh thank you so much for sharing, you are so kind to leave this comment and this totally made my day! ❤️ I hope you keep on making adorable narwhals!
I loved making this so much!
Aww what a cutie! I love how you added some cream around the cone, that’s such a good idea! You did an amazing job making your narwhal 😍 I love it so much! Thank you for sharing a picture, your work really made me smile 🙂
Thank you so much for the pattern! I just made a strawberry one and I’m really happy with how it turned out ^o^
Great pattern! I adjusted the eyes to be lower and further apart because I personally like that style more, but the instructions were easy to follow. It came out really cute, especially when using plush yarn to make it bigger and softer. Thank you for a fun pattern and I look forward to trying out more!