
Purchase the PDF version here
Supplies:
4mm crochet hook, 4/Medium weight yarn in any desired colors for body, white yarn, tan yarn red yarn, light and dark green yarn, grey. 8mm safety eyes, black embroidery thread, tapestry needle, scissors, and stuffing.
Additional Information:
Difficulty: Easy
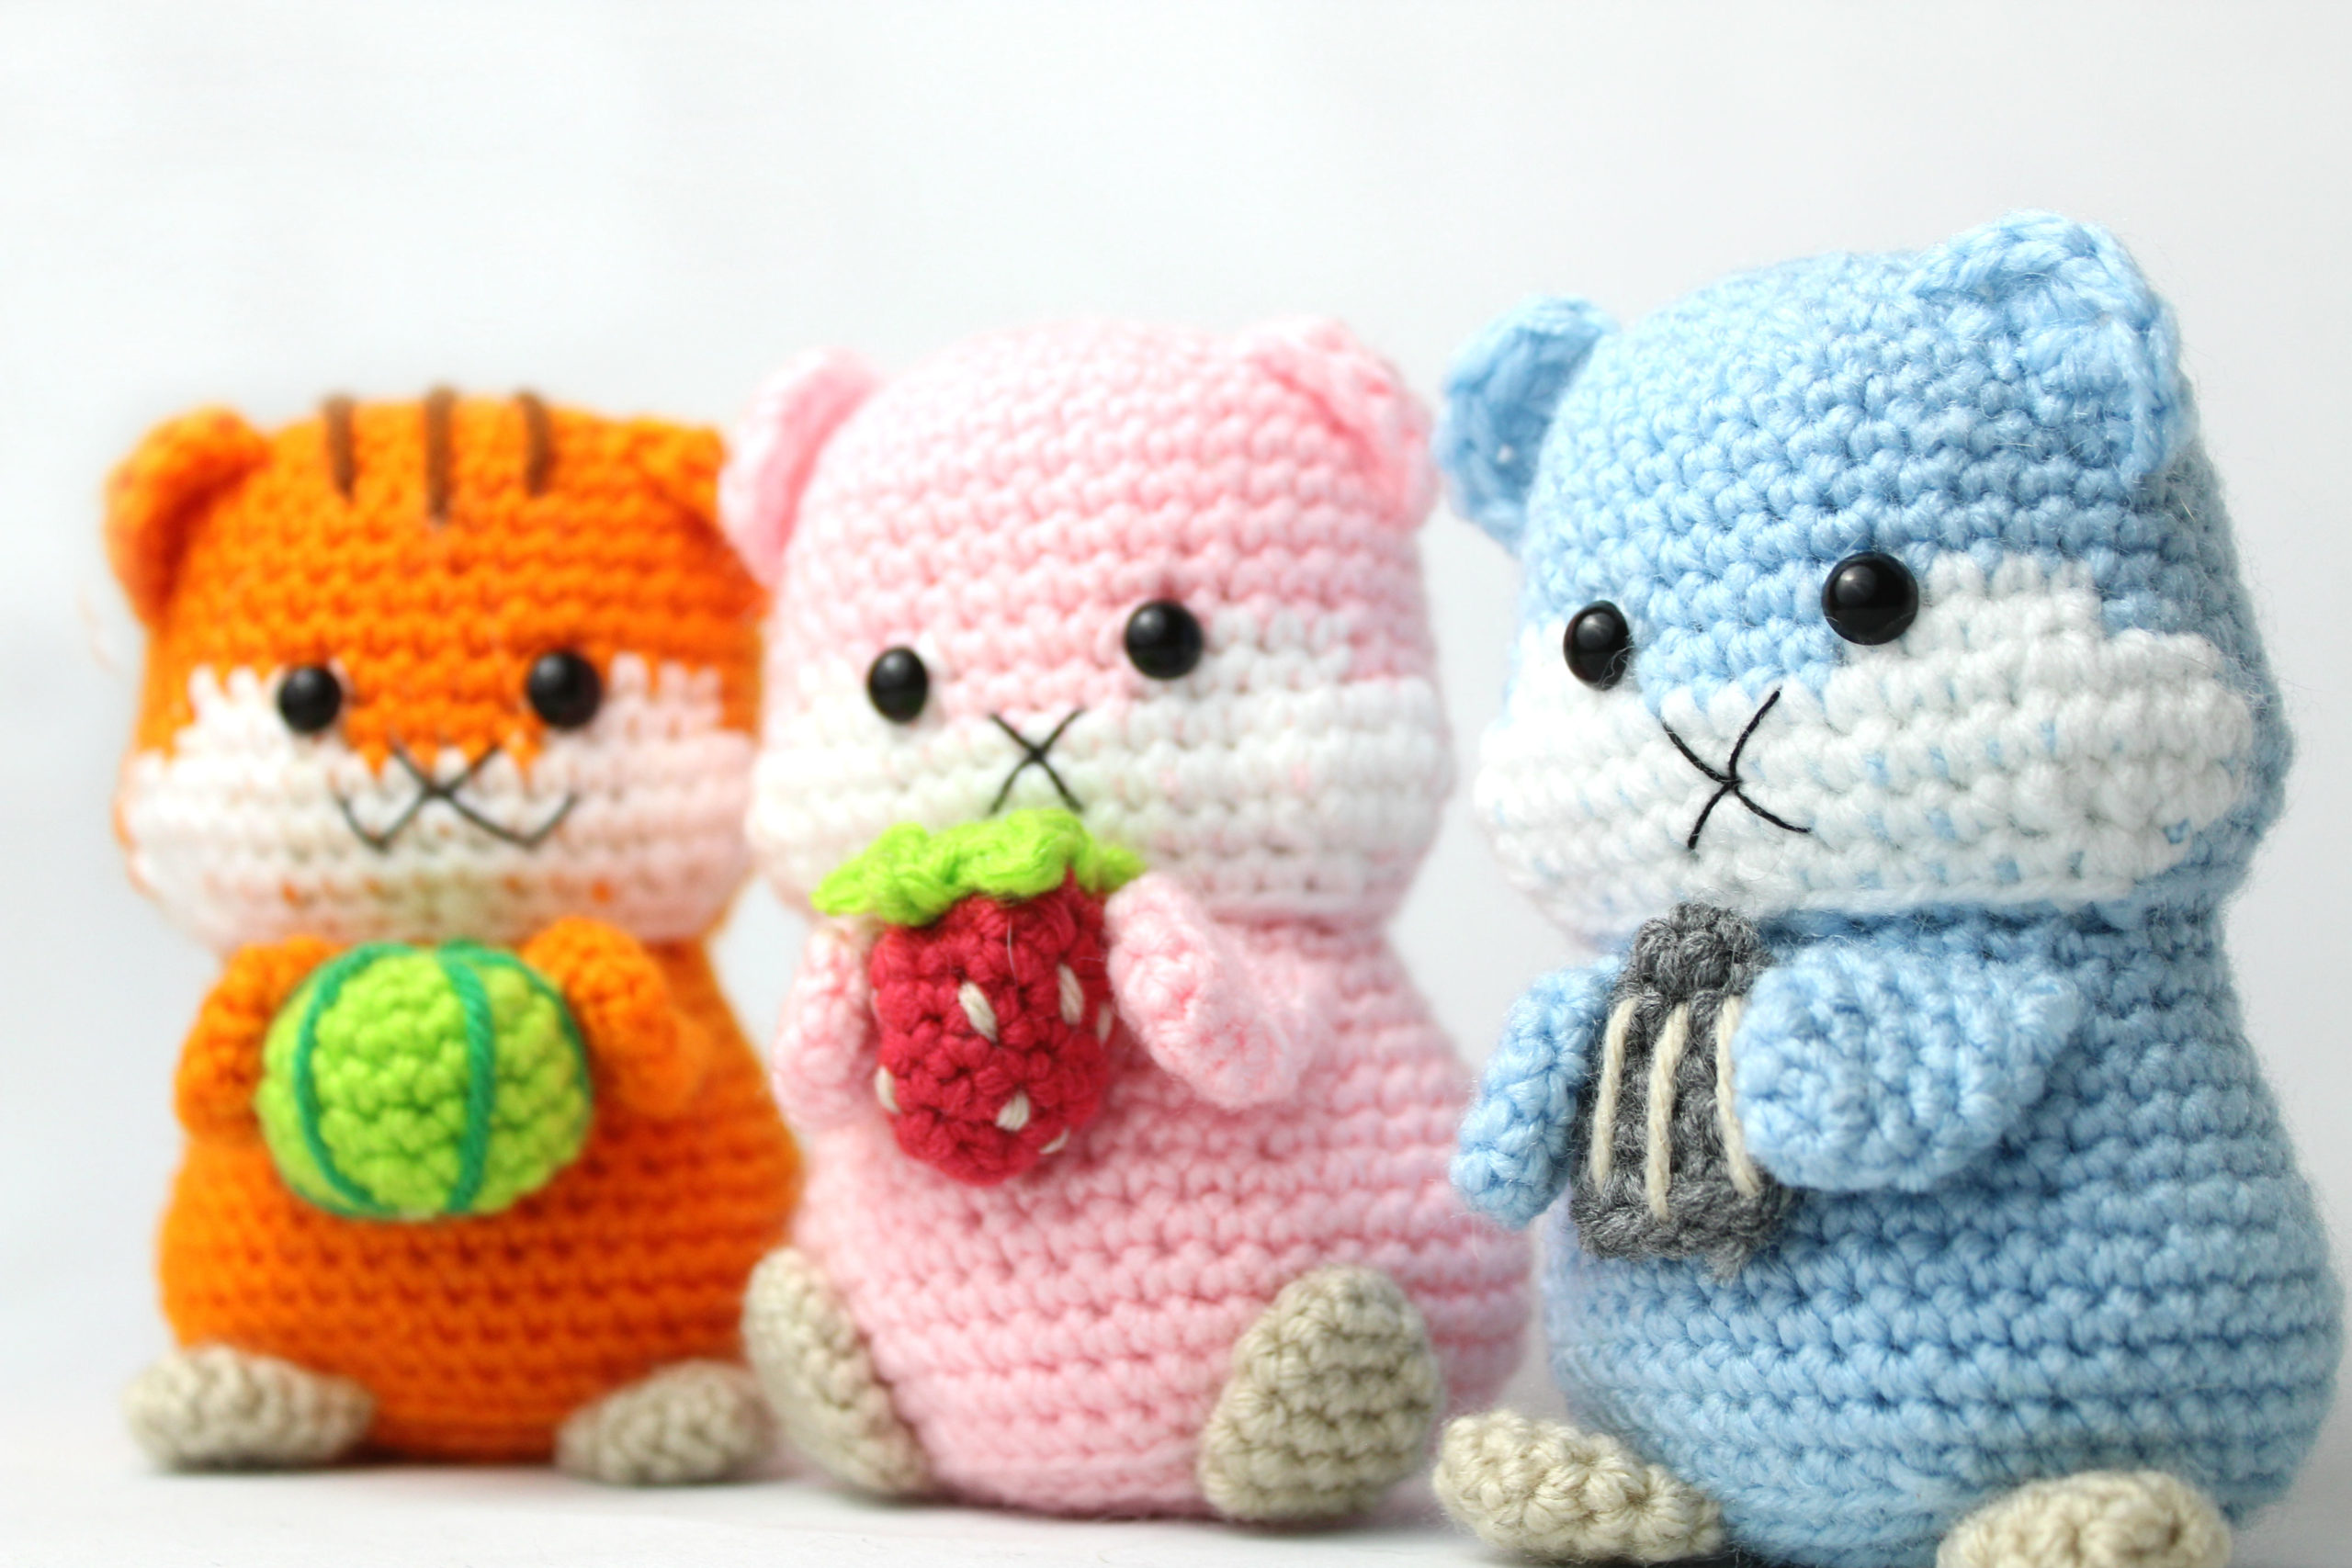
This pattern has color changes. Main Color is the main color you want your hamster. Use white for the color changes. The head and body are one piece, in which we start by making the head, which leads into the body. Then we make the ears, arms, legs, and fruit.
Head:
In Main Color
Round 1: 6 Sc in Magic Ring (6)
Round 2: *Inc* all around (12)
Round 3: *Inc, Sc* all around (18)
Round 4: *Inc, 2 Sc* all around (24)
Round 5: *Inc, 3 Sc* all around (30)
Round 6: *Inc, 4 Sc* all around (36)
Round 7-11: *Sc* all around (36)
Round 12: Sc in next 12 St. Switch to White and Sc in next 3 St, Sc in next St. Add different colored St marker to Sc just made. This marks where to put the eye. Switch to Main Color and Sc in next 4 St, Switch to White and Sc in next St. Add different colored St marker to Sc just made. Sc in next 3 St, Switch to Main Color and Sc in last 12 St (36)
Round 13: Sc in next 12 St. Switch to White and Sc in next 4 St, Switch to Main Color and Sc in next 4 St, Switch to White and Sc in next 4 St, Switch to Main Color and Sc in last 12 St (36)
Round 14: Sc in next 7 St, *Inc* in next 3 St, Switch to White, *Inc* in next 3 St, Sc in next 10 St, *Inc* in next 3 St, Switch to Main Color, *Inc* in next 3 St, Sc in last 7 St (48)
Round 15: Sc in next 13 St, Switch to White, Sc in next 22 St, Switch to Main Color, Sc in last 13 St (48)
Round 16: Sc in next 7 St, *Dec* 3 times Switch to White, *Dec* 3 times, Sc in next 10 St, *Dec* 3 times, Switch to Main Color, *Dec* 3 times, Sc in last 7 St (36)
Round 17: Dec, Sc in next 4 St, Dec, Sc in next 2 St, Switch to White, Sc in next 2 St, *Dec, Sc in next 4 St* 2 times, Dec, Switch to Main Color, Sc in next 4 St, Dec, Sc in last 4 St (30)
Round 18: In BLO *Dec, Sc 3* all around (24)
Round 19: In FLO *Inc, Sc 3* all around (30)
Round 20: *Sc* all around (30)
Round 21: Sc in next 7 St, *Inc in next St, Sc in next st* 3 times, Sc in next 6 St, *Inc in next St, Sc in next st* 3 times, Sc in last 5 St (36)
Round 22-24: *Sc* all around (36)
Stuff head here.
Round 25: Sc in next 8 St, *Inc in next St, Sc in next St* 4 times, Sc in next 8 St, *Inc in next St, Sc in next St* 4 times, Sc in last 4 St (44)
Round 26-29: *Sc* all around (44)
Round 30: Sc in next 8 St, *Dec, Sc in next St* 4 times, Sc in next 8 St, *Dec, Sc in next St* 4 times, Sc in last 4 St (36)
Round 31: IN BLO, *Dec, Sc 4* all around (30)
Round 32: In BLO, *Dec, Sc 3* all around (24)
Round 33: In BLO, *Dec, Sc 2* all around (18)
Stuff here
Round 34: In BLO, *Dec, Sc* all around (12)
Round 35: *Dec* all around (6)
Finish off and add any additional stuffing. Sew closed.
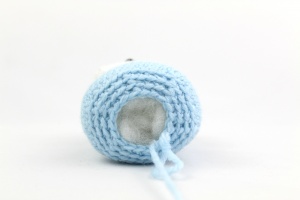
Ears:
In Main Color
Round 1: Ch 5.
Round 2: Turn, Dc in 2nd Ch from hook, Trc in next 2 St, Dc in last St, Slst in same st.
Finish off.
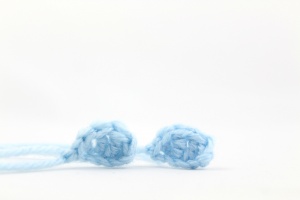
Arms
In Main Color
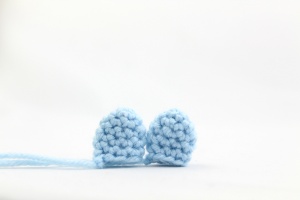
Round 1: 4 Sc in Magic Ring (4)
Round 2: *Inc* all around (8)
Round 3-6: *Sc* all around (8)
Finish off and pin to the front of the body.
Legs:
In Tan Color
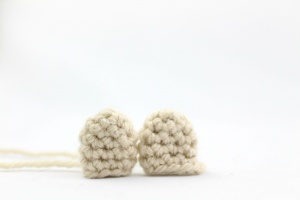
Round 1: 4 Sc in Magic Ring (4)
Round 2: *Inc* all around (8)
Round 3-6: *Sc* all around (8)
Finish off and pin to the front of the body.
Assembly:
Sew on each piece and weave in any ends.
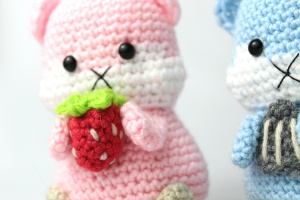
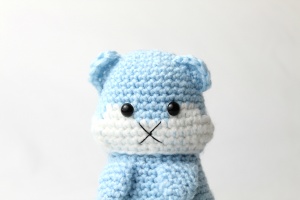
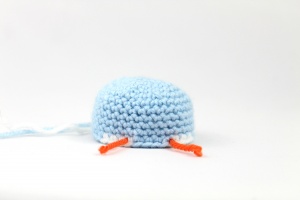
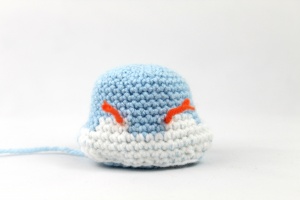
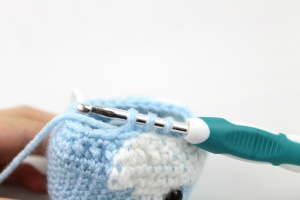
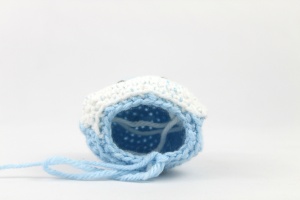
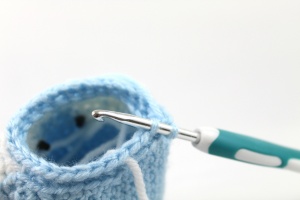
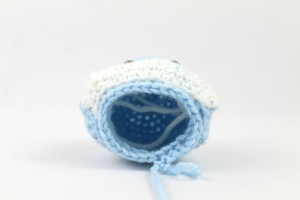
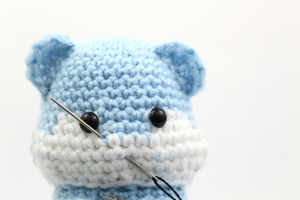
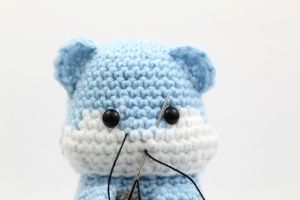
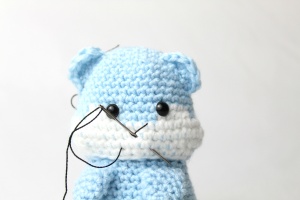
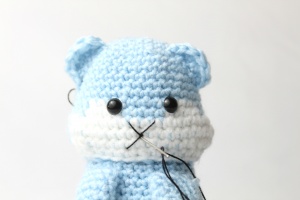
Smile Assembly: With Black Embroidery Thread
Insert needle going diagonal from middle of mouth to near under the left eye (Pic. 1). Reinsert needle back through first insertion. (Pic. 2). Now pull needle through to bottom side, lining up to first line. (Pic. 3). Repeat to other side. (Pic. 4). Finally, sew in loose ends.
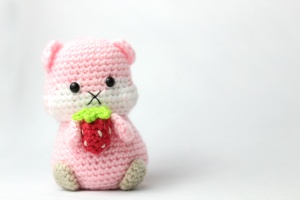
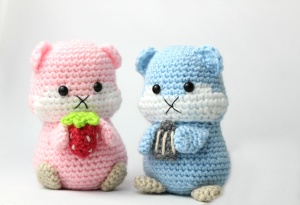
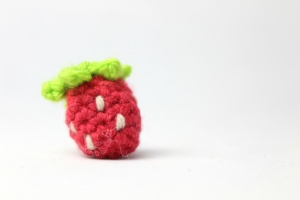
Strawberry:
In Red
Round 1: 5 Sc in Magic Ring (5)
Round 2: *Inc* all around (10)
Round 3-4: *Sc* all around (10)
Round 5: *Inc, Sc in next St* (15)
Round 6: *Dec, Sc* all around (10)
Round 7: *Dec* all around (5)
Stuff and sew shut. With white, sew seeds onto Strawberry.
Strawberry Top:
In Green
Round 1: 5 Sc in Magic Ring (5)
Round 2: *Sc in next St, Ch 2, Sc in 2nd Ch from hook, Slst in 1st St.* 5 times
Finish off and sew to the top of the strawberry.
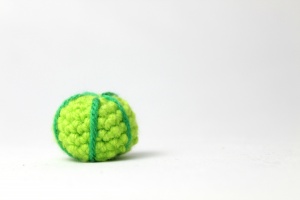
Watermelon:
In Green
Round 1: 6 Sc in Magic Ring (6)
Round 2: *Inc* all around (12)
Round 3: *Inc, Sc* all around (18)
Round 4-6: *Sc* all around (18)
Round 7: *Dec, Sc* all around (12)
Round 8: *Dec* all around (6)
Stuff here. Sew shut. With dark green, sew on lines.
Seed:
In Grey
Round 1: 4 Sc in Magic Ring (4)
Round 2-3: *Sc* all around (4)
Round 4: *Inc, Sc* all around (6)
Round 5: *Inc, Sc in next 2 St* (8)
Round 6-7: *Sc* all around (8)
Finish off and sew shut. With tan, sew 3 lines on.


52 Comments
Thank you
You’re welcome 🙂 I hope to bring you more amigurumi patterns that you will enjoy
Hello. Just a couple of questions… what do you mean by Inc? And how big do these little guys come out? They are super cute
Hi! I’m happy you like the hamsters 🙂 My hamsters came out to be about 4″, but they may come out a different size depending on your tension (how tight you hold the yarn/make your stitches) and your hook size. And “Inc” means increase. To make an increase, you do two single crochet (or Sc) into the same stitch. I hope this helps! But if not, please feel free to let me know if I can clarify or help you with something else! 🙂
Thank you for all the information. I’m hoping to start the project soon for my daughters birthday. I want to make it for her cake as a cake topper. If I have any more questions I hope you don’t mind me asking. Thanks again x
Aw that is so sweet and such a good idea! Maybe if you want it as a cake topper, you can use baby yarn (size 3 yarn) so it will be a little smaller.
And I don’t mind one bit if you have questions! I’m more than happy to help <3 So don't hesitate!
Nice
Yay thank you Ding Dong 🙂
Row 17 seems to have one extra stitch. Would you check it and let me know?
Thank you!
Hi Esther! Round 17 is all correct now, there was an extra *dec* in there on accident. Thanks so much!!
Sorry, I should have said, “round” instead of row.
Sooo cute!!! Not much into the amigurumi stuff, but I may actually try these guys.
Thank you so much! I hope you give them a try 🙂 Please feel free to let me know if you have any questions.
Hi! Is there any easy way to print this?
Hi there, you can purchase the clean formatted PDF version here: https://stringydingding.com/product/hamster-amigurumi-pdf/ .
It’s ideal for printing 🙂 Please feel free to let me know if you have any questions.
Hi! I bought the PDF version of this pattern and everything is really easy to follow, thank you. The only thing I seem to have trouble with is the colour changes. For some reason mine look a bit wrong compared to the pictures. Is there a tutorial that shows the way you’re supposed to do it? What I mean specifically is when you have to pull the new yarn through etc., I hope that makes sense.
Hi Amelia, thank you so much for purchasing the PDF version! I’m glad it was easy to follow. So for color changes, I actually carried the main color (so orange, pink, or blue) while crocheting with the white yarn. This means you basically hold the main color next to your crochet piece as you’re crocheting so that when you insert your hook into the next stitch and crochet, the main color will also be crocheted since it’s next to the crochet piece. So sorry if I didn’t explain that well, so please feel free to let me know if you still need some help with that and I can find a tutorial! (This isn’t necessarily a color change but will help make your color change look more defined so if you give this a try it may help as it helped me).
So as for the color changing to the next color I unfortunately don’t have a tutorial. I’ll write it out as best as I can so you can follow along the next time you’re crocheting though 🙂
1.Crochet all the way in your main color until you’re ONE stitch before you need to change to the white color.
2. With your Main Color (blue, orange, pink, etc.) insert your hook into the next stitch. Yarn over and pull up a loop. Now with your white color, yarn over and pull through both loops. You’ve just changed color.
3. Holding your Main Color behind your crochet piece, crochet as normal with your White color until you’re ONE stitch before the color changes to Main Color (blue, orange, pink, etc.)
4. Now that we’re one stitch before the color changes to Main Color, insert hook with white yarn into next stitch. Yarn over,and pull up a loop. Now with Main Color, yarn over and pull though both loops.
Now you have successfully changed color.
I hope this was able to help but I completely understand if you need a visual. Please let me know what you think!
Thank you! That was super helpful, I get it now. My second attempt looks much better 🙂
Oh and by the way, the PDF still has the extra decrease in round 17 that Esther mentioned, just wanted to let you know 🙂
Hi Amelia, sorry for the late reply! I’m so glad to hear that it worked out for you, and I went ahead and too out the extra decrease on the PDF! Thanks for letting me know 🙂
hello, i love this amigurumi i just finished it
Aw that’s so nice to hear!! I’m so happy you enjoyed it, I hope you can make many more amigurumis from my site 🙂
Hi,
Thanks for the free pattern.
It’s been a while since I’ve crocheted, so it isn’t easy to translate the English stiches to dutch.
Is it possoble to let me know if this is een UK or a VS version please? (Because there’s a difference between the translation of the stiches 😉).
My daughter really wants a pink hamster in these corona-times 🙈
Thank you
Xxx
This was a really fun project to make!!! Very happy with my hamster! Thank you!!
Thank you for letting me know you enjoyed this pattern Dianna! That’s great 🙂
This work is actually amazing.
If you don’t mind, can I share this pattern to my handmade page?
Aww thank you so much 🥰 You can definitely link out to this pattern, of course! Just don’t post the actual pattern on your website. I would love to check out your page, it’s always fun finding new crafty people 😊
I have had two attempts with this pattern but it goes wrong on colour change ☹️I suddenly don’t have the right amount of stitches as pattern says eg: after white back to main colour crochet 12 .. I have about 9 to crochet then it messes whole pattern up ..
confused
Cathy
Oh no I’m so sorry to hear about that! I’m happy you let me know though, let me try to help 🙂
So the first color change round is in Round 12. It says:
Round 12: Sc in next 12 St (12). Switch to White and Sc in next 3 St (3), Sc in next St (1). Add different colored St marker to Sc just made. This marks where to put the eye. Switch to Main Color and Sc in next 4 St (4), Switch to White and Sc in next St (1). Add different colored St marker to Sc just made. Sc in next 3 St (3), Switch to Main Color and Sc in last 12 St (12) (36)
If we add everything in parenthesis (12+3+1+4+1+3+12) = 36
So hopefully adding the number of stitches crocheted in Round 12 will make the round a bit easier to understand! I think what may go wrong accidentally crocheting too many single crochets when it’s not needed, if there’s a specific part that confuses you please let me know! I really want to help in any way I can 😍 I would also note to be sure you have 36 stitches made in Round 11, because if you have less than 36 stitches in Round 11, Round 12 won’t work! Please let me know about anything confusing, thanks so much Cathy! 🥰
ok going to have another go … thank you so much 😊
so does that mean 12 main color, 4 white, 4 main color, 4 white, and 12 main color again??
Hi Ayaka! Yes, you you are correct! 🙂
Please feel free to let me know if you have any other questions 😍
hai… the body pattern is not show ya? i want to make the body hamster
Hi there! The head works into the body as one piece, so follow the head pattern and it will work into the body! I hope that makes sense haha 🙂 Please feel free to let me know if you have any questions!
Thank you for the adorable guinea pigs and hamster.
My two guinea pigs passed away.
Slade and Dak.
Hi Christine! I’m happy that you like the guinea pig and hamster pattern! I hope they were able to bring back fond memories of your two guinea pigs ❤️ It’s never easy to lose a furry friend, but at least we have the wonderful times to think back to! Those are such cute names for them, too 🙂 I hope you can make the pattern in memory of your two little friends ❤️❤️❤️
Thank you for this pattern, it’s so cute and amazing!!
I have a question:
Can I sell plushies made from this pattern?
It would be great but you dont want to I respect it of course 🙂
Please answer and have a nice day!!
Hi Mil! Thank you so much for your really sweet comment, I really appreciate it 😁 You can definitely sell the finished physical toy you make from my patterns, I only ask to not sell the written pattern itself 🙂 I really appreciate that you would ask, I wish you the best of luck in selling your hamster! I’m sure you’ll do a great job selling it 🙂 Feel free to let me know if you have any questions with this hamster pattern by the way, I’m always happy to help 😍
So cute! My daughter wanted a hamster for her room at college so I’m going to make this for her! Easier to take care of! Lol 😆
Done! A few of my own touches and ready to fly to the other end of the country! Thanks for the pattern! ❤️
Hey, i have A few questions, what means BLO and what means FLO? Love your patters by the way
BLO BACK LOOP ONLY
FLO FRONT LOOP ONLY.
HOPE THAT HELPS
Hi! Could you perhaps explain how round 17 is done? I’m having trouble and ended up with missing stitches. Cute hamster though! Can’t wait to finish mine
Le PDF existe-t-il en français?
Hey, does the pattern not include the body or am I just not finding it? If it doesn’t where would you suggest looking for a pattern that fits this design?
Hi, I was wondering if this pattern includes the body?
Thank you 🙂
I have some questions, like what does BLO and FLO mean? and where is the body part?I don’t rlly know how to do the body and I did not see the section
hey, this pattern was made a while ago so I dont know if you’ll see this but if you do- I have began this pattern but realised the body section is missing? id love to finish it so if you can add the body section that would be great (:
I’m pretty sure it is just one piece, the creator mentions this in reply to another question.
I have recently started crocheting so I am quite new to most of the terms. I realise this is an old pattern but if anyone could help me understand what this phrase means, it would be greatly appreciated:
inc, 2 sc
I don’t know if you still need help but I’m just gonna explain it.
So inc stands for increase and sc for single crochet. What you need to do here is do one increase in the next stitch (an increase is two single crochet in the same stitch) and than do one single crochet in the next stitch and another single crochet in the following stitch. And than just repeat for the whole round. I hope that helps.
I don’t see instructions for body of hamster?
Hi there. The head and body are all in one. The head finishes at row 17 rows 18, 19 and 20 are the neck section and then you move on to the body. Hope that helps. It’s super cute … I’ve just finished one (just need to make the legs and attach)