
Purchase the PDF version here


Supplies:
4mm crochet hook, 4/Medium weight yarn in any desired colors for body & collar. 8mm safety eyes, safety nose, black embroidery thread, tapestry needle, scissors, and stuffing.
Additional Information:
Difficulty: Easy
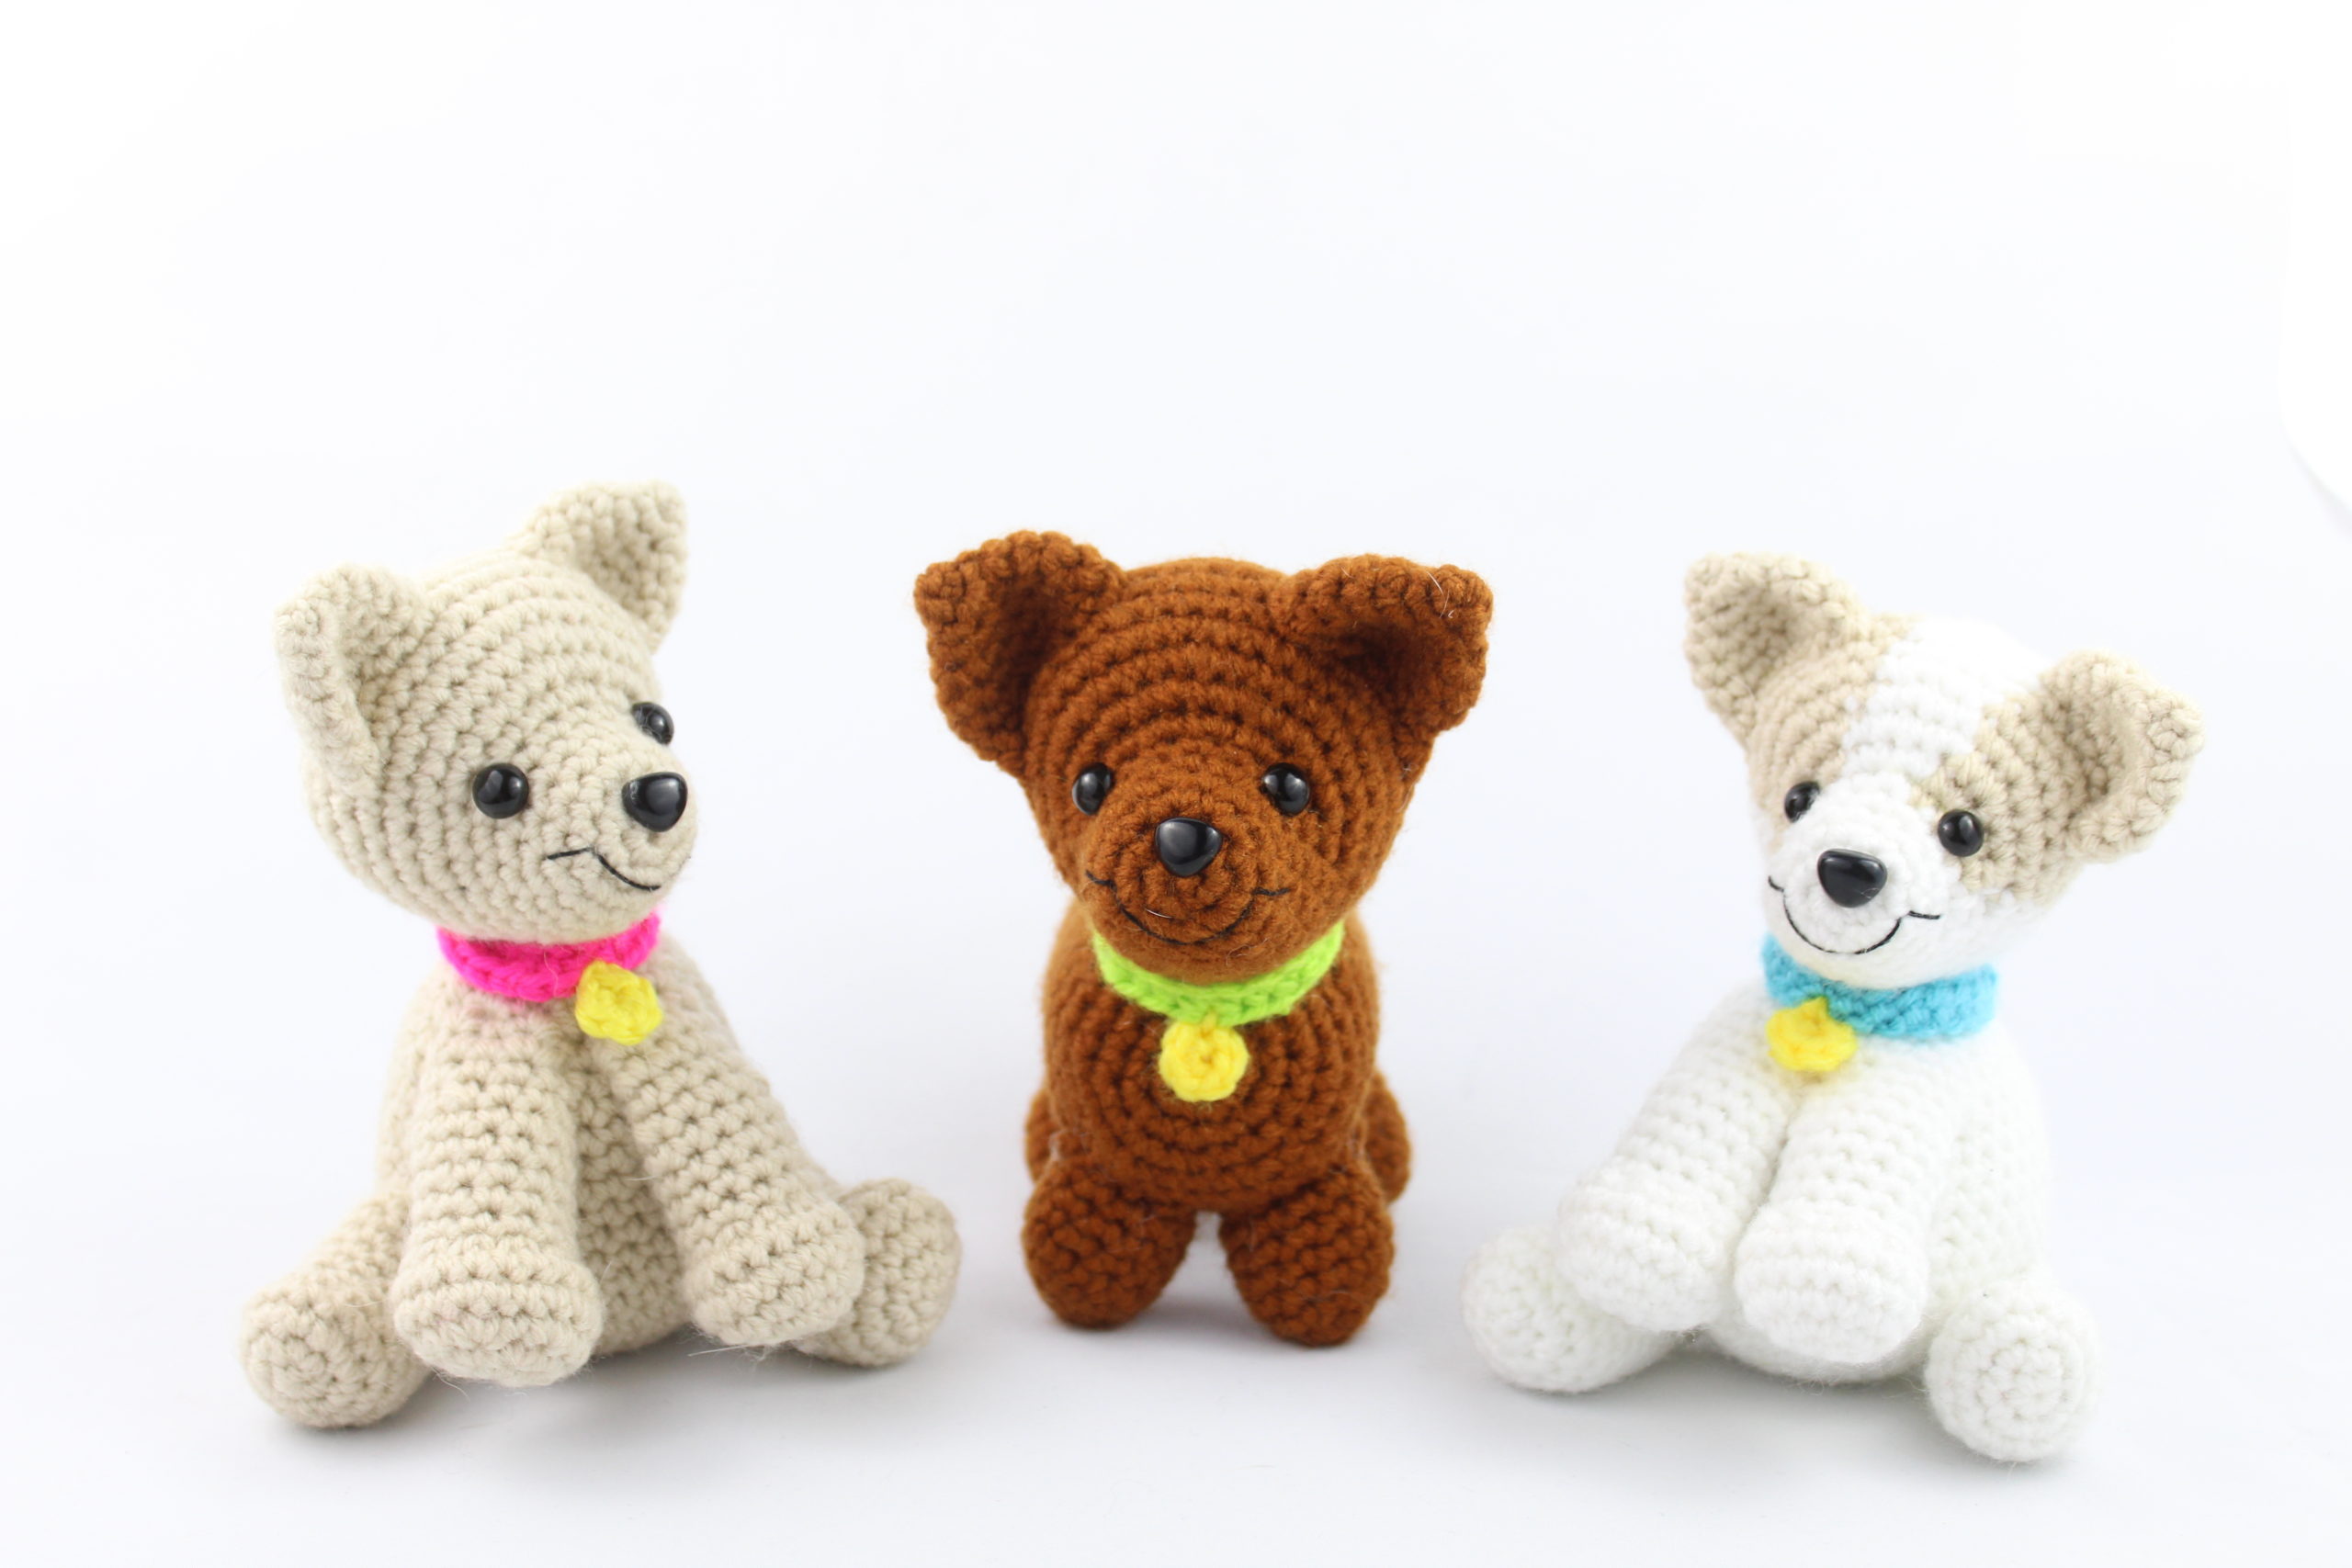
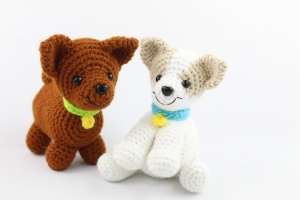
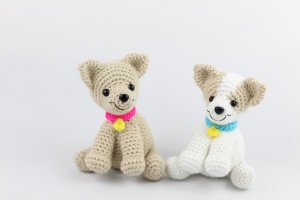
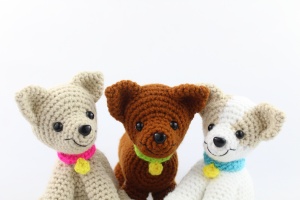
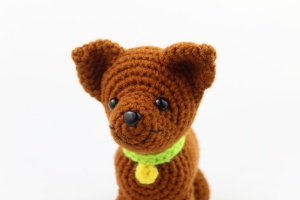
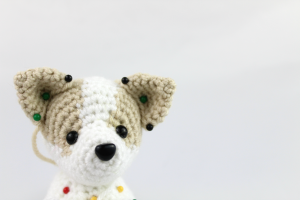
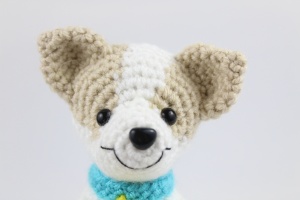
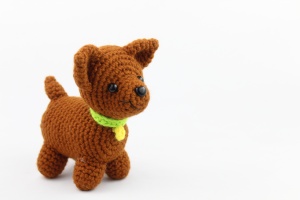
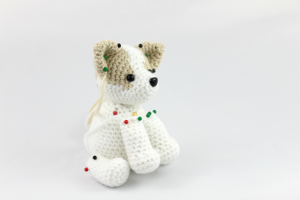
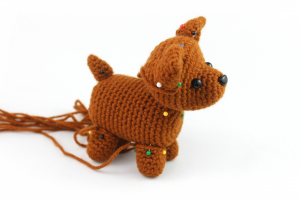
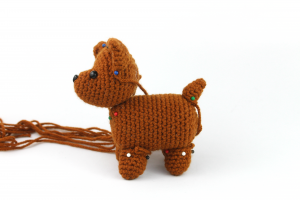
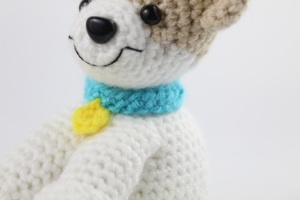
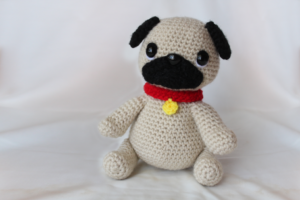
This pattern is to make a cute chihuahua! There are two types of bodies you can make, and the legs you will make depend on the body you decide to make. There is a “sitting” body and a “standing” body. Please see the photos in the pattern to decide which body you want to make.
For colors, “Main Color” refers to the color you want the chihuahua to be. You can incorporate color changes if you desire, but this pattern is to make one full colored chihuahua with no color changes.
We start by making the nose, which leads into the head. Then, we make the ears and assemble the face. We then create the body, arms, legs, and tail. After we assemble the body and sew the head on, we create the collar. Then we are done!
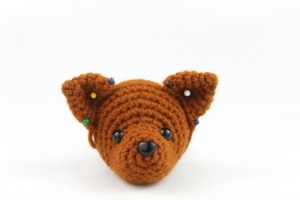
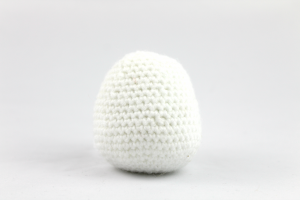
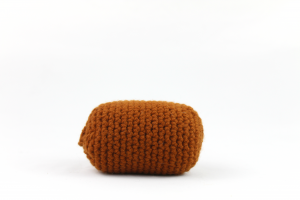
Head
In Main Color
Round 1: 6 Sc in Magic Ring (6)
Round 2: *Inc* all around (12)
Round 3: *Inc, Sc in next 3 St* 3 times (15)
Round 4: *Sc* all around (15)
Round 5: *Inc, Sc in next 4 St* 3 times (18)
Round 6: Sc in next 6 St, Sc in next St, add different St marker to Sc just made. Sc in next 4 St, Sc in next St and add different colored St marker to Sc just made, Sc in next 6 St (18)
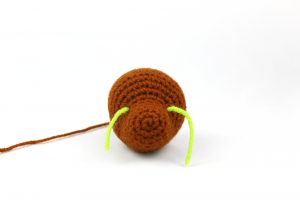
Round 6 eye markers look like this (above)
Round 7: Sc in next 6 St, *Inc* in the next 6 St, Sc in last 6 St (24)
Round 8: Sc in next 6 St, *Inc, Sc in next St* 6 times, Sc in last 6 St (30)
Round 9: *Inc, Sc in next 4 St* 6 times (36)
Round 10-14: *Sc* all around (36)
Round 15: *Dec, Sc 4* all around (30)
Round 16: *Dec, Sc 3* all around (24)
Round 17: *Dec, Sc 2* all around (18)
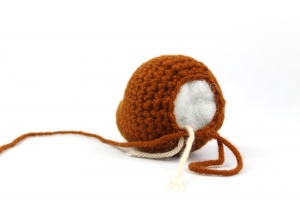
Stuff here. Add in Safety Eyes & Place Safety Nose.
Round 18: *Dec, Sc* all around (12)
Round 19: *Dec* all around (6)
Add any additional stuffing and finish off. Sew closed.

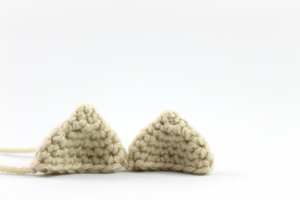
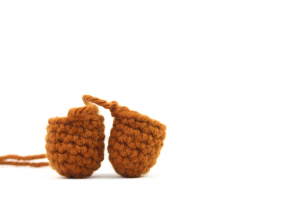
Ears: (Make 2)
In Main Color
Round 1: 4 Sc in Magic Ring (4)
Round 2: *Sc* all around (4)
Round 3: *Inc* all around (8)
Round 4: *Inc, Sc* all around (12)
Round 5: *Inc, 2 Sc* all around (16)
Round 6-7: *Sc* all around (16)
Finish off and pin to the head. Make sure to have ears bend inside in the middle for definition.
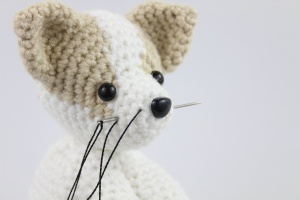
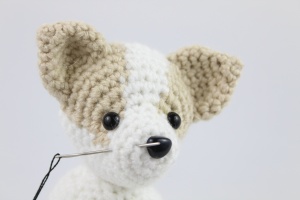
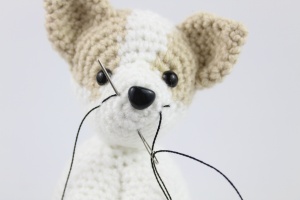
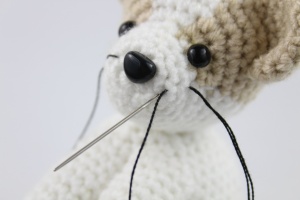
Smile Assembly: With Black Embroidery Thread
Insert needle adjacent to safety nose, about 4 stitches away. Pull needle out about 2 stitches away (Pic. 1). Reinsert needle back through first insertion. (Pic. 2). Now pull needle through to other side of mouth, and repeat as steps 1-2. (Pic. 3). Now insert needle in the middle of the mouth, directly underneath the nose. Pull needle to left smile crease. (Pic. 4). Finally, insert needle to the other half of the smile. Pull through and sew in loose ends.
![]()
Chihuahua Bodies
There are 2 types of bodies. The “sitting” body and the “standing” body. The limbs you make will depend on the type of body you make. Sitting Body on the left. Standing body on the right.
Sitting Body
In Main Color
Round 1: 6 Sc in Magic Ring (6)
Round 2: *Inc* all around (12)
Round 3: *Inc, Sc* all around (18)
Round 4: *Inc, 2 Sc* all around (24)
Round 5: *Inc, 3 Sc* all around (30)
Round 6: *Inc, 4 Sc* all around (36)
Round 7: *Inc, 5 Sc* all around (42)
Round 8: *Inc, 6 Sc* all around (48)
Round 9-11: *Sc* all around (48)
Round 12: *Dec, Sc 6* all around (42)
Round 13-15: *Sc* all around (42)
Round 16: *Dec, Sc 5* all around (36)
Round 17-18: *Sc* all around (36)
Round 19: *Dec, Sc 4* all around (30)
Round 20: *Sc* all around (30)
Round 21: *Dec, Sc 3* all around (24)
Round 22: *Dec, Sc 2* all around (18)
Stuff here
Round 23: *Dec, Sc* all around (12)
Round 24: *Dec* all around (6)
Finish off and add any additional stuffing. Sew closed.
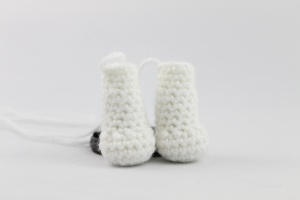
Legs: (Make 2)
Make these legs for the sitting body. In Main Color

Round 1: 6 Sc in Magic Ring (6)
Round 2: *Inc* all around (12)
Round 3: *Inc, Sc* all around (18)
Round 4: *Sc* all around (18)
Round 5: Sc in next 3 st, Dec 1 time, Sc in next 13 st (17)
Round 6: Sc 1, *Dec* 3 times, Sc in next 10 st (14)
Round 7: Sc 2, *Dec* 1 time, Sc in next 10 st (13)
Round 8-12:*Sc* all around (13)
Finish off and stuff. Pin to the bottom part of the body.
Arms: (Make 2)
Make these Arms for the sitting body. In Main Color
Round 1: 6 Sc in Magic Ring (6)
Round 2: *Inc* all around (12)
Round 3: *Inc, Sc* all around (18)
Round 4-5: *Sc* all around (18)
Round 6: Sc in next 3 st, Dec 6 times, Sc in next 3 st (12)
Round 7-11:*Sc* all around (12)
Round 12: Sc in next 3 St, *Dec* 1 time, Sc in nest 4 St, *Dec* 1 time, Sc in last St (10)
Round 13-15: *Sc* all around (9)
Finish off and stuff. Pin to the top inner part of the body.
Tail:
In Main Color
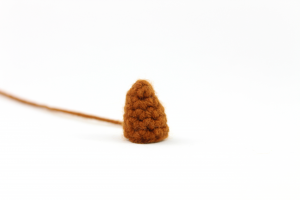
Round 1: 4 Sc in Magic Ring (4)
Round 2: *Sc* all around (4)
Round 3: *Inc* all around (8)
Round 4-6: *Sc* all around (8)
Finish off. Pin to the back of the body.
Assembly:
Reassemble any parts to your liking. Start by sewing on the legs, then the arms, then the tail. Last, sew on the head.

![]()
Standing Body:
In Main Color
Round 1: 6 Sc in Magic Ring (6)
Round 2: *Inc* all around (12)
Round 3: *Inc, Sc* all around (18)
Round 4: *Inc, 2 Sc* all around (24)
Round 5: *Inc, 3 Sc* all around (30)
Round 6-21: *Sc* all around (30)
Round 22: *Dec, Sc 3* all around (24)
Round 23: *Dec, Sc 2* all around (18)
Stuff here
Round 24: *Dec, Sc* all around (12)
Round 25: *Dec* all around (6)
Finish off and add any additional stuffing. Sew closed.
Legs: (Make 4)
Make these legs for standing body. In Main Color
Round 1: 6 Sc in Magic Ring (6)
Round 2: *Inc* all around (12)
Round 3-7: *Sc* all around (12)
Finish off and stuff. Pin to the bottom part of the body. Make tail as in page 6.
Assembly:
Make any readjustments to your liking. Sew on limbs, and stuff before fully sewing shut. Sew on tail. Finally, sew on the head.
Collar:
In any desired color
Round 1: Ch 22
Round 2: Turn, Hdc in 2nd Ch from hook, Hdc in next 20 St (21)
Finish off.
Collar Tag:
In Yellow
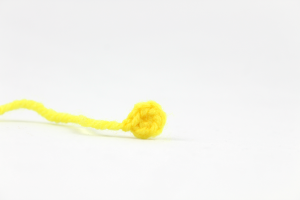
Round 1: 6 Sc in Magic Ring (6)
Round 2: Slst to next St. Finish off
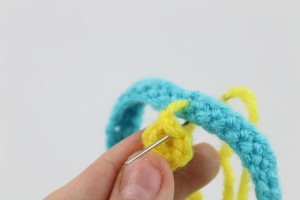
Assembly:
Insert collar tag in the middle of the collar. Pull yarn through, reinsert into the tag, then reinsert into collar.
Yay! You’re all done! If you finished this pattern, I would be SO HAPPY if you could tag me on Instagram @StringyDingDing, or “try” it on Pinterest!
More free amigurumi patterns…


27 Comments
The tail and ears of a Chihuahua are much longer. The tail actually curves around like a donut. You might want to look at a picture of a purebred standard size Chihuahua. the miniatures are not really purebred and tend to have smaller ears, but still have the long donut curved tail. I added 3 rows of 8 stitches and made two rows of 12 and made two rows of 16 for the ears. The tail should have at least 12 rows and be stitched midway to form the curve and then finish the curve with a stitch or two near the base of the tail. Your pattern, while very nice, is more of a Jack Russell terrier with a bobbed tail.
Thanks for your information! I usually looks at lots of pictures of cartoons and real life objects while making a pattern, but I guess I went for a cartoony look on this one haha. I hope the modifications worked out well and look more true to life! Thanks
Hi. Just want to thank you so much for this pattern and the hard work put into it. I made a horse using this pattern for my nephew and he loves it. Thank you!!
I might be doing it wrong but the legs for the standing dog dont seem to be coming out wrong. Their coming out flat. Help
Hi there, no worries I will try to help 🙂 So first make sure that your stitch count is matching up with the rounds. If your stitch count is less than the 12 stitches, it will be smaller and flatter. Next, make sure to single crochet around for a total of 5 rounds to make the leg longer. You can single crochet even more rounds if you want, to make the leg even longer. If this doesn’t seem to help, please let me know and I can see what else we can do! Thank you 🙂
Love this pattern! And I disagree with the first comment. I think this does look like this type of breed. My stepmom has one and this looks very much like her dog. Anyways, thanks for your pattern! I’m sure the little girl I babysit will love her birthday gift!
Hi Cheryl! Thank you so much for your very kind comment, it makes me so happy that you think it looks like a chihuahua! I tried my best so thank you so much 🥰 That’s also extremely adorable that you made your little friend a chihuahua!! I hope she loves it too! (I’m confident she will – after all it’s a handmade gift stitched with love ❤️)
I hope she has a super fun birthday and I hope you have an amazing day! Best wishes 🌞
Hi, can i know the size of this cute doggy.
Hi Aathi! The standing dog comes out to be about 3.5″ long by 5″ tall 🙂 Then the sitting dog is 5″ tall by 3.5″ long. Please let me know if you have any other questions ❤️
Question about round 7-8 when doing making head. Its saying to increase from 24 to 30 by 6 sc + 6 inc + 6 sc << this is only accounting for 18 stitches, not 24. Am I missing something? Should it be 8 sc + 8 inc + 8 sc? or 6 sc + 12 inc + 6 sc?
Hi there, thank you for the question! I hope I can help 🙂
Round 7 uses 18 stitches made from Round 6, but Round 7 makes 24 stitches at the end of the round. Let me explain 🥰
1. For Round 6 we end up with a total of 18 stitches. This means Round 7 will have to work in those 18 stitches!
2. Round 7 uses: 6 sc+6 inc+6 sc = 18 stitches used! But when we add the increases we will find the total of stitches made in round 7. So Round 7: 6+12(because we made 6 increases +6 =24 stitches made at the end of Round 7! Do note that with the increases we are making 1 increase into the next 6 stitches 😊
3. So now we can work on to Round 8. We will have to work into those 24 stitches from Round 7. For Round 8 it says: Sc in next 6 St, *Inc, Sc in next St* 6 times, Sc in last 6 St (30)
4. Round 8 uses: 6+ 2×6 = 12 (from the *Inc, Sc next st* 6 times + 6 st = 24 stitches used! Lets count the stitches made in Round 8: 6+3×6 = 18 (From the *Inc*, Sc in the next st* 6 times)+ 6 =30. So we have made those 30 stitches!
I hope that was able to explain what we’re doing 🙂 I’m sorry if it’s too math-y! Please feel free to let me know if I can clarify or if you have any other questions ❤️
OH thank you for that! I had missed the “SC” in the round 8 middle increase d’oh! I kind of eyeballed it.. no wonder it looks a little wavy, but it should be ok… hopefully… THANKS for explaining it so well, much appreciated.
FYI I just finished the ears, such a fun project!! Loving it so far. Thanks for your hard work.
One more question – how do you “sew” the pieces together? embroidery thread of the body color? Or just by slip stitches?
Aw yay I’m so glad it was able to work out for you! I can totally see how you may miss that extra Sc! I was worried my explanation was too all over the place, so I’m very happy to hear that it worked out for you 🙂
For sewing the pieces together, use the same color yarn you used for the body color. Put that yarn onto a needle and pin the piece into place. Now insert your needle going from the, let’s say ear to the body and pull the needle through. Repeat this process. Insert needle one stitch over in the body and bring it one stitch over to the ear 🙂 Repeat this all the way until the ear is completely sewed on. Once sewed on, tie this yarn into a firm knot and bring it into the body to hide. Then weave in the end of yarn and snip off any excess yarn! I hope that explains well enough, it’s a little difficult without a visual!
AH gotcha, so the same way as you close off crochet projects. Makes sense! I’m looking forward to seeing the final project. It’s for a Christmas gift, but it will be so hard to not show it off before hand. Will send you a picture when its done! Thanks again for your prompt responses, it’s very helpful.
this still does not make sense to me. I am new to crochet but the numbers do not add up. Please explain in simple crochet for round 8. round 6 works, round 7 works and round 9 works. round 8 makes no sense
Hi Tammy! Round 8 is very similar to Round 7, except a slight difference.
Round 8: Sc in next 6 St, *Inc, Sc in next St* 6 times, Sc in last 6 St (30)
So we will single crochet in the next 6 st. Now we will repeat what’s in the *stars*. So repeat *Inc in the next st, Single crochet in the next st* a total of 6 times (which makes 18 stitches). Now we will single crochet in the last 6 stitches, and this equals 6+18+6= 30 stitches!
I hope that was able to clarify 🙂 Please feel free to let me know if you have any questions ❤️
You say it is a free pattern but won’t allow to print??? Cute pattern.
Hi Anita! I’m really happy you like the pattern 🙂 You can view the pattern free online, but if you would like to print the pattern you can purchase the PDF here: https://stringydingding.com/product/chihuahua-amigurumi-pdf/
I change only $1.99 just because it takes maaaany hours to create a pattern, especially to put together the PDF! Please feel free to let me know if you have any questions when it comes to printing out the PDF 🙂 I’m happy to help! ❤️ 😍
Hi im looking for chase from paw patrol pattern free. Please do you perhaps have one its for a boys birthday. Thank you so much for the cute patterns
Hi Ella! That’s such an adorable idea to make one of the Paw Patrol puppies for a birthday! I don’t have any patterns for them, but you could make Chase using this pattern 🙂
All you would have to do is start making his nose in a light brown. Then, once you start forming the head change to a dark brown where we make the 3rd and 4th increase in Round 7 (Round 7: Sc in next 6 St, *Inc* in the next 6 St, Sc in last 6 St). Change back to light brown after making those 2 increases. Continue changing to a dark brown when you meet that dark brown increase area, making 4 stitches in dark brown. This will form his eye patches to be in light brown and the middle of his face to be in dark brown – just like the paw patrol puppy! On Round 12, continue in only dark brown.
I would make Chase using the standing chihuahua version of this pattern. For the standing version of the body, crochet Rounds 1-18 in blue to make Chase’s cop uniform. Then change to dark brown and crochet the rest of his body!
Make his ears and tail in dark brown. For his legs, also use the standing body legs. Crochet Rounds 1-2 in light brown. Change to dark brown and crochet Rounds 3-7 in dark brown! Make his collar in black.
I don’t have a cop hat pattern you could use, but if you would like I can write one up for you so you can make the complete dog! 🙂 ❤️
Please how can I download it in word? The Chihuahua
Greatings
Sabine
Loving this pattern. Still working on the head but how do you do the version with 2 colors on the face? I’m a beginner. Love your site and patterns!!
I have made the sitting chihuahua but not very well. It’s quite lopsided after I sewed it together- because I had trouble understanding the pattern and it’s too fiddly for me. But please tell me what Hdc means on the collar section- couldn’t find a glossary of terms! I’m in Australia- terminology probably different! Thanks! Liz
Hey. I love this pattern. I am trying to figure out how to make the white one with the beige around the eyes. I just can’t seem to figure it out. Any help would be appreciated. I am trying to make a tribute pup for someone who just lost their dog.
Thanks
Hi. Just want to thank you so much for this pattern and the hard work put into it. I made a horse using this pattern for my nephew and he loves it. Thank you!!
I made the first one similar to a friend’s dog. I tend to think afterwards what Id do different the next time and that’s the brown one