
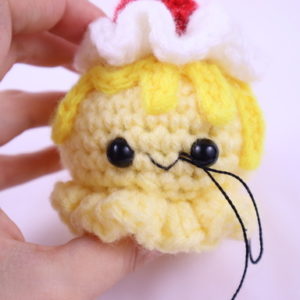
Banana Split Ice Cream Amigurumi – Free Crochet Pattern
 This pattern is just 1 out of 6 included in the Fast Food Amigurumi Bundle! Every week 1 new fast food themed amigurumi will be released.

Want to see the other fast food patterns and their release date? See them here!
Become a member to unlock each PDF pattern as they’re released!
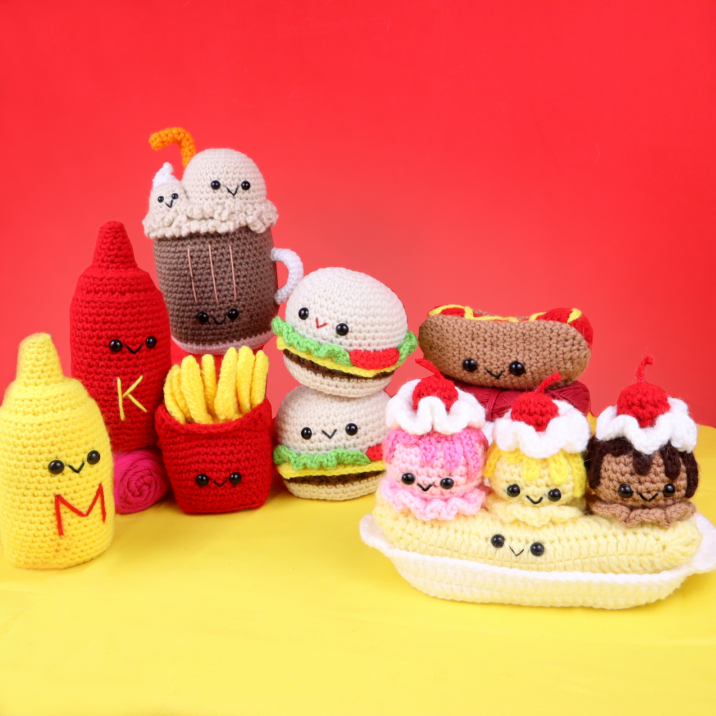
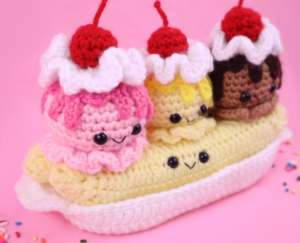
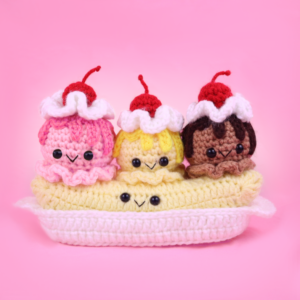
I hope you enjoy this free banana split amigurumi crochet pattern! Believe it or not, making the actual ice cream was the easiest part to figure out. It took a long time to get the banana and plate just right. But I know that my effort is well worth it, because you’ll have a blast making this pattern 🙂 Oh, in case you didn’t notice, I just released an amigurumi fast food bundle! This is the first pattern to it – one a week I’ll be releasing another new fast food pattern. I tried to pick out amigurumis that were fitting for summer, so naturally a banana split has to be included. Below is a picture of the full bundle:
I hope you look forward to the rest of the patterns! Do you see one you’re super excited to make? Honestly, my favorite has to be the root beer float. Let me know if you have a favorite 🙂
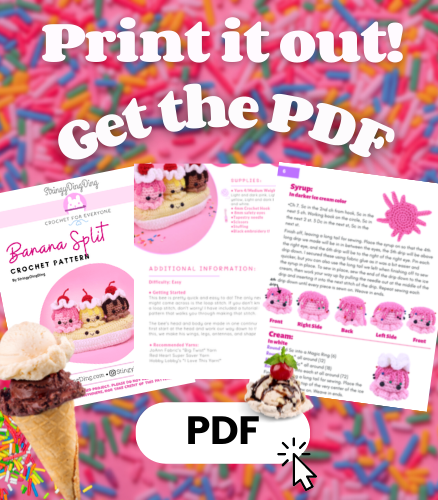
Print out this pattern – purchase the PDF here!
Supplies:
• Yarn 4/Medium Weight Yarn in…
Light and dark pink, Light and dark yellow, Light and dark brown, Red, and white.
• 4mm Crochet Hook
• 8mm safety eyes
•Tapestry needle
•Scissors
•Stuffing
•Black embroidery thread
Additional Information:
Difficulty: Easy
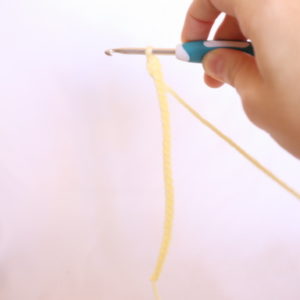
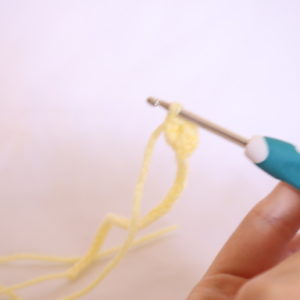
• Getting Started
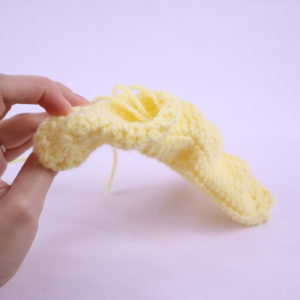
This banana split is really fun to make, but there are many parts to it which means lots of assembly! I provide lots of photos and descriptions on how to assemble everything to try and make it easier 🙂 First, we make the ice cream and their accessories. Next, we make the banana, and then the bowl!
Ice Cream:
In lighter ice cream color
Round 1: 6 Sc into a Magic Ring (6)
Round 2: *Inc* all around (12)
Round 3: *Inc, Sc* all around (18)
Round 4: *Inc, Sc 2* all around (24)
Round 5: *Inc, Sc 3* all around (30)
Round 6-9: *Sc* all around (30)
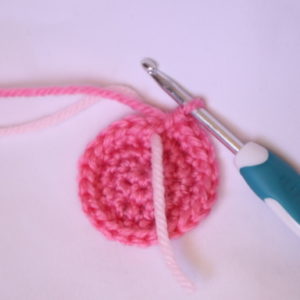
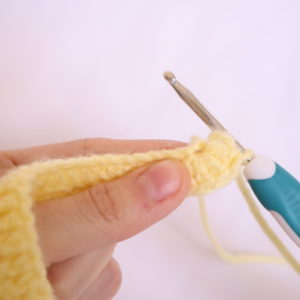
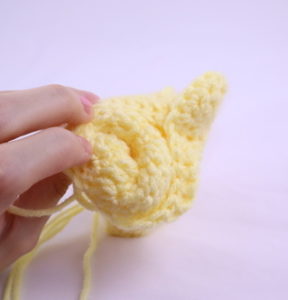
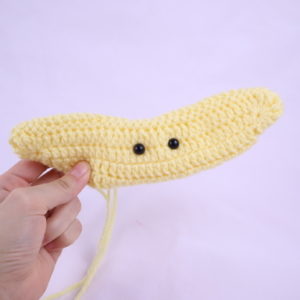
Now we will add 2 eye stitch markers into Round 9. These will mark where to place the safety eyes later. Be sure to use 2 differently colored stitch markers so you won’t confuse your eye stitch markers for your round stitch marker! Add a stitch marker into the 14th stitch and 18th stitch on Round 9.
Round 9 eye markers pictured above
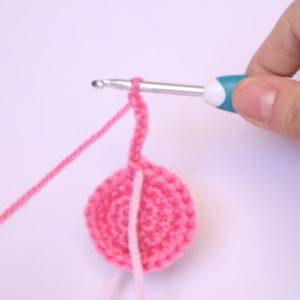
Round 10: *Sc* all around (30)
Round 11: *Dec, Sc 3* all around (24)
Round 12: *Dec, Sc 2* all around (18)
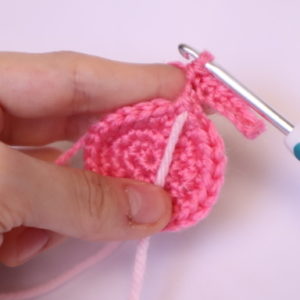
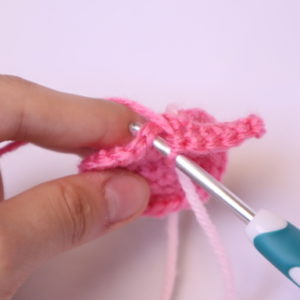
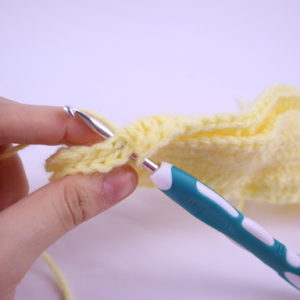
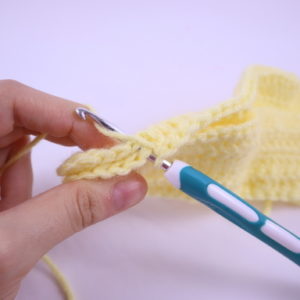
Round 13: In the FLO make 4 Dc into each stitch all around (72)
Round 14: We will be working in the back loops that we left from Round 13. Fold the ruffle towards you – it will expose the back loops (Pic 1). Working in those back loops (Pic 2), repeat *Dec, Sc* all around (12)
1. 2.
2.
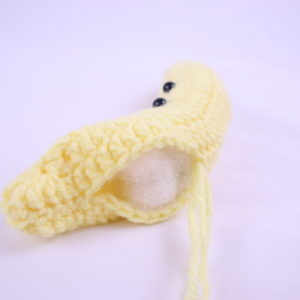
Add safety eyes into the marked areas. Stuff firmly here.
Round 15: In BOTH loops *Dec* all around (6)
Finish off and sew the remaining stitches closed. Weave in ends.
Syrup:
In Darker Ice Cream Color
Round 1: 6 Sc into a Magic Ring (6)
Round 2: *Inc* all around (12)
Round 3: *Inc, Sc* all around (18)
Round 4: *Inc, Sc 2* all around (24)
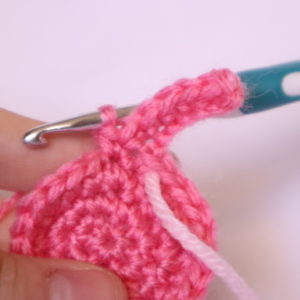
In the next round we will form the syrup drips.
Sc in the next st, Ch 7 (Pic 2). Sc in the 2nd ch from the hook, Sc in the next 5 ch (Pic 3). Working back on the circle, Sc in the next st (Pic 4-5), 3 Dc in the next st, Sc in the next st.
1. 2.
2.
3. 4.
4.
5.
•Ch 4, Sc in the 2nd ch from the hook, Sc in the next 2 ch. Working back on the circle, Sc in the next 2 st.
•Ch 5, Sc in the 2nd ch from the hook, Sc in the next 3 ch. Working back on the circle, Sc in the next st. 3 dc in the next st, Sc in the next st.
•Ch 4, Sc in the 2nd ch from the hook, Sc in the next 2 ch. Working back on the circle, Sc in the next 2 st.
•Ch 5, Sc in the 2nd ch from the hook, Sc in the next 3 ch. Working back on the circle, Sc in the next 2 st.
•Ch 7, Sc in the 2nd ch from the hook, Sc in the next 5 ch. Working back on the circle, Sc in the next st, 3 Dc in the next st, Sc in the next st.
•Ch 5, Sc in the 2nd ch from the hook, Sc in the next 3 ch. Working back on the circle, Sc in the next 2 st.
•Ch 4, Sc in the 2nd ch from the hook, Sc in the next 2 ch. Working back on the circle, Sc in the next 2 st.
•Ch 7. Sc in the 2nd ch from hook, Sc in the next 5 ch. Working back on the circle, Sc in the next 2 st. 3 Dc in the next st, Sc in the next st.
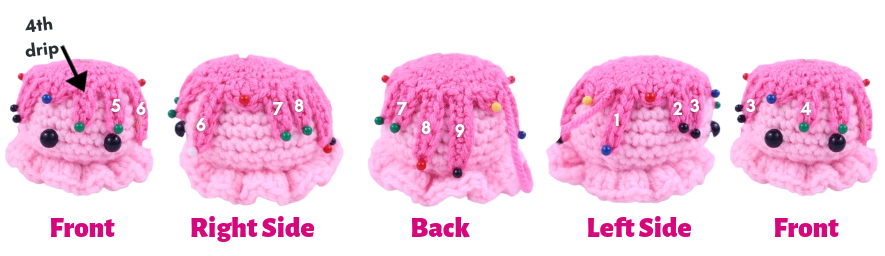
Finish off, leaving a long tail for sewing. Place the syrup on so that the 4th long drip we made will be in in between the eyes, the 5th drip will be above the right eye, and the 6th drip will be to the right of the right eye. Pin each drip down.
I secured these using fabric glue as it was a bit easier and quicker, but you can also use the long tail we left when finishing off to sew the syrup in place. To sew in place, sew the end of the drip down to the ice cream, then work your way up by pulling the needle out at the middle of the drip and inserting it into the next stitch of the drip. Repeat sewing each drip down until every piece is sewn on. Weave in ends.
Cream
In white yarn
Round 1: 6 Sc into a Magic Ring (6)
Round 2: *Inc* all around (12)
Round 3: *Inc, Sc* all around (18)
Round 4: 4 Dc into each st all around (72)
Finish off, leaving a long tail for sewing. Place the whipped cream on top of the very center of the ice cream/syrup and sew on. Weave in ends.
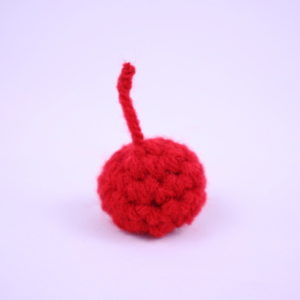
Cherry:
In Red
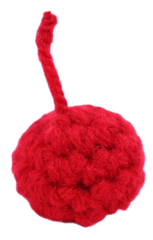
Round 1: 6 Sc into a Magic Ring (6)
Round 2: *Inc* all around (12)
Round 3-4: *Sc* all around (12)
Stuff firmly here.
Round 5: *Dec* all around (6)
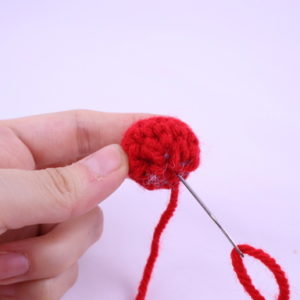
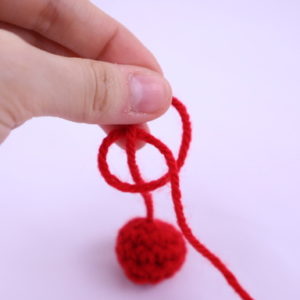
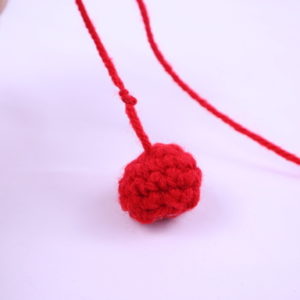
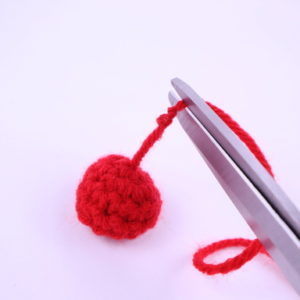
Finish off, leaving a long tail. Sew the remaining stitches closed. Insert the needle with thread from the very bottom center (Pic 1), pull the needle up to the center top of the cherry (Pic 2). Tie a knot about 1″ away from the ball 3 times (Pic 3-4). Then, cut above this knot (Pic 5-6). This will form the cherry’s stem! Place on top of the whipped cream and sew on with red yarn.
1. 2.
2.
3. 4.
4.
5. 6.
6.
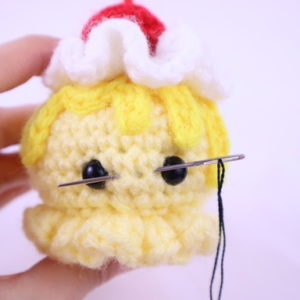
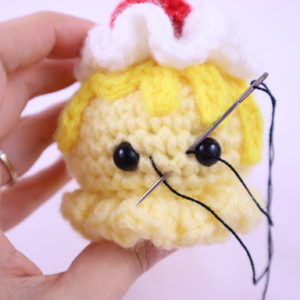
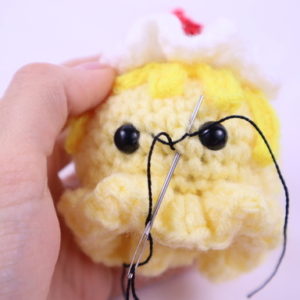
Smile:
In black embroidery thread
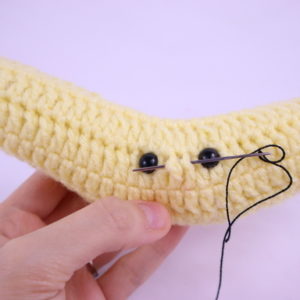
Insert needle with thread one stitch over from the right eye, then pull needle out one stitch over from the left eye as shown (Pic 1). Reinsert needle into the original insertion spot, and pull needle out where shown, making sure the needle lands ABOVE the thread (Pic 2). Reinsert needle into the same spot, this time making sure the needle lands BELOW the yarn as shown (Pic 3). Tie the tail ends of yarn firmly into knots and bring into the ice cream to hide. Done!
1. 2.
2.
3. 4.
4.
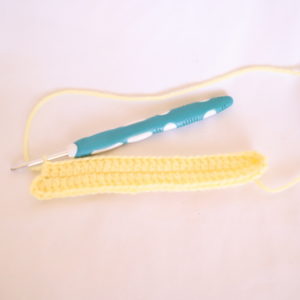
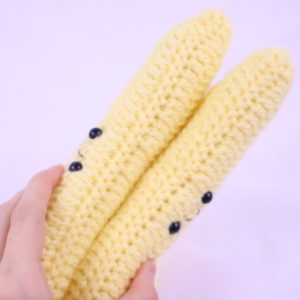
Banana:
In Yellow
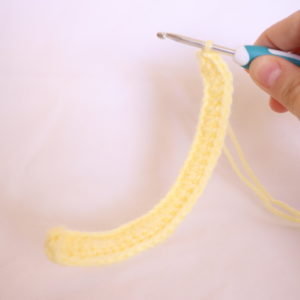
To make the banana, will make 2 separate pieces and crochet them together to form 1 banana. So total, you will need to make 4 pieces to make 2 complete bananas. We will start making this banana by making a chain and work completely around the chain to form a round!
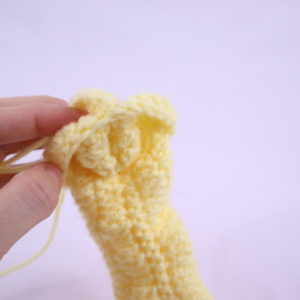
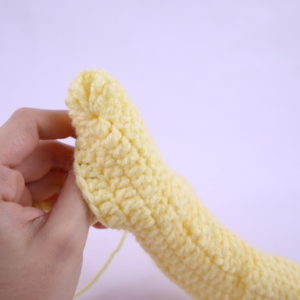
Row 1: Ch 32 (Pic 1). Skip the first 2 ch, Dc in the 3rd ch from the hook (Pic 2). The first 2 skipped chains count as 1st dc. Dc into the same st. Dc in the next 28 ch. 3 Dc in the last ch. Now we meet the end of the ch (Pic 3). Turn to the OTHER side of the ch, where we haven’t made any stitches yet (Pic 4). Dc in the next 28 st (Pic 5-6) (63)
1. 2.
2.
3. 4.
4.
5. 6.
6.
Row 2: Dc in the first st. Dc 2 times in the next st, Trc 2 times the same st, Ch 2, Trc 2 times in the same st, Dc 2 times in the same st. Dc in the next 7 st. Repeat *Dc dec 1 time, Dc in the next 2 st* 4 times. Dc in the next 7 st. 2 Dc in the next st, Trc 2 times in the same st, Ch 2, Trc 2 times in the same st, Dc 2 times in the same st. Dc in the next 9 st. Repeat *2 Dc in the same st, Dc in the next 2 st* 4 times. Dc in the next 9 st (81)
Banana Assembly:
In Yellow
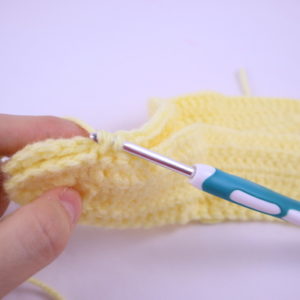
Place right sides of the banana together, having the wrong sides facing out (Pic 1). Line the stitches up. Going through BOTH stitches, Sc all around (Pic 2-8) – don’t Sc together the last 9 stitches you have left!
1. 2.
2.
3. 4.
4.
5. 6.
6.
7. 8.
8.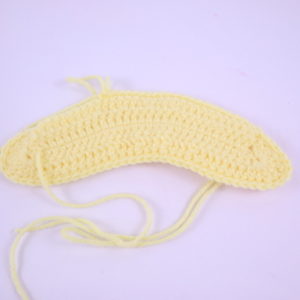
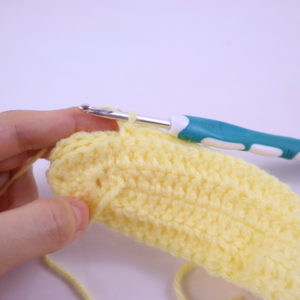
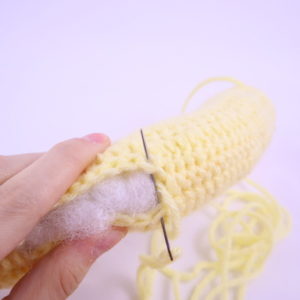
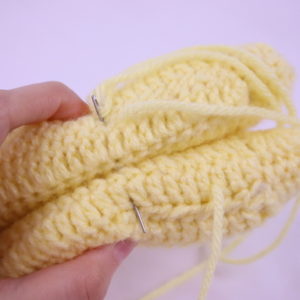
We will have a hole where we haven’t crocheted the last 9 stitches together (Pic 9). Flip the banana inside out going through the hole we left (Pic 2-5). By doing this, the seam where we crocheted the banana together will be hidden on the inside! Add safety eyes into the banana, stuff firmly, and sew the remaining stitches closed by going from the stitch close to you, to the opposite side’s stitch (Pic 8). Weave in ends.
9. 10.
10.
11. 12.
12.
13. 14.
14.
15. 16.
16.
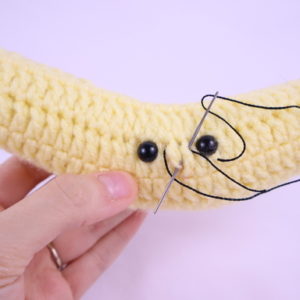
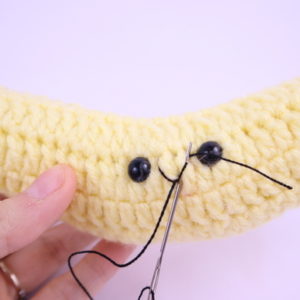
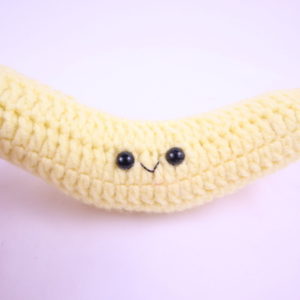
Banana Smile:
In black Embroidery Thread
Insert needle with thread one stitch over from the right eye, then pull needle out one stitch over from the left eye as shown (Pic 1). Reinsert needle into the original insertion spot, and pull needle out where shown, making sure the needle lands ABOVE the thread (Pic 2). Reinsert needle into the same spot, this time making sure the needle lands BELOW the yarn as shown (Pic 3). Tie the tail ends of yarn firmly into knots and bring into the banana to hide. Done!
1. 2.
2.
3. 4.
4.
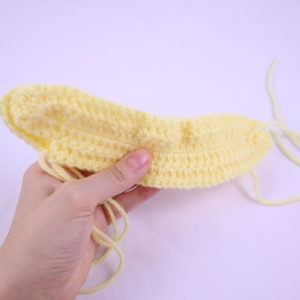
Assembly:
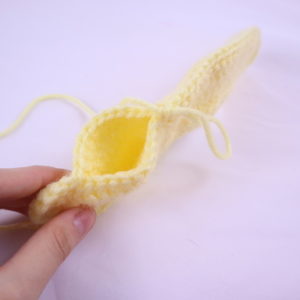
Place the two bananas together as shown (Pic 1). Take a long piece of light yellow yarn and insert it into one banana, and pull out at the other banana as shown (Pic 2). Repeat this until they’re fully sewn together. Now, take the pink ice cream and place it on the very left side of the banana, making sure the ice cream is in the middle of the two bananas (Pic 3). Sew it on with pink yarn, going from the banana up to the ice cream – then down the next stitch from the ice cream to the banana. Repeat this, making sure to sew the ice cream to both bananas. Repeat this for the other ice creams. Weave in ends.
1. 2.
2.
3.
Bowl:
In White
Row 1: Ch 17 (Pic 1). Skip the first 2 ch. Dc in the 3rd ch from the hook (Pic 2). Dc 5 times into that same st. Dc in the next 13 st. Dc 6 times in the last ch. Now we meet the end of the chains (Pic 3). Turn to the others side of the chain, where we haven’t made any stitches yet (Pic 4). Dc in the next 13 st (Pic 5-6) (38)
2.
3. 4.
5. 6.
Row 2: Repeat *2 Dc in each of the next 6 st. Dc in the next 13 st.* 2 times (50)
Row 3: Repeat *2 Dc in the next st, 1 Dc in the next st* 6 times. Dc in the next 13 st. Repeat *2 Dc in the next st, 1 Dc in the next st* 6 times. Dc in the next 13 st (62)
Row 4: Dc in the next 2 st. Repeat *2 Dc in the next st, Dc 1 time in the next 2 st* 6 times. Dc in the next 11 st. Repeat *2 Dc in the next st, Dc 1 time in the next 2 st* 6 times. Dc in the next 13 st (74)
Row 5: In the BLO (Back Loop Only), *Dc* all around (74)
Row 6: In BOTH loops, *Dc* all around (74)
Row 7: SlSt in the next 12 st. 3 Dc in each of the next 6 st. SlSt in the next 32 st. 3 Dc in each of the next 6 st. SlSt in the next 18 st. (74)
Finish off and weave in ends. Place the bananas and ice cream into the bowl. Done!


20 Comments
This little Banana Split is simply adorable. Thank you so much for the pattern. I’m looking forward to the rest of the patterns to go with it.
Hi Eileen! Thank you so much, I love to hear that you like this banana split! 🥰 I hope you’ll have some fun with the other patterns, are you looking forward to one in particular? I think my favorite is the upcoming rootbeer float pattern. I love anything ice cream related lol!
Please I want to know what I have to do to get this free pattern, thank you
Hi there Bibby! I’m so happy you’re interested in making this banana split pattern 😍 To see the full free pattern please scroll up from these comments and you’ll find the pattern. If by chance you have any questions when making this amigurumi, please let me know! I’m always happy to help 🙂
I just finished the banana split. It worked up well and your instructions are easy to follow. I enjoy your patterns. Thank you
Aww that’s so amazing to hear Mary! I’m so glad that you found this pattern easy to follow. I try my best to make the patterns easy for everyone, so the fact that you found it easy is awesome! I hope you can have some fun making my other crochet patterns… maybe some crochet french fries would go good with the banana split? Lol! 🙂
Hi, I;m making the banana split now, but I think there’s a mistake in banana pattern , on the first row, it is 63stitch , but in R2 , it is 65sitch (81) ? please check, thank you
I’m having a little trouble with the second row of the bananas. Do the 2 dc and 2trc, ch2 2 try and 2 dc all go into the same stitch? Or do they each go in their own stitch? Thanks
They all go into the same stitch to increase the banana ends
Do you have an updated pattern for the banana and the dish? Both have mistakes but the pattern is so cute and i really want to complete the project!
The bananas and bowl are not turning out right is there an updated version ?
Is there a way to make the banana without doing a chain stich? I do not know how to do a chain stich! Thanks a bunch!
How do you make the banana? I am having trouble! ( Chain stiches are not my thing!) Thank you! Cara.
Same like the others, even I buyed the pdf but the banana pattern it’s the same on this page, it’s not very clear.
Turned out so good! I love it. Thanks for the pattern!
Looks great. Like several others have noted, the banana pattern and the bowl dont seem to work out. Good for you for figuring it out. I’ve made all the other pieces but without a better explanation of the rest I’m afraid mine will remain unfinished
im not liking how the bowl is turning out….did you?
I loved making this pattern! It turned out so well! I found the bananas hard to do, but I got there in the end!
How did you do the bowl? Yours came out nicely! Every time I try to follow the pattern for it, it comes out wonky and I’m having trouble like others have mentioned 🙁
Adorable pattern! Thanks so much for making it! 🙂