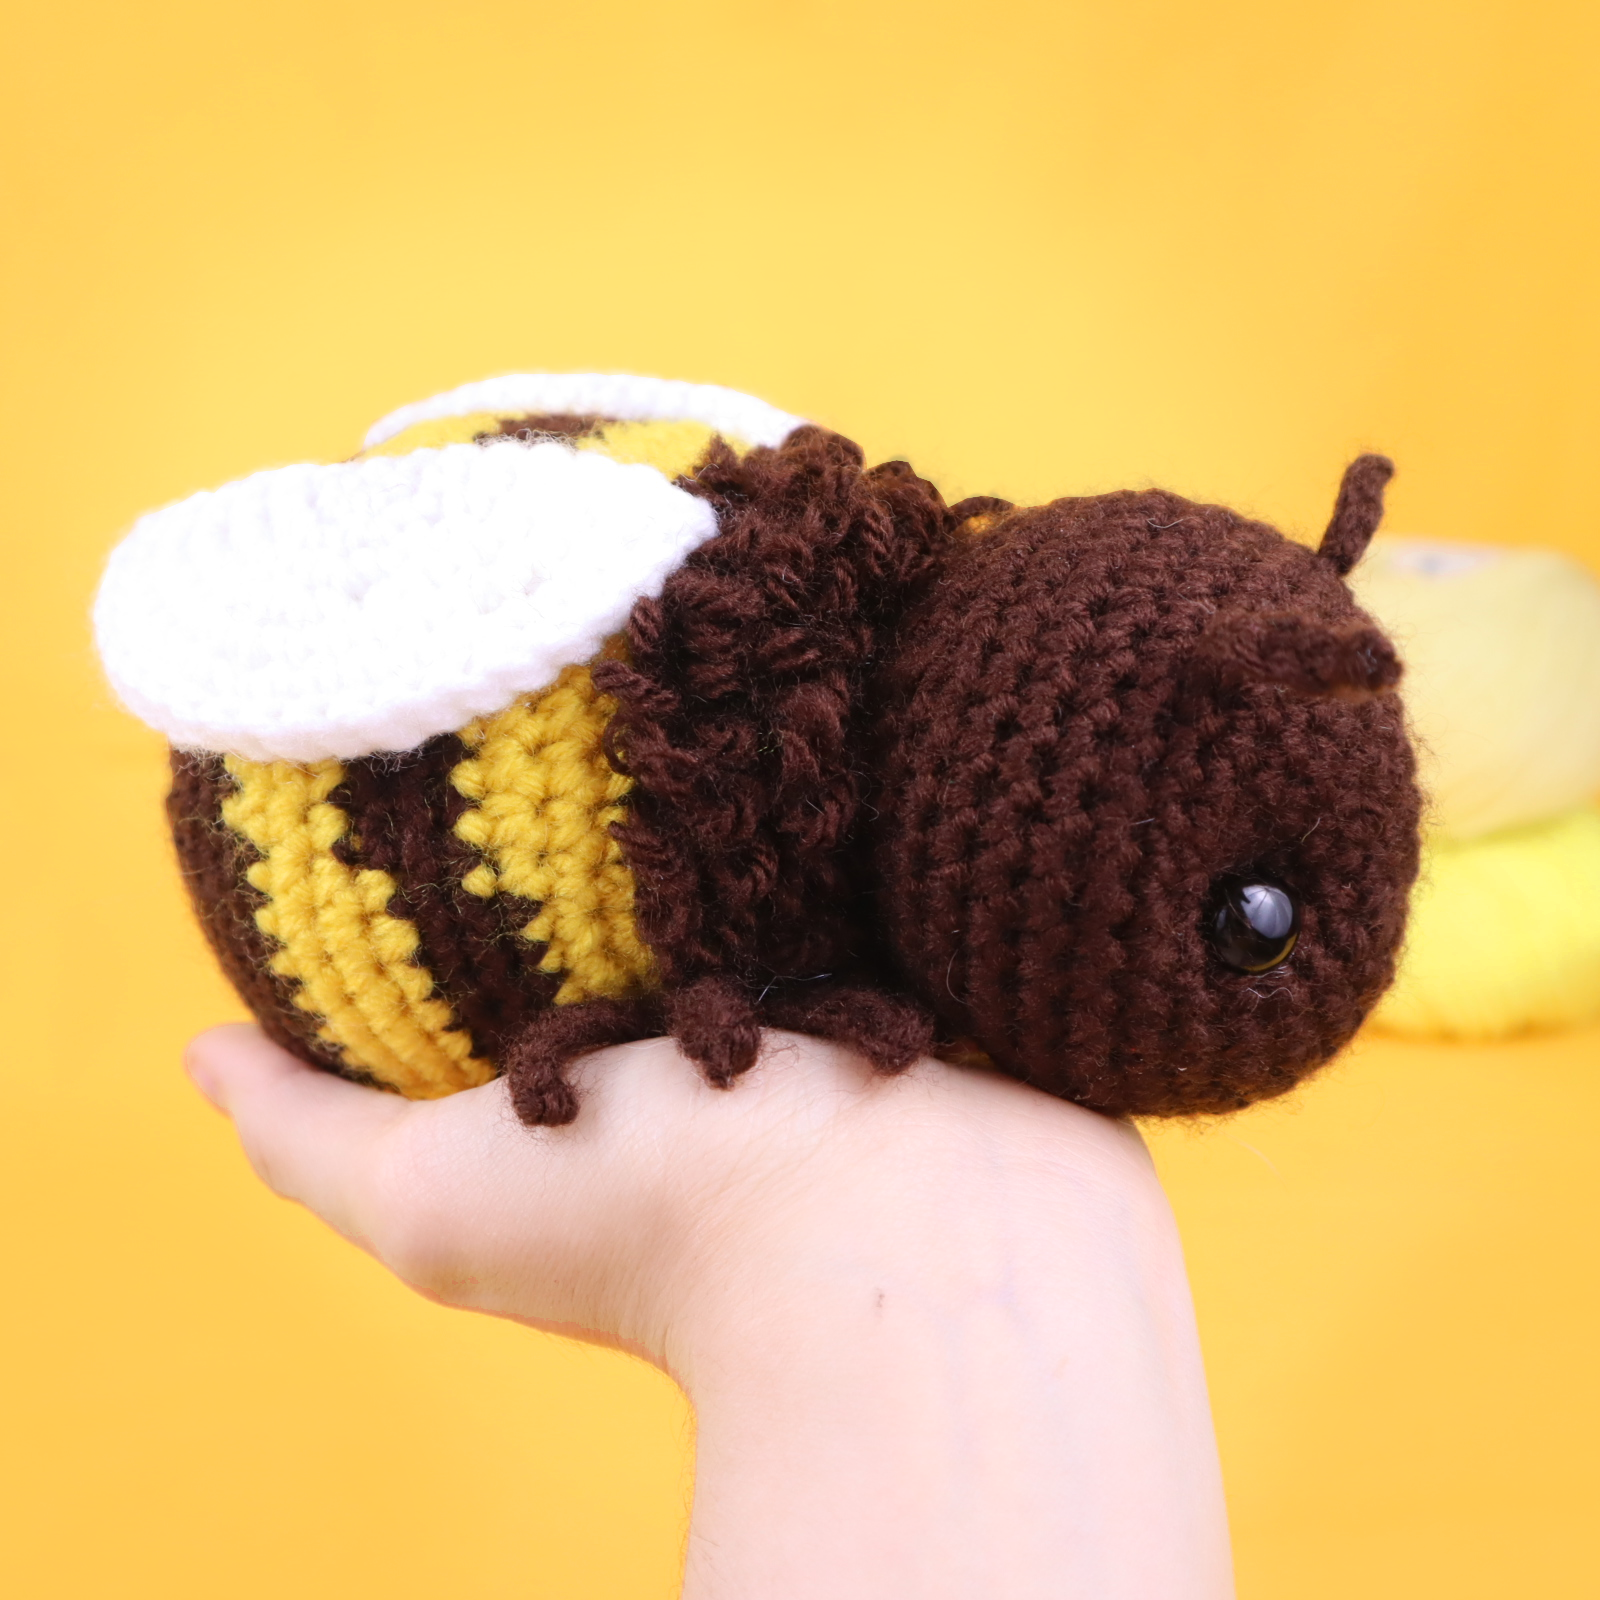
Free Bumble Bee Amigurumi Crochet Pattern
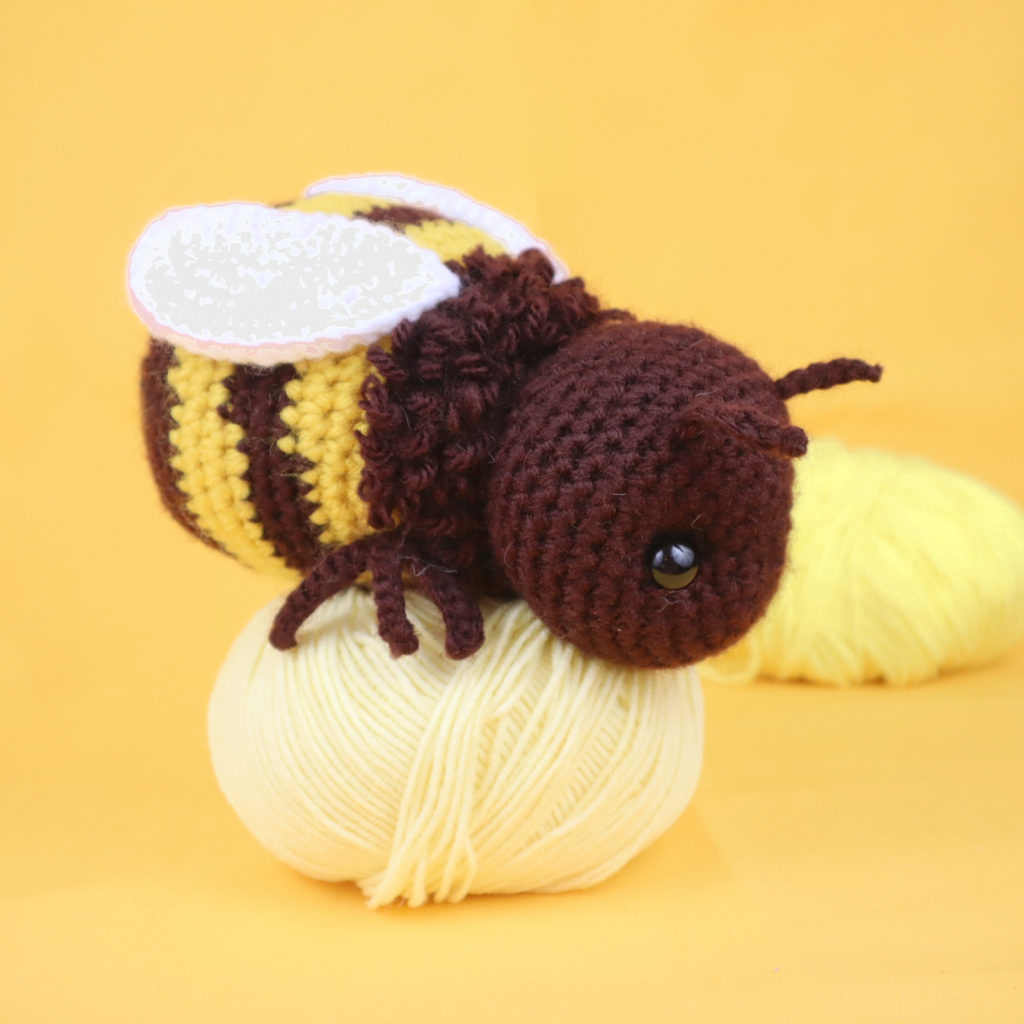
Hi everyone! It’s currently summer which means there’s lots of bees outside. Do you run away from them even though you’re not supposed to? Well, I don’t think you’ll be running away from this free bee amigurumi crochet pattern, because it’s so cute! My favorite part of this pattern is how we make it fuzzy. We do this by creating a loop stitch, which I show you step-by-step how to do.
I actually have a bee pattern already, which I didn’t realize until half way through making this pattern! The other bee pattern looks pretty different from this one, so I hope you don’t mind 🙂 As always, let me know if you have any questions when it comes to making this pattern! I try to add detailed descriptions with lots of pictures, but I know that we can get confused on certain parts. Just let me know!
I’m currently working on a bundle for next week’s release. I talked a bit about it on StringyDingDing’s member’s forum, so if you’re a StringyDingDing member go check that out!
Print this pattern out – purchase the PDF!


Supplies:
• Yarn 4/Medium Weight Yarn in…
Brown, Yellow, and White
• 4mm Crochet Hook
• 12mm safety eyes
•Tapestry needle
•Scissors
•Stuffing
Additional Information:
Difficulty: Easy
• Getting Started
This bee is pretty quick and easy to do! The only new thing you might come across is the loop stitch. If you don’t know how to do a loop stitch, don’t worry! I have included a tutorial in this pattern that walks you through making that stitch.
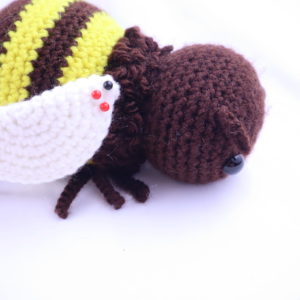
The bee’s head and body are made in one continuous piece. We first start at the head and work our way down to the body. After this, we make his wings, legs, antennas, and shape the face!
• Recommended Yarns:
JoAnn Fabric’s “Big Twist” Yarn
Red Heart Super Saver Yarn
Hobby Lobby’s “I Love This Yarn!”
Head/Body:
Start in brown
Round 1: 6 Sc into a Magic Ring (6)
Round 2: *Inc* all around (12)
Round 3: *Inc, Sc* all around (18)
Round 4: *Inc, Sc 2* all around (24)
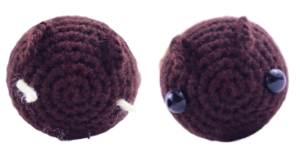
We will add 2 eye stitch markers into Round 5. This will mark where to place the eyes later. Be extra sure to use a differently colored stitch marker so you won’t confuse your eye stitch markers for your round stitch marker! Add a stitch marker into the 6th stitch and the 20th stitch.
Round 5: *Inc, Sc 3* all around (30)
Round 6: *Inc, Sc 4* all around (36)
Round 7-13: *Sc* all around (36)
Round 14: *Dec, Sc 4* all around (30)
Round 15: *Dec, Sc 3* all around (24)
Round 16: *Dec, Sc 2* all around (18)
Round 17: *Dec, Sc* all around (12)
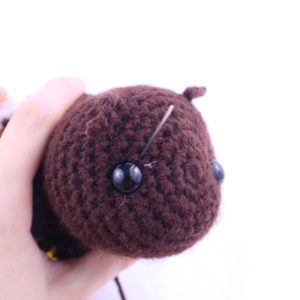
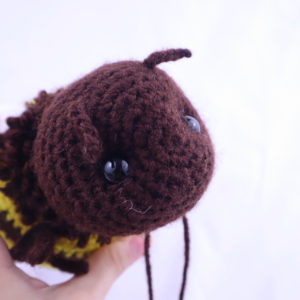
Add eyes in the marked areas now.
Stuff the head. In the next few rounds we will make a loop stitch to give the bee his fuzzy look. You can later cut these loop stitches and brush them out with a wire or bristle brush. I didn’t cut mine.
Round 18: Repeat *2 loop stitches in the next st, 1 Sc in the next st* all around (18)
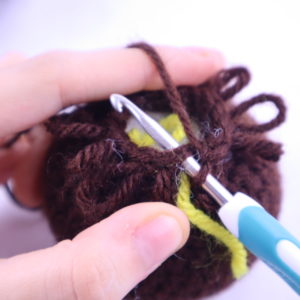
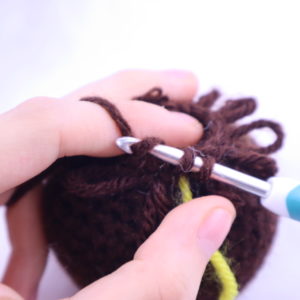
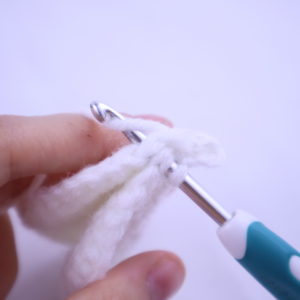
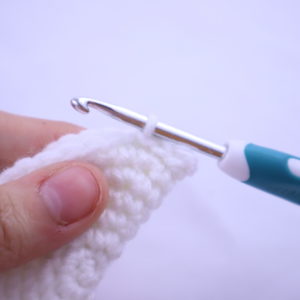
How to do a loop stitch:
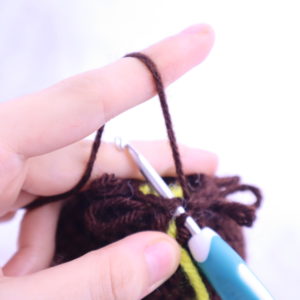
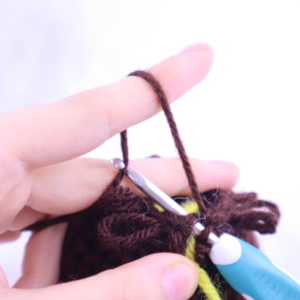
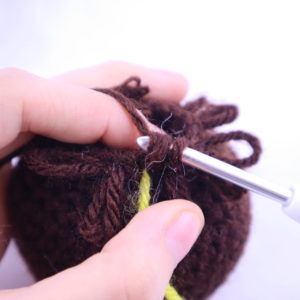
Insert your hook into the next stitch (Pic 1). Hold the yarn as shown (Pic 2). Pull the yarn on the left with your hook through the stitch (Pic 3-5).
1. 2.
2.
3. 4.
4.
5.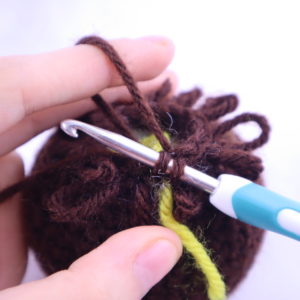
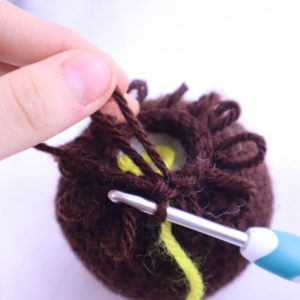
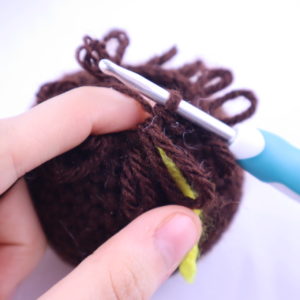
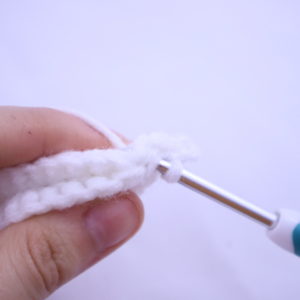
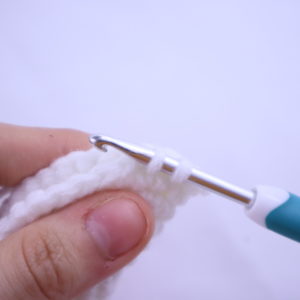
You will have 2 loops on your hook (Pic 5). Yarn over and pull through both loops (Pic 6-8)
6. 7.
7.
8.
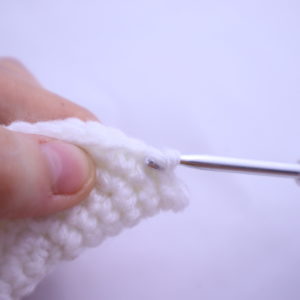
You’ve made 1 loop stitch, it will be a loop at the back. Pull that loop from the back to the front (Pic 9-10), and keep crocheting!
9. 10.
10.
Round 19: Repeat *Inc in the next st, 1 loop st in the next 2 st* all around (24)
Round 20: Repeat *Inc in the next st, 1 loop st in the next 3 st* all around (30)
Round 21-22: *1 loop st* all around (30)
Round 23: Change to yellow. *Inc, Sc 4* all around (36)
Round 24: *Inc, Sc 5* all around (42)
Round 25: *Inc, Sc 6* all around (48)
Round 26-28: Change to brown. *Sc* all around (48)
Round 29-31: Change to yellow. *Sc* all around (48)
Round 32-35: Change to brown. *Sc* all around (48)
Round 36: *Dec, Sc 6* all around (42)
Round 37: *Dec, Sc 5* all around (36)
Round 38: *Dec, Sc 4* all around (30)
Stuff the body firmly here. Continue stuffing after each round.
Round 39: *Dec, Sc 3* all around (24)
Round 40: *Dec, Sc 2* all around (18)
Round 41: *Dec, Sc* all around (12)
Round 42: *Dec* all around (6)
Finish off, leaving a long tail for sewing. Sew the remaining stitches closed.
Wings: (Make 2)
In White yarn
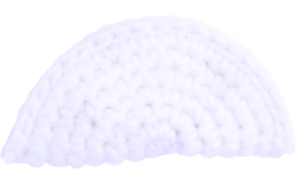
Round 1: 6 Sc into a Magic Ring (6)
Round 2: *Inc* all around (12)
Round 3: *Inc, Sc* all around (18)
Round 4: *Inc, Sc 2* all around (24)
Round 5: *Inc, Sc 3* all around (30)
Round 6: *Inc, Sc 4* all around (36)
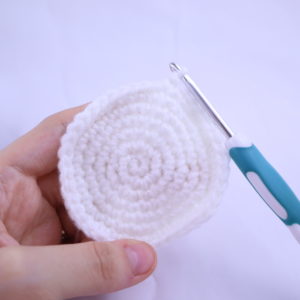
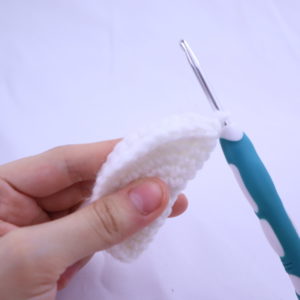
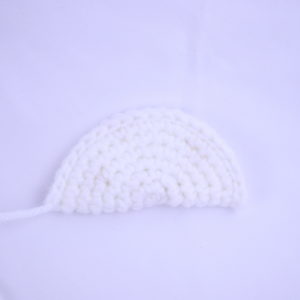
Fold in half as shown. Line up the stitches. Going through BOTH the stitches, SlSt in the next stitch.
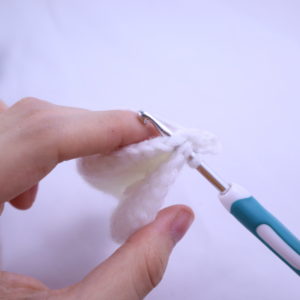
Assembly: Take the circle we made (Pic 1) and fold in in half, making sure the right side is out and that the stitches align (Pic 2). Now insert your hook under both of the loops and slip stitch the wing closed for the next 18 stitches (Pic 3-9). Once done, finish off leaving a long tail for sewing. Pin each wing on as shown, the circle side will face out (Pic 10) and sew on. Weave in ends.
1. 2.
2.
3. 4.
4.
5. 6.
6.
7. 8.
8.
9. 10.
10.
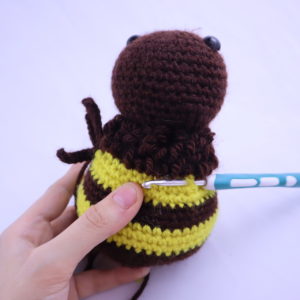
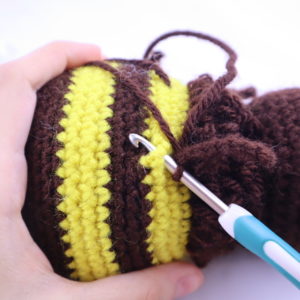
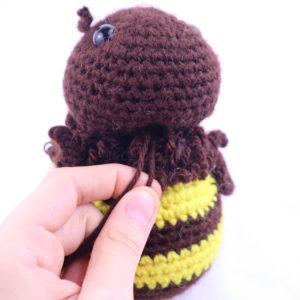
Leg Assembly:
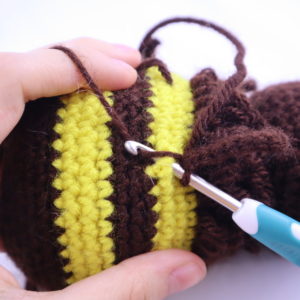
Attach your crochet hook into the first yellow round of the bee (Pic 1). Yarn over and pull yarn through the stitch (Pic 2-3). Ch 9 (Pic 4). SlSt in the 2nd Ch from the hook. SlSt in the next 7 st (Pic 5). Insert your hook into the next stitch below the arm you just made (Pic 6)
1. 2.
2.
3. 4.
4.
5. 6.
6.
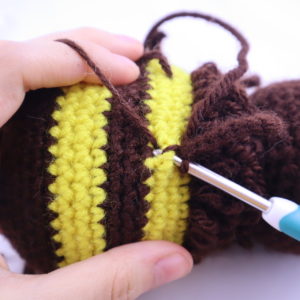
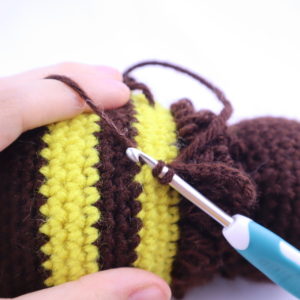
Make a SlSt through that stitch (Pic 7-11). This attaches the first arm down. To make the second and third arm, Ch 9 (Pic 12). SlSt in the 2nd Ch from the hook, SlSt in the next 7 st. SlSt in the next stitch below the second arm. Repeat this 1 more time for the third arm.
7. 8.
8.
9. 10.
10.
11. 12.
12.
13. 14.
14.
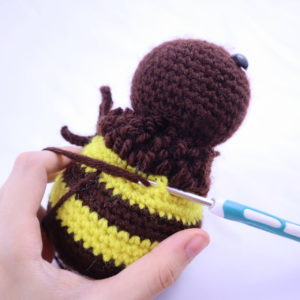
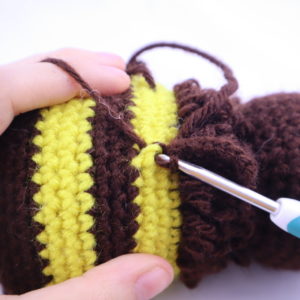
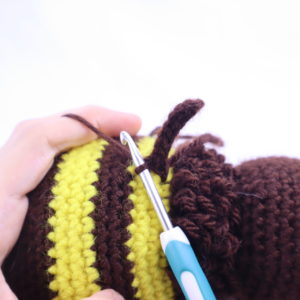
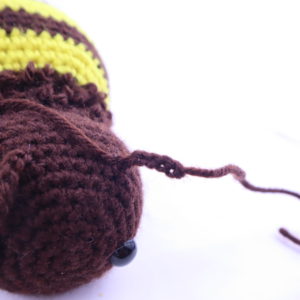
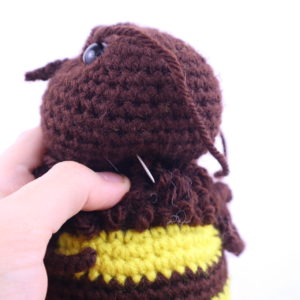
Antenna Assembly:
In Brown Yarn
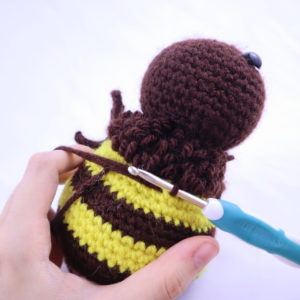
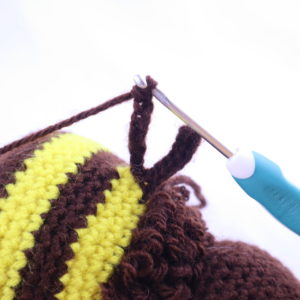
Attach your hook into the top of the bee, between Round 7 and 8 (Pic 1). Pull yarn through the stitch (Pic 2-3). Ch 7 (Pic 4).
1. 2.
2.
3. 4.
4.
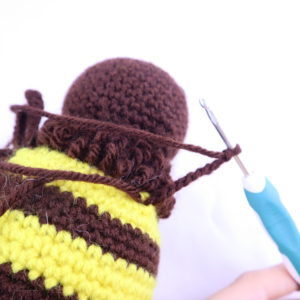
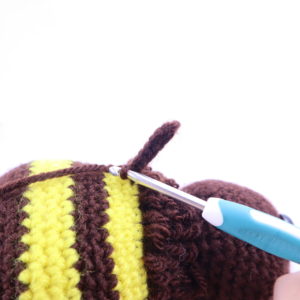
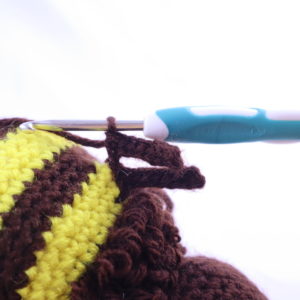
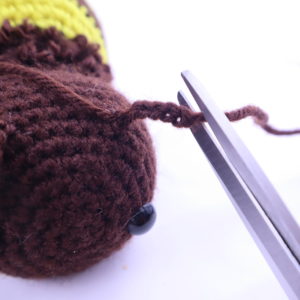
SlSt in the 2nd Ch from the hook. SlSt in the next 5 st. Finish off, and tie a firm knot with the tail end of yarn (Pic 5). Make sure the knot lands at the very tip of the antenna. Now, clip of the excess yarn at the top (Pic 6), and weave in the ends where we attached the yarn. Repeat this again for the other antenna!
5. 6.
6.
7.
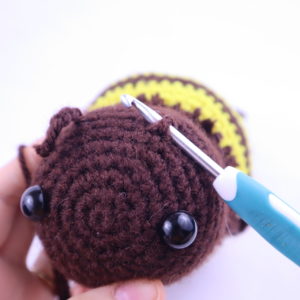
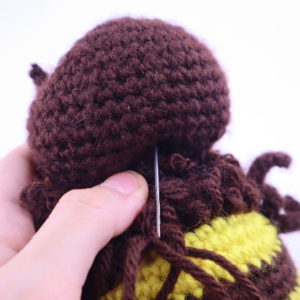
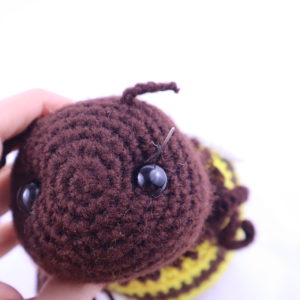
Face Shaping:
In Brown Yarn
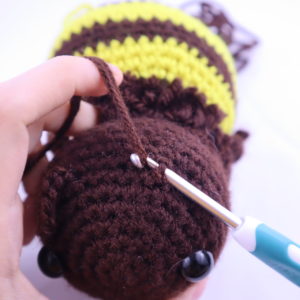
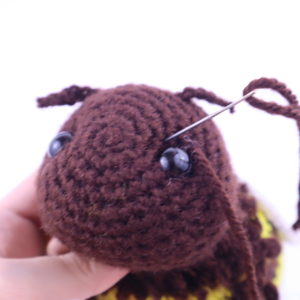
Insert needle into the middle, bottom of the bee’s head (Pic 1). Pull needle out at the top right corner of the bee’s right eye (Pic 2). Insert needle at the left corner of the right eye (Pic 3). Pull needle out at the same middle area, but one stitch to the left from where we first inserted it (Pic 4).
1. 2.
2.
3. 4.
4.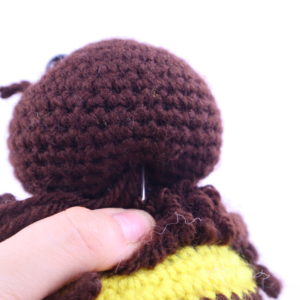
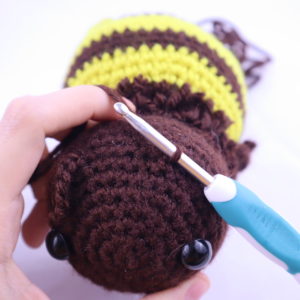
Insert needle one stitch to the left again (Pic 5). Pull needle out at the top right corner of the left eye (Pic 6). Insert needle at the left corner of the left eye (Pic 7). Pull needle out at the middle/bottom area of the head (Pic 8).
5. 6.
6.
7. 8.
8.
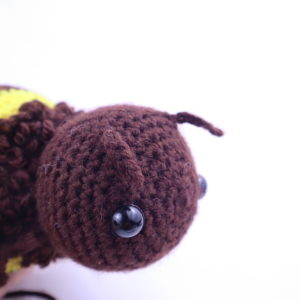
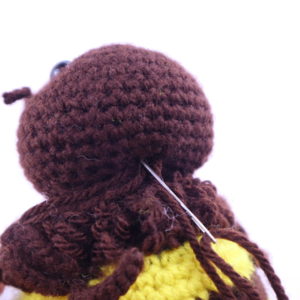
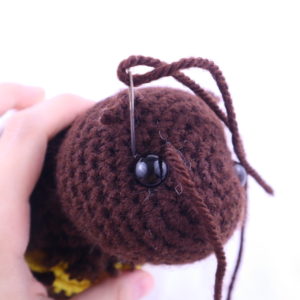
You will have 2 tail ends of yarn, pull them firmly to tighten the face shaping (Pic 9). Done! (Pic 10)
9. 10.
10.
Done!


16 Comments
I love this bee pattern! Can’t wait to make it .Thank you so much for posting this!
I am so HAPPY that you are making ( and SHARRING FOR FREEE!!! yay!) This awesome yet simple BIG bumble bee Olive! I LOVE it so much! I’ve been waiting for one like this for a long time….. So Thank you! And thank you to do it even if you already have one, cuz both are so different, and the other is not my style at all…There is also Complicated Knots ( go check her out on youtube, instagram, ravelry, etc. She also have a free patern for a GIANT mega amigurumi Bumble «bee. I waiting to have enough time to do it, and be able to concentrate cuz it look like its need concentration to be sure to make it look good!
Hi, I love your patterns. They are so cute. I have a doubt, I think that in the face shaping section you are explaining the antenna assembly again. Is it that the case? 🤔
Hi Patricia! Thank you so much for your kind words. I’m happy you like my patterns! And sorry about that mishap on the face shaping section, the description was for the antennas and not the face shaping 😅 Thanks so much, it’s all fixed now 🙂
No it is not, read it again
This is so cute that even though there are several other things I’m supposed to be doing this has jumped to the front of the line<3
That’s so funny, sometimes we just have to follow our creative side and crochet what speaks to us right away! I totally relate to that lol 😍 I hope you have fun with this pattern, please let me know if you have any questions!
Is there meant to be another colour change at round 32 of the body?
Hi Piper! Oh my gosh you are totally right, I completely missed that you need to change back to brown. Thank you so much for letting me know about that! I just added that to the pattern 🙂
I really appreciate your comment, please feel free to let me know if you find any other hiccups or if you need any help!
Take care,
Olive
Thank ye! I look forward to my chubby bee becoming reality!
No problem, thank you for letting me know! 🙂 Good luck making your bee, I’m excited for you to complete it!
Hello! I’m trying to start a small business to sell crochet items I make online. Would it be okay if I use your pattern for the toys? If so would you like me to credit you?
Hello I am really struggling with the loop stitch, my loops stand up straight and don’t lie flat like yours so for the next round I can’t see where I’m supposed to do the stitches. Is there an easier way to do it? Thanks Jay
Love this lil guy, super cute! I’m very much a beginner and struggling a bit with the loop stitch. Round 18 was fine but in 19 am I supposed to loop stitch in the chains made by the previous loop stitches?
It looks like I’m just stacking loop chain behind loop chain and the end result is gonna leave odd gaps. Does that sort itself as I create the rest of the chains? Sorry for all the questions. I just want to make sure I got this right since I hate having to frog my work after making progress lol.
Hi! I would love if you could possibly make a smaller version of some of the bigger animals you have on this website, thanks!
This bumble bee is gorgeous!! I’m wondering how much yarn did you use to make it?