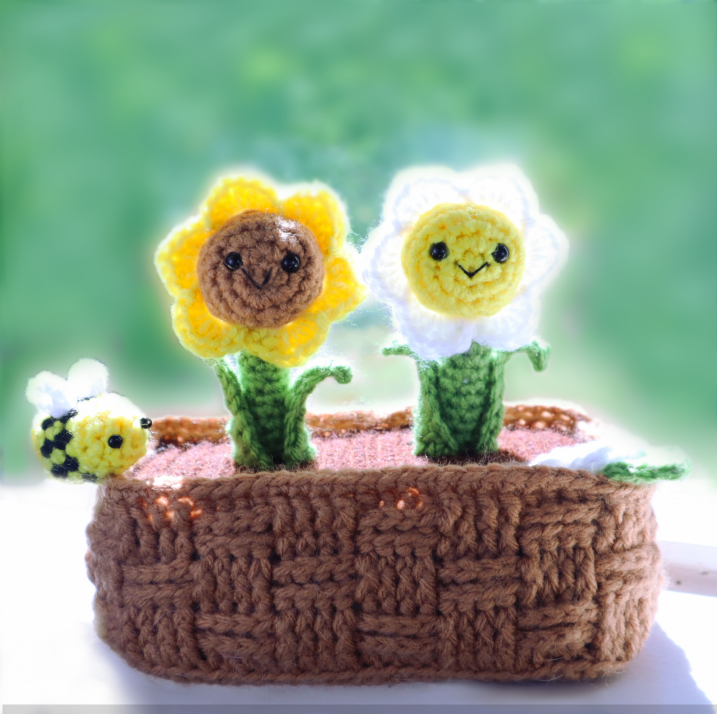
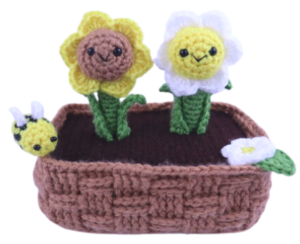
Basket of Flowers Amigurumi – Free Crochet Pattern
Print this pattern out! Purchase the PDF version here
Supplies:
• Yarn 4/Medium Weight Yarn in…
Light brown for basket
Dark brown for soil
Petal Color (Such as yellow)
Inside flower color (Such as brown)
Green for stem & leafs
Yellow & Black for bee
White for small flower & bee wings
•4mm Crochet Hook
•6mm safety eyes for flowers
•3mm bead eyes for bee
•Tapestry needle
•Scissors
•Stuffing
•Cardboard
Additional Information:
Difficulty: Intermediate
• Getting started
This flower basket has a lot of little pieces and detail to form the finished product, but it’s so worth it!
To start, we will form the bottom of the basket and work our way up. After this, we make the soil and sew it to the basket. Then, we make the flowers, leafs, and bee!
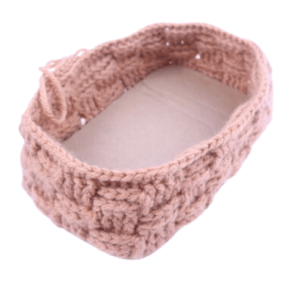
Basket:
In Light Brown
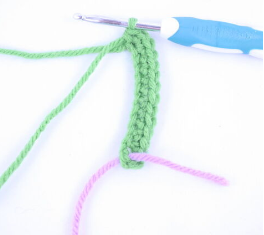
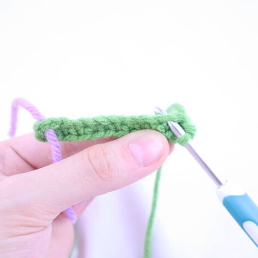
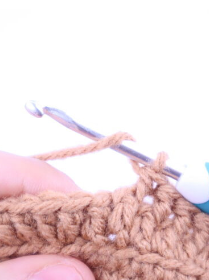
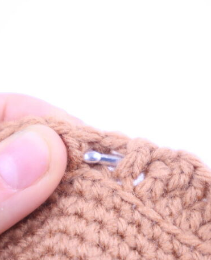
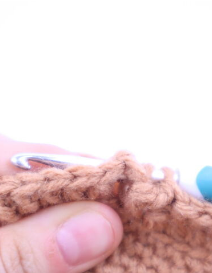
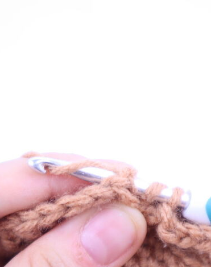
Round 1: Ch 13 (Pic 1). Sc 3 times in the 2nd ch from the hook. Sc in the next 10 st. Sc 3 times in the last Ch. Now we meet the end of the chain (Pic 2). Turn to the OTHER side of the chain, where we haven’t worked any stitches yet (Pic 3-4). Continuing on the other side, Sc in the next 10 st (Pic 5) (26)
1. 2.
2.
3.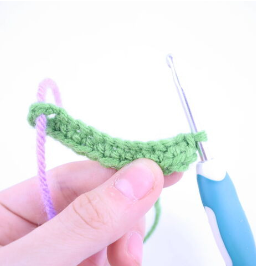 4.
4.
5.
Round 2: *Inc* in the next 3 st. Sc in the next 10 st. *Inc* in the next 3 st. Sc in the next 10 st (32)
Round 3: *Inc, Sc in the next st* 3 times. Sc in the next 10 st. *Inc, Sc in the next st* 3 times. Sc in the next 10 st (38)
Round 4: Sc in the next 2 st. *Inc, Sc in the next 2 st* 3 times. Sc in the next 10 st. *Inc, Sc in the next 2 st* 3 times. Sc in the next 8 st (44)
Round 5: Sc in the next 3 st. *Inc, Sc in the next 3 st* 3 times. Sc in the next 10 st. *Inc, Sc in the next 3 st* 3 times. Sc in the next 7 st (50)
Round 6: Sc in the next 3 st. *Inc, Sc in the next 4 st* 3 times. Sc in the next 10 st. *Inc, Sc in the next 4 st* 3 times. Sc in the next 7 st (56)
Round 7: Sc in the next 4 st. *Inc, Sc in the next 5 st* 3 times. Sc in the next 10 st. *Inc, Sc in the next 5 st* 3 times. Sc in the next 6 st (62)
Round 8: Sc in the next 5 st. *Inc, Sc in the next 6 st* 3 times. Sc in the next 10 st. *Inc, Sc in the next 6 st* 3 times. Sc in the next 5 st (68)
Round 9: Sc in the next 5 st. *Inc, Sc in the next 7 st* 3 times. Sc in the next 10 st. *Inc, Sc in the next 7 st* 3 times. Sc in the next 5 st (74)
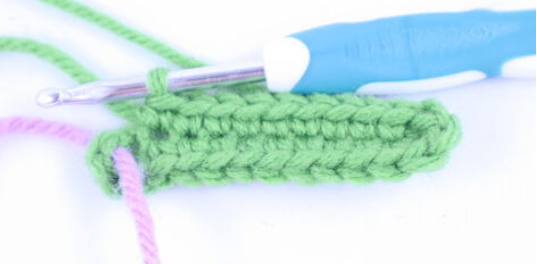
In the next round we will form the corners, so the oval will look more like a square. This will form the bottom of the box shape.
Round 10: Sc in the next 6 st. Hdc in next 2 st, Dc in next st, Trc in next st, Trc 3 times in next st, Trc in next st, Dc in next st, Hdc in next st, Sc in next 6 st.
Hdc in next st, Dc in next st, Trc in next st, Trc 3 times in next st, Trc in next st, Dc in next st, Hdc in next 2 st, Sc in next 14 st
Hdc in next 2 st, Dc in next st, Trc in next st, Trc 3 times in next st, Trc in next st, Dc in next st, Hdc in next st, Sc in next 6 st
Hdc in next st, Dc in next st, Trc in next st, Trc 3 times in next st, Trc next st, Dc next st, Hdc in next 2 st, Sc in next 6 st. *Dec* 2 times (80)
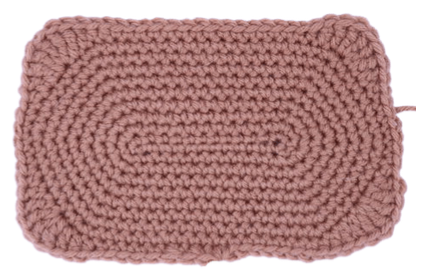
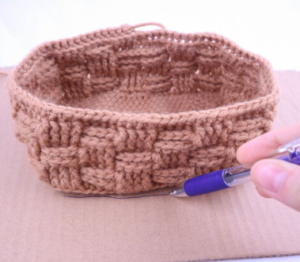
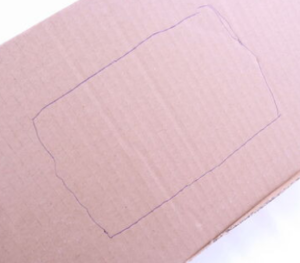
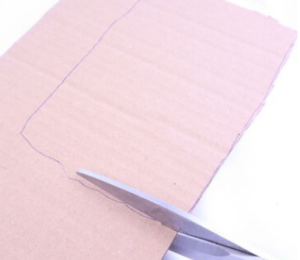
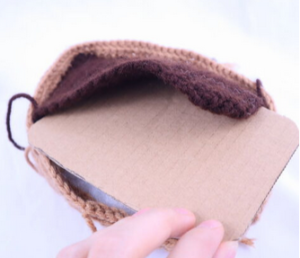
Now that we have the bottom of the basket, we need trace this part around some cardboard. We will use these cardboard pieces so before and after we stuff the box, it will keep it’s shape and stand firmly.
Take a piece of cardboard. Place the basket onto the cardboard as shown and outline around it (Pic 1). You will have a rectangle on your cardboard (Pic 2). Cut around the outline (Pic 3-4).
1. 2.
2.
3. 4.
4.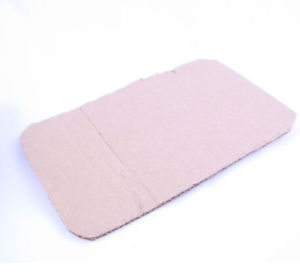
Repeat this one more, for a total of 2 cut out pieces.
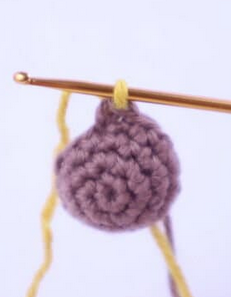
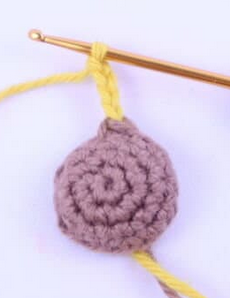
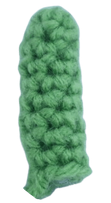
Round 11: In the FLO, *Dc* all around (80)
In the following rounds we will form the “basket”. We will do this by working in the front post and back post of the double crochets.
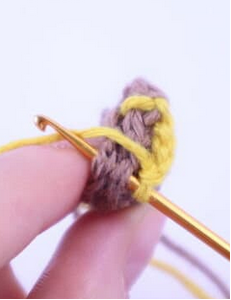
How to do a Front Post Double Crochet:
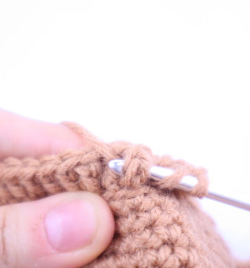
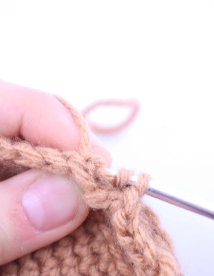
Yarn over (Pic 1). Insert hook through the next double crochet by inserting your hook from the right side of the double crochet, over to the left (Pic 1-2). Yarn over (Pic 4).
1.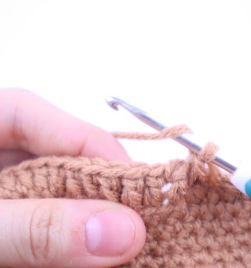 2.
2.
3. 4.
4.
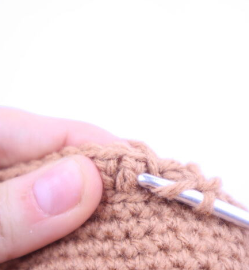
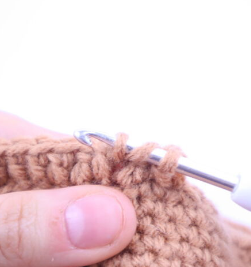
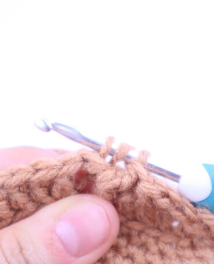
Pull yarn through (Pic 5-6). You will have 3 loops on your hook (Pic 6). Yarn over and pull through two loops. You will now have 2 loops left on your hook (Pic 7). Yarn over and pull through those remaining two loops (Pic 8).
5. 6.
6.
7. 8.
8.
How to do a Back Post Double Crochet:
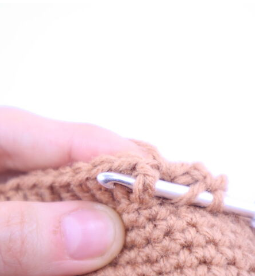
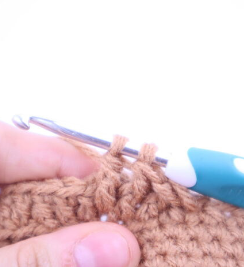
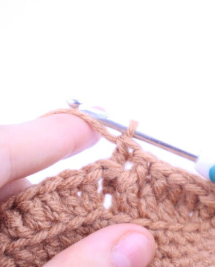
Yarn over (Pic 1). Insert hook through the back of the next double crochet by inserting your hook to the right side of the double crochet (Pic 2), over to the left and above the double crochet (Pic 3-4). Yarn over (Pic 5).
1. 2.
2.
3. 4.
4.
5.
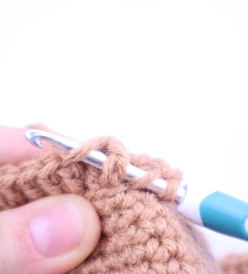
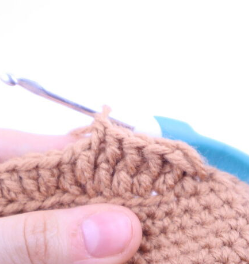
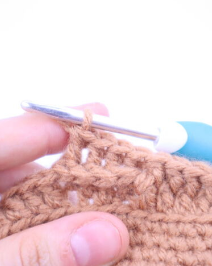
Pull yarn through (Pic 6-7). You will have 3 loops on your hook (Pic 7). Yarn over and pull through two loops. You will now have 2 loops left on your hook (Pic 8). Yarn over and pull through those remaining two loops (Pic 9). This makes a Back post double crochet!Pull yarn through (Pic 6-7). You will have 3 loops on your hook (Pic 7). Yarn over and pull through two loops. You will now have 2 loops left on your hook (Pic 8). Yarn over and pull through those remaining two loops (Pic 9). This makes a Back post double crochet! (Pic 10)
6. 7.
7.
8. 9.
9.
10.
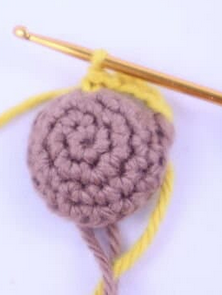
Tip: Every 2 rounds, the basket stitch will trade places
Round 12-13: FpDc in the next 4 st. BpDc in the next 4 st* 10 times (80)
Round 14-15: BpDc in the next 4 st. FpDc in the next 4 st* 10 times (80)
Round 16-17: FpDc in the next 4 st. BpDc in the next 4 st* 10 times (80)
Round 18: *Sc* all around (80)
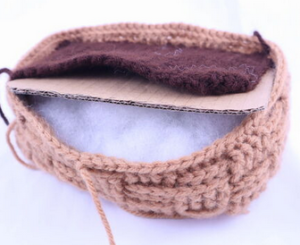
Finish off and weave in ends. Place one cardboard cut out into the bottom of the basket now.
Soil:
In Dark Brown
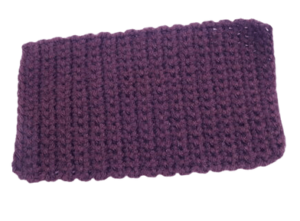
Row 1: Ch 20. Sc in the 2nd Ch from the hook. Sc in the remaining 18 st (19)
Row 2-26: Ch 1 & Turn. Sc in the next 19 st (19)
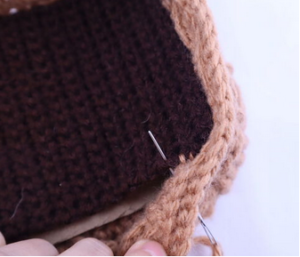
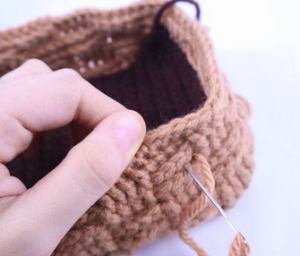
Finish off and weave in ends. Take a very long piece of basket colored yarn. Align the soil inside of the basket, around Round 15. Place the tail end of yarn onto your needle and start sewing the soil to be box. Go from the outside of the box (Pic 1), to the soil (Pic 2), back to the outside of the box (Pic 3).
1. 2.
2.
3.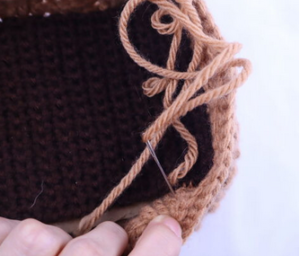
Repeat this until the soil is sewn on at 3 sides. Now stuff the box firmly, then place the second cardboard cutout into the top of the box (Pic 6-7). Finish sewing on the soil. Once done, weave in ends.
4. 5.
5.
6. 7.
7.
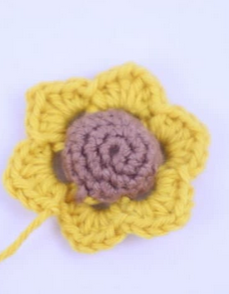
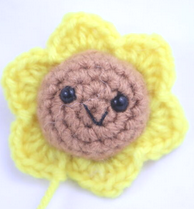
Flower
The flower is made in 2 separate pieces, we will have a front side and a back side. Make the back side first, and the front side last. We will then crochet the front and back side together, and as we do this we will also form the petals!
Back of flower: (Make first)
In center flower color

Round 1: 6 Sc into a Magic Ring (6)
Round 2: *Inc* all around (12)
Round 3: *Inc, Sc* all around (18)
Finish off now.
Front of flower:
In center flower color
Round 1: 6 Sc into a Magic Ring (6)
Round 2: *Inc* all around (12)
Round 3: *Inc, Sc* all around (18)
Round 4: *Sc* all around (18)
Add safety eyes in between Round 1 and 2. Place the safety eyes 5 stitches apart.
Round 5: Sc in the next 17 st. Sc in the next st, changing to the petal color when making the last stitch (18)
In the next round we will line the back of the sunflower up to the front of the sunflower. We will crochet both pieces together this round, so make sure to work in BOTH the back piece of the sunflower and the front piece of the sunflower (see pic 4). Be sure to stuff the sunflower half way through completing Round 6!
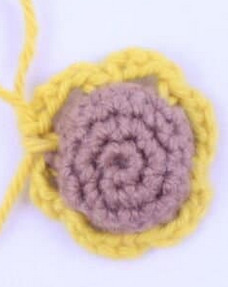
Round 6: In petal color repeat *Ch 4 (pic 2), skip the next 2 st, SlSt next st (pic 4-5)* 6 times (30, pic 6)
1. 2.
2.
3. 4.
4.
5. 6.
6.
Round 7: Repeat *3 Hdc in the next Ch 4 space (pic 7), Ch 1 (pic 8), 3 Hdc into that same Ch 4 space (pic 9), SlSt into that same Ch 4 space.* 6 times (48, pic 10)
7.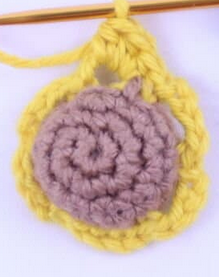 8.
8.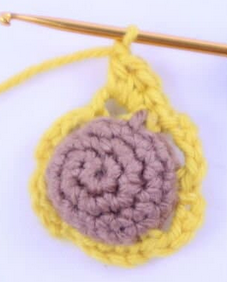
9.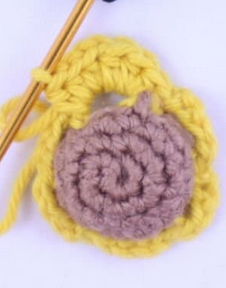 10.
10.
Finish off, leaving a long tail for sewing.
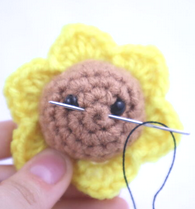
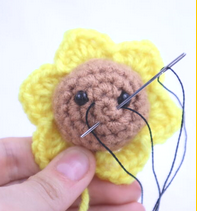
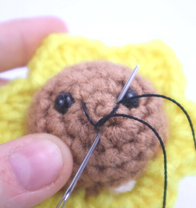
Flower Smile:
In Black Embroidery Thread
Insert needle with thread one stitch over from the right eye, then pull needle out one stitch over from the left eye as shown (Pic 1). Reinsert needle into the original insertion spot, and pull needle out where shown, making sure the needle lands ABOVE the thread (Pic 2). Reinsert needle into the same spot, this time making sure the needle lands BELOW the yarn as shown (Pic 3). Tie the tail ends of yarn firmly into knots and bring into the flower to hide. Done!
1. 2.
2.
3. 4.
4.
Flower Stem:
In Green Yarn
Round 1: 6 Sc into a magic ring (6)
Round 2-11: *Sc* all around (6)
Finish off, leaving a long tail for sewing. Stuff the stem firmly now. Place the flower’s back to the stem and sew on using petal colored yarn. Weave in ends. Pin the stem to the soil (you’ll pierce the cardboard, which is fine) and sew the stem, making sure your sewing needle is only going through the soil and not the cardboard. Once fully sewn on, weave in ends.
Flower Leaves: (Make 2, Optional)
In Green Yarn
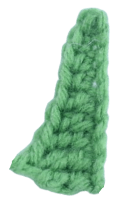
Row 1: Ch 10. Sc in the 2nd Ch from the hook. Sc in the next Ch. Hdc in the next 2 st. Dc in the next 3 st. Trc in the next 2 st (9)
Finish off, leaving a long tail for sewing. Pin the leaves to the sides of the stems as shown. Sew on.
Bee: (Optional)
In Yellow Yarn
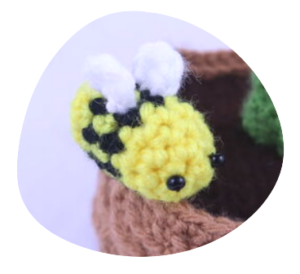
Round 1: 6 Sc into a Magic Ring (6)
Round 2: *Inc, Sc* all around (9)
Round 3-4: *Sc* all around (9)
Round 5: Change to Black. *Sc* all around (9)
Round 6: Change to Yellow. *Sc* all around (9)
Round 7: Change to Black. *Sc* all around (9)
Round 8-9: Change to Yellow. *Sc* all around (9)
Stuff the bee firmly now
Round 10: *Dec* 4 times, Sc in the last st (5)
Finish off now. Sew the remaining stitches closed. Embroider on eyes to the toy bee, or sew on small (about 3mm) beads to it.
Wings to bee: (Make 2)
In White
Round 1: 6 Sc into a Magic Ring (6)
Finish off now. Sew the wings to the top of the bee.
Sew the bee to the left of the basket, a little behind the corner.
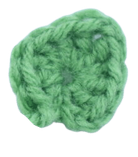
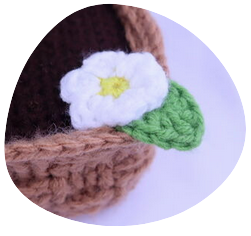
Small Flower Decoration:
In Yellow Yarn

Round 1: 6 Sc into a Magic Ring (6)
Round 2: *3 Dc in the next st. SlSt in that same st* all around (24)
Finish off, leaving a long tail for sewing.
Small Leaf Decoration:
In Green Yarn
Round 1: In a Magic Ring, 4 Dc, 1 Trc, Ch 1, 1 Trc, 4 Dc.
Finish off, leaving a tail of yarn for sewing. Pin the leaf to the corner of the basket, having it hang over the edge. Pin the flower over the leaf. Sew on now and weave in ends.
Done! If you made this flower basket I would LOVE to see it! You can show me by posting a picture in the comments underneath this post 🙂


1 Comment
This is so cute!!! I’m going to make this for my mom for Christmas!!! Thank you so much for making all these free patterns!!! 😀