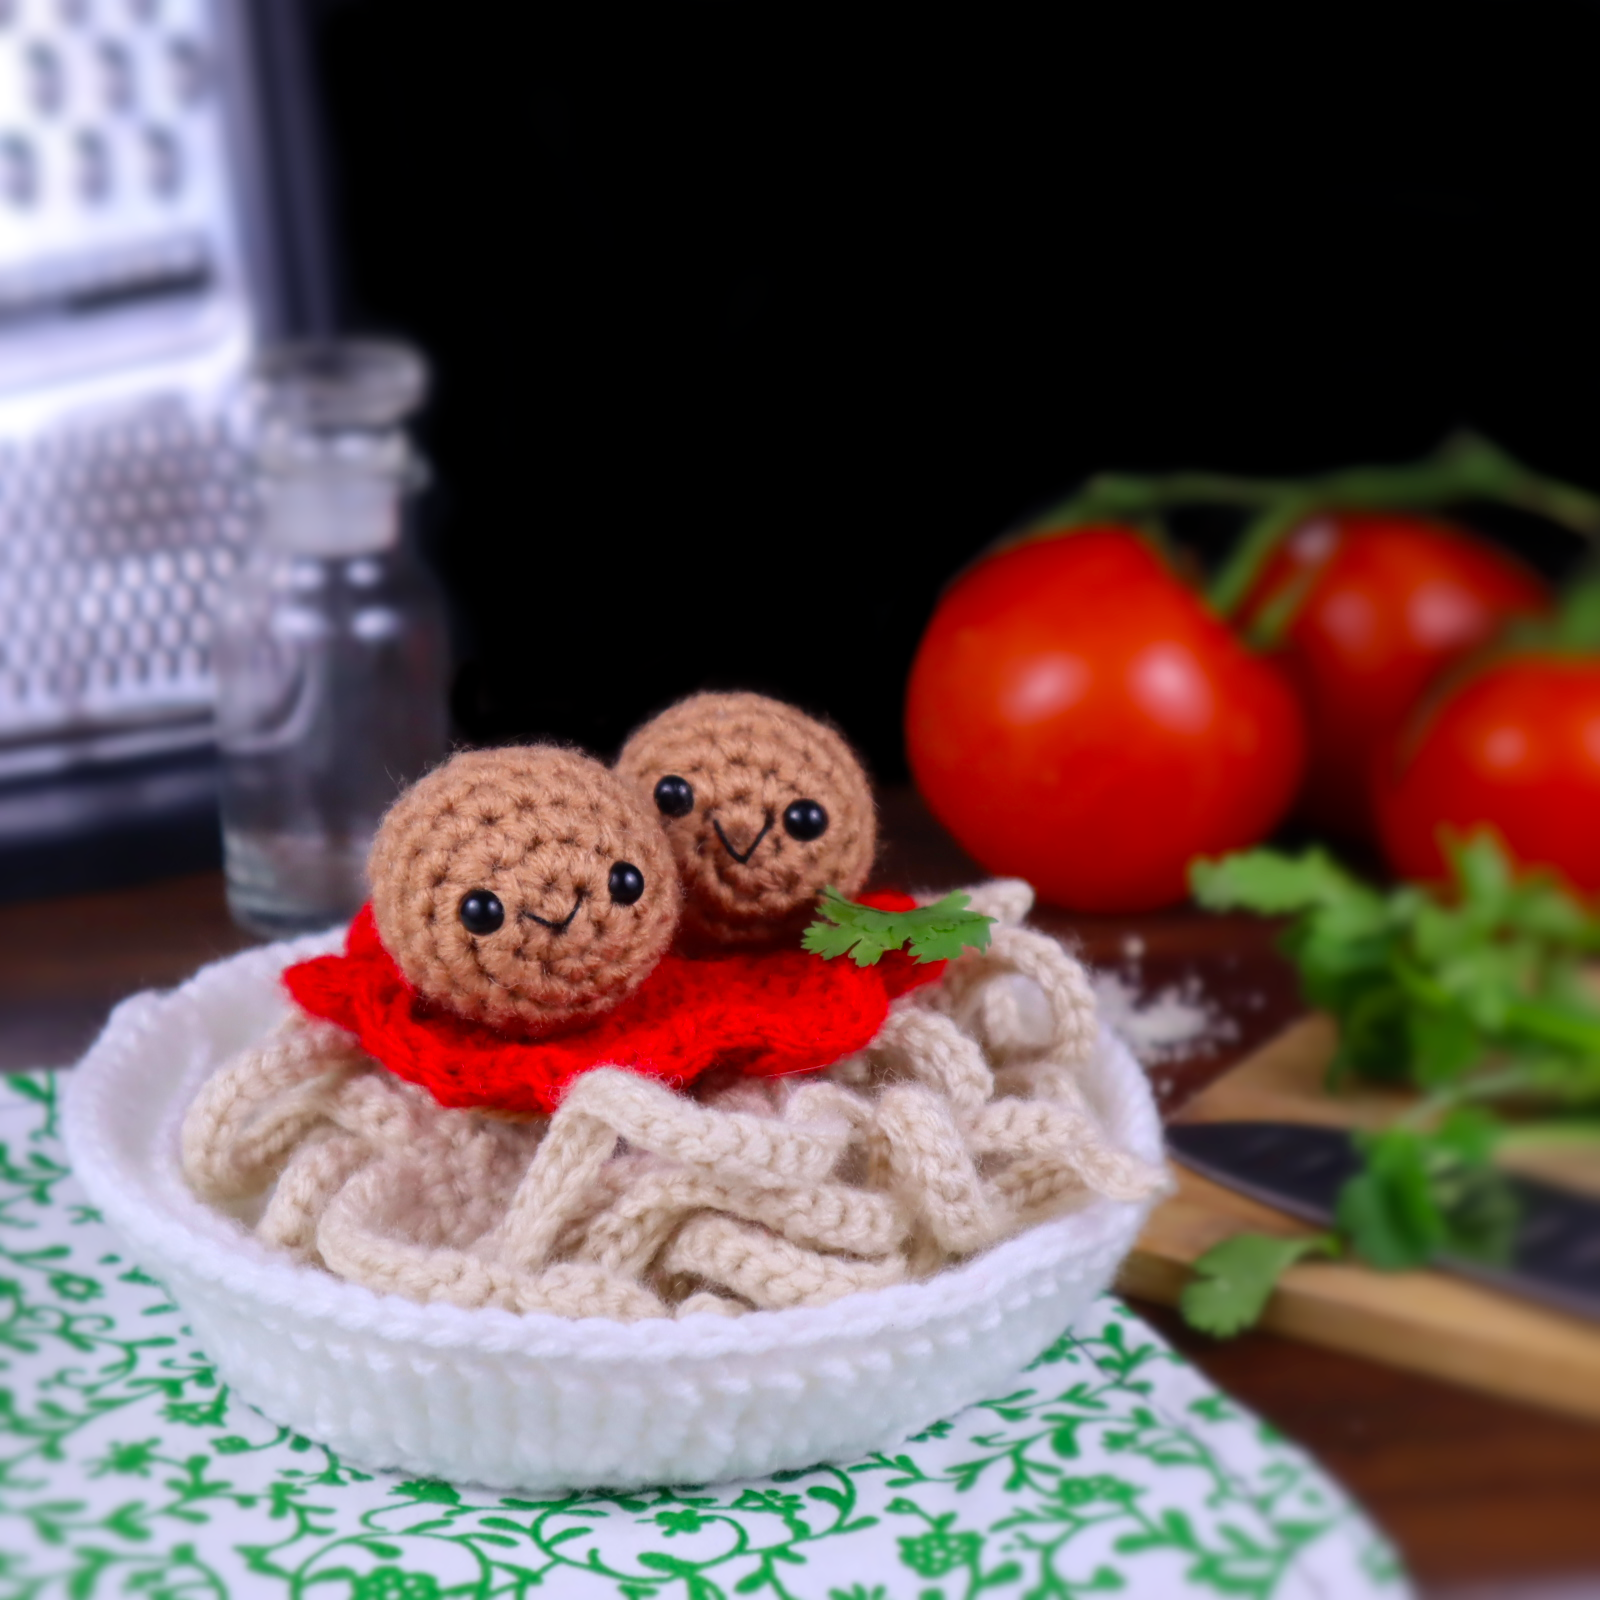
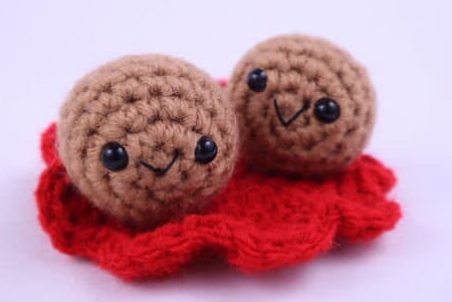
Spaghetti and Meatballs Amigurumi – Free Crochet Pattern
Print this pattern out – purchase the PDF here!
Hi everyone! I’ve apparently been following a trend the past 2 weeks. Basically, I’ve been inspired to make my next crochet pattern by the previous week’s pattern. It first started with my clown amigurumi – it had a sunflower on his suit. Next week, I made a sunflower. This week, the sunflower looked more like a meatball in the center. So I made a meatball pattern! It’s pretty funny how things work out like that 🙂
I’m really excited for you to try out this pattern. In typical StringyDingDing fashion, I tried to make sure this pattern was easy-yet-smart in how everything is made and assembled. You’d think all of those noodles are going to go missing because they’re separate pieces, right? WRONG! All of the noodles are crocheted into the same 1 piece, no sewing required. Plus, I even show you how we can sew the meatballs to the sauce, then the sauce to the noodles. This will ensure that you don’t… “lose your meatballs” 😎 Anyways, let’s get started!
Supplies:
• Yarn 4/Medium Weight Yarn in…
Light brown, Red, Cream, White.
•4mm Crochet Hook
•6mm safety eyes
•Tapestry needle
•Scissors
•Stuffing
•Cardboard (Optional)
Additional Information:
Difficulty: Easy
• Getting started
These meatballs are so cute and pretty easy to make! The best thing about this pattern is that the noodles are much easier to make than you’d think. The noodles are all worked into the same 1 piece, so you won’t have to do any sewing or worry about losing any spaghetti strands.
We also have the option of sewing the meatballs to the sauce, and the sauce to the spaghetti. I show you how to do this very easily, but you don’t have to sew them if you’re using this pattern for play food. Let’s get started!
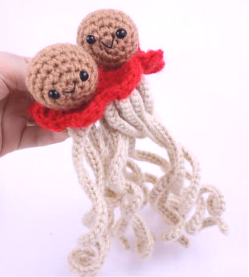
Meatball: (Make 2, or more if wanted!)
In light brown
Round 1: 6 Sc into a Magic Ring (6)
In the next round we will add 2 eye stitch markers. This will mark where to place the eyes later! Be sure to use a differently colored stitch marker for the eyes, so you don’t confuse them for your round stitch marker.
Round 2: *Inc* in the next 2 st. Sc in the next st and add a differently colored stitch marker into the Sc just made. Sc into that same st. *Inc* in the next 2 st. Add a differently colored stitch marker into the Sc just made. *Inc* in the next st (12)
Round 3-6: *Sc* all around (12)
Add eyes into the marked areas now
Round 7: *Dec* all around (6)
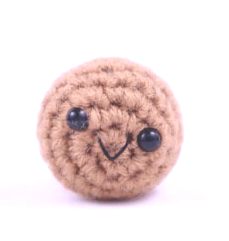
Finish off now, leaving a tail for sewing. Stuff the meatball firmly now. Sew the remaining stitches closed.
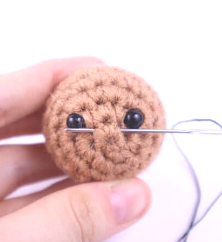
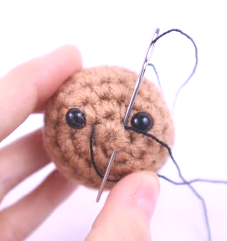
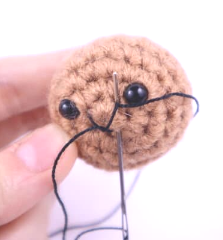
Smile:
In Black Embroidery Thread
Insert needle with thread one stitch over from the right eye, then pull needle out one stitch over from the left eye as shown (Pic 1). Reinsert needle into the original insertion spot, and pull needle out where shown, making sure the needle lands ABOVE the thread (Pic 2). Reinsert needle into the same spot, this time making sure the needle lands BELOW the yarn as shown (Pic 3). Tie the tail ends of yarn firmly into knots and bring into the flower to hide. Done!
1. 2.
2.
3. 4.
4.
Sauce:
In Red
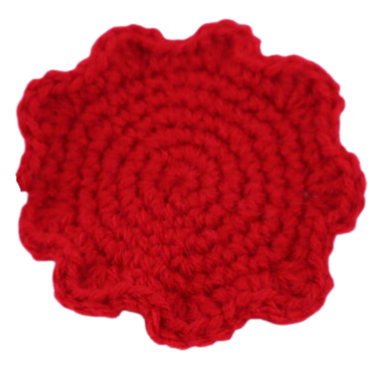
Round 1: 6 Sc into a Magic Ring (6)
Round 2: *Inc* all around (12)
Round 3: *Inc, Sc* all around (18)
Round 4: *Inc, Sc 2* all around (24)
Round 5: *Inc, Sc 3* all around (30)
Round 6: *Inc, Sc 4* all around (36)
Round 7: Repeat *3 Dc into the next st. Sc in the next 3 st* 9 times (54)
Finish off now and weave in ends.
Assembly:
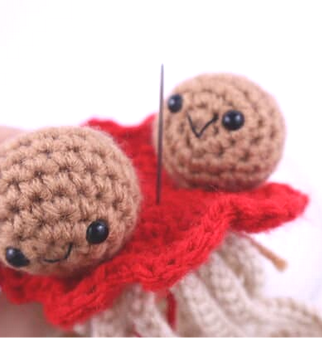
Take a ~8″ piece of light brown yarn. Place the yarn onto a sewing needle. Insert the needle into the bottom of the sauce (Pic 1). Insert the needle through the bottom of the meatball (Pic 2). Insert the needle back into the sauce (Pic 3). Repeat this 2 more times to make sure it’s secure. Now, tie both ends of yarn together 3 times to form a firm knot (Pic 4). This will secure the meatball. Cut the excess yarn. Done! (Pic 5).
1.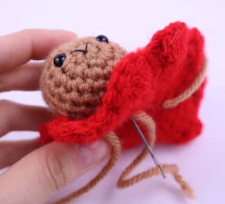 2.
2.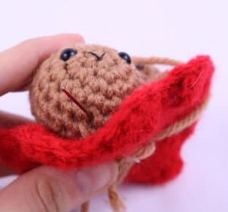
3.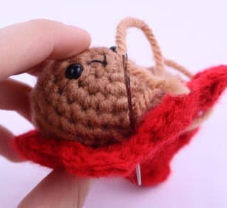 4.
4.
5.
Spaghetti:
In Cream Color
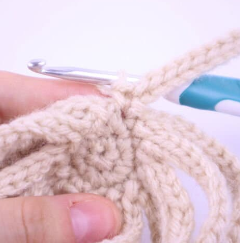
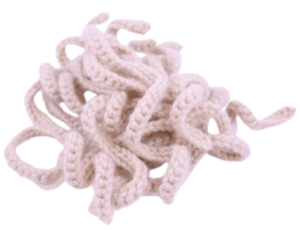
The spaghetti strands are all worked into the same one piece. This means there’s no sewing spaghetti strands together, and you’ll also not have to worry about losing so many strands of spaghetti!

Round 1: 6 Sc into a Magic Ring (6)
Round 2: *Inc* all around (12)
In the next round we will make long chains, work our way down that chain, then make a stitch back onto the circle. This will keep all of the spaghetti pieces attached together.
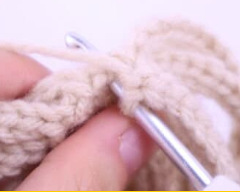
Round 3: Repeat *Ch 51. SlSt in the 2nd Ch from the hook. SlSt in the next 49 Ch. Sc in the next st of the circle.* 12 times.
Ch 51. SlSt in the 2nd Ch from the hook. SlSt in the next 49 Ch. Sc in the same st you created the Ch in. (You will have 13 noodles) Finish off now and weave in ends.
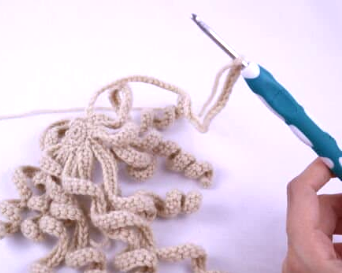

Note: If you want a larger amount of noodles, you can make an increase round, then use the method in Round 3 to make the noodles. However many stitches you have at the end of your increase round, you’ll have that many noodles (plus an extra noodle).
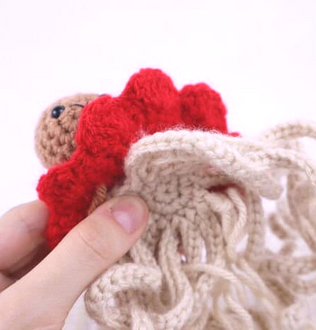
Spaghetti & Sauce Assembly:
This step is optional, but again I wouldn’t sew the noodles and sauce if you’re making this as play food. However, it’s up to you 🙂
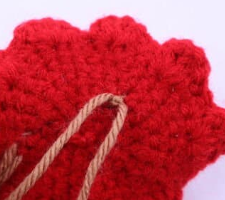
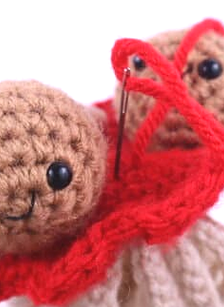
The spaghetti will have a circle in the middle. Line up this circle to the bottom and middle of the sauce (Pic 1). Insert sewing needle with long red piece of yarn into the bottom of the spaghetti (Pic 2), and bring it out to the top of the sauce (Pic 3). Insert the needle back down to the spaghetti (Pic 4-5)
1. 2.
2.
3. 4.
4.
5.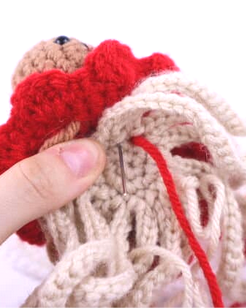
Repeat this around until it’s fully sewn on around the circle (Pic 6-7). Weave in ends.
6. 7.
7.
Bowl:
In White
Round 1: 6 Sc into a Magic Ring (6)
Round 2: *Inc* all around (12)
Round 3: *Inc, Sc* all around (18)
Round 4: *Inc, Sc 2* all around (24)
Round 5: *Inc, Sc 3* all around (30)
Round 6: *Inc, Sc 4* all around (36)
Round 7: *Inc, Sc 5* all around (42)
Round 8: *Inc, Sc 6* all around (48)
Round 9: *Inc, Sc 7* all around (54)
Round 10: *Inc, Sc 8* all around (60)
Round 11: *Inc, Sc 9* all around (66)
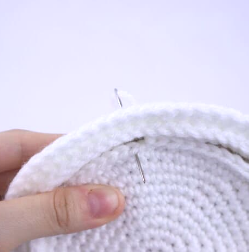
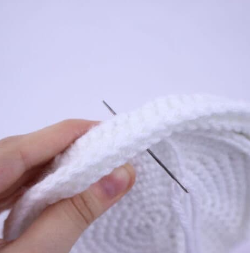
Round 12-13: Work in the FLO and *FpDc* all around (66)
Round 14: *Sc* all around (66)
Finish off now, weave in ends.
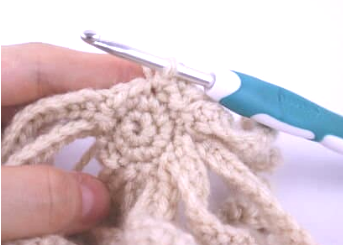
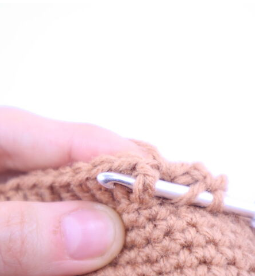
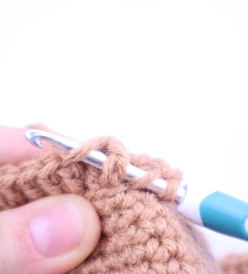
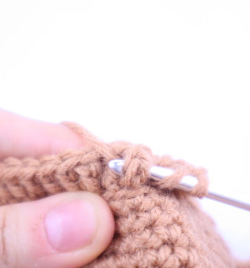
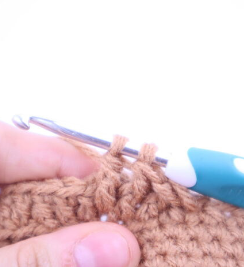
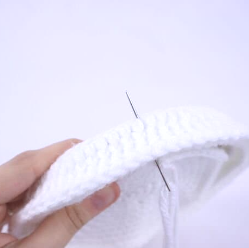
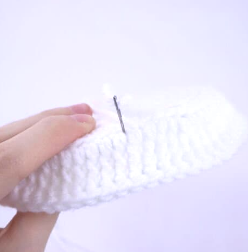
How to do a Front Post Double Crochet
Yarn over (Pic 1). Insert hook through the next double crochet by inserting your hook from the right side of the double crochet, over to the left (Pic 1-2). Yarn over (Pic 4). Pull yarn through (Pic 5-6)
1.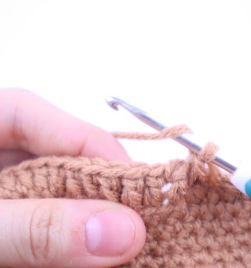 2.
2.
3. 4.
4.
5. 6.
6.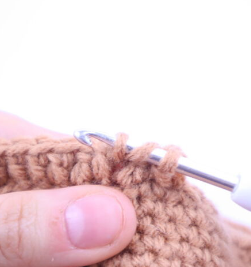
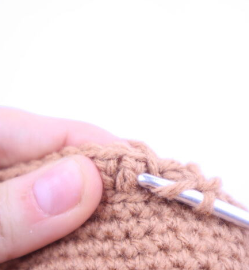
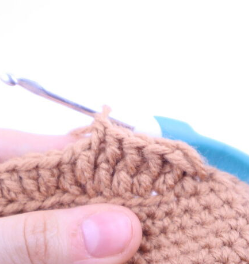
You will have 3 loops on your hook (Pic 6). Yarn over and pull through two loops. You will now have 2 loops left on your hook (Pic 7). Yarn over and pull through those remaining two loops (Pic 8).
7. 8.
8.
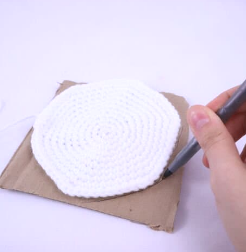
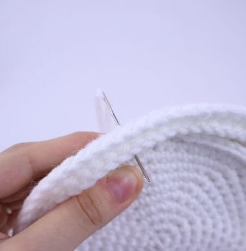
To make the bowl sturdier, we can add cardboard to the bottom. We’ll need to cover this cardboard up with another bowl piece. If you do this, please note that you can’t wash the toy bowl due to the cardboard.
Cardboard Cover Piece:
In White
Make this second bowl piece by following bowl instructions on the previous page up until Round 9. Finish off, leaving a very long tail for sewing.
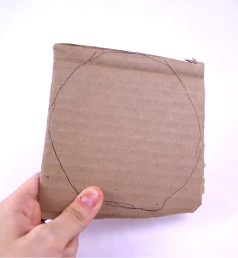
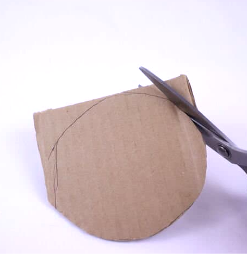
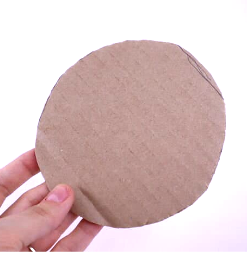
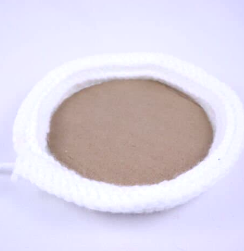
Take a piece of cardboard. Place the second bowl piece onto the cardboard as shown and outline around it (Pic 1). You will have a circle on your cardboard (Pic 2). Cut around the outline (Pic 3-4). Place the cardboard into the bottom of the first bowl (Pic 5). Place the second bowl piece over it (Pic 6).
1. 2.
2.
3. 4.
4.
5. 6.
6.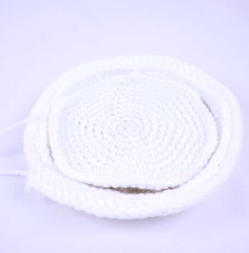
Sew on, inserting the needle into Round 12 of the first bowl (Pic 7). Reinsert needle into the next stitch of the first bowl (Pic 8), and into the next stitch of the second bowl (Pic 9). Insert needle back into the next stitch of the first Bowl (Pic 10). Repeat this all around until the two bowls are fully sewn together. Weave in ends. Done! (Pic 12)
7. 8.
8.
9. 10.
10.
11. 12.
12.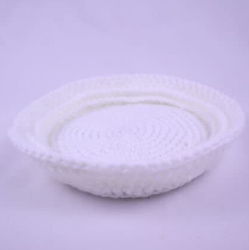
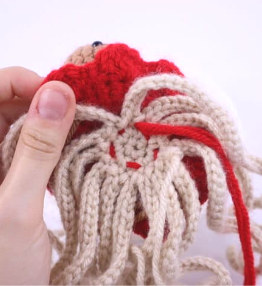
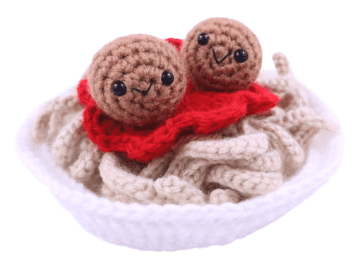 Now you’re done! Just place the spaghetti into the bow. No need to get it in there perfect – it’s supposed to be messy! You can sew on if desired, but I prefer not to.


7 Comments
Those happy meatballs bought a very bright spot to my day. They made laugh out loud. Thank you.
Awww thank you so much! I’m so happy to hear that, I feel like crochet food is such a hilarious thing to make. I hope you have a fun time making this 😍
I love it, My coworkers always stop by my desk to see what I’ve crocheted so this will be a conversation starter for sure. I’m getting started now. 😁
Hahaha it sounds like you have some awesome coworkers! I bet you always keep them guessing with what crazy thing you’ll make next 😁 I think this pattern will make them laugh, I hope you have fun with it! Let me know how it goes 🙂
Hi! Love this cutie. I’m almost finished with the bowl, round 12 are we FLO DC all the way around…. then row 13 FpDC around?
Hi Heather! You’re correct, I could have written this a bit better, but you will work Round 12 in the FLO and then Round 13 will be a regular FpDc using the double crochet post from the previous round 🙂 I hope that could help clarify, and I’m so happy you like this amigurumi! Let me know if I can help 😁
I did it! Just sewing the bowl together now, I am making this for a neighbor that brought me spaghetti and meatballs after my surgery. I hope she gets a giggle from it.