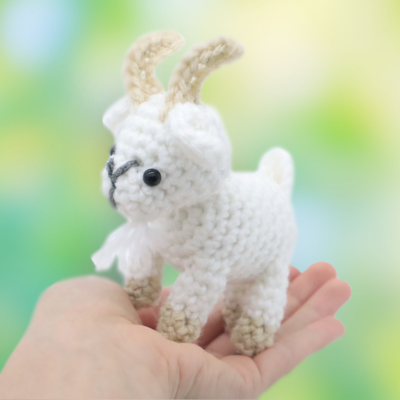
Billy Goats Amigurumi – Free Crochet Pattern

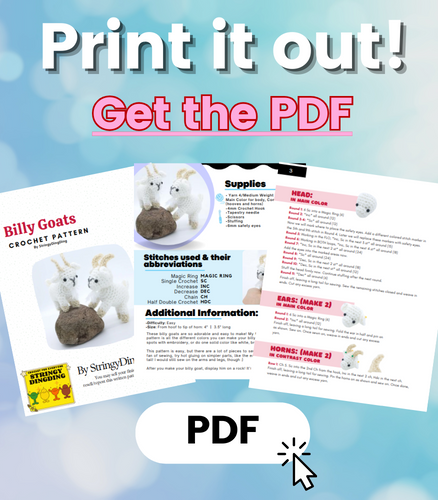
Print this pattern out – purchase the PDF version here!

 Supplies:
• Yarn 4/Medium Weight Yarn in…
Main Color for body, Contrast color (hooves and horns)
•4mm Crochet Hook
•Tapestry needle
•Scissors
•Stuffing
•6mm safety eyes
Additional Information:
•Difficulty: Easy
•Size: From hoof to tip of horn: 4″ | 3.5″ long
These billy goats are so adorable and easy to make! My favorite part of this pattern is all the different colors you can make your billy goat! You can add spots with embroidery, or do one solid color like white, brown, grey, or black.
This pattern is easy, but there are a lot of pieces to sew on. If you’re not a fan of sewing, try hot gluing on simpler parts, like the ears, head, horns, and tail! I would still sew on the arms and legs, though 🙂
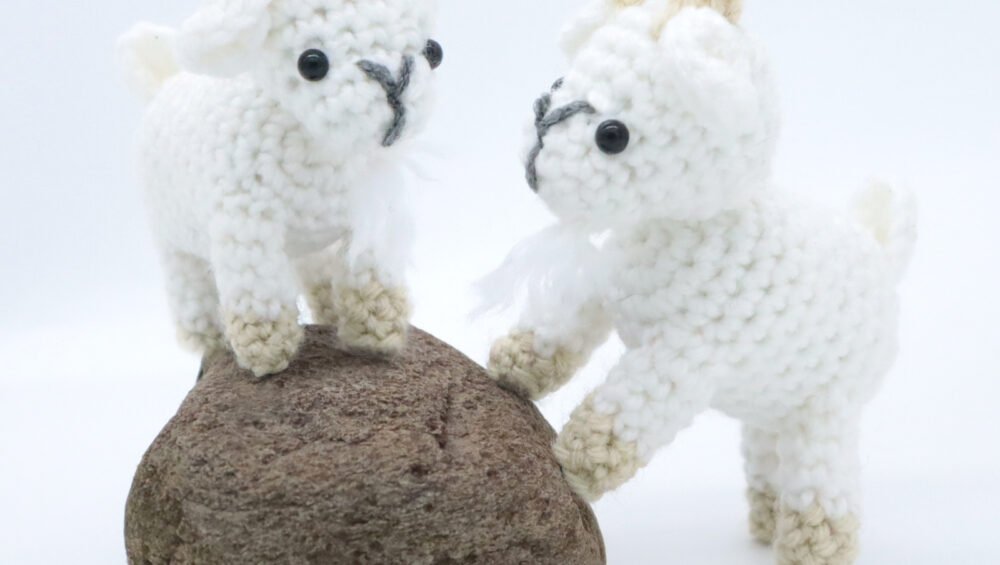
After you make your billy goat, display him on a rock! It’s so cute!
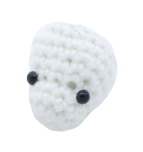
Head:
In Main Color
Round 1: 6 Sc into a Magic Ring (6)
Round 2: *Inc* all around (12)
Round 3-4: *Sc* all around (12)
Now we will mark where to place the safety eyes. Add a different colored stitch marker in the 5th and 9th stitch in Round 4. Later we will replace these markers with safety eyes.
Round 5: Working in the FLO, *Inc, Sc in the next 3 st* all around (15)
Round 6: Working in BOTH loops, *Inc, Sc in the next 4 st* all around (18)
Round 7: *Inc, Sc in the next 2 st* all around (24)
Add the eyes into the marked areas now.
Round 8: *Sc* all around (24)
Round 9: *Dec, Sc in the next 2 st* all around (18)
Round 10: *Dec, Sc in the next st* all around (12)
Stuff the head firmly now. Continue stuffing after the next round.
Round 11: *Dec* all around (6)
Finish off, leaving a long tail for sewing. Sew the remaining stitches closed and weave in ends. Cut any excess yarn.
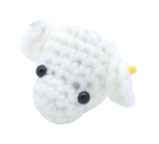
Ears: (Make 2)
In Main Color
Round 1: 6 Sc into a Magic Ring (6)
Round 2: *Inc* all around (12)
Finish off, leaving a long tail for sewing. Fold the ear in half and pin on as shown. Sew on. Once sewn on, weave in ends and cut any excess yarn.
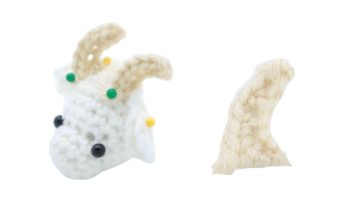
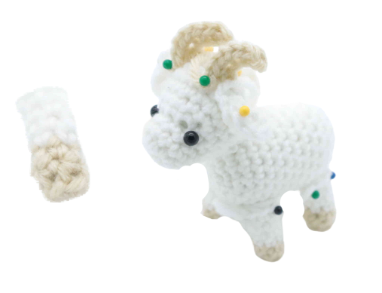
Horns: (Make 2)
In Contrast Color
Row 1: Ch 5. Sc into the 2nd Ch from the hook, Inc in the next 2 ch, Hdc in the next ch.
Finish off, leaving a long tail for sewing. Pin the horns on as shown and sew on. Once done, weave in ends and cut any excess yarn.
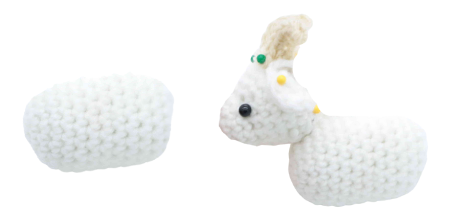
Body:
In Main Color
Round 1: 6 Sc into a Magic Ring (6)
Round 2: *Inc* all around (12)
Round 3: *Inc, Sc in the next st* all around (18)
Round 4-13: *Sc* all around (18)
Round 14: *Dec, Sc in the next st* all around (12)
Stuff the body firmly now. Continue stuffing after the next round.
Round 15: *Dec* all around (6)
Finish off, leaving a long tail for sewing. Sew the remaining stitches closed and weave in ends. Cut any excess yarn.
Arms: (Make 4)
Start in Contrast Color
Round 1: 6 Sc into a Magic Ring (6)
Round 2: Working in the BLO, *Sc* all around (6)
Round 3: Working in BOTH loops, *Sc* all around (6)
Round 4-7: Change to main color. *Sc* all around (6)
Finish off, leaving a long tail for sewing. Stuff the arms, then pin on as shown. Sew on. Once done, weave in ends and cut any excess yarn.
Tail:
In Main Color
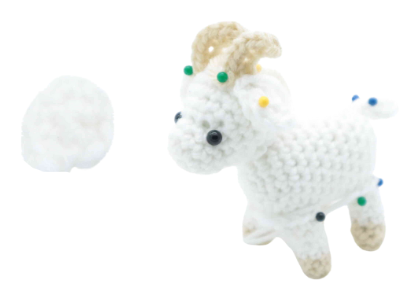
Round 1: 6 Sc into a Magic Ring (6)
Round 2: *Inc* in the next 4 st.
Finish off, leaving a long tail for sewing. Fold the tail in half and pin on as shown and sew on. Once sewn on, weave in ends and cut any excess yarn.
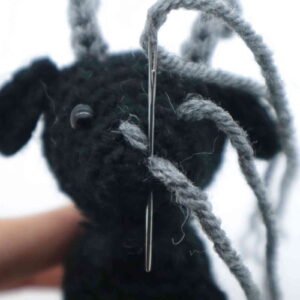
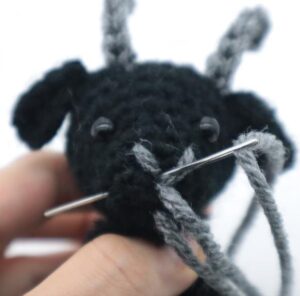
Chin Hair:
In Main Color
Cut 3 pieces of 4″ yarn. Place onto a needle and bring half of the yarn through the chin area. About 2″ of yarn should be on each side. Tie into a firm knot twice. Repeat this with the other two pieces of yarn, putting them in the same spot. Brush the yarn out with a metal pet brush. Trim the hair.
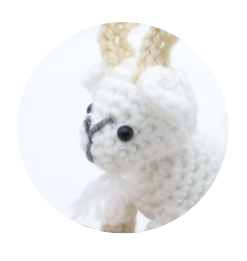
Nose Embroidery:
In Contrasting Color
Insert needle into the middle nose area and pull needle out at the top left area (Pic 1). Reinsert into the middle nose area and pull out at the right (Pic 2). Reinsert into the middle nose area and pull out near the beard (Pic 3). Reinsert where shown and pull out anywhere (Pic 4). Once done, tie ends of yarn into firm knots and bring inside the toy to hide. Cut any excess yarn. Done.
1. 2.
2. 3.
3. 4.
4. 5.
5.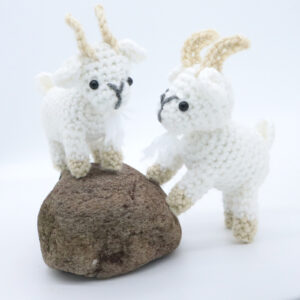
Done! If you made a billy goat, I would LOVE to see! You can show me by posting a picture in the comments section underneath this post 🙂


4 Comments
CUUTTEEEEEEE THANK YOU SO MUCH FOR THE PATTERN!!! All your patterns are AMAZING!!! These little goats are absolutely adorable!!!! Your patterns are so wonderful and easy to understand.
That has got to be one of THE cutest patterns I’ve ever seen!
Hi! Thanks so much for this unique, adorable pattern–I love my goat! I had a little trouble with his legs (I am still very new at this), but it was a valiant effort, LOL!
Anyway, you rock. Thanks so much!
Almost forgot to post a pic!