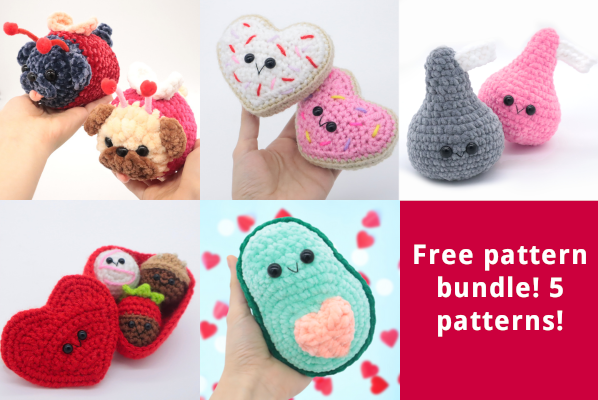
Box of Chocolates Amigurumi – Free Crochet Pattern
This is only 1 of 5 patterns in this free bundle! Click here for the other patterns!
Print this pattern out – purchase the PDF version here!
 Supplies:
• Yarn 4/Medium Weight Yarn in…
Red, dark brown, light brown, green, white, and pink
•4mm Crochet Hook
•Tapestry needle
•Scissors
•Stuffing
•8mm safety eyes for heart, 6mm eyes for candy
•Black Embroidery Thread
Additional Information:
•Difficulty: Easy
•Size: 3.5″ tall, 1.5″ wide
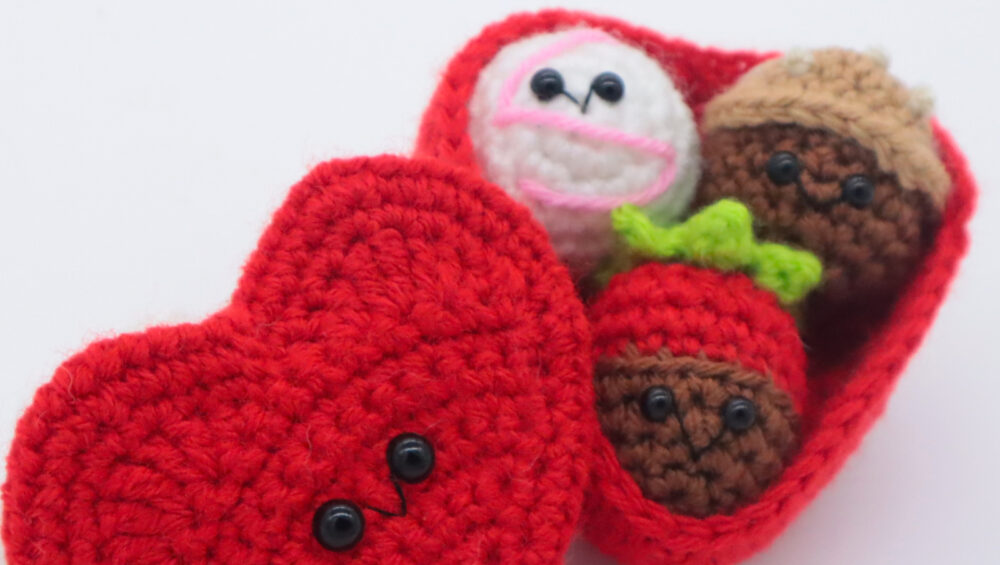
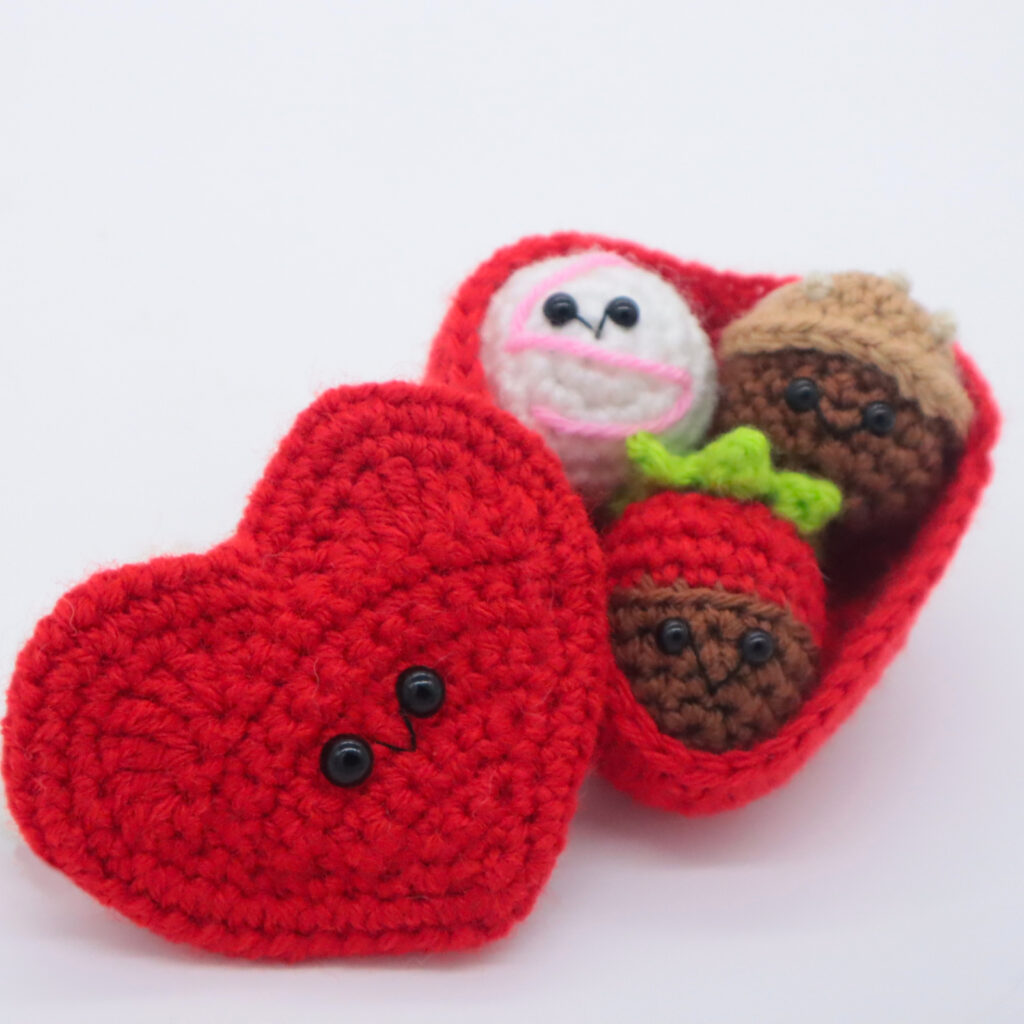
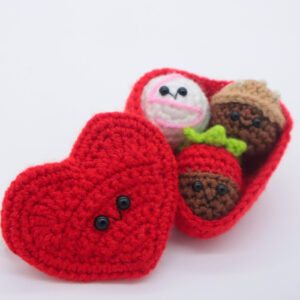
The only thing sweeter than a box of chocolates is making this as a gift for your loved one! This box of chocolates is easy to make and the candies are really fun to play with, making this a fun gift for kids! Let’s get started!
Heart: (Make 2)
In Red
Row 1: Ch 2. Sc 2 times in the 2nd Ch from the hook (2)
Row 2: Ch 1 and turn. Inc in each of the next 2 st (4)
Row 3: Ch 1 and turn. Inc in the next st, Sc in the next 2 st, Inc in the next st (6)
Row 4: Ch 1 and turn. Inc in the next st, Sc in the next 4 st, Inc in the next st (8)
Row 5: Ch 1 and turn. Inc in the next st, Sc in the next 6 st, Inc in the next st (10)
Row 6: Ch 1 and turn. Inc in the next st, Sc in the next 8 st, Inc in the next st (12)
Now we will mark where to place the safety eyes. Add a stitch marker into the 4th and 7th stitch in Row 6. Later we will replace these markers with safety eyes.
Row 7-10: Ch 1 and turn. Sc in the next 12 st (12)
In the next row we will form the top part of the heart
Row 11: Ch 1 and turn. Hdc in the next st, Dc 2 times in the next st, Trc 2 times in the next st, Dc 2 times in the next st, Hdc in the next st, SlSt in the next 2 st. This forms the first bump. Let’s continue.
Hdc in the next st, Dc 2 times in the next st, Trc 2 times in the next st, Dc 2 times in the next st, Hdc in the next st (18)
Add eyes into the marked areas now.
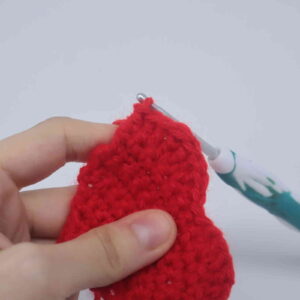
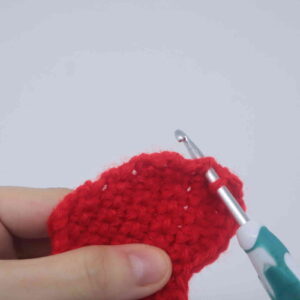
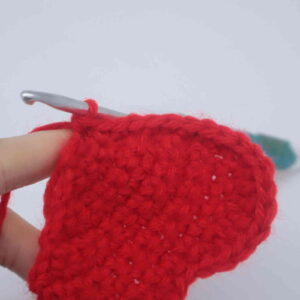
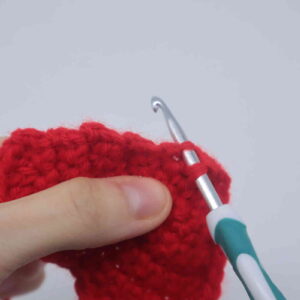
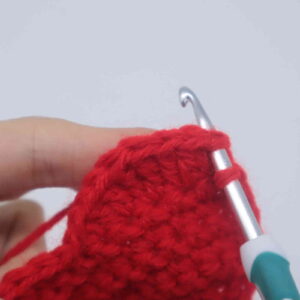
Row 12: Do not turn. Instead, we will now work along the sides of the heart. Working down the first side, Sc in the next 10 st (Pic 1-3). Now we meet the tip of the heart. Sc 2 times into the tip (Pic 4-5). Working along the other side of the heart, Sc in the next 10 st (Pic 6).
Now we’re back at the top bumps of the heart – we are now going to crochet in the recent row we made (Pic 7).
Sc in the next 2 st, Inc in each of the next 4 st, Sc in the next 2 st, SlSt in the next 2 st. Sc in the next 2 st, Inc in each of the next 4 st, Sc in the next st (47)
1. 2.
2. 3.
3. 4.
4. 5.
5. 6.
6. 7.
7.
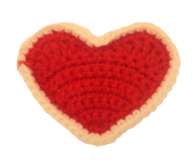
Row 13: You can change to white now if you want the box to have a white edge. If not, continue in red, as I did which is shown in final image!
Working along the side of the heart, Sc in the next 11 st. Now we meet the tip, Inc in each of the next 2 st. Working along the side of the heart, Sc in the next 16 st, Inc in each of the next 2 st. Sc in the next 4 st, SlSt in the next 2 st, Sc in the next 4 st, Inc in each of the next 2 st, Sc in the next 5 st (54)
Finish off now, leaving a very long tail for sewing. Later we will use this tail end of yarn to sew the two heart pieces together. Make a second piece. Once you’ve made the second piece, align both hearts together and sew together. This will make the top box thicker. Once done, weave in ends.
Bottom Box:
In Red
Row 1: Ch 2. Sc 2 times in the 2nd Ch from the hook (2)
Row 2: Ch 1 and turn. Inc in each of the next 2 st (4)
Row 3: Ch 1 and turn. Inc in the next st, Sc in the next 2 st, Inc in the next st (6)
Row 4: Ch 1 and turn. Inc in the next st, Sc in the next 4 st, Inc in the next st (8)
Row 5: Ch 1 and turn. Inc in the next st, Sc in the next 6 st, Inc in the next st (10)
Row 6: Ch 1 and turn. Inc in the next st, Sc in the next 8 st, Inc in the next st (12)
eyes 6th 9th
Row 7-10: Ch 1 and turn. Sc in the next 12 st (12)
In the next row we will form the top part of the heart
Row 11: Ch 1 and turn. Hdc in the next st, Dc 2 times in the next st, Trc 2 times in the next st, Dc 2 times in the next st, Hdc in the next st, SlSt in the next 2 st. This forms the first bump. Let’s continue.
Hdc in the next st, Dc 2 times in the next st, Trc 2 times in the next st, Dc 2 times in the next st, Hdc in the next st (18)
Row 12: Do not turn. Instead, we will now work along the sides of the heart. Working down the first side, Sc in the next 10 st. Now we meet the tip of the heart. Sc 2 times into that tip. Working along the other side of the heart, Sc in the next 10 st.
Now we’re back at the top bumps of the heart – we are now going to crochet in the recent row we made.
Sc in the next 2 st, Inc in each of the next 4 st, Sc in the next 2 st, SlSt in the next 2 st. Sc in the next 2 st, Inc in each of the next 4 st, Sc in the next st (47)
Row 13: Working along the side of the heart, Sc in the next 11 st. Now we meet the tip, Inc in each of the next 2 st. Working along the side of the heart, Sc in the next 16 st, Inc in each of the next 2 st. Sc in the next 4 st, SlSt in the next 2 st, Sc in the next 4 st, Inc in each of the next 2 st, Sc in the next 5 st (54)
Row 14: Working in the BLO (Back Loop Only), Sc in the next 39 st, SlSt in the next 2 st, Sc in the next 13 st (54)
Row 15: Working in BOTH loops, Sc in the next 39 st, SlSt in the next 2 st, Sc in the next 13 st (54)
Row 16: Sc in the next 39 st, Dec 1 time, Sc in the next 13 st (53)
Row 17: Sc in the next 37 st, Dec 2 times, Sc in the next 12 st (51)
Row 18: Sc in the next 13 st, Dec 1 time, Sc in the next 36 st (50)
Row 19: Sc in the next 37 st, Dec 1 time, Sc in the next 11 st (49)
Finish off, leaving a long tail for sewing. Weave in ends and cut any excess yarn.
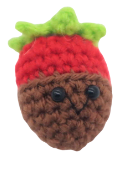
Strawberry:
In Brown
Round 1: 6 Sc into a Magic Ring (6)
Round 2: *Inc, Sc in the next st* all around (9)
Round 3: *Inc, Sc in the next 2 st* all around (12)
Round 4: *Inc, Sc in the next 3 st* all around (15)
Round 5: *Inc, Sc in the next 4 st* all around (18)
Now we will mark where to place the eyes. Add a different colored stitch marker into the 7th and 9th stitch into Round 5. later we will replace these markers with safety eyes.
Round 6: *Sc* all around (18)
Round 7: Change to red. Working in the BLO, *Sc* all around (18)
Add the eyes into the marked areas now.
Round 8-9: *Sc* all around (18)
Round 10: *Dec, Sc in the next st* all around (12)
Stuff the strawberry firmly now.
Round 11: *Dec* all around (6)
Finish off, leaving a long tail for sewing. Sew the remaining stitches closed.
Strawberry Top:
In Green
Round 1: 6 Sc into a Magic Ring (6)
Round 2: Repeat *Ch 3. Sc in the 2nd Ch from hook, Hdc in the next Ch. SlSt into the next st on the circle* 6 times.
Finish off, leaving a long tail for sewing. Pin the top of the strawberry on as shown and sew on. Once done, weave in ends and cut any excess yarn.
Make the smile of the strawberry following the smile tutorial at the end of this pattern.
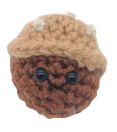
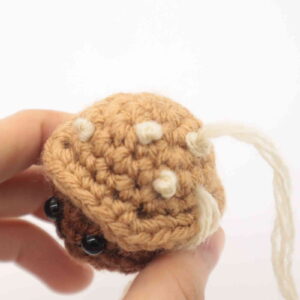
Chocolate:
In Light Brown
Round 1: 6 Sc into a Magic Ring (6)
Round 2: *Inc* all around (12)
Round 3: *Inc, Sc in the next st* all around (18)
Round 4-5: *Sc* all around (18)
Round 6: Working in the FLO, repeat *Sc in the next 3 st, Sc 3 times into the next st* 4 times. Sc in the next 3 st.
Round 7: Change to dark brown. Working in the BACK loop we left in Round 6, *Sc* all around (18)
Round 8-9: *Sc* all around (18)
Now we will mark where to place the safety eyes. Add a different colored stitch marker into the 8th and 10th stitch in Round 9.
Round 10: *Sc* all around (18)
Round 11: *Dec, Sc in the next st* all around (12)
Add the eyes into the marked areas now. Stuff the chocolate firmly, and stuff once again after the next round.
Round 12: *Dec* all around (6)
Finish off, leaving a long tail for sewing.
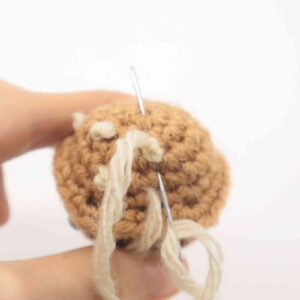
Chocolate Top:
In light cream color
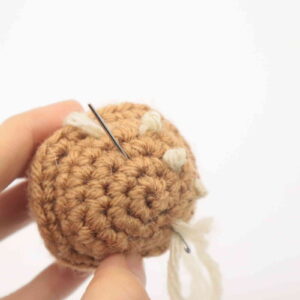
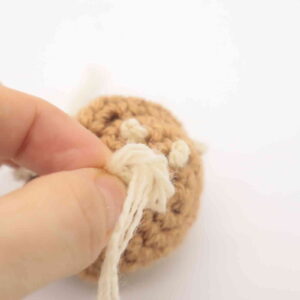
Insert needle into the top of the candy (Pic 1). Tie a knot close to the base (Pic 2-3). You can repeat this again, tying the knot over the knot you just made to make it thicker. Now insert needle one stitch over and pull out nearby to make another topping (Pic 4). Once done, weave in ends and cut any excess yarn.
1. 2.
2. 3.
3. 4.
4.
White Chocolate:
In White
Round 1: 6 Sc into a Magic Ring (6)
Round 2: *Inc* all around (12)
Round 3: *Inc, Sc in the next st* all around (18)
Place 6mm safety eyes in between Round 1 and 2, 2 stitches apart.
Round 4-7: *Sc* all around (18)
Round 8: *Dec, Sc in the next st* all around (12)
Stuff the toy firmly now. Continue stuffing after the next round.
Round 9: *Dec* all around (6)
Finish off, leaving a long tail for sewing. Sew the remaining stitches closed and weave in ends. Cut any excess yarn.
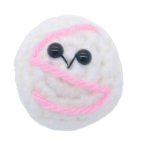
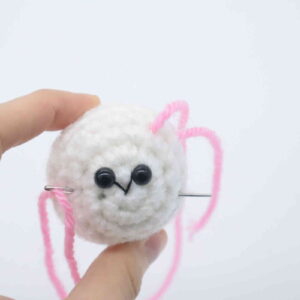
White Chocolate Drizzle:
In Pink
Insert needle where shown (Pic 1). Reinsert needle to the left of the toy‘s left eye (Pic 2).
1. 2.
2.
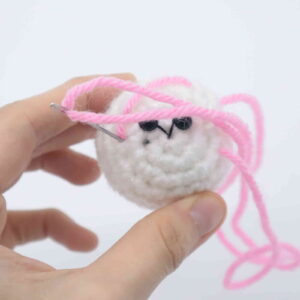
Pull needle out at the right as shown (Pic 3). Reinsert needle into the same left area (Pic 4).
3. 4.
4.
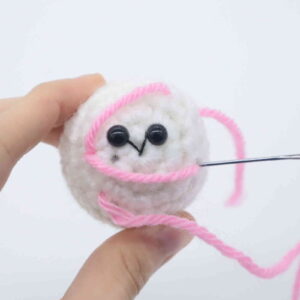
Pull needle out at the bottom (Pic 5). Reinsert needle into the right area (Pic 6). Tie the ends of yarn into a firm knot, this will secure the embroidery. Bring the knots inside the toy to hide, cutting any excess yarn.
5.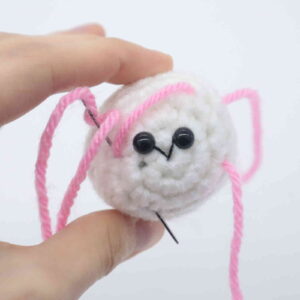 6.
6.
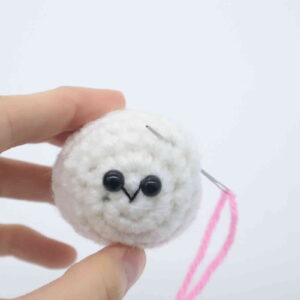
Smile:
In Black Embroidery Thread
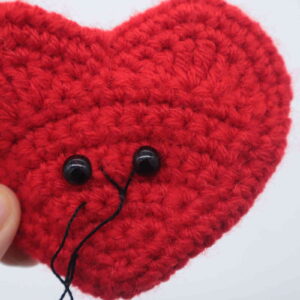
Insert needle into the middle area of the toy as shown (Pic 1) and pull needle out at the left of the toy’s eye as shown (Pic 1). Reinsert needle into the middle of the toy (Pic 2) and pull needle out next to the toy’s right eye (Pic 2). Reinsert needle into the middle of the toy as shown (Pic 3) and pull needle out nearby. Tie ends of thread into firm knots and bring knots inside the toy to hide. Cut any excess yarn. Repeat this for all smiles on the candies.
1.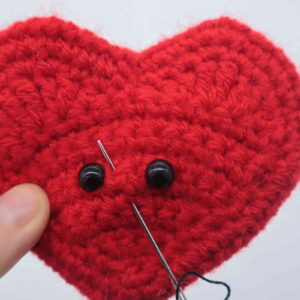 2.
2.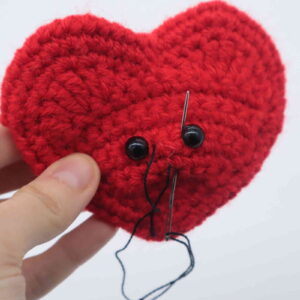 3.
3.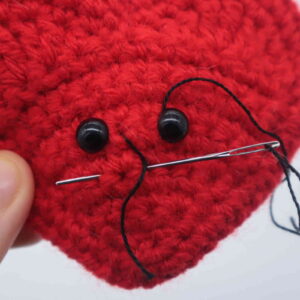 5.
5.
Done! If you made this box of chocolates, I would LOVE to see! You can show me by posting a picture in the comments section below 🙂


9 Comments
Such a cute idea and was so easy with the pattern!
I love these patterns, such cute little sweets! Thank you for the free pattern!
I’m guessing my tension is too tight, but I did restitch the first 4 rows separately with very low tension and it still resembled my tall skinny heart more than the pattern. I ended up having to add stitches to maintain a heart shape but other than that what am I doing wrong? 😮💨
What size hook are you using and what yarn weight? It looks like your tension is significantly too loose, actually, and you could probably benefit from using a smaller hook. Hope this helps! <3
Thank you so much for such a cute pattern!
This was so fun! I added sides to the top of my box so it could close
Omg how did you add the sides ?!?!
This was fun! Thank you kindly for the pattern dear.
This was my first-ever crochet project! It was a bit of a crash course for learning all the different stitches (I’ve learned that magic rings can smell fear…), but I think everything turned out great! I also didn’t get any eyes, so I ended up fully embroidering the faces (even though I’ve only just started learning embroidery too). This was a ton of fun to do, so thanks for teaching me a new skill!!! :]
I think your candy’s look so cool Brianna