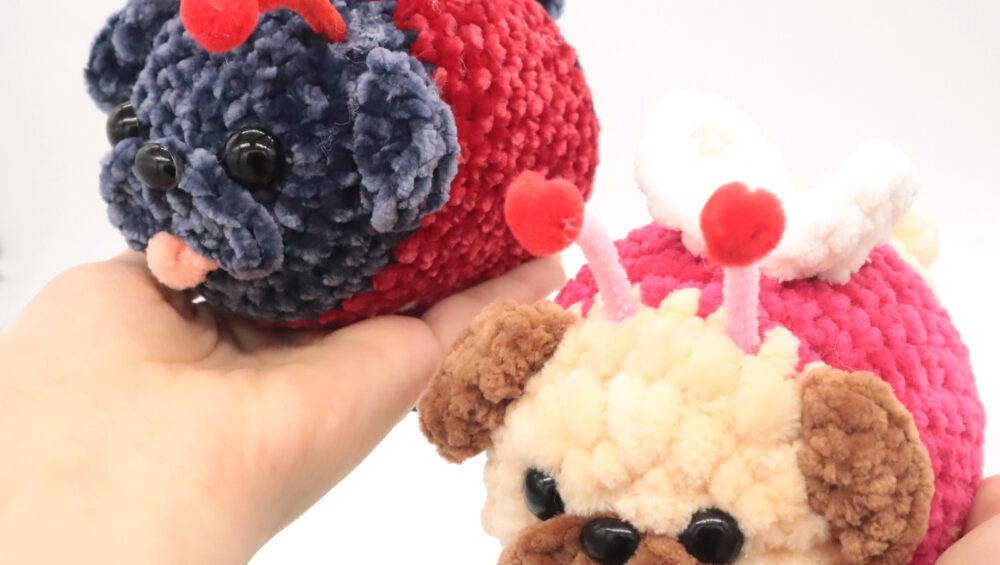
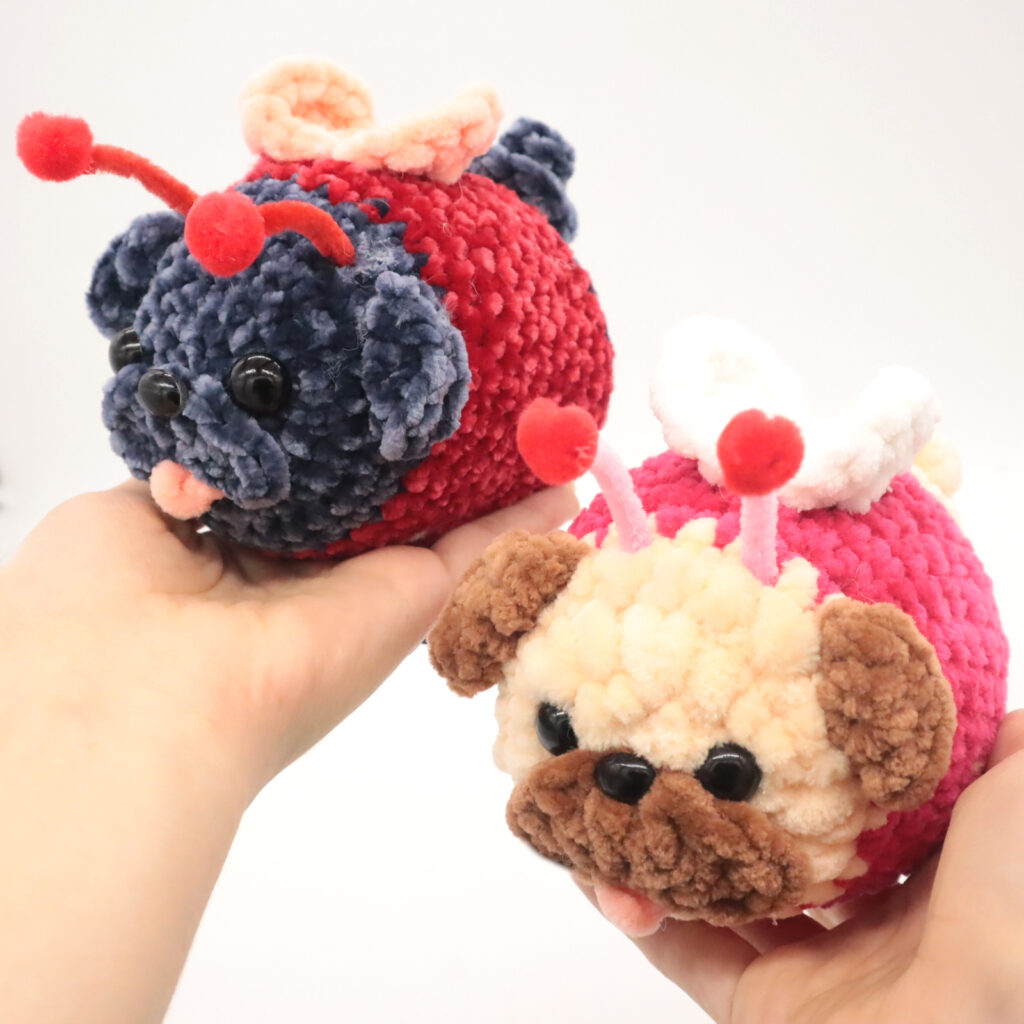
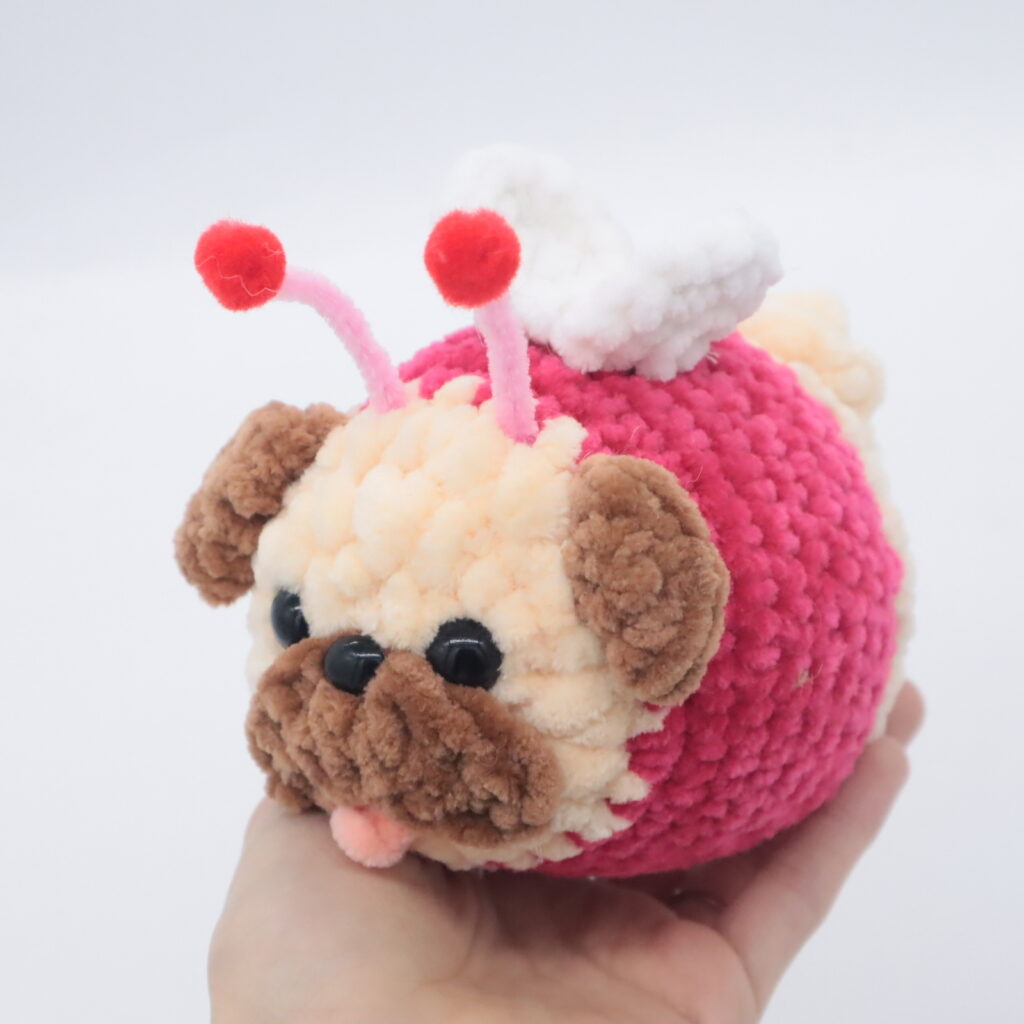
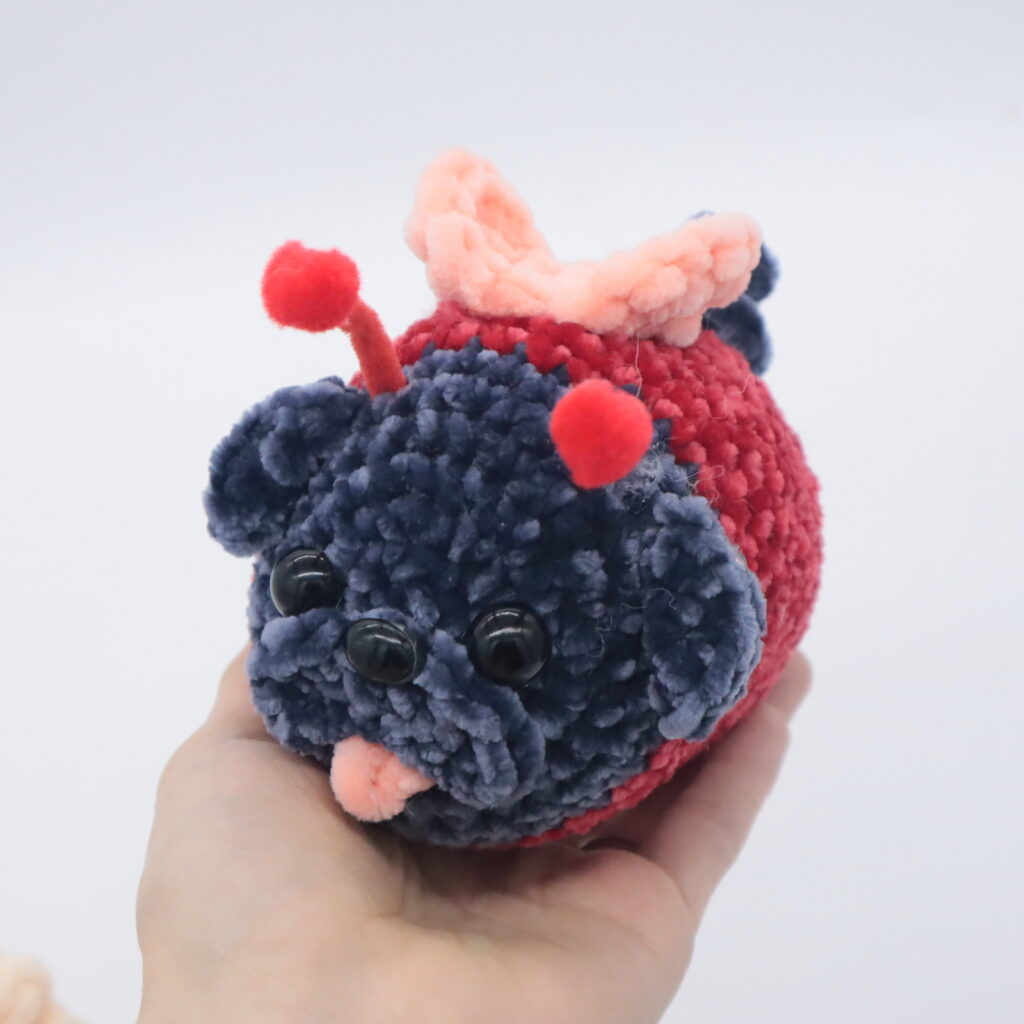
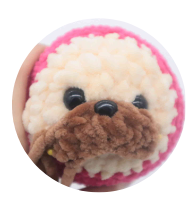
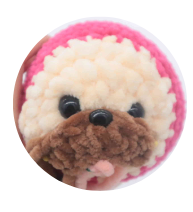
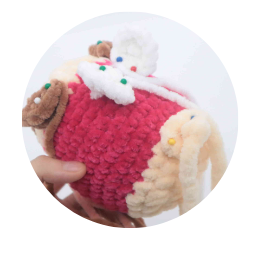
Love Pugs Amigurumi – Free Crochet Pattern
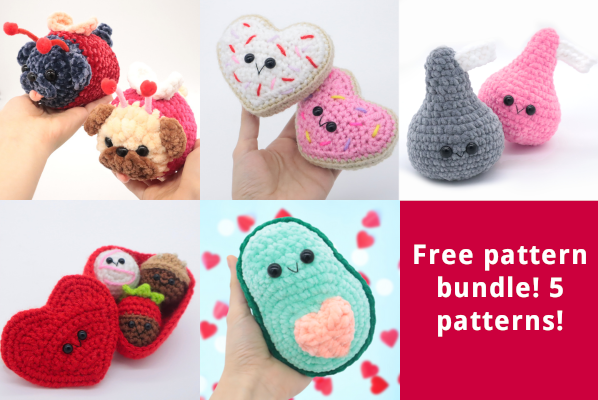
This is only 1 of 5 patterns in this free bundle! Click here for the other patterns!
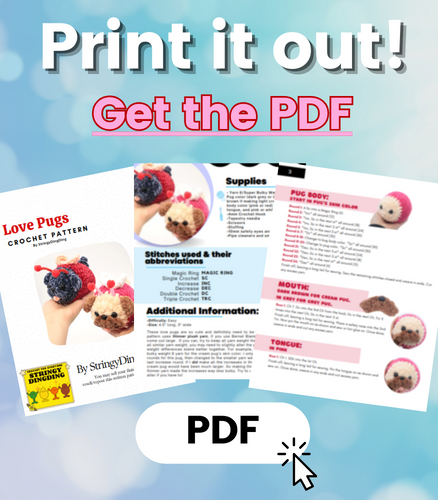
Print this pattern out – purchase the PDF version here!
 Supplies:
• Yarn 6/Super Bulky Weight Yarn in…
Pug color (dark grey or light cream), brown if making light cream pug. Bug body color (pink or red), pink for tongue, and pink or white for wings.
•5.5mm Crochet Hook
•Tapestry needle
•Scissors
•Stuffing
•10mm safety eyes and a safety nose
•Pipe cleaners and small red pom poms
Additional Information:
•Difficulty: Easy
•Size: 4.5″ long, 3″ wide
These love pugs are so cute and definitely need to be in your to-do list! This pattern uses thinner plush yarn, if you use Bernat Blanket yarn, your pugs will come out large . If you can, try to keep all yarn weight the same. If you can’t find all similar yarn weight, you may need to slightly alter the pattern to make the yarn weight differences blend better together. For example, I could only find a very bulky weight 8 yarn for the cream pug’s skin color. I only increased for the first 4 rounds for this pug, then changed to the smaller yarn weight (in pink) to make the last increase round. If I did make all the increases in the bulkier weight yarn, my cream pug would have been much larger. So making the last increase round with thinner yarn made the increases way less bulky. Try to use all similar yarn weight, alter if you have to!
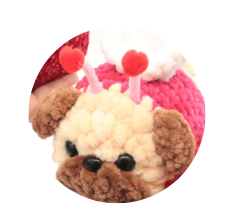
Pug Body:
Start in Pug’s Skin Color
Round 1: 6 Sc into a Magic Ring (6)
Round 2: *Inc* all around (12)
Round 3: *Inc, Sc in the next st* all around (18)
Round 4: *Inc, Sc in the next 2 st* all around (24)
Round 5: *Inc, Sc in the next 3 st* all around (30)
Round 6-7: *Sc* all around (30)
Round 8-18: Change to bug body color. *Sc* all around (30)
Round 19-20: Change to pug color. *Sc* all around (30)
Round 21: *Dec, Sc in the next 3 st* all around (24)
Round 22: *Dec, Sc in the next 2 st* all around (18)
Round 23: *Dec, Sc in the next st* all around (12)
Round 24: *Dec* all around (6)
Finish off, leaving a long tail for sewing. Sew the remaining stitches closed and weave in ends. Cut any excess yarn.
Mouth:
Dark brown for cream pug. in grey for grey pug.
Row 1: Ch 7. Dc into the 3rd Ch from the hook, Dc in the next Ch, Trc 3 times into the next Ch, Dc in the next 2 st.
Finish off, leaving a long tail for sewing. Place a safety nose into the 2nd Trc. Now pin the mouth on as shown and sew or hot glue on. Once done, weave in ends and cut any excess yarn.
Tongue:
In Pink
Row 1: Ch 1. SlSt into the 1st Ch.
Finish off, leaving a long tail for sewing. Pin the tongue on as shown and sew on. Once done, weave in any ends and cut excess yarn.
Ears: (Make 2)
Dark brown for cream pug. in grey for grey pug.
Round 1: 6 Sc into a Magic Ring (6)
Round 2: *Inc* all around (12)
Finish off, leaving a long tail for sewing. Fold the ear in half – you can secure this by placing a dot of hot glue inside the toy’s ear before folding. Pin the ears on as shown and sew on. Once sewn on, finish off and weave in ends. Cut any excess yarn.
Wings: (Make 2)
In White or Light Pink

Round 1: 6 Sc into a Magic Ring (6)
Round 2: *Inc* all around (12)
Finish off, leaving a long tail for sewing. Pin the wings on as shown and sew or hot glue on. Once done, weave in ends and cut any excess yarn.
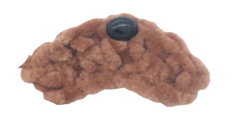
Tail:
In Pug’s Skin Color
Round 1: 6 Sc into a Magic Ring (6)
Round 2: *Inc* all around (12)
Finish off, leaving a long tail for sewing. Pin the wings on as shown and sew or hot glue on. Once done, weave in ends and cut any excess yarn.
Antennas:
Cut pipe cleaners to be about 2.5“ long. Insert the end of your crochet hook into the area where you will put the pipe cleaner. Jam your hook back and forth in this area – this will create a clearing for the pipe cleaner to easily fit. Remove the hook and place a dot of hot glue in this area. Insert the pipe cleaner in, having about .5“ go inside the toy. Now take a red pom pom, I cut a small line out of the middle of the pom pom to create a heart. Place a small dot of hot glue on the pom pom and stick on the end of the pipe cleaner, holding on for a few seconds to secure.
Done! If you made a love pug, I would LOVE to see! You can show me by posting a picture in the comments section underneath this post 🙂


4 Comments
Would you please post a picture of the back of a finished Love Pug?
Love this pattern for the love pug dogs. Am confussed about the tail.
Of course we can, Vicky! You will just have to wait 3 947 394 business days for us to do that. 😊 Have a good day, and God bless you! 😘🙏
Lol I thought that was funny ;D