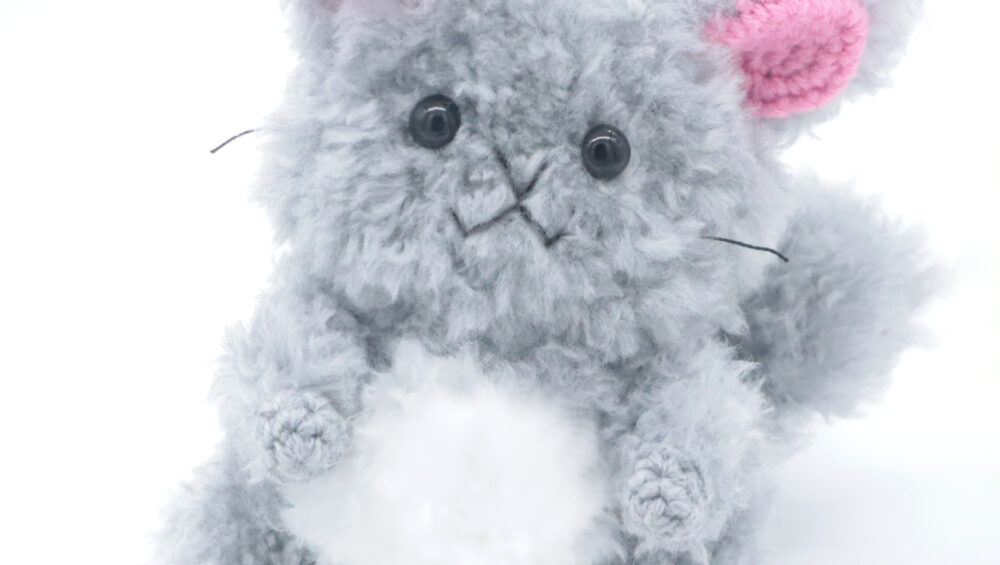
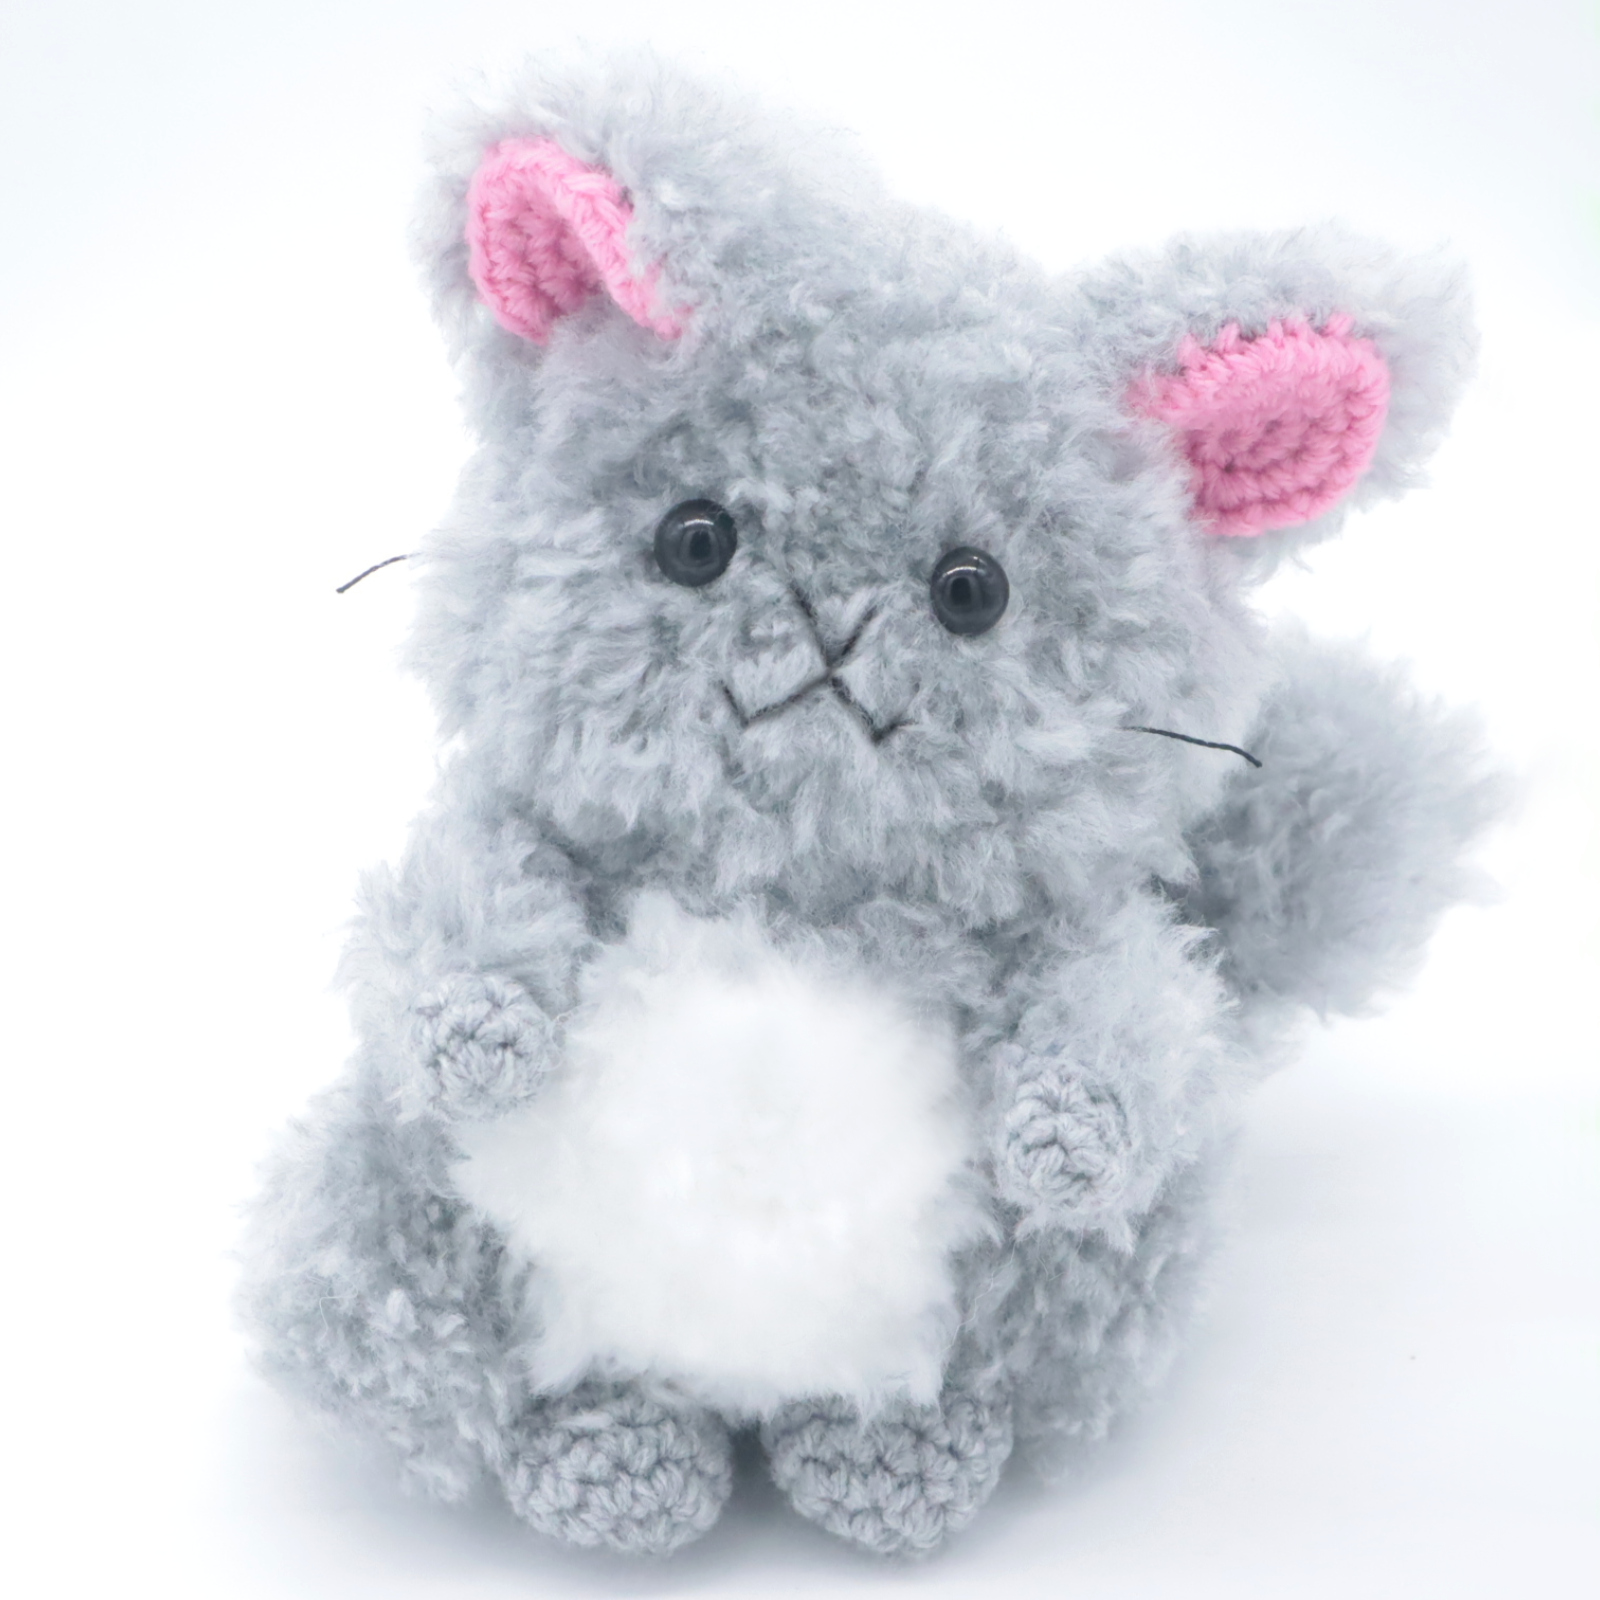
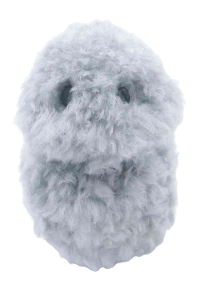
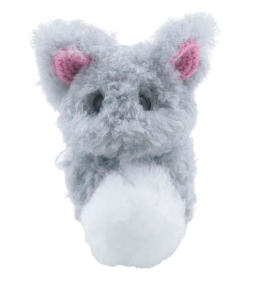
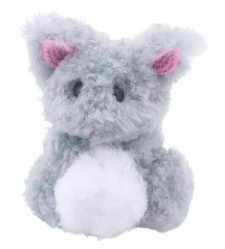
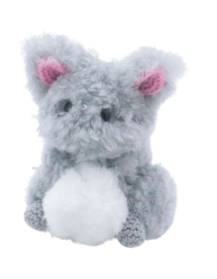
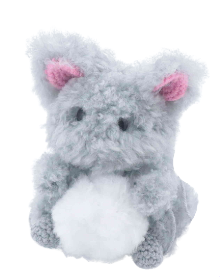
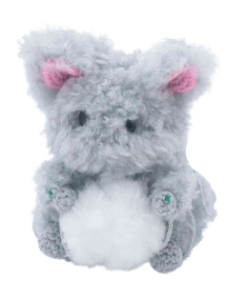
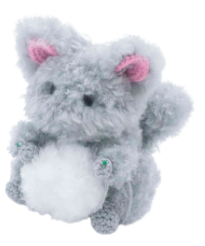
Chinchilla Amigurumi – Free Crochet Pattern
Print this pattern out – purchase the PDF here!

 Supplies:
• Yarn 4/Medium Weight Yarn in…
Grey, white, and pink
•4mm Crochet Hook
•Tapestry needle
•Scissors
•Stuffing
•Hot glue gun (Optional)
•12mm safety eyes
•Metal pet brush
•Black embroidery thread
Additional Information:
•Difficulty: Intermediate
•Size: 8″ tall
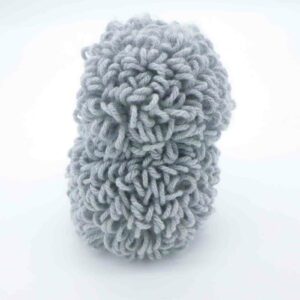
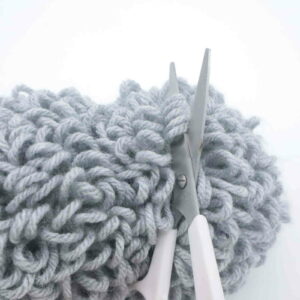
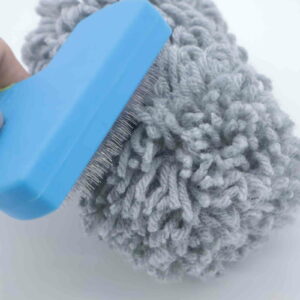
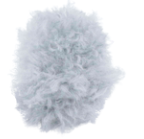
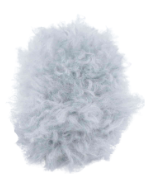
Some people think rodents are creepy, but I always find their tiny little bodies and adorable furry appearance so cute. Chinchillas are no exception! This pattern uses loop stitches to make the fluffy appearance, so crocheting this chinchilla isn’t difficult! You won’t need to deal with annoying furry yarn, just use regular yarn 🙂 After we make the loop stitches, we cut them and brush them out with a metal brush. And viola – fluffy! Don’t know how to make loop stitches? No worries! This pattern shows you how step-by-step!
Let’s get started!
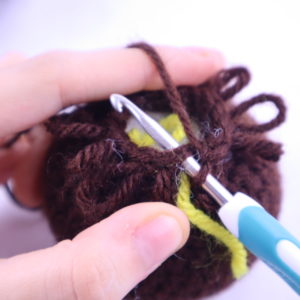
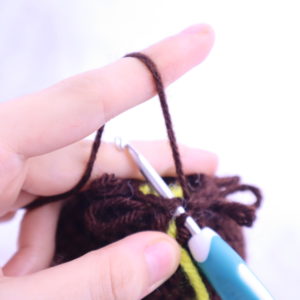
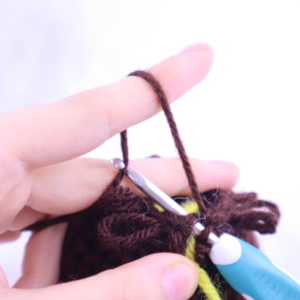
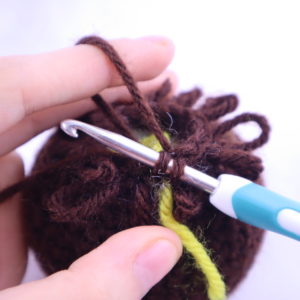
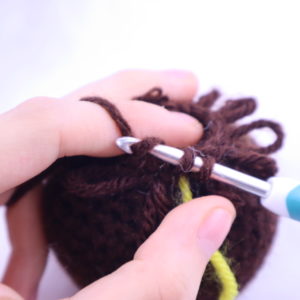
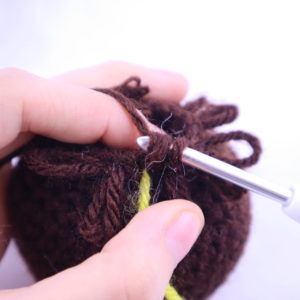
How to do a loop stitch:
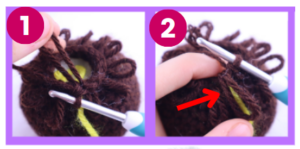
Insert your hook into the next stitch (Pic 1). Hold the yarn as shown (Pic 2). Pull the yarn on the left with your hook through the stitch (Pic 3-5). You will have 2 loops on your hook (Pic 5). Yarn over and pull through both loops (Pic 6-8). You’ve made 1 loop stitch, it will be a loop at the back. Continue crocheting!
1. 2.
2. 3.
3. 4.
4. 5.
5. 6.
6. 7.
7. 8.
8.
Important note:
When we make an increase, dimply do two loop stitches into one stitch to make an increase. Do this anytime you see “inc” in the pattern.
Body:
In Grey
The wrong side of the crochet piece will show. Just make sure your loop stitches are out. If you get confused, you can turn your crochet piece inside out to ensure the loop stitches are on the outside.
Round 1: 6 Sc into a Magic Ring (6)
Round 2: *Inc* all around (12)
Round 3: *Inc, LpSt in the next st* all around (18)
Round 4: *Inc, LpSt in the next 2 st* all around (24)
Round 5: *Inc, LpSt in the next 3 st* all around (30)
Round 6-7: *1 LpSt in each st* all around (30)
Round 8: 1 LpSt in each of the next 6 st. Repeat *Inc, LpSt in the next st* 3 times. LpSt in the next 12 st. Repeat *Inc, LpSt in the next st* 3 times (36)
Round 9-10: *1 LpSt in each st* all around (36)
Round 11: Repeat *Dec, LpSt in the next 4 st* all around (30)
Round 12: Repeat *Dec, LpSt in the next 3 st* all around (24)
Round 13: Repeat *Dec, LpSt in the next 2 st* all around (18)
Round 14: Working in the Front Loop Only (FLO), repeat *Inc, LpSt in the next 2 st* all around (24)
Round 15: Working in BOTH loops, repeat *Inc, LpSt in the next 3 st* all around (30)
Round 16: Repeat *Inc, LpSt in the next 4 st* all around (36)
Round 17-23: *1 LpSt in each st* all around (36)
Stuff the head firmly here.
Round 24: *Dec, LpSt in the next 4 st* all around (30)
Round 25: *Dec, LpSt in the next 3 st* all around (24)
Round 26: *Dec, LpSt in the next 2 st* all around (18)
Stuff the body firmly here. Continue stuffing after each round. Make sure your loop stitches are on the outside of the crochet piece. If not, flip your crochet piece inside out so the loops are facing out.
Round 27: *Dec, LpSt in the next st* all around (12)
Round 28: *Dec* all around (6)
Finish off, leaving a long tail for sewing. Sew the remaining stitches closed and weave in ends. Cut any excess yarn. Cut the loops, brush them out, and trim the fur to your liking. Keep the cheek area’s fur longer and poofier.

Tummy:
In White
Round 1: 6 Sc into a Magic Ring (6)
Round 2: *Inc* all around (12)
Round 3: *Inc, LpSt in the next st* all around (18)
Round 4: *Inc, LpSt in the next 2 st* all around (24)
Round 5: *Inc, LpSt in the next 3 st* all around (30)
Finish off, leaving a long tail for sewing. Cut the loops, brush them out, and trim the fur. Pin the belly on as shown and sew or hot glue on. Once done, weave in ends and cut excess yarn.
Ears: (Make 2)
Start in pink
Round 1: 6 Sc into a Magic Ring (6)
Round 2: *Inc* all around (12)
Round 3: *Inc, LpSt in the next st* all around (18)
Round 4: *Inc, LpSt in the next 2 st* all around (24)
In the next round we will make decreases. When making these decreases make a loop with your finger as we’ve been doing for the first part of the decrease we make. Pull this loop to the front after each decrease we make (Pic 1-2). If this is too confusing, you can make a regular decrease, but the ear won’t be as fluffy.
Round 5: Change to grey. Working in the BLO, repeat *Dec, LpSt in the next 2 st* all around (18)
Round 6: Working in BOTH loops, *Dec, LpSt in the next st* all around (12)
Round 7: *Dec* all around (6)
Finish off, leaving a long tail for sewing. Cut the loops, brush them out, and trim the fur. Pin the ears on as shown and sew on. Once done, weave in ends. Cut any excess yarn.
Legs: (Make 2)
In Grey
Round 1: 6 Sc into a Magic Ring (6)
Round 2: *Inc* all around (12)
Round 3: *Inc, LpSt in the next st* all around (18)
Round 4: *Inc, LpSt in the next 2 st* all around (24)
Round 5-7: *LpSt in each st* all around (24)
Finish off, leaving a long tail for sewing. Cut the loops, brush them out, and trim the fur. Pin the leg on as shown and sew on, but be sure to add stuffing before fully sewing on. Once done, weave in ends and cut any excess yarn.
Feet: (Make 2)
In Grey
Round 1: 6 Sc into a Magic Ring (6)
Round 2: *Inc* all around (12)
Round 3-6: *Sc* all around (12)
Finish off, leaving a long tail for sewing. Pin the feet on as shown and sew on, be sure to add stuffing before fully sewing on. Once done, weave in ends and cut any excess yarn.
Arms: (Make 2)
In Grey
Round 1: 6 Sc into a Magic Ring (6)
Round 2-7: *1 LpSt in each st* all around (6)
Finish off, leaving a long tail for sewing. Cut the loops, brush them out, and trim the fur. Pin the arms on as shown and sew on. Cut any excess yarn.
Hands: (Make 2)
In Grey
Do NOT make loop stitches for this piece. The right side of the crochet piece will face out for the hands.
Round 1: 6 Sc into a Magic Ring (6)
Round 2-3: *Sc* all around (6)
Finish off, leaving a long tail for sewing. Pin the hands on as shown and sew or hot glue on. Once done, weave in ends and cut any excess yarn.
Tail:
In Grey
The wrong side (the loop stitches) will be facing on the outside of this crochet piece.
Round 1: 6 Sc into a Magic Ring (6)
Round 2: *Inc* all around (12)
Round 3-12: *1 LpSt in each st* all around (12)
Finish off, leaving a long tail for sewing. Cut the loops, brush them out, and trim the fur. Pin the tail on as shown and sew or hot glue on. Once done, weave in ends and cut any excess yarn.
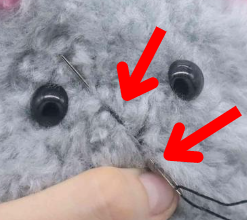
Smile Embroidery:
In Black Embroidery Thread
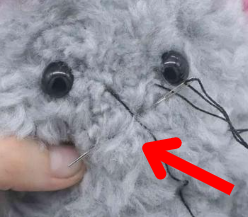
Insert needle with thread into the middle face area of the toy (Pic 1), then bring the needle diagonal and to the left (Pic 1).
1.
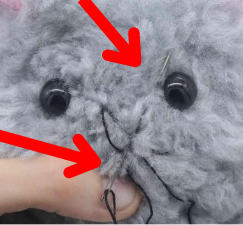
Reinsert needle into the middle face area (Pic 2), and pull needle out diagonal and to the right (Pic 2).
2.
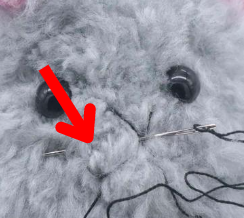
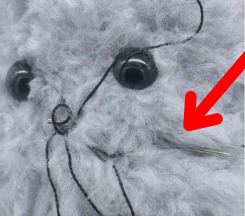
Reinsert needle into middle nose area (Pic 3) and pull needle out at the lower left area as shown (Pic 3).
3.
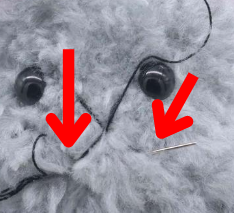
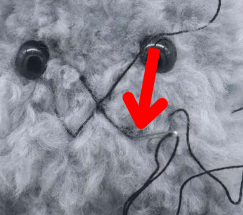
Reinsert needle into middle face area and pull needle out at the lower left area, a bit above the previous area you pulled out of (Pic 4).
4.
Reinsert needle where shown (Pic 5), and pull needle out at the right side of the face where shown (Pic 5).
5.
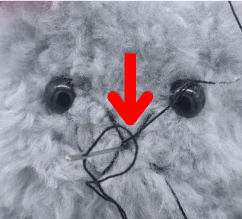
Reinsert needle into middle face area (Pic 6).
6.
Pull needle out a little higher at the right side of the face where shown (Pic 7).
7.
Reinsert needle where shown (Pic 8). You can repeat this process another time to make the smile thicker. Now tie ends of thread into firm knots and bring the knots inside the toy to hide. Cut any excess yarn.
8.


2 Comments
could i make this without loop stitches. i don’t have a pet brush ( well only one with dog fur in it ) to make it fluffy
I use velcro to do things like this, but if I had a brush I would use it, no matter the condition.