

Purchase the PDF version here

Or purchase the entire Valentine’s Day PDF Bundle here
Supplies:
4mm crochet hook, 4/Medium weight yarn in any desired colors, and red for the teeth. 9mm safety eyes, tapestry needle, scissors, and stuffing.
Additional Information:
Difficulty: Easy
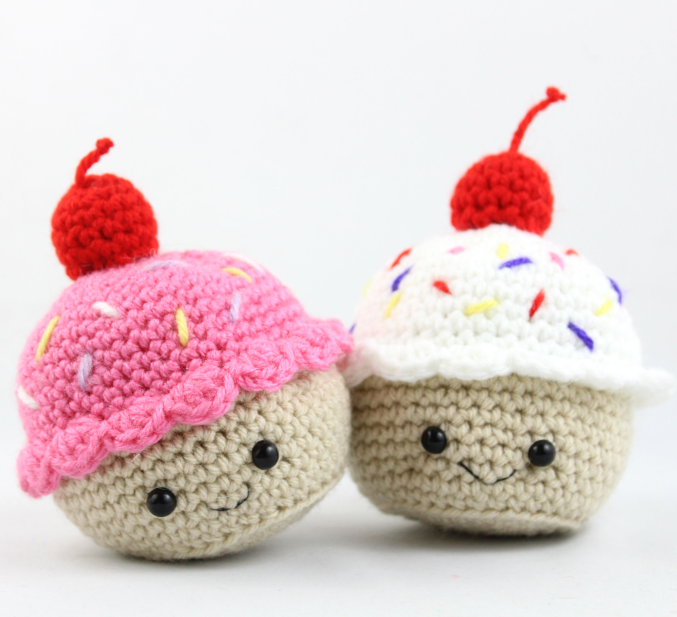
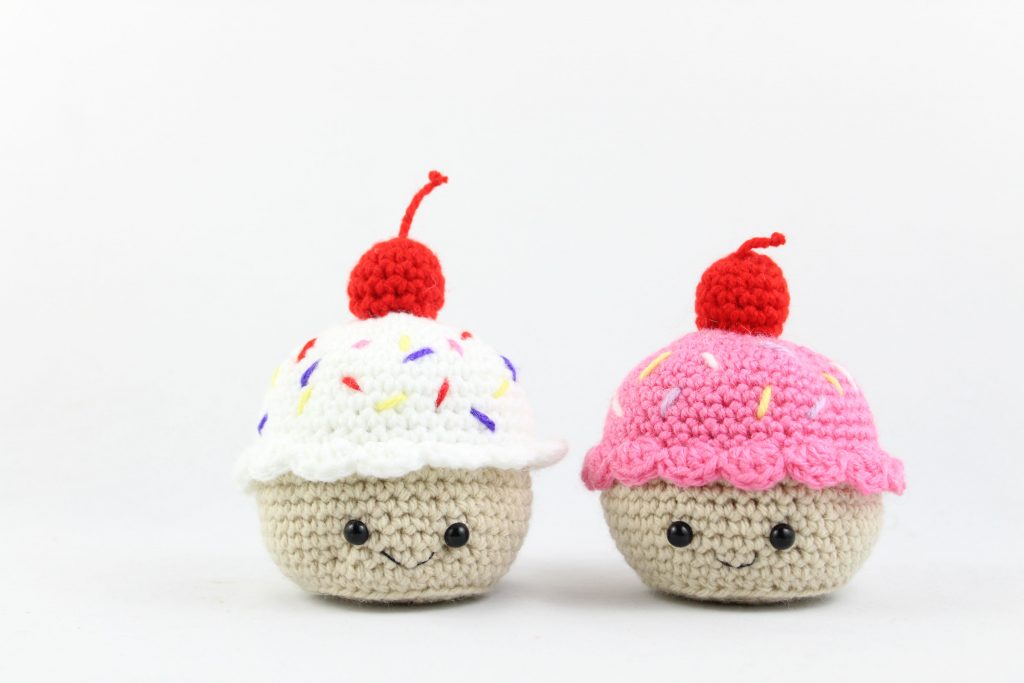
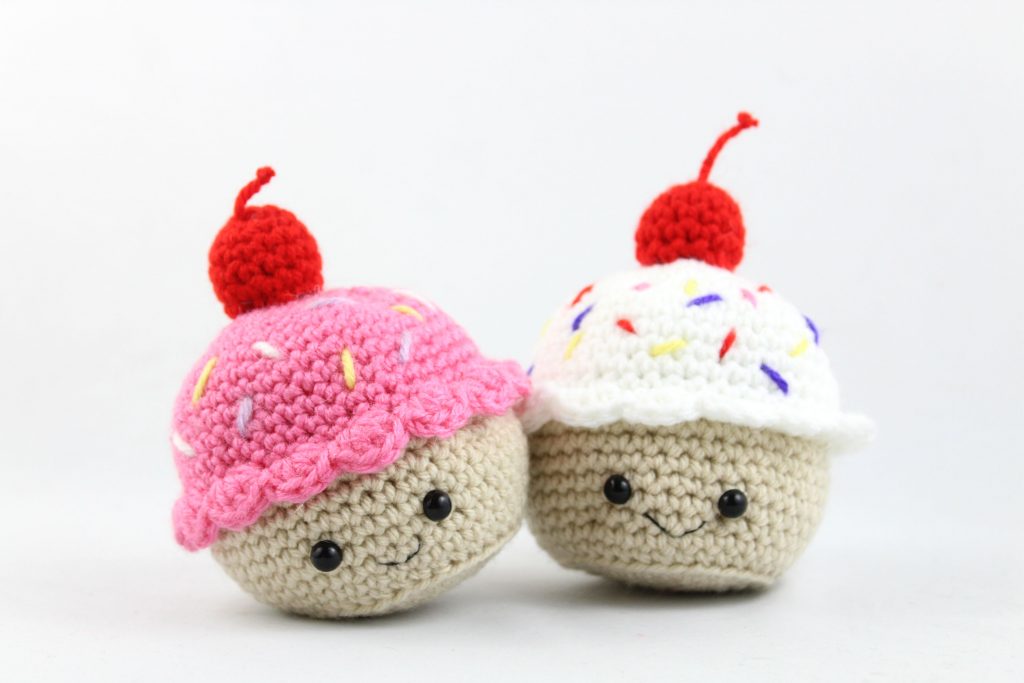
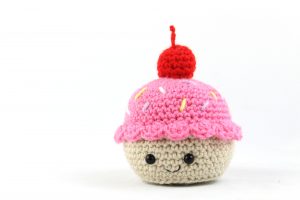
We start by making the cupcake bottom. We then make the cupcake top or “icing”, and then assemble the top and bottom together. Next, we make the smile. Now we make the cherry and sew on some sprinkles. Done!
Bottom Part:
In Cream Color
Round 1: 6 Sc in Magic Ring (6)
Round 2: *Inc* all around (12)
Round 3: *Inc, Sc* all around (18)
Round 4: *Inc, Sc 2* all around (24)
Round 5: *Inc, Sc 3* all around (30)
Round 6: *Inc, Sc 4* all around (36)
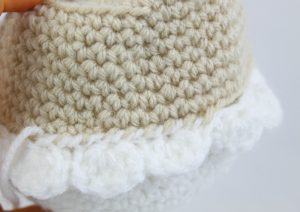
Round 7: In BLO (Back Loop Only), *Sc* all around (36)
Round 8-9: *Sc* all around (36)
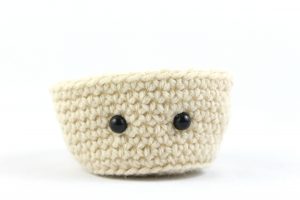
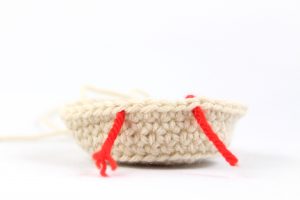
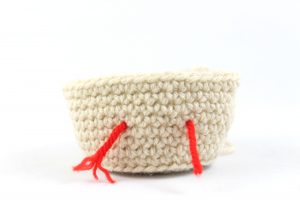
Round 10: *Inc, Sc 5* 2 times. *Inc* in the next st, Sc in the next st and add a different colored st marker to the Sc just made. This marks where to place the eye. Sc in the next 4 st. Sc in the next st and add a different colored st marker to the Sc just made. Sc in the same st. Sc in the next 5 st. Repeat *Inc in the next st, Sc in the next 5 st* 2 times (42)
Round 11-14: *Sc* all around (42)
Round 11 Pictured below
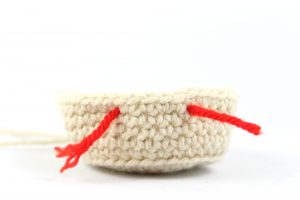
Finish off. Add eyes in marked areas now.
Cupcake Top:
In Icing Color
Round 1: 6 Sc in Magic Ring (6)
Round 2: *Inc* all around (12)
Round 3: *Inc, Sc* all around (18)
Round 4: *Inc, Sc 2* all around (24)
Round 5: *Inc, Sc 3* all around (30)
Round 6: *Inc, Sc 4* all around (36)
Round 7: *Inc, Sc 5* all around (42)
Round 8-13: *Sc* all around (42)
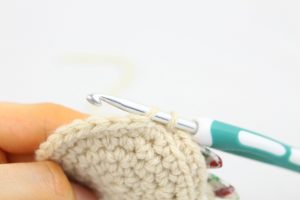
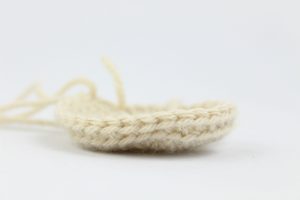
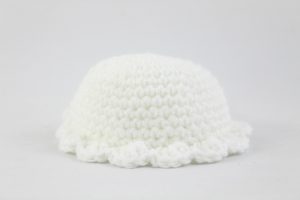
Round 14: In FLO (Front Loop Only) Dc 4 times in the next st. Skip the next st, SlSt in the next st. Repeat *4 Dc in the next st, skip the next st, SlSt in the next st* 13 times.
Finish off and leave a long tail for sewing the top cupcake to the bottom.

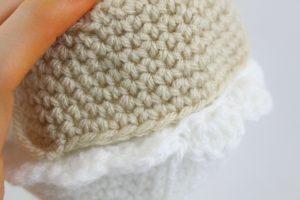
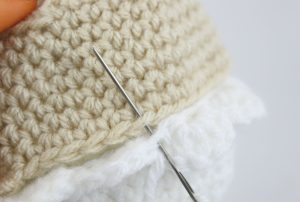
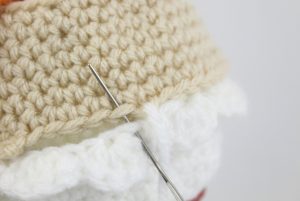
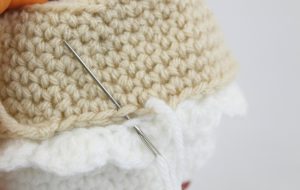
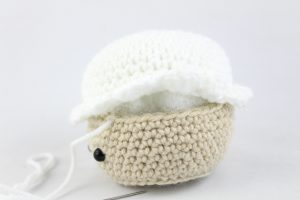
Assembly:
Line up the bottom and top part together (Pic 1). With the tail from the top cupcake, sew the pieces together going from the front loop left on the top cupcake (Pic 2), to the back loop of the bottom cupcake (Pic 3). Repeat this around and stuff (Pic 7) before fully closing.

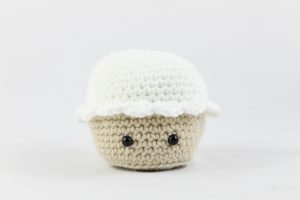
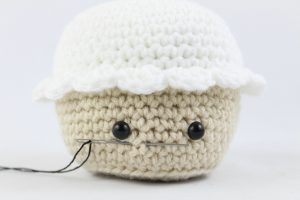
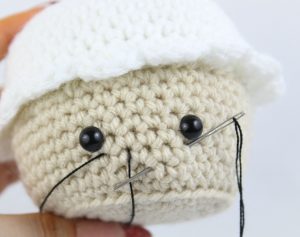
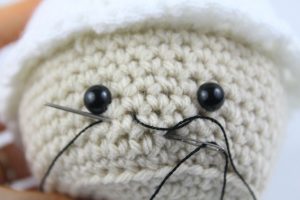
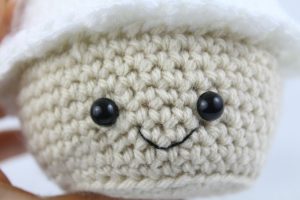
Smile:
In Black Embroidery Thread
Insert needle with black embroidery thread where shown (Pic 1), and pull out one stitch to the right (Pic 1). Insert needle on the opposite side of the mouth (Pic 2), and pull needle out of the middle of the mouth (Pic 2). The working string is now right above the the smile. Reinsert needle under smile, but in same stitch as inserted before (Pic 4). Weave in ends. Done!

Cherry:
In Red

Round 1: 6 Sc in Magic Ring (6)
Round 2: *Inc* all around (12)
Round 3-6: *Sc* all around (12)
Round 7: *Dec* all around (6)
Finish off. Sew closed. Pin to the top of the cupcake.
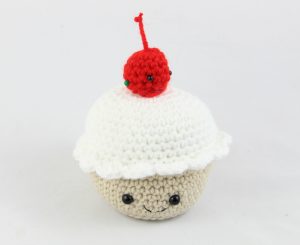
Sprinkles:
Sew on sprinkles in 2-4 different colors and weave in the ends. Done!


37 Comments
I’m so excited to try it. I am not sure I am using the right brand of yarn, my projects are so stiff and hard. Can you let me know the brand your using? Thanks a lot
I hope you enjoy making these cupcakes! The brand I use most is Big Twist, it’s a JoAnn brand. I also use Red Heart, so give one of those a try 🙂
in round 10 of the bottom part does *2 times mean 2 more times or 2 total times
Hi! That part of Round 10 means to repeat it 2 more times 🙂
I love cupcakes and i absolutely loved this pattern! I’m thinking about making a chocolate version next. anyways, it turned out super cute and I will totally be using this pattern for stocking stuffers and gifts.
Aw that’s really awesome Trinity! I love to hear that 🙂 I think you’re right, people would love to have these as gifts! You could make quite a lot of cupcakes with different colors 🙂
In round 8-14 do i do BLO only?
Hi there! You only work in the BLO for Round 7 🙂 Round 8-14 please work in both loops! ❤️ Please feel free to let me know if you have any questions, and I would love to see your finished cupcake!
For round 14 for the icing what does DC mean?
Dc means “Double Crochet”! If you don’t know how to do a double crochet, I have video tutorials on how to do the basic crochet stitches on my Membership website! You can find them here: https://members.stringydingding.com/crochet-stitches/
Please let me know if you ever have any other questions 🙂
My base turned out alot bigger i have 55 stitches in the last round i am okay with the size but how do i make sure the icing is large enough for it.
Thank you for showing me how it’s coming out so far! It shouldn’t be a huge issue that you have 55 stitches 🙂 What we can do is make sure the icing also has 55 stitches to match the base of the cupcake.
So the icing originally ends up with 42 stitches, so we must add 13 stitches to get 55. After Round 7: *Inc, Sc 5* all around (42) do this for Round 8: Repeat *Inc in the next st, Sc in the next 2 st* 13 times, Sc in the last 3 st (55)
Then we will slightly change the following rounds. Do this for Round 9-14: *Sc* all around (55)
We will also slightly change the last round!
Round 15: In FLO (Front Loop Only) Dc 4 times in the next st. Skip the next st, SlSt in the next st. Repeat *4 Dc in the next st, skip the next st, SlSt in the next st* 17 times. Sc in the last st.
Finish off and leave a long tail for sewing the top cupcake to the bottom.
Please be sure to follow this and it will match the size of the cupcake! Please let me know if I can help 🙂 Yay 🥰
Fat Cupcake
Hahaha I LOVE it! I am so so happy it worked out great, it looks awesome 🙂 That colorful yarn is beautiful, it looks like sprinkles on the frosting 😍 Thank you so much for sharing, I really love it! If you ever have any questions with my other patterns please just let me know!
In row 7 it says in the back loop only and then after that it says single crochet all around what do I do?
Hi there! You will work only Round 7 by making a single crochet in the back loops only 🙂 So insert your hook between both the top and bottom loop, and push the hook away from you. This will go under the back loop only. Continue to make a single crochet, and you will have made a single crochet in the back loop only! Continue this around for only Round 7 ❤️
It turned out perfect!! I found the instructions really easy to follow, and I did rainbow sprinkles because we have tons of embroidery thread laying around 🙂 Thanks so much for sharing!!
What the meaning of ( inc, sc ) ?
Inc = two SC in the same ST
Sc= Single crochet
What the meaning of sc3* or sc4 *
Is that mean that i should crochet 3 sc in every stitch all around ?
Or you mean sc3 that i should do 3 rows sc ?
Hi Jermen! If you see something like *Inc, Sc 3* that means repeat *Increase in the next stitch, Make 1 single crochet in the next 3 stitches*.
This also applies if you see *Inc, Sc 4* all around. It would be, *Increase in the next stitch, Make 1 single crochet in the next 4 stitches*. I hope that makes sense! You are repeating whatever is inside the stars ** for the stated amoutn of times. So make your increase, then single crochet 1 in the next 4 stitches. Go back to repeating the first part inside the stars **. Increase in the next stitch, Single crochet in the next 4 stitches!
Please let me know if I can help clarify anything, or if you have any other questions 🙂 I’m happy to help!
SC in the next 3 ST
SC in the next 4 ST
Had fun making this adorable cupcake, I decided to make mine into a pin cushion for my sewing projects. Thank you
I love your creativity, that is such an adorable idea! Your cupcake came out so cute too, the pins make the perfect sprinkles 😍 Thank you so much for sharing!
Hi! I loved this pattern! The only thing is I used the wrong side for the base of the cupcake and now it looks like a ball lol. How could I fix this?
Hi Valerie! First of all, I absolutely love your cupcake!
Since the wrong side is facing out, the bases’ stitches are being pushed out the wrong way 🙁 The only way to fix this would be to undo the cupcake from the icing, flip it right side out, then re-sew it so the right side is facing out. Then the base would go inside rather than out. I’m sorry, I wish there was an easier solution! It wouldn’t be too hard of a fix, though 🙂 Plus, I think you cupcake looks adorable as is! 😍 ❤️❤️❤️
Love the pattern!
What a fun pattern to make!! Thank you so much for sharing! Will be def making more of these 🙂
My cupcake is a little large, but I love it.
I made it for my Granddaughter Kaylee. Her Birthday is February 16th.
Thank you my very first amigurumi !!.. the pattern is the cutest 😍…
This is really easy and fun to do! I’m going to make extras to have on hand for birthdays I will inevitably forget about. Thank you for sharing this pattern!
Also made this into a pin cushion for a friend’s birthday since she sews A LOT! Thank you for the fun pattern!
This was my very first project! Thank you for helping me create this cutie.🩷
what does SISt mean
it means slip stitch, you go through 2 loops of the single crochet stitch, pull up a loop and pull through the loop on your hook without yarning over like what you normally do in single crochet.
Thanks 🙂
Can I sell the finished product from this pattern? just to be clear I’m not reselling or redistributing your pattern, just the finished product from it.