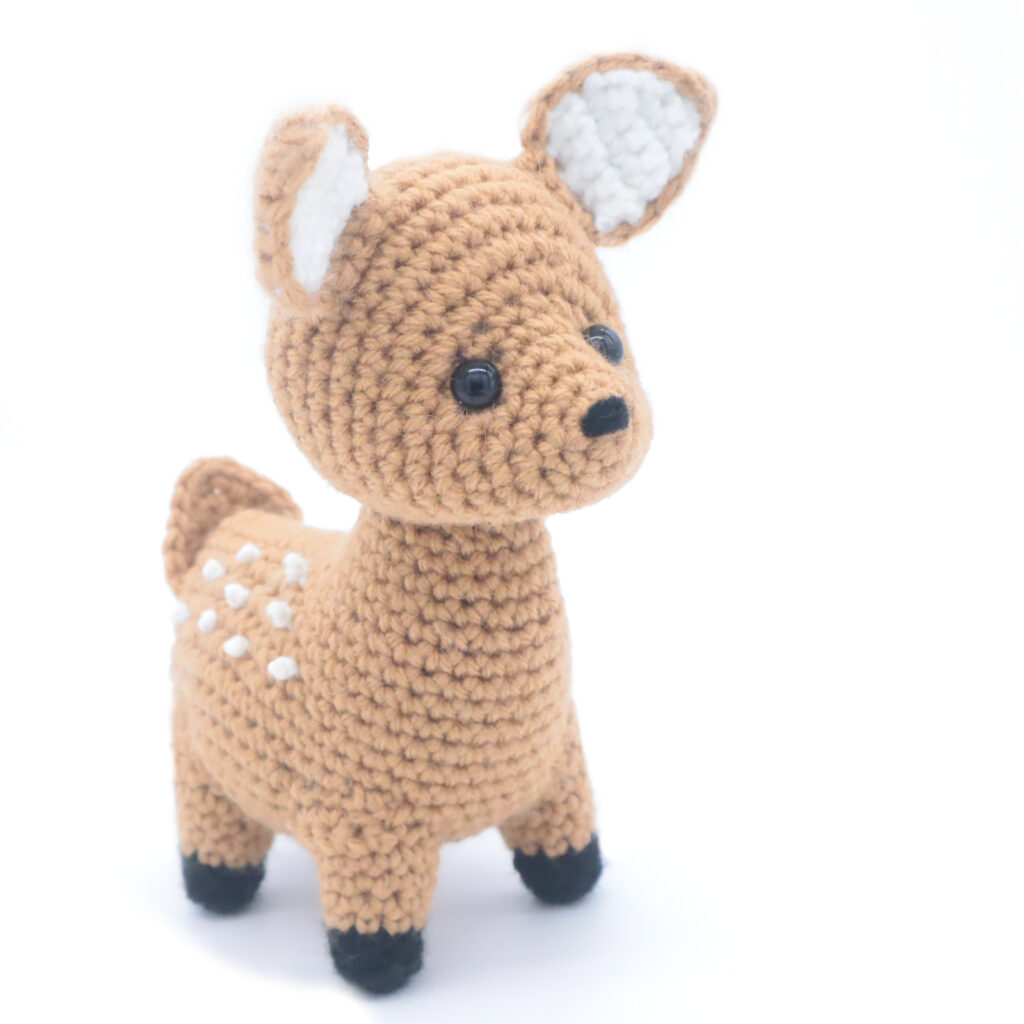
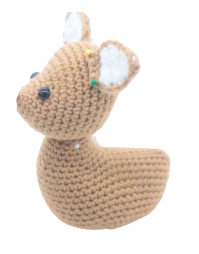
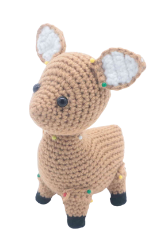
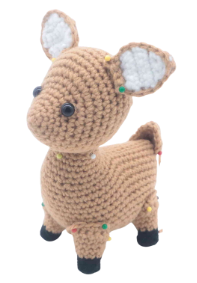
Deer Amigurumi – Free Crochet Pattern
Print this pattern out – purchase it here!

 Supplies:
• Yarn 4/Medium Weight Yarn in…
Brown, black, and white
•4mm Crochet Hook
•Tapestry needle
•Scissors
•Stuffing
•10mm safety eyes
Additional Information:
Difficulty: Easy
Size: 7″ long from tip of ears to the hoof
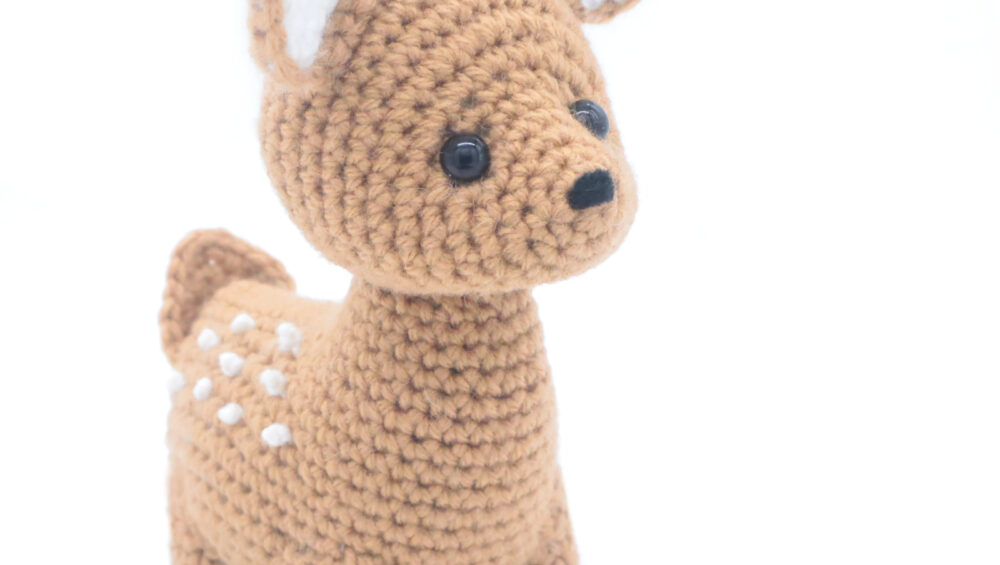
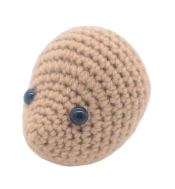
Deers are so adorable and seem to be at the forefront of my mind during the autumn and winter seasons! This deer pattern looks advanced, but it’s actually simple and easy! My favorite parts of this little deer are its spots and his cute baby-ish face! You’ll have a great time crocheting this easy and adorable deer pattern.
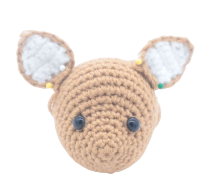
Head:
In Brown
Round 1: 6 Sc into a Magic Ring (6)
Round 2: *Inc, Sc in the next st* all around (9)
Round 3: *Inc, Sc in the next 2 st* all around (12)
Round 4: *Inc, Sc in the next 3 st* all around (15)
Round 5: *Inc, Sc in the next 4 st* all around (18)
Round 6: *Inc, Sc in the next 5 st* all around (21)
Now we will mark where to place the safety eyes. Add a different colored eye stitch marker into the 8th and 14th stitch in Round 6.
Round 7: *Inc, Sc in the next 6 st* all around (24)
Round 8: Sc in the next 10 st. Inc in each of the next 6 st. Sc in the next 8 st (30)
Round 9: Sc in the next 10 st. Repeat *Inc, Sc in the next st* 6 times. Sc in the next 8 st (36)
Add the safety eyes into the marked areas now.
Round 10-15: *Sc* all around (36)
Round 16: *Dec, Sc in the next 4 st* all around (30)
Round 17: *Dec, Sc in the next 3 st* all around (24)
Round 18: *Dec, Sc in the next 2 st* all around (18)
Stuff the head firmly here. Continue stuffing after each round.
Round 19: *Dec, Sc in the next st* all around (12)
Round 20: *Dec* all around (6)
Finish off, leaving a long tail for sewing. Sew the remaining stitches closed and weave in ends. Cut any excess yarn.
Ears: (Make 2)
The ear is made of two pieces. One is a white piece, and the other is a brown piece. Start by making the white piece, then we will make the brown piece after.
Row 1: Ch 2. Inc in the 2nd Ch from the hook (2)
Row 2: Ch 1 and turn. Sc in the next 2 st (2)
Row 3: Ch 1 and turn. Inc in each of the next 2 st (4)
Row 4: Ch 1 and turn. Inc in the next st, Sc in the next 2 st, Inc in the next st (6)
Row 5-6: Ch 1 and turn. Sc in the next 6 st (6)
Row 7: Ch 1 and turn. Dec 3 times (3)
Finish off the white piece now. Make the second piece in brown, but do NOT finish off the brown piece. Instead, continue with the next row.
Row 8: Align the white and brown pieces together. Using your brown yarn, Sc around the edges of the ear to connect them together. Once you reach the bottom of the ear, Sc in the next 4 st. Ch 1 and turn. Sc in the next 4 st.
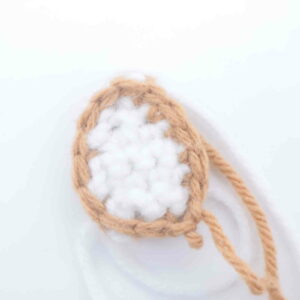
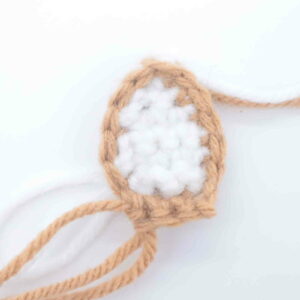
Finish off, leaving a long tail for sewing. Pin the ears on as shown and sew on. Once done, weave in ends and cut any excess yarn.
Neck/Body:
In Brown
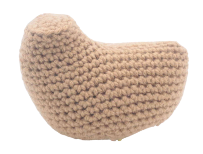
We will start by crocheting the neck, which leads into the body.
Round 1: 6 Sc into a Magic Ring (6)
Round 2: *Inc* all around (12)
Round 3: *Inc, Sc in the next st* all around (18)
Round 4: Working in the Back Loop Only (BLO), *Sc* all around (18)
Round 5: Working in BOTH loops, *Sc* all around (18)
Round 6: Repeat *Inc, Sc in the next 5 st* all around (21)
Round 7-8: *Sc* all around (21)
Round 9: Sc in the next 12 st. Ch 12. Sc in the 2nd Ch from the hook. Sc in the next 10 st. Working back on the body, Sc in the next 9 st (32)
Round 10: Repeat *Inc, Sc in the next 3 st* 3 times. Working on the chain, Sc in the next 9 st. Sc 2 times in the next 2 st. Working on the OTHER side of the chain, Sc in the next 10 st. Working back on the body, repeat *Inc, Sc in the next 3 st* 2 times. (48)
Round 11-19: *Sc* all around (48)
Round 20: *Dec, Sc in the next 6 st* all around (42)
Round 21: *Dec, Sc in the next 5 st* all around (36)
Round 22: *Dec, Sc in the next 4 st* all around (30)
Round 23: *Dec, Sc in the next 3 st* all around (24)
Stuff the body firmly now. Continue stuffing after each round.
Round 24: *Dec, Sc in the next 2 st* all around (18)
Round 25: *Dec, Sc in the next st* all around (12)
Round 26: *Dec* all around (6)
Finish off, leaving a long tail for sewing. Sew the remaining stitches together and weave in the ends. Cut any excess yarn.
Pin the head onto the body as shown and sew on. Once sewn on, weave in ends and cut any excess yarn.
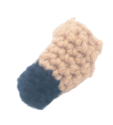
Limbs: (Make 4)
In Brown
Round 1: 6 Sc into a Magic Ring (6)
Round 2: *Inc, Sc in the next 2 st* all around (8)
Round 3: Working in the Back Loop Only (BLO), *Sc* all around (8)
Round 4: Working in BOTH loops, *Sc* all around (8)
Round 5: Change to light brown. Repeat *Inc, Sc in the next 3 st* all around (10)
Round 6: *Sc* all around (10)
Round 7: *Inc, Sc in the next 4 st* all around (12)
Round 8: *Sc* all around (12)
Round 9: Ch 1 and turn. Sc in the next 6 st.
Round 10: Ch 1 and turn. Dec 1 time, Sc in the next 2 st, Dec 1 time.
Finish off, leaving a long tail for sewing. Pin the leg on as shown and sew on – be sure to add stuffing before fully sewing on.
Tail:
In Brown
Row 1: Ch 2. Sc 2 times in the 2nd Ch from the hook (2)
Row 2: Ch 1 and turn. Inc in the next 2 st (4)
Row 3: Ch 1 and turn. Sc in the next 4 st (4)
Row 4: Ch 1 and turn. Inc in the next st, Sc in the next 2 st, Inc in the next st (6)
Row 5: Ch 1 and turn. Sc in the next 6 st (6)
Row 6: Sc around the tail piece to make the edges smooth. Once done, finish off, leaving a long tail for sewing. Pin the tail on as shown and sew on. Once sewn on, weave in ends and cut any excess yarn.
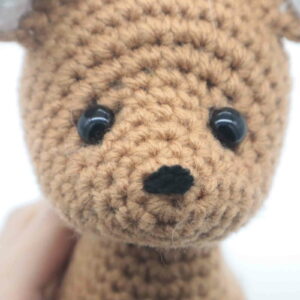
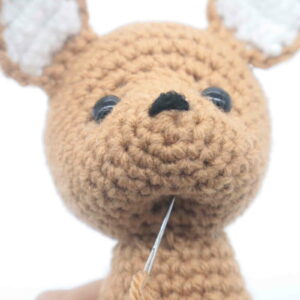
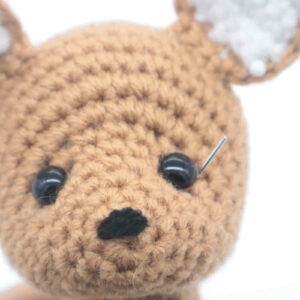
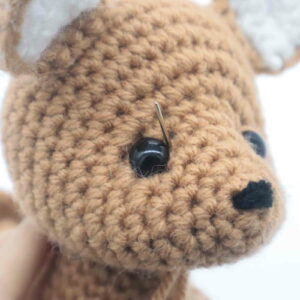
Nose:
In Black
Insert needle with black yarn into the toy‘s nose area (Pic 1). Reinsert as shown (Pic 2). Reinsert once again as shown (Pic 3). Tie tail ends of yarn into firm a firm knot. Bring the knot inside the toy to hide. Cut any excess yarn.
1.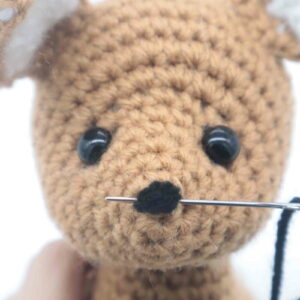 2.
2.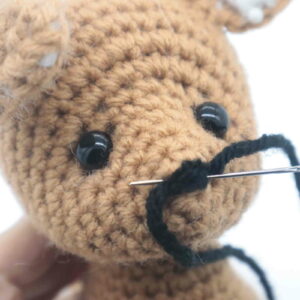 3.
3.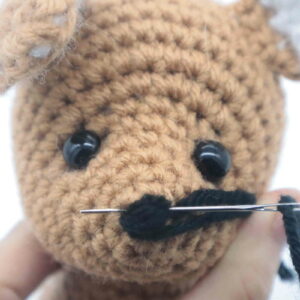 4.
4.
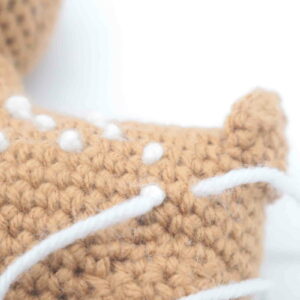
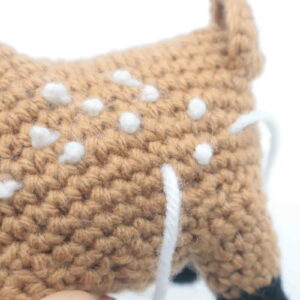
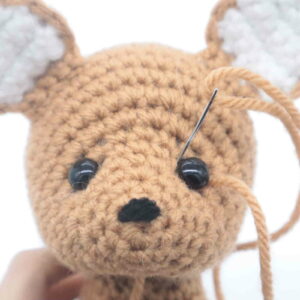
Spots:
In White
Take a very long piece of white yarn and place it on a needle. Insert needle into the side of the toy (Pic 1).
1.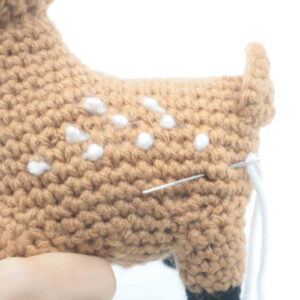
Tie a knot at the base of the toy‘s body (Pic 2-3).
2. 3.
3.
Tie a knot into the same place to make the knot bigger (Pic 4).
4.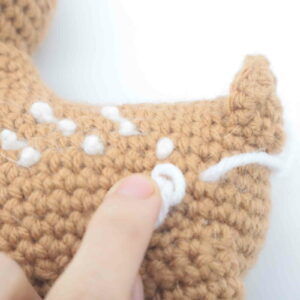
Insert needle into the next stitch over, and pull needle out to the next stitch to the left (Pic 5-6). Repeat this to make spots on both sides of the deer.
5. 6.
6.
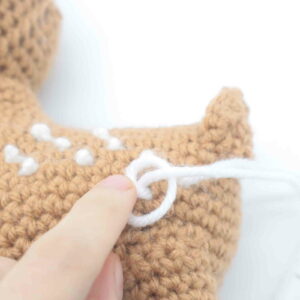
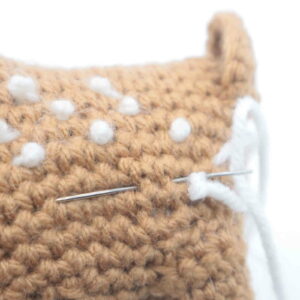
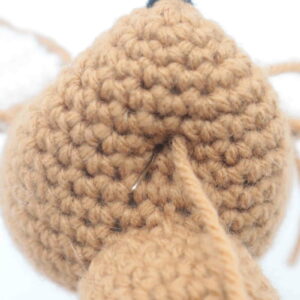
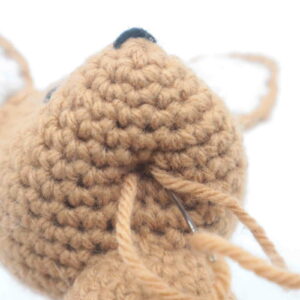
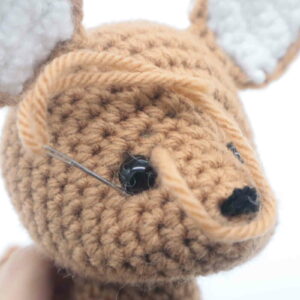
Face Shaping:
In Brown
Take a long piece of brown yarn and place it onto a needle. Insert needle into the bottom of the toy‘s head (Pic 1).
1.
Pull needle out on the right side of the toy‘s right eye (Pic 2). Reinsert needle to the left of the toy‘s right eye (Pic 3).
2.
3.
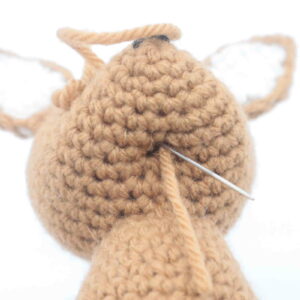
Pull needle out one stitch to the left of the original insertion spot (Pic 4).
4.
Reinsert needle one stitch to the right (Pic 5).
5.
Pull needle out at the right side of the toy‘s left eye (Pic 6).
6.
Reinsert needle to the left of the toy‘s left eye (Pic 7).
7.
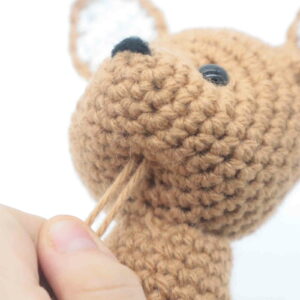
Pull needle out where the tail of yarn is coming out of (Pic 8). Pull both ends of yarn at the same time to tighten the face shape. Tie the ends of yarn into firm knots. Bring the knot inside the toy to hide. Cut any excess yarn. Done!
8. 9.
9.
Done! If you made this deer, I would LOVE to see! You can show me by posting a picture in the comments section underneath this post! 🙂


7 Comments
i love this deer it is just too cute. 🙂 but i was expecting a turkey pattern you know being November and all. hopefully there will still be one. and in the mean time i have all your other patterns to make 🙂
also. just wondering. do you yourself use Acrylic or cotton yarn for your amigurumi (or a mix of both). i’ve been wanting to know for a while (i don’t know why). i love love love LOVE your patterns and this is one of the best ones yet 🙂 🙂 🙂 🙂
I can’t wait to crochet this for our Christmas tree. As my Great Grandmother loved Cardinals. Thank you. Cheri
This pattern is so adorable!!! Thank you so much for sharing all these free patterns with us!!!
Hi
I love this cute deer… I have a confusion in selecting the yarn for kids toys which is not pill… Can you please help me to choose right yarn for amigurumi.. and I want cotton yarns which is eco-friendly
Sweet snuggles is amazing for no pill!!!
Thank you for the free patterns! This deer is one of my favorites. I added some extra spots and named her Cookie Dough, or Cookie for short 😄