Kitty Cats Amigurumi – Free Crochet Pattern
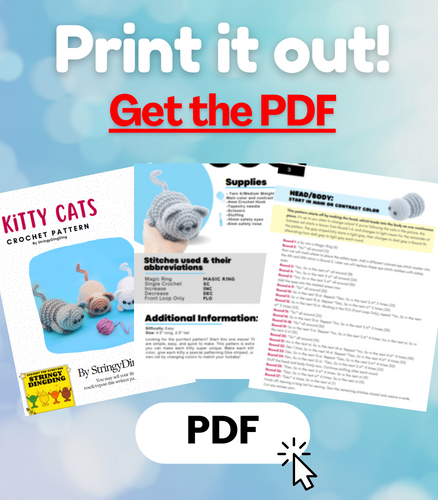
Print this pattern out – purchase the PDF version here!

 Supplies:
• Yarn 4/Medium Weight Yarn in…
Main color and contrast color
•4mm Crochet Hook
•Tapestry needle
•Scissors
•Stuffing
•10mm safety eyes
•6mm safety nose
Additional Information:
Difficulty: Easy
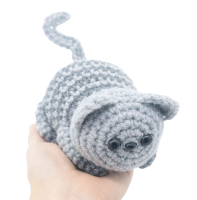
Size: 4.5″ long, 2.5″ tall
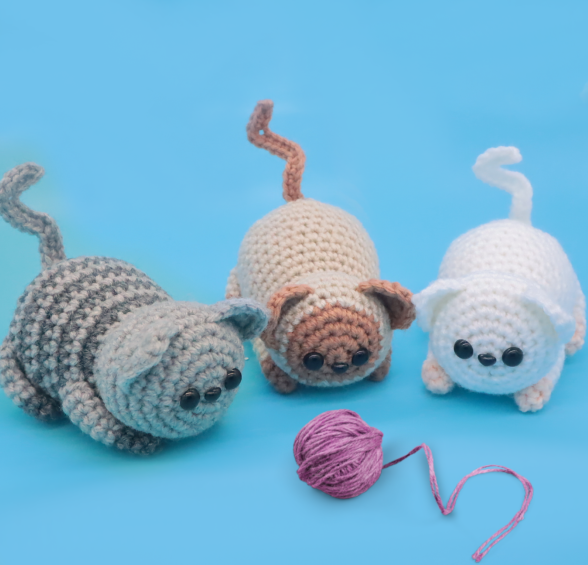
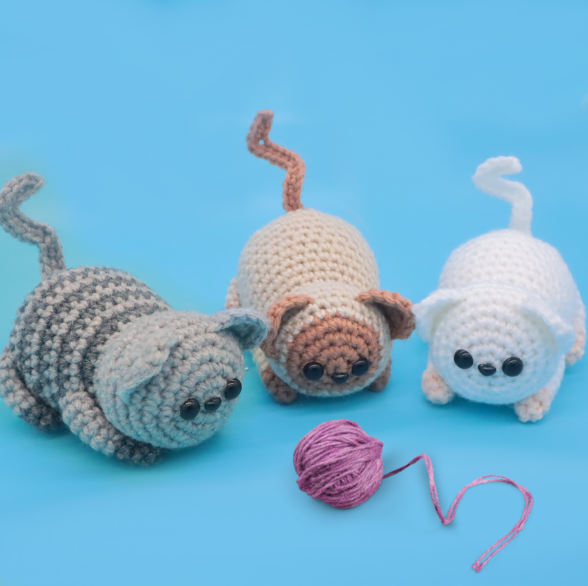
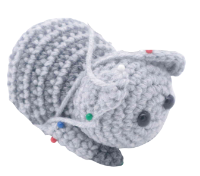
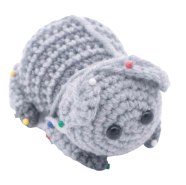
Looking for the purrfect pattern? Start this one meow! These crochet kitties are simple, easy, and quick to make. This pattern is extra awesome because you can make each kitty super unique. Make each kitty a unique and fun color, give each kitty a special patterning (like stripes), or even replicate your own cat by changing colors to match your furbaby!
Head/Body:
In Main or Contrast Color
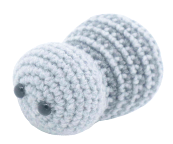
This pattern starts off by making the head, which leads into the body as one continuous piece. It’s up to you when to change colors! If you’re following the cats in the picture, the Siamese cat starts in brown from Round 1-4, and changes to light cream for the remainder of the pattern. The grey striped kitty starts in light grey, then changes to dark grey in Round 14, alternating from dark grey to light grey each round.
Round 1: 6 Sc into a Magic Ring (6)
Round 2: *Inc* all around (12)
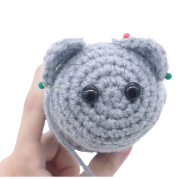
Now we will mark where to place the safety eyes. Add a different colored eye stitch marker into the 4th and 10th stitch in Round 2. Later we will replace these eye stitch markers with safety eyes.
Round 3: *Inc, Sc in the next st* all around (18)
Round 4: *Inc, Sc in the next 2 st* all around (24)
Round 5: *Inc, Sc in the next 3 st* all around (30)
Add the eyes into the marked areas now.
Round 6-9: *Sc* all around (30)
Round 10: Sc in the next 10 st. Repeat *Dec, Sc in the next 2 st* 5 times (25)
Round 11: Sc in the next 10 st. Repeat *Dec, Sc in the next st* 5 times (20)
Round 12: Sc in the next 10 st. Working in the FLO (Front Loop Only), repeat *Inc, Sc in the next st* 5 times (25)
Round 13: *Sc* all around (25)
Round 14: Sc in the next 10 st. Repeat *Inc, Sc in the next 2 st* 5 times (30)
Round 15-18: *Sc* all around (30)
Round 19: Sc in the next 11 st. Repeat *Inc, Sc in the next 3 st* 4 times. Inc in the next st, Sc in the next 2 st (35)
Round 20: *Sc* all around (35)
Round 21: Inc in the next st, Sc in the next 14 st. Repeat *Inc, Sc in the next 4 st* 4 times (40)
Round 22: Dec 1 time, Sc in the next 14 st. Repeat *Dec, Sc in the next 4 st* 4 times (35)
Round 23: Dec, Sc in the next 13 st. Repeat *Dec, Sc in the next 3 st* 4 times (30)
Round 24: Dec, Sc in the next 12 st. *Dec, Sc in the next 2 st* 4 times (25)
Stuff the head and body firmly now. Continue stuffing after each round.
Round 25: *Dec, Sc in the next 2 st* 6 times. Sc in the next st (19)
Round 26: *Dec, Sc in the next st* 6 times. Sc in the next st (13)
Round 27: *Dec* 6 times, Sc in the next st (7)
Finish off, leaving a long tail for sewing. Sew the remaining stitches closed and weave in ends. Cut any excess yarn.
Ears: (Make 2)
In Main or Contrast Color
Row 1: Ch 2. Inc in the 2nd Ch from the hook (2)
Row 2: Ch 1 and turn. Inc in the next 2 st (4)
Row 3: Ch 1 and turn. Inc in the next st, Sc in the next 2 st, Inc in the next st (6)
Row 4: Now we will crochet around the edges of the ear. This will make the edges look cleaner. Sc along the edges, making 2 Sc into one stitch when you meet the tip of the ear.
Finish off, leaving a long tail for sewing. Pin the ears on as shown and sew on. Once done, weave in ends and cut any excess yarn.
Arms: (Make 2)
Start in Contrast Color
Round 1: 6 Sc into a Magic Ring (6)
Round 2-4: *Sc* all around (6)
Round 5-9: Change to Main Color. *Sc* all around (6)
Finish off, leaving a long tail for sewing. You can lightly stuff the arms if you’d like, but I didn’t stuff them. Now pin the arms on as shown and sew on. Once done, weave in ends and cut any excess yarn.
Legs: (Make 2)
Start in Contrast Color
Round 1: 6 Sc into a Magic Ring (6)
Round 2-3: *Sc* all around (6)
Round 4-8: Change to Main Color. *Sc* all around (6)
Finish off, leaving a long tail for sewing. You can lightly stuff the legs if you’d like, but I didn’t stuff them. Now pin the legs on as shown and sew on. Once done, weave in ends and cut any excess yarn.
Tail:
In Main or Contrast Color
Row 1: Ch 16. Sc in the 2nd Ch from the hook. Sc in the next 2 st. Sc 3 times in the next st. Sc in the next 3 st. Dec 2 times, Sc in the next 4 st (15)
Finish off, leaving a long tail for sewing. Pin the tail on as shown and sew on. Once done, weave in ends and cut any excess yarn.
Done! If you made a kitty, I would LOVE to see! You can show me by posting a picture in the comments section underneath this post 🙂


9 Comments
these little kitties are so cute. i love all your patterns so much that i wish they came 1 time a DAY…or like…5 times a day that’s how much i love them. no pressure to make THAT many patterns i’ll just have to wait…ooh i’ll pass the time buy making more of older your patterns
i meant to say your older patterns NOT older your patterns. silly me. oh and you REALLY DON’T have to make that many patterns…i just love them. 🙂
Love this and I am making a Giant one for my bestie love this stuff please make more!!✨✨✨ No pressure
I am going to make some of these for my great granddaughters. Thank you for all the free patterns. I’ve made quite a few of them!
Thank you so much for your free patterns, not all of us crochet people can afford to buy. Thank you for your Kindness and generosity, love your patterns so much.
Lucy
it says its a free pattern but it will not down load and print for me
It says you have to pay for the pdf, From what I can tell we can look at the pattern on this page.
This is a fun little cat. The photo seems like the cat is little but it’s not that small. I didn’t see anywhere in the directions of when to insert the nose. Do we insert that when we do the eyes?
I wanted to tell you how much I love all your patterns. I want to try them all. Thank you. I had a question…. In the Head/Body, row 10, it mentions repeat. I’m trying to figure out what to repeat. Thank you so much!