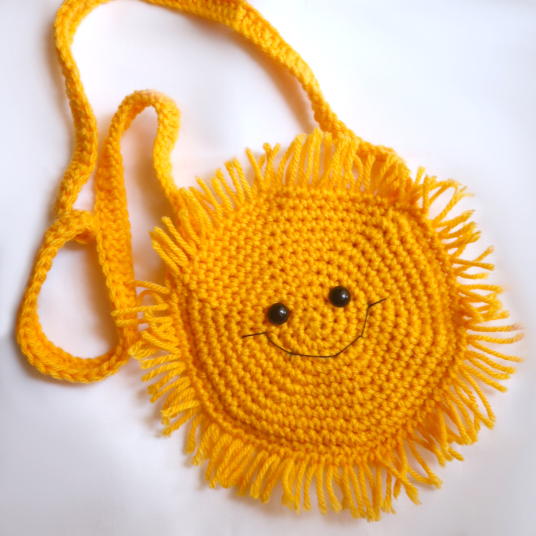
Easy Sun Bag – Free Crochet Pattern
Purchase the PDF version here!

 Supplies:
• Yarn 4/Bulky Weight in…
Yellow
•5.5mm Crochet Hook
•Tapestry needle
•Scissors
•12mm safety eyes
Additional Information:
Difficulty: Easy
Let’s get started!
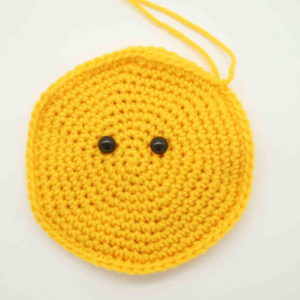
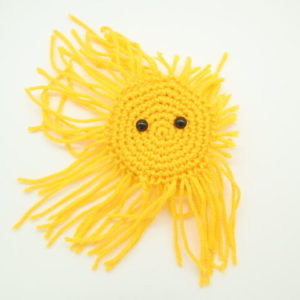
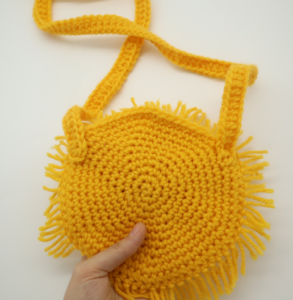
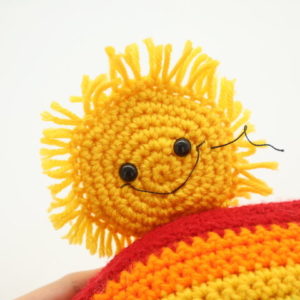
This bag is easy and quick! First, we make two pieces of the sun (the front and the back). After we create both pieces, we will crochet both pieces together to form the bag. After this, we will make the sun rays, smile, and straps.
Sun:
In yellow
Round 1: 6 Sc into a Magic Ring (6)
Round 2: *Inc* all around (12)
Round 3: *Inc, Sc in the next st* all around (18)
Round 4: *Inc, Sc in the next 2 st* all around (24)
Round 5: *Inc, Sc in the next 3 st* all around (30)
Now we will mark where to place the eyes. Add an eyes stitch marker into the 10th and 17th stitch in Round 5. We will add the eyes into these stitches later.
Round 6: *Inc, Sc in the next 4 st* all around (36)
Round 7: *Inc, Sc in the next 5 st* all around (42)
Round 8: *Inc, Sc in the next 6 st* all around (48)
Round 9: *Inc, Sc in the next 7 st* all around (54)
Round 10: *Inc, Sc in the next 8 st* all around (60)
Round 11: *Inc, Sc in the next 9 st* all around (66)
Finish off the first piece now. DON’T finish off the second piece. Instead, continue on the next round.
Round 12: Line up BOTH pieces so the stitches match up. Inserting your hook through BOTH stitches, Sc the next 48 stitches together. Once you’ve done that, finish off and weave in ends.
1. 2.
2. 3.
3. 4.
4. 5.
5. 6.
6. 7.
7. 8.
8. 9.
9.
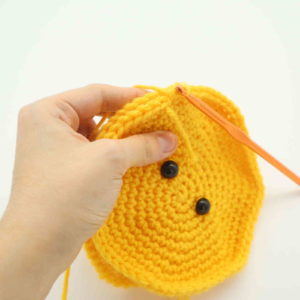
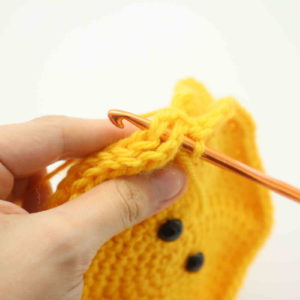
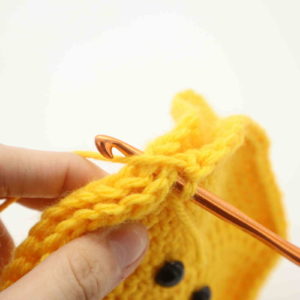
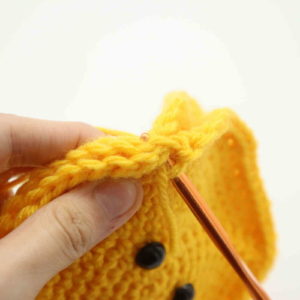
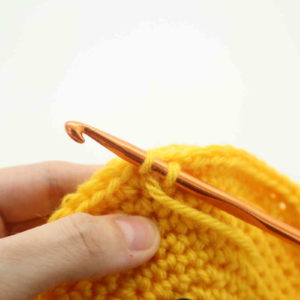
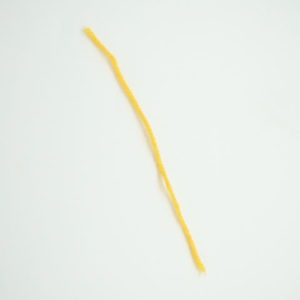
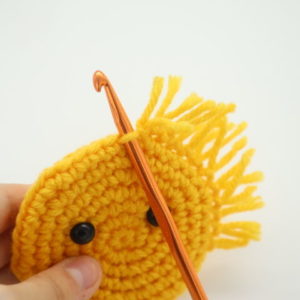
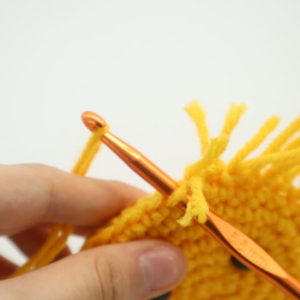
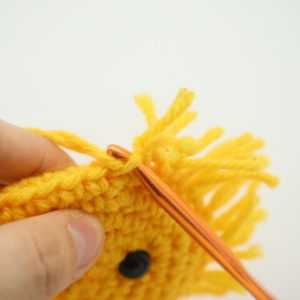
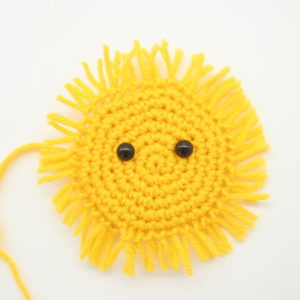
Sun Rays:
In yellow
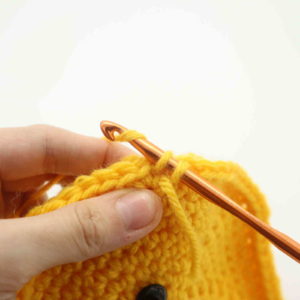
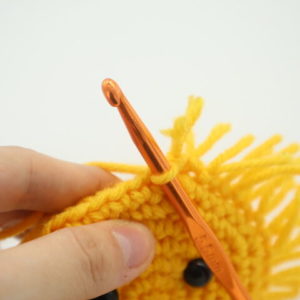
Take a ~5″ piece of yarn (Pic 1). Insert your hook into one of the stitches (Pic 2). Yarn over with the strand (Pic 3) and pull it through the loop (Pic 4-5).
1. 2.
2. 3.
3. 4.
4. 5.
5.
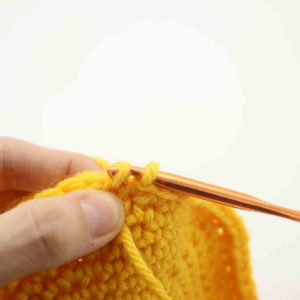
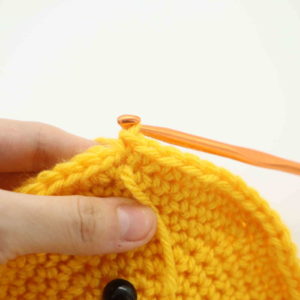
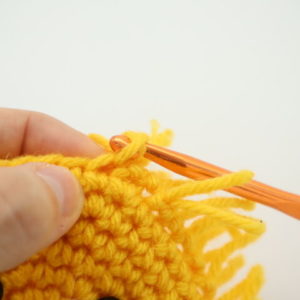
Yarn over with both ends of the strand (Pic 6) and pull through (Pic 7-8). Repeat this all around (Pic 9). Trim the yarn to your liking (Pic 10). Done!
6. 7.
7. 8.
8. 9.
9. 10.
10. 11.
11.
Bag strap:
In Yellow
Row 1: Ch 140. Skip the next 2 st and Dc in the 3rd St. Dc 1 time in the next 127 st. Finish off now, leaving a long tail for sewing.
Place the straps onto the back of the bag and sew on as shown.
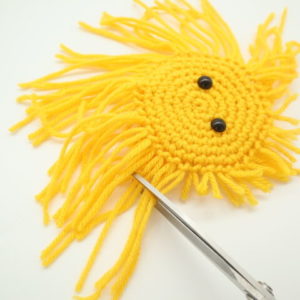
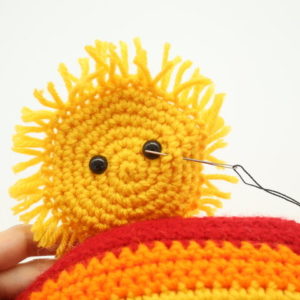
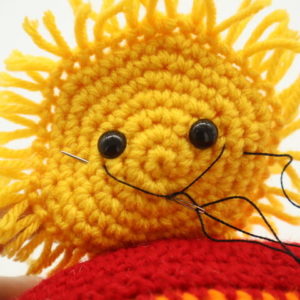
Sun Smile:
In black embroidery thread
Insert needle with thread a few stitches over from the right sun’s eye as shown (Pic 1) and pull needle out at next to the left of the sun’s right eye (Pic 1). Insert needle next to the sun’s left eye (Pic 2). Pull needle out at the middle of the sun as shown, making sure the needle lands ABOVE the thread (Pic 2).
1. 2.
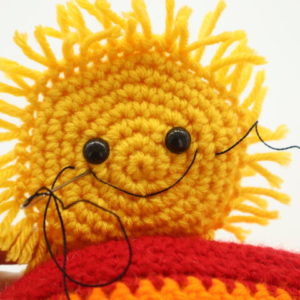
2.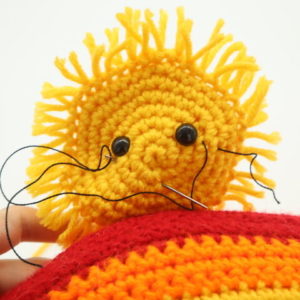 Reinsert needle into the same spot, making sure the needle lands BELOW the thread (Pic 3). Pull the needle to the left of the left eye as shown (Pic 3). Reinsert needle where shown (Pic 4). Pull needle out as the right side of the eye as shown (Pic 5).
3. 4.
4. 5.
5.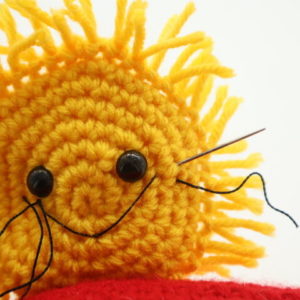 Reinsert needle into the next stitch to the left as shown (Pic 6). Tie both tail ends of thread into firm knots. Bring the knots into the sun to hide. Cut any excess thread.
6. 7.
7.
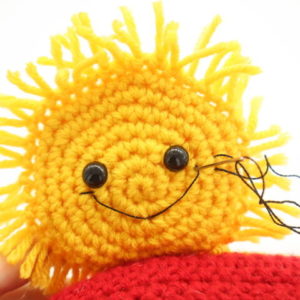
Done! If you made this bag – show us! Add a picture in the comments section under this post!


4 Comments
What do the numbers mean. Like inc,SC 4all around mean.how many times do you have to go around.
So if you’re using a stitch marker, make your first stitch, place the marker, then make the next stitch to complete the Increase. Then sc 4, then do another increase, then another 4 sc and so on until you hit your stitch marker. Then repeat for the remainder of rounds. And the number in parenthesis are how many stitches you should have in that round. If you’re unsure if you did it correctly just make sure to go back and count your stitches before moving on.
So if you’re using a stitch marker, make your sc, place the marker, then make the next sc in that same stitch to complete the Increase. Then sc 4, then do another increase, then another 4 sc and so on until you hit your stitch marker. Then repeat for the remainder of rounds. And the number in parenthesis are how many stitches you should have in that round. If you’re unsure if you did it correctly just make sure to go back and count your stitches before moving on.
I accidentally messed up some terms in the first comment so look at the second comment.