Purchase the PDF here!

Supplies:
4/Medium weight yarn in…
Grey
4mm crochet hook
9mm safety eyes, tapestry needle, scissors, and stuffing.
Additional Information:
Difficulty: Intermediate
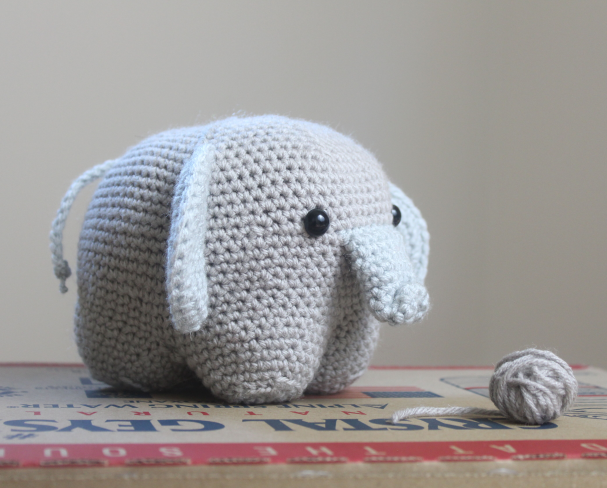
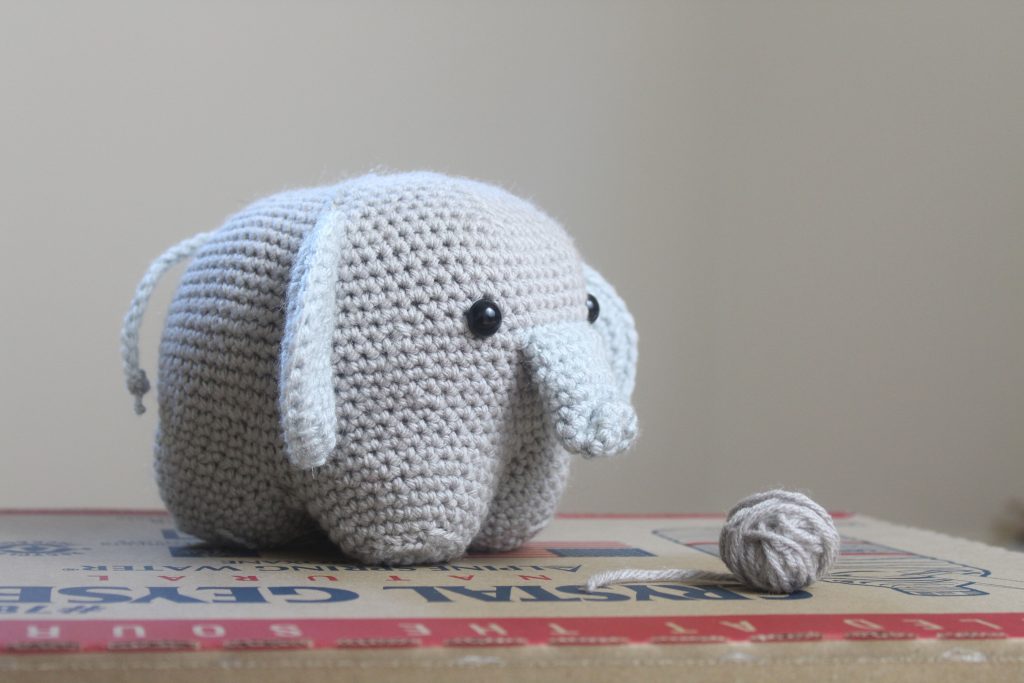
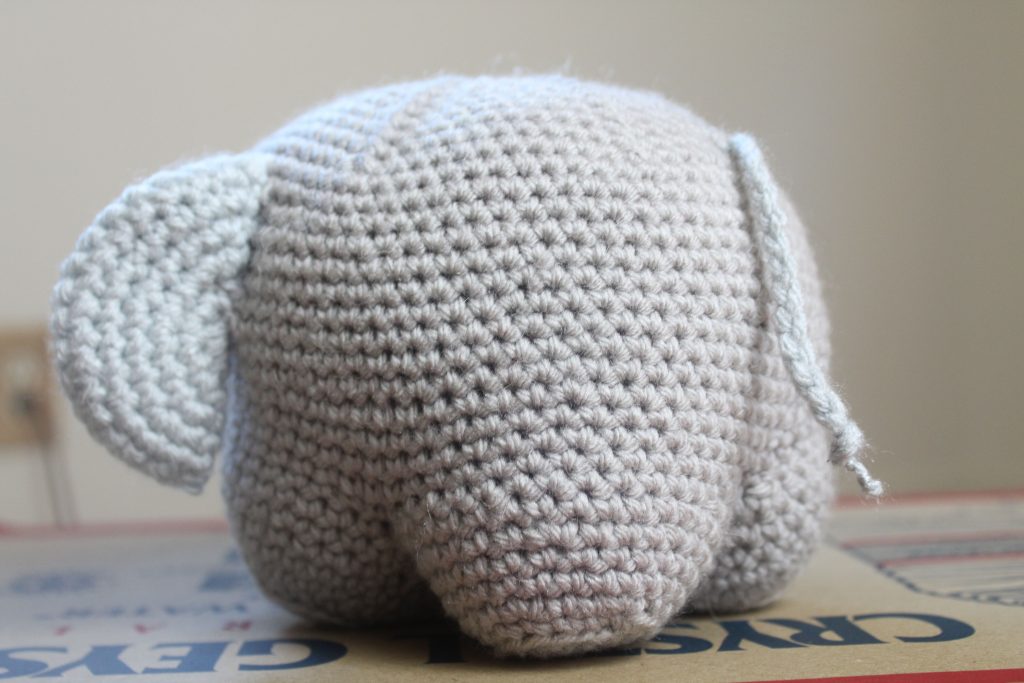
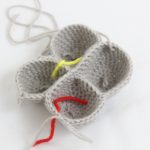
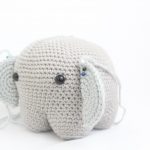
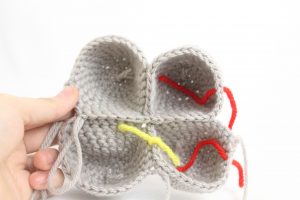
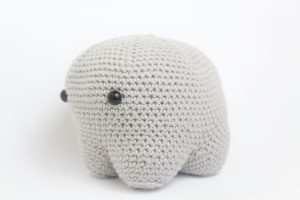
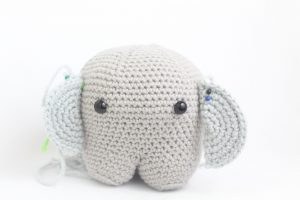
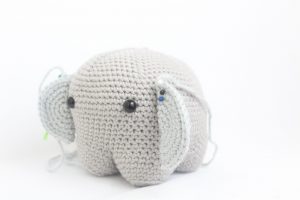
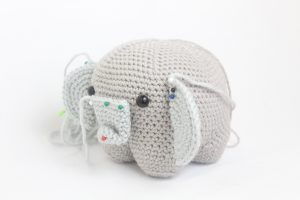
This elephant is super cute and a great gift! We make the elephant’s legs first, then we crochet them all together. Once the legs are all crocheted together, we continue crocheting around the legs to form the body. The legs and body are one piece. Next, we make the ears, nose, and tail! (Note that the yellow marker seen in this pattern is for my reference, I just placed it there to keep track of which leg was which. It doesn’t mark anything else but just that!)


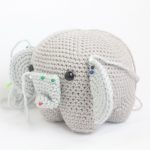
Please let me know if there’s any confusion with this pattern. I really try to make my patterns as clear as possible. This is one of my more detailed patterns since the legs are all worked into one, so I really tried to be thorough. Of course I’m open for any feedback! Thanks ❤️ I hope you enjoy this pattern
Legs:
In Grey
We start by creating two individual legs. We then crochet these legs together to create one pair of legs. Next, we make another set of two individual legs and crochet those two legs together. Then, we crochet both pairs of legs together. After this, the legs work up into making the body. The legs and body are all one continuous piece.
Legs: (Make 4)
In Grey
Round 1: 6 Sc in magic Ring (6)
Round 2: *Inc* all around (12)
Round 3: *Inc, Sc* all around (18)
Round 4: In the BLO (Back Loop Only), *Sc* all around (18)
Round 5: *Inc, Sc 2* all around (24)
Round 6-7: *Sc* all around (24)
Round 8: *Inc, Sc 3* all around (30)
Continue to Round 9 only for the FIRST leg. If you’re making the second leg, skip Round 9 and continue on to Round 10.
Round 9: *Sc* all around (30)
Finish off first leg here. Set first leg aside for now and make the second leg.
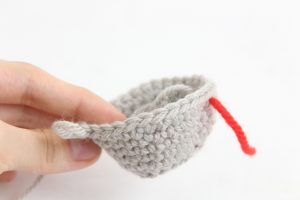
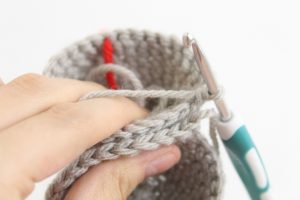
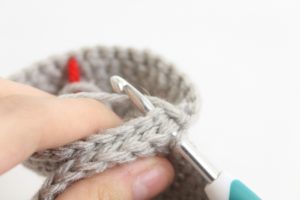
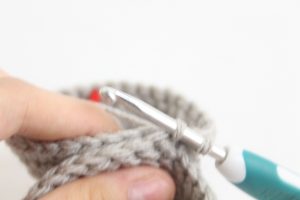
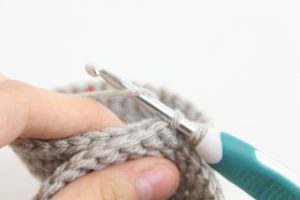
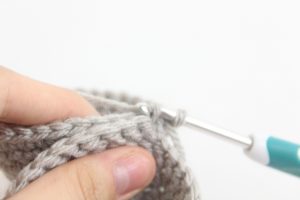
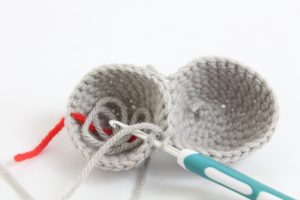
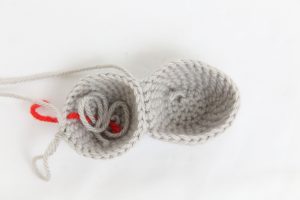
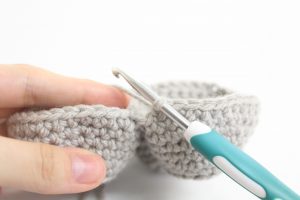
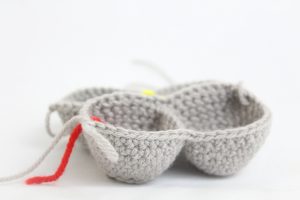
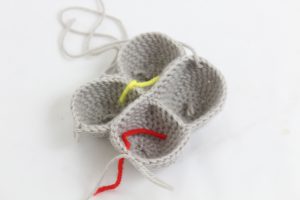
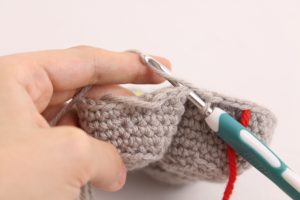
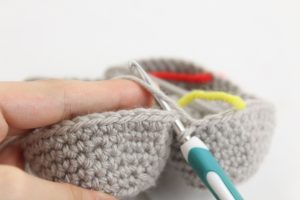
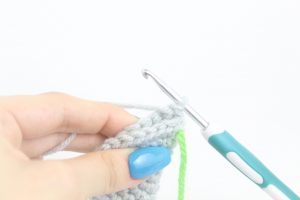
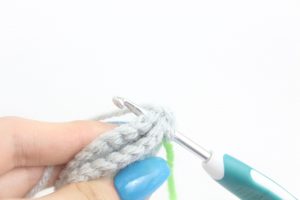
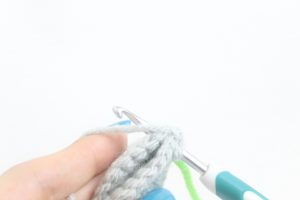
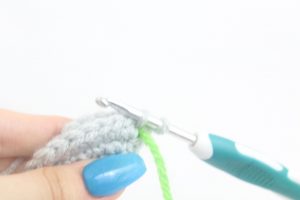
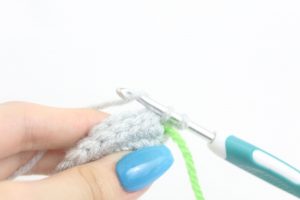
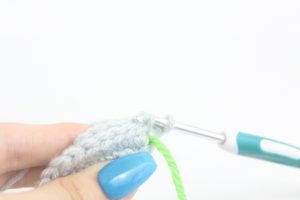
Round 10: Sc in the next 12 st (Pic 1). Now take the first leg you made and align it to the second leg, making sure the stitches line up (Pic 2). Insert your hook into BOTH the first and second leg stitches (Pic 3).
1. 2.
2.
3.
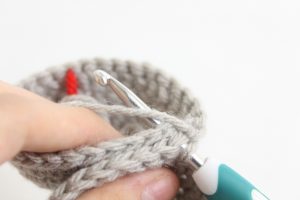
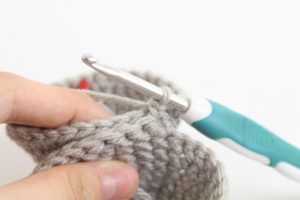
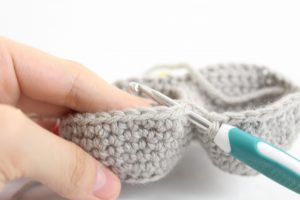
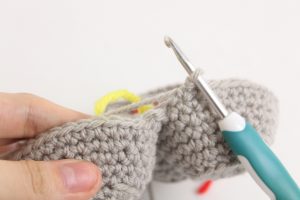
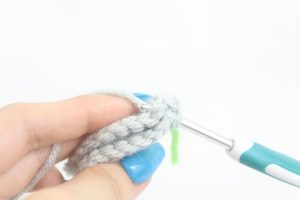
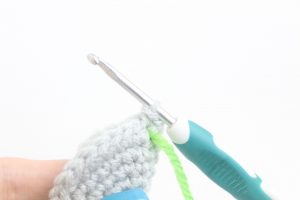
Single crochet both of the leg stitches together for a total of 6 stitches (Pic 4-9).
4. 5.
5.
6. 7.
7.
8. 9.
9.
Now we meet back at the second leg. Sc in the next 12 st (Pic 10-12) (Stitch count: 48 st on both legs, 6 st connecting the legs together)
10. 11.
11.
12.
Finish off the first pair of legs. DON’T finish off second pair of legs. Instead, continue on to Round 11.
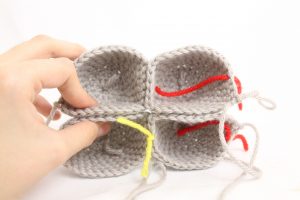
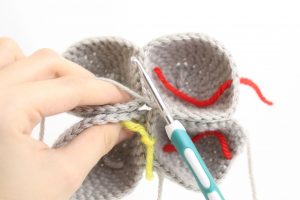
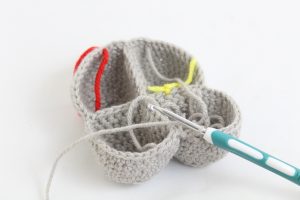
Round 11: Sc in the next 4 (Pic 1). Now line up the two pairs of legs next to each other, making sure the stitches line up as shown. The stitches where we connected the legs will meet in the middle, vertically, (Pic 2). Sc in the next 8 st (Pic 3).
1. 2.
2.
3.
Now we meet the line where we connected the legs. Sc in the next 8 st (Pic 4). Now continuing on the second pair of legs we made, Sc in the next 16 st (Pic 5). Now we meet the other leg (Pic 6)
4. 5.
5.
6.
Sc in the next 12 st (Pic 7-9) (64)
7.  8.
8.
9.
Round 12: Sc in the next 4 (Pic 1). Now we meet the next leg. Sc in the next 16 st (Pic 2). Now we meet the next leg (Pic 3). Sc in the next 16 st (Pic 4).
1. 2.
2.
3. 4.
4.
Now we meet the next leg (Pic 5). Sc in the next st of that leg and move the stitch marker to the sc just made (Pic 6-7). This stitch marker will now mark the rounds.
5. 6.
6.
7.
Round 13-15: *Sc* all around (64)
Round 16: *Inc, Sc 9* 6 times, Sc in the last 4 st (70)
Round 17-18: *Sc* all around (70)
Round 19: Sc in the next 32 st, Repeat *Inc in the next st, Sc 1 in the next st* 6 times, Sc in the next 26 st (76)
Round 20-26: *Sc* all around (76)
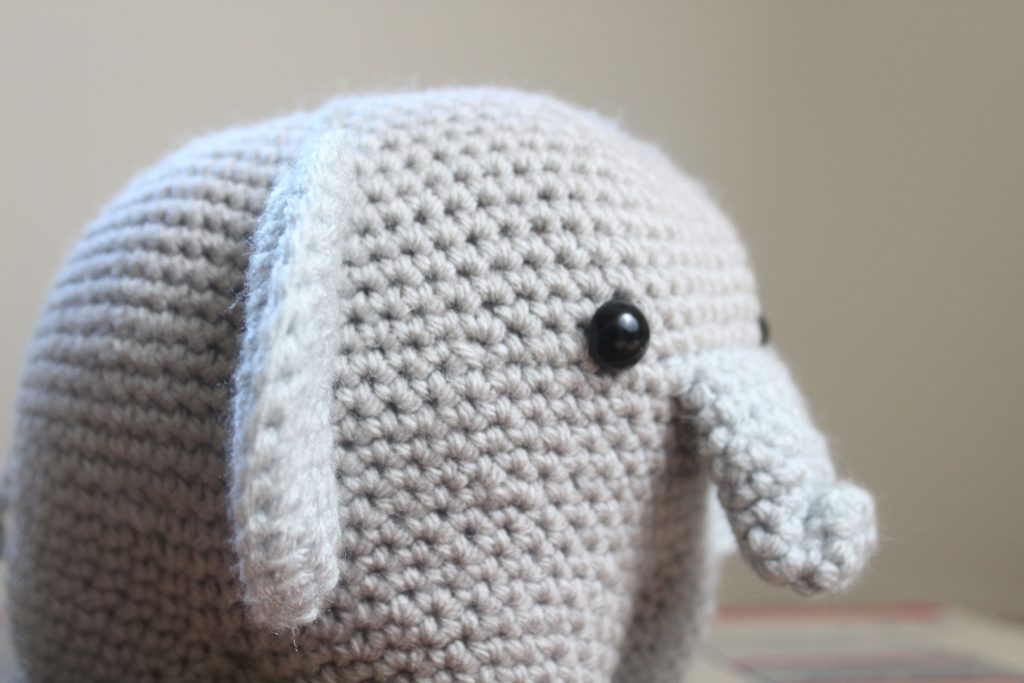
Insert safety eyes between Rounds 21-22, 13 st apart.
Round 27: Repeat *Dec, Sc in the next 10 st* 6 times, Sc in last 4 st (70)
Round 28: Repeat *Dec, Sc in the next 9 st* 6 times, Sc in the last 4 st (64)
Round 29: Repeat *Dec, Sc in the next 8 st* 6 times, Sc in the last 4 (58)
Round 30: Repeat *Dec, Sc in the next 7 st* 6 times, Sc in the last 4 st (52)
Round 31: Repeat *Dec, Sc in the next 6 st* 6 times, *Dec* 2 times (44)
Round 32: *Dec, Sc in the next 5 st* 6 times, *Dec* 1 time (37)
Round 33: *Dec, Sc in the next 4 st* 6 times, Sc in the last st (31)
Stuff here. Continue stuffing after each round.

Round 34: *Dec, Sc in the next 3 st* 6 times, Sc in the last st (25)
Round 35: *Dec, Sc in the next 2 st* 6 times, Sc in the last st (19)
Round 36: *Dec, Sc in the next st* 6 times, Sc in the last st (13)
Round 37: *Dec* 6 times, Sc in the last st (7)
Finish off. Set the body aside for now.
Ears: (Make 2)
In Grey
Round 1: 6 Sc in magic Ring (6)
Round 2: *Inc* all around (12)
Round 3: *Inc, Sc* all around (18)
Round 4: *Inc, Sc 2* all around (24)
Round 5: *Inc, Sc 3* all around (30)
Round 6: *Inc, Sc 4* all around (36)
Continue to Ear Assembly.
Ear Assembly:
Fold the ear in half, making sure the stitches align next to each other (Pic 1-2). Insert your hook under BOTH stitches (Pic 3).
1. 2.
2.
3.
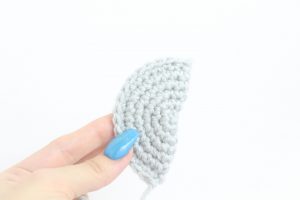
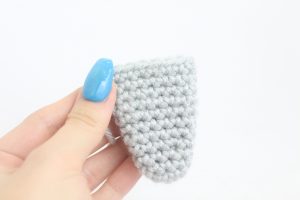
Now Single Crochet the next 18 stitches together, this will make the circle into a half circle ear (Pic 4-10)
4. 5.
5.
6. 7.
7.
8. 9.
9.
10.
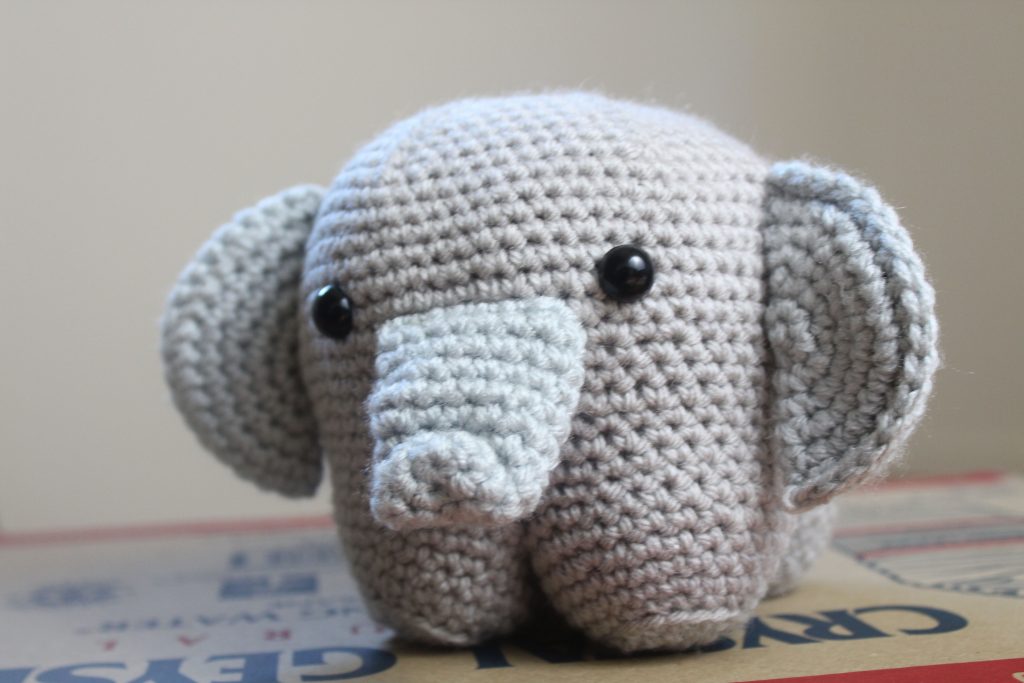
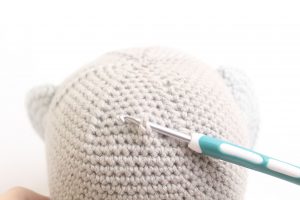
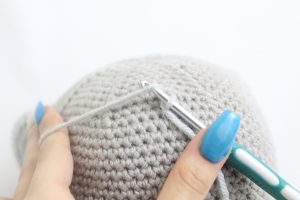
Pin each ear to the elephant as shown, the flat side of the ear will be on the elephant and the round side will be facing out (Pic 11-12). Sew each ear on.
11. 12.
12.
Nose:
In Grey
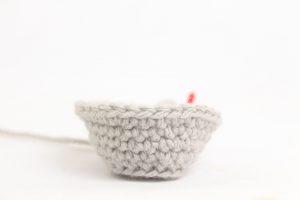
Round 1: 6 Sc in Magic Ring (6)
Round 2: *Inc, Sc* all around (9)
Round 3-4: *Sc* all around (9)
Round 5: *Inc, Sc 2* all around (12)
Round 6-7: *Sc* all around (12)
Round 8: *Inc, Sc 3* all around (15)
Round 9-12: *Sc* all around (15)
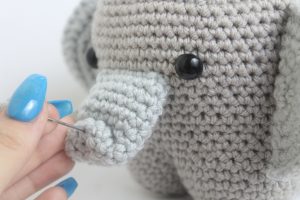
Finish off, leaving a long tail for sewing. Don’t stuff the nose. Now pin the nose on as shown. Sew the nose on completely.
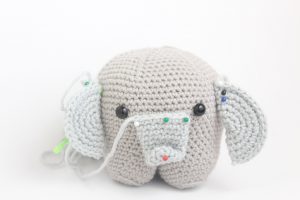
Once it’s fully sewed on, bring the tail of yarn to the trunk area where it’s folded and sew the folded piece. Tie the ends of yarn with a firm knot and weave the knot into the elephant to hide the ends.
Tail:
In Grey
Find the perfect spot for the tail. I placed mine on the upper back area (Pic 1). Insert your hook into that area (Pic 2). Now pull grey yarn through the area where you’ve inserted your hook (Pic 3-5).
1. 2.
2.
3. 4.
4.
5.
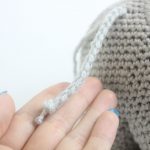
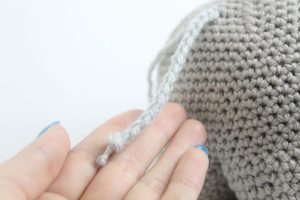
Make a chain a total of 20 times and finish off (Pic 6-8). Tie a knot with the tail towards the end of the chain. This makes a cute looking tail.
6. 7.
7.
8. 9.
9.
 Done! If you made an elephant I would LOVE to see it! You can show me by “trying” it on Pinterest.
I hope you enjoyed this pattern. It was a fun new challenge to make the legs work into the body as one piece. I have been wanting to make an elephant for a while and was worried I’d make an ugly elephant, so I hope this one is cute! I’m also trying to photograph in more interesting areas, since the white backdrop is getting a little old. I hope you all have a great day!


9 Comments
I am in love with my elephant baby, it’s absolutely ADORABLE
That’s so great to hear! It sounds like the pattern went well for you! Yay! 🙂
so cute! bigger than expected but i love it so much.
Yaaay I am so happy you like it! 😍 Thank you for letting me know 🙂
Thank you so much for the amazing pattern! 🐘 My favorite part was attaching the legs. 😊
Awww how cute! I think it’s so fun how the colors change on your elephant, that’s really unique! I’m glad you had fun with the legs, it’s a bit of a challenge but then you at least learn some new techniques 🙂 Thank you so much for sharing a picture!
Thank you for the pattern it’s so cute and the pattern was super easy to follow along with!!!
Ahhhhh that’s CUTE! I’m very relieved that you thought this pattern was easy because I was worried the legs were confusing! Your elephant looks so adorable and I really appreciate that you shared a picture with me 🥰
When connecting the legs the patter was a bit confusing and the pictures a little unclear. But otherwise I love the pattern came out so cute!