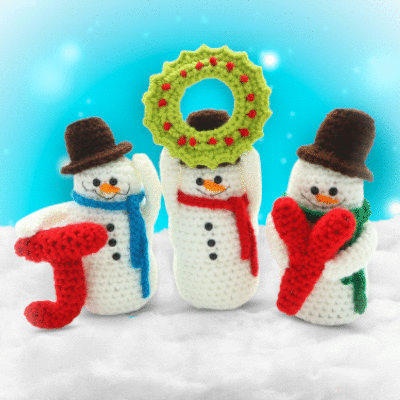
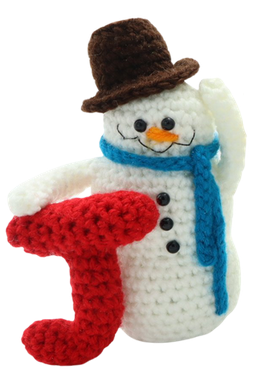
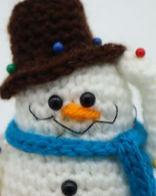
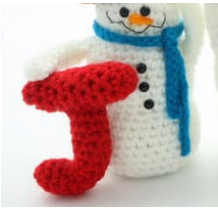
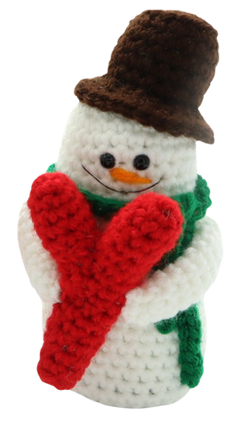
JOY Snowmen Amigurumi – Free Christmas Crochet Pattern
Hi everyone! It’s starting to feel a lot like Christmas with this FREE snowmen crochet pattern! I was super excited to get this pattern out to you, which is why I’m releasing it in November. I want you to have enough time to crochet this so you can display it during December! This pattern is really easy to make, however, there are a lot of pieces to make for each snowman.
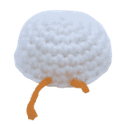
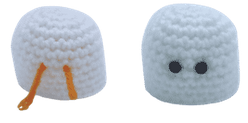
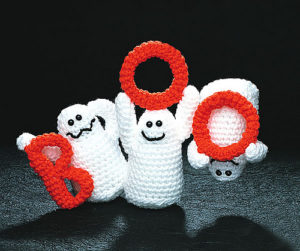 I also want to mention that this pattern is inspired from one of my favorite patterns made by Beverly Mewhorter. She created this ghost pattern (pictured above) where each ghost is holding a letter to spell “BOO”. If you haven’t seen this classic pattern, you can find it here! My pattern doesn’t follow her pattern, but mine is very much inspired from hers 😍
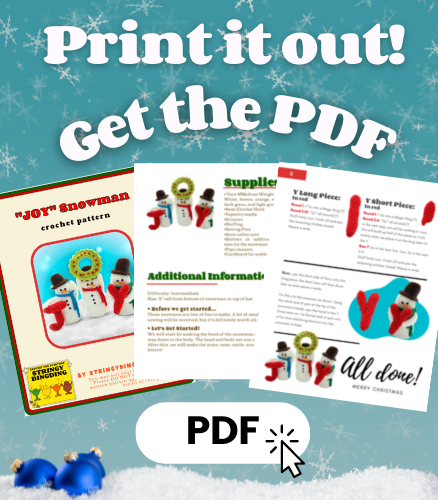
Print this pattern out – purchase the PDF version here!

 Supplies:
• Yarn 4/Medium Weight in…
White, brown, orange, red, blue, dark green, and light green
•4mm Crochet Hook
•Tapestry needle
•Scissors
•Stuffing
•Sewing Pins
•6mm safety eyes
•Buttons or additional safety eyes for the snowman’s buttons
•Pipe cleaners
•Cardboard for stable bottom
Additional Information:
Difficulty: Intermediate
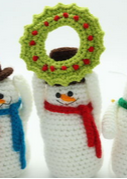
Size: 5″ tall from bottom of snowman to top of hat
• Before we get started…
These snowmen are lots of fun to make. A lot of small pieces and sewing will be involved, but it’s definitely worth all of the effort 🙂
• Let’s Get Started!
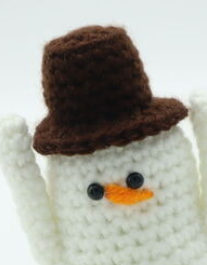
We will start by making the head of the snowman, then work our way down to the body. The head and body are one continuous piece. After this, we will make the arms, nose, smile, scarf, hat, and letters!
Snowman: (Make 3 in White)
Round 1: 6 Sc into a Magic Ring (6)
Round 2: *Inc* all around (12)
Round 3: *Inc, Sc in the next st* all around (18)
Round 4: *Inc, Sc in the next 2 st* all around (24)
Round 5-7: *Sc* all around (24)
Now we will mark where we will place the eyes later. Add an eye stitch marker into the 12th and 14th stitch of Round 7.
Below are what Round 7’s eye markers will look like:
Round 8-11: *Sc* all around (24)
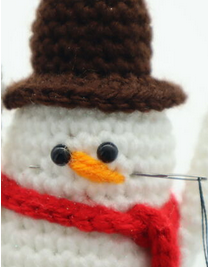
Now add safety eyes into marked areas now, as shown below:
Round 12: *Inc, Sc in the next 3 st* all around (30)
Round 13-17: *Sc* all around (30)
Round 18: *Dec, Sc in the next 3 st* (24)
Round 19: In the FLO *Inc, Sc in the next 3 st* all around (30)
Round 20-25: In BOTH loops, *Sc* all around (30)
Round 26: *Dec, Sc in the next 3 st* all around (24)
Round 27: In the BLO *Dec, Sc in the next 2 st* all around (18)
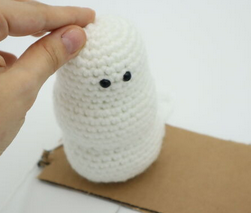
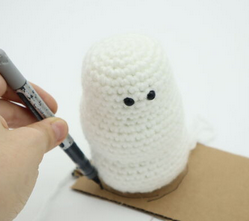
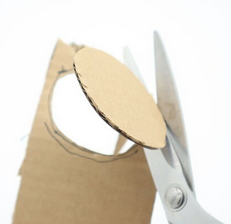
TIP: To have the snowmen sit flat, I highly recommend cutting a piece of cardboard into a circle. Let me show you how I do it before going on to the next rounds. Before this, stuff the body firmly now.
Take a piece of cardboard. Place the body onto the cardboard as shown (Pic 1) and outline around the last round we made (Pic 2). You will have a circle on your cardboard, cut around the outline (Pic 3-4). Now place it into the snowman (Pic 5), you will have to fiddle around to get it completely in.
1. 2.
2. 3.
3. 4.
4. 5.
5.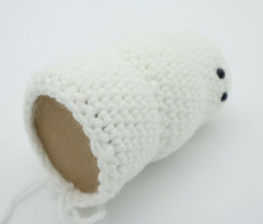
Round 28: In BOTH loops, *Dec, Sc in the next st* all around (12)
Round 29: *Dec* all around (6)
Finish off, leaving a tail for sewing. Sew the remaining stitches closed. Weave in ends.
For buttons: Sew on small buttons or glue in 6mm safety eyes into Rounds 17, 15, and 13.
Arms: (Make 2)
In White
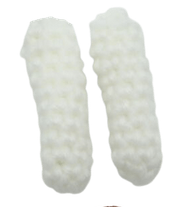
Round 1: 6 Sc into a Magic Ring (6)
Round 2-11: *Sc* all around (6)
Finish off, leaving a long tail for sewing.
How we pin the arms onto the snowman will be different depending on which letter they’re holding.
For J: Pin the left arm so it’s facing straight towards you. Pin the right arm so it’s facing straight up. Sew arms on and bring the tail ends of yarn to the tip of the snowman’s hands. With the right arm, sew his hand to his head as shown and weave in ends. With the left hand, we will later sew the hand to hold the j.
For O: Pin both arms so they are straight up as shown. Sew the arms on and bring the tail ends of yarn to the tip of the snowman’s hands. Later we will use the yarn coming out of the snowman’s hands to sew the hands to the O.
For Y: Pin both arms so they’re facing forward. Sew the arms on and bring the tail ends of yarn to the tip of the snowman’s hands. Later we will use the yarn coming out of the snowman’s hands to sew the hands to the Y.
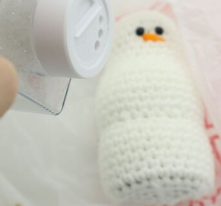
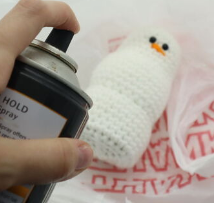
NOTE: Now that we have the body of the snowman done, we can add glitter to the snowman so it looks like snow! This is totally optional. Place the snowman in a bag, dust glitter over, then spray hairspray all over the snowman to secure the glitter. This won’t make the glitter 100% stick, but it helps 80% of it 🙂 Let it dry.
1.
 2.
2. 3,
3,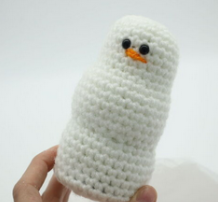
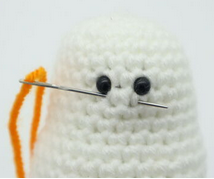
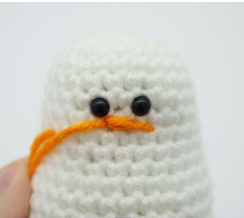
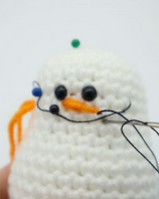
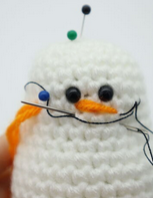
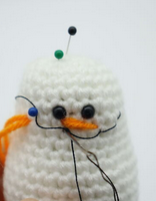
Nose:
In Orange
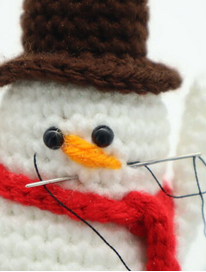
Insert needle with yarn directly under the snowman’s left eye (Pic 1), and pull needle out one stitch down from it’s right eye (Pic 1). Reinsert needle into the original insertion area (Pic 2), and pull needle out at the same spot under it’s right eye (Pic 2).
1.
 2.
2.
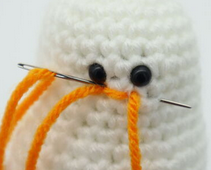
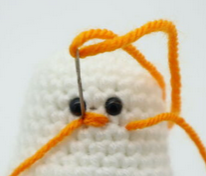
Reinsert needle into the original insertion spot (Pic 3), and pull needle out one stitch to the right of the right eye (Pic 3). Reinsert the needle into the original insertion spot (Pic 4). Now the nose it done! (Pic 5). To secure the nose, tie the tail ends of yarn into firm knots. Bring the knots into the snowman’s body to hide, cutting excess yarn.
3. 4.
4. 5.
5.
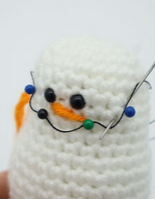
Silly Smile:
In black embroidery thread
With black embroidery thread, pin the smile on as shown, leaving a long amount of thread on the right side (Pic 1). Place the thread onto your needle. Insert needle where shown (Pic 2). Pull needle out at the first divot, making sure your needle lands ABOVE the thread (Pic 2). Insert needle into the same stitch, making sure your needle lands BELOW the thread (Pic 3).
1. 2.
2. 3.
3.
Pull needle out where shown, making sure your needle lands ABOVE the thread (Pic 4). Insert needle into the same stitch, making sure it lands BELOW the thread (Pic 5). Repeat this once more for the last part (Pic 6-7).
4. 5.
5. 6.
6. 7.
7.
Now, place the left piece of thread onto your needle (Pic 8) and pull the needle out where the other end of black thread is. Tie these two ends of thread into a firm knot, then bring the knot inside the snowman to hide the knot.
8.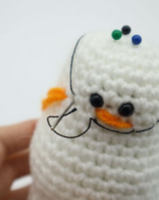 9.
9.
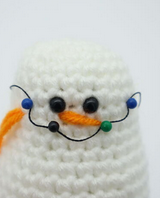
Regular Smile:
In black embroidery thread
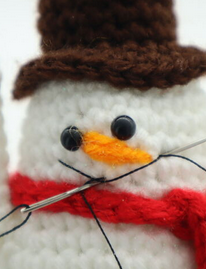
Insert needle with thread where shown (Pic 1), and pull needle out to the left of the snowman’s eye (Pic 1). Reinsert needle into the original insertion spot (Pic 2), and pull needle out at the middle of the snowman’s face, making sure the needle lands ABOVE the thread (Pic 2). Insert needle into the same stitch, making sure the needle lands BELOW the thread (Pic 3). Pull needle out at the original insertion spot (Pic 4). Tie these two ends of thread into a firm knot, then bring the knot inside the snowman to hide the knot.
1.
 2.
2. 3.
3. 4.
4.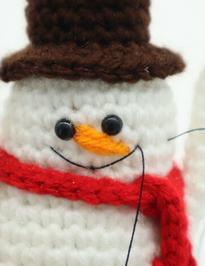
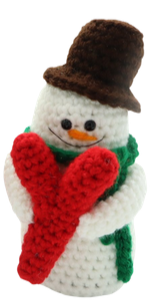
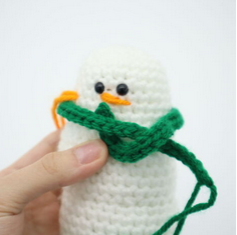
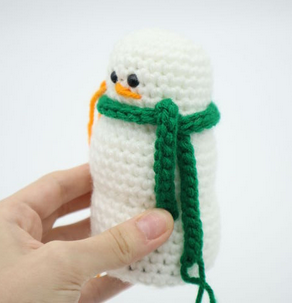
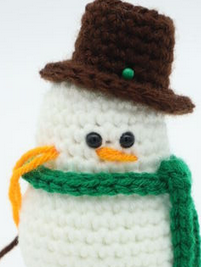
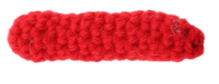
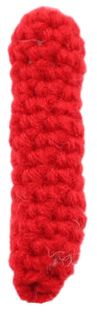
Scarf:
Make 1 in blue, 1 in red, 1 in dark green
Row 1: Ch 57. SlSt in the 2nd Ch from the hook. SlSt in the remaining 55 st (56)
Finish off, leaving a tail for sewing.
Wrap the scarf around the snowman, having the ends to the right of the snowman as shown (Pic 1). Cross the right side of the scarf over to the left, above the other piece as shown (Pic 3). Take that – now left piece – of the scarf and bring it under the scarf (Pic 4). You can pull both ends of the scarf to tighten. Pin the scarf down as shown (Pic 5) and using the tail end of yarn, sew the ends of the scarf onto the snowman’s body. Tie the tail end of yarn into a firm knot and bring into it’s body to hide. Cut excess yarn.
1.
 2.
2. 3.
3. 4.
4. 5.
5.
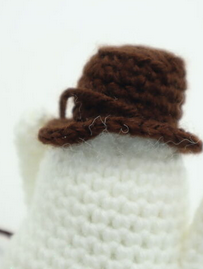
Hat:
In brown yarn
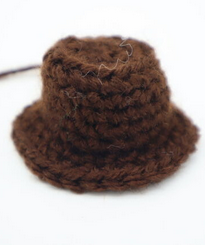
Round 1: 6 Sc into a Magic Ring (6)
Round 2: *Inc* all around (12)
Round 3: *Inc, Sc in the next st* all around (18)
Round 4: In the BLO, *Sc* all around (18)
Round 5-8: *Sc* all around (18)
Round 8: In the FLO, *Inc, Sc in the next 2 st* all around (24)
Round 9: In BOTH Loops, *Inc, Sc in the next 3 st* all around (30)
Finish off, leaving a long tail for sewing. Pin the hat onto each snowman, I slightly skewed the hats on the J and Y snowman, but pinned the hat on the O snowman to be straight. Once pinned on, sew the hat on. Be sure to add stuffing to the hat before sewing completely closed (Pic 3). Once done, tie the end of yarn firmly into a knot and bring into the snowman to hide. Done! (Pic 4)
1.
2. 3.
3. 4.
4.
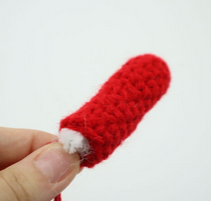
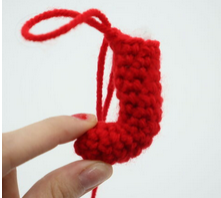
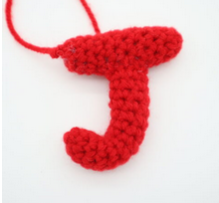
J Top Piece:
In Red
Round 1: 6 Sc into a Magic Ring (6)
Round 2: *Inc, Sc in the next 2 st* all around (8)
Round 3-12: *Sc* all around (8)
Stuff firmly here
Round 13: *Dec, Sc in the next 2 st* all around (6)
Finish off and sew the remaining stitches closed. Set this piece aside for now.
J Bottom Piece:
In Red
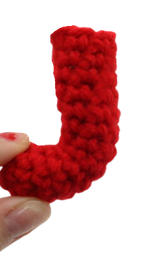
Round 1: 7 Sc into a Magic Ring (7)
Round 2-14: *Sc* all around (7)
Finish off, leaving a long tail for sewing.
Continue on the next page for assembly.
J Assembly:
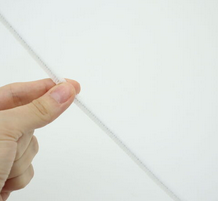
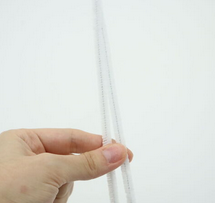
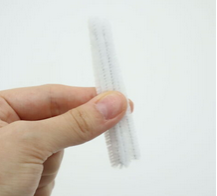
Take a pipecleaner and fold it in half (Pic 2). Fold it in half two more times (Pic 3). Insert the pipecleaner into the bottom j piece (Pic 4).
1. 2.
2. 3.
3. 4.
4.
Bend the bottom of the piece to look as Pic 5. Now place the top piece of the J on as shown (Pic 6). Sew the pieces together (Pic 7). Pin the J onto the snowman (Pic 8). Using the white end of yarn at the tip of the snowman’s hands, sew the hand to the J. Once sewn on, tie the tail end of yarn into a firm knot and bring the knot into the snowman to hide.
5. 6.
6.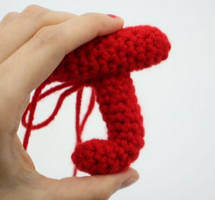 7.
7. 8.
8.
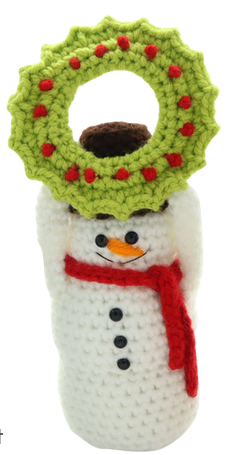
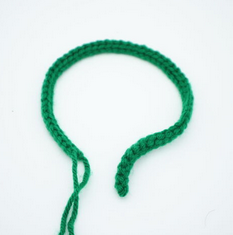
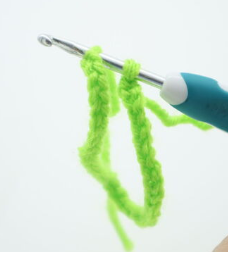
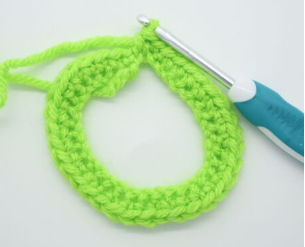
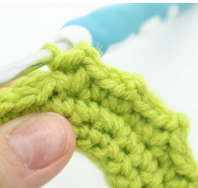
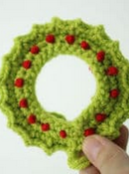
Wreath: Make 2 pieces.
In Green
To make the wreath, we will make two pieces then crochet them together to form the one wreath. As we crochet them together, we will form the “peaks” of the wreath.
Round 1: Ch 36. Sc to the very first Ch made, this will connect the circle. Make sure to NOT twist the chain when doing this (Pic 2-5)! Add a stitch marker to the Sc you just made, this will mark the rounds. Sc in the next 35 st (Pic 6, 36)
1. 2.
2. 3.
3. 4.
4. 5.
5. 6.
6.
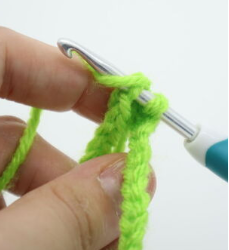
Round 2: Repeat *Inc, Sc in the next 4 st* all around (Pic 7, 42)
Pic 7.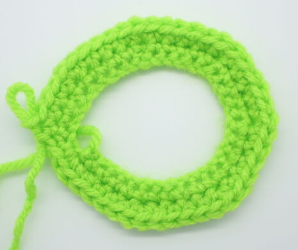
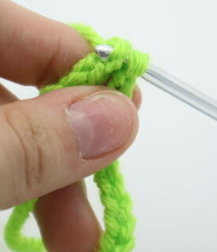
Finish off the first wreath now. DON’T finish off the second wreath. Instead, continue on with the next round:
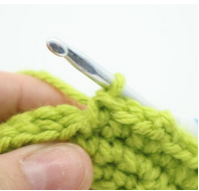
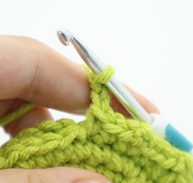
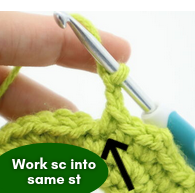
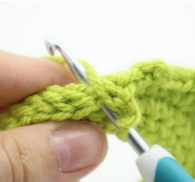
Round 3: Line up both pieces together, making sure the stitches line up (Pic 8). Going through both stitches (Pic 9), repeat *Sc in the next 2 st, Ch 2, Sc into that same st (Pic 12-13)* all around. (You will have 18 peaks)
8. 9.
9. 10.
10. 11.
11. 12.
12. 13.
13. 14.
14. 15.
15.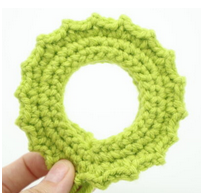
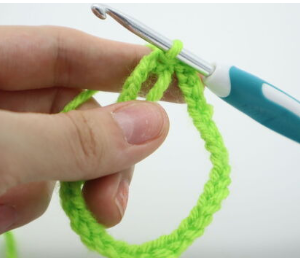
Finish off, leaving a long tail end of yarn.
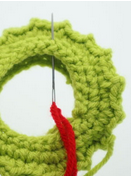
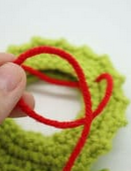
Wreath Berries:
In Red
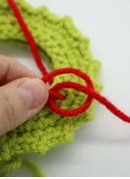
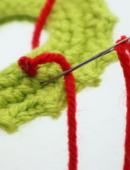
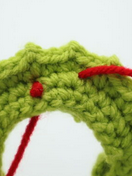
Place red yarn onto your needle. Insert the needle in between the two layers of the wreath and pull the needle out at the outside of the wreath (Pic 1-2). Tie a knot close to the surface of the wreath (Pic 3-6). Tie the knot into the same area 1-2 more times to make a larger knot
1. 2.
2. 3.
3. 4.
4. 5.
5. 6.
6.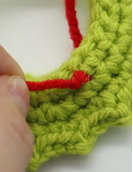
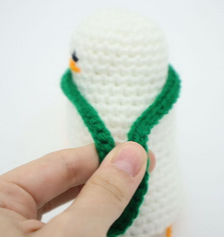
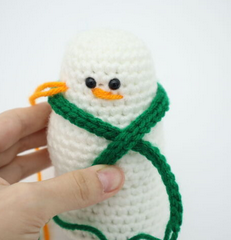
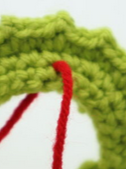
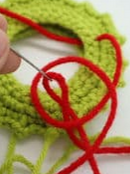
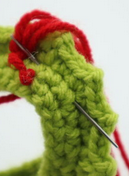
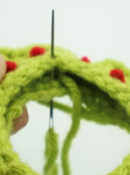
Now, insert your needle into a close nearby stitch (Pic 7), and pull needle out a few stitches away (Pic 8-9). Repeat the above process until the wreath has a complete circle of berries (Pic 10). Once done, weave in ends. Take the green tail end of yarn and sew the two layers of the wreath closed (Pic 11). Using the yarn left on the snowman’s arms, sew the arms to the wreath and weave in ends (Pic 12).
7. 8.
8. 9.
9. 10.
10. 11.
11. 12.
12.
Y Long Piece:
In Red
Round 1: 7 Sc into a Magic Ring (7)
Round 2-15: *Sc* all around (7)
Stuff firmly now. Finish off and sew the remaining stitches closed. Weave in ends.
Y Short Piece:
In Red
Round 1: 7 Sc into a Magic Ring (7)
Round 2-6: *Sc* all around (7)
In the next step, we will be working in rows. This will build up half of the piece so it sits evenly when we place it on the long stem of the Y.
Row 7: Sc in the next 3 st. Turn, Sc in the next 3 st.
Stuff firmly now. Finish off and sew the remaining stitches closed. Weave in ends.
Next… pin the short side of the y onto the long piece, the short rows will face down. Sew on and weave in ends.
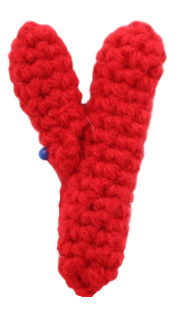
Pin the y to the snowman as shown. Using the white end of yarn at the tip of the snowman’s hands, sew the hand to the Y. Once sewn on, tie the tail end of yarn into a firm knot and bring the knot into the snowman to hide.
All done! I hope you enjoyed making this snowman 🙂 If you made one, I would LOVE to see! Post a picture in the comments below this post 🙂


5 Comments
Wow! This is super cute!! Finally something different to try for Christmas😉
Thank you Olive!!
These little snowmen are adorable. Thank you for the free pattern. Can’t wait to give them a go.
very cute! Thank you
These are adorable! I’ve been looking for something like this for weeks. Thanks so much for the patterns with pictures – I feel I can learn amigurumi with those!
This pattern is awesome! I can’t wait to try it! Also if you’re looking for pattern ideas, I have a few suggestions:
-candy cane
-ornament
-present
Just in case you ran out of ideas haha 😉 Merry Christmas!