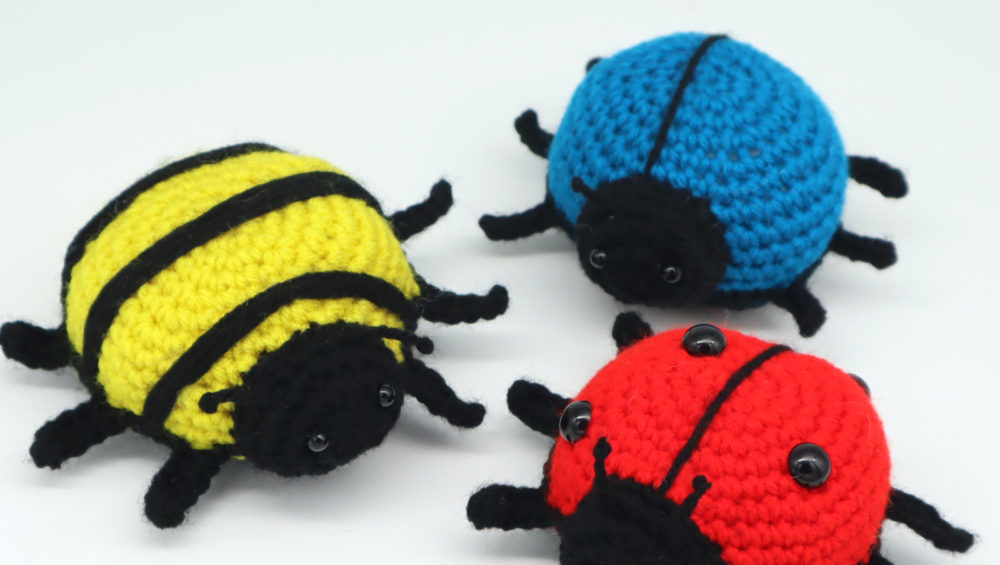
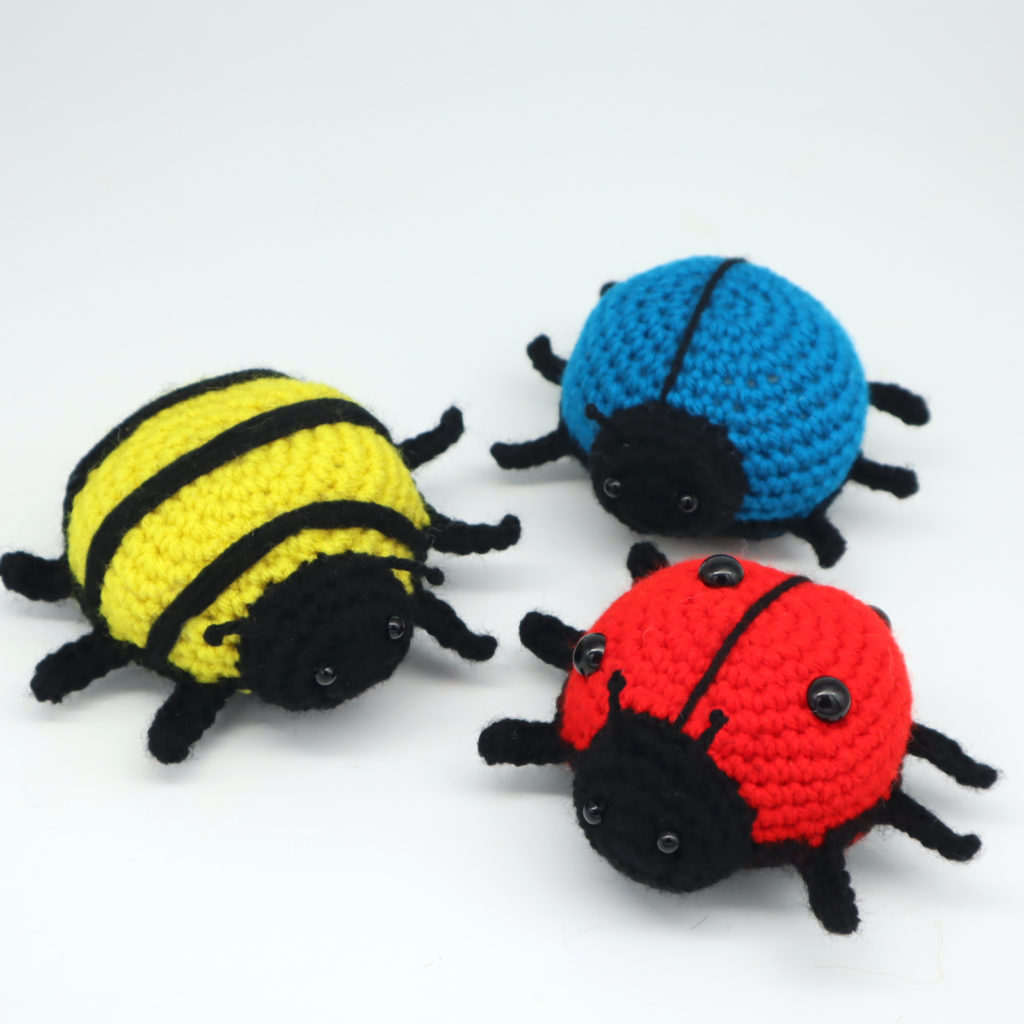
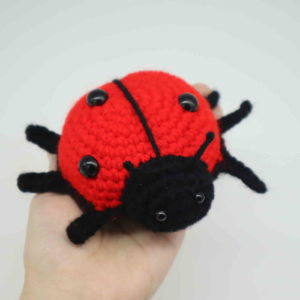
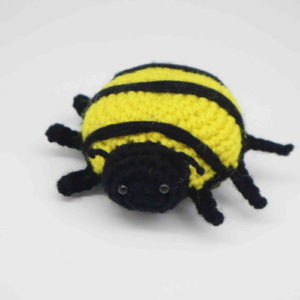
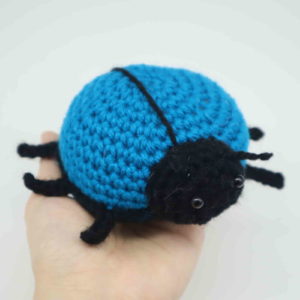
Ladybug, Bee, and Beetle Amigurumi – Free Crochet Pattern
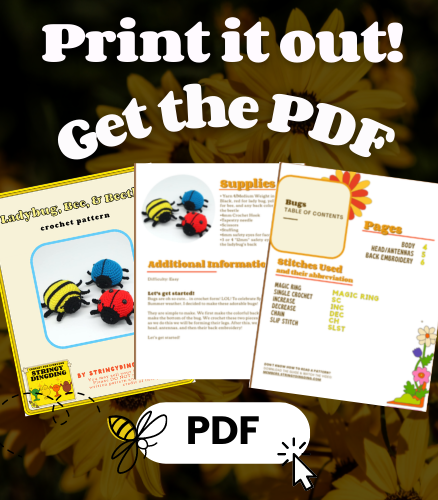
Print this pattern out – purchase the PDF version here!

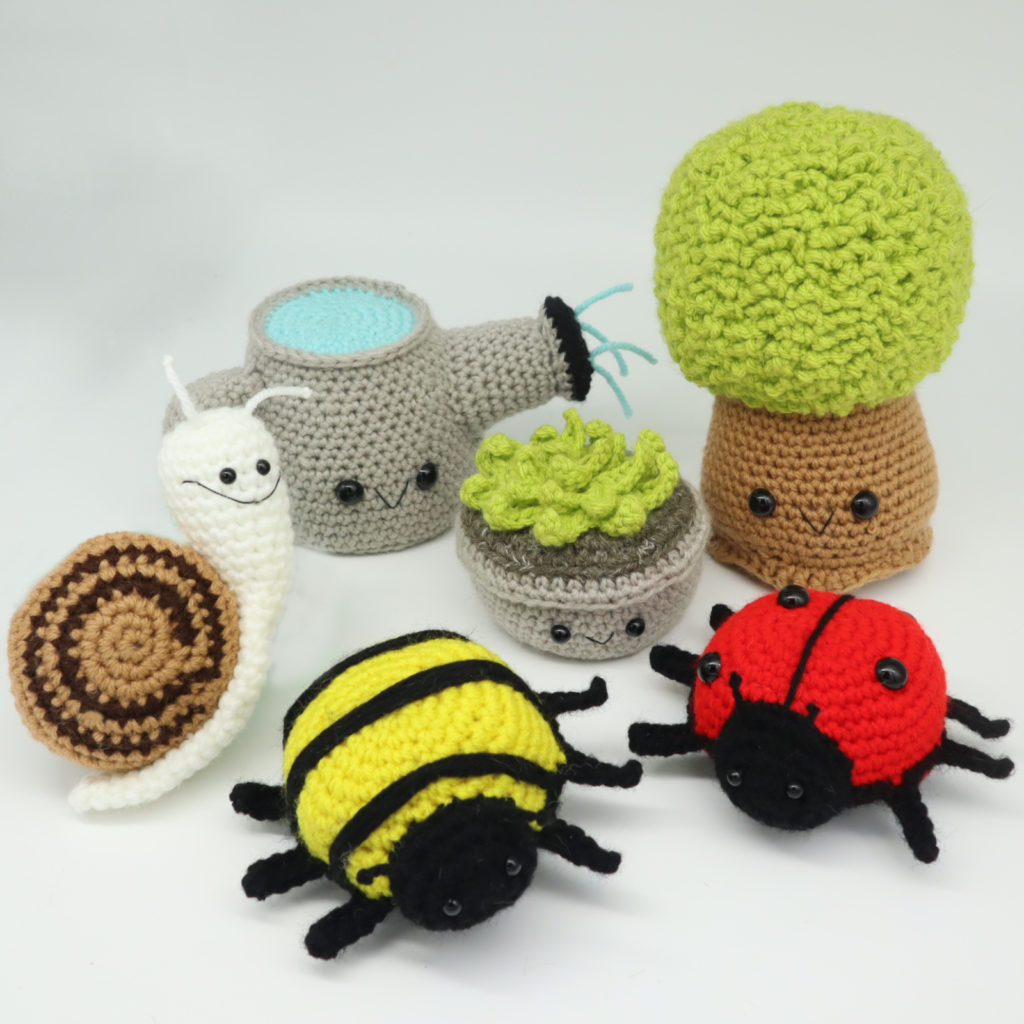 This is 1 of 5 different patterns in my Spring amigurumi bundle! Want to see the rest of the free Spring patterns? Click here!
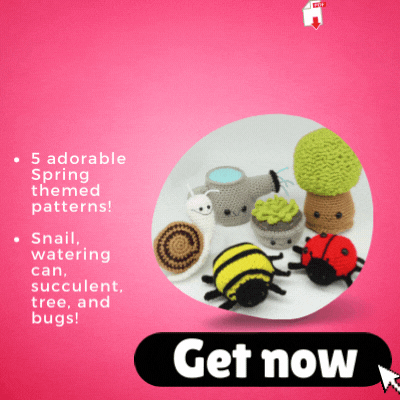
Want the PDF version of the Spring bundle amigurumis? Click here!
Supplies:
• Yarn 4/Medium Weight in:
Black, red for lady bug, yellow for bee, and any back color for the beetle
•4mm Crochet Hook
•Tapestry needle
•Scissors
•Stuffing
•6mm safety eyes for face
•3 or 4 “12mm” safety eyes for the ladybug’s back
Additional Information:
Difficulty: Easy
Let’s get started!
Bugs are oh so cute… in crochet form! LOL! To celebrate Spring and Summer weather, I decided to make these adorable bugs!
They are simple to make. We first make the colorful back, then we make the bottom of the bug. We crochet these two pieces together, and as we do this we will be forming their legs. After this, we will make the head, antennas, and then their back embroidery!
Back:
In red for ladybug. In yellow for bee. In any color for the beetle.
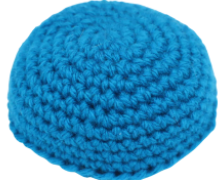
Round 1: 6 Sc into a Magic Ring (6)
Round 2: *Inc* all around (12)
Round 3: *Inc, Sc in the next st* all around (18)
Round 4: *Inc, Sc in the next 2 st* all around (24)
Round 5: *Inc, Sc in the next 3 st* all around (30)
Round 6: *Inc, Sc in the next 4 st* all around (36)
Round 7-10: *Sc* all around (36)
Finish off now and weave in ends. Cut any excess yarn.
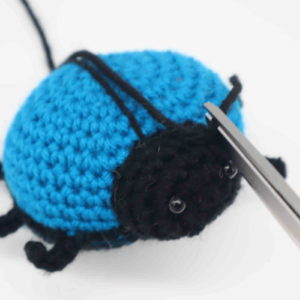
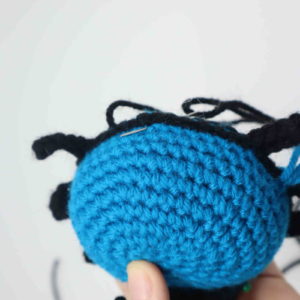
Add 3-4 safety eyes into the back for ladybug’s dots as shown. You can do this step later, but you will have to secure the safety eyes with glue since the back will be crocheted closed.
Bottom of bug:
In black
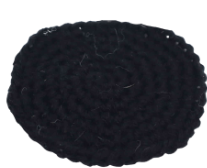
Round 1: 6 Sc into a Magic Ring (6)
Round 2: *Inc* all around (12)
Round 3: *Inc, Sc in the next st* all around (18)
Round 4: *Inc, Sc in the next 2 st* all around (24)
Round 5: *Inc, Sc in the next 3 st* all around (30)
Round 6: *Inc, Sc in the next 4 st* all around (36)
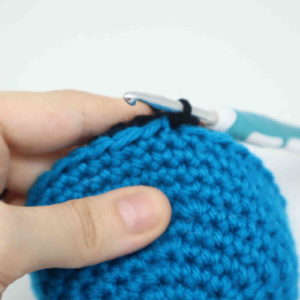
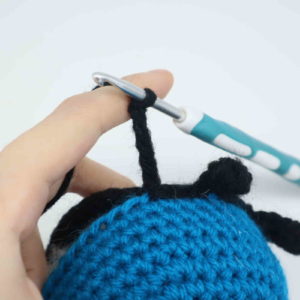
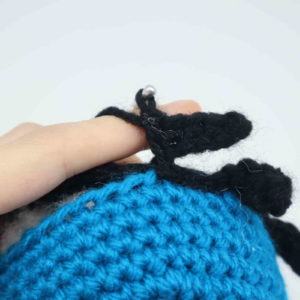
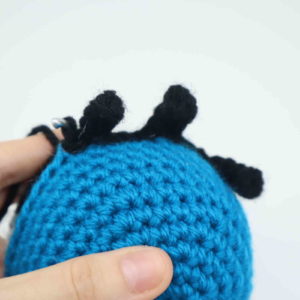
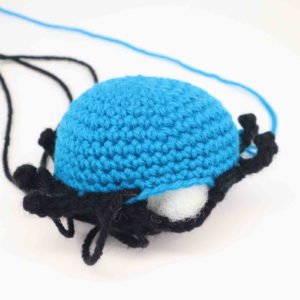
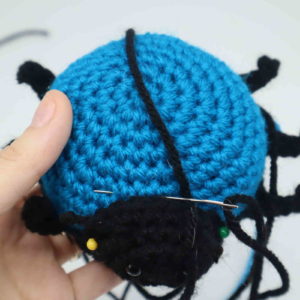
Line up the bottom and back together, making sure the stitches line up (Pic 1). Make sure the colorful back is facing you (Pic 1). Inserting your hook through the back, then into the bottom, make 1 SlSt (Pic 2-3). Slst in the next 2 st. Repeat *Ch 6 (Pic 4), SlSt in the 2nd Ch from the hook, SlSt in the next 4 ch. Working into the back/bottom, SlSt in the next 4 st* 3 times. Slst in the next 9 st. Stuff the body firmly before fully crocheting closed. Repeat *Ch 6 (Pic 4), SlSt in the 2nd Ch from the hook, SlSt in the next 4 ch. Working into the back/bottom, SlSt in the next 4 st* 3 times. Finish off and weave in ends.
1.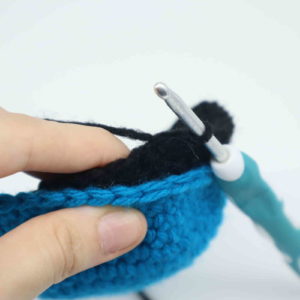 2.
2.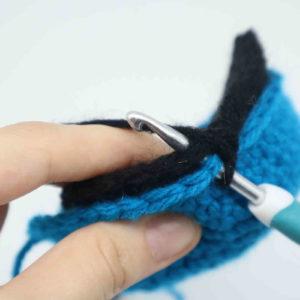 3.
3. 4.
4. 5.
5. 6.
6.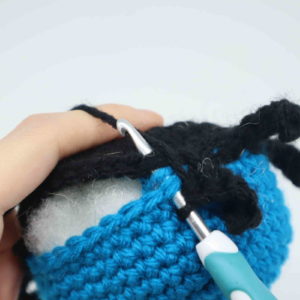 7.
7. 8.
8.
Head:
In black
Round 1: 6 Sc into a Magic Ring (6)
Round 2: *Inc* all around (12)
Now we will mark where to place the safety eyes. Add a different colored eye stitch marker into the 3rd and 7th stitch in Round 12.
Round 3: *Inc* in the next 3 st, Sc in the next 3 st, *Inc* in the next 3 st, Sc in the next 3 st (18)
Round 4-5: *Sc* all around (18)
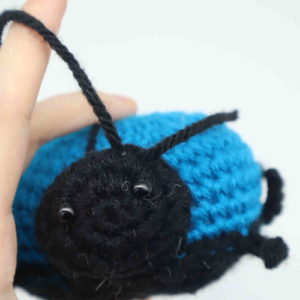
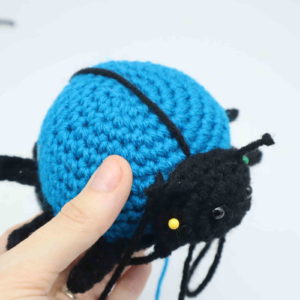
 Finish off, leaving a long tail for sewing. Add the safety eyes in the marked areas now. Pin the head onto the bug, be sure to pin the head on the side where the legs are closer together. Sew on, stuffing the head firmly before fully sewing closed. Once sewn on, weave in ends and cut excess yarn.
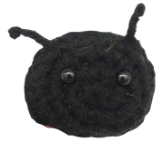
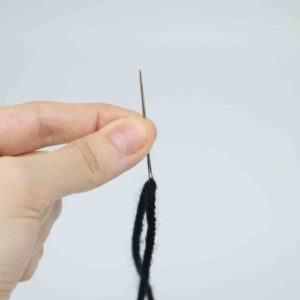
Antenna:
In black
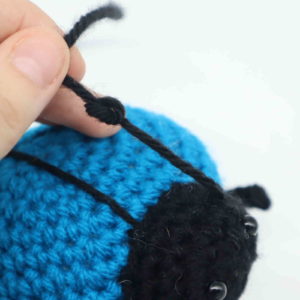
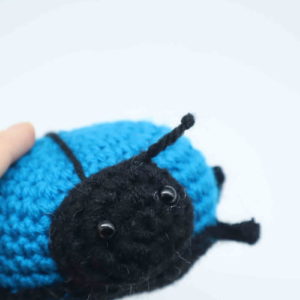
Take a long piece of black yarn and place it on you needle (Pic 1). Insert it 1 around above the toy’s eye as shown (Pic 2). Pull it so that you have 2 sides of yarn as shown (Pic 3). Tie both pieces of yarn together 2 times (Pic 4). Cut the shorter piece of yarn (Pic 5). Using the longer piece of yarn, tie a knot 2 times to make the antenna (Pic 6). Cut the yarn above the knot (Pic 7). Done! (Pic 8)
1. 2.
2. 3.
3. 4.
4. 5.
5. 6.
6. 7.
7. 8.
8.
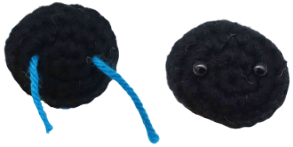
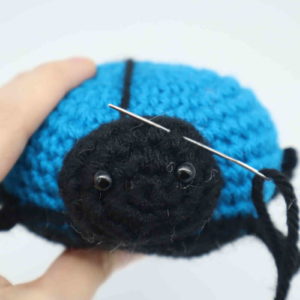
Ladybug & beetle back embroidery:
In black
Round 1: 6 Sc into a Magic Ring (6)
Round 2: *Inc* all around (12)
Now we will mark where to place the safety eyes. Add a different colored eye stitch marker into the 3rd and 7th stitch in Round 12.
Round 3: *Inc* in the next 3 st, Sc in the next 3 st, *Inc* in the next 3 st, Sc in the next 3 st (18)
Round 4-5: *Sc* all around (18)
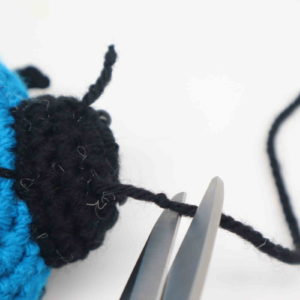
Insert needle with thread into the middle back area of the toy as shown (Pic 1). Reinsert needle at the top middle area near the toy’s head as shown (Pic 2). Pull the needle through and the wings will be made! (Pic 3). Tie the tail ends of yarn into firm knots, then bring the knots inside the toy to hide the knot. Cut excess yarn.
1. 2.
2. 3.
3.
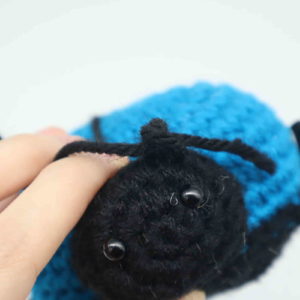
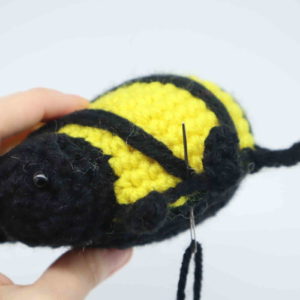
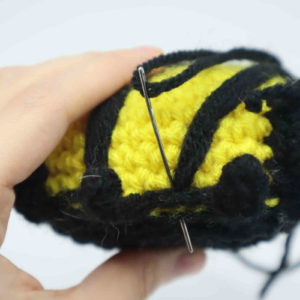
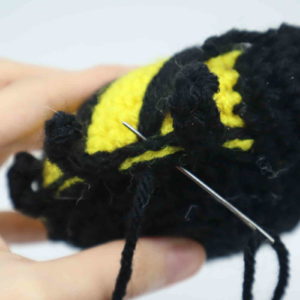
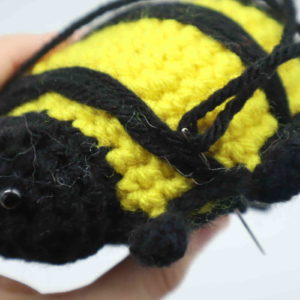
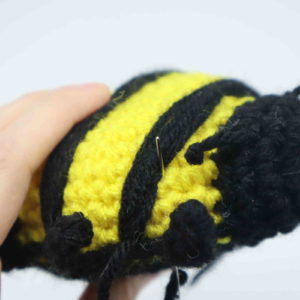
Bee back embroidery:
In black
Insert the needle in between the toy’s 1st and 2nd leg (Pic 1). Reinsert needle on the other side of the 1st and 2nd leg (Pic 2). Pull the yarn until it’s firm over the back as shown (Pic 3). Insert your needle one stitch over as shown (Pic 4). Reinsert your needle onto the other side of the bug as shown (Pic 5). Repeat this process 1 more time. Now bring your needle where shown (Pic 6). Insert needle on the opposite side of the stripe as shown (Pic 7). Repeat this process in the middle and other end of the stripe to secure! Now repeat this entire process 2 more times for the middle and back of the bee. One done, weave in ends.
1. 2.
2. 3.
3. 4.
4. 5.
5. 6.
6. 7.
7. 8.
8.
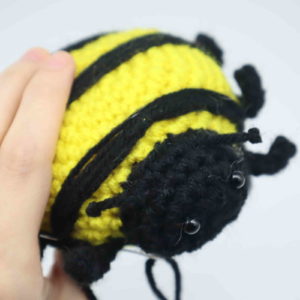
Done! If you made one of these bugs, I would LOVE to see! You can show me by posting a picture in the comments underneath this post 🙂


7 Comments
These so cute
Going to make for my grandson
Your patterns are adorable! My ladybug is not perfect but so much fun!
mine is perfect just can’t get antennae
Great pattern, thank you!
I made a few little changes, but here’s my rendition.
Here’s my newly created ladybug
I love her