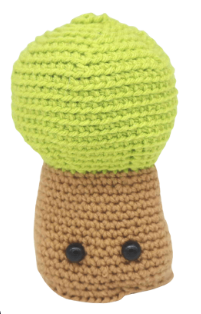
Tree Amigurumi – Free Crochet Pattern
Print this pattern out – purchase the PDF version here!

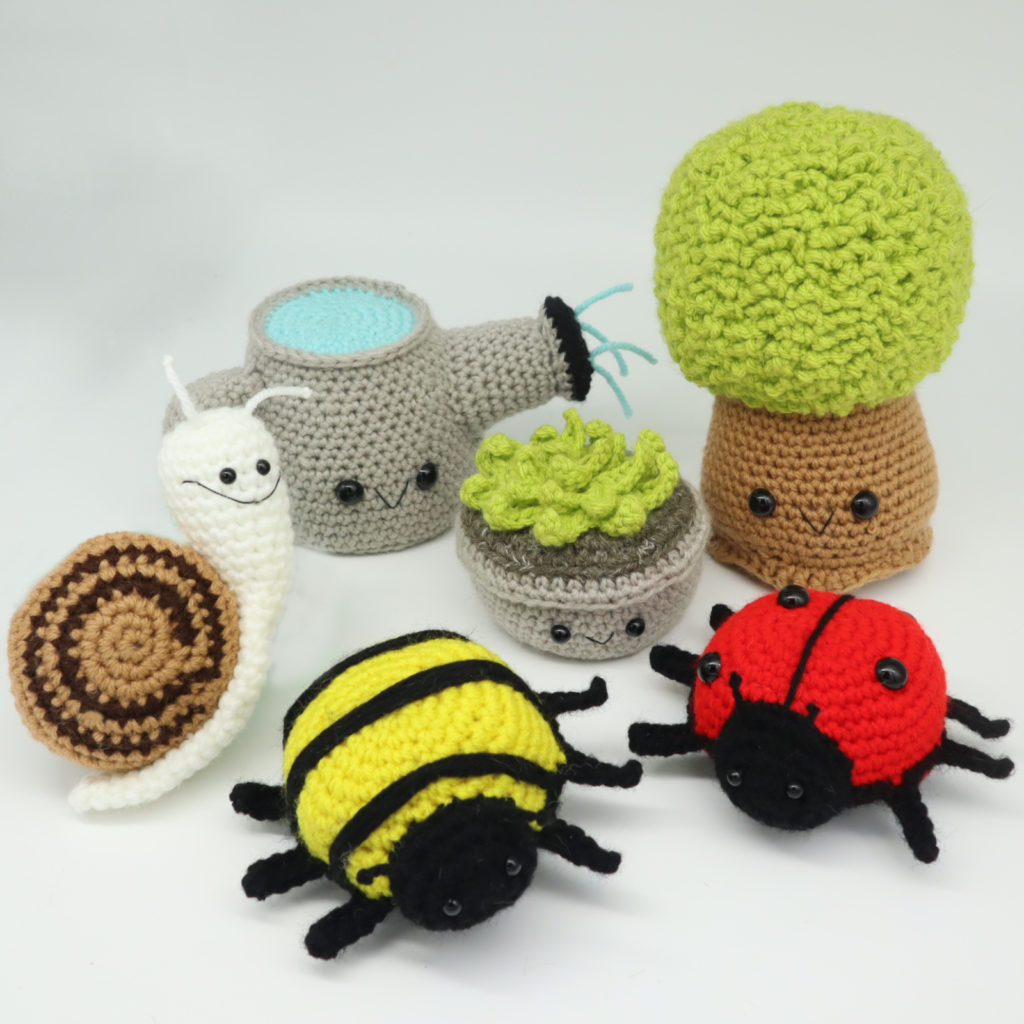 This is 1 of 5 different patterns in my Spring amigurumi bundle! Want to see the rest of the free Spring patterns? Click here!
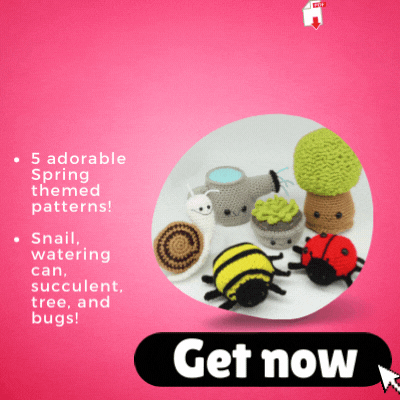
Want the PDF version of the Spring bundle amigurumis? Click here!
Supplies:
• Yarn 4/Medium Weight in:
green and brown
•4mm Crochet Hook
•Tapestry needle
•Scissors
•Stuffing
•12mm safety eyes
•Black Embroidery Thread
Additional Information:
Difficulty: Easy
Let’s get started!
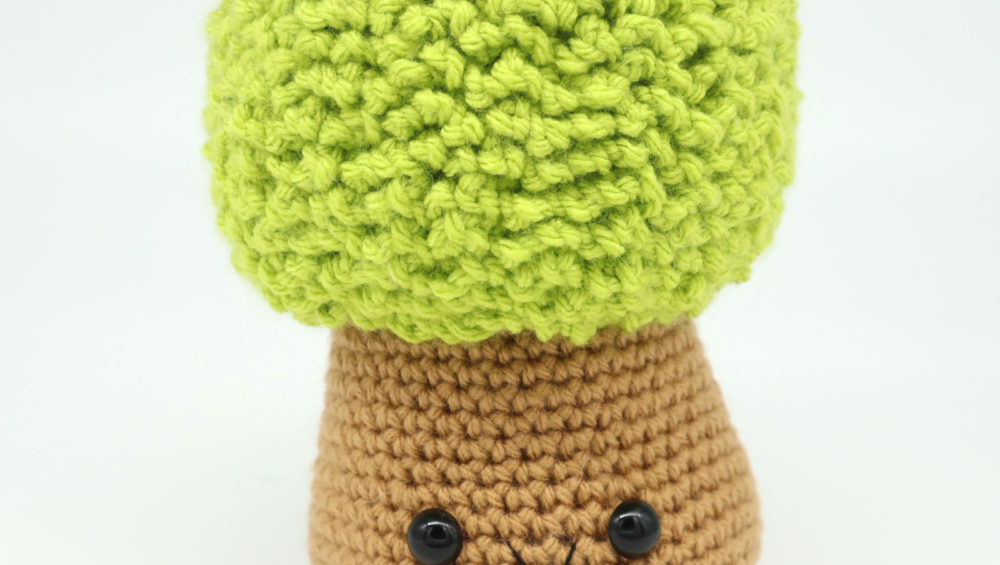
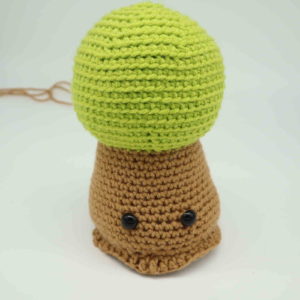
Trees are a huge part of our world – they help us breathe and are homes to many bugs and animals! Though StringyDingDing has many patterns for flowers, we didn’t have a tree pattern… until now!
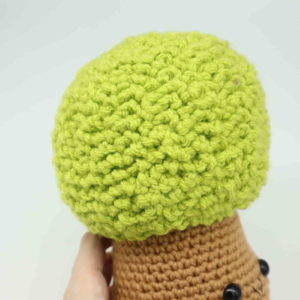
Crochet this super cute tree! The pattern is easy but is a bit more time involved due to making the leaves. If you prefer to not have 3D leaves as shown in the picture, you can easily opt to work in BOTH loops rather than just the Back Loop Only when called for in the first 21 rounds of the tree 🙂 To make this tree, we first create the bottom of the stump. Then, we create the tree itself. We will start at the top of the tree and work our way down to the bark. After this, we will crochet on the leaves, then add the smile!
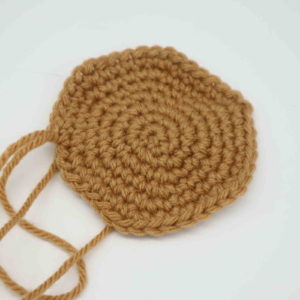
Bottom piece of tree: Make first
In brown
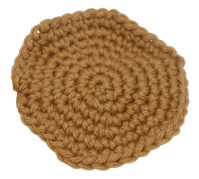
Round 1: 6 Sc into a Magic Ring (6)
Round 2: *Inc* all around (12)
Round 3: *Inc, Sc in the next st* all around (18)
Round 4: *Inc, Sc in the next 2 st* all around (24)
Round 5: *Inc, Sc in the next 3 st* all around (30)
Round 6: *Inc, Sc in the next 4 st* all around (36)
Round 7: *Inc, Sc in the next 5 st* all around (42)
Finish off now and weave in ends. Cut any excess yarn.
Tree:
In green
Round 1: 6 Sc into a Magic Ring (6)
Round 2: In the BLO (Back loop only), *Inc* all around (12)
Round 3: In the BLO, *Inc, Sc in the next st* all around (18)
Round 4: In the BLO, *Inc, Sc in the next 2 st* all around (24)
Round 5: In the BLO, *Inc, Sc in the next 3 st* all around (30)
Round 6: In the BLO, *Inc, Sc in the next 4 st* all around (36)
Round 7: In the BLO, *Inc, Sc in the next 5 st* all around (42)
Round 8: In the BLO, *Inc, Sc in the next 6 st* all around (48)
Round 9: In the BLO, *Inc, Sc in the next 7 st* all around (54)
Round 10-17: In the BLO, *Sc* all around (54)
Round 18: In the BLO, *Dec, Sc in the next 7 st* all around (48)
Round 19: In the BLO, *Dec, Sc in the next 6 st* all around (42)
Round 20: In the BLO, *Dec, Sc in the next 5 st* all around (36)
Round 21: In the BLO, *Dec, Sc in the next 4 st* all around (30)
Round 22: Change to brown. In the FLO, *Sc* all around (30)
Round 23: In BOTH loops, *Inc, Sc in the next 4 st* all around (36)
Round 24-29: *Sc* all around (36)
Round 30: *Inc, Sc in the next 5 st* all around (42)
Round 31: *Sc* all around (42)
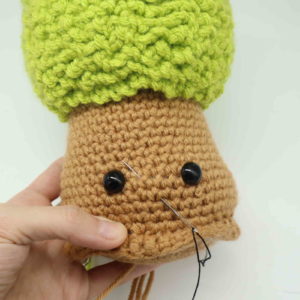
Now we will mark where to place the eyes. Add an eye stitch marker into the 17th and 23rd stitch in Round 31. Be sure to use different color stitch markers compared to your round stitch markers so you don’t confuse them!
Round 32-36: *Sc* all around (42)
Add eyes in the marked areas now! Stuff the green part of the tree now.
Round 37: Inc in the next 4 st, *Dec* 4 times, Sc 4 times in the next st, *Dec* 4 times, *Inc* 4 times, *Dec* 4 times, *Inc* 4 times, Skip the next st, *Dec* 2 times (42)
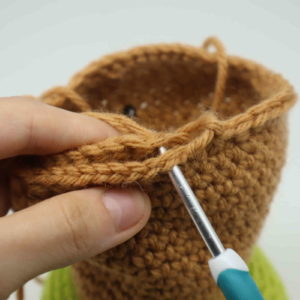
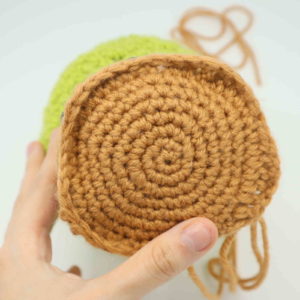
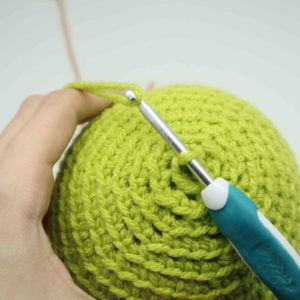
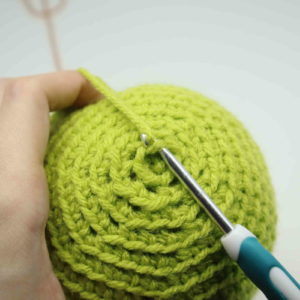
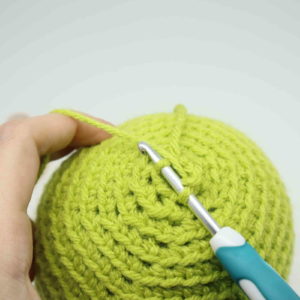
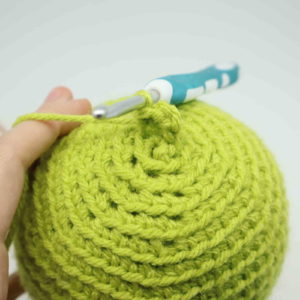
Round 38: Now line up bottom of tree piece we first made (Pic 1) to the bottom of the tree. Inserting your hook through BOTH stitches (Pic 2), repeat *Sc in the next st, Hdc in the next st, Dc in the next 2 st, Trc in the next 2 st, Dc in the next 2 st, Hdc in the next st* 4 times. Stuff the tree firmly now (Pic 4). Sc in the next st, Dc in the next st, Trc in the next 2 st, Dc in the next st, Sc in the next st. Finish off, leaving a long tail for sewing. Weave in ends and cut any excess yarn. Done! (Pic 5-6)
1. 2.
2. 3.
3. 4.
4. 5.
5. 6.
6.
Tree leaves:
In green
Insert your hook into the first loop we left in the tree as shown (Pic 1). Yarn over with green (Pic 2) and pull the yarn through (Pic 3-4). Repeat *Ch 3 (Pic 5), SlSt in the next stitch (Pic 6)* all around until you’ve completed making leaves in each loop of the tree’s green part (Pic 7-8). Once done, finish off and weave in ends. Cut any excess yarn.
1. 2.
2. 3.
3. 4.
4. 5.
5. 6.
6. 7.
7. 8.
8.
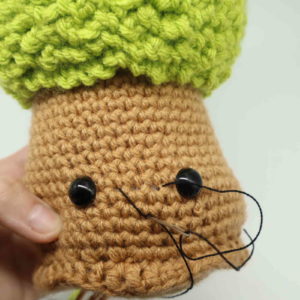
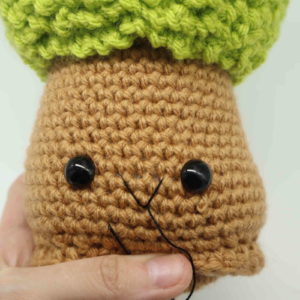
Smile:
In black embroidery thread
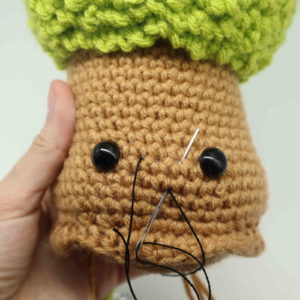
Insert needle with thread into the middle mouth area of the toy, and pull the needle out next to the toy’s left eye as shown (Pic 1). Reinsert needle into the middle mouth area (Pic 2) and pull needle out next to the right eye (Pic 2). Reinsert needle into the middle mouth area and pull needle out a few stitches over. Tie the ends of thread into firm knots and bring them inside the toy to hide. This will secure the smile. Done!
1. 2.
2. 3.
3. 4.
4.


1 Comment
I love this little tree. I think I will do another one and use an orange variegated yarn for a fall peak colors tree.