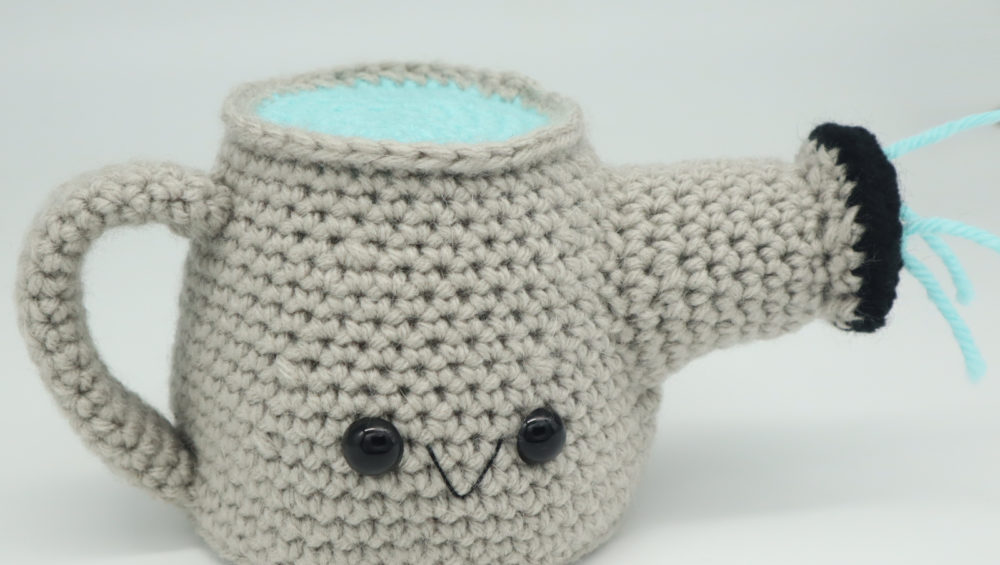
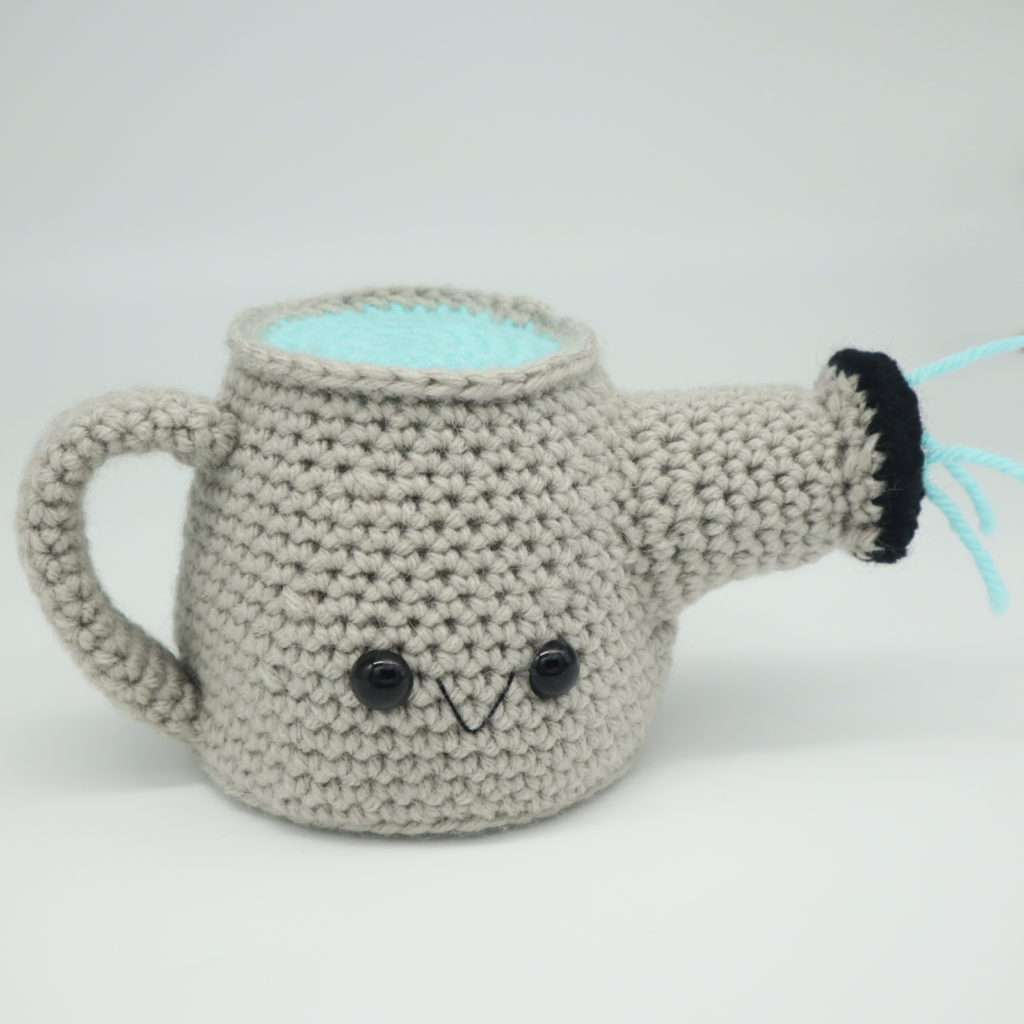
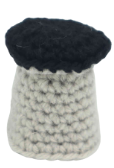
Watering Can Amigurumi – Free Crochet Pattern
Print this pattern out – purchase the PDF version here!
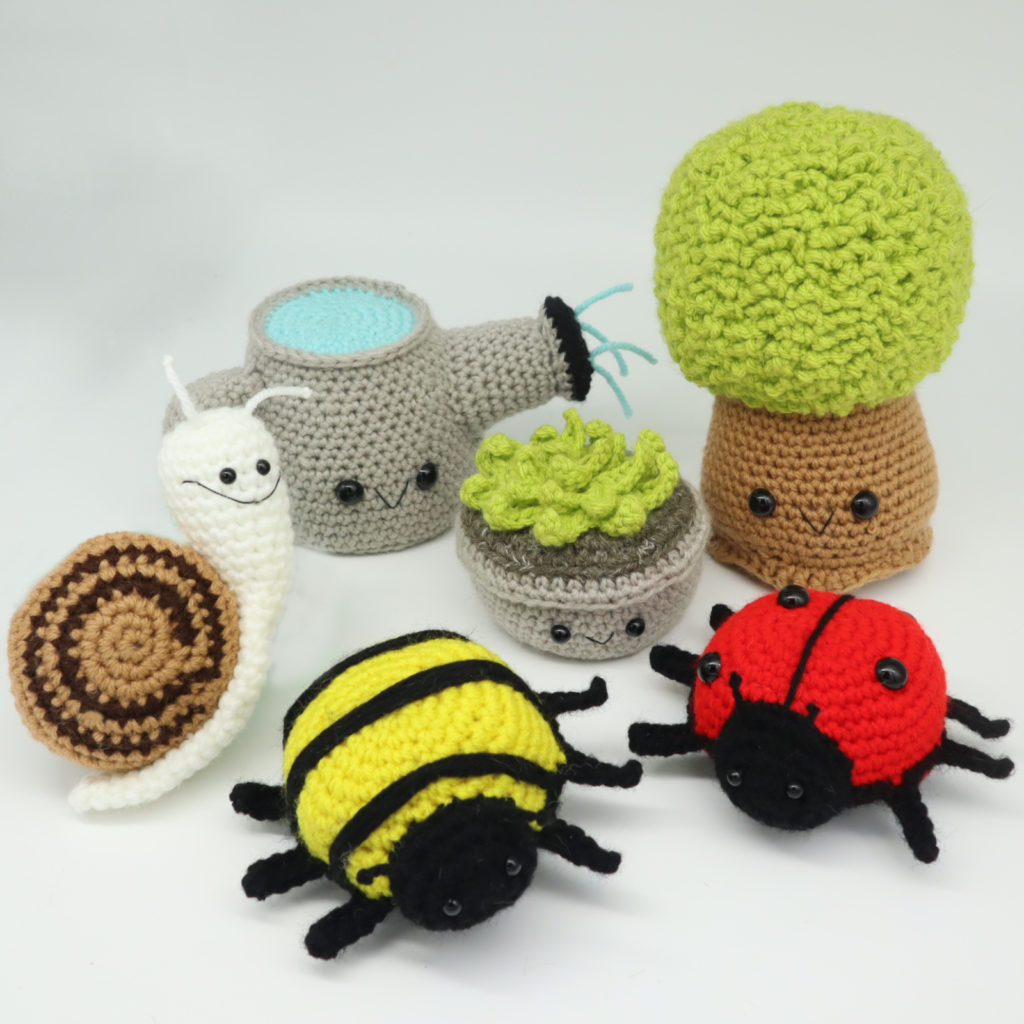 This is 1 of 5 different patterns in my Spring amigurumi bundle! Want to see the rest of the free Spring patterns? Click here!
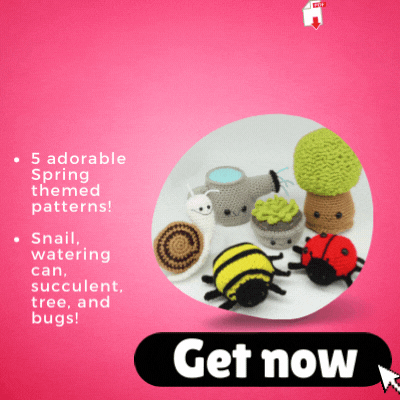
Want the PDF version of the Spring bundle amigurumis? Click here!
Supplies:
• Yarn 4/Medium Weight in:
grey, blue, and black
•4mm Crochet Hook
•Tapestry needle
•Scissors
•Stuffing
•12mm safety eyes
•Black Embroidery Thread
•Cardboard
Additional Information:
Difficulty: Easy
Let’s get started!
Gardening is so much fun, so why not have an adorable amigurumi to remind you to water your plants? This watering can amigurumi is simple, easy, and very fun to play with. For starters, we will crochet the water for the top of the can. Then, we will crochet the can itself, and crochet the water and can together. Next, we will crochet the handle and nozzle. Finally – we make the smile! Let’s get started with making this adorable gardening buddy 🙂
Water: (Make first)
In blue

Round 1: 6 Sc into a Magic Ring (6)
Round 2: *Inc* all around (12)
Round 3: *Inc, Sc in the next st* all around (18)
Round 4: *Inc, Sc in the next 2 st* all around (24)
Round 5: *Inc, Sc in the next 3 st* all around (30)
Round 6: *Inc, Sc in the next 4 st* all around (36)
Finish off now and weave in ends. Cut any excess yarn.
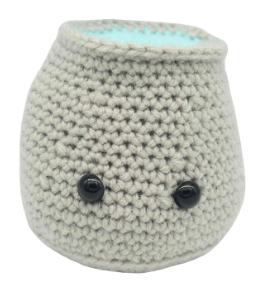
Watering Can:
In grey
Round 1: 6 Sc into a Magic Ring (6)
Round 2: *Inc* all around (12)
Round 3: *Inc, Sc in the next st* all around (18)
Round 4: *Inc, Sc in the next 2 st* all around (24)
Round 5: *Inc, Sc in the next 3 st* all around (30)
Round 6: *Inc, Sc in the next 4 st* all around (36)
Round 7: *Inc, Sc in the next 5 st* all around (42)
Round 8: *Inc, Sc in the next 6 st* all around (48)
Round 9: *Inc, Sc in the next 7 st* all around (54)
Round 10: In the BLO (Back Loop Only), *Sc* all around (54)
Round 11-17: In BOTH loops, *Sc* all around (54)
Round 18: *Dec, Sc in the next 7 st* all around (48)
Now we will mark where to place the eyes into Round 18. Add a different colored stitch marker into the 20th and 25th stitch in Round 18. We will place the safety eyes into these marked areas later.
Round 19-20: *Sc* all around (48)
Round 21: *Dec, Sc in the next 6 st* all around (42)
Round 22-25: *Sc* all around (42)
Add the safety eyes into the marked areas from Round 18 now.
Round 26: *Dec, Sc in the next 5 st* all around (36)
Round 27-31: *Sc* all around (36)
Stuff the can firmly now.
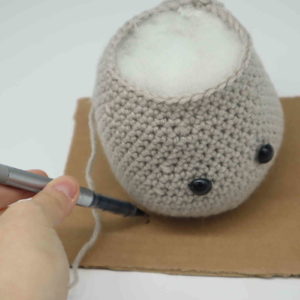
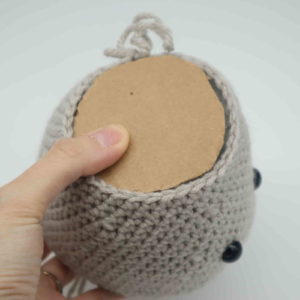
Now we will add in cardboard so the bottom and top of the pot sit flat!
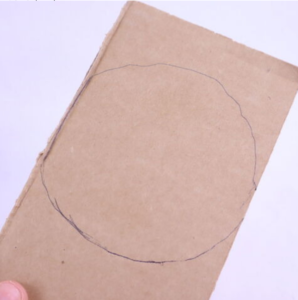
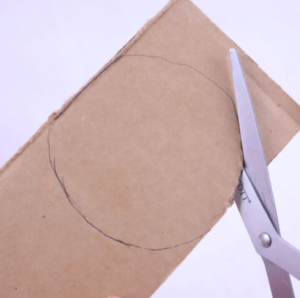
Step 1. Place the watering can on cardboard and trace around the entire bottom of it (Pic 1)
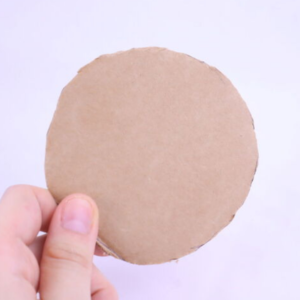
Step 2. You will have a circle (Pic 2). Cut around the circle with scissors (Pic 3-4)
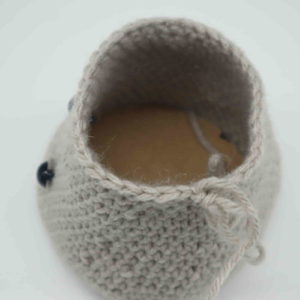
Step 3. Place the cardboard into the bottom of the can (Pic 5). Stuff the can firmly now (Pic 6).
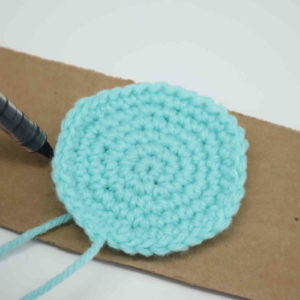
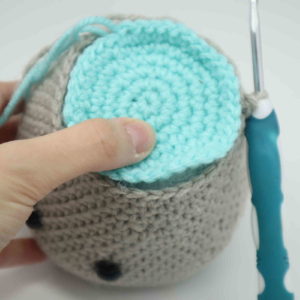
Step 4. Repeat steps 1-2 again, except with the water piece we made earlier (Pic 7). Place this second piece of cardboard onto the can as shown (Pic 8).
Watering can assembly:
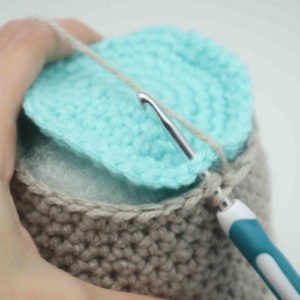
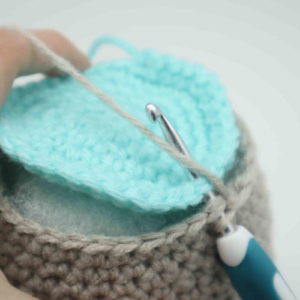
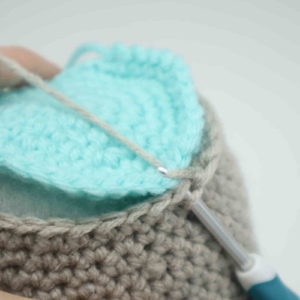
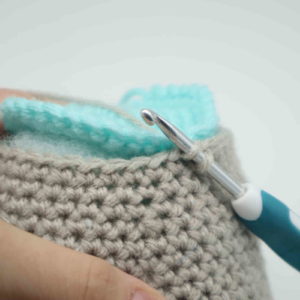
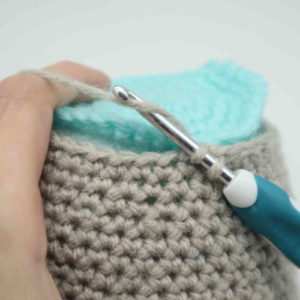
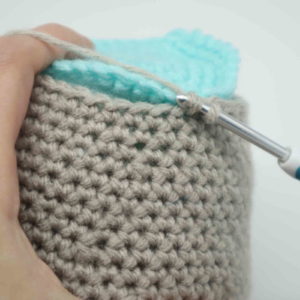
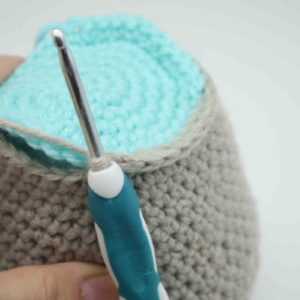
Now take the water piece we made previously. Line up the water’s stitches to the can’s stitches (Pic 1). Going through BOTH the can and water (Pic 2), make a single crochet (Pic 2-8). Continue making single crochets all the way around until you’ve crocheted both pieces together. Once done, finish off and weave in ends. Cut any excess yarn.
1. 2.
2. 3.
3. 4.
4. 5.
5. 6.
6. 7.
7. 8.
8.
Handle:
In grey
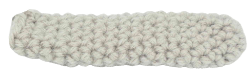
Round 1: 6 Sc into a Magic Ring (6)
Round 2: *Inc, Sc in the next 2 st* all around (8)
Round 3-20: *Sc* all around (8)
Finish off, leaving a long tail for sewing. Pin the handle onto the side of the can and sew on both ends to the can. Once done, tie a firm knot with the tail end of yarn. Bring the knot into the can to hide – this will help secure the handle. Weave in ends and cut any excess yarn.

Nozzle:
In grey
Round 1: 6 Sc into a Magic Ring (6)
Round 2: *Inc* all around (12)
Round 3: *Inc, Sc in the next st* all around (18)
Round 4: *Inc, Sc in the next 2 st* all around (24)
Round 5: Change to grey. In the BLO, *Dec, Sc in the next 2 st* all around (18)
Round 6: In BOTH loops, *Dec, Sc in the next st* all around (12)
Round 7: In the FLO, *Inc, Sc in the next st* all around (18)
Round 8-12: *Sc* all around (18)
Round 13: *Inc, Sc in the next 5 st* all around (21)
Round 14: *Sc* all around (21)
Finish off, leaving a long tail for sewing. Pin the nozzle onto the side of the can as shown. Sew on, and stuff the nozzle firmly before fully sewing closed. Once done, weave in ends.

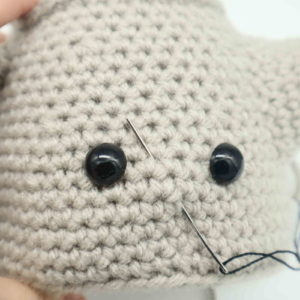
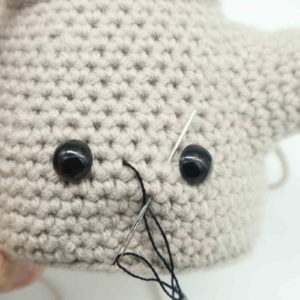
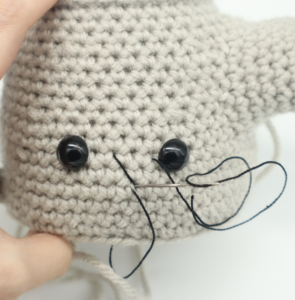
Smile:
Black embroidery thread
Insert needle with thread into the middle mouth area of the toy, and pull the needle out next to the toy’s left eye as shown (Pic 1). Reinsert needle into the middle mouth area (Pic 2) and pull needle out next to the right eye (Pic 2). Reinsert needle into the middle mouth area and pull needle out a few stitches over. Tie the ends of thread into firm knots and bring them inside the toy to hide. This will secure the smile. Done!
1. 2.
2. 3.
3. 4.
4.


1 Comment
I loved this pattern! It is so cute! I can’t wait to to use it on my crochet plants!