
Purchase the PDF now!


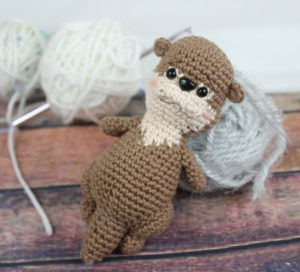
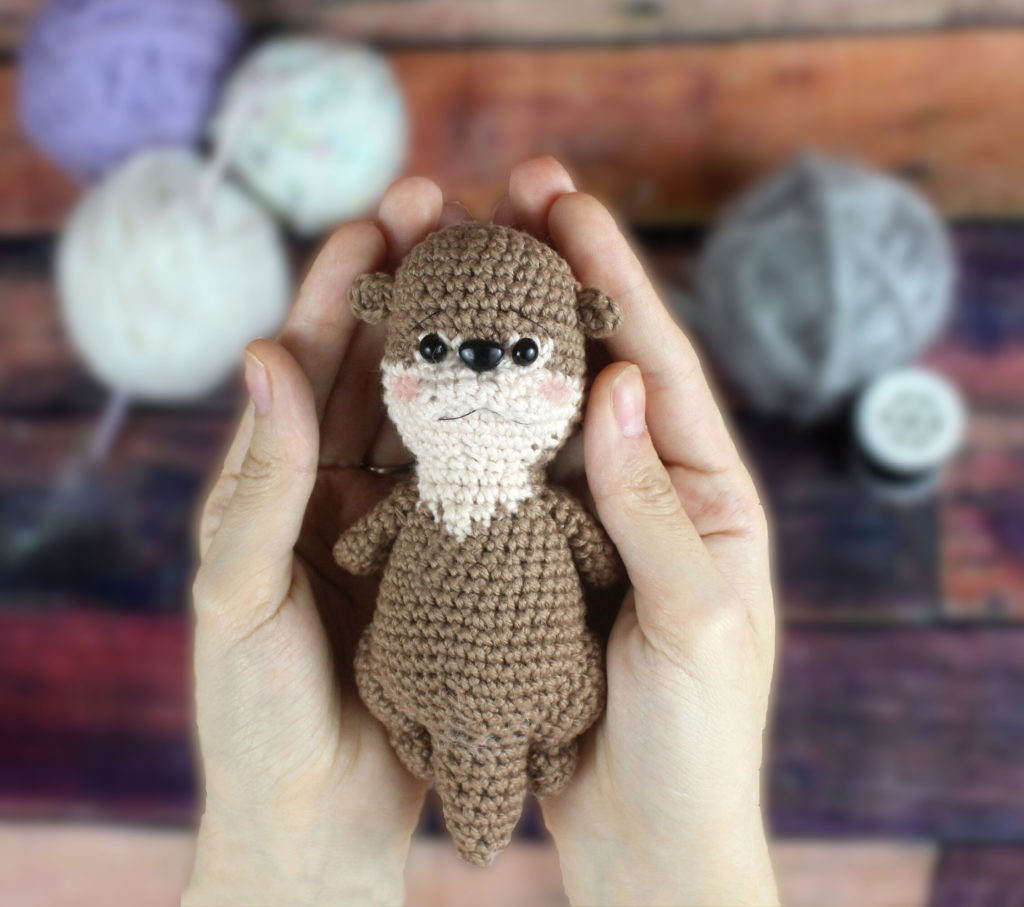
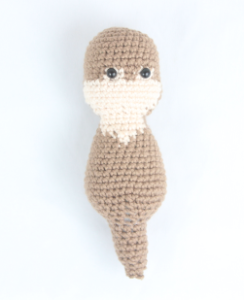
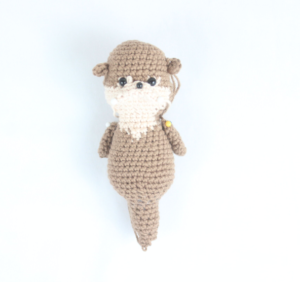
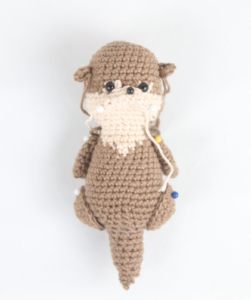
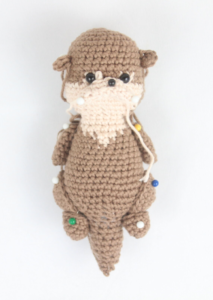
I’m very excited to share with you this free little otter crochet pattern! I have really been wanting to make an amigurumi with a smaller hook and yarn for a more intricate look. Of course, you can just use regular 4/Medium weight yarn and a 4mm crochet hook 🙂
I hope you like it!
Supplies:
• Yarn 4/Medium Weight Yarn in…
Brown (Hobbii Rainbow 8/4 Light Brown) and Cream (Hobbii Rainbow 8/4 Almond)
• 3mm Crochet Hook
•6mm safety eyes
•6mm safety nose
•Tapestry needle
•Scissors
•Stuffing
•Thin black thread
Additional Information:
Difficulty: Intermediate
• Getting started
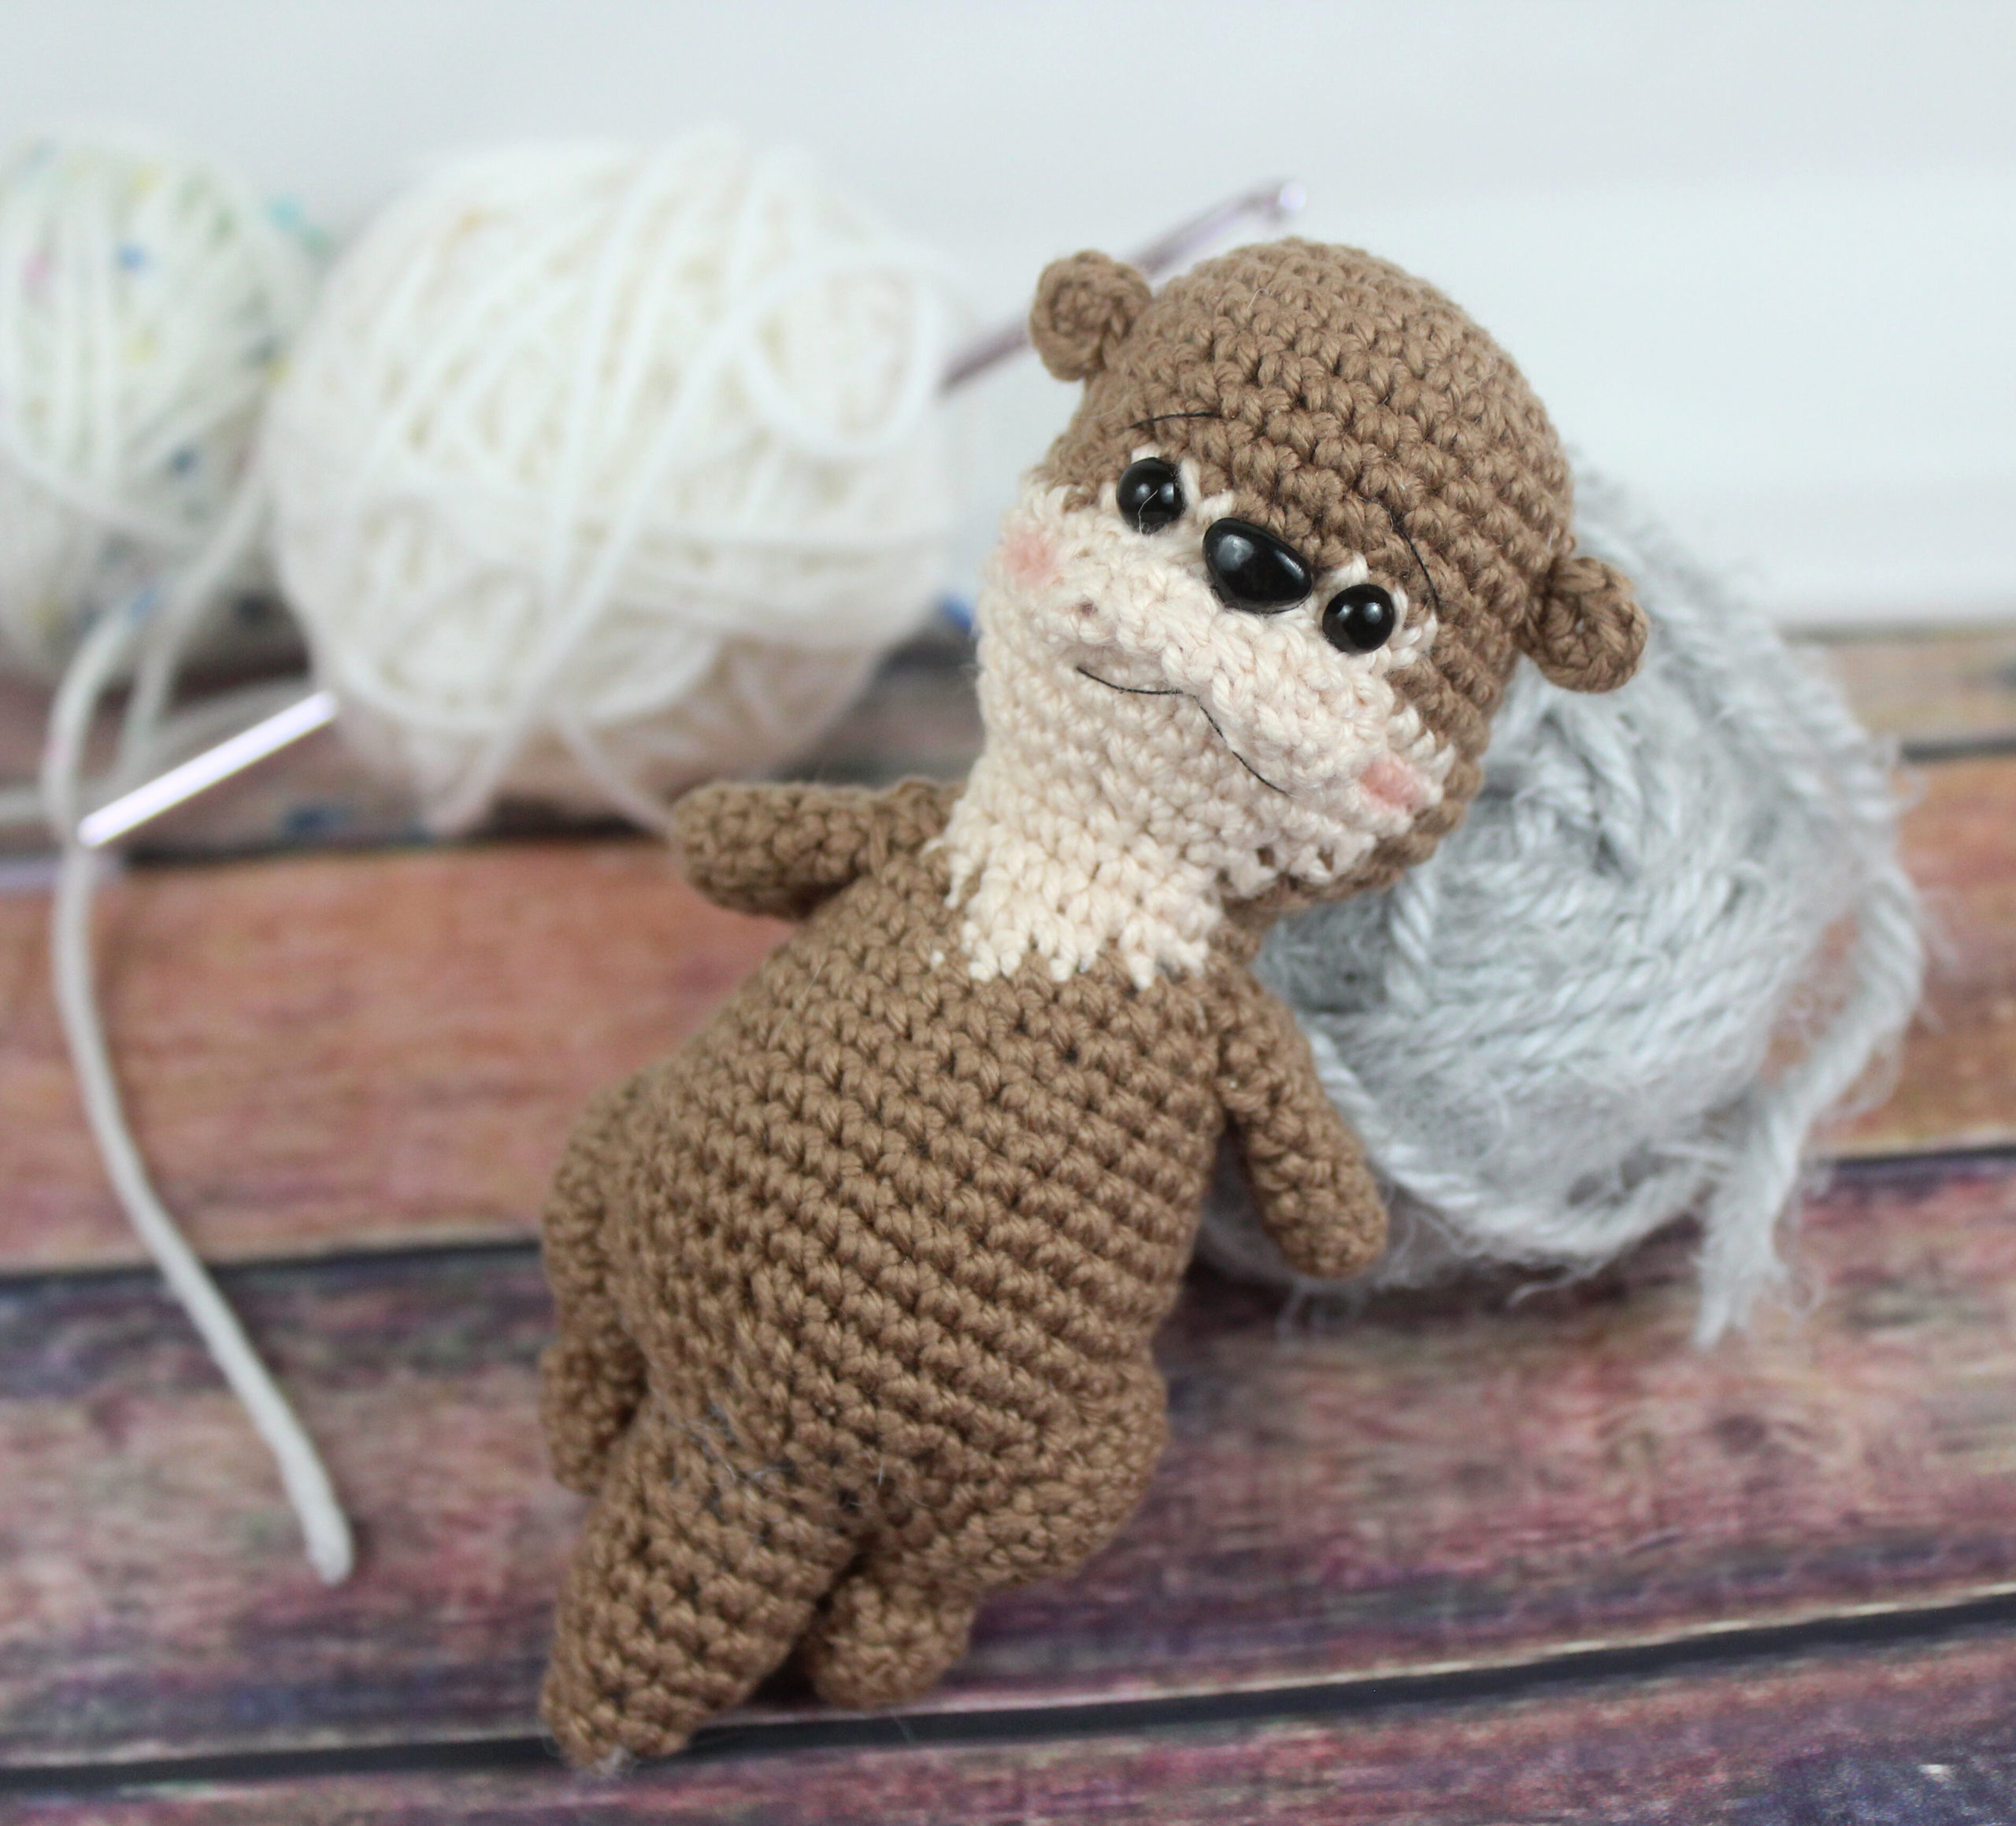
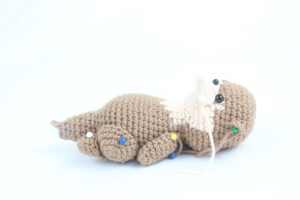
To make this otter we will start with his head and work our way down to the tail. The head, body, and tail are one continuous piece. After this we will make the ears, mouth, arms, legs, feet, and smile!
• Size
From head to tail he is 5.5″/14cm tall.
• Note before starting
We will be making color changes frequently.
We’ll also be making color changes during decreases. I will explain and show pictures on how we do this when we reach that part. It isn’t difficult luckily!
Otter:
Let’s start by making the top of the head. Remember, this head will eventually work into the body as one piece.

Head:
In Brown
Round 1: 6 Sc into a Magic Ring (6)
Round 2: *Inc* in each stitch all around (12)
Round 3: Repeat *Inc in the next st, Sc in the next st* all around (18)
Round 4: Repeat *Inc in the next st, Sc in the next 2 st* all around (24)
Round 5: *Sc* all around (24)
Round 6: *Inc, Sc 3* all around (30)
Round 7-10: *Sc* all around (30)
In the next round we will color change to start making the light color of the face.
Round 11: Sc in the next 11 st. Change to cream and Sc 3. Change to brown and Sc 2. Change to cream and Sc 3. Change to brown and Sc 11 (30)
Round 12: Sc in the next 3 st, Repeat *Inc in the next st, Sc in the next st* 4 times. Change to cream and Sc 3. Change to brown and Sc 2. Change to cream and Sc 3. Change to brown and repeat *Sc in the next st, Inc in the next st* 4 times. Sc in the next 3 st (38)
Round 13-15: Sc in the next 10 st. Change to cream and Sc in the next 18 st. Change to brown and Sc in the next 10 st (38)

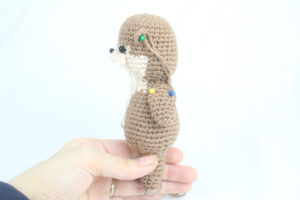
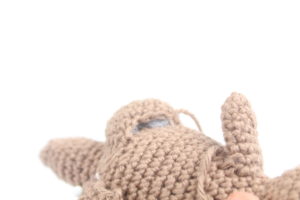
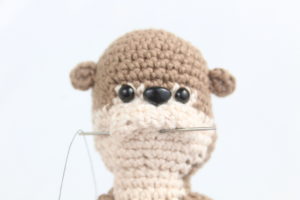
Insert 6mm eyes between Rounds 11 & 12, 5 stitches apart. Be sure to place the eyes on the cream color of the face! Now place a 7mm safety nose in between Round 12 & 13, right between the two eyes!
Head:
In the next round we will continue with making our color changes. However, when we make our decrease we will also be doing a color change to make sure the colors line up with the previous round. This is pretty easy luckily!
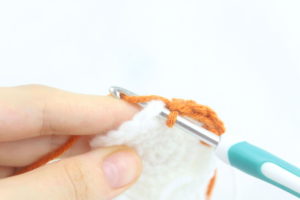
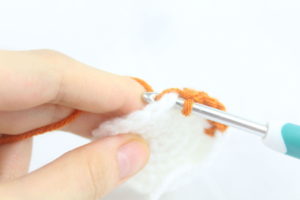
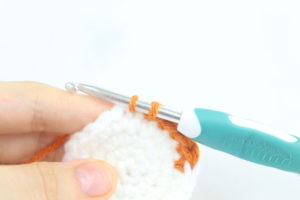
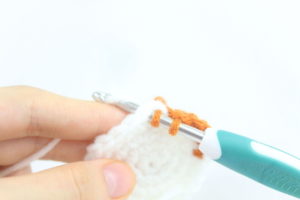
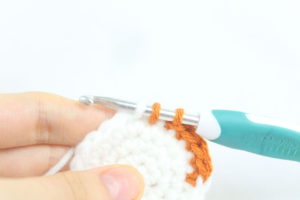
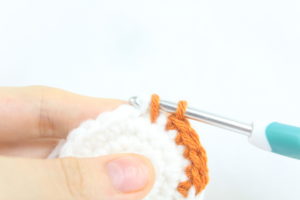
Pictured below Round 16: How it looks when doing the color change decrease
Round 16: Sc in the next 3 st. Repeat *Dec, Sc in the next st* 2 times. Now we will make our color change decrease. Insert your hook into the next st and yarn over with brown (Pic 1), pull up this loop (Pic 2-3). Insert your hook into the next st and yarn over with cream (Pic 4), pull up this loop (Pic 5-6). Yarn over all 3 loops with cream (Pic 7-9). Now we are working in cream. Sc in the next st, Dec 1 time, Sc in the next 9 st. Dec 1 time, Sc in the next st. Insert your hook into the next st and yarn over with cream, pull up this loop. Insert hook into the next st and yarn over with brown, pull up this loop. Yarn over all 3 loops with brown. Now we are working in brown. Repeat *Sc in the next st, Dec 1 time* 2 times. Sc in the last 4 st (30)
1.  2.
2.
3. 4.
4. 
5. 6.
6.
7. 8.
8.
9.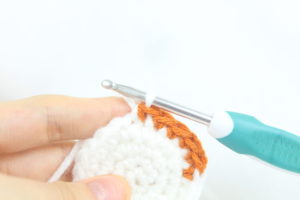
Note: We will be making more color change decreases in this pattern. I explain when to change colors, but reference the pictures above for a better idea.
Round 17: Dec 1 time, Sc in the next 3 st, Dec 1 time, Sc in the next st. Change to Cream and Sc in the next 2 st. Repeat *Dec, Sc in the next 3 st* 2 times. Dec 1 time, making sure to yarn over all 3 loops with brown. Now we are working in brown. Sc in the next 3 st, Dec 1 time, Sc in the next 3 st (24)
Round 18: Dec 1 time, Sc in the next 2 st. Dec 1 time, making sure to yarn over all 3 loops with cream. Now we are working in cream, Sc in the next 2 st. Repeat *Dec, Sc in the next 2 st* 2 times. Our next stitch will be a color change decrease. Insert hook into the next st and yarn over with cream and pull up a loop. Insert hook into the next st yarn over with brown and pull up a loop. Yarn over all 3 loops with brown. Now we are working in brown. Sc in the next 2 st, Dec 1 time, Sc in the next 2 st (18)
Round 19: In the FLO (Front Lop Only) Sc in the next 5 st. Change to cream and Sc in the next 8 st. Change to brown and Sc in the next 5 st (18)
Round 20: In BOTH loops, Sc in the next 5 st. Chang to cream and Sc in the next 8 st. Change to brown and Sc in the next 5 st (18)
Round 21: Sc in the next 6 st, Change to cream and Sc in the next 7 st, Change to Brown and Sc in the next 5 st (18)
Round 22: Repeat *Inc in the next st, Sc in the next 2 st* 3 times. Change to cream and *Inc* in the next st, Sc in the next st. Change to brown and Sc in the next st. Repeat *Inc in the next st, Sc in the next 2 st* 2 times (24)
Stuff the head here.
Round 23: Sc in the next 13 st. Change to cream and Sc in the next st. Change to brown and Sc in the next 10 st (24)
Cut the cream yarn now, we will no longer be using it!
Round 24-25: *Sc* all around (24)
Round 26: *Inc, Sc in the next 3 st* all around (30)
Round 27-28: *Sc* all around (30)
Round 29: *Inc, Sc 4* all around (36)
Round 30-32: *Sc* all around (36)
Round 33: *Dec, Sc 4* all around (30)
Stuff the body now. Continue stuffing after each round.
Round 34: *Dec, Sc 3* all around (24)
Round 35: *Dec, Sc 2* all around (18)
Round 36: *Dec, Sc* all around (12)
Now we will make the tail
Round 37-42: *Sc* all around (12)
Round 43: *Dec, Sc* all around (8)
Round 44-45: *Sc* all around (8)
Finish off, leaving a long tail of yarn for sewing. Sew the tail of the otter closed. Weave the ends into the otter and cut any excess yarn.
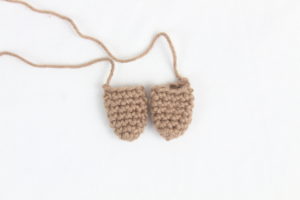
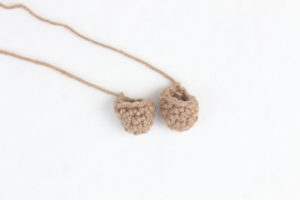
Ears: (Make 2)
In Brown
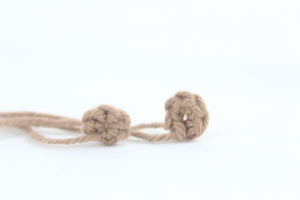
Round 1: 6 Sc into a Magic Ring (6)
Finish off, leaving a long tail of yarn for sewing.
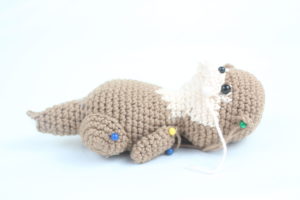
Pin the ears onto the otter between rounds 8 and 9. Sew the ears on. Next, weave the ends of yarn into the otter. Cut any excess yarn.

Mouth:
This mouth is made with a chain, and we work around the chain in it’s entirety in a round, not a row.
We will make a chain, then crochet down the chain. Once we meet the end of the chain, we will turn it to the opposite side, where we haven’t made any stitches yet! We will continue down that opposite side to complete our round. Remember, we are not turning and working on top of the single crochets we just made. That would be a row!
Mouth:
In Cream

Round 1: Ch 7. Sc 3 times into the 2nd Ch from hook. Sc next 4 ch. Sc 3 times into the next st. Now we meet the end of our chain. Turn to opposite side of the chain, where we haven’t made any stitches yet. Sc in the next 4 st (14)
Round 2: *Inc* in the next 3 st, Sc in the next 4 st, *Inc* in the next 3 st, Sc in the next 4 st (20)
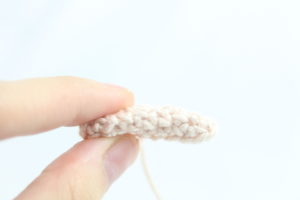
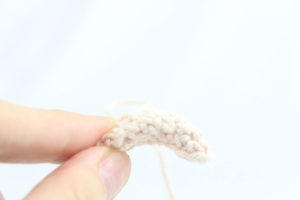
Finish off, leaving a long tail for sewing. Fold the oval in half as shown (Pic 1). Now you can bend the sides as shown (Pic 2). Pin the mouth to the otter, the lowest sides of the mouth will be between Round 14 and 15. The top part of the mouth will be between Round 11 and 12 (Pic 3). Once pinned on, sew the mouth on. You don’t need to stuff the mouth! Now weave the ends into the otter and cut any excess yarn.
1. 2.
2.
3.
Arms: (Make 2)
In Brown
Round 1: 6 Sc into a Magic Ring (6)
Round 2: *Sc* all around (6)
Round 3: *Inc, Sc in the next st* all around (9)
Round 4-8: *Sc* all around (9)
Finish off, leaving a long tail for sewing. Pin the arms to the otter. The arms should be pinned between Rounds 20 and 21. I didn’t stuff the arm, you can very lightly if you want. Now sew on. Now weave the ends into the otter and cut any excess yarn.
Leg Sides: (Make 2)
In Brown
Round 1: 6 Sc into a Magic Ring (6)
Round 2: *Inc* all around (12)
Round 3: *Inc, Sc* all around (18)
Round 4-5: *Sc* all around (18)
Finish off, leaving a long tail for sewing. Pin the top part of the leg between Rounds 30 and 31. Pin the bottom of the leg between Round 37 and 38. Lay down the otter to make sure the leg holds the otters body. Sew on the leg, making sure to lightly stuff it before fully sewing closed. Weave in the ends and cut any excess yarn.
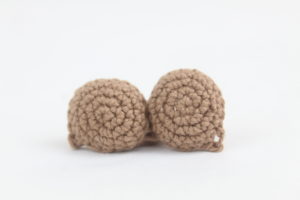
Feet: (Make 2)
In Brown
Round 1: 6 Sc into a Magic Ring (6)
Round 2: *Inc, Sc* all around (9)
Round 3-5: *Sc* all around (9)
Finish off, leaving a long tail for sewing. Pin the foot to the leg as shown. Sew onto the leg, there’s no need to stuff the foot since it’s so small. Now weave in ends and cut any excess yarn.
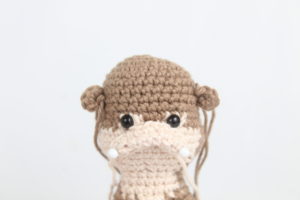
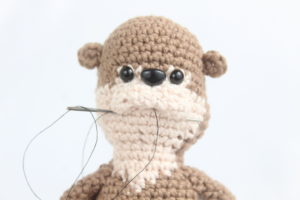
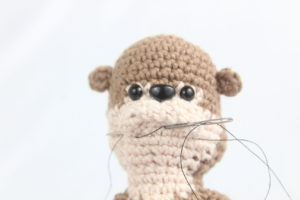
Smile & Eyebrows:
In Thin Black Embroidery Thread
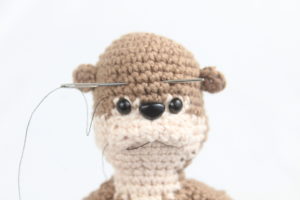
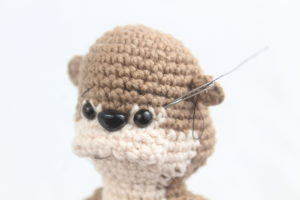
Insert needle a stitch away from the left side of the mouth and pull the needle out at the very middle of the mouth (Pic 1). Insert needle at the corner of the left side mouth and pull needle out at the right corner of the right side mouth (Pic 2). Reinsert needle into the very middle of the mouth and pull needle out where we originally first put the needle (Pic 3). Insert needle into the same stitch we just pulled out of and pull the needle out about 5 stitched directly up (Pic 4).
1. 2.
2.
3. 4.
4.
Insert needle where shown and pull needle out 3 stitches away (Pic 5). Insert needle where shown (Pic 6) and pull needle out where we very first put in our needle (Pic 7). Now we have his smile and eyebrows! Tie the ends of thread into a firm knot and weave into the otter. Cut any excess thread.
5. 6.
6.
7. 8.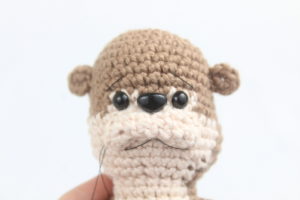
All done! If you made this otter, I would LOVE to see. You can show me by “trying” it on Pinterest. You can also add a photo to the comments below this post!